How much to tip: hotel and family vacation guidelines

Don’t you hate that feeling when you don’t know whether you should tip or not? I do! And the more I travel and write about travel, the more I realize how many families are confused how much to tip. Hotel rates aside, when should we tip? Who should we tip, and how much? There’s no ‘correct’ way to tip, and opinions vary. However, after years of tipping during travel and talking with travel industry professionals across the US and Canada, I’ve compiled the following vacation tipping guidelines for family trips.

Tipping in hotels:

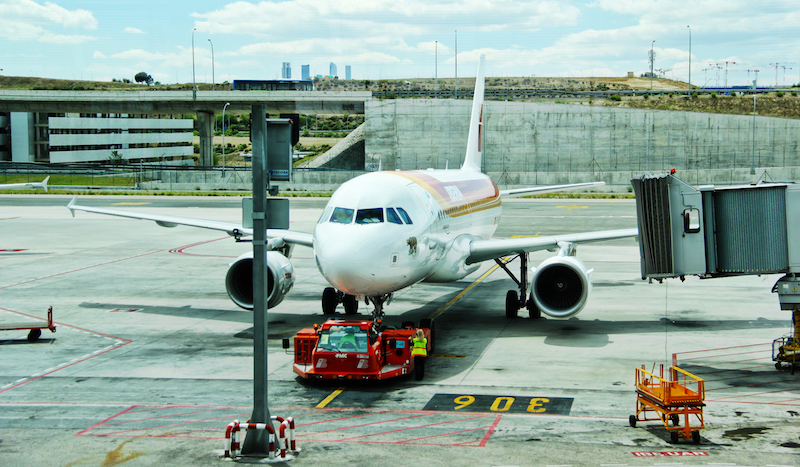
Everyone knows to tip their waiter (though more on that in a minute) and their cab driver, but the majority of tipping confusion happens once parents reach their hotel. In three-to-five star hotels, tipping is expected, and how many hotel staff members earn their living. Here’s what we do:

Valet:

I love valet parking, mostly because I hate finding parking spaces in cities. When I chose to valet park, I know I need to add the cost of tipping into my budget. There’s wisdom in the advice to tip at the onset of any interaction for best service, but we tip a valet whenever we receive our car. Since we go in and out of valet several times during any hotel stay, we spread our tip among several valets this way.

How much to tip: we tip a valet $3-$5 whenever our car is brought to us.
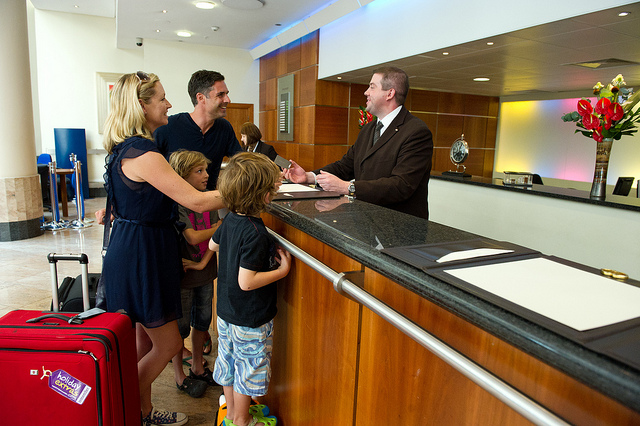
travel with kids

Front desk:

Ok. While tipping hotel housekeeping is a given for me, I do not tip the front desk staff member when I check into hotels. However: this man or woman does hold the most power to assist you during your stay. He or she has the ability to upgrade you in numerous ways, and I do know travelers who routinely tip their front desk agent in hopes of getting a better room.

How much to tip: If you decide to tip your front desk agent, you need to start with at least a $20. If he or she takes the time to help you with an extra service, such as sending something up to your room, finding that item you left behind, or acting as a concierge, tip in this case as well.

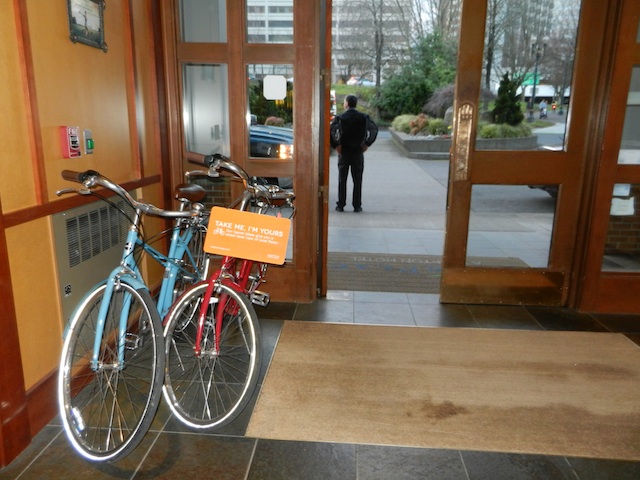
Doormen and bellmen:

Tip these guys! These men (or women, despite the antiquated job titles) rely heavily on tips. When they ask if I’d like help with my bags, I say ‘yes’ unless I truly only have one to roll behind me. Once upon a time, I thought the polite answer was, ‘No, I got it, thanks,’ while dragging half a dozen bags behind me. Not so! This is their job, and they get paid when they do it.

How much to tip: we tip $1 per bag, every time they’re touched. On average, when our family of five checks into a hotel and the bellman brings up our five bags, I tip $5. If we have extra items, such as shopping bags, backpacks, etc, I up it to $10.

Room service and poolside service:

We absolutely always tip for room service, and tip pool-side or other resort-grounds service when applicable. Sometimes a charge will be placed on your hotel tab: in this case, it’s very easy to tip when you sign for the item. This works best at the pool, where you won’t want to fiddle with cash.

How much to tip: we tip $3-5 for a standard room service delivery. 

tipping-bellmen

Housekeeping:

Another hardworking group that’s often overlooked. I worked in housekeeping two full summers as a teen, and will never take their work for granted! Some families prefer to tip housekeeping one time at the end of their stay, but since staff often rotates, and to ensure goodwill exists during our stay, not just after we’re gone, we tip daily.

How much to tip: we tip $1 per day per person in the room. If you tip daily, be sure to leave the tip under the little card or note usually left by your housekeeper, so they don’t mistake it with cash you’ve simply left out.

Spa staff:

If you visit the spa during your hotel stay, it customary to add a tip to your total at checkout. This is perhaps the easiest tip to leave at a hotel: simply add the amount to your total when paying at the desk. If you put your spa service on your room charge, leave a cash tip at the counter for your spa staff member.

How much to tip: I tip 10% of the cost of my service.

Tipping for tours and experiences:

tipping-for-tours

Tip your guide! But tipping tour guides can be tricky: it’s hard to know when it’s appropriate. In general, I’ve found that any tour guide working for a private company (such as a concessionaire within a national park or a city or nature tour business) accepts tips. Tip at the end of your interaction together, when you’re thanking him or her for your day. If you’re in doubt as to whether to tip, ask! I always say, “This was great! We had such a nice day. Are you able to accept tips?”

Note regarding all-inclusive, multi-day tour experiences: if you’re with a travel company for multiple days, such as a tour through Europe or a guided rafting trip, tip at the end of the vacation. Budget this tip into your vacation cost: we’ve tipped as much as the cost of one person’s airfare for very high-end multi-day tour experiences. Keep in mind that some local experts during your trip (such as a guide while on an African safari) do not work directly for your tour company and may expect a separate tip. Your tour company can advise you on this.

How much to tip: we tip 10% of the total cost of the tour (single day or multi-day). If our day snowshoe tour is $50 per person and we spent $250, we tip $25. If our (hypothetical) safari is $10,000, we’d tip $1000.

Tipping drivers:

I tip all drivers, from cab drivers to airport shuttle drivers to tour bus drivers. How much to tip: $1 per person for shorter drives or shuttle drivers helping with luggage. For drivers taking us around all day, we tip at least $20.

Tipping on cruises:

Disney Fantasy docked at Castaway Cay

Like tipping for multi-day tours or all-inclusive experiences, tipping on cruises should be considered part of your cruise cost. If necessary, budget accordingly. Many cruise lines make tipping easy by offering a standard tip percentage to be added to your onboard charge at the end of a cruise, but you can also tip independently. When servers, housekeeping, and bartenders remain constant on cruise ships, we tip once at the end of the cruise. No need to mess with cash every day. More details on tipping on a Disney cruise. 

How much to tip: we use this cruise tipping chart. It’s designed for Disney cruises, but will work as a guideline for any cruise experience.

Tipping in restaurants:

I think we all know what to do here. I tip 20% if service is good, and more if I’m dining with a baby or toddler who spills half his or her food on the ground (I also try to pick up what I can). I don’t know if I’ve ever not tipped, but I definitely leave closer to 10% if service is bad. While in restaurants, don’t forget about the bartender: if you start your meal at the bar and migrate to a table, leave a tip on the bar. This advice may not be applicable often if traveling with kids, as you’re not likely to be in the bar area.

As noted above, these tipping guidelines are not meant to be absolutes. The tip amounts listed are what our family uses as a guideline; when we can, we tip more. We are almost always on a tight budget when we travel. Your family’s budget may vary. No matter what your budget, I believe it’s better to tip what you can rather than tip nothing at all.

I invite you to share your own tipping standards in the comments, whether you’re a traveler, work in the travel industry, or both! If I’ve missed a main category of travel industry personnel to tip, please let me know.

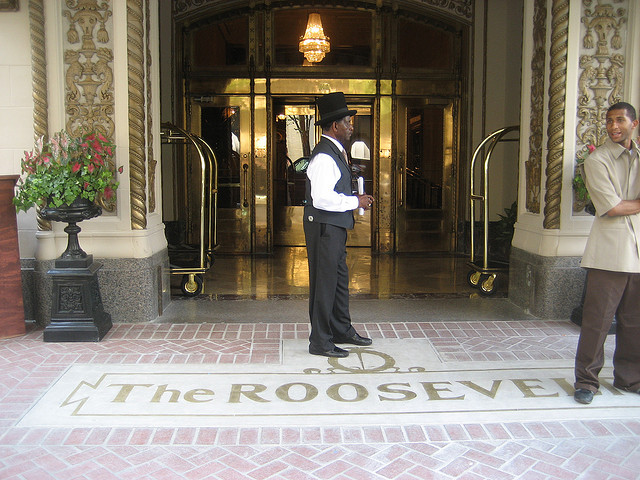
Photo credit: Roosevelt New Orleans, Flickr/LightCollector

Best hotel reward programs for your family: SIDE BY SIDE COMPARISON

If you vacation often as a family, you know that hotel room rates add up. Parents can save money with their loyalty! In my experience as both a traveling mom and a travel writer, hotel loyalty programs consistently save me money. Having a handful of hotel loyalty cards in my wallet (in fact, I have all of the below), I enjoy perks that pay off during our trips.

hotel rewards programs

The best hotel reward programs offer money-saving perks that go beyond earning free stays. Below are our personal favorites of the best hotel loyalty programs for US travel:

Kimpton In-Touch Guest Rewards:

The Kimpton In-Touch Guest Rewards loyalty program gets first pick from me for one reason: free minibar items with every stay! Of course, it’s also no hardship staying at a Kimpton Hotel. This brand takes great care when choosing their hotels’ locations, often renovating old buildings in downtown districts instead of building new ones. But a Kimpton hotel stay can be costly, so what do you get for your loyalty?

Kimpton In-Touch is free to join, and includes a free night stays earned after seven, free in-room wifi (normally a charge), and a $10 ‘Raid the MiniBar’ credit, which I always find convenient. At some Kimptons, membership also earns you reduced valet parking, and member or not, most Kimpton hotels host evening wine receptions to sweeten a stay.

Starwood Preferred Guest:

As a Starwood Preferred Guest (or SPG), you save time by gaining access to their absolute best rates on the SPG website. And many travelers don’t realize that Starwood includes nine hotel brands, including Westin, Regis, Sheraton, and more. You’re never limited. You receive 2 Starwood points for every dollar spent, which can then be redeemed for a free room. There are no blackout dates. Because Starwood includes so many brands, I like that I’m always reminded of a hotel’s Starwood status upon check-in; I’ve never not been reminded to use my card to redeem my points.

Marriott Rewards Program:

I like the Marriott Rewards Program because there are multiple ways to earn points. You earn via stays, of course, but travelers can also earn extra points by booking travel services through their partners, who include Hertz, Travelling Connect, and CruisesOnly. You can earn additional points through booking airfare with many airlines. If you spend often on airfare and rental cars, a Marriott reward card may be the way to go.

Like Starwood, Marriott encompasses many hotel brands, ranging from economy brands such as Courtyard by Marriott, great team hotels like Residence Inn Marriott, and Ritz Carlton for luxury travel. You could earn points during the kids’ soccer games, then spend them on your summer vacation.

Hyatt Gold Passport:

I love Hyatt hotels, but travelers don’t even have to be staying at one to earn Hyatt Gold Passport points. Just dining in one of their restaurants or opting for a service in a Hyatt spa will allow you to earn points. You get five points for every dollar spent (more than most loyalty programs), can convert points to miles, and there are no blackout dates for standard rooms. After five Hyatt stays, you unlock free wifi and a 15% point bonus.

How to go wine tasting with kids: tips on visiting wineries as a family

With vineyards springing up all over the U.S., wine tasting has become more popular than ever. Visiting wineries is a great way to assist a local economy, taste local pairings, and learn about an area’s agriculture. In fact, vineyards are now a big part of agricultural tourism. But what if you have the kids along? Can you go wine tasting with kids? We believe the answer is yes. Follow the tips below to have a fun, successful, and positive experience at a winery with kids.

Cliff Creek Cellars

Pair vineyards with outdoor activities:

Instead of telling the kids that they’ll be touring tasting rooms all day (get ready for a negative reaction on that one), pick one winery you’d really enjoy visiting and pair it with a family outdoor activity. Many wineries and tasting rooms are ideally located in the countryside surrounding tourist destinations and cities: think of your wine tasting day as an opportunity to explore a rural area. Outside of Portland, Oregon, for instance, lies the Willamette Valley brimming with wineries…and family fun. Before heading the casual and cozy Alloro Winery, we opt for a bike ride or a side trip to nearby Evergreen Aviation and Space Museum for hands-on, kid-centric entertainment.

No matter what region you’re visiting, before your wine tasting, parents can take the kids on a hike in the area, rent bikes and go for a bike ride, or tour a local museum or amusement park. Consider your wine tasting to be a complement to this family day outside, not the sole reason for it.

lawn games at wineries

Select no more than one winery per visit:

Multi-vineyard wine trails are a lot of fun…for adults. Most kids, however, are pretty much of the opinion that if you’ve seen one vineyard, you’ve seen them all. Most tourists spend an average of one to two hours at a winery: plan for one and done to avoid tired, bored kids. Which winery to pick? Ask your hotel concierge or another local for the scoop on the most family-friendly winery in the region, or pick one closest to other area attractions.

Opt for a family-friendly tasting experience:

Yes, they do exist! The emphasis of a successful family day at a winery is not on the wine itself, but rather on the ambiance and togetherness. That said, my kids will tell you it’s not much fun if everyone has something good to drink except for them. We pick wineries that serve sparkling cider or root beer to the kids while adults enjoy tasting flights, and those that will put together a kid-friendly snack, such as a cheese plate.

Cliff Creek charcuterie plate

Many wineries now allow picnics and other food items to be brought in by guests. Check ahead of time to make sure the one you want to visit has this policy, and if so, bring a spread! Look for wineries with plenty of outdoor space, and a staff who will welcome your kids. During a recent visit to Cliff Creek Cellars on the Upper Rogue Wine Trail of Southern Oregon, our kids were greeted by the vineyard dog and offered their pick of bocce ball or other lawn games by the winery staff.

Get on winery mailing lists to learn about events and festivals:

Many wineries host summer concert series, holiday events, and other family-friendly happenings. One of our favorite Easter Sundays was spent at Troon Vineyard, where the kids enjoyed an elaborate Easter egg hunt while adults enjoyed tastings and brunch. Other wineries in our region host bluegrass bands (perfect for dancing to, if you ask any toddler), art festivals, and local charity events. During the summer months, kids can spot hang-gliders coming in for landing at many Applegate Valley Wine Trail vineyards.

Above all, be responsible:

Of course, you want to be safe and set a good example to your children whenever you consume alcoholic beverages. If you think you’ll need it, hire a wine tour service to drive you to the tasting room and back again, or set out on a short walk with the family post-tasting before you get behind the wheel of your car. Most wineries don’t mind a bit if you linger: bring extra outdoor toys for the kids or even a pack of cards and play a family game before heading home.

Haleakala National Park

When I think of Maui, I think sun-kissed sand and stunning beaches…not ascending to 10,000 feet to hike amid peaks. But families vacationing on the island would be remiss to skip Haleakala National Park, where kids will learn about the natural landscape of this breathtaking area, and get a glimpse of a Maui not well-known.

Haleakala consists of both Haleakala Summit and the lower Kipahulu Coast, making it possible for families to hike through barren and beautiful terrain as well as lush vegetation, all while learning more about native Hawaiian ecology and species during one of several ranger-guided talks offered. I love that Haleakala is such a region of contrasts: kids learn about many types of natural beauty, from the high peak to the streams and waterfalls in the park’s Kipahulu area.

Tip: The night sky is so clear at the national park, that it’s home to the Haleakala Observatory. Haleakala is open 24 hours a day, so if you time it right, you can take in the Milky Way as you’ve likely never seen it before!

For one family’s take on Haleakala National Park and its junior ranger program for kids, visit Mary at The World is a Book for an extensive review.

Distance from an interstate: See directions below.

Hours of operation: The park is open year-round, 24-hours a day, seven days per week. Visitor center hours are as follows: Haleakala Visitor Center (9740 ft/2969 m) 5:30 a.m. to 3:00 p.m., Kipahulu Visitor Center (sea level) 9:00 a.m. to 5:00 p.m.

Admission costs: Daily park passes are $10 per vehicle. For more information on park fees, see the Haleakala National Park site.

Directions: Getting to Haleakala National Park includes a beautiful drive through Maui’s ‘upcountry’ of ranches and farms. To reach the Summit Area, start at Kahului via Route 37 to 377 to 378. Driving time to the summit from Kahului is approximately 1.5 hours. To the coastal area (Kipahulu), take Route 36 to 360 to 31. Driving time from Kahului is approximately 3 hours.


Best travel water filter system (SIDE BY SIDE COMPARISON)

When traveling abroad and when backpacking or camping in the backcountry, it’s crucial to have a travel water filter system you can rely on. The best systems we’ve found use gravity to do most of the work, but there’s an abundance of choice. Which travel water filter system is right for you? Read our side by side comparison!

Katadyn BeFree gravity system:

The simplicity of a gravity-based filtration system makes them reliable, plus these systems are lightweight, easily packable, and versatile for a large group or family. The Katadyn Gravity BeFree 3.0 L filter fits this bill perfectly. It’s extremely easy to use: you just fill the reservoir and hang it using the included rugged bail handle and carry loop, and wait for it to filter at an impressive two liters per minute.

When you’re not using it, the filter packs down small; it collapses and then can be rolled tight, fitting easily into a day bag, backpack, or carry-on bag. It’s been tested to protect against harmful organisms, removing protozoa (99.99%) and bacteria (99.9999%), which means it meets EPA standards, so not only can you bring the Katadyn filter along on your next backpacking or kayaking adventure in the US, but it works well for trips abroad as well, when you need to be assured of potable water. Note that it does not meet standards for virus removal; it’s to ensure safe drinking water against bacteria only.

This filter is BPA-free of course, and the wide-mouth opening makes it easier to fill than most. I’ve learned this the hard way with other bladders, when trying to awkwardly fill them in shallow streams, hard to access lakes, or bubbling springs. I did notice that it was easier to fill the bladder by using a second container, such as a backpacking cooking pot or cup to help feed the water into the reservoir.

You should clean the Katadyn filter occasionally, which is simple: just shake or swish to remove debris. We actually do this every trip, and it’s worked out very well. So far, this filter has come along with us on a front-country and backcountry combination trip to Mt. Katahdin in Maine as well as a backpacking trip through Central America. Next, it will accompany my son through Indonesia.

You can pick up the Katadyn Gravity BeFree online at the official Katadyn site or Amazon for $69 for the 3L option.

LifeStraw Flex with Gravity Bag:

Pair the confidence you already have in LifeStraw with the convenience of filtering a gallon of water at a time. You get next-level protection against heavy metals including lead as well as bacteria, parasites, microplastics, and organic chemical matter like pesticides, and herbicides, all in an ultralight system. The whole thing only weighs 6 ounces, and can filter one liter every two minutes. As always with LifeStraw, when you buy a product, you give a product to one school child (one year of clean water).

It works in the same manner as other gravity-based systems: just fill the bag, hang, add the filter, and allow the water to drip through the filter and into your water vessel whenever you need it. Alternatively, you can use the LifeStraw filter individually like you would any LifeStraw, which is a nice bonus of versatility. Pick up the system for only $54, a great value.

Platypus GravityWorks:

©Earl Harper

The GravityWorks system is similar to that of the LifeStraw and Katadyn varieties, but it involves two bladders instead of one. This can be a pro or a con: on one hand, the system is slightly heavier and bulkier to pack, but on the other, you have a dedicated clean-water bladder to use in a variety of ways, storing clean water and carrying it to your next backpacking location, for instance. 

You can choose between a 2 liter and 4 liter kit (I like the 2 liter). Just fill the ‘dirty water’ bladder with lake, stream, or iffy hotel water, then attach the included hose and filter system between it and the dedicated clean water bladder. Hang the dirty water bladder higher (hence the use of gravity), and wait for your water to fill the bladder. The disadvantage to this system is that you have to wait for the clean water bladder to completely fill, which can take a matter of about 20 minutes. With the other systems, you can have water on demand, though you might have to squeeze the bag a bit if you’re impatient. 

With the GravityWorks system, you get extra parts, including a universal bottle adapter. Pick up the Platypus GravityWorks on Amazon for $99.

Sawyer Squeeze:

It’s small, it’s easy to carry, and it’s cheap: the Sawyer Squeeze is a super simple system that involves a bag (bladder) plus a small filter. You fill the bag with water and squeeze it through the filter and into your water vessel. You can get bags in various sizes (the smaller ones are only $12) so this can still work for a family or group, but it will be slower going. I like to have a Sawyer Squeeze in my day pack as an extra filter, just in case. Pick one up on Amazon.

Grayl GEOPress:

Another individual travel water filter system, the Grayl is by far the easiest to use, if you don’t like drinking through a straw. You just scoop up water from a creek, lake, river, or faucet, then press the filter down through the water vessel like you would a French press coffee container. It takes about ten seconds and while you do need to use some force, if you have a sable surface, it’s easy.

Once you’ve filtered your water, you’re good to go. I don’t like drinking my filtered water from a straw if I can help it, so I really liked the design of the GEOPress, which allowed me to gulp instead of drink from a straw. With the GEOPress, you get 24 ounces of safe drinking water swiftly.

The water bottle is heavier and bulkier than I’d like (but they do have a slimmer, lighter version if you’re willing to reduce your ounces), but it’s worth it if you don’t have to also carry a water filter or pump with you. I love the ease of arriving at a river and just scooping up my water.

GEOPress protects from global waterborne pathogens (virus, bacteria, protozoan cysts), pesticides, chemicals, heavy metals, and even microplastics, so you’re getting the purest water possible. The cap has a fast-flowing drink spout that can be sealed closed, and vents air while purifying (unscrew the cap a bit when you’re filtering, or you’ll be hard-pressed (pun intended) to press down the filter).

Pick up a GEOPress in one of four colors for $89 (less than most filter systems) or opt for the smaller ultralight filter for $59.

LifeStraw Universal:

When we hike, we like to have Lifestraw filters in ALL our water bottles. Lifestraw Universal gives you just that: this kit sets you up with one filter (2-stage), two sized bottle caps, and one cap lid. We have used the kit to add a Lifestraw filter to our favorite water bottles, from a wide-mouth Nalgene to a narrow-mouth Camelbak. Details for the caps: the wide cap is 63 mm and the narrow cap is 43 mm. The filter height is 7.3 inches. You also get a carry bag.

As always, the filter does the following:

  • Removes 99.999999 % of bacteria
  • Removes 99.999 % of parasites
  • Reduces organic chemical matter (pesticides, herbicides, VOCs)
  • Removes 99.999% of microplastics
  • Compatible with most water bottles
  • Lasts 1,000 gallons

Now when we backpack or camp, everyone in our family can use a Lifestraw filter in their favorite water bottle, and I can travel with a filter in the bottle I love to use for international trips. The Universal kit is only $34, allowing you to switch out your filter from bottle to bottle at will. Pick up your kit on the Lifestraw website or at other online retailers, such as Amazon.

Tip: Lifestraw, Platypus, and Katadyn all carry their own versions of an individual water bottle with filter included. Find your favorite brand and buy a few extras to have in day packs when you travel!

Things to do on Channel Islands with kids

Channel Islands National Park is located right off the coast of Ventura, CA, but feels a million miles away from the rest of Southern California. The park has a different vibe than most: the main visitor’s center is located not in the park, but in the Ventura Harbor, where visitors depart for the islands, and the islands themselves remain remote, isolated, and almost completely undeveloped.

channel islands

Don’t let the Channel Islands, and the logistics of exploring them, deter you: this national park is perfect for kids. Families simply need to know the best things to do on Channel Islands, how to get to Channel Islands National Park, and where to stay prior.

Channel Islands

Which island?

All the Channel Islands are accessible, but the most easily accessed (and with the most to do for families) is Santa Cruz Island, the largest of the five. Protected coves allow for great snorkeling here, and the camping is easiest (on other islands, backpacking may be necessary). Santa Cruz Island is also the most affordable to travel to, making it ideal for larger family groups.

Camping or day trip?

The next thing families need to decide is whether to make their Channel Islands adventure a day trip or an overnight. Camping at Channel Islands is reserved by ReserveAmerica, and the most popular camping experience for families is located at Scorpion’s Cove on Santa Cruz. This campground is walk-in (meaning backpacking is not necessary) and the lower campground is only .2 mile from the beach. Running water and pit toilets are available, and each site has a picnic table and food storage box.

channel islands camping

For families deciding not to camp, a day trip to Santa Cruz Island can be more than enough to experience the National Park. Santa Cruz (the most easily accessible island) is undeveloped; in addition to the campground, there are only a few ranger cabins (rangers are on-site), evidence of the island’s ranching history, and hiking trails. A dock exists at Scorpion’s Cove, where passengers disembark. For a day trip, we recommend taking an early boat (9 am) out to Scorpion’s Cove, and returning at 4 pm or 5 pm. This gives visitors enough time to experience the island’s snorkeling, kayaking, and hiking.

snorkeling on Channel Islands

How to get there:

Island Packers is the official transportation to the islands. They’re located in the Ventura Harbor adjacent to the Channel Islands visitor center (follow the brown National Park signs to the end of the drive along the pier) and reservations should be made in advance. The boat ride over takes approximately 1 hour and 15 minutes, and is certainly part of the fun. We spotted dolphins during our passage, and when the water is choppy, as it was on our visit, the ride is downright exhilarating. Kids can stand at the deck and feel the spray of the ocean, or interior seats are also available. The Island Packers crew and staff are all friendly, laid-back, and fun. The cost of an Island Packers passage varies by island and whether your passage is a day trip or camping trip. At the time of my visit, day trip passage was $56 round trip for adults and $39 round trip for children (up to age 12). Overnight passage was $75 for adults and $54 for children.

island packers

Snorkeling, kayaking, and hiking on the islands:

Snorkeling at Scorpion’s Cove, we swam with harbor seals, and spotted multiple fish species, sea urchins, sea stars, and kelp forests. Snorkeling gear can be rented by the day at Ventura Sports, located in the Ventura Harbor, but be advised: they don’t have adequate sizes for kids under age 10. While their staff was friendly, they rented us a wetsuit that was far too large for our seven-year-old, with no warning that it wouldn’t work for him. (Wet suits are usually necessary in all seasons on Channel Islands.) In addition to snorkeling, kayaks can be rented in the harbor and transported for the day or the duration of your camping trip by Island Packers, or guided kayak tours are available on the island (reserve ahead of time). When not on or in the water, numerous hiking trails (of about 2 miles in length at most) are available on Santa Cruz Island, and offer beautiful vistas of the island and sea.

Holiday inn express Ventura harbor

Where to stay in Ventura:

If you’re coming any distance to visit the islands, you’ll need to stay overnight in Ventura the evening prior. We recommend the Holiday Inn Express Ventura Harbor, which overlooks the Ventura Harbor and is less than a quarter mile from Island Packers. I call this Holiday Inn Express an ‘express plus’, because it’s directly tied to the Four Points Sheraton next door, and guests have access to their very nice outdoor heated pool and hot tub (hot tub for adults only). A pedestrian bridge connects the two hotels, and the Holiday Inn Express includes one of the best complimentary breakfasts we’ve ever experienced. Bottom line: the Holiday Inn Express Ventura is a great value for families, and you’ll be close enough to enjoy the Ventura Harbor prior to your Channel Islands trip.

Tips for buying airfare from third party airline booking sites

If you’ll be among the many families deciding to buy airfare this year, you may feel overwhelmed by the number of third party airline booking sites competing for your business. Buying airfare using third party airline booking sites can reward you with the lowest fares possible, but you do need to go into the process with eyes wide open.

airfare

Related post:  find the lowest airfare for your trip, every time!

Buying airfare using third party airline booking sites

You’re already familiar with third-party booking sites, even if you’re not familiar with the term. You’ve heard of online travel agencies such as JustFly, among others like Expedia or Kayak. To understand how you can get a great deal through third-party sites, it’s important to understand how they work.

In the airfare pricing industry, there are 4-5 big aggregators of the price and available data called global distribution systems. According to Hopper.com (which is not a third-party site selling airfare, but rather an airfare prediction app), when you go to a third-party site and search for flights, that site will make a request from those four systems. They’ll send it back, with the trips you could buy, and what they cost. Much like hotel booking sites, third-party booking sites can block out seats in bulk, bringing the price down for you.

Essentially, you’re bringing in a middle-man when using third-party sites, which could–but does not always–complicate your travel day. For these reasons, I do recommend booking travel directly through your airline when possible. However, I understand that sometimes, getting the lowest fare during your flight search is essential to your travel plans. We, personally, have used third-party booking sites for this reason. Here’s what you need to know.

buying-airfare

Tips for using JustFly and other third-party booking sites:

We used JustFly during our recent trip to Europe. Why? We were operating under a strict travel budget, and when searching for airfare, JustFly offered the route we needed for about $100 less per person. Since we’re a family of five, saving $500 on airfare was significant to our budget.

Using JustFly allowed us to take our trip within budget, so in this case, it was absolutely the way to go. However, we knew that by using a third-party booking site, there were a few things we needed to keep in mind.

  • Customer service is key: Like with any service, it’s crucial to book with a company that offers good communication and customer service. Why? If anything goes wrong with your reservation, you’ll need to work through your booking site. I like to get on the phone with a booking site right away, before finalizing my reservation, as a test run of sorts before there’s a real problem. Then I usually call again before my flight to confirm my reservation and make sure everything is in order. When I did this during my JustFly booking for Europe, I was very happy with the level of service. It’s also reassuring to know I’m not alone…JustFly gets solid reviews from consumers. I got through to JustFly right away, and spoke to pleasant, competent representatives.
  • The airline will not make you a priority: Anytime you use a third-party booking site, it will show up on your airline reservation. Depending on the airline and their level of customer service, this can sometimes mean you’re treated like a second-class citizen (of the airline, not of the booking site). At the airport, the airline will prioritize those passengers who are loyal to their brand and book through their channels. How this can manifest itself: you’ll be last priority for rebooking in the case of a cancellation caused by the airline, and unlikely to receive seating upgrades. How to combat this: be sure to list your frequent flier number on your reservation, which you can do when booking on JustFly.
  • Be ready for some back and forth: When you book through a third-party site, you’re bringing another ‘cook into the kitchen’, so to speak. When you have an issue, your third-party site may tell you to call the airline to resolve it, and the airline may tell you to call the booking site. Patience is key. When we booked through JustFly, we had one flight on our itinerary change flight numbers a few days before departure. This was the airline’s doing, but we were alerted to the change via JustFly. I called them to make sure our itinerary was intact, and was told to call the airline. When I gave the airline my booking number, they tried to send me back to JustFly. It took some insistence and patience to get the issue sorted, simply because there were two agencies involved. How to combat this: be prepared for this possibility, and allow yourself time to resolve it by watching your airline reservation carefully in the days before departure.
  • Prepare for possible seating issues: In most cases, booking early ensures families can score seats together on a flight, but when booking through a third-party site, sometimes those seat choices don’t carry over. We only had a problem with this once when we booked JustFly, and it may have been because it was on an international leg of a flight. We picked our seats when we booked our flight with JustFly (months in advance), but when we checked in for the flight, the airline hadn’t carried the seat reservations over. We were guaranteed seats, just not the ones we’d picked. The airline told us we were out of luck (see point #1), and we were forced to ask fellow passengers to switch seats. It all worked out, but wasn’t fun. How to combat this: check on your seat reservations through the airline 72 hours before departure, before you check-in for your flight. After you check in, they cannot make seating changes.

The bottom line:

While more complicated and with potential for more issues than booking directly through an airline, booking via a third-party site like JustFly is a tool to have in your travel planning tool belt. For those times when budget is priority #1, JustFly can be a great way to get the fare you absolutely need. If you go into it knowing what to watch for, you’ll have an experience that meets your expectations and, at the end of the day, gets you a great fare. After all, using JustFly, we ended up here, able to enjoy Christmas in Florence!

florence

While this post was written in conjunction with JustFly, I was given full freedom to my opinion, in order to give my readers my best, honest advice.

One day in Badlands National Park itinerary with kids

We were blown away by the beauty and peacefulness of Badlands National Park! During our one day visit, we found ourselves comparing this dry, rugged, and dramatic park to other favorites: it has much of the same feel as Death Valley National Park and Joshua Tree National Park. However, Badlands adds another element: high prairie wildlife and terrain that will impress in a subtile, almost delicate manner. Here’s what to do with one day in Badlands National Park:

badlands-national-park

Allow me to explain: while the first thing visitors are likely to notice about the park is its dramatic rock formations and chasms (think of Grand Canyon in miniature, or as one fellow traveler put it, of being a giant hiking in the Grand Canyon), it’s quickly evident that beyond, and in some cases, above, these rock formations, lie plateaus, gulches, and lowlands blooming with sunflowers and wildflowers, harboring prairie dogs and rabbits, and opening up onto prairie grasses. The juxtaposition of dry, cracking rock and flowering plants is stunning.

badlands-sunflowers

The park is well-known for fossil finds dating to prehistoric eras, though we learned that dinosaur fossils are not found here. The region was underwater during that time period. Instead, early mammal fossils are found quite regularly, and dig sites can still be active.

How to spend a day at Badlands National Park:

Ready for your Badlands National Park itinerary with kids? Though the park area is quite large, most of the sites and hiking options are in a concentrated area, making this park do-able in a day, if needed. As we always suggest, start at the Badlands visitor center to get your bearings. Here, kids can see a well-made 20-minute video, then tour several rooms of exhibits on the park’s geological history, wildlife, and native history (this is Lakota territory). Stop at the desk and ask for a form on which to document any fossil finds. They can still be spotted in the rock throughout the park, and park scientists depend on visitor documentation to help their research. Cool, right?

badlands-fossils

After touring the visitor center, take the Badlands Loop Road. Backtrack to the Window Trail and Door Trail parking lot.

Tip: to do this itinerary as described, enter the park via I-90 Exit 131 instead of via Exit 110 near Wall. We suggest this direction because it places families at the visitor center early on.

The Door Trail offers an amazing vista of the canyons of the park, with half a mile of ‘trail’, which is actually rock hopping and free-form hiking from marked post to post (the rock bottom here doesn’t allow for a proper trail). The way is easy enough, but kids can make it more fun by climbing a few short rock formations along the path. The nearby Window Trail consists just of a boardwalk ending in a vista to see a very deep chasm in the canyon. Definitely do both. Note: we hit this trail at sunrise, which rewarded us with beautiful light against the stone.

sunrise-at-badlands

Accessed from the same parking lot, the short Notch Trail is great for kids who want more climbing, as this 1.5 mile loop descends through the canyon then up a wooden ladder to follow a ledge to a great view of the White River valley. Only proceed on this trail if you’re comfortable with heights.

badlands-hiking

For those wanting a longer hike, The Castle Trailhead is located just across the street from the Door and Window trails. This trail is 10 miles long, and travels west all the way to the opposite end of the Badlands Loop Road at the Fossil Exhibit. Those wanting to hike 10 miles will need a car to pick them up on the other end. However, thanks to a very user-friendly trail system in the park, it’s possible to hike only a portion of the Castle Trail. Starting at the trailhead at Door, hike a short distance on flat terrain to the junction of the Castle and Medicine Root trails. At this point, families have access to a loop of 4 miles, making the hike around 5.5 miles total, or can opt for an out-and-back for less mileage, turning around at the junction.

badlands-castle-trail

Or, do what we did: after seeing Door and Windows, head back on the Badlands Loop Road in your car and stop at the Saddle Pass trailhead. This quarter mile trail connects you to the Medicine Root/Castle Trail loop for a hike of 4.2 miles. The short Saddle Pass section is severely steep as you climb from the valley floor to the top of the ‘wall’, but once there, the terrain is quite flat. Up on this wall while hiking the Medicine Root Loop, you’ll see prairie grasses, sunflowers, wildflowers, and, possibly, snakes and other small animals. There is no shade up here, so plan to accomplish this part of your day in the morning.

Medicine-Loop-Trail

Further along the Badlands Loop Road, families will come to the Fossil Exhibit Trail. This boardwalk loop of about half a mile features well-done displays en route, which describe the various fossils found here, and whether these prehistoric animals ended up adapting, moving to a new region, or becoming extinct.

badlands

If you depart the park via the Badlands Loop Road toward Wall, you’ll come across many more roadside pull-outs with vistas of this area of the park. It seems to go on and on!

Where to eat:

During your day, definitely stop to eat at the Cedar Pass Lodge. This lodge is modern-looking and new, which didn’t quite seem to fit in with the setting of the national park, but inside, it has a very nice gift shop filled with handmade items and Lakota souvenirs, and a casual cafe that serves wonderful fry bread tacos. These native treats can be ordered with buffalo meat or black beans, and they are huge…two people can definitely share one. And yes, they are very fattening. Enjoy!

Where to stay:

The park does have lodging at Cedar Pass, in the form of very nice cabins overlooking the terrain (and the highway, but it’s no big deal). I did not stay the night on this trip, as the park can definitely be done in one day, but certainly this would be a good option as well.

The park is located along I-90 in South Dakota, near Wall. Make a stop at Wall Drug before or after!

Lodging near Joshua Tree National Park

The first time we visited Joshua Tree National Park, we stayed in Indian Cove campground and spent almost all our time within the park boundaries. We never regret spending time in parks; however, several unique lodging opportunities exist in nearby 29 Palms and by the unincorporated town of Joshua Tree. Looking for lodging near Joshua Tree? Here’s where to stay hear Joshua Tree National Park if you don’t plan to camp.

29-palms-inn

29 Palms Inn:

On a first drive through the desert town of 29 Palms, it may not be evident that there’s much to stop for. Not so. This gateway to Joshua Tree National Park has a lively, artistic community with fun dining options and an amazing resort at 29 Palms Inn

Located on 70 acres, 29 Palms Inn is centered around the Oasis of Mara (acquired by the Southern Pacific Railroad during the railroad boom). Guests can still walk right up to the oasis (on site) and explore it. The 29 Palms Inn was established in the 1920s, and is now owned by the Grunt family, who run it locally along with the Roughly Manor. Everything about the Inn celebrates the desert landscape, with much of the resort property outdoors. The pool, office, and restaurant comprise the heart of the inn, with sandy walking paths leading around cacti and brush to multiple stand-alone adobe and wooden cabins, rooms, and studios. The dining area is indoor-outdoor, and there’s an outdoor living room space just beside the pool for relaxing in the shade.

29-palms-inn

Amenities:

We love that sleeping spaces are roomy (perfect for families!) and that breakfast is included. Every morning, guests will find a healthy, homemade breakfast served buffet style. During our visit, we found steel cut oatmeal with toppings, breads and coffee cake, fresh fruit, juice, and coffee.

Lunch and dinner are served (at extra cost) in the same poolside building, featuring produce from the inn’s very own organic garden, Faultline Farm. Picnic lunches are also available to go for $10 each, so you can leave to enjoy the park without stopping for groceries.

Yoga and nature walks are offered on the weekends, and the heated pool is available to guests every day. There are plenty of places for kids to explore and play outdoors, which I appreciate. Hammocks are hung by the garden, and the Creative Center artist studio is located within easy walking distance on site. Here, families can paint a canvas or pottery with artist (and Inn family member) Heidi Grunt.

29-palms-inn

Lodging options:

Lodging options range from a stand-alone adobe cottage with a complete kitchen, living space, and outdoor patio perfect for a whole family, to single rooms ideal for adults traveling solo. Rates are in the $150 range. Check for latest prices. 

Roughley Manor:

Also owned by the Grunt family, Campbell House is very different than 29 Palms Inn, but has the same relaxed vibe and love for the outdoors and nature in common. Founded in 1925 as the Campbell’s Ranch (the Campbells  have a history with the Oasis of Mara as well), Roughley Manor was turned into a bed and breakfast in 1994. The manor and grounds are designed in a serene English manor style, with gardens, shade trees, and stonework. While in stark contract to the desert landscape, Roughly Manor somehow just works, creating an oasis of its own for families exploring Joshua Tree.

roughly-manor

Amenities:

The manor serves a full breakfast included in the room rate. There’s also an outdoor pool, and acres of landscaped flower gardens, fruit trees, and courtyards to relax in. Kids can play Bocce Ball in front of the manor, as well as chess.

Lodging options:

Most rooms are stand-alone cabins and cottages that dot the property, complete with kitchenettes (microwaves, mini-fridges, and sinks) and bathrooms with tubs. Most have a small porch. Some rooms also are offered inside the manor house, for a total of 12 options. Like the Inn, rates are around $150.

roughly-manor

Bonus lodging option:

Families who are adventurous but also ready for a special, spiritual Joshua Tree lodging experience may want to consider the eco-friendly, sustainable earth bag built domes at Bonita Domes. Rented through AirBnb, two sleeping pods in the Bonita Domes ‘village’ anchor an outdoor kitchen, kiva pit, and shower pod. An additional unit is also for rent in the main home.

bonita-dome

Bonita Domes are owned and operated by contemporary medicine woman and Joshua Tree resident Lisa Starr. Because Bonita Domes is also Lisa’s home, she rightfully asks for respect and reverence in this special space. We recommend bringing children who are ready for the experience of sleeping in a pod, being tuned with the outdoors, and can appreciate this special place.

Lisa also offers shamanic medicine sessions at the kiva pit, which I was lucky to experience. The session takes about an hour (sometimes more) and involves a rhythmic drum cadence and meditation. No experience is needed…just an open mind to enjoy the experience. Sessions are $150 each, and not required during the stay (but recommended for families with older kids).

Pit for later!

lodging-near-Joshua-Tree

As I disclose whenever applicable, I experienced these lodging options and the drum medicine session as a guest, for the purpose of review. All opinions are my own.

Visiting Manuel Antonio National Park Costa Rica

Manuel Antonio National Park (or Parque Nacional Manuel Antonio), is about a three hour drive from San Jose, Costa Rica, an hour from Playa Jaco, and only a short distance from a number of the coastal towns that serve it. We arrived via the Pacific Ocean, on our Uncruise ship, the Safari Voyager, but once in the park, the same tips apply to cruise passengers and other visitors.

guide to manuel antonio

Manuel Antonio has a well-earned reputation for animal spotting, and during our day there, we were rewarded with sightings of capuchin monkeys, howler monkeys, squirrel monkeys, sloths, white-tailed deer, raccoons, quatis, and more types of birds (including macaws) than we could keep track of. It’s small in size at only about 1,700 acres, but it packs a big punch, with expanses of white-sand beaches, jungle hikes, and wildlife viewing platforms. Because this national park is so popular, it has a daily cap of visitors, which helps with the flow of pedestrian traffic.

You can definitely spend a whole day here, alternating between the hiking trails and the beach; we recommend setting up a beach base camp after your morning hike so people can come and go to explore. Just remember to keep someone ‘manning the fort’ as it were, or monkeys will steal all your possessions!

manuel-antonio

Visiting Manuel Antonio National Park: Top trails for animal viewing:

We absolutely loved the Punta Cathedral Point Trail, which winds from one beach to the next, elevating through the jungle via many series of rustic stairs to prime viewing areas. We saw monkeys here, but the prime sloth viewing is on the aptly named Sloth Trail, which is shorter in length and flatter. Ironically, we ended up seeing a sloth in a tree near the beach. Playa Espadilla Sur Beach and Playa Manuel Antonio appear on the map to be on opposite ends of the park, but are in fact only separated by a matter of yards, making it easy to explore both sides.

manuel-antonio

Tips for visiting Manuel Antonio National Park:

  • First off, start early! The park opens at 7 am, and since it fills up fast (and many animals are most active in the morning and evening), we recommend getting there when it opens. Start with a morning hike while it’s still relatively cool (ha!) then head to one of the beaches for a post-hike dip. In our experience, most visitors tend to settle in at the beaches of Manuel Antonio, and it’s hard to blame them; this park has been voted one of the most beautiful in the world many times for a reason. However, getting off of the sand and into the jungle will reward you with animal sightings.
  • Take precautions around the capuchin monkeys (white-faced monkeys) and the raccoons, as they have become so accustomed to humans, they have no fear and will blatantly try to steal your food, backpacks, hats, and just about anything else. Staying on the trail helps somewhat.
  • Consider hiring a guide. We had naturalist guides included in our Uncruise visit, but anyone can hire a guide for the day, who will walk you through the park. At the time of our visit, they were about $40 US for three hours, and from what I could see from observing them with many families, well worth it. (Note: you can bargain.)
  • Bring a picnic or sack lunch and lots of water. While some vendors are outside the park, no food vendors are inside the park boundaries. We also recommend bringing a few beach towels in a backpack.
  • Wear swimsuits over sun and insect-protectant clothing, such as trekking pants and long-sleeve sun shirts. You WILL want to swim, and you WILL sweat a lot!
  • The entrance fee is $16/pp US for foreign visitors, so plan accordingly.
  • Beware the Beach Apple trees. These highly poisonous trees are (mostly) marked, but even sitting under them and touching their leaves can be dangerous. Eating beach apples is highly dangerous, and usually results in a hospital stay. Take the warnings seriously.

If you need lodging and food recommendations outside the park, check out this post.