How to stay healthy while traveling with the family

Traveling can be an exciting adventure, especially when you get to share it with family. Flying or driving to a new city, having new experiences, and getting to detach from your regular routine are things most people can look forward to when travel is in their future. If you have stress in your typical day to day life, sometimes travel is the only way to really get away to de-stress.

On the flip side, traveling isn’t always so nice for our routines when it comes to staying healthy. When you leave your house, you might leave your regimented life behind and regret it when you return home. Traveling with family brings its own types of stress that are different from your “normal stress,” and it can be handled. Incorporating these  healthy traveling tips are similar to managing your health with a super busy schedule.
air-travel

Keep Some Routine

It’s easy to let routine items slip to the wayside while you’re traveling, but it’s a good idea to keep some of your routines in place, so you don’t experience “travel shock” when you return home.

For example, if you drink coffee every morning to get you going, that shouldn’t become foreign just because you’re traveling. Most lodging has a coffee maker in the room, or you can find a coffee place nearby to grab a cup of joe. Along with giving you your morning jolt, the caffeine in coffee can help your bowel movements stay regular. If you take pre-workout supplements, stay on your routine.

Visit a Local Grocery Store

While you’re traveling, there is no excuse not to find fresh snacks, especially if that’s what your body is used to on a regular basis. It’s just as simple to find fresh fruits and veggies even at gas stations these days as it is to grab a sodium-packed bag of chips off the shelf.

If you’re staying somewhere for a few days, there is likely a grocery store that sells fresh produce and other snacks that will keep you in good health. If your accommodations have a refrigerator that is accessible to you, grab some produce from the local supermarket for snacking in the room or on-the-go. You can stock up for your entire stay with one trip to the store.

If you’re worried about spending extra money on airport food on a layover or as you road trip, pack some pre-made snacks in your suitcase or cooler. This is great for babies and picky eaters. If you’re flying, check the Transportation Security Administration’s website for what foods are allowed through security. If you’re driving, pretty much anything is allowed, but be cautious of states that don’t allow items like fresh fruits across their borders.

Supplements and Water

Supplements are gaining popularity as easy ways to get your daily dose of certain nutrients you might not get in your regular diet. If you’re one of these people, you should absolutely take enough on your travels to keep your health in check. You can’t always count on restaurants to use fresh ingredients that with no preservatives, so your family’s salt intake may spike while you’re traveling. You may consider adding a probiotic to the mix while you’re traveling to maintain your gut health. For your budget-friendly, yet equally nutrient-rich superfood, learn more here in Amazing Grass Green Superfood review.

Also, ensure your family is staying adequately hydrated. Traveling for long periods of time can disturb the level of hydration you usually experience. Whether you’re flying for 2 hours, 12 hours, or trapped in a car for the day, your body will suffer some dehydration. This doesn’t mean you need to consume crazy amounts of water to cause numerous bathroom breaks.

Keep Moving

Unless your travel adventure includes hiking or other activities that keep your family active, consider incorporating a short movement session that includes the whole family. Whether it’s time in the pool swimming laps, maybe disguised as races for kids, or pulling up a yoga video on your iPad, get some movement in each day for at least 30 minutes.

If you’re a member of a national gym, ask if your membership includes admittance to gyms in the area you’ll be visiting or if you can get a guest pass. You can also check out any public fitness groups to get your heart rate up for a bit. Of course, you can always utilize the hotel gym if one is offered. Even if you’re walking a lot each day, you’ll be able to get some weight training in if that’s what you’re used to.

Good Night’s Sleep

Even though traveling is usually a limited time, your sleep is crucial and should not be sacrificed. It’s tempting to pack your day full of activities and sites but consider how it will affect your family’s sleep schedule. Getting quality sleep will keep your mood and mental health in check to ensure each portion of your travels is enjoyed to the fullest.

If you have younger children, you endanger their regular sleep routine by putting them to bed later or waking them up earlier than usual. You might even look at how you can incorporate their usual nap time to give them the rest they’re used to and give you a break.

Stitch Fix for fall travel: wardrobe planning tool or indulgence?

So I finally tried Stitch Fix. Yes, I know I’m behind the times. I decided to take the plunge because I needed some fall travel clothing, and wanted to expand my style range a bit, and try a few new options. I’m not much of a shopping fan, and I’m not terribly concerned with style, so I wasn’t sure if it would be for me. Here’s what I learned.

Stitch Fix for fall travel:

Everyone who signs up for Stitch Fix starts by filling out a style profile. The questions range from practical (what’s your height and weight) to personal preference (do you like casual clothing, business clothing, a mix, etc). Even though I’m not really a ‘clothes person’, I found it fun to fill out the style profile.

Afterward, you’re given a series of images of styles and clothing options that you can rate as thumbs up or thumbs down. This was fun, too, and it helps the stylist who will be assigned to you get a feel for your preferences. You can do more of these ‘slide shows’ later, and honestly, I still find them fun.

Once you’ve filled out the style profile, you can schedule your  ‘Fix’ or you can ask for automatic shipments. I scheduled mine, for more control (though you can opt out any time either way).

Note: You’re never obligated to buy any of the clothes sent to you, but you do have to pay a small stylist fee if you opt to return all the items. If you buy, the fee is waived, and if you buy everything in your box, you get a significant discount.

My first box arrived, and it was a mixed bag (or box). I had a pair of skinny jeans, which I liked, but I already had a pair in my closet, a few tops that really weren’t my style, a boxy sweater I thought I’d hate when I unpacked it, but ended up loving, and a button-up tunic I liked, but didn’t feel was high enough quality to keep. In the end, I kept one item: the sweater. I sent the rest back in the pre-paid envelope (easy-breezy).

I enjoyed the experience but didn’t feel it met my goal of finding some new styles for my fall travels, but since you rate all the items in your box after it arrives, I decided to give it another chance. Now, my stylist would ‘know me’ better, right? Right! My second box was MUCH more ‘me’, while still giving me new options to try that I wouldn’t have picked out for myself. I got another pair of skinny pants that I liked but didn’t need, but then got a thin, fitted sweater that will be perfect for the plane, a great scarf, another tunic that was higher quality, and only one top that wasn’t really my thing. I kept everything except the pants and top.

I like that Stitch Fix sends you little cards that give you style ideas with your order (like below). And that they make it so easy to return things. You have three days to make decisions, so you can try the new items on with stuff you already have in your closet. You can list a budget in your profile, and I set mine at something around ‘medium’, since I wanted higher quality items but didn’t want to spend a lot. The items sent to me tended to be in the $40-80 per item range. The stylist fee is $20 (waived if you buy).

Overall, I did gain some new travel wear for fall travel, so I’m satisfied. And while I don’t need more items now, I can ‘pause’ Stitch Fix and come back to it, scheduling more ‘Fixes’ in the winter or spring for more flair to my travel wardrobe as needed. Every so often, I’ll continue to update my style profile in the meantime.

Have you used Stitch Fix? What are your thoughts?

Note: I tried Stitch Fix at the invitation of the company, for the purpose of review. All opinions remain my own.


Grown-up getaway: Ashland Hills Hotel

Now that school has started, this is a great time to get away with your partner to toast another great summer. Autumn travel has the advantages of providing less crowded hotels and restaurants, and off-season hotel deals are the norm. Recently, my husband and I enjoyed a getaway to Ashland, Oregon for a romantic, yet still adventurous, stay at Ashland Hills Hotel.

Ashland hills hotel

For us, this getaway was a staycation: Ashland is our hometown. But this small Southern Oregon town is full of character–and more importantly, great entertainment venues and dining options–making it an ideal grown-up getaway for anyone within driving distance.

You won’t lack for quality lodging options in Ashland, ranging from quaint B&Bs to luxury escapes. For our most recent getaway, we tried Ashland Hills Hotel, which hits upon a perfect middle ground. This elegant property used to be nothing special until bought by the same folks who run several top-notch Rogue Valley hotels, including one of my favorites, the historic Ashland Springs Hotel. Knowing this boosted my confidence that we’d be in good hands at Ashland Hills Hotel, and we certainly were!

Ashland-hills

The hotel is located on the south side of Ashland, placing it on the opposite side of downtown but adjacent to some of the area’s best hiking and outdoor recreation. From this location, it’s easy to get to Emigrant Lake, Mt. Ashland, and Crater Lake, and you’re still only about five minutes by car from downtown Ashland.

The renovated lobby is spacious, airy, and calming, and our king bed room overlooking the pool was also generously sized. We had the usual amenities, such as coffee and tea service, and a mini-fridge, plus there are additional on-site amenities that really up the value, such as tennis courts and free bikes to use. Free WiFi and parking was a nice touch as well, both of which I no longer assume will be granted at higher-end hotels. The entire feel of Ashland Hills Hotel is what I’d call ‘gently retro’. It’s not over-the-top, but the retro furnishings, colors, and woodwork are tasteful and appealing.

ashland-hills-hotel

The continental breakfast set out on the Mezzzanine is standard…nothing amazing here, but a good value for a free breakfast and in a nice setting away from the lobby with plenty of seating.

What to do in Ashland:

Early fall is a great time to visit Ashland. The weather is still warm, which means couples can take full advantage of the many hiking and biking trails in and near the city limits, SUP or kayak on Emigrant Lake, or book a whitewater rafting trip. The downtown sector of Ashland is entirely pedestrian-friendly, with interesting shops and eateries lining Ashland Street and Main and the downtown square.

Walk through Lithia Park: this downtown park is vibrant in fall, and even in September, before the leaves change color, it’s a sanctuary of leafy green goodness. Walk among the ponds, and be sure to venture further up the park past the children’s playground to see the many acres beyond the lawns and formal gardens.

Ashland-Oregon

Hike or bike the White Rabbit: This network of trails and single track snake through the hills overlooking Ashland, and are accessible at the end of Ashland Loop Road or Park Street. Lots of signage within this hiking area ensures you won’t get lost (just stay on trails to avoid poison oak).

Take in an Oregon Shakespeare Festival production: Ashland is famous for its OSF, and tickets are often discounted after school starts. Take in a show (Shakespeare or otherwise) in the outdoor theater before the season is over. Note that many other smaller theaters churn out good productions in and around Ashland, too. Consider looking into what’s playing at the Caberet in Ashland or the Craterian in Medford.

Go wine tasting: The Rogue Valley boosts over 30 wineries, many of them award-winning. Venture north and drive along the Applegate Wine Trail or the Upper Rogue Wine Trail, or try some local Ashland area wineries like Weisinger, Bella Fiore, or Pebblestone.

Southern-oregon

Dine anywhere downtown: Seriously, you can’t go wrong. Our favorite dining options on the square or downtown  include Amuse or Larks (fine dining), Standing Stone (brew pub), Liquid Assets (wine bar), Smithfields (locally sourced) or Brickroom (killer cocktails), and Sesame (Asian fusion). For brunch, look no further than Morning Glory.

Indulge at Waterstone Spa: Waterstone is part of the hotel group that runs several top-notch hotels in the area, including Ashland Hills Hotel, which means it’s easy to combine a stay with a treatment here. We opted for foot soaks for a quick but refreshing service following a short hike in the area as part of Ashland Hills Hotel’s Wild Pacific Crest Trail package.

Walk along part of the PCT: Speaking of which, the PCT runs right past Ashland near the Mt. Ashland recreation area and Pilot Rock. This is a great area to take a day hike, even if you won’t be trekking the trail from start to finish. We like to hike a few miles when we can, accessing the trail from the Mt. Ashland access road off I-5.

As we disclose whenever applicable, our stay at Ashland Hills Hotel was complimentary, for the purpose of review. All dining and activities in Ashland were at our expense.


Best food containers and bento boxes for the road

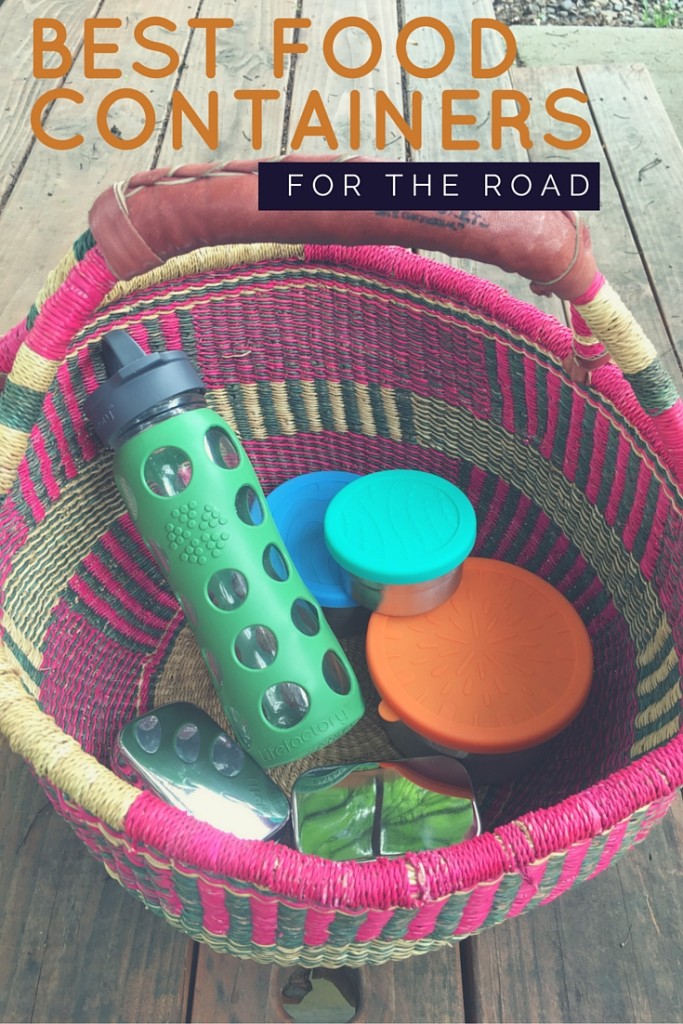
One of the best ways to save money and stay healthier on road trips is to pack your own food. Almost every road trip we take, we pack lunches and drinks, whether we’ll be on the road a few hours or a few weeks. Since we banned plastic baggies and disposable plastic containers in our house years ago, the best food containers for our car include the following. Bonus: For a list of road trip friendly snacks, check here.

food-containers

Bento boxes for the road:

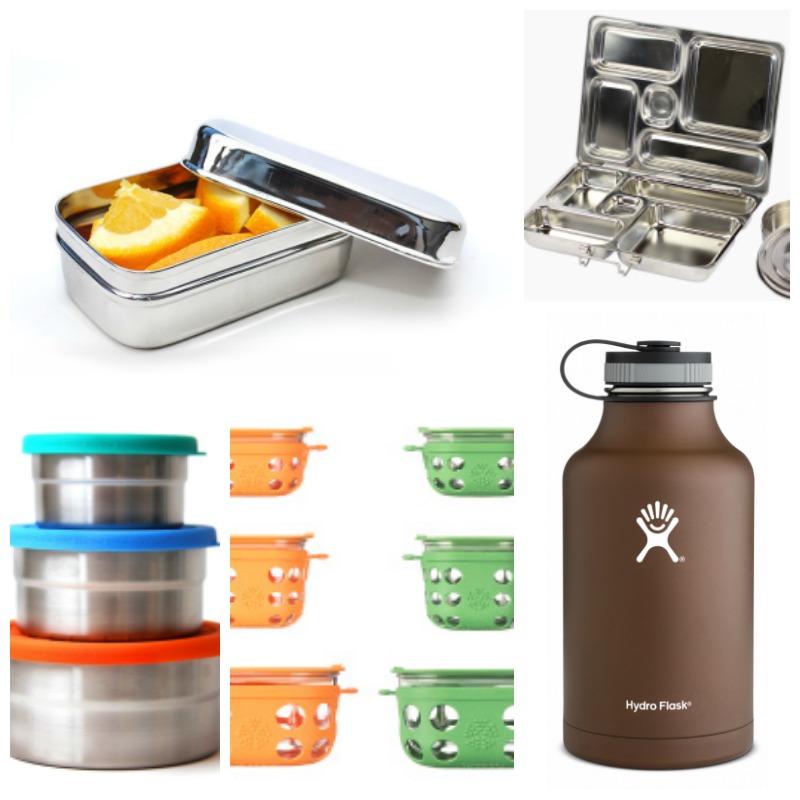
Seal Cup Trio: This trio of round stainless steel containers come with soft rubber lids and are made by ECOLunchBox. We love that they nest together when not in use, so they take up less room in the cupboard, and that they’re not very heavy. If you’ve toted around glass containers, you know what I mean (see below). The Seal Cup Trio are perfect for snacks like pretzels, cut fruit, and granola. You can put wet items in, but not liquids. They’re $29, which is a good deal for three pieces.

ECOLunch Pod: These little 5 ounce rectangular containers are complete stainless steel, with stainless steel lids. We love them because they’re very versatile: you can use them for snacks, or as accessories to your lunch, storing wet wipes or even crayons or other crafty games for the car. They’re only around $8 each.

PlanetBox food tray: No doubt about it, PlanetBox food systems are expensive. However, we use one every day for our son’s lunch for school, then again on the road. What I love: it’s all one unit, so it’s easy to transport and not lose pieces, and the included dip containers never leak. For what it’s worth, we never use the included cover…just one more thing to lose in the car! Pick one up for $64.

Life Factory: For bigger food items, such as prepared salads and sandwich rolls, we use Life Factory 2-cup and 4-cup containers. Beware: these glass containers are heavy to lug around (so they’re best for road tripping where food transport is at a minimum). However, we love them because they’re encased in rubber to prevent breakage and seal very well. Pick up the 2-cup version for $17.

HydroFlask growler: We love everything HydroFlask (hey, it’s an Oregon company, and we’re Oregonians!) but many families don’t think of buying a growler for road trips. Usually used for beer, growlers are ideal for keeping drinks cold on the road: we fill our growler with water, tea, and fruit juices to dole out along the way. Plus, if the adults in the family come across local brews, they can easily fill up! They’re under $50 on Amazon. We also use HydroFlask water bottles and food containers, but note: in our experience, the food containers do not keep liquids like soup hot for more than five hours.

road-trip-containers

What to carry road trip snacks in:

For short term road trips and outdoor pit stops, we love to use our bulga basket. We picked ours up for under $25. I use bulga baskets more than soft-sided coolers because I can easily access everything and see all the items I’ve packed, which I find very convenient. However, I cannot keep foods very cold in a basket. When we need to transport foods longer than a few hours, I turn to my Yeti cooler. No, buying a Yeti isn’t overkill: this high end cooler may have been designed for hunters and explorers out in the wilderness for days and weeks at a time, but trust me, after using one, you’ll never go back to a regular plastic cooler again. Our Yeti Tundra keeps our food cold and fresh for days!

amzn_assoc_placement = “adunit0”;
amzn_assoc_search_bar = “true”;
amzn_assoc_tracking_id = “pitstoforkid-20”;
amzn_assoc_ad_mode = “manual”;
amzn_assoc_ad_type = “smart”;
amzn_assoc_marketplace = “amazon”;
amzn_assoc_region = “US”;
amzn_assoc_title = “My Amazon Picks”;
amzn_assoc_linkid = “ff091f71741a3fbc1be67b0816ea564b”;
amzn_assoc_asins = “B0040MH642,B006IVM9VS,B01ACASP8G,B01C0Q974Q”;

Hiking Safety: How to keep kids safe in the outdoors

A ramble through the woods, a stroll across a mountain meadow, or a strenuous alpine hike with the reward of a breathtaking vista – it all sounds idyllic until something goes wrong. As a former search and rescue volunteer and EMT, hiking safety is very important to me. I’ve participated in too many wilderness searches that could have been avoided with a few precautions, a little know-how, and the right hiking gear.

nature-hikeTrust me – if golf is “a good walk spoiled,” so is a search for a missing hiker! If you’re planning to explore hiking trails in your region this fall and winter, know what is needed to have a fantastic outdoor experience (and make it home in time for dinner).
Safety Precautions

Before setting out on any wilderness hike, download or buy a topographical map of the trail network so you’ll be aware of trail crossings and alternative routes. Consider hiking with a buddy, or, if you must hike alone, always tell a friend or loved one where you’ll be and when you plan to be back. Many trailheads offer “sign-in stations,” where hikers can register their presence.

Lucky hikers will enjoy spotting wildlife en route; with very few exceptions, these animals will respect your presence if you respect theirs. Carrying bear spray is a good precaution against the rare event of an aggressive animal, but a camera will come in handy far more often.

Gear to Take

Most hikers remember to pack weather-appropriate clothing and their best hiking boots, plus to carry a water bottle when setting out, but they are surprised to learn what else should be in their day pack. While compasses and GPS units are useful, they don’t make the list of absolute necessities. Neither do high-tech hiking poles or hydration systems, despite being nice to have. In fact, hikers carrying just the following five items will greatly increase their chances of survival in the wilderness should they spend more time in the elements than planned:

  • Bandana
  • Whistle
  • Glow Stick
  • Plastic Poncho
  • CD or Mirror

All five of the items above can be purchased for under $10 at any outdoor store or dollar store. Keep all five safety tools in your hiking day pack permanently to ensure they’re at the ready on every hike.

Read our full article on fix.com.


Source: Fix.com

Five outdoor travel experiences any family can try

Good news parents: Most kids’ favorite vacations involve sleeping bags and campfires instead of five-star luxury and turn-down service. Traditional camping trips are a crowd favorite, but if you’re looking for something a bit further off the beaten path of family travel, check out one of the following outdoor travel experiences any family can enjoy, no prior wilderness knowledge necessary.

outdoor travel experiences

1. Spend a night in a fire tower lookout.

2014-02-18-pickettbuttebed.jpg

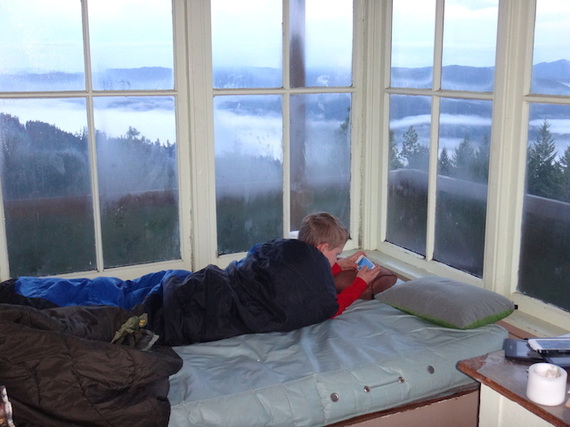
Un-used or seasonally manned fire tower lookouts dot US Forest Service lands, especially in the Western states. Many of these lookouts are available for seasonal rental. Our fire lookout stay at Pickett Butte, Oregon included two nights in an isolated three-story high tower, with plenty of room to play, hike, and let our dog roam. We enjoyed downtime, plenty of paperbacks, roaring campfires, and the excitement of sleeping above the treetops while the wind blew. Fire lookouts are available to reserve via Recreation.gov, just like state campground sites.

2. Book an overnight river rafting trip.

2014-02-18-rafts.jpg

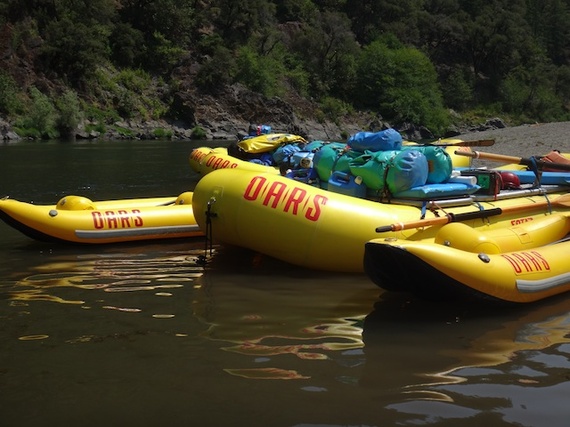
Untried on the river? Don’t try to plan an overnight float trip by yourself. We’ve seen the results first-hand (and they usually involve stuck rafts and miserable families). When we wanted to explore Oregon’s backcountry via the Rogue River, we entrusted our vacation to OARS, who took care of everything from experienced rafting guides to three-course meals. Rafting tours are available in most states, with the most popular overnight trips for families in California, Oregon, Utah, and Idaho.

3. Go dog sledding.

2014-02-18-BigWhitedogsledtrip.jpg

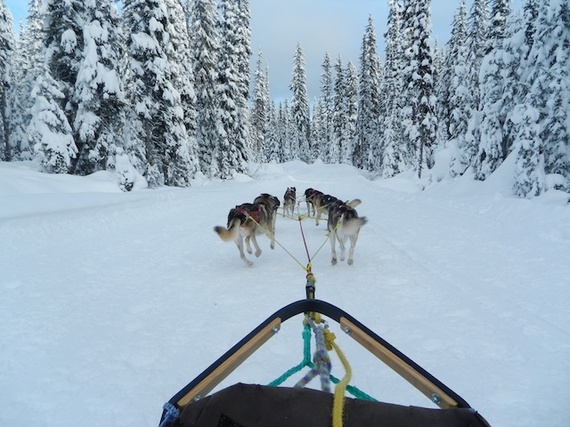
A day trip that involves speed, snow, and happy, barking canines? Sign us up! The best dog-sledding tours will include educational opportunities for kids to learn about the history and practice of dog sledding, as well as time to greet the dogs, learn about their care, and see where they eat and sleep. We loved our dog sledding tour in Big White, British Columbia, as well as our summer tour of a dog sledding training facility in Juneau, Alaska.

4. Rent a state park yurt.

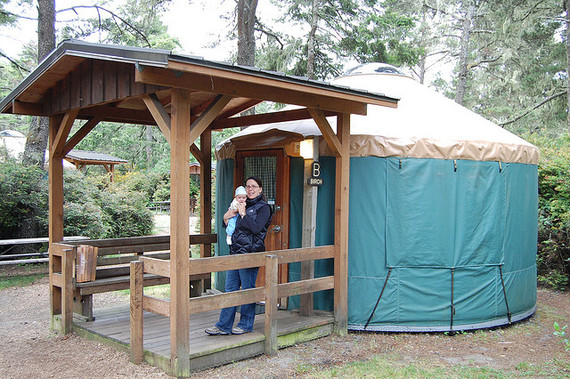
2014-02-18-yurtstay.jpg

Want to camp in the Pacific Northwest in the off-season, but don’t have an RV or camper to keep warm? No problem: rent a state park yurt. Reservable via Recreation.gov, state park yurts in Washington and Oregon (as well as other states across the US) provide families with just enough comfort to still be considered a camping trip. Yurts along the Pacific coast provide heat, electricity, and beds… perfect for a weekend of whale watching or winter storm viewing. Reserve early: yurts are very popular!

5. Take a hut-to-hut ski or hike tour.

2014-02-18-amc.jpg

Perhaps you grew up taking overnight backpacking trips, but your children aren’t quite old enough to carry full packs of gear (yet). Or maybe you’d like to get into the sport, but are first-timers. Enter hut-to-hut hiking or skiing, where families can enjoy the backpacking experience combined with the comfort and security of a winterized (and sometimes stocked) hut at the end of each day’s journey. Our favorite hut-to-hut trips are located in the heart of the White Mountains, run by the Appalachian Mountain Club. Families can opt to trek on their own, or base in one of AMC’s family-friendly lodges such as the Highland Center Lodge for a guided day trip. Just in time for summer, AMC has extended their guided family vacations.

Photo credit: Amy Whitley, Flickr Creative Commons

Summer in Idaho: Schweitzer Mountain Resort with kids

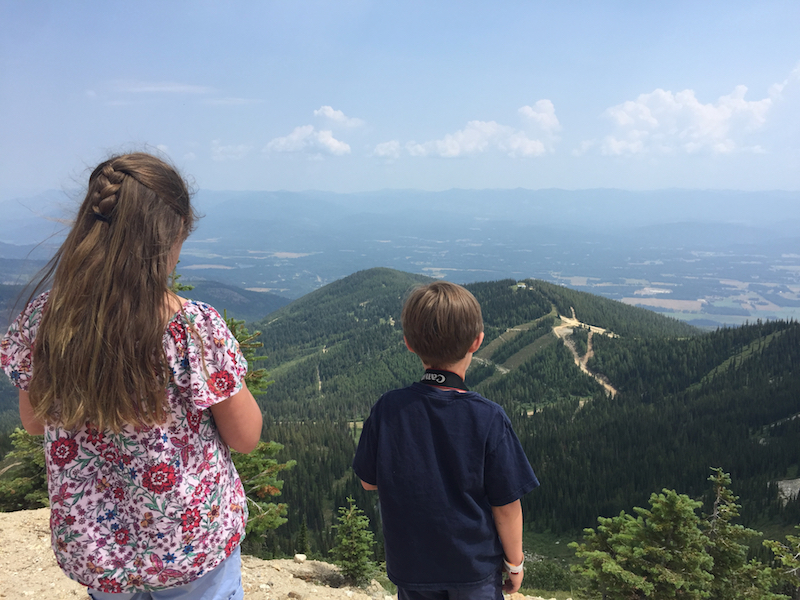
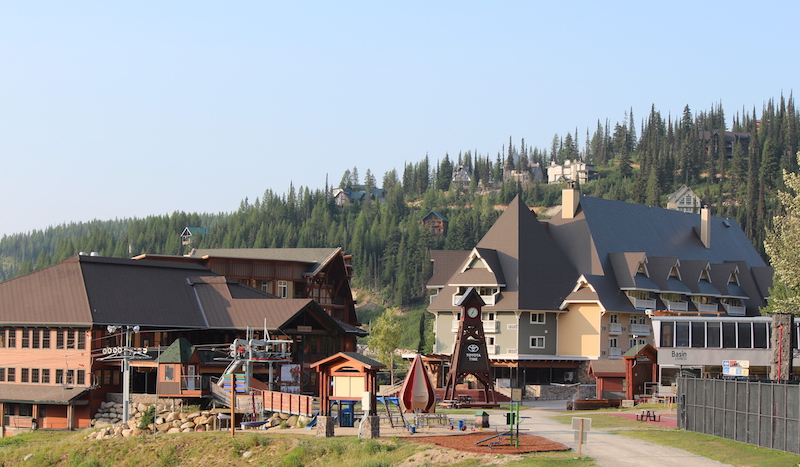
In the panhandle of Idaho, high above Lake Pend Oreille and the picturesque town of Sandpoint sits Schweitzer Mountain Resort. While many people know Schweitzer as a ski destination, summer on the mountain has much to offer the active outdoor family from late June until early September. Find miles of trails to explore, ripe huckleberries to pick, free lawn games to play, sprawling vistas to gaze upon, Village attractions to thrill you, blooming wildflowers to photograph, and a chairlift ride to amaze (and somewhat scare) you.

Schweitzer caters to those who love the outdoors.  The main attraction is undeniably the over twenty miles of trails and its connection to the massive Selkirk Recreation District trail system. However, we found that Schweitzer in the summer offers many summer activities aimed at entertaining the whole family from hiking to a playground, pool and thrill attractions. And if you time it right and visit in late July or early August the wildflowers will be in bloom and the huckleberries delicious. 

Tip: Once you’ve explored the mountain, don’t forget to spend a day at City Beach in Sandpoint enjoying the sun, volleyball, sailing, beachside playground or swimming before heading a few blocks over to experience an “auto bridge” that is now enclosed and home to one of the most unique shopping experiences in the country.

Lodging accommodations

Schweitzer offers two on-site lodges, the Selkirk and White Pine, with a variety of room types to address different family needs.  The lodges offer rooms from the standard double queen to three bedroom condos that can sleep up to ten people. The Selkirk Family Suite met the needs of our family of five. It included a queen bed and a twin bed over a second queen, a small kitchenette and table for in-room dining. The room was spacious enough not to be overcrowded when all five of us were present and quiet and relaxing when our youngest went down for her afternoon nap. 

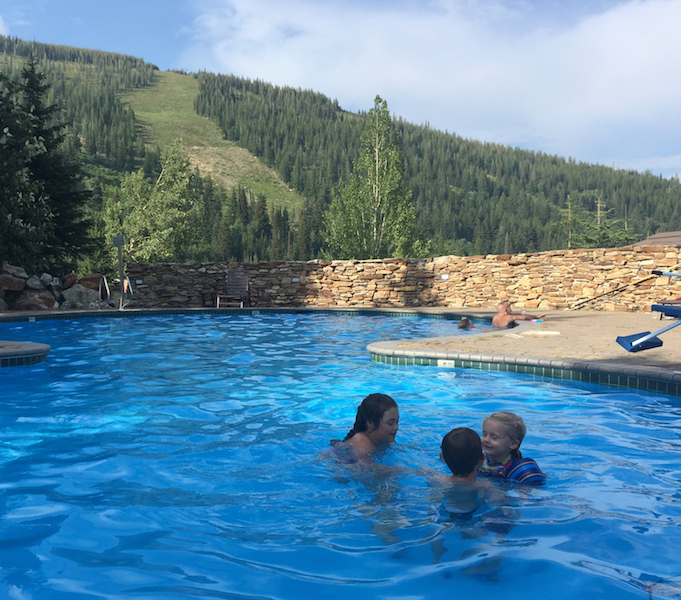
While the lodge included typical hotel amenities like an exercise room and small business center, it was the more unique features and Northwest flare that won over our family. The lodge includes a theater room (first family there picks the movie for the night!) as well as an outdoor heated pool with views of the mountain. It is difficult to describe how or why the pool won us over so completely, but unlike other experiences where the pool area is heavily regulated, Schweitzer takes a more relaxed approach. Do you want to take your food and beverages (even the adult type) out to the pool and eat dinner as the sun sets over the mountains and your children splash around in the shallow end or warm up in the hot tubs?  Of course you do.  And at Schweitzer they let you. 

Note: don’t leave your Pucci’s Pub nachos (they are delicious) unattended as the adorable marmots will move in on them quickly!

The Selkirk Lodge also shares space with the Chimney Rock Grill and Mojo Coyote’s Coffee Shop.  You don’t have to leave the building and both are excellent.  While it was nice to be just a flight of stairs away from our morning lattes, we especially enjoyed the ample portions of the kids’ meals at Chimney Rock. The food came with attentive and quick service that thoughtfully seated us on the shaded patio keeping us out of the more congested areas and provided us with another opportunity to admire the views. 

The Selkirk Lodge is centrally located in the Village and faces the common area on one side and the mountain on the other. From just outside our room we were able to play a game of giant checkers, spend time stargazing with our telescope, and watch the kids enjoy an impromptu dance party. A playground is adjacent, as is a massive colony of marmots, and deer and moose to spot. For reservations and rates go to Schweitzer.com.

The Schweitzer Ultimate Fun Pass

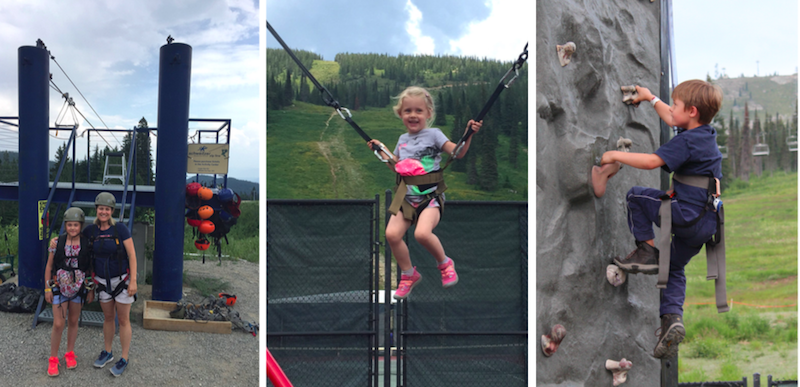
To help facilitate summertime fun in the Village, Schweitzer offers the Ultimate Fun Pass (UFP), which gives all-day (11am – 5pm) access to the chairlift and other paid attractions. The UFP attractions include unlimited chairlift rides, trips down the zip line (for those eight years old and 60 lbs), climbs up the climbing wall, and jumps on the trampoline jumper. Every UFP also includes one bag of dirt and jewels to be sluiced at Cranky Jennings Sluice Box which was a crowd favorite in our family.

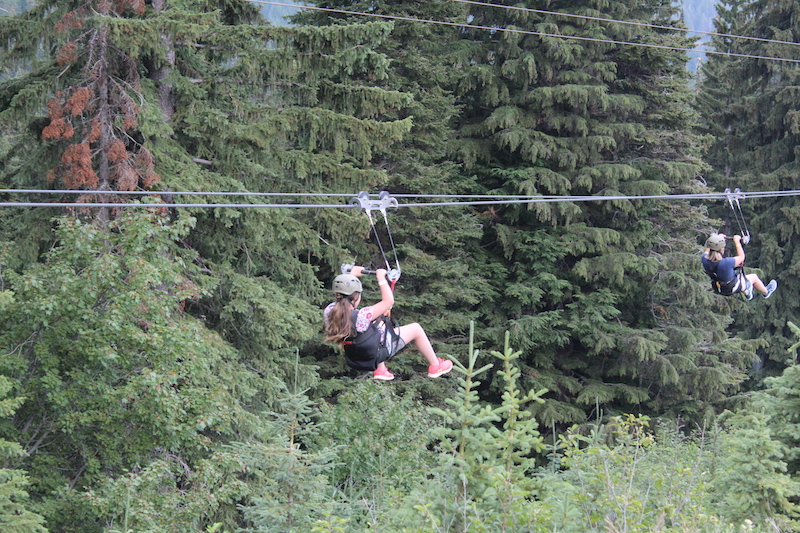
Our 10-year-old took advantage of the unlimited rides on the 700’ foot long dual zip lines (and yes, mom did join her).  This was an exhilarating adventure for both child and parent to enjoy together while offering us a unique view of Lake Pend Orielle down the valley. The modest length and height, as well as the extremely accommodating and friendly staff at both ends of the zip line, made for a perfect introduction to the sport for our traditionally tentative and risk-averting daughter.  In fact, mom was more anxious than she was, especially the second time down the line. 

Since our three and six-year-olds did not meet the minimum age or weight requirements, the rest of us moved the short distance in the Village to the trampoline jumper and climbing wall while older sister and mom enjoyed the zip line. A single parent was able to simultaneously supervise the two younger kids on the trampoline jumper and the 25-foot tall rock wall. This was made possible by the attentive and helpful staff who supervise both locations. 

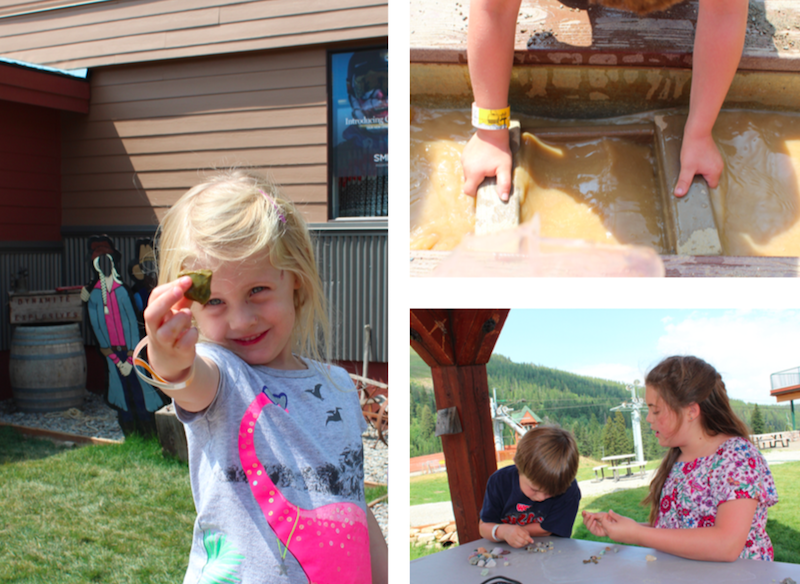
From all of the activities enjoyed with the UFP, surprisingly the sluice box was best received and enjoyed by all ages. Everyone who purchases the day pass receives a bag of dirt that contains hidden gems and stones. Using screens and a running channel of water you can wash away the dirt leaving just the treasures behind. From the magical discovery of a hidden gem to the trading of valuable items and even the imagining of enchanted powers related to different types of stones, the sluice box kept our kids entertained for an afternoon and their imaginations active for days. While we found one bag per kid to be an appropriate level of fun and amount of stones to haul around with us, for those wanting additional fun, individual bags are available for purchase in the Activity Center.

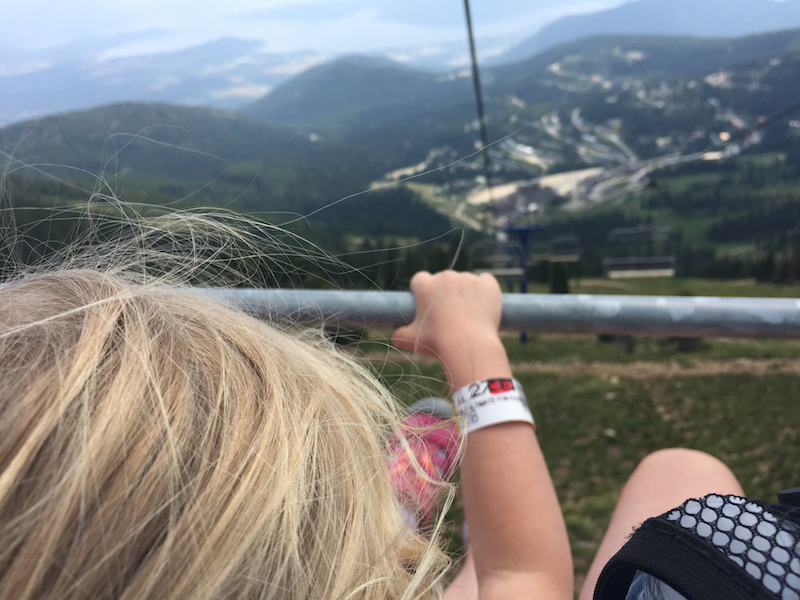
The most anticipated UFP activity for many is the chairlift ride to the summit. It was our three-year-old’s first open-air chairlift ride and we were a bit nervous starting out. Soon we were rewarded for our bravery with spectacular views of the valley below and a pleasant meal at the top of the mountain. Even for kids raised on the marvels of the computer-generated worlds of Star Wars, there is a jaw-dropping, ‘wow’-inducing moment, when you get to the top and turn around and look at the resort, tiny and insignificant by comparison, hovering above the valley and lake below.

The Nest at Sky House opened in 2016 and offers a relaxed but finer type of dining than we expected. If your family is looking for a kale Caesar, scallops, or steak sandwich, at 6000 plus elevation, you can’t go wrong. Kids under age 12 can pick from a cheese quesadilla, cheese pizza or bowl of noodles. The food was well prepared and our server was pleasant and attentive. The homemade raspberry lemonade was perfect for a hot summer day and fueled us up for another walk around the mountain’s summit. The Sky House Bar, also open 11am – 5pm, offers adults beverages as well. Staff will even provide to-go beverage cups as alcohol is permitted on all resort property. 

Tip: for the budget-conscious families or ones with picky eaters, you may want to consider packing a picnic and taking it with you to the summit. Plenty of picnic tables are available, all with a view.

After lunch, our kids took advantage of the opportunity to wrestle around in front of a ‘Danger: Cliff’ sign (increasing parent anxiety) while others could enjoy a round of disc golf, a hike, or mountain bike ride down the mountain.

If you fear heights or have particularly squirmy kids (thankfully our three-year-old sat still except for the last 25 feet), the ride down the lift can be a white-knuckle experience. Rather than looking into and up the hill, you look out over the drop. While most families won’t be fazed by it, some will be hugging the little ones and tightly clinching the safety bar.

There are some practical considerations before purchasing the Ultimate Fun Pass:

  • Weight: Between 30 and 240 lbs for most activities. (60 lbs for the zip line)
  • Age: At least 8 years old for the zip line.
  • Shoes: You must have shoes that are closed over your toes and heel. 

Note: Schweitzer may take a more relaxed approach around the pool; however, they do not mess around with age and weight limits on the Village attractions and mountain bike rentals.  Be warned, you will be weighed on site, on an actual scale. Attractions can be purchased a la carte as well, at the Activity Center, if you don’t think your little ones will make full use of the pass.

Up next, additional summer activities…click on the button below to continue!

fathom-cruise

Pages: 1 2

Maine with kids: Baxter State Park backcountry itinerary for families

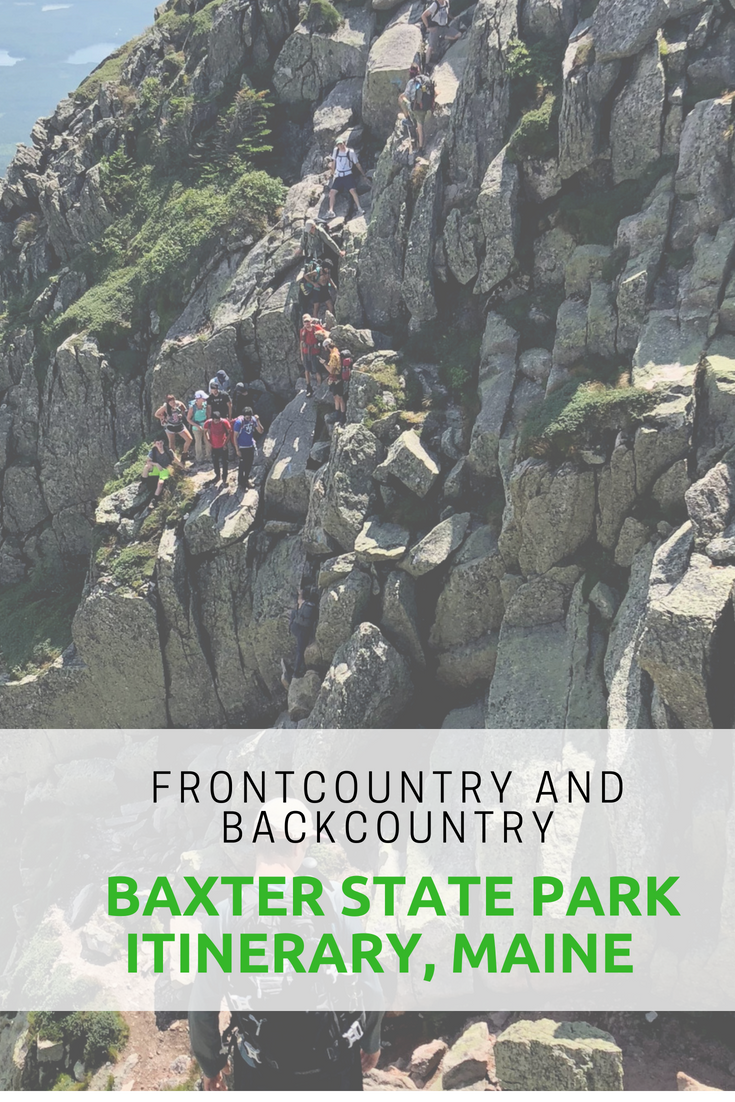
Baxter State Park is Maine’s largest expanse of untamed public wilderness. With almost 210,000 acres to explore, where do you start? Our Baxter State Park backcountry itinerary for families includes days in the frontcountry enjoying Baxter’s car camping options, several days in Baxter’s backcountry, then a rest day to play and explore before departure.

Baxter’s scope and size is on a national park scale, but unlike national parks, almost every lake, pond, waterfall and stream in the park is accessible only by trail. In very few places in Baxter can you drive up to see anything, and even then, you must drive miles upon miles on dirt roads. In other words, you earn you sightseeing! Baxter limits the number of visitors to the park daily, which means you won’t be rubbing elbows with crowds of tourists. It also means you have to be organized about your trip and get the required permits you need early. Here’s how!

The best way to experience Baxter State Park is by camping, though day permits are available as well (if you opt for that, stay in nearby Millinocket). Here’s our suggested itinerary, after doing most things right and a few things wrong during our five days in Baxter.

Day 1: Frontcountry camp at Roaring Brook Campground

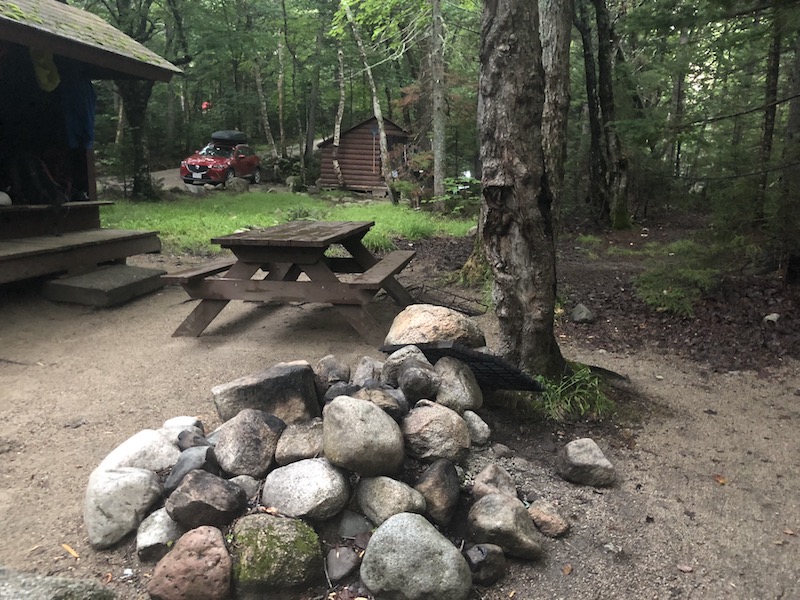
In case you’re not sure, when I say ‘frontcountry camp’, I mean ‘car camp’, or camping via car access. Roaring Brook Campground is about eight miles into the park after you check in at the ranger station at the Togue Pond entrance, past Millinocket via dirt road. The campground, like all in Baxter, is remote and basic, with nicely-kept pit toilets, a place to purchase firewood (bring cash), and a staffed ranger station, but no other amenities, such as showers or potable water.

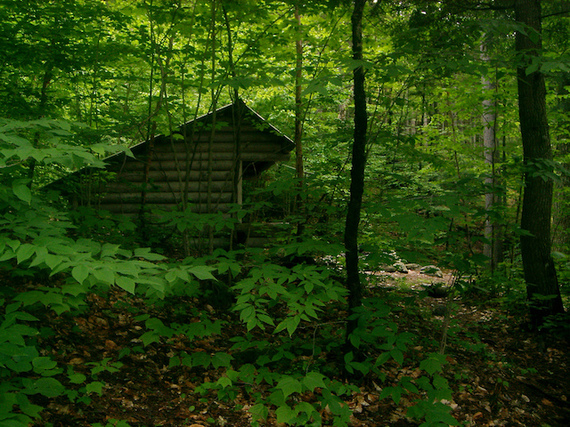
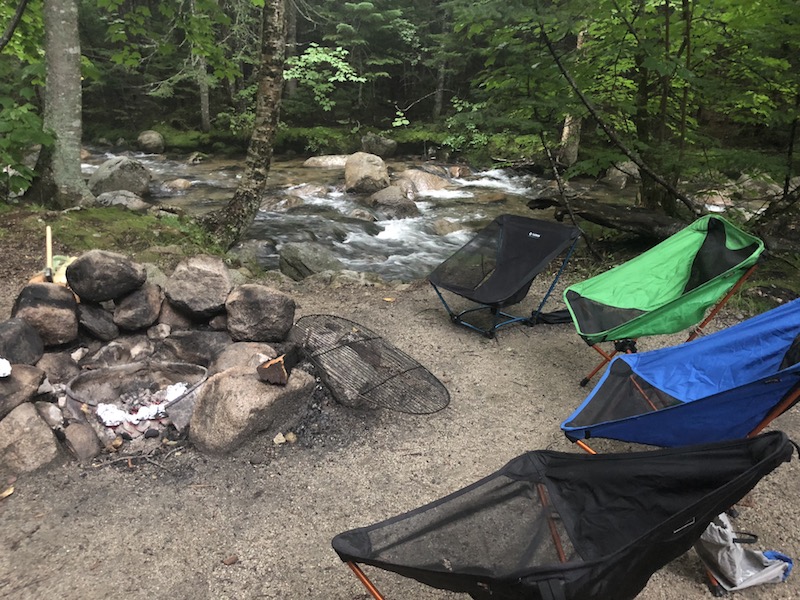
You can pick between tent sites and lean-to sites, and I recommend the latter, because they’re on the brook. You get a basic wooden shelter with a platform for each site, plus a picnic table and fire pit. We loved the shelters (lean-tos) throughout Baxter, as they provided just enough protection from the afternoon rainstorms and gave us a place to roll out our sleeping bags off the dirt. They’re not enclosed, however, and you won’t be safe from mosquitos there, so you can opt to set up a tent inside the shelter (but not outside of it). Roaring Brook is cold and clear, and we loved swimming in it.


Tip: You MUST enter Baxter State Park before 8:30 pm, so time your arrival accordingly. Also, the entirety of Baxter is ‘carry out’ for all your trash, so bring trash bags and plan on storing your trash in your car at night. You must also stow away all your food at night.

Day 2: Hike Mount Katahdin

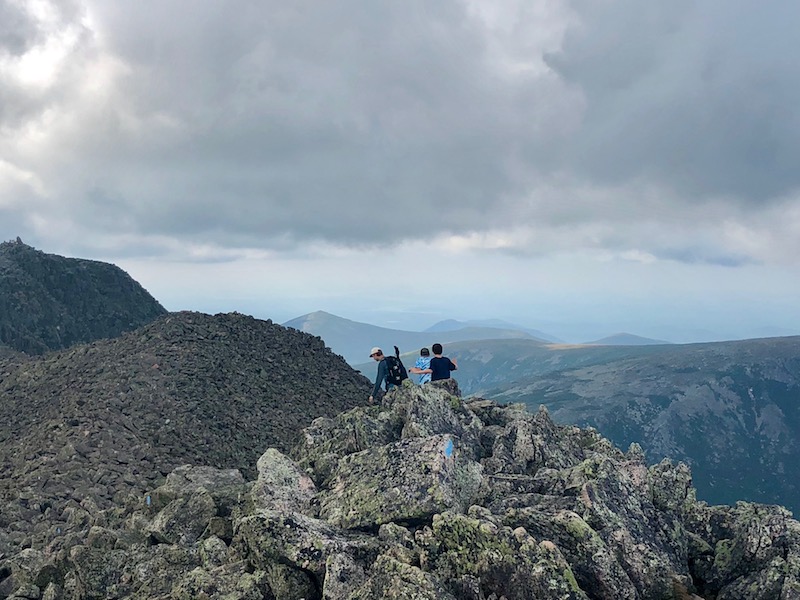
If summiting Mount Katahdin is on your to-do list in the park, do it early in your trip, while you’re still fresh. It’s 5.5 miles (pretty much straight up) from the Roaring Brook Campground, and it took our family (seasoned hikers) 12 hours to complete. The trail is extremely strenuous, and the final mile of the summit hike is along a ‘knife edge’ with some scary-looking drops. If you go: bring tons of water, and a means to filter more on the trail (you’ll need it). Also bring headlamps in case you’re caught hiking after dark. We took the following route: Roaring Brook to the Helon Taylor Trail, to the Knife Edge, to the Saddle Trail, to the Chimney Pond to Roaring Brook trail. It was 11 miles that took us forever to complete.

Note: Kids under age six are NOT ALLOWED above the treeline at Katahdin, though on our visit, we did not see a ranger monitoring this. I’m told there usually are. We took a seven-year-old, my niece, who rocked it, but she’s unusual in her awesomeness.

If you don’t want to tackel Katahdin, I recommend the Chimney Pond trail from Roaring Brook (3.3 fairly strenuous miles) to enjoy a picnic lunch at Chimney Pond, which has fantastic views of Katahdin right at the base of the mountain.

Day 3: Recover from Katahdin

This is where we made a mistake in our itinerary. We didn’t give ourselves a rest day after summiting Katahdin. Stay one more night in Roaring Brook and plan on sticking around camp. Enjoy the swimming and maybe go .2 mile to Sandy Pond, to try to spot the moose who like to hang out there at twilight. No nothing more!

Day 4: Head into the backcountry

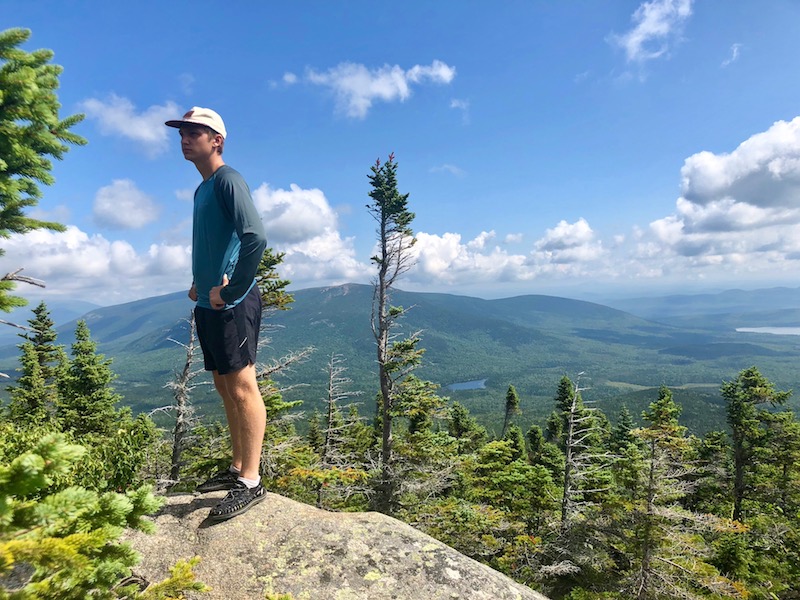
If you’re prepared for backpacking in Baxter, depart Roaring Brook today, hitting the Russell/Sandy Stream trail. The destination: either Russell Pond Campground with lean-tos (7.2 miles away), or, if you don’t want to go quite so far, reserve at Wassataquoik Stream, which offers several more lean-tos with great swimming (5 miles away). If you’re ambitious, you could aim for Wassataquoik Lake, 9 miles distant, which doesn’t have a campground but does have several more lean-tos. Russell Lake has a staffed ranger office and lean-tos, a bear line, and pit toilets, and we settled in at two of them, adding a tent site for our group of 10.

Note: Baxter State Park is VERY strict about group size and where you can camp. This is a good thing, as it eliminates big groups in campsites they don’t fit into. If you reserve a lean-to made for four, you can ONLY have four people sleep there. Ditto for six-person lean-tos and tent sites.

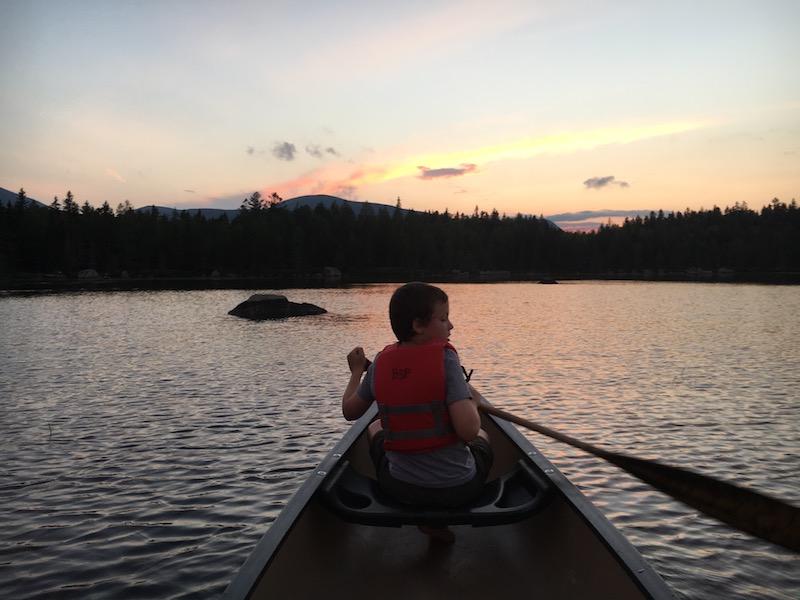
At Russell Pond, you can use the provided canoes at the dock for a small fee (I believe it was $1/hour, on the honor system) and you can swim, though we don’t recommend it (there are many leeches here). It is, however, a good place to spot moose. The Wassataquoik Stream lean-tos are better for swimming, and theWassataquoik Lake lean-tos offer a bigger lake (better for swimming) and more canoes.

Alternatively, you could backcountry camp at Chimney Pond instead of Russell Pond (see description above). It’s a shorter distance, though a rockier trail.

Day 5: Day hike from Russell Pond

We enjoyed hanging around camp and day hiking from Russell Pond to Wassataquoik Lake (2 miles) on this day. We played board games and cards in our lean-tos, picked blueberries in the wild patches nearby, and tried to spot moose.

Day 6: Hike back to the frontcountry

Return to Roaring Brook today, and spend the late afternoon cooling off in the brook. Pack up and depart Baxter the next morning, checking out additional parts of Baxter if time allows. We recommend Blueberry Ridges or Ledge Falls if so, and if not, hit a last swim spot just outside the park boundary at Togue Pond. You can grab a nice sandwich and some souvenirs from the North Woods Trading Post just outside the park toward Millinocket, and if you want a bigger meal, we recommend the friendly and affordable Sawmill Bar and Grill.

How to reserve your campsites:

Baxter State Park is popular, and as mentioned, entry is limited. To ensure you get your campsite, reserve far in advance. Baxter uses four month rolling reservations, so you’ll want to reserve exactly four months before you desired time. You can reserve online or by phone.

More tips:

  • If you’re day hiking Katahdin (staying in Millinocket), you’ll want to reserve your parking space (these are limited as well!). Here’s how. Parking reservations are only held for you until 7 am, then are given away on a first-come, first-served basis. Yes, you really need to start that early. If you’re camping in the park, you don’t need a parking reservation.
  • You’ll need to treat ALL your water in the park. Bring a good filter. We like the Sawyer Squeeze to bring on day hikes and the Platypus GravityWorks for in camp.
  • You cannot bring firewood into the park. You must purchase it in camp.
  • No pets are allowed, even in car camping campgrounds. Plan accordingly.
  • Check in at every ranger station as you hike. Bring a phone and treat it as an emergency device (you won’t get service in the park anyway).
  • Pack out all your trash…make it easier on yourself by reducing packaging on your food before you arrive. Store all food and trash in your car at night in the frontcountry, and on bear lines in the backcountry (use your sleeping bag stuff sacks to store food and hang it from the line provided).
  • Backcountry campgrounds DO include pit toilets with toilet paper. They were all in good condition during our visit.
  • Enjoy the Maine wilderness!


Best essential oils for travel

Like everyone else (it seems), I’ve recently started using essential oils in my home and for my family. While I don’t deem them lifesaving (gasp!), I do believe essential oils add to our family’s well-being and overall health. Why not take this show on the road? We have a round up of the best essential oils for travel (and when to use them):

Three best essential oils for travel:

essential-oils

Motion sickness:

Several members of our family suffer from motion sickness in cars and on ships. I hate medicating for this, because no matter what we use, we seem to get drowsy. Before motion sickness can hit, I like to use essential oils topically (to the back of the ears, temples, or wrists) to fight nausea. It’s important to apply the essential oils before getting in the car!

Essential oils for motion sickness: ginger, peppermint, or spearmint. Alternatively, get a pre-made blend. We like Motion-Eaze, which is a combination of lavender, peppermint, frankincense, chamomile, myrrh, Ylang Ylang, and birch.

Immune defense:

This is a biggie. We do everything in our power to prevent sickness while on vacation. For immune defense, we diffuse essential oils at home pre-trip. If you have a small diffuser, you can even bring it along on road trips to use in hotel rooms and vacation homes. You can also just bring the oils, and add a few drops to a bowl of boiling water to breathe in.

Essential oils for immune defense: clove, lemon, cinnamon, eucalyptus, rosemary. Or use a blend like Thieves. We are using Best Friend, from Better Essentials. Better Essentials makes blends nearly identical to those made by the big essential oil makers, at a lower cost. Their oils are 100% pure, therapeutic grade, and third-party tested.

Sleep:

Sleep is absolutely essential (no pun intended!) while on vacation. To assist with sleep in hotel rooms and other unfamiliar places, we apply essential oil to our wrists, plus perhaps a dab behind the ears. You can also spray pillows lightly. I just don’t suggest doing this in enclosed spaces like airplanes, as the scent could bother others.

Essential oils for sleep: lavender, or a blend like Breathe. We are using Fresh Air from Better Essentials (their version of Breathe), or we use pure lavender. Hard to beat it!

How to conveniently bring essential oils:

Luckily, essential oils come, by their very nature, in small packages. They are easy to bring along on road trips in any first aid kit or medication kit, and easy to bring for air travel in a 3-1-1 bag. Almost all are under 3 ounces. Several travel-sized diffusers are on the market, but we don’t bother with this: for our use on the road, we apply our essential oils topically. However you decide to use your oils, make sure you buy therapeutic grade, and place all oils in a plastic bag or otherwise airtight container. This will contain the scent (when you don’t want it) and also prevent any leakage.

amzn_assoc_placement = “adunit0”;
amzn_assoc_search_bar = “true”;
amzn_assoc_tracking_id = “pitstoforkid-20”;
amzn_assoc_ad_mode = “manual”;
amzn_assoc_ad_type = “smart”;
amzn_assoc_marketplace = “amazon”;
amzn_assoc_region = “US”;
amzn_assoc_title = “My Amazon Picks”;
amzn_assoc_linkid = “87cfb6f6de58c95d5111725a5c4ebbe0”;
amzn_assoc_asins = “B002D6M94E,B01ETQXMM8,B016PSMSHI,B0183K2AG0”;

Do you use essential oils? What are your favorite blends?

What you need to know about going through international travel customs with kids

To some parents, the thought of navigating immigrations and customs with kids is intimidating. For some, the first experience in customs will be during a trip to Mexico, or Canada. For all of us, it can be tiring, especially after a long travel day (or night). But by knowing what to expect (and having the forms and documents you need) going through travel customs with kids can be a breeze. Here’s what you need to know:

going-through-customs-with-kids

1. Finding customs will be easy.

To frequent travelers, this may be obvious, but I’ve been asked by several parents how they’ll know where customs is. The answer: you can’t miss it. Airport security won’t let you. Once you deplane, the only way to go will be through immigrations and customs (through an international arrivals terminal). On the way, don’t delay, if you can help it. There are usually restrooms just before you enter the customs line, but if everyone’s good to go, it’s best to keep moving to avoid a long line.

2. You’ll go through Passport Control/Immigration first.

Get in the line that applies to you (foreign citizen or American citizen, depending on where you are and who you are). Have your customs declaration form ready (one per family, given to you on the plane), plus everyone’s passports. Keep your cell phone off, and pay attention to when it’s your turn. Keep all carry-on luggage with you (just as you would elsewhere in the airport).

When it’s your turn, hand the immigration agent all the passports and the customs declaration form, and be ready to answer some basic questions, such as why you’re in the country, how long you’ll be there, and where you’re staying. The agent may ask questions of your children, as well. He or she will give you the customs declaration form back.

3. Head next to pick up your bags (if you have any).

Again, you won’t be able to miss this step. On the other side of immigration, the baggage carousels will be waiting. Get your bags before heading to customs. If your bag is delayed (bummer!) be sure to have your baggage claim form handy. You will have to pick up your bags whether or not you’re in your final destination. If you’re connecting to another flight, get the bags, go through customs (explained below), then follow signs to ‘connecting flights’ or ‘luggage drop off’.

4. Go through customs.

Get in the proper line (do have something to declare, do not) and turn in your customs declaration form. Declare everything you might have bought in the country, including duty-free items. Our souvenirs never add up to much, and we’re always waved through without much fanfare.

5. Head out and connect with your next flight or ground transportation!

That wasn’t so bad, was it?

If you’re traveling without your children’s other parent:

Learn from my mistakes, because this is where we’ve hit a snag. If you share custody of your children (either in a custody arrangement or as married parents), but you’re traveling without the other parents, you MUST have a signed letter stating that you have permission to take your children out of the country. If possible, get it notarized. We were delayed and ‘interrogated’ (using that term loosely) when I neglected to have a letter from my spouse on a recent trip to Canada.

If your teen is traveling alone:

In addition to his or her passport and customs declaration form, any teen traveling without a parent or guardian should also have a notarized letter from both parents (if both have custody) explaining his or her purpose in the country. He or she should also have a document with the names, addressees, and phone numbers of whomever he or she is meeting in the country. We also send our son with a photocopy of his passport, carried in a different bag on his person.

Will your child be flying as an unaccompanied minor? Read our tips for kids flying solo.

Photo credit: J Aaron Farr