Family mountain biking tips and gear

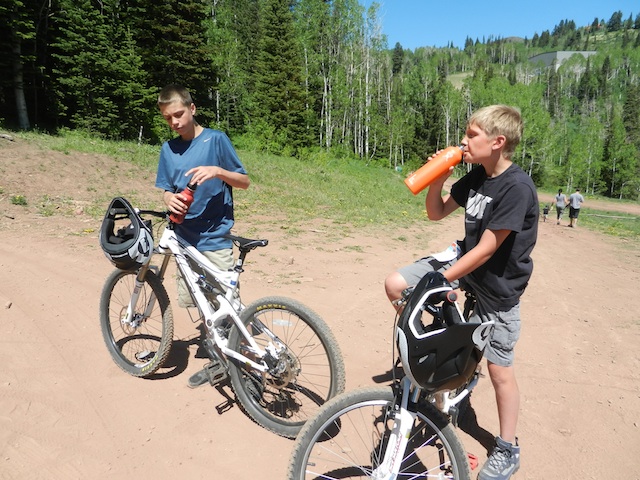
Our family loves mountain biking. Many outdoor-focused resorts now offer mountain bike rentals and mountain bike single track, and we discovered the sport while traveling. Right away, our kids wanted to mountain bike at home, too. Here’s what we’ve learned about finding family mountain biking trails (at home and while on the road), how to best transport your bikes, and the gear it’s helpful to have with you.

canyons bike park

Where and how to mountain bike while on vacation:

Even if you can’t or don’t want to get into mountain biking at home (after all, there’s lots of gear to buy), all families can try mountain biking while traveling. Look for family resorts that focus on outdoor activities and nature, ski resorts in the summer, and state parks. Many resort towns offer bike rental shops, and ski resorts will often have rentals available slope side. Our favorite resorts for mountain biking offer gear for kids, a variety of single track for all abilities, and amenities for after biking, like pools or spa services.

The Lodge at Eagle Crest, Oregon: This Central Oregon family resort has everything you’d want, including a full bike rental shop with sizing for young kids to adults. There are easy paved bike loops for those who want a tame experience, plus miles of single track (dirt paths) accessible directly from the property for those who want a challenge. Plus, Eagle Crest has golf, pools, restaurants, and playgrounds. Read a full review.

Northstar California: We love to mountain bike at ski resorts! Northstar, located in North Tahoe, CA, has some of the best gravity-based mountain biking for families. What does ‘gravity-based’ mean? It means the trails all run downhill, with lifts to carry you (and your bike) back up. The trails are marked easy (green) to advanced (black), just like during the ski season. You’ll also find fun elements like bridges and berms to play with. We recommend taking a lesson at a ski resort like Northstar. Another favorite location: Park City Mountain Resort! Read a full review.

canyons bike park

State parks: State parks in many states offer easy access to mountain biking trails. The only downside: usually you’re on your own for bikes, so bring them with you or look for a local bike rental shop. To find state parks with the best single track, try state park pages by state, such as this one for Florida or this one for Utah.

How to get into mountain biking at home:

Once you’ve tried out the sport on vacation, I bet you’ll want to check out the mountain biking scene near your home as well. We’ve found that the best way to enjoy family mountain biking at home is to:

  • Get a bike rack for easy transport to trails
  • Get to know your local bike shop
  • Join a Facebook group or club

You can read below for detailed info on getting a bike rack to fit your car. But first, a word on the importance of a local bike shop: these establishments serve several purposes. The staff at a good bike shop can help you maintain your bike, whether it’s a fancy model or just a starter bike, and educate you on bike tire pumps, locks, and the best trails near your home. We could learn a lot about caring for our bikes ourselves, but instead, we just bring our bikes into our local shop for inexpensive tune-ups every so often. Our bike shop also posts information about local bike clubs and groups for fun rides, plus maps of area trails.

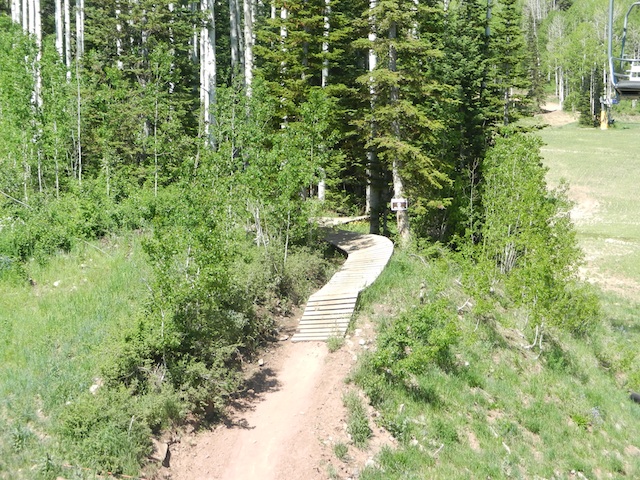
The best way to find local single track trails is to ask people in the know, whether that be your neighbor whose always on his bike to the bike shop pros. We have several mountain bike and hiking networks within a few miles of our house, and our teens will often load up the bikes and ride for a few hours in the evenings.

Gear you’ll need to mountain bike on your own:

park city mountain biking

If you want to mountain bike at a resort, likely the only thing you’ll need is a water bottle. Everything will be provided. But at home, here’s the very basics of what you’ll want:

Mountain bike: I’m a firm believer that mountain bikes don’t have to be top of the line…to start out with. Look for a bike with good shocks, mountain biking tires, and a fairly lightweight frame. You don’t need full suspension on your first bike, and kids’ bikes can have even fewer frills. This guide to buying your first mountain bike is helpful.  Our kids started out with Trek bikes with just a few gears, and grew into their bikes with more bells and whistles.

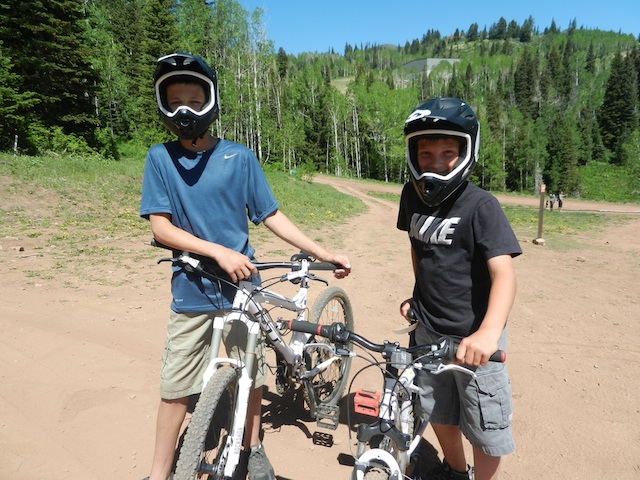
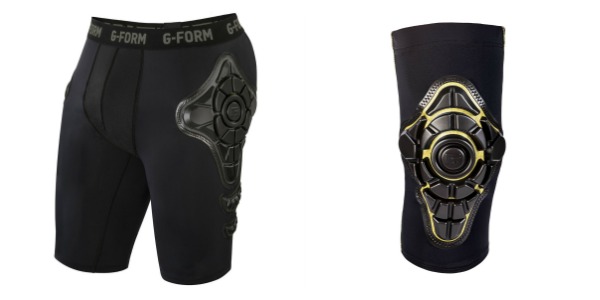
Helmet and pads: Helmets while mountain biking, are of course, essential. Do you need a motorcycle-style helmet with face guard? Probably not, at least until you start doing some serious vertical. However, it’s worth investing in a good pair of padded shorts. We have been happy with G-Form Pro-X compression shorts. These breathable, thin compression shorts fit well under athletic shorts or pants and give kids (and adults) just enough added padding to make those inevitable falls less painful. Best of all, G-Form’s shorts are versatile: invest in them once, and your kid or teen can wear them during biking, skiing, skating, and even sports like soccer. With three active boys, they’re now a staple in our closets.

g-form

We also recommend knee pads and shin guards, ever since our oldest bashed his shin hard enough to leave a scar when falling (the pedal hit his shin bone). At very least, plan to ride with long pants and a lightweight but long-sleeved shirt.

G-Form-review

Bike rack: If you’re biking as a family, you’ll need a bike rack for your car sooner rather than later. When we got ours, we started mountain biking at least twice as often, because suddenly, it wasn’t a hassle to get out there. The easiest and cheapest way to transport bikes on your car is with a trunk-mounted bike rack. Our favorite is the Yakima Fullback. It fits on most cars, and is easy to take on and off. The downside: you have to remove it to access other things in your truck or far-back of your car. If you have a hitch mount and can spend a few more bucks, opt for a hitch-mounted rack that swings away from your vehicle for ease of use. Our favorite is the SportRack Ridge Swing. Roof-top racks are also available, but most only hold one bike per rack.


Teach Proper Technique:

Kids who have previously only biked on pavement need to learn proper mountain biking technique before tackling single track. Teach kids what’s commonly known as “default position” or “attack position”: stand with pedals level, elbows bent, and weight centered over the bike. Remind kids to remain relaxed; no stiff muscles or death grips allowed.

No matter the terrain, whether it be steep, rocky, or technical, teach kids to keep their head up and their eyes focused on the trail ahead of them, not on the obstacles they’re currently trying to avoid. Looking at obstacles such as trees, trail edges, or boulders just about guarantees you’ll hit them. Encourage kids to practice often, even if just at home. Grass, dirt, and even curbs, gutters, and stairs can be great places to hone mountain biking skills between trips to the trail.

Safety first

Mountain biking can seem intimidating to some kids. Others will be fearless. Both reactions can end in injury. Hesitant kids may try to navigate tricky terrain too slowly, losing balance in the process, and overconfident kids can tackle terrain at too high a speed, resulting in a spill. Help fearful kids by encouraging plenty of practice at home, on flat ground. Repetition is key to gaining confidence. Teach overconfident kids by example, displaying caution where relevant. Never push kids onto terrain they don’t feel ready for, or into a group of riders above their ability level.

Pin for later!


Source: Fix.com Blog

Do you mountain bike as a family? What are your tips?

Fun things for families in San Francisco  

San Francisco is one of the top destinations on the West Coast for families! With so much history, culture, and fun activities there’s so much to see and do no matter what your family is interested in! Traveling with kids can be stressful, that’s why it’s so important to plan activities in advance so you always have fun things planned! Hiring  airport transfers to SFO  should also be a part of your plan if you want a hassle-free travel going to your preferred destination and back to the airport.  Once in the city, whether you opt for Bike Rentals San Francisco or a children’s museum, you’re guaranteed to have a great time with the entire family!

Bike Rentals

San Francisco is such a gorgeous city, it’s perfect for exploring by bike! You can find a variety of bike rentals that are perfect for families. With kid equipment, tandem bikes, and surrey’s, there are a lot of ways to elevate your bike experience. Tour the bay area with the sea breeze at your side! Ride bikes to your favorite attractions or just tour your favorite park in a new way. You’ll feel like a local in no time.

California Academy of Sciences

Though the California Academy of Sciences sounds like it might not have many things for kids and families, it’s actually one of the best things to do in San Francisco. The California Academy of Sciences has things like a four-story rainforest walkthrough as well as a planetarium. Explore the deep blue sea with the Steinhart Aquarium or experience an earthquake with the earthquake simulator. With a lot of attractions and hands-on activities for kids, it’s the perfect way to spend a day!

Exploratorium

For more of an educational experience, spend a few hours exploring the San Francisco Exploratorium! Specifically designed for kids of all ages, you’ll learn about things like natural disasters, electricity, and engineering all under one roof! With so much to see and do and a rotating list of exhibits, this museum is particularly perfect for families!

Exploratorium san francisco

Pier 45

Pier 45 in Fisherman’s Wharf is home to one of San Francisco’s most historic attractions! You can tour a real WWII submarine which now calls Pier 45 home. This submarine went on a total of 6 missions in its lifetime and it’s still intact as a floating museum! For kids interested in submarines and history, this is a great way to spend a few hours! See the USS Pampanito for yourself to step into a real piece of US history.

The Coastal Trail

For outdoor enthusiasts, take in a perfect day in San Francisco by walking the Coastal Trail! This is a San Francisco staple which starts at SF Presidio and goes all the way to Ocean Beach. You can start or stop anywhere on the trail, and you’ll want to bring your camera! You can capture the best views of the Golden Gate Bridge as well as the beautiful blue water down below! Even if you don’t enjoy hiking usually, this is a trail you and your family won’t want to miss!

Ride the Cable Cars

Who said family-friendly activities have to cost a lot of money? Hop aboard one of the many cable cars in the city and go for a ride! While there are many lines to choose from, one of the local favorites is the Powell/Hyde line. This line goes from Union Square to Fisherman’s Wharf and it’s known for its stunning city views! You’ll also get to ride down one of the steepest streets in the city. Your kids might even think it’s a ride!

Are you ready to take a great trip to San Francisco with your family? Known as one of the most family-friendly cities in California, you can’t go wrong with a trip to San Francisco! With so much to see and do, not to mention stunning views, you’ll want to come back again and again!

Joovy Qool review: travel-ready stroller

UPDATED FOR 2018

The Joovy Qool lives up to its name. With a sleek design and luxury features that mirror those of the most expensive brands on the market, the Qool makes it look easy. Which is definitely the point, for those of us wanting our strollers to go the distance while traveling.


Our baby gear tester Karyssa tested to Qool in 2014 with her son, and is back with an updated review of the newest Qool model with her newborn daughter (with Deklan now along for the ride as a preschooler). Designed for babies three months and up (or from birth with a car seat attachment), the Qool is still not the lightest stroller on the market, but like most Joovy strollers, it manages to fit into the lightweight category while not skimping on features.

Joovy Qool review:

I was excited to try out the new Joovy Qool stroller with bassinet with my daughter. The package arrived promptly, and my husband started putting it together as soon as it arrived. The instruction booklet is pretty thick, but he was able to do most of the assembly without the instructions fairly easily. He only referred to the instructions once. Total assembly including the bassinet took about 15 minutes.

Initially looking at the stroller I thought that it would be heavy because of the larger wheels and wider base. That was not the case. The stroller is so easy to lift into my car, much lighter than it looks. Breaking it down or opening it up is a breeze and takes about 5 seconds.

The ability to attach the bassinet to the stroller and allow my baby to sleep comfortably is so convenient. Attaching the bassinet to the stroller is really simple just line up the bassinet and click. We did not get the car seat adapter for the stroller because it wasn’t available for the brand of car seat we have. Honestly, I am happy that we didn’t because I am more likely to put her in the bassinet and she will be more comfortable. The Mayo clinic does not recommend for babies to be in car seats for long periods of time outside of the car.

Joovy made the fabric inside the bassinet super plush and soft it almost has a velvety feel. It is white though, so I lay a blanket down between the baby and the mattress in case of spit up or accidents. The sun visor has 50+ sun protection and comes with a great zip cover the also works to protect your little one from extreme weather. My only wish is that the visor came down a little lower or had an option to completely shield my baby from the sun. If I am walking in the middle of the day I have to put a thin blanket over the top to completely shield her from the sun.

The stroller rolls great on and off the pavement and I think the large wheels help make it a smoother ride. 

My four-year-old loves to sit on the Qool bench seat and doesn’t even mind being buckled. It’s great for the longer walks when he decides he is too tired to walk or he just wants to sit and take a break. Unfortunately, we can’t use the seat with the bassinet but otherwise it is an amazing addition to the Qool. There are several position options for the Qool bench seat and the stroller in the instruction booklet.

Storage is plentiful in the bottom of the stroller. It will fit my diaper bag, blankets, another backpack and more. I am certain that it would fit all of my shopping bags and diaper bag during a shopping trip at the mall. My four-year-old even thought that he should crawl under there and make sure it fit him, and it did.

Joovy Qool at a glance:

Want the highlights? Here’s Karyssa’s quick takes:

  • Easy access brake
  • Maneuvers easily through tight places
  • Nice leather grip
  • Medium sized basket storage (can hold a purse but not a large diaper bag)
  • Expandable cover shields baby from rain and sun
  • Wheels glide over bumpy terrain
  • Doubles as a jogging stroller
  • Compacts and folds to fit tightly in small spaces
  • Lightweight
  • Leather bumper for baby to hold or attach toys
  • Adjustable handlebar makes for easy steering at any height
  • Cushy gel-like seat (which is removable)
  • Front wheel locks from swivel at a push of a button
  • Difficult to fold for some (I had trouble; husband and son could fold it in 6 seconds)
  • Cover window not large enough for baby to view out of easily

Pit Stops for Kids Joovy Qool Review for one toddler:

If you’re using the Qool with one child, is easy to maneuver through tight areas that can often frustrate parents pushing a stroller. I tested the Qool at a large sporting event with mobs of people. The stroller turned effortlessly through the crowds. A major advantage is that this stroller fits in tight areas at department stores and turns on a dime around racks that can otherwise hang up stroller wheels.

The brake is easy to find and engage in the middle of the rear wheels, and virtually anyone can push the stroller comfortably with the adjustable handlebar. The handlebar has a nice comfortable leather grip and a cup holder can be easily attached as an additional accessory.


The expandable sun and rain cover kept my little one sheltered but still able to see out the front.  My only caveat: the peek-a-boo window is on the small side, and doesn’t provide much of a view.

The seat is really cooshy with a gel like liner unlike any other stroller seat I have seen. The shoulder harness is easily adjustable for different sizes. I jogged with the stroller over bumpy sidewalks and bricks without ever feeling a jolt. The wheels have major shock absorption and I was very impressed that it handled so well. The front wheels can also be locked by just pushing a button above the wheel.

Initially I thought the Qool was tricky to fold up, but my husband and twelve year old could handle it no problem. Once I tried again it was super easy. It can be folded down tightly with the seat in about five seconds. After it is folded down it can’t be pushed or pulled; it has to be lifted. It is extremely lightweight so that makes up for it.

Tip: Not sure which Joovy stroller is right for you? Compare the Qool to the Joovy Caboose VaryLight, also reviewed by a Pit Stops for Kids mom!


Buy the Qool for $549 on Joovy.com, or Pick it up on Amazon for about 20% less!

Summer in the Berkshires: Hancock Shaker Village

The Berkshires is a wonderful region in Massachusetts to explore with kids, and summer in the Berkshires can’t be beat! Parents will appreciate the rural, countrified setting with farmer’s markets, rolling hills, and quaint towns, and kids will find plenty to do in the form of roadside ice cream stands, gentle streams and rivers, and museums and gardens.

hancock-shaker-village

The Hancock Shaker Village is located outside Pittsfield (the county seat), near the New York state border. This sprawling property is preserved beautifully from the time Massachusetts Shakers communed here, with gardens, lawn, and buildings to explore. The Shaker way of life was peaceful and industrious, with an emphasis on equality, hard work, and kindness that is still taught at the property today.

summer-in-the-berkshires


Families can start with a short video, or make their way immediately to a self-guided tour, which includes the famous round barn (ideal for milking productivity), the main Shaker living quarters (with dining rooms, kitchens, infirmary, laundry rooms, children’s rooms, and more), a blacksmith shop, tannery, and coops of chickens, turkeys, and sheep.

shaker-village

Kids will not want to miss the Children’s Discovery Room, in which docents will help kids make bracelets of yarn, learn Shaker games, and milk a replica cow. Dress up clothes from the period are on-hand to try, as well as a Shaker chair to mend.

hancock-shaker-village


In every building, ask a docent to tell you more about the place! In most buildings, experts are demonstrating different types of Shaker work; during our trip, we had a great conversation with a local blacksmith, who made the five-year-old in our group his own handmade nail. In another section, a man was spinning wool, and in a third, stablehands were mucking out stalls. Holstein cows grazed nearby.

summer-in-berkshires

Plan to spend a few hours in the village, with time to check out the shop (kids can buy old-fashioned simple games or candy) and have a picnic. There’s a cafe on-site, plus space for bringing in outside food. We opted for a combination: picnic food complimented by hot dogs bought on-site.

Date last visited:

June 20, 2014

Distance from the interstate:

Right off Route 20, not far from I-90.

Admission:

Adults are $18, teens are (13-17) $8, and kids 12 and under are free!

Hours:

Open seven days a week (including holidays) from 10 am to 4 pm in winter, 10 am to 5 pm in summer.

Directions:

If using GPS, plug in the address instead of the name of the destination: 34 Lebanon Mountain Road, Hancock. Get full directions here.

Tips for traveling with pets

Plenty of families will be hitting the road with Fido this summer. We get it: our dogs are part of our family, too! If you’re planning to bring your dog (or even cat) on your family vacation, we have tips for traveling with pets!

travel with pets

Tips for traveling with pets by plane:

In general, we recommend traveling with pets by plane only when you have to, such as during a long-distance move. This is especially true if your pet will need to be transported in the plane’s cargo hold instead of in the cabin. We have written an extensive post on air travel with pets, which can help you decide whether air travel is right for your dog, cat, or even bird. Pay attention to various airline policies, as they do differ, and the fees related to flying your pet. Always check with your veterinarian to make sure your pet is healthy enough for air travel, too. If you want to be extra careful, it would be smart to take out a pet insurance policy so that your pet stays healthy and safe during your trip.

Tips for travel with pets by car:

In many ways, traveling with pets by car is easier and simpler than by plane, simply because you have control over the situation. We all know to NEVER leave a pet unattended in a car, especially in summer, but there are additional things to remember when road tripping with your dog.

  • Roadside rest stops and public parks are man’s best friend’s best friend: At rest stops and parks, pets on a leash can get out of the car, relieve themselves, and get some energy out. Remember that many state parks and county parks do not allow dogs at all, so it’s easiest to stick with city parks and roadside rest stops. Getting to a stop and realizing your dog can’t get out of the car is the worst! Always carry a leash, even if your pet knows how to behave without one, because they are required in almost all public spaces. Be sure to know if there are natural dangers to your pet that may not exist at home, such as foxtails growing nearby, ticks, or predators.
  • Look for dog parks and dog beaches en route: Even better than a public park (but sometimes harder to find), dog parks allow well-behaved dogs to run unrestricted by a leash. Our kids love them, too, because they get to love on many different dogs. I guess it’s dog therapy on the road! Designated dog beaches are available along many coastlines and at large lakes.
  • Call campgrounds ahead of time to confirm pet policy: The last thing you want to do is arrive at your campsite to realize pets are not allowed. Almost all have leash laws, but some also have noise ordinances you may need to note if you have a dog that likes to bark. Plan activities that include your pet, to minimize the number of hours Fido is ‘home alone’ at the campsite.
  • Look for pet-friendly hotels ahead of time: There are actually a surprising number of pet-friendly hotels. Most hotel booking sites have a pet-friendly search option, but we prefer looking on Official Pet Hotels. When budgeting for your vacation, remember that often hotels tack on extra fees for traveling with your pet, or place you in pet-designated rooms.
  • Pick a hotel that is not only pet-tolerant, but pet-loving: If you’re willing to pay, luxury hotel brands such as Ritz Carlton and Fairmont embrace pets, rolling out the red carpet with doggie beds, a pet room service menu, and more. Our favorite hotel brand for pet travel is Kimpton…many of their hotels have pet mascots in the lobby, showing their pet-friendliness day in and day out.

Gear you’ll need for traveling with pets:

Of course, you know you need your pet’s leash and collar (with ID if the pet is not micro-chipped), but consider bringing the following as well:

  • Bedding and/or old beach towels for your pet: The beach towels can double as mud and dirt control after your pet has played in the sand, water, or park, and then Fido can sleep on them at night.
  • Pet-designated water and food bowls: You can buy collapsible soft-sided pet bowls on Amazon, which are easy to clean and pack. Or, any durable, non-breakable set of bowls will do.
  • Crate: If your dog is crate trained, bringing his or her crate makes a lot of sense. Your dog will have a designated place to sleep and rest, and it can help contain your pet in the vehicle, too.
  • Dog medical kit: Yes, you read that correctly. I’m sure you carry a first aid kit for your family when you travel, and your dog needs one too. We love Adventure Medical Kit’s Adventure Dog Series; the Trail Dog kit we use is only $24 on Amazon. In the kit, you’ll find a splinter picker/tick remover, plenty of bandages, including an elastic bandage that doesn’t stick to fur for wrapping injuries. You also get wound-cleaning supplies, hydrogen peroxide to induce vomiting, paw care items, and saline solution, all in a waterproof zip-lock style baggie for safe-keeping.

To find perfect accessories for your pet, check MyPetNeedsThat for their pet products and gadgets reviews.

Pin it for later:


Source: eReplacementParts.com

Fair Wind Big Island Kealakekua Snorkel Cruise review

Note: The Big Island is tourism-ready and Fair Wind is open for business after Hawaii’s recent lava flows.

Snorkeling on the west coast of Hawaii (the Big Island) is always a hit due to the incredibly clear water on the dry side of the island, and there’s nowhere better than Kealakekua Bay. This calm, sheltered bay is the home of the Captain Cook Monument and is well known for its clear water, pods of dolphins, and the multitude of fish. However, it’s hard to get here on your own!

Fair Wind Big Island Kealakekua Snorkel Cruise review:

Visitors can hike into the Captain Cook Monument (a four mile round trip hike, often hot and exposed), kayak across the bay (with the proper permits only; keep in mind that you are not permitted to dock your kayak at the monument, so you’ll have to have it attached to you while you snorkel), or join a boat tour such as the Fair Wind Big Island Ocean Guides. We chose the latter, and couldn’t have been happier with our choice!

Upon arrival at the Fair Wind offices in Keauhou Bay, we were fitted for masks and snorkels (fins were supplied on the boat) and provided with plenty of reef-safe sunscreen. If you don’t have your own, don’t worry—there was plenty available on the boat before, during, and after snorkeling. Once on board, we had a continental breakfast of muffins, quiche, fruit, and coffee while we cruised toward Kealakekua Bay. We even had a pod of spinner dolphins escort us around the point and into the bay! After a brief safety talk with info on where and where not to snorkel, we headed into the water for two and a half hours. Of course, because we had kids in our group (7 and 9 years old), they couldn’t resist trying out some of the other entertainment options on board. The Fair Winds II has two slides off the back of the boat that send the rider flying about 6 feet above the water. Needless to say, this was a big hit! There’s also a high dive off the top deck (my favorite!). Because we had so much time to spend in the bay, we found that we had plenty of time to enjoy the slides and high-dive without feeling like we were missing out on snorkeling.

Lunch was served near the end of the snorkel time, and gave us a chance to come in from the water for a little break. I found that one of the best things about having breakfast and lunch included was that we didn’t have to worry about lugging a cooler, sandwiches, etc. onto the boat and were able to pack light and enjoy the ride.

We had a great time on the Morning Kealakekua Snorkel and BBQ Cruise with Fair Wind; I would even say that no trip to the Big Island is complete without a snorkel experience in Kealakekua Bay.

Prices:

The morning cruise (2.5 hours snorkel time, plus breakfast and lunch): $149/adult; $89/child, + taxes and fees

For a less expensive option, consider the afternoon cruise to Kealakekua Bay (1.5 hours snorkel time, snacks only, same boat as the morning cruise): $89/adult; $49/child + taxes and fees

Disclosure: we experienced this snorkel cruise at a discounted media rate, for the purpose of review.

Summer sandals for kids: shoes for summer travel

It’s that time of year…time to go through the closets, size kids’ feet, and buy shoes for spring and summer travel! We’re parents too, and we know it can be frustrating to buy summer sandals for kids only to have them discarded: maybe they’re too hot or too pinchy or too…something. Luckily, we review travel shoes all the time, taking the guess-work out of the process for you. When it comes to children’s sandals for travel, we put them through their paces, chat with brand reps, and pack the shoes in our own travel bags before deciding which shoes to recommend. Below are our top summer sandals for kids for this year:

best summer sandals

Keen Moxie Mary Jane:

This Mary Jane option is cute while remaining tough as nails, which is just how a girl’s shoe should be. You get the signature Keen rubber overlay around the toe, guaranteeing that extra protection while your kid explores, and while not waterproof, the Moxie does well in light rain or small puddles. Since this sandal is closed-toed, it’s game for just about anything; our East Coast editor’s daughter wore hers everywhere from the playground to a spring break beach trip. Pick up the Moxie Mary Jane in toddler through big kid size.

Keen Chandler and Newport:

The Chandler sneaker is made of breathable quick-dry mesh with a non-marking rubber sole and good, deep tread. No slipping in this shoe! There are no laces to tie—that was a big plus in the eyes of my six-year-old—but the hook-and-loop strap system still allows for a snug, secure fit, which makes Mom happy. This sneaker is available from toddler sizes ($50) up through big kids’ size 7 ($55). Find it for significantly less on Amazon.

Note: Last year, we recommended the Chandler CNX, which we still love. If you need a shoe that’s more rugged, check it out.

My nine-year-old wanted to try an outdoor sandal rather than a sneaker, because he wanted to be able to splash in the water as well as hike. The Newport Neo fits the bill. Lightweight and very supportive, this sandal has the same fabulous tread to grip uneven surfaces. It’s constructed of materials that repel water and offer natural odor control (every #boymom knows how important that is!). Plus, it’s machine washable. Newport Neo is available for $55 from little kids’ size 8 up through big kids’ 7.

amzn_assoc_placement = “adunit0”;
amzn_assoc_search_bar = “true”;
amzn_assoc_tracking_id = “pitstoforkid-20”;
amzn_assoc_ad_mode = “manual”;
amzn_assoc_ad_type = “smart”;
amzn_assoc_marketplace = “amazon”;
amzn_assoc_region = “US”;
amzn_assoc_title = “My Amazon Picks”;
amzn_assoc_linkid = “d635169d55e89adc7bc8dd61d0469f06”;
amzn_assoc_asins = “B01H4X7LAW,B01A0M392I,B010TVS8H6,B01H76W9GC”;

Columbia Techsun:

This sandal is no frills, yet incredibly affordable. If you have kids who are going to outgrow their summer sandals before Independence Day, you’re welcome. At only $35, the Techsun is a strappy sandal that can easily be worn as a light walking shoe as needed, but performs best in the sand, on the river, at the lake, and near the waterpark. Pick it up for even less on Amazon.

Hi-Tec Cove:

This substantial sandal can easily be worn on light hikes, making it one of the best all-purpose shoes for your kids this summer. It’s not flashy like the Uneek, but some kids prefer the understated (I know I have one like that). It’s easy to get the Cove on and off, and the back has a heel strap, but not a full molded back, which makes it one of the more breathable shoes we tried. Pick up the Cove in toddler through big kid size.

Bonus: Crocs Cayman: I fought Crocs for a while, because I am not a huge fan of their looks, but darn it, these shoes are excellent summer travel shoes for young kids. Give in and buy a pair and enjoy having happy kids. Better yet, get the Mickey Mouse version.

See more sandal reviews for summer travel!

Disclosure: Pit Stops for Kids tested multiple sandals for this review. Post contains affiliate links.

Apps to make your traveling easy and enjoyable 

When planning to tour the world, the last thing that you wish to happen would be to get stranded because you do not know where to find a hotel room or did not get a notification about the flight’s rescheduling. Use these apps to travel around the world with ease. 

How To Travel The World With Ease: best travel apps to use 

Do you take traveling to be a hobby? Then you might have come across two or three events that made you think again about the choice of your hobby. Perhaps, it was that long and boring trip, or maybe the challenge in finding an appropriate room for you to stay that matched your tastes and preferences? Generally, going on a trip can be involving and stressful at times, but it does not have to be so every time if you package it well. This article reveals appropriate ways to make your trip around the world enjoyable and fun by embracing technology.

Best travel apps to use when going on a trip

Most fans of traveling have a common principle – anytime is travel time. Undoubtedly, traveling around the world is exciting and comes with numerous lessons. On the other hand, you need to be prepared for a couple of inherent issues while on a trip. The appropriate use of technology is what can help you remedy some of these problems with different applications on the laptop of your smartphone. All you need to do is identify the best app that will give you a better experience on your trip. This guide provides an overview of several apps that you can install on your mobile devices to ease the hassle of traveling in any part of the world. The list coves apps that focus on different aspects of travel such as how to get to your destination, the activities you can engage in, communicating, as well as apps that make your payment for services and products easy and safe.

Airbnb –Book accommodations with ease

In the past, when going on a trip, you did not have any option other than staying in a hotel. Presently, Airbnb makes it possible for anyone to identify a place where they will be staying. It is possible to stay at the center of any city if you like, or in a little cottage on the outskirts of any town. With Airbnb, you book your accommodations with ease and get access to a few guides on where to go for sightseeing.

Netflix –get entertained with your favorite movies

Netflix remains the best travel app that every traveler should consider having. Although it requires you to subscribe to a given package, it comes with much flexibility and freedom. For example, it is now possible to download anything from the app to view it on your devices, and offline viewing is thus possible. If you are engaging in a lengthy trip, you will need Netflix to get the hours passing.

The app in the Air

This application is useful as a guide on flight updates, navigation tips and maps for airports, changes in the gate. All the alerts are available in real-time, implying that you will not have to rush to an airport terminal anymore since you get all information on your mobile device for ease of planning.

Booking.com –hassle-free hotel booking

Booking.com is available in different parts of the world and makes it easy to book hotels. Its database has more than a million hotels that you can review for the best deals in different locations. In addition, its community of over 100 million users can be of significant help when you have not yet decided which hotel is best for you. Booking.com is fast and efficient and provides you with a confirmation instantly after you have booked your hotel. The confirmation gives you access to a paperless check-in as well as offline maps to give you a glimpse of the area.

XE Currency – helps you know the rate of currency conversion

If you are traveling across borders, it is no doubt that you will need to have XE Currency installed on your mobile devices. It is an application that helps you to establish the rate at which you exchange certain currencies. Its conversation rates are precise and accurate, irrespective of what currency you intend to convert.

Citymapper –for ease of navigation

Getting lost in a foreign city is easy. However, Citymapper helps you to move around with ease as though you were a local. This app is available in many cities of the world, hence offering you much convenience when finding your way around any city abroad. Whether you are using the rail or road, Citymapper gives you live updates about any closures to expect as well as delays. In addition, it is quite simple to use and gives the option of saving maps offline for later references.

iTranslate –communicate in any language

Most often, you travel to countries in which locals speak a language different from yours. iTranslate is a simple app that you can install on your mobile device; you can speak into your device and it gives a translation of what you have said in the language of your listener. Then the listener can talk, and the speech is translated into your language. With over 90 languages to translate, you can be assured to move to any place without fear of a language barrier.

Traveling the world is fun but not when you do not know where to stay, how to move around, how to exchange currency, or even how to communicate with people speaking a language you do not understand. However, technology has made traveling hassle-free with the availability of travel apps discussed above, and many others you may explore in your App Store or Google Play. As you make your trips with ease, do not forget to order your dissertation help at https://thesispanda.com/buy-dissertation. It will make your traveling even more peaceful, knowing that someone reliable is handling your assignment.

Flying tips with kids and babies

The travel season is upon us, and if you’ve delayed that family vacay because you’re worried about travel with children and in particular, flying with kids, fear not! You’ve got this! Here are our top flying tips with kids:

No matter how savvy a traveler you are, the rules are different once you’re trying to book a flight (usually to save money) and travel enjoyably with kids in tow. Here’s how to get from Point A to Point B without misery, and maybe even have a little fun!

Booking Tips With Kids

Naturally, when you book airline tickets for family travel, you expect to sit together. Unfortunately, this is no longer guaranteed, or even the norm in some cases. To ensure you sit together, start by booking early and selecting seats at booking. This is the most obvious and certain way to sit together on the plane.

Next, check your reservation before departure to make sure your seat reservation hasn’t changed. I know, right? But they do that to you sometimes. If there’s a problem, call to talk directly to an agent. Explain your situation calmly and politely, and ask the agent not if something can be done, but what can be done. The nicer you are, the more the agent will want to help you. This may not be fair, but it’s human nature.

Always beware of booking seats on third-party sites. Sometimes, there’s a disconnect between third-party booking sites and airline sites. For instance, if you book your reservation on Travelocity and select seats on their website, this information may not make it to the airline agent.

For this reason, booking directly from the airline is best when flying with children. Sometimes the lowest fare wins, we know, but for the reason above, book through the airline when possible. Desk agents can see who you booked through, and can offer more upgrades or help to “loyal” customers. You’ll be better off in the case of delays or cancellations if you book directly, too.

unaccompanied minor

If you can’t book seats together at booking, book all aisle or all window seats. These seats are much better “commodities” than middle seats when you need to trade with other passengers later. Another option: elect to book seats with a middle “buffer.” Book the aisle and the window, leaving the middle. This middle seat will be among the last seats booked, increasing your chances of having an empty middle seat to spread out in. However, if it does fill up, the decent thing to do as a fellow human being is to offer that person the aisle.

To help you out, use a seat alert at a site like SeatGuru or ExpertFlyer. These sites show interior maps of almost all airplanes, allowing you to see the best seating options at a glance. Unless desperate, do not pay at the gate for premium seats. Some airlines use this tactic to increase revenue, but in almost all cases, seating can be arranged once onboard, if you have young children.

Finally, if you still can’t resolve your seating arrangement, you’ll have to ask fellow passengers to switch (see how below).

Seating Tips: In The Trenches

It should be acknowledged that paying passengers should never have to resort to begging strangers to have mercy on them and “allow” them to sit next to their own children. However, it often comes to that. Here’s how to go about it for the best results:

  • Start by going to your assigned seat and waiting there. No one will appreciate your cluttering the aisle, least of all the onboard flight attendants.
  • Politely let the attendants know what you need. Their main objective is to get the flight in the air on time, so they’ll almost always help you in your quest.
  • Start with the passengers in your direct vicinity, politely explaining the situation (pointing out your helpless child rows away). Have something decent to trade if possible. Note that the passenger sitting directly next to your young child is the most likely candidate to trade.
  • If the first person you ask refuses (it’s their right to do so), just keep asking. Someone will cave, if only to end the awkward begging session.
  • If you have older kids or teens, do NOT expect anyone to trade. You can ask – we have – and get lucky, but after a polite ask, drop it. We were once subjected to a huge fit by an adult passenger insisting on sitting next to his girlfriend on a two-hour flight. Don’t be that guy.

Car Seat and Stroller Hacks

If you’re bringing your car seat on board, make sure it’s FAA-approved (there will be a sticker on the seat). Board early if it’s an option. It’s not easy to maneuver a car seat down that narrow aisle! Don’t be surprised if a flight attendant comes by to check your installation.

If you don’t need your car seat, car seats can be checked at the gate or at check-in, both free of charge. If your seat has wheels or attaches to a stroller or frame, by all means, bring it directly to the gate. Gate-checking is the only way to guarantee your seat actually goes on your plane and will be waiting for you at arrival.

Bringing a stroller? Like car seats, strollers can be gate-checked or checked upon arrival at the airport free of charge. If you gate check, it will be waiting for you in the jetway upon arrival (you’ll need to wait for it for a few minutes).

Tip: Don’t want to hassle with baby gear in transit? Rent strollers, car seats, and even high chairs and cribs at the arrival terminal or in your destination city.

air-travel-tips

Airplane Etiquette With Kids

Kids, just like everyone else, become citizens of that small metal tube we call an airplane the minute they board. Make sure they learn how to be good citizens. The best way to teach them is by example, of course. Seeing Mom and Dad acting politely and generously toward fellow passengers goes a long way. Here are a few additional tips to make your life easier on board (as well as everyone else’s).

GET MORE FLYING ETIQUETTE TIPS!

Get rid of as much gear as you can before boarding. Parents of young kids have enough on their hands – they don’t need to fight for overhead space, too. If you’re headed to your final destination, consider volunteering to gate-check your carry-on bags, stroller, and car seat (if you’re not using it on the flight).

If you’ve done tip 1, don’t board too early. Ignore the offer to board first with young kids. Who wants to sit on the restrictive plane longer than necessary? Now, if you have carry-on bags to stow in overhead bins, by all means DO board first.

Help kids avoid kicking the seat back in front of them by sitting cross-legged. This seems to be the number one complaint of solo and adult passengers on planes in regard to children, but sometimes, toddlers’ legs are just the right (or wrong) length. Yes, you can and should teach kids not to purposely kick the seat, but for those ages during which it’s unavoidable, this is a solution.

Bring appropriate entertainment. You’ll want to carry on toys with magnetic strips and few pieces. That collection of cars or Legos Junior loves? This is not the best use of them. If your young child is going to watch media, but sure to use child-size headphones and splitters to ensure no one else has to hear cartoons.

GET LONG HAUL FLIGHT TIPS!


Source: Fix.com

Five favorite coastal campgrounds for families

Families wanting to make the most of the camping season need to head to coastal, temperate zones to avoid temperature extremes (bonus if they can find yurts or cabins at the campground). Family camping is economical, easy to plan, and often close to home! We’ve compiled a list of our favorite coastal campgrounds for families in the Pacific Northwest and California. At each of the following state campgrounds, you’ll find miles of beach, shady trails, ample camping space, and programs for kids. Check the websites below for exact pricing, but on average, California and Oregon state park fees are very reasonable (under $20 a night for tent camping and under $30 for hook-ups). Don’t forget hot cocoa and most importantly, the s’mores!


Sunset Bay State Park OR: Located just outside Coos Bay, Oregon on Highway 101, it’s safe to say Sunset Bay is my family’s favorite coastal campground. The sites are nestled in a beautiful forest just steps from the beach, flat, paved loops allow for perfect bike riding around camp, the showers are heated and facilities up-to-date, and the beach itself is gorgeous. Best of all, yurts are available (reserve far ahead!), as well as two additional state parks within easy hiking distance.

Cape Blanco State Park, OR: The beacon of the Cape Blanco lighthouse welcomes campers to this windswept section of Oregon’s pacific coast, where rugged cliffs and high coastal plains lead from Highway 101 to the campground. The sites overlook the beach and light with lots of space for kids to play and explore. All sites are first-come, first-served at this park, but there are four rustic cabins that can be reserved ahead of time. I’ve never seen this park truly crowded, and love the stark beauty of the storm-battered coast along this exposed shore. In season, families can take a lighthouse tour, too!

Harris Beach State Park, OR: One of our favorite beaches for its natural beauty and natural playground qualities for kids, Harris Beach is located just north of Brookings, Oregon (again, on Highway 101). Kids love to explore the rock formations along the cliff sides of this beach, as well as the creek that feeds into it from the nearby campground. I love that the campground has plenty of sites, and is on the bluff overlooking the beach, giving campers wonderful views of the ocean (and keeping day crowds away from the sites). The town of Brookings is near enough to offer conveniences, but far enough removed that families truly feel away from it all. And like Sunset Bay, yurts are available to rent (but be sure to reserve early!).


Navarro River Redwoods State Park: This gorgeous state park just off scenic Highway 1 near Albion in Mendocino County boasts beachcombing, swimming, picnicking, and camping at Paul M. Demmick campground. The redwoods here are fantastic: in summer, you’ll be cocooned in a shady bower (when you’re not seeking the sunshine on the beach), and kids love playing in and around these massive trees while at the campground. For a fun way to spend the day, venture to the Russian river for a swim!

San Onofre State Beach, CA: This sunny California beachside state park near the city of San Cemente offers sunbathing, surfing, and boogie-boarding in addition to San Mateo Campground, which lies one mile away via sandy trail. The pros of this camping experience are many: think blue skies, warm evenings, and beautiful surf. There are, however cons: the proximity of both the freeway (I-5) and Amtrak train tracks are definitely annoying, and the beach can certainly get crowded in summer. With 3.5 miles of sand at your disposal however, you’re sure to find a place to lay your beach towels!

Bonus campground idea: Check out Hug Point State ParkHug Point State Park for a more economical beach trip near Cannon Beach, Oregon.

Want more camping info? Get Pit Stops for Kids’ camping gear list!