Traveling with kids with Down Syndrome

In honor of World Down Syndrome Day, it’s my pleasure to share a personal post from our midwest travel contributor, who travels with her family of four kids, one of whom has Down Syndrome.

Ten years ago, I found out that my newborn daughter had Down syndrome. At that moment, I was far too worried about things like walking and talking to consider the implications her diagnosis might have on our ability to explore the larger world. But as our life with Julianna has unfolded, I’ve found that a disability doesn’t have to be a death sentence on dreams of travel and adventure.

julianna

Author’s daughter Julianna on a beach trip.

First, a word of caution. There’s a truism among the disability community: “If you’ve met one person with Down syndrome, (or autism, or any other disability), you’ve met one person with Down syndrome.” This post is the experience of one family, whose child is both verbal and mobile. Still, I hope it illustrates that traveling with kids who have disabilities is a reachable goal.

1. Plan around your family’s unique situation.

The key for our family has been planning around the abilities of all our children—not just Julianna. By the time Julianna turned eight years old, she had visited Mackinac Island (twice), Rocky Mountain National Park, and Disney World. Some of these trips were more successful than others, but each one fine-tuned our understanding of our kids’ limits and, equally important, our own. When we look at available activities, we choose what is appropriate for our whole family. Sometimes—often, even—this means we don’t get to do some of the things that would be more interesting to us as adults. (Sound familiar?)

2. Look for child care where you’re going.

On the other hand, some places—cruise ships and some nicer hotel/resorts—offer group programs or vetted babysitters for hire. We have taken advantage of that both at Mackinac’s Grand Hotel and on a Royal Caribbean cruise ship. Of course, some kids with more significant special needs will need a special kind of child care provider—but don’t rule out the possibility before you take the time to talk to the people in charge. You’ll never know unless you ask.
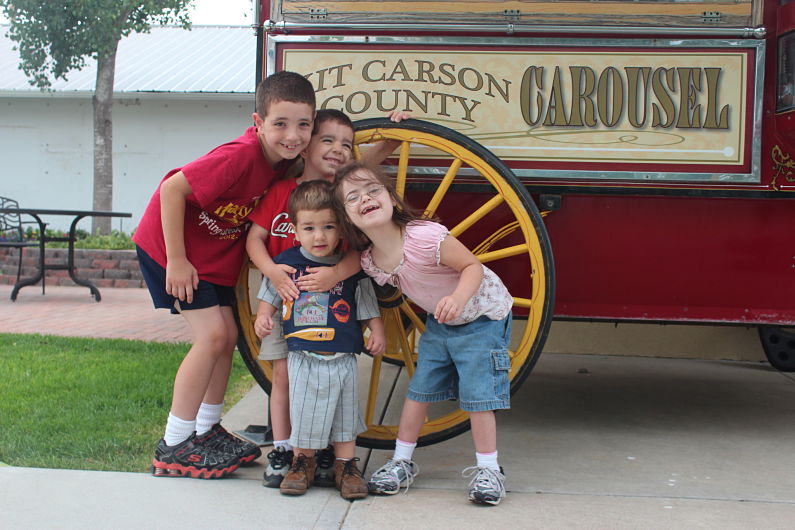
burlington CO

3. Ask about accommodations for disability.

Many places go out of their way to accommodate people with disabilities. For example, Disney World offers a disability pass that gives families a set return time (much like a Fast Pass) so you don’t have to wait in long lines. Many other amusement parks offer similar services.

4. Look at travel as an opportunity to increase awareness.

I remember sitting in a Golden Corral in Valdosta, Georgia, and realizing that two or three adults were staring at my daughter. But not an ugly, cruel stare—on the contrary, they had the look of dawning understanding. I could see them realizing, through seeing my vivacious and charming daughter interact with other people, that disability is not a curse—that it can, in fact, be beautiful.

In this way, Julianna serves as an ambassador for Down syndrome. She loves people, and she functions at a high enough level that she can overcome—or perhaps the better term might be “overwhelm”—most people’s inhibitions.

One particularly memorable New Years Eve, we were taking shelter from a tornado in a McDonald’s in Nashville, Illinois. While we were trying to keep her brothers entertained, 3-year-old Julianna slipped away. We found her walking up and down the aisles saying “Ah! Ah!” (how she said “hi” at age 3) and waving to other refugeed travelers. When we caught up, she was sidling onto a bench and eyeing someone else’s box of french fries. We ended up in conversation with that family and several others, comparing weather reports and swapping travel stories. It was a moment of connection we would never have had without her.

DisneyWorld

5. Take reasonable precautions.

Of course, there’s a flip side to having a child with a developmental disability who’s never met a stranger. One December, we were waiting in line to tour the “Holiday Train” when Julianna simply disappeared.

It’s every parent’s nightmare: a big space, lots of exits, thousands of people, and a child who, although verbal, has trouble making herself understood. She didn’t yet know how to ask for help, and worst of all, we knew she wouldn’t even recognize she needed it.

Eventually, we found her riding the kiddie train at the end of the terminal. Mind you, this was a train that cost $5 to ride. We asked the operator, “How did she even get in?”

She answered, “Well, she just acted like she belonged there…”

After this, we ordered a medical bracelet and necklace with our mobile numbers engraved on them. We also have tags that attach to her shoe laces. Julianna has been coached extensively and repeatedly on what to tell an adult if she doesn’t know where we are.

It’s worth it!

As Julianna gets older, she’s less prone to wandering and better at following instructions. Traveling has given her lasting memories—from the fire-breather at the Chinese Lantern Festival to meeting Tinker Bell—that she still talks about.
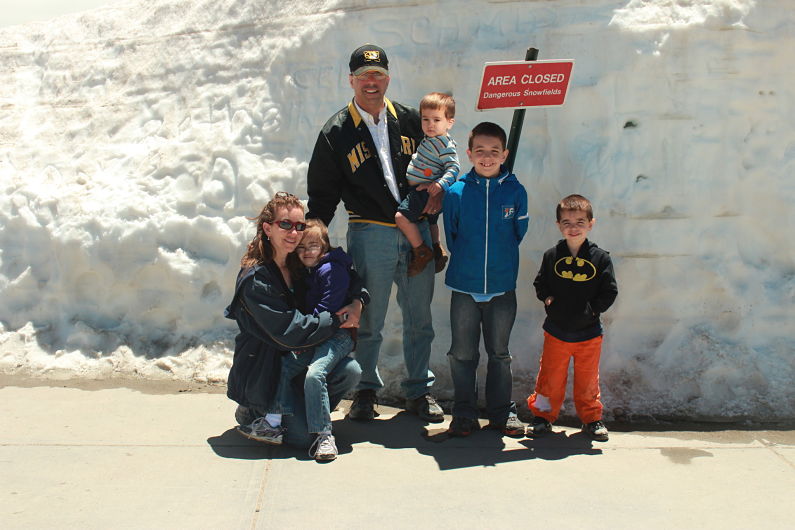
Rocky Mountain National Park

Your special needs child will likely always face limitations the rest of the family does not—but you know how to plan around that; you do it every day. The rules don’t change when you travel—they just require a little more advance prep to be familiar with the possibilities and prepare for the possible pitfalls.

You want to travel with your special needs child? Go for it. You’ve got this.

Adventure travel for your phone: Tech 21 case review

Gone are the days when leaving your phone on the charging dock, at the ski lodge, in your backpack, or in the car is an option. I’m a big fan of outdoor adventure travel, but also a big fan of having my phone with me when I’m on vacation. It’s often my camera, my communication device, my note taker, and my navigator. But I hate it when I feel limited because I’m worried about my phone.

tech 21

My phone ‘wears’ different cases for different activities, which protects it nicely from drops, spills, and any other silliness I may put it through. But when I travel outdoors, my phone brings along a second ‘outfit’. It’s essential that my phone owns a second skin that’s waterproof, dustproof, and generally adventure travel-proof.

Tech 21 Evo Aqua case review:

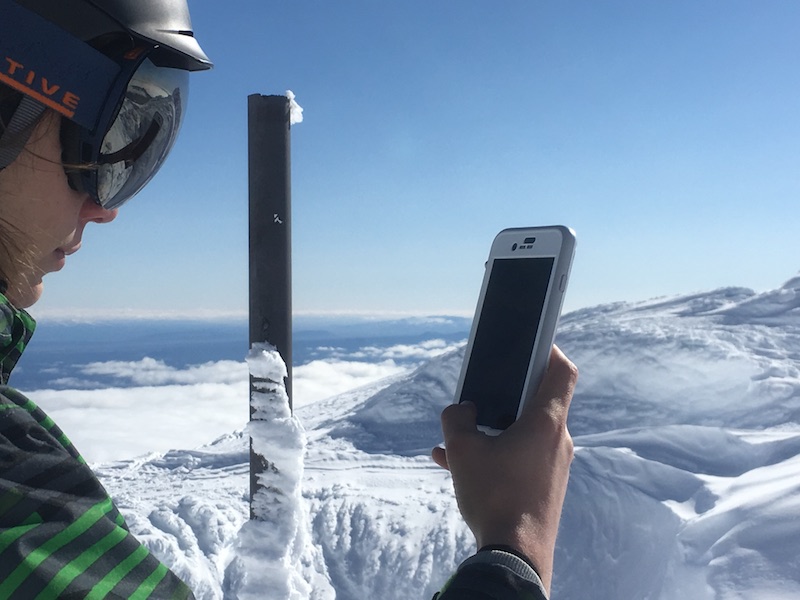
Enter the Tech21 Evo Aqua. Currently, we’re trying out the Aqua on my teen son’s iPhone 7+, but it also comes in the iPhone 7. Why test the Aqua on my son’s phone? Frankly, because it’s the phone that goes through the most ‘adventure’. Our first test came on a winter weekend at Mt. Bachelor, Oregon, a ski resort known for creating its own weather system due it its large, volcanic peak. When we stepped out of the car, the temperature was 14 degrees F, with the wind blowing.

My son’s phone likes to ‘die’ nearly immediately in very cold weather (it must have been fated for a life in Hawaii, not the Pacific Northwest), but right away, we noticed that the Aqua case protected the ports and speaker from the bracing cold, which I believe aided to a long day of battery life. (This is not a proven fact; just something we noticed.)

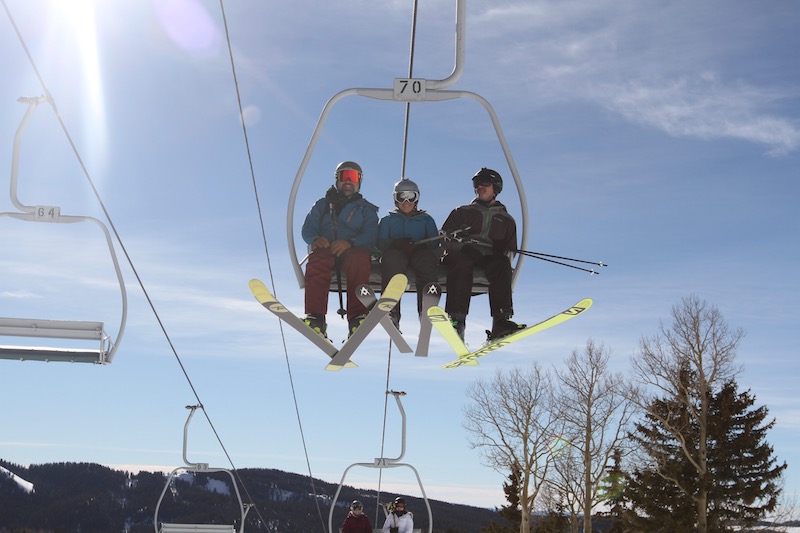
We then tested the Aqua in the snow, retrieving it from the protection of a ski jacket pocket often to take photos, take video while skiing, and take a few tumbles. We even dropped it from the ski chair, though I’ll admit that was an accident.

What’s comparable to other waterproof cases:

The Tech21 Aqua is waterproof to over 6.5 feet submersion, which, in my experience, is similar to a few other waterproof cases. It has FlexShock drop protection, comparable with others, and it retails for $89, which is a bit less, but fairly similar, to other waterproof cases I’ve tried. The Aqua also allows for full access to all your ports and buttons, which I’ve found to be true of other cases. It’s a bit harder to hear from the speaker, because it’s more securely closed off, but on the flip side, it’s easily to access my charging port on the Aqua than on other cases. All in all, it’s a pretty compatible experience.

Tech 21 Evo Aqua

What’s unique about Tech 21 Aqua:

When I first enclosed my iPhone in the Tech 21 Aqua, I did a double take. Why? The front of my phone was still unprotected! Then I looked more closely: while the front glass face of my phone was indeed ‘naked’, the waterproofing seal wrapped all the way around it. This is such a great benefit to the Aqua, because unlike other waterproof cases, this one doesn’t require me to practically beat my phone with my fists to get it to respond to touch. There’s no bulky plastic casing over my screen. Yes, it’s hard to trust this design at first, but once you do, you’ll love it.

The textured finish on the Aqua makes the case a little bit ‘grippy’, which is nice when your phone is wet. Combined with the open front face, I never felt like my phone was a slippery, plastic torpedo about to leave my grasp. We also tested the Aqua in the Narrows of Zion National Park, and I was grateful for its ‘grippiness’ there, too. Yes, it’s waterproof, but no, I don’t want to test that thoroughly (more on this below).

What to watch out for:

For this review, we didn’t submerge the Aqua all the way in water, but the phone certainly got wet, icy, and clammy, with no issues. We DID test it in water as instructed in the Tech21 instruction manual, which gets me to an important point: definitely, absolutely, no-joke, FOLLOW THE INSTRUCTIONS when putting the Aqua case on your phone, especially for the first time. It seems self-explanatory, but it’s imperative that you know how to put the case on correctly the first time, so you can see how it feels and looks to be on the right way.

Basically, you place your phone in the front of the case and then attach the backing of the case by making sure each section securely snaps and seals, working your way around the phone as you go, but if it’s not securely sealed, water WILL get in. The instruction book recommends installing a plastic ‘dummy’ phone (provided) into the case first, then submerging it underwater for 30 minutes to make sure you put it on properly. I highly recommend this as well. This process really made us confident when we put the Aqua on the real phone.

Note: I personally do not submerge my phone completely in water in ANY case. I’ve just seen things go sideways too many times. Instead, I use an underwater or waterproof point-and-shoot camera for underwater photos.

 Tech 21 cases for ‘low impact’ travel:

As noted above, you’re not going to use the Aqua for everything, or every day travel. On travel days, I use my earbud port and speaker more than usual, and I certainly don’t want to mess with a clunky case when my phone needs to be tucked away in my carry-on. I also use up a lot of battery on travel days, since I store my boarding passes and hotel reservations on my phone. For travel days, I tried the Tech 21 Endurance, which is a battery case that’s still streamlined and sleek. Not only is the Endurance a battery case, but it still provides protection from drops and spills. And unlike any other battery case I’ve tried, there’s no heat emission. That’s huge to me.

tech 21 gem

Don’t need extra battery power? For ‘low impact’ travel days (i.e., days I’m not hiking through rivers, skiing, or facing a thunderstorm or sand storm), I like the Tech 21 Evo Gem. It’s ultra-thin and lightweight, but still provides cushioning for drop protection. It’s the perfect level of case when you don’t need mega protection.

Grown Up Getaway: Eureka California wine and cider weekend

A wine weekend in…Eureka? Yes, California’s rugged northern ‘lost coast’ can make for an ideal grown-up getaway, provided you know where to go. Parents will feel completely away from it all, with cell service cutting delightfully in and out with each curve of Highway 101. The scenery is spectacular, the shopping and art scene funky and fun, and the cuisine is original, yet suburb.

eureka ca


Eureka California wine and cider weekend:

Eureka, California is about five hours north of San Francisco, up the windy coastal highway, Highway 101. We approached it from the  north; Eureka is about 1.5 hours from Crescent City, California and four hours from our home in Southern Oregon. Either way, it’s far enough to feel transported. (I think we felt truly relaxed as we left the Redwood Highway by the California/Oregon border and turned south along the coastline.)

Stay at Carter House:

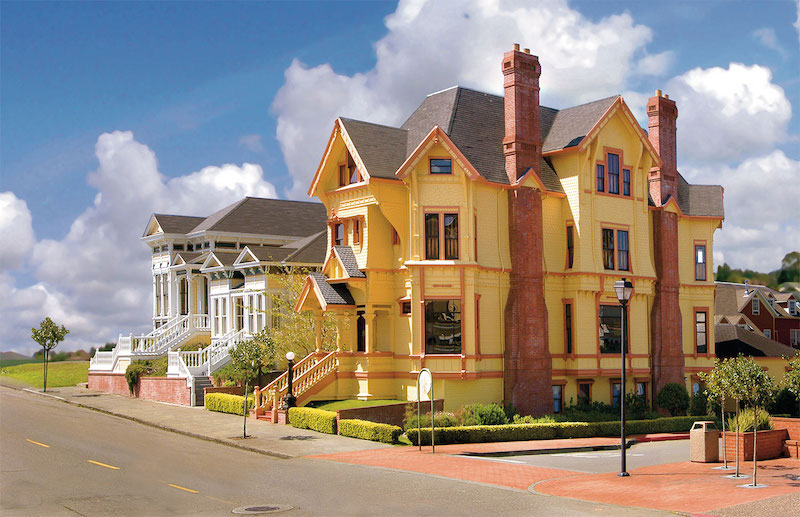
Eureka is known for their oysters, not their wineries, but that doesn’t mean you can’t find 100 point wines in town. Carter House is touted as a bed and breakfast, but we decided we’d consider it a closer cousin to a boutique hotel. With over 30 rooms in three Victorian buildings in the heart of historic downtown Eureka, Carter House has a beautiful bar with a 90-page wine list, including offerings from wineries such as Silver Oak, LaFite, and George Latour, and a wine cellar on premises that guests can tour (actually three wine cellars). Their Restaurant 301 is well-known in the area for their philosophy of local sourcing and seasonal ingredients; in fact, they have their own gardens across the street.

carter house

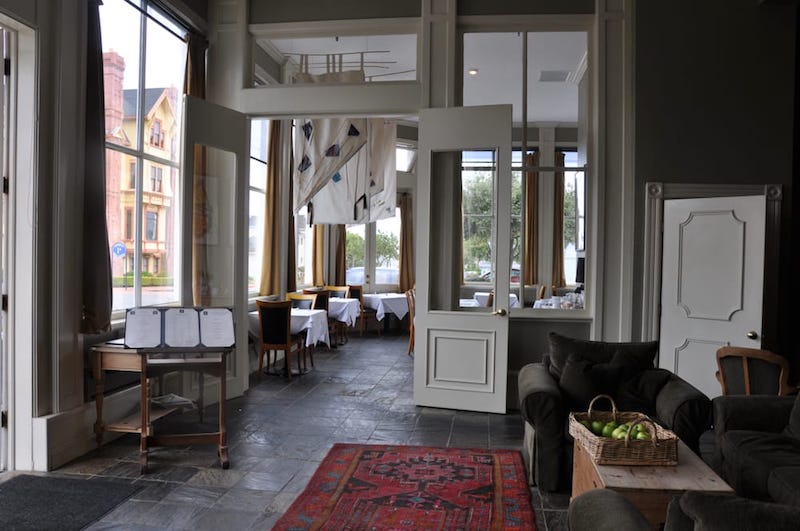
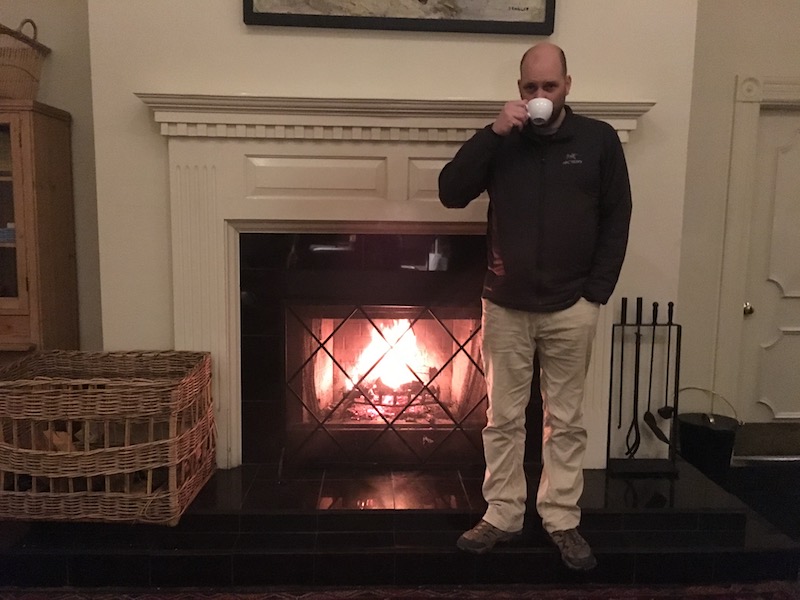
Our room at the Carter House was small but beautiful, with a jetted tub and the tall ceilings you can expect in a historic building. Downstairs, the bar and lobby areas invite guests to mingle for complimentary appetizers and wine during happy hour, and again at 8 pm, where complimentary tea and cookies are set out by the fireplace.

We wished the check-in desk was located slightly apart from the sitting areas of the lobby, as it took away from the ambiance, but during a three-day stay, this was our only complaint. We made a reservation at Restaurant 301 our first night, and were not disappointed. (I recommend the French onion soup, made from scratch on premises.) Guests can order wine by the glass or by the bottle during dinner or in the bar, and can expect bottle prices to start at around $50-60 and top out at a stunning $12,000. While such a wine was beyond our means by about $11,950, we enjoyed pursuing the menu. Restaurant 301 also offers a five-course tasting menu with wine pairings, for about $100 per person. Our meal with wine, appetizers, and an entry each was just over $100 for two, so we opted for the a la carte menu, but were tempted by the pairings. The bar has happy hour food to sample as well, such as truffle fries or rolled tacos, if you’re not up for a full meal.

grown up getaway

At Carter House, guests are within walking distance of the rest of historic Eureka, which showcases an impressive number of restored Victorian buildings hugging the waterfront. (Outside the historic downtown area, Eureka gets significantly more dingy; anyone familiar with small, isolated towns with struggling economies will relate. We never felt unsafe; we just preferred the historic center while on a weekend vacation.) Within the historic downtown, we found multiple additional restaurants, including an additional wine bar called The Wine Spot with great selection and a friendly staff. There are also several art galleries, specialty shops, and bookstores. We recommend Humboldt Bay Bistro, Cafe Nooner, and Oberon Grille, all located within walking distance. You can also walk easily to the marina, located just a block from Carter House.

What you get for your room rate at Carter House:

No matter which room you book, a Carter House stay includes breakfast (hence the B&B designation), which is excellent. Each day, breakfast included a generous and gourmet continental breakfast buffet with fresh juices, baked goods, and fruit and granola, plus a complimentary menu of oatmeal, yogurt, toast, and the like. One special per day is also included complimentarily; during our stay, it was eggs Benedict and French toast.
carter house inn

You also get the nightly appetizers and tea/cookies that are set out in the lobby, and one glass of complimentary wine in the wine bar (one per person per stay, not per day). WiFi and parking are free, and the ambiance is warm. The staff is helpful and welcoming, and we found the room rate (in off-season) of $200 per night to be a good value.

Taste wine across the Eureka area:

In addition to the impressive wine cellar at Carter House, there are a number of small, but up-and-coming wineries in the area. Recommended to us were:

  • Persimmons Garden Gallery & Wine Tasting This winery is also a nursery, art gallery, wine bar, and cafe. 1055 Redway Dr., Redway.
  • Riverbend Cellars Located on the Eel River, Riverbend is producing Cabernet, Merlot, and Syrah. 12990 Avenue of the Giants, Myers Flat.
  • Elk Prairie Vineyard For a remote tasting room experience, Elk Prairie’s wares can be sampled, above Humboldt Red­woods State Park.

Sip brews for grown-ups:

Eureka is home to Lost Coast Brewing and nearby Humboldt Brewing, so beer lovers will be content, but we love finding unique cider breweries, and were very impressed with Humboldt Cider Co. It’s located east of downtown in a residential area near the Eureka fairgrounds, and actually hard to find from the street (you’ll find it off Harris St). You need to go inside the parking area just past the fairgrounds, where a few other businesses are located, and it feels like you’re going to the wrong place, but once you get there, it’s great. They have a small but cutely decorated tasting room, and during our visit, had ten ciders on tap. We opted for a tasting of all ten for $17, which we happily shared. Their ciders ranged from very dry, hoppy brews to sweet brews laced with local honey or candied pecans…. we loved the honey one so much we bought a growler full to bring home.

Note: If you’re willing to go a bit further afield, try Bittersweet Sea Cider in Arcata.

redwoods hike

Hiking and nature:

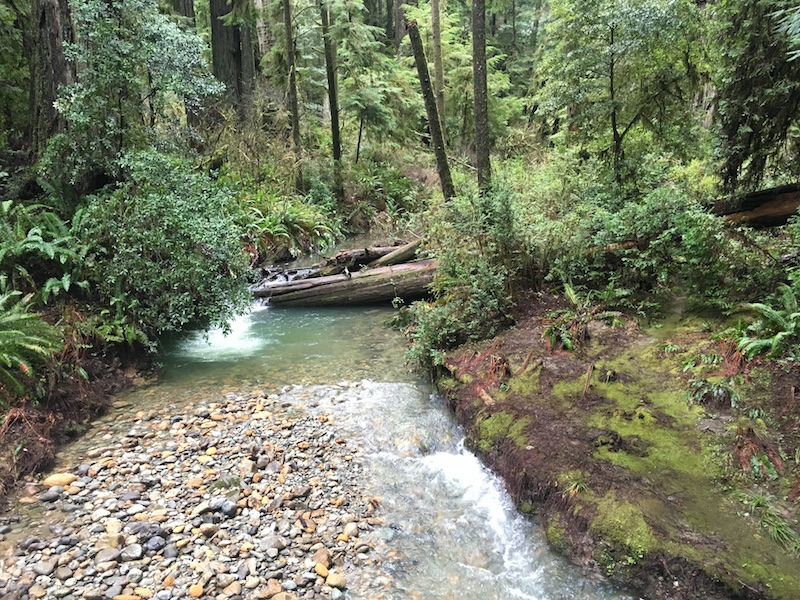
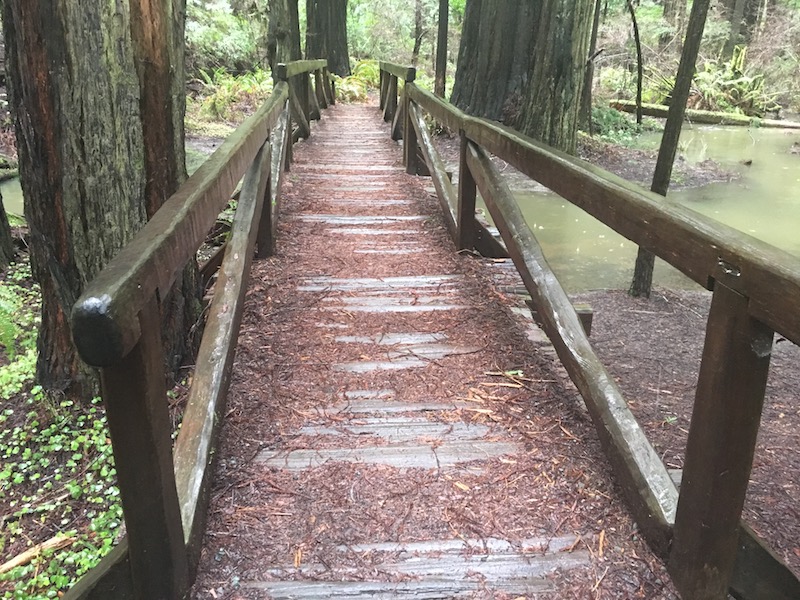
Between sipping wine and cider, we made our way down the coast about 40 miles to the Avenue of the Giants, located within Humboldt Redwoods State Park. This large park has multiple entrances and exits along Highway 101, with the headliner being the Avenue of the Giants, a 30+ mile roadway through towering redwoods. The ‘Ave’ used to be the original Highway 101, before it was rerouted, and driving through can take just an hour or so or all day, depending on how many times to stop to hike through the various redwood groves. You really can’t go wrong picking a path to hike; we tried several couple-mile loops, then ended up at the visitor center, located at about the halfway point along the Ave.

Avenue of the Giants

If you go north instead of south from Eureka, Patricks Point State Park is located directly on the rocky coastline by Trinidad, and offers multiple hiking loops and beach walks. There’s also a small visitors center, though we didn’t check it out, and campgrounds. The Inn of the Lost Coast is located at the end of Patricks Point Road at Shelter Cove, and has a causal eatery with ocean views for lunch. The seaside town of Trinidad itself is a great stop, with an iconic lighthouse and cute harbor for small fishing boats. You can explore small but beautiful Trinidad State Park, or just head to the adjacent city beach to watch the surf.

Trinidad

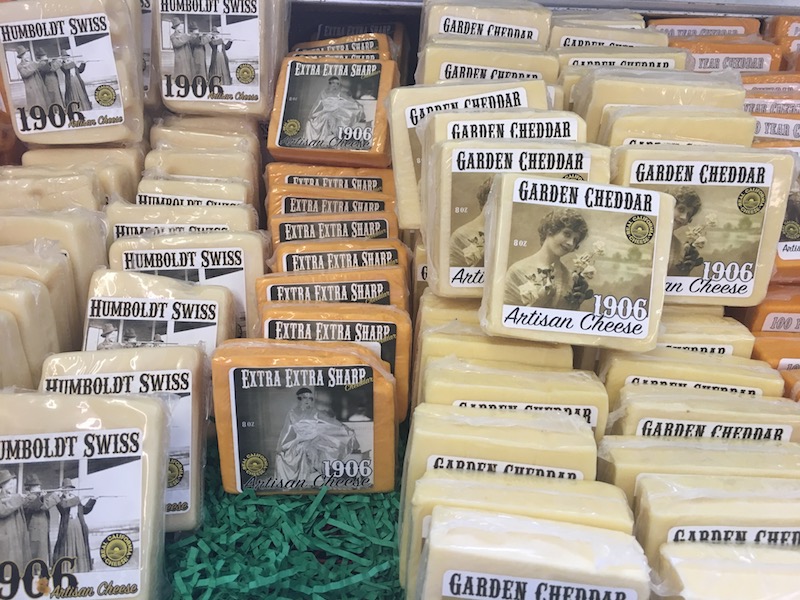
En route back toward Eureka, we decided to stop at Loleta Cheese Factory (at 252 Loleta Dr.). We were expecting a large cheese operation in this sleepy coastal town, but instead, found the factory to be in a small house. We took a chance and checked it out, and are so glad we did. This little cheese factory has amazing cheeses (all available for sampling), and best of all, in the back resides a grilled cheese bar, serving inventive sandwiches headlining their cheeses. Guy Fieri has featured it in Diners, Drive-Ins, and Dives (in fact, he’s recommended several establishments in the Eureka area, his home county). In the back of the grilled cheese bar area is a beautiful garden, which is inviting in the warmer months.

cheese factory

Tip: If you’re following this itinerary WITH kids in tow, this cheese shop would be a great stop; they even offer a fun scavenger hunt for kids when they arrive. Of course, all the hiking in Humboldt Redwoods State Park would be a excellent way to spend time as well.

During the summer months, it’s easy to rent kayaks or stand up paddle boards in Eureka or neighbor Arcata, and beach-going and picnicking is a popular pastime. Don’t be afraid of visiting Eureka during the off-season, however. We visited in February, and found the hotels to still be bustling, and the room rates to be slightly lower. While it rained during our visit, the chances of rain are significant during any time of year.

Have you been to Eureka or the Lost Coast for a weekend getaway? Where did you stay?

Photo credit: Unique Inns, Amy Whitley


How to take travel photos on your phone

There are many benefits to using your phone to take photos while traveling. First of all, when you learn how to take travel photos on your phone, you won’t have extra equipment to pack; chances are, you’re already bringing your phone. It’s always with you during the day, and thanks to excellent technology, your phone probably comes packed with features better than or at least equal to those on your point-and-shoot camera. Your phone is portable, and with the right case, it can be waterproof and dust-proof, which is crucial for some travel spots.

bryce-national-park

Photo opportunities, and how to make the most of them:

You don’t have to be a photography expert to take great travel photos with your phone, but it does help to keep some basic photography techniques in mind. If you don’t remember anything else, remember that a great travel photo tells a story, showcases a subject (whether it’s an object or person), and captures a moment in time. To achieve these goals, follow these basic photography rules.

  • Rule of thirds: Turn on your camera’s grid feature, which will show you a nine-square grid overlaying your framed shot. Use this grid to frame your subject proportionally. Place your primary subject in the middle three squares of your grid, or try an off-centered subject for an eye-catching effect.
  • Place that sun behind you: Sunshine is lovely, but when you take a photo directly into the sun, your photo will be washed out, and you’ll lose the detail of your subject(s). Especially when you’re taking photos of other people, place the sun at your back. Yes, your subjects will be tempted to squint as they’ll be looking into the sun, so suggest they close their eyes, count to three, and then open them for the photo!
  • Pay attention to exposure: Many people don’t realize that they can adjust the lighting of a shot with one touch on a phone. Tap and press on the subject of your photo to make sure the shot is properly exposed before taking it. You’ll see the lighting adjust on your screen.
  • Go horizontal: Most of the time, you should get in the habit of taking horizontal photos. Video should always be horizontal, not vertical. Why? Horizontal videos use the most screen space when you show your work on a computer or TV screen. Vertical videos will appear as just one strip of the screen.
  • Get to know your flash setting and when to use it: Placing your flash on auto will work most of the time, but in low light, indoors, and in fully dark settings, play with your flash to get your desired result. If you’re taking a selfie in the dark, such as in a nightclub or at a concert, turn on a flashlight app if you don’t have a front-facing flash (which can be the case with older phones).

Get creative when you take travel photos with your phone:

Now that you know how to use your settings, it’s time to make your travel photos more interesting. Remember how every travel photo should tell a story, focus on a subject, and capture a point in time? It’s easy to do that with your phone on any vacation, whether it’s a bucket list-worthy trip or a road trip to grandma’s.

Start by getting new angles. Your phone is mobile, so make yourself mobile too! Get down on the ground to take a shot from below your subject, or get elevated to get an overhead angle. Notice the shot everyone around you is taking, and do something different. If everyone is taking a long-range photo of a mountain, focus your shot on the trail leading up to it or the trees in the foreground, for instance.

When you’re taking photos of people, shots of smiling groups are nice, but they’re nothing remarkable. Focus on emotion instead. Try to capture a laugh, an expression of joy or surprise, or a look of wonder on the faces of your subjects. The best way to do this is to have your phone ready to shoot as your friends and family discover new experiences or see a new sight.

Last, to use your phone camera to its fullest, don’t forget to try your high dynamic range (HDR) setting. This setting can feel intimidating to those who rely on auto settings on their cameras, but it can greatly enhance your travel photos. Your HDR setting will help you properly expose your photo much better than simply pressing a finger on the screen to adjust the lighting. This is because doing so only adjusts the subject, and it can over- or underexpose the background. In your HDR setting, your phone is essentially taking three photos for every one and then layering them for ideal lighting. However, this means it takes longer to take the shot, so you need to hold the camera still.

To make sure your HDR setting is being used to the fullest, use a tripod or brace your elbows on a ledge or table when shooting. Your subjects need to hold still as well. For this reason, I only turn off HDR when I’m shooting wildlife that will not cooperate or when I cannot hold the camera steady (such as when I’m on in a moving boat).


Source: eReplacementParts.com

Have your phone at the ready and take lots of shots! Have photo tips? Share them in the comments!

Introducing Twist: a digital magazine celebrating family travel

Who has not been inspired to try a new destination after seeing gorgeous photos of a friend’s trip? Or has not turned the pages of a glossy magazine and drooled over a hotel spread? We all have, and I know that for me, I often get new travel ideas from other parents who have adventured before me. The idea of sharing travel ideas through personal experiences is, of course, the message and intent behind Pit Stops for Kids, and any story I write elsewhere.

Twist magazine

Introducing Twist travel magazine:

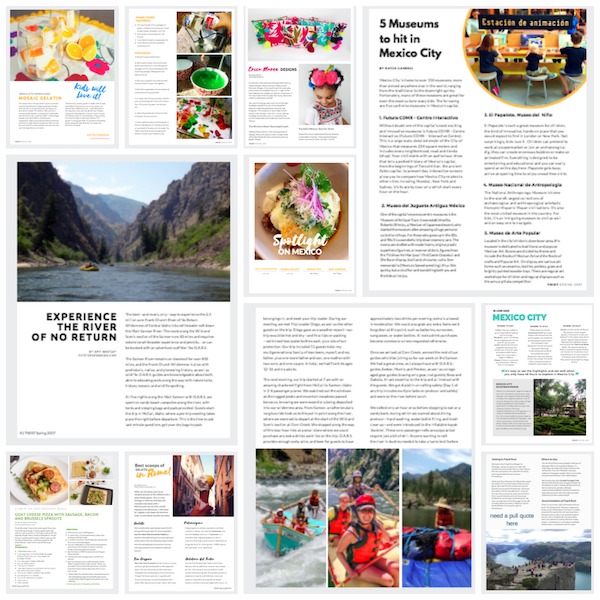
I’m proud to say that I’m now contributing to another, new outlet for sharing travel experiences and inspiration: Twist magazine. Twist is the brain child of Keryn Means of Walking On Travel and Andrea Fellman of Wanderlust Living, and will come to your computer screens in high resolution, digital magazine glory. I know that when I previewed this first issue of Twist, I was inspired myself by the travel destination pieces packed into its pages. There are now 2-3 new places I cannot wait to take my kids!

TWIST

In addition to destinations, Twist issues will always feature gear reviews and travel style and trends for both parents and kids, plus practical advice and currently trending travel services and tour companies. Because TWIST will be seasonal, and features over a dozen contributors who are all family travel experts, you can expect to get the very latest in travel news, travel deals, and travel inspiration.

Please go HERE to download your first issue of Twist. I am confident it will not be your last!

Apple Watch travel tips

I bought my Apple Watch for heath and GPS exercise tracking. I regarded its travel uses with skepticism. After all, I have a phone, which already accompanies me on trips, and saw no need to carry two devices for the same purpose. However, after using the Apple Watch for a few months, I’ve found it to be an extremely useful travel tool. It’s not great for everything, but it’s helpful enough that I no longer travel without it. Ready for some Apple Watch travel tips?

How, when, and why to use your Apple Watch while traveling

Apple Watch travel tips:

For me, the prime benefit of traveling with my Apple Watch Series 2 is the ability to keep my hands free and my phone stashed away. Using the apps on my watch means I can keep my backpack or tote bag closed, my eyes up, and my distractions to a minimum. Here are the uses I’ve found for my watch on travel days:

Boarding passes in Passbook:

When I check into my flight online, I use the appropriate airline app on my phone. Then I save my mobile boarding pass to Passbook. When I open Passbook on my watch, my boarding pass is right there. I can scan it at the gate and at security and never have to dig my phone out of my bag. I also keep the airline apps I use on my watch, because they will alert me of any changes to my flight right on my wrist.

Note: the TripIt app is now available for Apple Watch too, and I find it very helpful to get their alerts.

Directions on my wrist:

I have no sense of direction, so when I travel, I rely heavily on my Maps app. When I use Maps with my phone, I’m distracted, looking down at my screen while I walk unfamiliar streets, or worse, glancing too often at my phone while driving in unfamiliar cities. When I set up mapping directions on my phone before I depart, they sync to my watch, which gives me point-by-point directions as I go. I wasn’t sure if I’d like haptic touch (where the watch buzzes and vibrates to indicate which way to go), but I find I love it. I can drive and be confident about when to turn without taking my eyes off the road.

News bites in real time:

I have the CNN and New York Times apps on my watch, and appreciate how I can stay up-to-date on news as I travel. Yes, I could see updates on my phone, but how often, on a busy day, do I actually take the time to open a news app and read? With CNN and NYT on my wrist, short, one-line news bites are delivered to me, helping me be more aware as I travel.

Note: there are many other great news sources; for my watch, I chose CNN and NYT because their app headlines are particularly succinct and digestible…good for the small screen of my watch.

Apple pay on the go:

I can’t tell you how many times I’ve approached the register at an airport newsstand store or dining venue and had to dig around in my bag for my wallet or phone to pay. It’s time consuming, and can be unsafe to open everything up…important things could easily fall out of my bag. I use Apple Pay on my watch, and I’d say it works easily 70% of the time. The other 30%, it’s a big pain in the butt because it doesn’t work for some reason and I have to dig my wallet out after all. So there are negatives to using Apple Pay, but still worth trying.

GPS tracking for safety:

Some people don’t like to track their GPS, and I get that, but when I’m in a new city, I still like to run outdoors when it’s possible. I appreciate the fact that with just my watch, I can track my route, so I can easily find my hotel again. Also, in the case of anything going wrong, my route is tracked on my phone (which is back at the hotel room), so my family can more easily find me. It’s just a precaution, but one I appreciate.

A few of my favorite Apple Watch apps (not mentioned above):

  • TripIt: great to plan travel and get live updates on your travel plans
  • Timer: fun to time waits in line (so you can prove to kids that they haven’t been ‘waiting forever!’)
  • Breathe: a nice relaxation tool on travel days
  • Uber: I’ve found it to be pretty seamless as long as your account is up-to-date on your phone
  • 1Password: for when I’ve forgotten a password that I need to enter on my phone and my computer isn’t handy
  • Music: I pair with bluetooth headphones and listen to music on the go

What I never use Apple Watch for:

  • Email: heck no! Way too small a screen
  • Photos/video: though I know people who like the remote camera app
  • Banking/Paypal: no real reason other than the small screen
  • Social media: I like to see Instagram, Facebook and more on a bigger screen

Do you have an Apple Watch? Do you use it for travel?

5 Tips for Traveling to Europe With Kids

Traveling to Europe with kids is an exciting, rewarding, and exhausting experience. You’ll create lots of family memories and give your kids invaluable chances to experience other cultures. At the same time, you need a lot more planning and plenty of patience.

Europe with kids

Plan Travel in Advance

It is so important that you do your research. Plan your destinations and transportation on Europe-specific travel platforms like GoEuro before you leave. Decide how you’ll be getting from city to city, whether that be by bus, train, or plane, and book those tickets while you’re still in the states. The last thing you want to deal with is tired, hungry kids while you’re figuring out train tickets in an unfamiliar place where you don’t speak the language. As an alternative, you could book a pre-arranged Europe tour if you want to avoid the hassle of planning.

Concentrate on Fewer Locations

When you’re in Europe, you’ll be tempted to see as many spots as you can during your visit. Focus on getting the most out of just a few locations if you’ll be there for longer than a week, and concentrate on just one if you’ll be there for less than a week.

Planning your transportation through Europe is simpler when you aren’t hopping among five cities in four weeks. Similarly, if you focus on smaller destinations, such as Bath instead of London, you’ll have an easier time exploring with kids. Big cities can overwhelm children, but they’ll adjust to smaller places more quickly.

Leave Room for Downtime

When traveling with adults, you might be able to see four museums and monuments in one day without hailing a single cab. Kids get tired and bored more quickly, though. Plan for downtime, but be open to rescheduling or extending it depending on how your kids are feeling. Otherwise, you might have to cut short a visit to the Louvre or cancel a tour of the Colosseum.

Plan for Emergencies

Kids get lost even when you’re paying close attention. When it happens in a city where you don’t know the language, the experience is especially terrifying. Create contingency plans before you start packing. This might include giving your kids cell phones or GPS devices so you can locate them or telling them to stay put as soon as they realize they’ve lost you. Rick Steves has lots of great ideas for families who want to plan for this kind of emergency.

Europe with kids

Try Not to Check Bags on Flights

When kids are young, they can only carry a small backpack containing a few belongings. You’ll have to carry the rest. In Europe, you’ll be doing a lot of walking. Imagine lugging two or three gigantic suitcases behind you while you walk from the train station to your hotel!

To avoid this situation, pack light. Cut down on toiletries and nix the non-essentials such as hair dryers and excess makeup. Plan to wash clothes while you’re there, and research accommodations that offer laundry facilities. Pack one carry-on per adult to make your trip simpler.

Traveling with adults has its own list of perks, but taking your kids to Europe is a rewarding experience. Plan ahead to design a trip that nobody in your family will soon forget.

Salt Lake City: Natural History Museum of Utah with kids

Considering a visit to Salt Lake City’s Natural History Museum of Utah with kids? Absolutely go! This is one of the best natural history museums we’ve visited, with five stories of exhibits on earth and life science. The museum is located on the University of Utah campus  in Salt Lake City, and families can easily spend a full morning or afternoon here.

museum-with-kids

If you’re visiting in the warmer months, allow time to explore the outdoor spaces, including terraces with views of the Wasatch Mountains and downtown, and hiking trails that lead from the museum. During my visit in winter, these areas were closed due to heavy snow, but this may not always be the case.

Natural History Museum of Utah with kids:

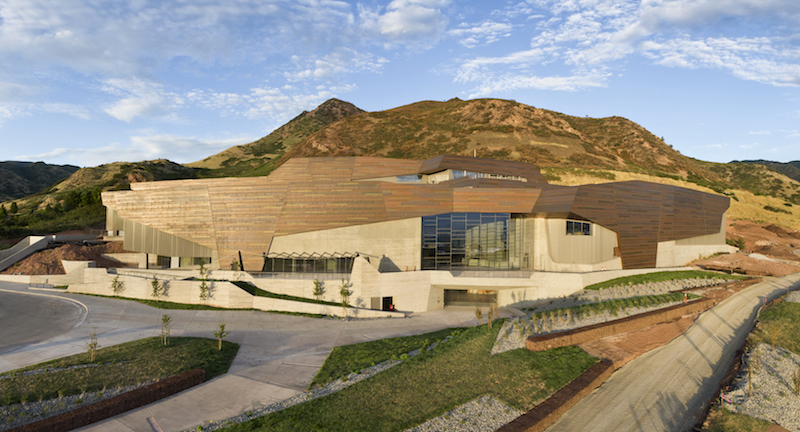
The building housing the museum alone is impressive; its copper exterior and LEED Gold certified features echo the message of the permanent exhibits: one of sustainability and eco-responsibility. Start  on the second level (admissions is on level 1) and check out the topographic map in the lobby. Then start in Past Worlds, which houses an impressive dinosaur exhibit with a paleo lab.

In this area is the ‘backyard’ room for young kids; be sure to check it out with toddlers and preschoolers.

The Past Worlds section will lead seamlessly into the First Peoples and Land areas…just follow the sky bridges and pathways. In this way, this natural history section evolves from prehistoric times slowly to present day life, with sections on early humans and anthropology as well as geology and local Salt Lake climate studies.  This leads to the large Life section, which has a working naturalist lab with glass walls so kids can watch scientists at work.

museum of natural history

At the very top of the museum on Level 5, the Sky section offers amazing city views, an elevated outdoor terrace, and exhibits on the night sky. Past Sky, the circular Native Voices room showcases present-day Native American culture on the Wasatch Front and further, including beyond the Salt Lake basin.

Be sure to check out the current special exhibit, which is housed on Level 3. During my visit, it was an extensive exhibit on poison; both natural poisons found in nature as well as human myths, lore, and history of poison. It was very interesting and had something for all ages.

Admission and hours:

Admission information can be found here. At the time of my visit, adult admission was about $15, teens were $13, and kids 3-12 were $10. The museum is open from 10 am to 5 pm. As with many museums, it is usually worth looking into a museum membership if you have a large family or plan to visit more than once a year. You can turn your day admission into a membership at the time of your visit.

natural history museum

Note: there is a cafe on site, as well as picnic lunch areas available.

Directions:

The museum is located at 301 Wakara Way, within the University of Utah campus. There is ample parking, and it’s easy to access from the TRAX public transit system.

Where to ski in Utah: Brian Head Resort with kids

Deciding where to ski in Utah is a little like deciding which tropical island to buy…you really can’t go wrong, wherever you choose.  That said, there are distinct differences between Utah resorts, and perhaps an even bigger difference between Salt Lake City and Provo area resort and Southern Utah resorts. For the first time, I explored the skiing options in Southern Utah, where I loved the friendly, relaxed, and sometimes almost eccentric vibe.

brian-head

Brian Head Resort with kids:

Brian Head Resort has the highest base elevation in Utah (you’ll be at over 9000 feet at all times, and up to 11,000+ feet while skiing). It offers 650 acres with eight chairs. It’s not the largest Utah ski resort, and also not the most challenging in terms of expert terrain, but it has something distinct going for it that really plays in its favor: isolation.

brian-head

Because Brian Head is pretty far from a metropolis (you’re 3.5 hours from SLC and 3 hours from Las Vegas), your closest neighbors during your stay are national parks and monuments. Brian Head has the distinction of being a Dark Sky location, which means you’re free from light pollution. All this isolation means Brian Head Resort makes its own fun. Events, apres ski dining options, live bands, and special programming seems to be scheduled for just about every night. Need proof? Just take a look at their event schedule.

Getting the lay of the land:

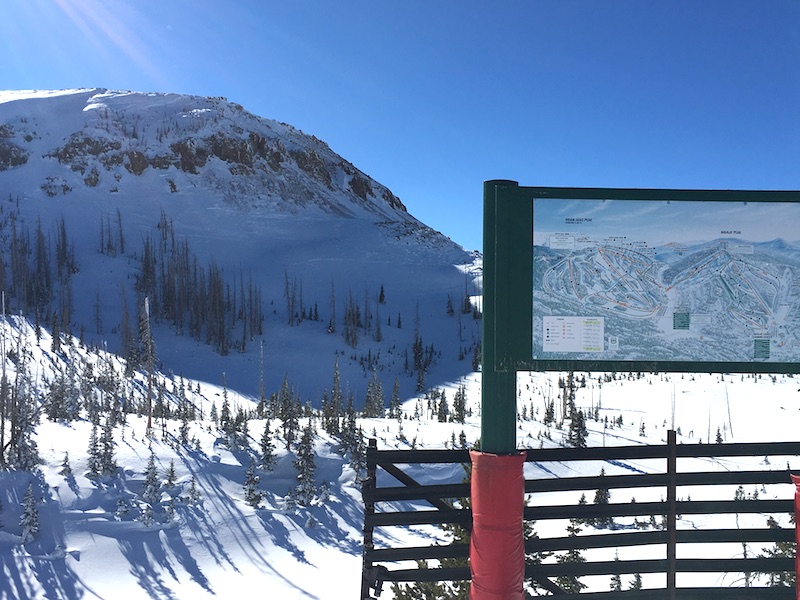
When skiing Brian Head resort with kids, it’s important to note Brian Head has two distinct base areas: Navajo and Giant Steps. They are separated by the highway, with a ski bridge that links them. Base lodges are at both locations. The simplest way to categorize them is to say that Navajo offers the beginner and intermediate terrain, and Giant Steps offers intermediate and expert terrain. There’s a meeting place for the winter sports school at both locations, but the kids’ camp is at Navajo. The two Brian Head hotel lodges are a couple minutes’ drive from the Navajo side, but there are many house rentals and condos available at both base areas.

brian-head

You can absolutely ski between the two sides using the ski bridge, but it does take a few chairs and some traversing. There is also a  free shuttle that connects the base areas, convenient if you have family members skiing at different levels but want to meet up for lunch or apres ski.

Skiing at Brian Head:

Brian Head is one of those resorts that seems to double its size on powder days…there are just so many open areas to ski. (The openness of the resort is actually due to the need to remove many trees during a beetle infestation years ago.) But of course, not every day can be a powder day. During my visit, we stuck mostly to groomed runs, which were plentiful and pleasant. There are a number of great chutes near the top of Giant Steps, and even after the fluffy powder is skied out, hidden stashes remain in the trees. On the Navajo side, the green beginner runs are some of the most interesting I’ve seen…think winding paths through forests and fun curves.

brian-head

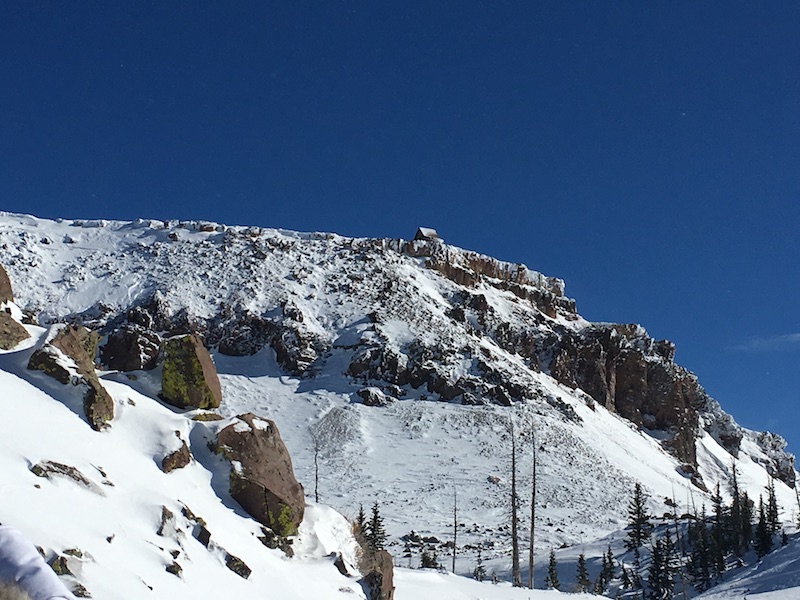
From both sides, skiers are rewarded with views of classic Southern Utah red rock, and glimpses of nearby Cedar Breaks National Monument. On clear days, it’s possible to see all the way to Great Basin National Park in Nevada. What you won’t see often are crowds. We visited on a Saturday in January, and it felt like a quiet Tuesday morning.

Other things to do at Brian Head:

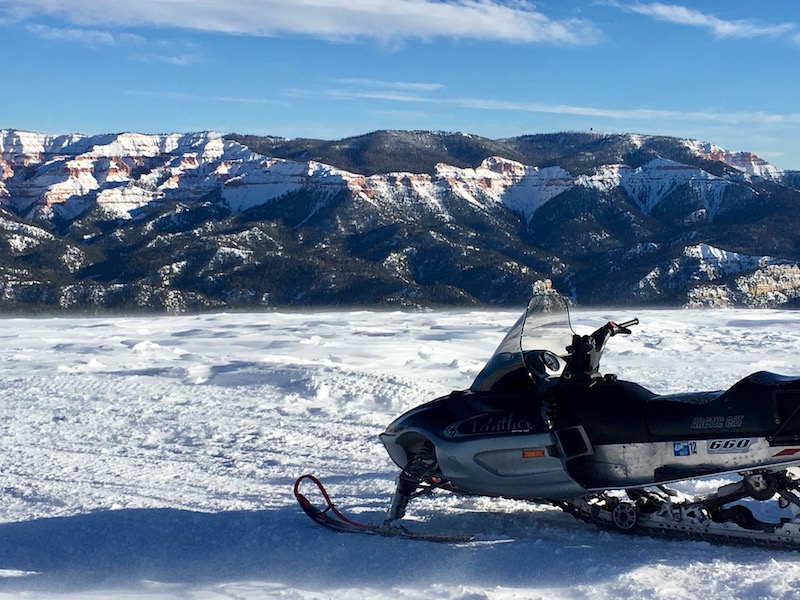
Remember how close you are to Cedar Breaks while in Brian Head? If you want to take an afternoon off from skiing, you can actually take a snowmobile tour from the resort area to High Mountain, which offers incredible close-up views of the red rock of Cedar Breaks. Thunder Mountain Motorsports offers 1.5 hour, 3 hour, and all day rides. We found 1.5 hours to be just enough time to go through the backcountry of Brian Head to High Mountain and back, with time to play around in snow-filled meadows and learn about the natural history of the area. Our guide was fantastic: the perfect mixture of helpful and informative but also lighthearted and fun. Tours start at $85/machine, which families can ride double for only $15 extra. If you have it, you can even take your own machine and follow the tour for $20.

snowmobiling

If snowmobiling isn’t your thing, you can also snowshoe or cross-country ski in Cedar Breaks. It’s best to call for up-to-date info on road conditions and where to start your winter exploration: 435-586-9451.

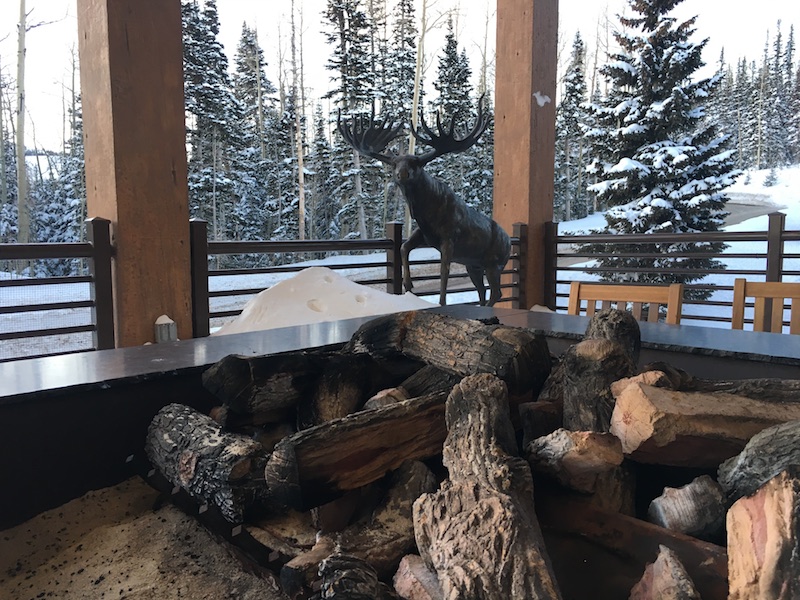
Brian Head also offers snow tubing, which I’m told is on a steeper track than most. (I didn’t get a chance to try it.) However, one of the best things I did at Brian Head was their free ‘Star Party’. Held once a month at Navajo base lodge, star parties are a fun and informative viewing of the night sky. Because Brian Head is a Dark Sky location, the view on clear nights is fantastic. They bring out ‘dark rangers’ (like park rangers) to lead short talks, in which they point out constellations and planets and give families time to look through telescopes. There are fire pits and hot chocolate as well.

Where (and what) to eat at Brian Head:

Remember how I said Brian Head was just a bit eccentric? This characteristic is most evident in their dining and entertainment scene. Brian Head was bought by a new owner a few years ago; owner John Grissinger has brought his love of Kansas City BBQ to the resort, and everyone benefits! At least once a week (and usually more often), families can find ‘John’s KC style BBQ’ on the events calendar. Held at Last Chair Saloon at Giant Steps base, this BBQ meal is not to be missed. You may get two choices on the menu, but don’t expect more. What you’ll get is amazing BBQ meat (usually ribs, catfish, or tri-tip) served with sides. It’s accompanied by live music, and the whole event is very family-friendly.

When you can’t get BBQ, you have other options: Giant Steps lodge and Navajo have your standard ski day fare, and if you want to dine out in the evening, the Grand Lodge offers a simple but solid menu at their Lift Bar and Grill. Cedar Breaks Lodge offers a restaurant as well.

Where to stay at Brian Head:

As noted above, there are many condo rentals and home rentals in Brian Head. If you opt for a hotel, you have the choice between the Grand Lodge and Cedar Breaks Lodge. We stayed at Grand Lodge, which has a great indoor pool and hot tub, plus an outdoor hot tub. Their spa was closed for the season, but it is on offer in summer months. They have a decent continental breakfast at the Lift Bar and Grill, which is convenient before your ski day, though it does cost extra (around $10 pp). I found this price to be too high for the standard fare; at some chain hotels, you can get a similar spread complimentarily). However, our waitress did charge less for those who were eating less, which was nice.

grand lodge

Rooms are standard, with mini fridges and microwaves, which is nice to have, and the lodge has fun live music and a pretty hopping bar on weekends. It’s a friendly, welcoming vibe. You’re about a one minute drive to the base of Navajo, or you can get on the free Brian Head shuttle.

Getting to Brian Head: Take I-15 to Parowan, then Highway 143 to Brian Head. It’s about 3.5 hours from Salt Lake City or 3 hours from Las Vegas.

Pin it for later:

Ever heard of Brian Head? Here's why you should take note of this small ski resort!

Disclosure: I experienced Brian Head as a guest of the resort, for the purpose of review. All opinions are my own.

Travel Gear We Use: Best day pack for international travel

I’ve been conducting travel bag reviews here and at Practical Travel Gear since 2009 and 2011 respectively. That’s a lot of reviews! I’ve tried crossover bags, messenger bags, backpacks, totes, and roller bags. Finally, I think I’ve nailed it. I think I’ve found the best day pack for international travel, especially with kids in tow. That’s right…


Best travel bag for international travel: we reviewed it!

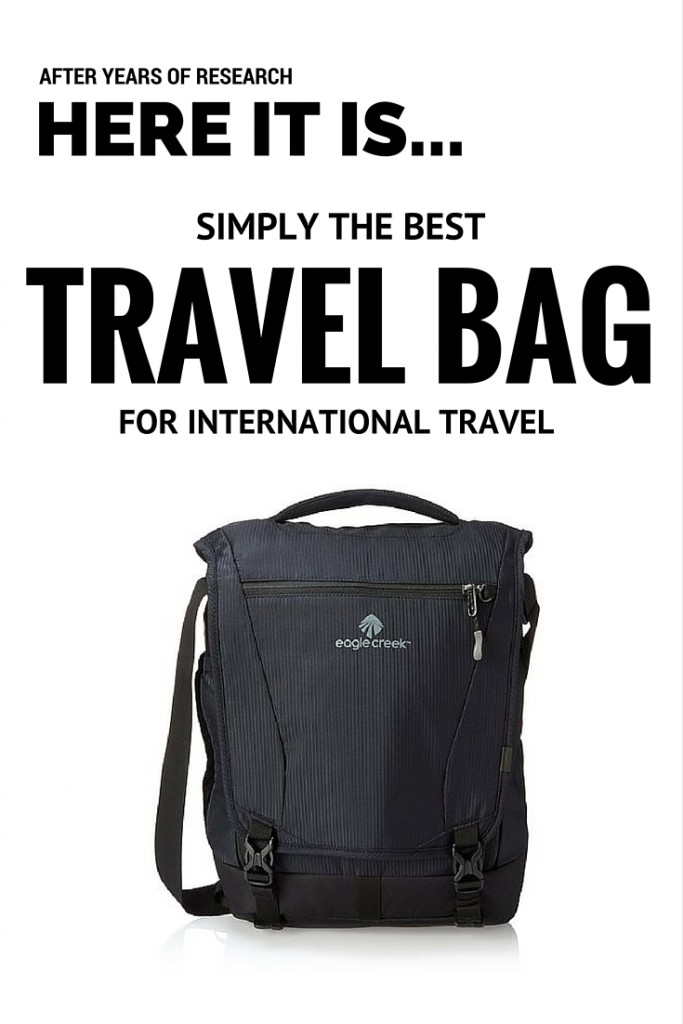
The Eagle Creek Catch All Courier Pack RFID

What is it: The Catch-All Courier is a courier bag (with shoulder strap) that converts to a backpack with the ease for just two clips. It weight just over one pound, and the capacity is 12L. It’s made of tough poly ripstop, and has several compartments, or zones. The first zone is the outside zippered pocket, which is pretty straightforward. The next is a zone under the flap. This zone is the main organizational section, with several sleeves, a key fob, and slots, plus a passport-sized RFID paneled pocket. The zipper on this compartment is lockable in two ways (more on that below). The largest zone is the central interior of the bag, which is roomy enough for some layers, a large camera, snacks, and a 13″ laptop (in padded sleeve). To convert the bag to a backpack, unzip the backpack straps from the back panel (they’re zippered in when not in use), and snap them by a simple clip to each side of the bag. You’re done.

What makes it great: It’s exactly the right size (and no bigger) for day use while city touring, with just the right amount of pockets and organization panels. We appreciate the security of the RFID panel when we’re traveling with important documents and credit cards, and I love the way the zippers lock. In addition to being lock-ready (with your own small padlock) like most bags, they also have a built in toggle which you can slip into a slot, ensuring the zippers cannot be pulled by anyone around you while you’re wearing the pack. The front panel additionally locks with two snap closures. You can access the ‘zone 2’ panel really easily without opening the main section of the pack, which is nice when you need to get out a wallet or cell phone. There’s a water bottle sleeve, too (though I wish there were two!). There’s a nice handle at the top for easy grabbing, and the bag fits under airplane seats nicely, and isn’t too heavy to wear around a city.

Grab your own for around $70 on Amazon.

Honorable mentions:

Fjallraven Tote 2: This tote is really pretty, and functional, too. You can read a full review on Practical Travel Gear, but essentially, the selling points are the waxy, weather-proof material, the classy canvas look, and the ease of converting between tote and backpack. The downside: the backpack straps are not comfortable enough, leading to a sore neck if the pack is pretty full.

Osprey FlapJill: I really love Osprey packs, and the FlapJill delivers with a nice grab handle, a secure flap opening, and a roomy interior. The best thing about Osprey packs…the comfort of wearing them. The shoulder straps are the best of any of these picks, by far. The only reason the FlapJill is an honorable mention: it’s just a bit bulkier than the Catch-All, lacks RFID, and is more expensive.