Multi-night river rafting on the Tuolumne River

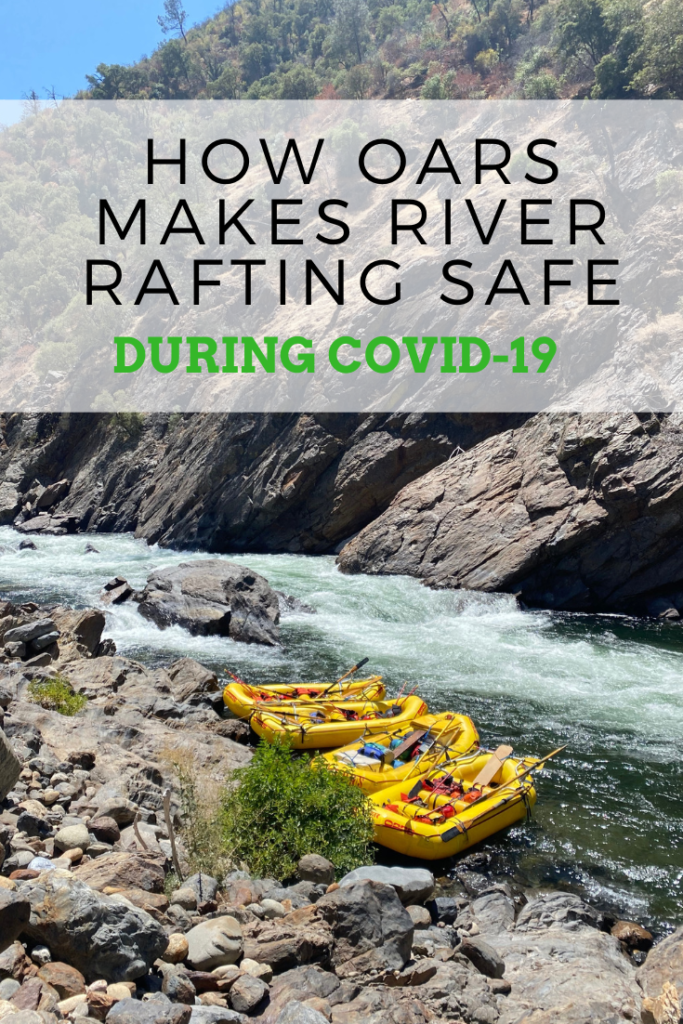
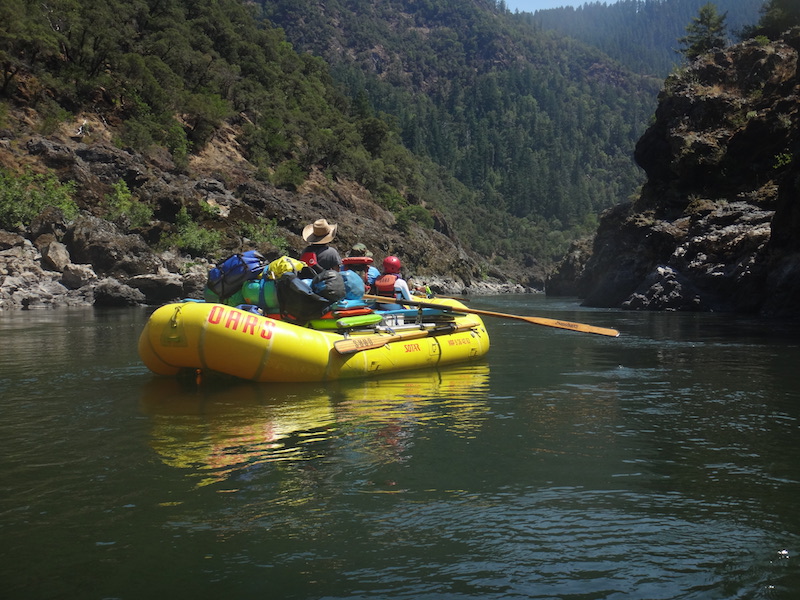
The Tuolumne River near Yosemite National Park is one of the most pristine and exciting rivers I’ve experienced. But is river rafting safe during COVID-19? My fifteen-year-old son and I rafted the Tuolumne River for three days with OARS, and not only did we have the usual amazing time on the river I’ve come to expect from an OARS trip, but we felt safe and responsible, too.

All of our OARS trips include the same basic formula: clean mountain air + clean river water + starry skies and lots of adventure. Our three day, two night trip on the Tuolumne included all of the above, plus some additional safety measures that had been put into place.

Instead of flying, we drove to the meeting place from Southern Oregon (about a 7 hour drive) and stayed overnight in charming Groveland, California near the entrance of Yosemite National Park at the Groveland Hotel, which I highly recommend for their friendly hospitality, ample outdoor deck space with in-house dining, and whiskey bar (yes, really!).

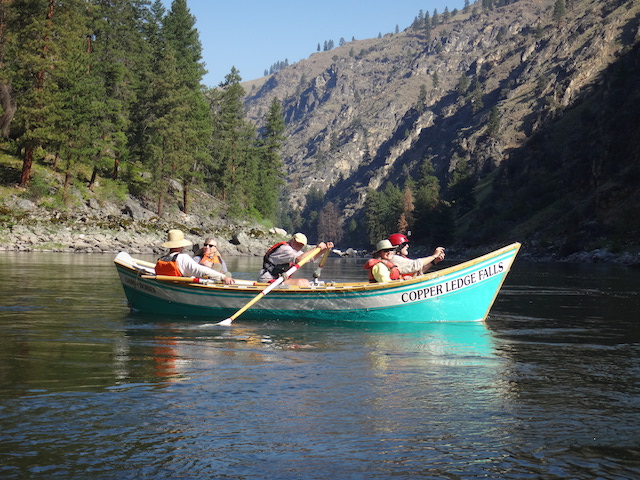
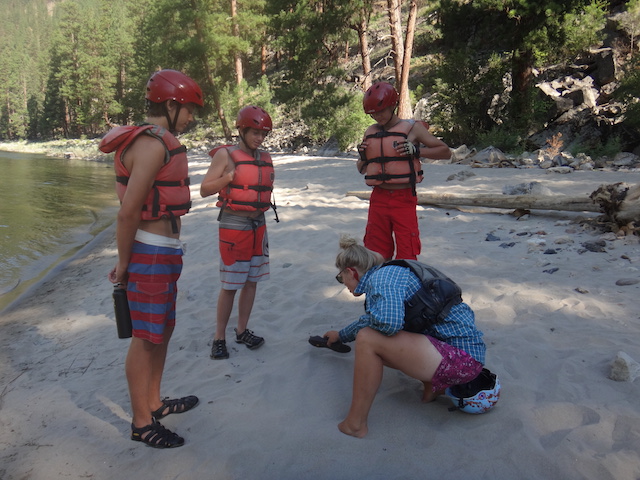
The next morning, we met with our group of 12 additional rafters and trip leader, Rebecca, then boarded an OARS bus for the 45 minute drive to the put-in on the Tuolumne. We began experiencing the COVID-19 safety measures immediately.

How OARS makes river rafting safe during COVID-19

  • Before arrival, every guest filled out a health check-list and survey.
  • At the pre-trip meeting, everyone’s temperature was checked.
  • Everyone’s temp was checked every day of the trip thereafter.
  • Face coverings were worn by all on the bus and any other enclosed space, plus the kitchen area of camp every day.
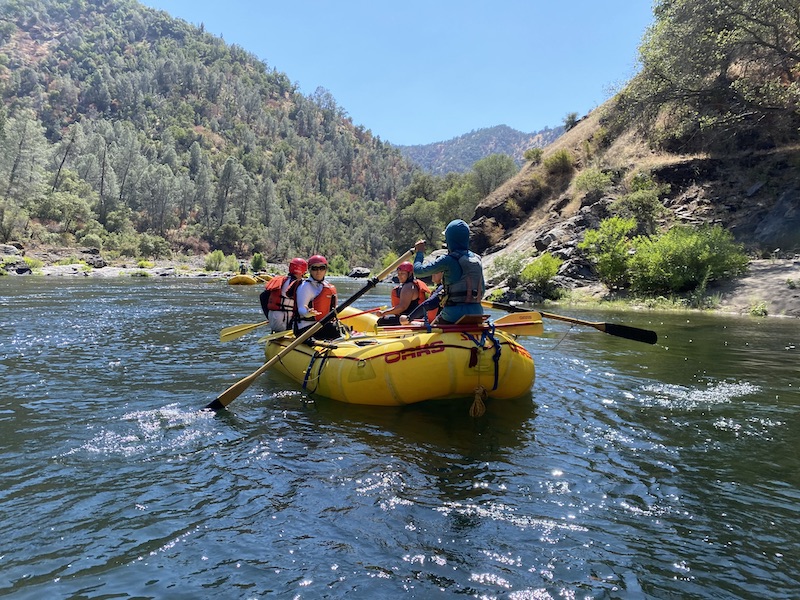
  • Face coverings were also worn any time guests from separate families/parties interacted at a distance of less than six feet, such as in rafts, while setting up camp, etc.
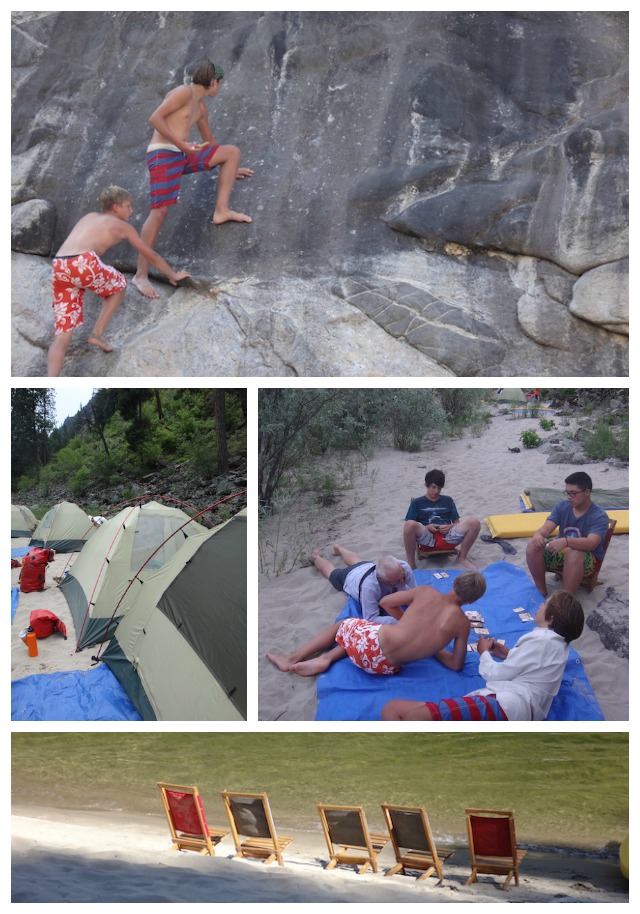
  • Individuals were assigned all gear, including tents, pads, chairs, and sleeping bags…no swapping.
  • The OARS crew always wore face coverings while preparing food and setting up camp, and hand washing was mandatory for ALL multiple times per day.
  • Hugs were banned, but hand waves and air kisses sufficed!
  • Hand sanitizer, soap, and water for hand washing were available at all times.
Face coverings like Buffs double as eye masks during raft naps!

What you can ALWAYS expect from OARS on the Tuolumne

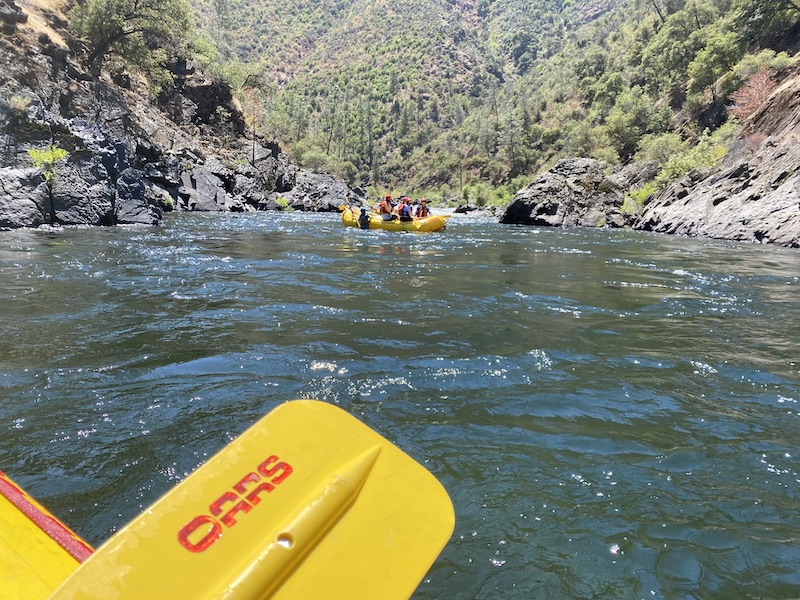
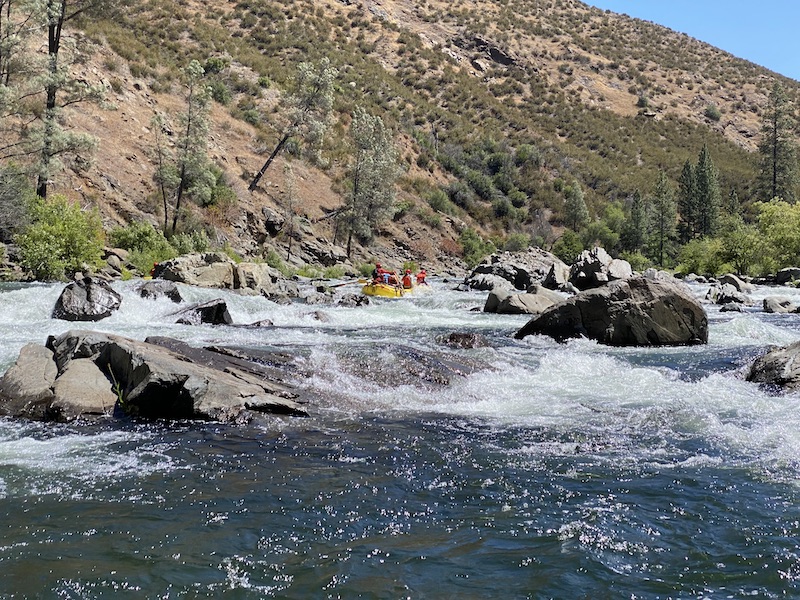
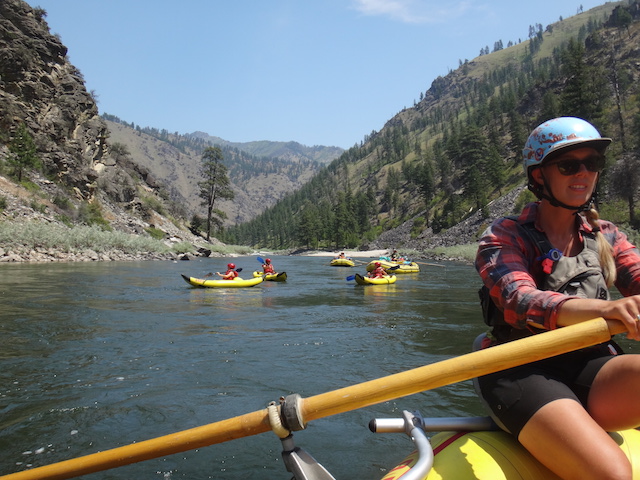
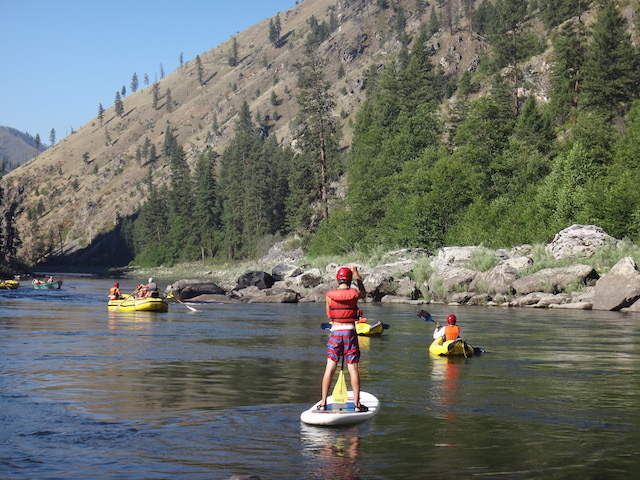
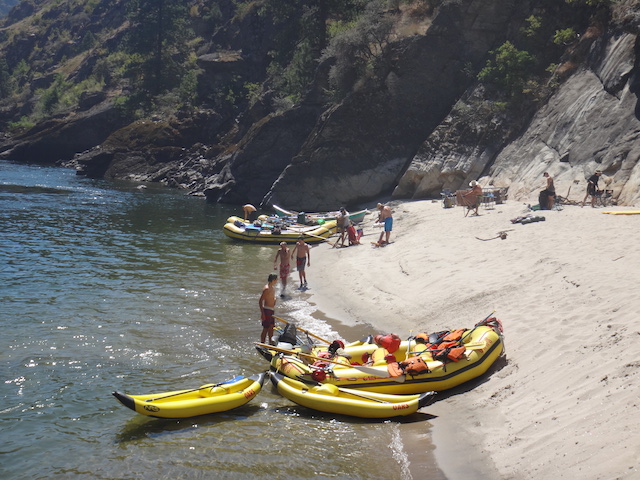
Whitewater, whitewater, whitewater! This river is technical and fast-moving, and offers a lot of Class IV and Class V rapids. As such, guests spend their time in paddle boats instead of individual IKs (inflatable kayaks, a.k.a ‘duckies’). At first my teen was bummed to not be able to man his own IK, but we agreed that the thrill of the whitewater made paddle-boating more fun than usual.

The river’s water level is controlled by daily releases from Hetch-Hetchy dam, which adds a particular challenge: your start time on the river might change daily based on how much water is flowing. For instance, on day 1, the water was released at 10 am, and we were off and floating. The last day, it wasn’t flowing until 3 pm, which meant we hiked and swam first.

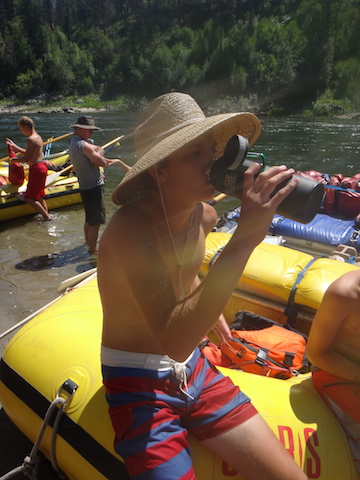
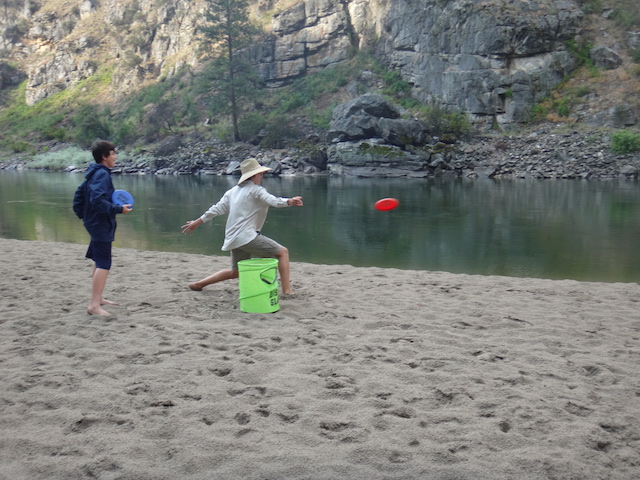
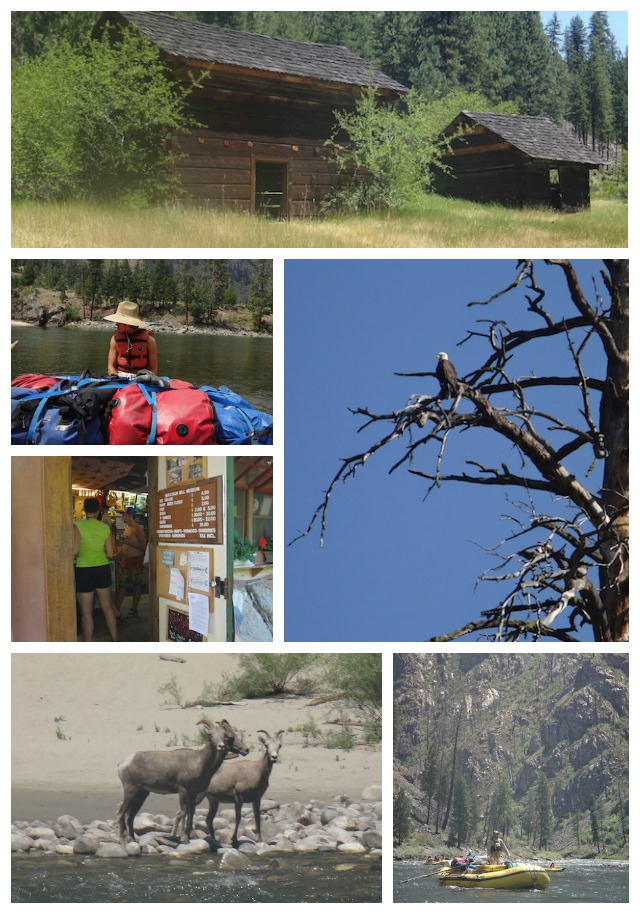
Each day, we camped at another iconic location along the river, with views of foothills, eagles and hawks, and whitewater. The banks of this river are exposed and the sun beats down hot, but the river water is cold, so you’ll be refreshed often!

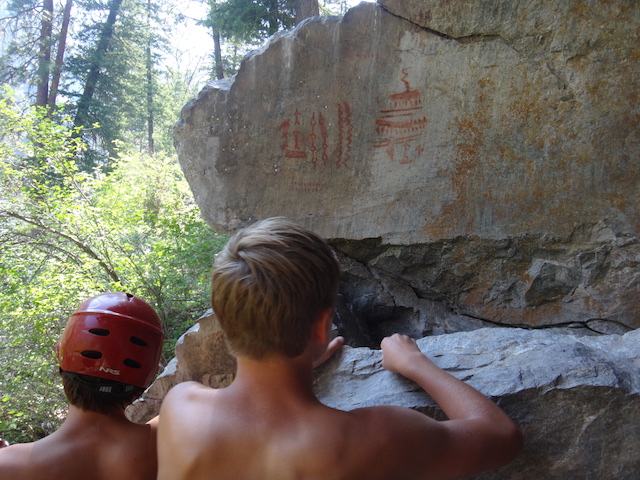
Our guides took us on side hikes up canyons and creek beds every day, where we were delighted by swimming holes and jumping rocks. Each hike was more ‘canyoneering’ than walking, so river shoes with good traction are a must. The hikes are short in length, however, and definitely worth the effort.

Each meal was carefully prepared for us by our OARS crew, and we dined on salmon, steak, eggs, bacon, French toast, fresh fruit, salad wraps, and more. Two beers or soft drinks per person, per night are included, as well as wine at dinner. Guests are free to bring their own additional beverages as desired, to be consumed in camp (not on the river).

If you have more generalized questions, or need camping, packing, or ‘grover’ (portable camp toilet) advice, please see our post on what to expect on every OARS trip.

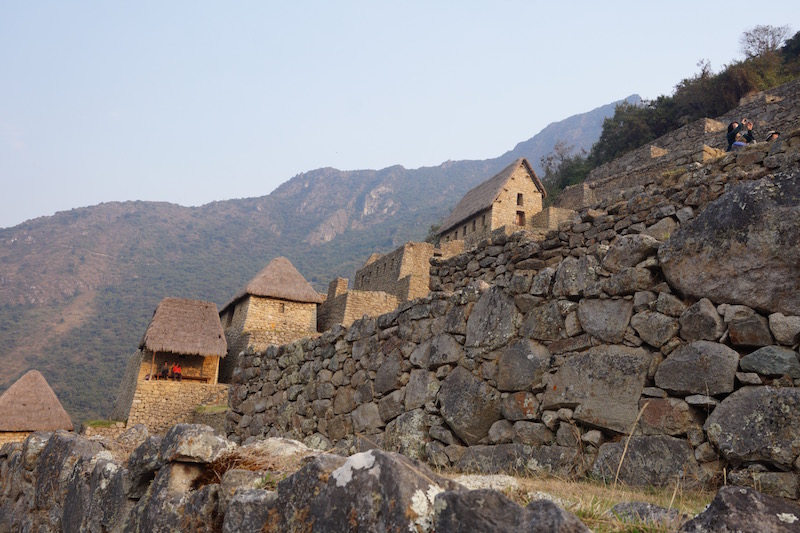
Perhaps best of all about a Tuolumne River trip, you’re in close proximity to Yosemite! I highly recommend pairing your OARS adventure with some time exploring Yosemite National Park.

Summer in the Berkshires: Zoar Outdoor river rafting

The largest of three area river rafting outfitters, Zoar Outdoor offers all levels of tours down the scenic Deerfield River, from family float trips to advanced whitewater day trips. Located in beautiful Charlemont in the heart of Massachusetts’ Berkshires, Zoar is one part family resort (tent cabins and lodge rooms are available), one part adventure center (guests can try their skill on the climbing wall, bike, hike, and zip line while visiting), and one part rafting outfit.

family float trip

During a time when many vacations are not possible, outdoor activities offer the ability to safely social distance, especially if families road trip or are visiting locally. Hotels.com asked me to share my favorite activities and tips for exploring the Berkshires, so start here as you plan a safe and responsible vacation.

Where to stay in the Berkshires: Lodging is available throughout the Berkshires and I would have loved to experience a night or two in this beautiful location! The town of Lenox has the most options available, which puts families close to Jiminy Peak ski area, which offers up fun in all seasons.

We visited Zoar on a late June afternoon for their Family Float Trip, which departed at 3:15 pm and ended at approximately 7 pm, and included a picnic dinner on the river, provided by Zoar. Depending on how many guests have reserved space on the trip, tours may depart with several rafts in the party or just one; on the afternoon of our trip, we were a solitary raft seating six guests and one guide.

zoar-outdoor-deerfield-river

Our guide, Matt, was a natural on the river, having grown up on the Deerfield, floating and rafting from an early age. One of over 50 well-trained Zoar guides, Matt was a wealth of information about the local natural landscape and wildlife (as well as what to do with kids in the area). Clearly skilled at his job, it was a pleasure to spend our hours on the river with him. The kids agreed; they loved the ways in which he kept what could have been a sleepy river float an adventure. Matt made sure we found all the ‘white water’ we could, stopped in the deeper pools for swimming opportunities, and taught the kids a great game that involved balancing on the edge of the raft while he spun it in circles. (Oh, and he knew to hide the cookies at dinner until everyone had eaten their sandwiches and salad.)

zoar-outdoor-family-float

The family float trip covers over eight and a half miles of river, stopping for a dinner of sandwiches (which guests can fix for themselves from an array of cold cuts, veggies, and condiments), pasta salad and salsa and chips (made fresh daily), cookies, lemonade, and water. The entire experience was very peaceful; I don’t know whether it was the time of evening our trip departed or just luck, but we were the only raft on the water through miles of quiet twists and turns, lovely green river banks, and great views. It was the perfect length and rafting level for families with young kids in tow (minimum age is five), and yet was still entertaining for my 12 and nine year olds. If everyone in your party is over age six, the Zoar Gap tour, with a minimum age of seven, might be an even better fit. It covers a different section of the same river, and adds more white water elements.

There’s no need to bring anything with you; Zoar suggests locking valuables in your car, then holds your keys for you in a lock box to prevent losing them to the river. I brought my water-resistant camera with me (at my own risk), and in hindsight, would have dressed the kids in long-sleeved shirts or sweatshirts under their floatation devices (which they could have taken off if needed), because after swimming in the Deerfield, they did get a bit chilled. Other than that, we needed nothing but sunglasses, sunscreen, and swimming attire or shorts and t-shirts.

Calvin-zoar-outdoor

Directions: Zoar Outdoor is located at 7 Main Street, Charlemont, MA. From I-91, take the Greenfield exit (26), then exit onto MA-2 Mohawk Trail. Follow MA-2 approximately 17 miles to Zoar.

As I disclose whenever applicable, we experienced the Deerfield River as guests of Zoar Outdoor. While we appreciate their hospitality, this compensation came with no expectation of a positive review. We have a partnership with Hotels.com, which allows us to keep our activity reviews front and center.

Main Salmon River rafting trip with O.A.R.S.

The best—and nearly only—way to experience the 2.3 million acre Frank Church River of No Return Wilderness of Central Idaho is by whitewater raft down the Main Salmon River. The route along the Wild and Scenic section of the Salmon runs 80 miles and requires extensive whitewater experience and permits…or can be booked with an adventure outfitter like O.A.R.S.

oars-salmon-river

Why choose the Main Salmon with O.A.R.S.?

The O.A.R.S. Main Salmon River trip takes five nights, six days and delivers families through pristine high desert and forested wilderness. Multiple outfitters take this course, but we recommend O.A.R.S for many reasons, including stellar guest service, the comfort of good food and camps, and river expertise.

The Salmon River remains undammed for over 400 miles, and the Frank Church Wilderness is alive with prehistoric, native, and pioneering history, as well as wildlife. O.A.R.S. guides are knowledgeable about both, able to educate guests along the way with nature talks, history lessons, and wildlife spotting. If that’s not enough for you, this O.A.R.S. itinerary employs no fewer than five modes of transportation down the river: guests can ride in an oar boat, dory, paddleboat, inflatable kayak (called a ducky), or stand-up paddle board (SUP).

salmon-river

What to expect on the Main Salmon:

All five nights along the Main Salmon with O.A.R.S. are spent on sandy beach campsites along the river, with tents and sleeping bags and pads provided. Guests start the trip in McCall, Idaho, where a pre-trip meeting takes place the night before departure. This is the time to ask last-minute questions, get your dry bags to pack belongings in, and meet your trip leader. During our meeting, we met Trip Leader Diego, as well as the other guests on the trip. Diego gave us a weather report—our trip would be hot and dry—and final tips on packing—we’d need two water bottles each, plus lots of sun protection. Our trip included 11 guests total: my multigenerational family of two teens, myself, and my father, plus one more father and son, one mother with two sons, and one couple. In total, we had five kids ages 12-16 and six adults.

salmon-river

The next morning, our trip started at 7 am with an amazing chartered flight from McCall to Salmon, Idaho in 2-8 passenger planes. We watched out the windows as the rugged peaks and mountain meadows passed below us, knowing we were essentially being deposited into our wilderness area. From Salmon, a rather brutally long bus ride took us to the put-in point along the river, where we were set to depart at the start of the Wild and Scenic section at Corn Creek. We stopped along the way of this two-hour ride at a small store where we could purchase any extra drinks we’d like on the trip. O.A.R.S. provides enough soda, wine, and beer for guests to have approximately two drinks per evening; extra is allowed in moderation. We could also grab any extra items we’d forgotten at this point, such as batteries, sunscreen, sunglasses, or water bottles. All extra drink purchases become communal unless requested otherwise.

dory-rafting

Once we arrived at Corn Creek, we met the rest of our guides who’d be joining us for our week on the Salmon. We had a great crew, as I always have with O.A.R.S.: guides Amber, Morris, and Prester, as well as college-aged gear guides (rowing only gear, not guests) Rose and Dakota. All are essential to the trip and all interact with the guests. We got dialed in on rafting safety (Day 1 of any trip includes multiple talks on protocol and safety) and were on the river before lunch.

river-trip

We rafted only an hour or so before stopping to eat on a sandy bank, during which we learned about dining protocol—hand washing, water bottle filling, and trash clean up—and were introduced to the inflatable kayak ‘duckies’. These solo-passenger rafts are popular but require just a bit of skill. Anyone wanting to raft the river in duckies needed to take a ‘swim test’ before we left the lunch spot. This test involves paddling the ducky in an eddy, purposely flipping it over, and getting oneself back in in deep water. This sounds intimidating, but with tips from the guides, everyone in our group who took the test, from the teens to the grandfather, passed.

oars-rafting

We rafted another three hours or so, navigating through our first rapids, Killum, Gunbarrel, and Rainer, before landing at our first night’s camp. Here, we learned all about camping protocol, including how to create a ‘fire line’ to off-load the boats of gear (everyone helps) to how to set up our tents and where to find our sleep kits (which included sleeping bags, tarps, and pillows). We also became acquainted with the ‘Unit’ at this point, sometimes called the ‘Groover’. This portable toilet system is required by all rafting parties on the river as part of the Leave No Trace principles followed. It takes some getting used to if you don’t spend a lot of time in the outdoors, but embrace the Unit: after all, it’s the only option.

oars-camp

After setting up camp, we found ample time to play, swim, and get to know one another better through conversation over cold beers and sodas. Our guides surprised us with several beach toys brought out from the depths of the boats, including frisbee games and a fun washer game similar to horseshoes. A salmon dinner was followed by more community time around the ‘circle’ (of chairs), where adults conversed and kids brought out card games. Around 8 pm, the summer heat was broken by a spectacular thunderstorm and hail storm: we all dug out rain jackets and scurried to the sanctuary of our tents to wait it out. For most of us, this was the only night on the trip we didn’t sleep out under the stars and bright moon.

river-rafting-camp

The next morning, the coffee call came around 7 am, followed by breakfast of huckleberry pancakes, sausage, and fruit at 8 am. We packed up camp around 8:30, filled up our water bottles with filtered river water, and were back on the boats before 9 am. The next five days followed the same general routine: coffee call, breakfast, camp breakdown, rowing on the water interspersed with challenging rapids, hikes to historic points, or wildlife, lunch, more river time, arrival at camp, playtime both in the water and on the sand, appetizers and drinks, dinner, and community time. As guests, we set up our own tents and helped on and offload boats, but never cooked or planned any of the itinerary.

oars-food

Each day on the river brought something new: on Day 2, we floated past a hot springs (and would have stopped had the temperature not been nudging 100 degrees) and stopped to look at Native American petroglyphs, on Day 3, we toured a historic cabin and ranch once owned by river legend Jim Moore, on Day 4, we stopped at hermit Buckskin Bill’s homestead and store, and on Day 5, we hiked a short distance to an old-growth yew tree grove and the foundation of a Chinese mining claim.

oars-river-rafting

Each morning and at each lunch break, guests can decide which type of raft to ride in or paddle: I liked to alternate between the paddle raft, where guests help paddle, the dory, which sits higher on the water and cuts through rapids with precision and grace, and the duckies, which takes more concentration with bigger rewards. When we needed a break, we could sit back and relax on a gear boat, rowed by guide Morris, who regaled his passengers with stories and tales. The kids gravitated to Morris’ boat as well, but mostly clamored for time in the duckies and on the SUP (allowed in small rapids and riffles, after kids have proven themselves).

history-salmon-river

Evening entertainment took on varied forms as well: we played games of ultimate frisbee and card games, played in the water during kayak wars and SUP practice, and even made a ‘raft slide’ of an overturned paddle raft. During two magical evenings, we were treated to talks by the campfire circle on local history and conservation by geology teacher turned river guide Morris. Meals were excellent and varied from Day 1 to Day 6, and to a person, our six guides were hard working, fun-loving, and responsible.

oars-rafting

By Day 3, we’d hit a stride of river life that truly fell into pace with the current. Without screens or smart phones, we slowly felt the tethers of day-to-day demands fall away, to be replaced by a quiet rhythm of sunshine, river water, and fun companionship. By Day 6, we felt so acclimated to river life it felt odd to return to civilization: trucks on the road overlooking the river on the last day felt jarring after so many days without the sound of them and day trippers felt like intruders. While we were ready for a shower and to call loved ones with news of our trip, we never felt uncomfortable on the river: with some much time in the water, we didn’t feel as dirty or grimy as we might backpacking.

rapid-scouting-oars

Tips for a successful O.A.R.S. trip:

  1. Remember you’re in a communal environment. This means helping out with gear, respecting rules and people, being considerate (please don’t cut in line at lunch or take the best tent site every night), and acting to keep rafts and camp clean and safe. O.A.R.S. makes sure a hand-washing station (a rather ingenious bucket and hose contraption) is available before every meal and at every ‘bathroom’ location, and everyone is expected to use it to keep germs at a minimum in such an intimate environment. Parents, don’t just do all the above yourself; teach kids to follow rules and be considerate as well.
  2. Expect to follow Leave No Trace guidelines. This means all trash, even ‘micro-trash’ such as table scraps, must be disposed of in the designated containers, because everything packed in will be packed out. It also means you’ll be expected to follow Unit protocol, which does have some rules involved. For instance, liquid waste goes in a different place than solid waste, as does toilet paper and feminine products. Yes, this is gross to think about, but the sooner you leave your inhibitions behind, the better. The Unit is always set up in a discrete place at camp, and while it’s odd to go to the restroom in a place without walls or a door, it affords a beautiful view, and there’s a system to ensure some privacy. Wondering what the ‘Unit’ is, exactly? It’s a metal bucket with a toilet seat attached, which can be seated shut between camps. Does it smell? Not as badly as a pit toilet or port-a-potty. Is plumbing preferable? Sure, but it’s better than being the cause of waste left in camps that will be used by numerous rafters all summer.
  3. Follow the packing list. Our trip was a hot one, with days over 100 degrees, but I was still glad to have my rain gear when we encountered that thunderstorm. And you never know when the weather will change, so you can bet I had my fleece and base layers at the bottom of my bag, albeit untouched.
  4. Don’t expect showers, cell service, or cold water in your water bottle, though you can expect excellent, fresh food and cold drinks at the end of each day. It’s amazing what can be packed into the O.A.R.S. coolers: we had steak on our last night, and fresh nectarines our last morning.
  5. Bring two sun hats and two pairs of sunglasses each. Sunglasses get lost or broken easily, and sun hats are just to precious to be without. Sunscreen is crucial as well, of course.
  6. Don’t expect O.A.R.S. to control the weather or the river (though you can expect them to navigate it with expertise). The natural elements of any river trip must be respected.
  7. Expect rules. There’s an inherent danger in any whitewater rafting trip, and while many freedoms are afforded on the water and in camp, rules are in place for a reason. We found that when we proved to our guides that our teens would listen to and respect rules right from Day 1, more privileges were granted. We love rafting with O.A.R.S. because we feel safe, but not coddled. Our boys were able to push themselves on the water, rafting every rapid in duckies if they wished, and some on the SUP. They were able to explore around camp and even sleep solo on a beach around the corner from us. They loved the freedoms they’d earned.

oars-camp

A comparison of O.A.R.S. Salmon River to O.A.R.S. Rogue River:

Both river trips are excellent family trips, though the Salmon requires kids be age 12 and up in high water (spring and early summer). Both offer 5-6 day trips filled with incredible scenery, though the Salmon is largely high desert and canyon while the Rogue is more heavily forested with more dramatic canyon walls. We found the same level of guide service on both rivers.

On the Salmon, the trip begins with the scenic flight from McCall, a bonus treat, and includes rafting on dories in addition to rafts. Duckies and SUPs can be found on both rivers.

Ready to book? Get more generalized O.A.R.S. booking tips and read our Rogue River report.

As we disclose whenever applicable, we experienced the Salmon River as guests of O.A.R.S., for the purpose of review.

Iceland camper van road trip tips

Iceland has become a popular family vacation destination for many reasons: it is every bit as breathtakingly beautiful as it looks in photographs, there’s essentially no language barrier, it’s extremely family-friendly, and the outdoor recreation and sightseeing is almost endless.

What Iceland is not: cheap. Standard hotels can cost families as much as $400 per night on top of expensive rental car fees (especially if you need a 4×4 car for rough roads). Dining in Iceland is very expensive as well; fast food meals at a basic grill during the time of our 2017 trip were about $15 U.S. per person, and standard sit-down restaurant meals were closer to $45-50 per person. The solution: take an Iceland camper van road trip and combine your lodging and car rental cost and eliminate your restaurant dining out cost. Ready for Iceland camper van road trip tips? Let’s get started!

iceland camper van road trip tips

Start with your camper van rental:

The first stage of planning your Iceland road trip is booking your camper van rental. We used Kuku Campers, one of the largest camper van rental companies in Iceland. Kuku Campers offers just about every size and type of camper van, ranging from small vans that sleep 2-3 people to the larger style we rented, which sleeps five (both are Class C, which don’t require any additional training or know-how to drive). You can also opt between 2×2 or 4×4.

kuku camper

Kuku 2×2 category C camper

We picked this 2×2 van for five people (click on the link to see detailed interior photos) which cost approximately $1800 for nine days ($200 per night). This cost was significantly less than we’d spend on hotels and a rental car. Kuku Campers offers this van in standard (stick shift) or automatic. We opted for standard, as it was cheaper, and  I am comfortable driving a stick shift.

Note: Do you need a 4×4 vehicle? If you’re a regular reader of Pit Stops for Kids, you know we’re a pretty adventurous family. We rented a 2×2 van, and were able to access everything we wanted, and more. You need a 4×4 vehicle only if you plan to drive F roads (Iceland’s most rugged dirt roads), which is needed if you plan to backpack or hike deep in the interior.

The features and configuration of our camper van:

In the front were two bucket seats (the driver’s seat and the front passenger seat). Behind those seats was the kitchen area: a countertop/food prep surface with sink and faucet, storage area for a portable stove/cook top, electric refrigerator (which runs when the car is running), dishes and kitchen utensils and silverware, a large water storage container, and a pantry area for food. Behind the kitchen was the main compartment of the van, which had a padded bench seat in a U shape, surrounded by a roomy kitchen table. Above this was a sleeping bunk. At night, the table and bench seat easily folded down to become a second sleeping area. The bottom slept three, and the top slept two. During the day, passengers could sit on the bench seat with seatbelt while the van was on the road.

kuku-camper

Lots of space: to the front of this photo would be the kitchen area.

In addition to the running water, which ran from a hose from the water container to the kitchen sink, the van had two overhead lights and a nighttime heater (which could be run when the van was turned off). There is no bathroom in the van, but this isn’t a problem (we’ll get to that soon). We found sufficient storage in the van for our bags under the bench seats and at the very back of the van, in addition to smaller storage areas above the front seats and above the kitchen. Lastly, there were useful hooks to hold jackets and rain pants, as well as curtains to pull around the windows at night. These hung on elastic cords, which we used to hang additional items like wet towels and swimsuits.

But was the van hard to drive? 

At first, a little bit, yes. I don’t ever drive anything larger than a minivan at home, so for me, it took a day to get comfortable driving something taller and wider. Icelandic roads are narrower than US roads, so there is definitely a learning curve. I also needed time to get used to backing up the van (though it was far easier than trying to back up a van with a trailer). By Day 2, I was quite comfortable. Overall, driving the van was no big deal, even on dirt and gravel roads, though the van certainly got dirty!

iceland road trip

Stopping to make a snack and take photos on a gravel road. There are plenty of turn-outs to use!

The van took diesel fuel, which seemed to be easily available at every gas station, and it cost me about $160 to fill the tank. We drove for eight days, I filled up twice and topped off once, and I spent a total of $360 on gas. At all campgrounds and parking lots for trails, scenic overlooks, and historic sites, there was ample room to park the van. The only place I had trouble navigating parking was in downtown Reykjavik, and even there, I managed (but it was stressful).

Next plan your trip! Here’s what to expect:

I’m going to say something now that I never say on this site: don’t over-plan. If you allow your itinerary to stay flexible, you’ll be able to advantage of all the many moments of spontaneity possible in Iceland. There are natural wonders and historic sites every few kilometers at times; you can’t do it all, but you can decide what to do in the moment. We planned a general route which included the south, west, and east. We purposely didn’t travel the entire Ring Road because with only eight full days on the road, we wanted to spend more time on side roads than Route 1.

iceland camper van

Waterfall at the base of one of our campsites.

I absolutely loved having our Kuku Camper, because of the freedom it offered. Every day, we traveled WITH our lodging and dining, so we never had to worry about getting to an exact place to eat or sleep each night. In Iceland, especially in the rural areas (which is most areas), we found that restaurants and shops closed relatively early in the day, even in the peak of summer. We were hard pressed to find dining options open after 6 pm, so we loved the ability to picnic our meals anytime, anyplace. We got into a routine of making breakfast in our camper at the campground in the morning, making a picnic or packed lunch to enjoy out and about, and then stopping at one of Iceland’s many, many scenic overlooks to BBQ or cook our dinner on the road. We arrived at each campground at night well-fed and ready to make camp. While we were driving, if someone was hungry, they could simply make a sandwich on the road, and if we decided at the last minute to detour to see or do something, we never had to care about missing reservations.

iceland picnic

Iceland outdoor picnic!

The most unnatural thing to me, as a natural planner, was the fact that you do not need to make campground reservations. If you’ve tried to camp in popular campgrounds in the US in summer, you know this simply isn’t true at home. But in Iceland, they really do mean it when they say their campgrounds do not fill up. They really don’t. Not anywhere. Not ever.

uncruise-review

Pages: 1 2 3

Five family outdoor adventure vacations worth planning for

Embarking on a jungle trek in search of sloths. Skiing fresh powder accessible only by snow-cat. Climbing up a waterfall using only a rope tied to a tree. These kinds of adventures are not behind you now that you have kids. If anything, with the right planning and the right guides and tour operators, they’re perfect for families who want the chance to explore the outdoors beyond a nature walk or zip-line. 

Five family outdoor adventure vacations to take with your kids:

A jungle cruise you can’t find at Disney:

Have you heard of Uncruise? It’s a company doing exactly what the name implies: taking your preconceived idea of what a ‘cruise’ entails out of your mind, and replacing it with something better. We took Uncruise’s adventure itinerary through Panama and Costa Rica, where every day started with a briefing on the day’s excursions over a gourmet breakfast. Unlike on a large ship, you’re off the ship (in a new destination) at least twice per day, hiking the jungle, kayaking, paddle-boarding and swimming, and wildlife watching. Uncruise vacations are offered throughout the year, with nice discounts in the shoulder seasons (mainly non-holiday periods when kids are in school). Read more about Uncruise’ Panama and Costa Rica itinerary.

A bucket-list trip to the land of Machu Picchu:

Every day of a Vantage Adventures trip to Peru, you’re outside and doing things that feel like a challenge, whether that challenge is walking up seemingly endless stone steps to the top of a UNESCO-protected antiquity or gathering ingredients for a group dinner at a bustling Cusco outdoor market. My point: adventure doesn’t always have to mean ‘extreme’ adventure. ‘Soft’ adventure can bring families together just as easily, and young kids can participate. Get a glimpse of what’s in store in Peru.

machu-picchu

A whitewater camping trip:

When you raft an American river with OARS, my hands-down favorite family rafting operation, you get a camping trip and rafting trip in one. Even if you’ve never slept a night in a tent before embarking on a river, you’ll feel like an expert by the time you’re done four or five days later. Many families report that this is where their own traditions of camping began. If you’re a family accustomed and experienced in the outdoors, OARS will still bring on the challenges with whitewater, personal ‘ducky’ kayaks to command, and side hikes up to jumping rocks, to hot springs, and to waterfalls. Learn more about OARS trips.

oars

An RV vacation under the Midnight Sun:

Maybe you’ve been on an RV vacation road trip, but have you done it in Iceland? In summer, the sun literally never sets, which means adventure is a 24-hour endeavor (much to my kids’ delight). Once you get the hang of driving one of Iceland’s many camper rentals on their narrow roads, you’ll be off and running…to glaciers, hot springs, geothermal pools and hiking trails. Do as much or as little as you want, and plan your itinerary as you go. Read more tips on Iceland camper vacations.

iceland hidden hot springs

A week of Wild West adventure:

Maybe you’re not ready to tackle a glacier yet, or you don’t know if you can trek all the way to Central or South America. Maybe you just want to get your kids on horseback, learn to fly fish, or spend your days hiking and biking. A dude ranch vacation is like summer camp for grown-ups, because you’ll play right alongside your kids all day, and never have to worry about cooking, planning, or driving. Just wait for the dinner bell each evening (and maybe try your luck at rodeo or gymkhana games). Read our guide to planning a dude ranch vacation for next summer.

flathead lake lodge

Why you want to invest in travel insurance for any family adventure trip:

  • Adventure trips that involve specialized guides, exotic destinations or extreme conditions are expensive and can sometimes be delayed or derailed by weather or other aspects out of our control. We never pay for a bucket list-worthy trip without buying Allianz Travel insurance. The Allianz Premier Plan is one of their annual plan options and covers everyone in your household…perfect for families. It gives me the peace of mind I need to hit that ‘book’ button. Why Allianz Travel? Read why this is the travel insurance we trust here.
  • Your credit card or health insurance at home may not cover you in full, and your airline won’t reimburse you or offer you credit in the case of weather-related delays or cancellations.
  • You want to be covered in case YOU have to cancel, for whatever reason.
  • You definitely want to forego all of that extra coverage every car rental company wants you to tack onto your reservation.

General tips to ensure you won’t need to use that travel insurance:

  • Fly into your departure destination at least a full day before any adventure cruise. Remember, if you’re delayed for any reason, the ship will not wait for you.
  • Opt for public transportation when possible, and hire local drivers in difficult-to-navigate areas.
  • Pay attention to seasons and weather. Will it be hurricane season where you’re going? How about wildfire season (in the American West?). Always, always invest in travel insurance when traveling during high-risk seasons.
  • Always pack a well-stocked first aid kit, that includes any prescription or over-the-counter medications your family regularly needs. For our crew, this means stashing plenty of antihistamine tablets for those of us with severe seasonal allergies and minor food allergies.
  • Prepare for any weather discomfort with the right clothing. This doesn’t mean you have to go out and buy the best of everything, but it does require an investment. Think sun protection and layering: make sure everyone in the family has wool or synthetic base layer items to wear against the skin for any outdoor adventure trip, wool socks, and a down or down-alternative puffer jacket and rain jacket.


This post is written in partnership with Allianz Travel, my preferred travel insurance provider. All opinions are my own.

Winter backcountry skiing: a stay with Cascade Huts

As soon as I was made aware of Cascade Huts, a system of backcountry cabins in the Mt. Hood wilderness near Government Camp, Oregon, I knew we had to review it! Set miles away from civilization, each of Cascade Huts’ three rustic cabins are situated along backcountry ski and bike trails accessible in winter from any of three area sno parks. Overnight guests snowshoe or cross-country ski in, stay a night (or two or three!), and hike out on any of several available routes.

Cascade Huts outdoor adventure

We’re avid backpackers, but even so, the idea of packing in overnight supplies (even to a shelter) in winter with the kids was intimidating. From the moment I contacted owners James and Don, my worries were set aside. James emailed me many times, answering all my questions in a very professional and knowledgable manner. One of the nicest things about the Cascade Hut system is its flexibility: guests can opt to hike a short or long distance, choose difficult or easier (note I didn’t say easy) terrain, and even navigate their own routes if they’re skilled in GPS navigation.

cascade huts

Since we’re not expert navigators, I asked James to choose the best route for our single overnight to the White River Hut. Because I was trekking in with kids who are new to cross-country skiing, and I’d be using the provided maps and directions instead of a GPS unit, he suggested we travel the historic Barlow Road from the Barlow Pass Sno-Park, on Highway 35 (longer in distance, but easier to navigate). On the provided maps, I noted that this route was marked as ‘intermediate’, as opposed to the ‘expert’ route also available.

Even so, the Barlow Road was no joke: we navigated the six mile wet powder trail (with multiple small creek crossings and over 1000 feet of elevation change) in just over five hours, needing to stop often to make adjustments, carefully cross creeks, and pick each other up! Luckily, we had planned to be on the trail most of the day, so we’d gotten an early start and made sure to have a picnic lunch ready for the route. Note: even in winter…especially in winter…make sure you include enough water for all members of your group, and keep hydrated.)

cascade hut

We arrived at the White River Hut before sundown, and trust me, it was a welcome sight! The kids (with their endless energy) made snow forts outside while we prepped the cabin: detailed instructions await you upon arrival, and include turning on the propane to run the heater, stove, and gas lanterns. The hut is 256 square feet and sleeps up to eight people. Four bunks line two walls, a third wall features a kitchen counter, supplies, and a stove, and the fourth houses the front door and wall-mounted propane heater. Small windows provide adequate light and ventilation (be careful of CO2 poisoning while using propane!), and a table and chairs provide a nice space to eat and play games.

Cascade Huts

While staying in Cascade Huts, there’s no need to overpack! I admit, we did just that; not being certain what would be provided (better safe than sorry), we packed in more equipment and water than necessary. Though there is no running water (or electricity), the cabin-side creek was running freely in February, and we were able to both pump clean water and boil snow on the stove for drinking water. In the cabin are sleeping bags (just bring liners), lots of board games (we didn’t need to haul in our poker chips and cards!), all kitchen utensils, pots, pans, plates, and mugs (could have saved pack space there!). Also stocked was a good first aid kit, toilet paper, a snow shovel, and plenty of extra gas cylinders for the portable heater. There’s also an outhouse about 40 yards down the trail, but we found it very difficult to access in the winter, due to a nearby stream.

Note: Summer guests are provided with food and water as well, but in the winter, it would freeze!

Once we figured out the propane and various features of the cabin, we were quite comfortable (cozy, even!) all night. It’s important to bring plenty of layers of clothing for each person, as drying out wet gear is tough. We brought two sets of gloves, hats, and under layers for everyone, and were glad we did, when we were caught in a snow/rain storm on our hike back out.

Barlow Road Cascade Hut

If you go:

1. Make sure you feel comfortable in the backcountry. The Mt. Hood wilderness is very remote, and all guests should be comfortable following topographical maps and/or GPS units. We had several maps as well as a compass, and used all three. You won’t get cell phone service at the cabin, but it still doesn’t hurt to bring one along. My iPhone didn’t get a signal (though my compass app came in handy), but T-Mobile BlackBerry phones or other smart phones might. Cascasde Huts does a great job of preparing guests (and putting them at ease), and every guest signs a waiver, which isn’t only due to liability, but also ensure their location is known on the date they’ve reserved the cabin(s), an important safety step.

2. If cross-country skiing or snowshoeing is new to you, take a trial run. Since we’re expert downhill skiers, we underestimated the difficulty of cross-country skiing. Though I grew up with the sport, it was Nate (12) and Calvin’s (10) first time, and there was a slight learning curve. The terrain to the huts is steep in places, involves obstacles like logs, creeks, and rocks, and shouldn’t be taken lightly.

3. If you need to rent equipment, go to MountainTracks in the nearby town of Government Camp. You can reserve what you need ahead of time online, making for an easy pick-up!

4. If you’re going the distance (six miles or more), opt for skis instead of snowshoes. Maps of all routes will be sent to you from Cascade Huts, but I also recommend picking up a snowshoe and backcountry trail map at MountainTracks.

Check out the Pit Stops for Kids’ Kid Cam video for a better glimpse of our experience:

Date last visited: February 20, 2012

Distance from the interstate: The Barlow Pass Sno Park (trailhead) is on Hwy 35 (just shy of Hwy 26). The area is approximately 1 hour from Portland, OR.

Nightly Rate: In winter, a Cascade Hut cabin can be reserved for $150 per night (for up to eight people). Additional nights (up to three) can be reserved for a discounted price. In summer, mountain bike routes are available, and prices start at $300 per person for a 4-day, 3-night itinerary that includes meals.

Directions: Depending on your route and hut destination, trailheads are located at any of three area sno parks. Our adventure began at the Barlow Pass Sno Park, located one mile from Government Camp on Highway 35. Be sure to get a sno park permit!

Thanks to Cascade Huts for providing us with one night’s lodging at the White River Hut. This compensation came with no expectation of a positive review.

Things to do on Channel Islands with kids

Channel Islands National Park is located right off the coast of Ventura, CA, but feels a million miles away from the rest of Southern California. The park has a different vibe than most: the main visitor’s center is located not in the park, but in the Ventura Harbor, where visitors depart for the islands, and the islands themselves remain remote, isolated, and almost completely undeveloped.

channel islands

Don’t let the Channel Islands, and the logistics of exploring them, deter you: this national park is perfect for kids. Families simply need to know the best things to do on Channel Islands, how to get to Channel Islands National Park, and where to stay prior.

Channel Islands

Which island?

All the Channel Islands are accessible, but the most easily accessed (and with the most to do for families) is Santa Cruz Island, the largest of the five. Protected coves allow for great snorkeling here, and the camping is easiest (on other islands, backpacking may be necessary). Santa Cruz Island is also the most affordable to travel to, making it ideal for larger family groups.

Camping or day trip?

The next thing families need to decide is whether to make their Channel Islands adventure a day trip or an overnight. Camping at Channel Islands is reserved by ReserveAmerica, and the most popular camping experience for families is located at Scorpion’s Cove on Santa Cruz. This campground is walk-in (meaning backpacking is not necessary) and the lower campground is only .2 mile from the beach. Running water and pit toilets are available, and each site has a picnic table and food storage box.

channel islands camping

For families deciding not to camp, a day trip to Santa Cruz Island can be more than enough to experience the National Park. Santa Cruz (the most easily accessible island) is undeveloped; in addition to the campground, there are only a few ranger cabins (rangers are on-site), evidence of the island’s ranching history, and hiking trails. A dock exists at Scorpion’s Cove, where passengers disembark. For a day trip, we recommend taking an early boat (9 am) out to Scorpion’s Cove, and returning at 4 pm or 5 pm. This gives visitors enough time to experience the island’s snorkeling, kayaking, and hiking.

snorkeling on Channel Islands

How to get there:

Island Packers is the official transportation to the islands. They’re located in the Ventura Harbor adjacent to the Channel Islands visitor center (follow the brown National Park signs to the end of the drive along the pier) and reservations should be made in advance. The boat ride over takes approximately 1 hour and 15 minutes, and is certainly part of the fun. We spotted dolphins during our passage, and when the water is choppy, as it was on our visit, the ride is downright exhilarating. Kids can stand at the deck and feel the spray of the ocean, or interior seats are also available. The Island Packers crew and staff are all friendly, laid-back, and fun. The cost of an Island Packers passage varies by island and whether your passage is a day trip or camping trip. At the time of my visit, day trip passage was $56 round trip for adults and $39 round trip for children (up to age 12). Overnight passage was $75 for adults and $54 for children.

island packers

Snorkeling, kayaking, and hiking on the islands:

Snorkeling at Scorpion’s Cove, we swam with harbor seals, and spotted multiple fish species, sea urchins, sea stars, and kelp forests. Snorkeling gear can be rented by the day at Ventura Sports, located in the Ventura Harbor, but be advised: they don’t have adequate sizes for kids under age 10. While their staff was friendly, they rented us a wetsuit that was far too large for our seven-year-old, with no warning that it wouldn’t work for him. (Wet suits are usually necessary in all seasons on Channel Islands.) In addition to snorkeling, kayaks can be rented in the harbor and transported for the day or the duration of your camping trip by Island Packers, or guided kayak tours are available on the island (reserve ahead of time). When not on or in the water, numerous hiking trails (of about 2 miles in length at most) are available on Santa Cruz Island, and offer beautiful vistas of the island and sea.

Holiday inn express Ventura harbor

Where to stay in Ventura:

If you’re coming any distance to visit the islands, you’ll need to stay overnight in Ventura the evening prior. We recommend the Holiday Inn Express Ventura Harbor, which overlooks the Ventura Harbor and is less than a quarter mile from Island Packers. I call this Holiday Inn Express an ‘express plus’, because it’s directly tied to the Four Points Sheraton next door, and guests have access to their very nice outdoor heated pool and hot tub (hot tub for adults only). A pedestrian bridge connects the two hotels, and the Holiday Inn Express includes one of the best complimentary breakfasts we’ve ever experienced. Bottom line: the Holiday Inn Express Ventura is a great value for families, and you’ll be close enough to enjoy the Ventura Harbor prior to your Channel Islands trip.

Five stops along the Icefields Parkway in Jasper and Banff National Parks

If you’re visiting both Jasper and Banff national parks on your Canadian Rockies vacation (and you should be!), you will drive the Icefields Parkway connecting the two parks. This 3 hour stretch has been described as one of the most scenic highways in the world, and after our fall 2013 visit, I concur. The parkway takes approximately 3.5 hours to drive, but families will definitely want to stop along the way. Where to plan you pit stops:

Icefields parkway hiking

Sunwapta Falls:
About 30 km from Jasper, you’ll come to Sunwapta Falls. Signage clearly marks this point-of-interest, but you can also spot it by the resort and restaurant sitting roadside. Stop for a snack or trip to the restroom, but definitely drive beyond the resort to the falls, which can be viewed from above next to the parking lot or from a footbridge a few yards down. The falls are impressive (yes, even if you’ve been to Jasper’s Maligne Canyon), and even though this isn’t a hiking location, it’s a great place for photos and to let kids stretch their legs.

Icefield Centre:
Athabasca Glacier lies at the approximate halfway point of the Icefields Parkway, as visitors steadily climb up into the mountains from either direction. At the glacier you’ll find the Icefield Centre, a huge building run by Brewster’s Canada. On-site is a restaurant and cafe, plus hotel rooms and a large observation deck. On the ground level is Brewster’s Glacier Adventure.

brewsters glacier adventure

One look out onto the glacier from the deck, and your kids will see what Glacier Adventure is, and probably want to do it: visitors board bus-sized all-terrain vehicles and drive out onto the ice, where they can stand out on the glacier. Sounds cool, but is it worth the $49/adults and $25/kids ticket price? That depends on what you want out of it: if you want to be able to say you’ve walked on a glacier or simply love cool vehicles, the answer is yes. If you expect an adventurous experience or a hike, the answer is no.

glacier adventure

The vehicles, called Ice Explorers, take you along a short but steep road (the second steepest commercial road in North America, to be exact) leading onto the ice. Once there, they park in a snowplowed area the size of a small parking lot along with other Ice Explorers and let you out to walk on the snow. What we liked most about the experience: the interesting facts presented by our guide. Note: Expect to get your feet wet unless wearing waterproof boots, and bring gloves and a jacket.

Parker Ridge trailhead:
There are multiple trailheads along Icefields Parkway, all clearly marked (and most with parking areas and decent pit toilets). One of manageable length for a brief stop is Parker Ridge, which lies just beyond the Icefield Centre toward Banff. The 3 km round-trip hike offers views of the Saskatchewan Glacier and Mt. Castleguard on a clear day.

Peyto Lake and Bow Summit:
Peyto is a short road-side hike to the lake, with the option of hiking further toward Bow Summit for alpine wildflower viewing and meadows. This is the highest point on the Icefields Parkway. Picnic tables make this a great place to stop and picnic and photographers will be happy!

lake louise

Lake Louise:
Only 57 km from Banff, Lake Louise is a must-do stop, if not an overnight or all-day excursion. From the Lake Louise exit, the lakeshore is only a few kilometers away. Park in the large parking lot and walk to the lake to take in the views and snap some photos, gawk at beautiful Fairmont Chateau Lake Louise, and, if time permits, take a hike. The lake loop is an easy walk for kids of all ages, but if you have time, we recommend the 7 km round trip ascent to Lake Agnes (trail departs directly from Lake Louise). For your efforts, you’re rewarded with tea, coffee, or a snack at the picturesque Lake Agnes Tea House at the top.

See our video review of more things to do in the Canadian Rockies:

Tip: Remember that you’ll pass the national park ticket booth on either end of the Icefields Parkway. At the time of this writing, admission to the parks was almost $10 per day for adults (almost $5 for kids) or a family fee of under $20 per day. You only need to pay once, and display a receipt on the dashboard of your car.

As I disclose whenever applicable, we were hosted for some activities along the Icefields Parkway, for the purpose of review.

Best snowshoe tour in Bend: Wanderlust Tours

Another day, another excellent outdoor experience with Wanderlust ToursWhat makes Wanderlust the best snowshoe tour in Bend? My family and I first experienced Wanderlust during a kayak tour of the Cascade Lakes of Central Oregon, and loved our afternoon so much, we came back for a winter Cascade Mountain Snowshoe tour. Yes, Wanderlust gets our highest possible endorsement: a return visit.

snowshoe-tour-for-kids

What makes Wanderlust Tours great? Their access to areas off-limits to other tour operators, their expertise and professionalism, but more than anything, their guides. Wanderlust guides know their stuff—flora, fauna, and outdoor safety—but they don’t just spout it out. They teach it in a natural and enthusiastic way that gets even teens onboard. They meet their guests’ needs in the fullest extent possible, tailoring each tour to what people want to experience.

Before our Wanderlust snowshoe tour, my kids said they didn’t like snowshoeing. It’s an activity I enjoy, and drag them along for. The boys are adrenaline junkies who love downhill skiing and mountain biking: snowshoeing is too tame! However, the minute we met Wanderlust tour guide Danny, I knew their opinion was about to change. I was right: Danny met the challenge of creating snowshoe fans with enthusiasm. He understood and enjoyed kids—a crucial requirement in any guide—and treated them to an off-trail, deep powder snowshoe trek. Our tour included epic snowball fights, snow fort building, snowshoe jumping (and sort of landing) and races. Would this be everyone’s ideal snowshoe trip? Maybe not, but that’s the point: Wanderlust tailored the afternoon to us.

wanderlust-tours-bend

The nitty gritty:

We started at the Wanderlust Tours office in Bend, and drove approximately 25 minutes up Century Drive into the mountains. We stopped at Mt. Bachelor, where we donned snowshoes and took off into the woods. We weren’t restricted to trails, and while Danny guided our route, he was open to suggestions. Right away, he proved himself a good shot with a snowball, which intrigued all the kids. For the next two hours, we trekked, ran, jumped, and even dove through the snowy terrain, with short periods in which Danny reigned us in to point out various trees and moss, and to give us historical or geological lessons. We stopped mid-way for a hot chocolate break, and practiced building snow shelters just for fun. By the end of our tour, all our boys thanked me for booking the snowshoe tour, and admitted that now that they knew ‘how to make it so fun’, they’d snowshoe with me again. Win-win!

wanderlust-tours-bend

Snowshoe tours are offered by Wanderlust daily, and span half-days. This is the optional amount of time needed to gear up, get there, and return, with approximately two hours in the snow. Any longer, and we would have begun to feel the cold, and any less, and we wouldn’t have felt as though we’d gotten too far into the wilderness. Wanderlust also offers cave tours, moonlit snowshoe tours, and craft beer tours for adults. In summer, try a kayak tour!

wanderlust-tours

Tips: As with all outdoor guided experiences, families will want to arrive prepared. For a snowshoe tour, wear waterproof pants and jacket (ski attire works well) and snow boots. Knitted hats and gloves are a must. If you don’t own snow pants or boots, they are available for rent. Snowshoes will be provided. We found it helpful to bring a small day pack to store extra layers and water bottles. We also brought granola bars for the van ride back down the mountain.

Date last visited:

March 2014

Distance from the interstate:

Wanderlust Tours is located in Bend, off Highway 97.

Rates:

During the time of our tour, snowshoe half-day tours were $60 for adults and $55 for kids. Children must be 8 years old and up to participate. Check the Wanderlust Tours website for specific tour date info.

Directions:

The Wanderlust Tours office is located at 61535 S. Highway 97 in Bend.

As I disclose whenever applicable, we experienced Wanderlust Tours as guests, for the purpose of review. All opinions are our own.

Hiking Safety: How to keep kids safe in the outdoors

A ramble through the woods, a stroll across a mountain meadow, or a strenuous alpine hike with the reward of a breathtaking vista – it all sounds idyllic until something goes wrong. As a former search and rescue volunteer and EMT, hiking safety is very important to me. I’ve participated in too many wilderness searches that could have been avoided with a few precautions, a little know-how, and the right hiking gear.

nature-hike
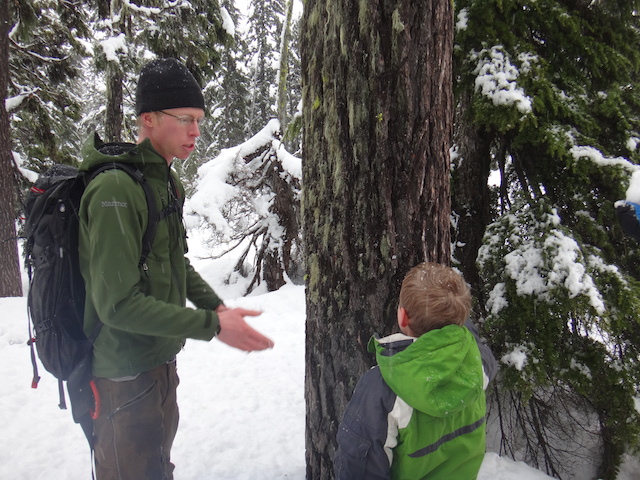
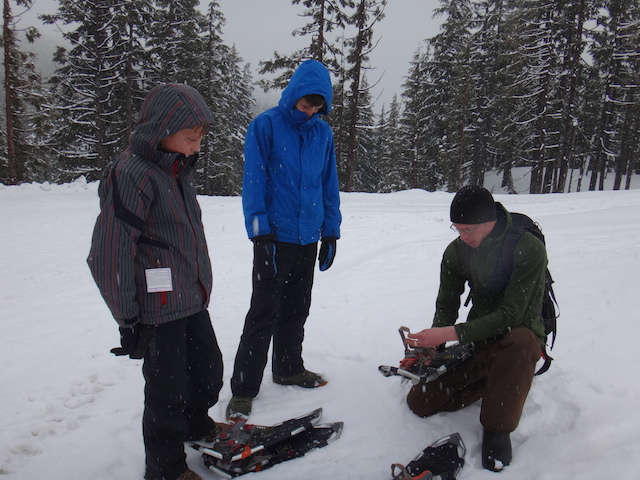
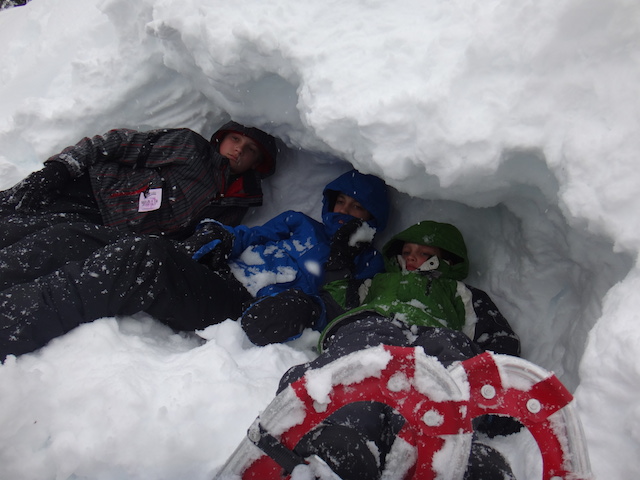
Trust me – if golf is “a good walk spoiled,” so is a search for a missing hiker! If you’re planning to explore hiking trails in your region this fall and winter, know what is needed to have a fantastic outdoor experience (and make it home in time for dinner).

Safety Precautions

Before setting out on any wilderness hike, download or buy a topographical map of the trail network so you’ll be aware of trail crossings and alternative routes. Consider hiking with a buddy, or, if you must hike alone, always tell a friend or loved one where you’ll be and when you plan to be back. Many trailheads offer “sign-in stations,” where hikers can register their presence.

Lucky hikers will enjoy spotting wildlife en route; with very few exceptions, these animals will respect your presence if you respect theirs. Carrying bear spray is a good precaution against the rare event of an aggressive animal, but a camera will come in handy far more often.

Gear to Take

Most hikers remember to pack weather-appropriate clothing and their best hiking boots, plus to carry a water bottle when setting out, but they are surprised to learn what else should be in their day pack. While compasses and GPS units are useful, they don’t make the list of absolute necessities. Neither do high-tech hiking poles or hydration systems, despite being nice to have. In fact, hikers carrying just the following five items will greatly increase their chances of survival in the wilderness should they spend more time in the elements than planned:

  • Bandana
  • Whistle
  • Glow Stick
  • Plastic Poncho
  • CD or Mirror

All five of the items above can be purchased for under $10 at any outdoor store or dollar store. Keep all five safety tools in your hiking day pack permanently to ensure they’re at the ready on every hike.

Read our full article on fix.com.


Source: Fix.com