Maine with kids: Baxter State Park backcountry itinerary for families

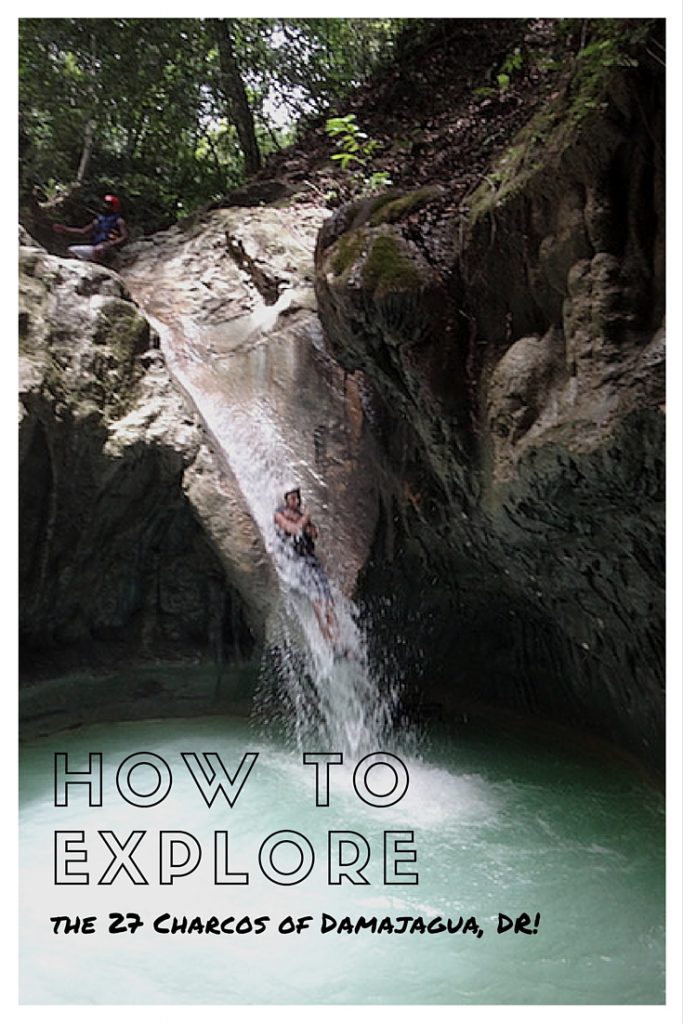
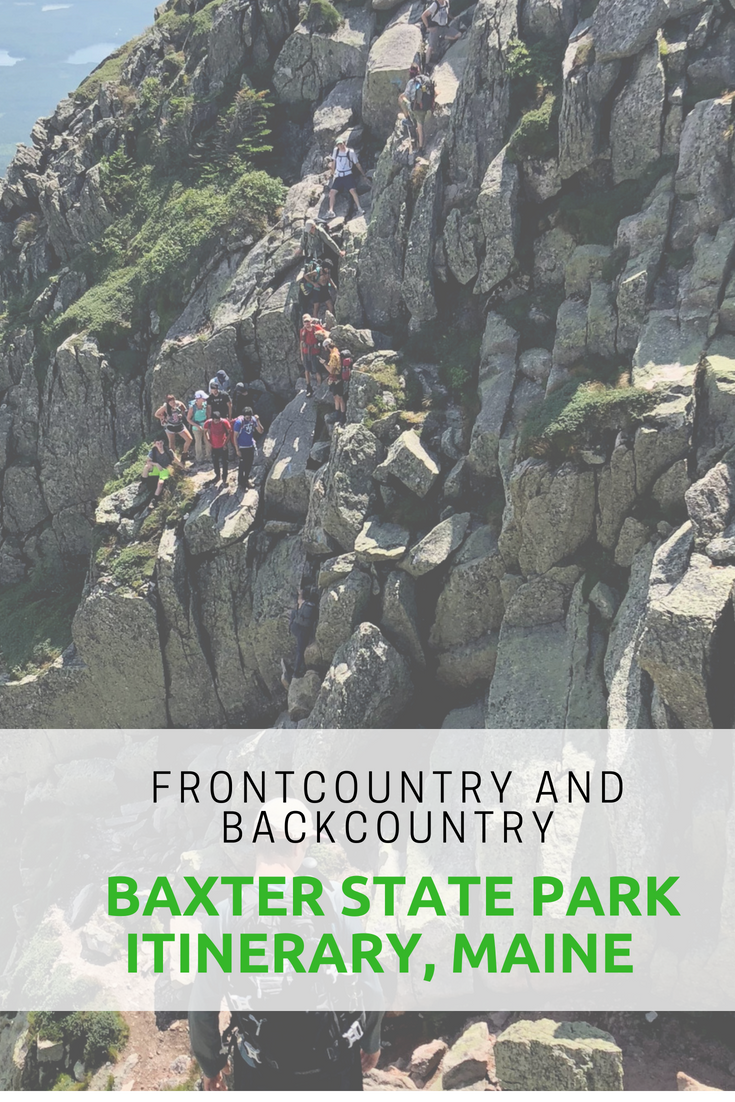
Baxter State Park is Maine’s largest expanse of untamed public wilderness. With almost 210,000 acres to explore, where do you start? Our Baxter State Park backcountry itinerary for families includes days in the frontcountry enjoying Baxter’s car camping options, several days in Baxter’s backcountry, then a rest day to play and explore before departure.

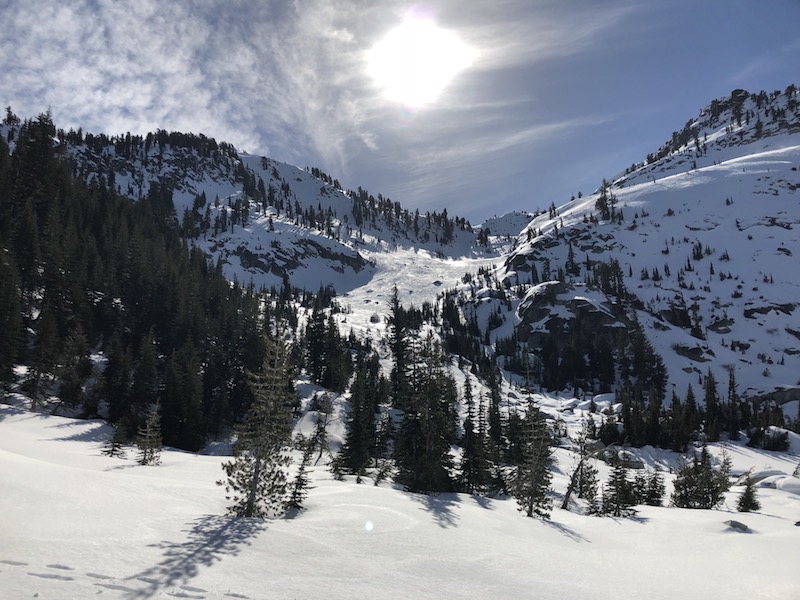
Baxter’s scope and size is on a national park scale, but unlike national parks, almost every lake, pond, waterfall and stream in the park is accessible only by trail. In very few places in Baxter can you drive up to see anything, and even then, you must drive miles upon miles on dirt roads. In other words, you earn you sightseeing! Baxter limits the number of visitors to the park daily, which means you won’t be rubbing elbows with crowds of tourists. It also means you have to be organized about your trip and get the required permits you need early. Here’s how!

The best way to experience Baxter State Park is by camping, though day permits are available as well (if you opt for that, stay in nearby Millinocket). Here’s our suggested itinerary, after doing most things right and a few things wrong during our five days in Baxter.

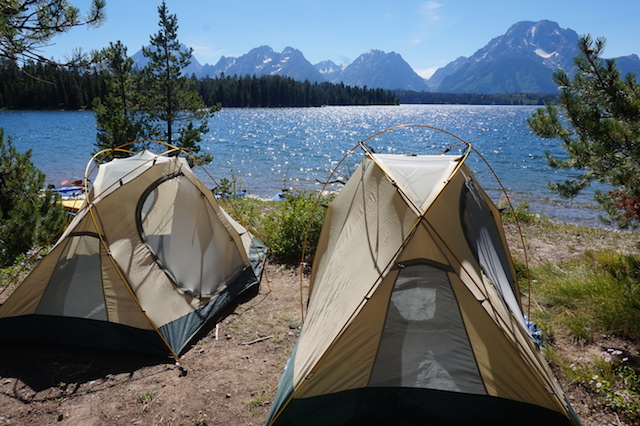
Day 1: Frontcountry camp at Roaring Brook Campground

In case you’re not sure, when I say ‘frontcountry camp’, I mean ‘car camp’, or camping via car access. Roaring Brook Campground is about eight miles into the park after you check in at the ranger station at the Togue Pond entrance, past Millinocket via dirt road. The campground, like all in Baxter, is remote and basic, with nicely-kept pit toilets, a place to purchase firewood (bring cash), and a staffed ranger station, but no other amenities, such as showers or potable water.

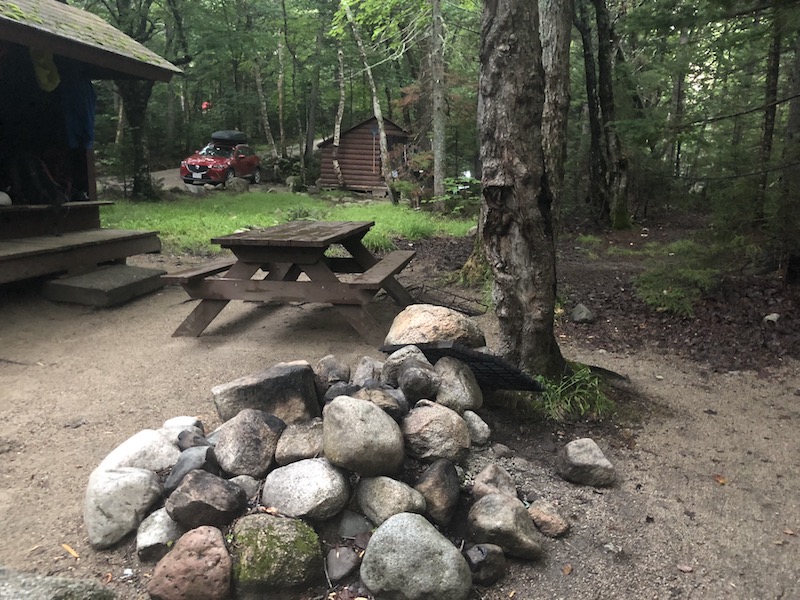
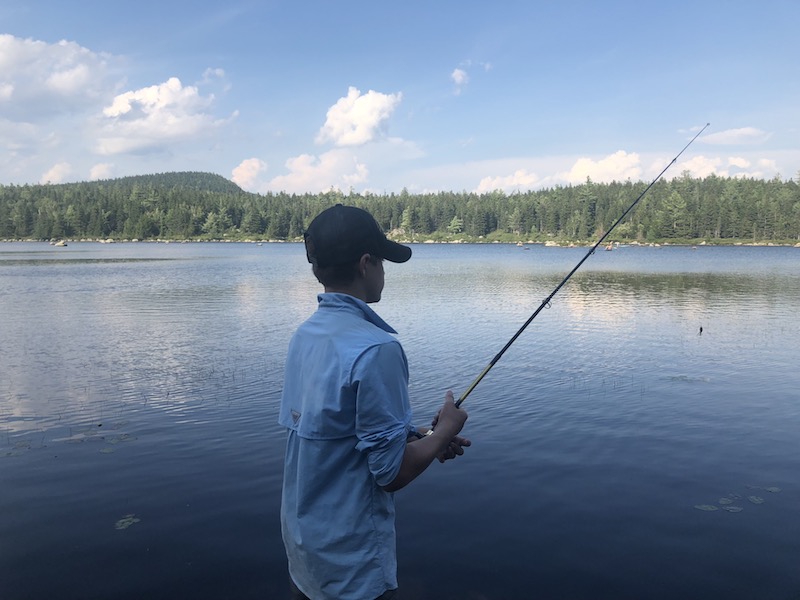
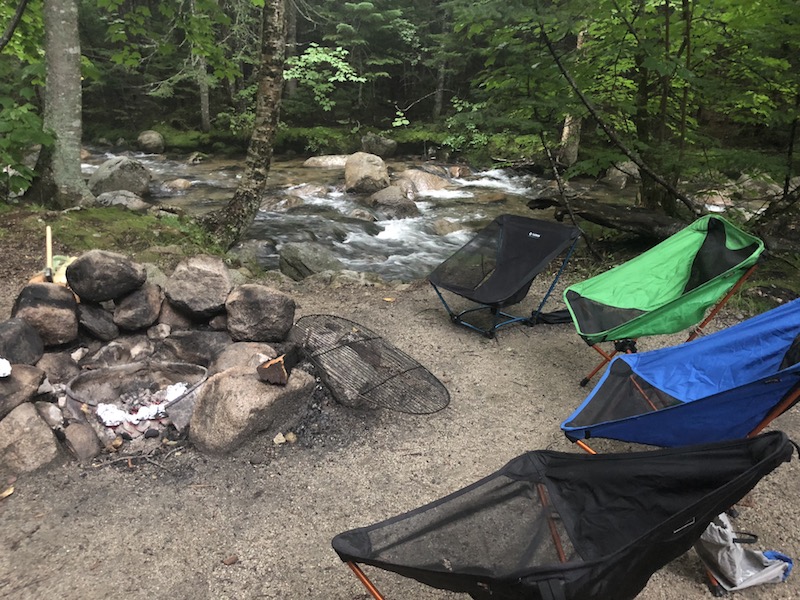
You can pick between tent sites and lean-to sites, and I recommend the latter, because they’re on the brook. You get a basic wooden shelter with a platform for each site, plus a picnic table and fire pit. We loved the shelters (lean-tos) throughout Baxter, as they provided just enough protection from the afternoon rainstorms and gave us a place to roll out our sleeping bags off the dirt. They’re not enclosed, however, and you won’t be safe from mosquitos there, so you can opt to set up a tent inside the shelter (but not outside of it). Roaring Brook is cold and clear, and we loved swimming in it.


Tip: You MUST enter Baxter State Park before 8:30 pm, so time your arrival accordingly. Also, the entirety of Baxter is ‘carry out’ for all your trash, so bring trash bags and plan on storing your trash in your car at night. You must also stow away all your food at night.

Day 2: Hike Mount Katahdin

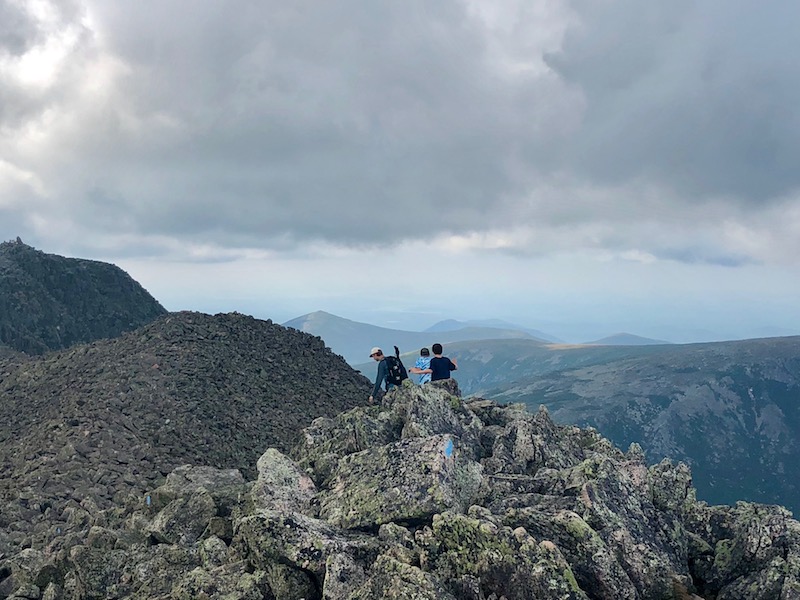
If summiting Mount Katahdin is on your to-do list in the park, do it early in your trip, while you’re still fresh. It’s 5.5 miles (pretty much straight up) from the Roaring Brook Campground, and it took our family (seasoned hikers) 12 hours to complete. The trail is extremely strenuous, and the final mile of the summit hike is along a ‘knife edge’ with some scary-looking drops. If you go: bring tons of water, and a means to filter more on the trail (you’ll need it). Also bring headlamps in case you’re caught hiking after dark. We took the following route: Roaring Brook to the Helon Taylor Trail, to the Knife Edge, to the Saddle Trail, to the Chimney Pond to Roaring Brook trail. It was 11 miles that took us forever to complete.

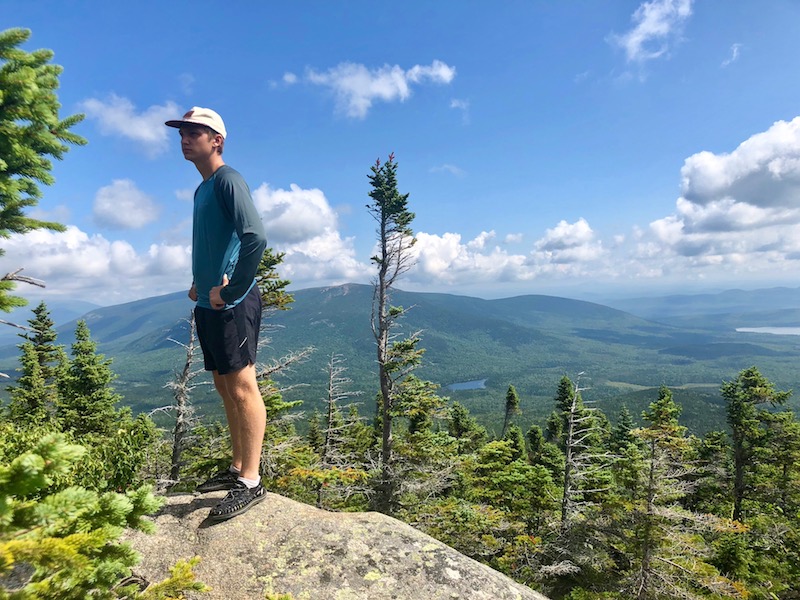
Note: Kids under age six are NOT ALLOWED above the treeline at Katahdin, though on our visit, we did not see a ranger monitoring this. I’m told there usually are. We took a seven-year-old, my niece, who rocked it, but she’s unusual in her awesomeness.

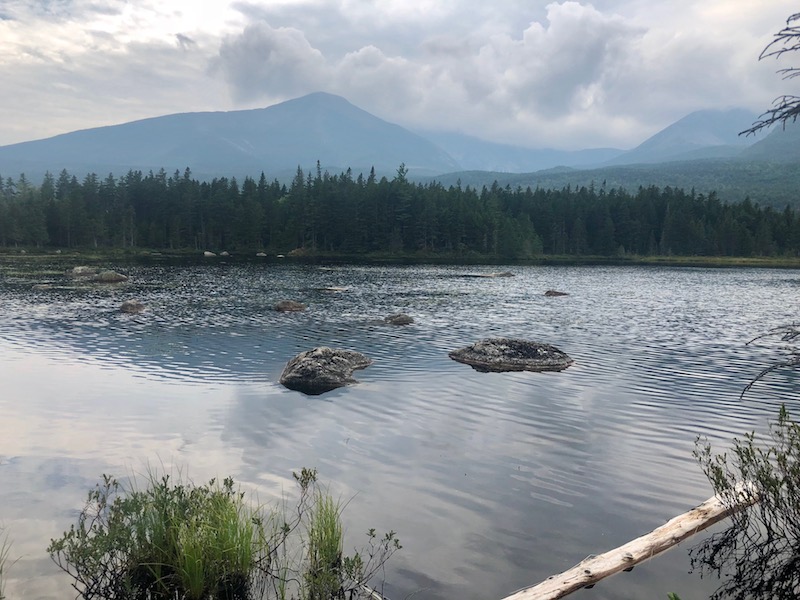
If you don’t want to tackel Katahdin, I recommend the Chimney Pond trail from Roaring Brook (3.3 fairly strenuous miles) to enjoy a picnic lunch at Chimney Pond, which has fantastic views of Katahdin right at the base of the mountain.

Day 3: Recover from Katahdin

This is where we made a mistake in our itinerary. We didn’t give ourselves a rest day after summiting Katahdin. Stay one more night in Roaring Brook and plan on sticking around camp. Enjoy the swimming and maybe go .2 mile to Sandy Pond, to try to spot the moose who like to hang out there at twilight. No nothing more!

Day 4: Head into the backcountry

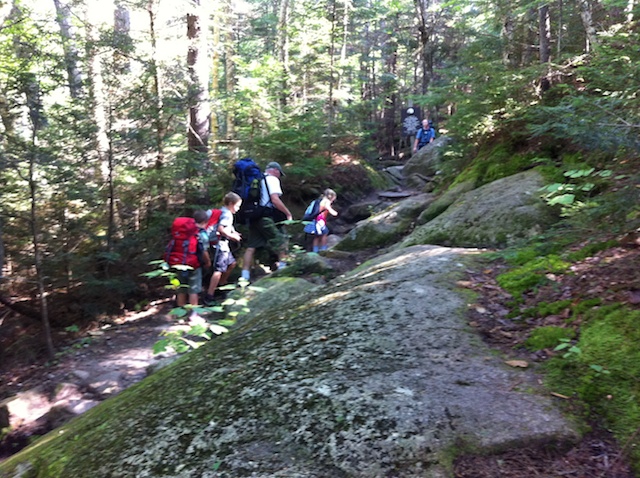
If you’re prepared for backpacking in Baxter, depart Roaring Brook today, hitting the Russell/Sandy Stream trail. The destination: either Russell Pond Campground with lean-tos (7.2 miles away), or, if you don’t want to go quite so far, reserve at Wassataquoik Stream, which offers several more lean-tos with great swimming (5 miles away). If you’re ambitious, you could aim for Wassataquoik Lake, 9 miles distant, which doesn’t have a campground but does have several more lean-tos. Russell Lake has a staffed ranger office and lean-tos, a bear line, and pit toilets, and we settled in at two of them, adding a tent site for our group of 10.

Note: Baxter State Park is VERY strict about group size and where you can camp. This is a good thing, as it eliminates big groups in campsites they don’t fit into. If you reserve a lean-to made for four, you can ONLY have four people sleep there. Ditto for six-person lean-tos and tent sites.

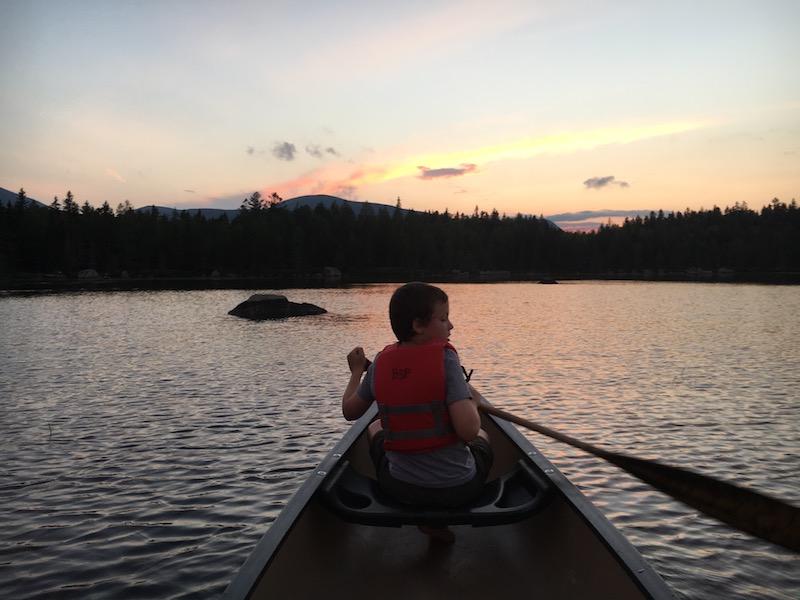
At Russell Pond, you can use the provided canoes at the dock for a small fee (I believe it was $1/hour, on the honor system) and you can swim, though we don’t recommend it (there are many leeches here). It is, however, a good place to spot moose. The Wassataquoik Stream lean-tos are better for swimming, and theWassataquoik Lake lean-tos offer a bigger lake (better for swimming) and more canoes.

Alternatively, you could backcountry camp at Chimney Pond instead of Russell Pond (see description above). It’s a shorter distance, though a rockier trail.

Day 5: Day hike from Russell Pond

We enjoyed hanging around camp and day hiking from Russell Pond to Wassataquoik Lake (2 miles) on this day. We played board games and cards in our lean-tos, picked blueberries in the wild patches nearby, and tried to spot moose.

Day 6: Hike back to the frontcountry

Return to Roaring Brook today, and spend the late afternoon cooling off in the brook. Pack up and depart Baxter the next morning, checking out additional parts of Baxter if time allows. We recommend Blueberry Ridges or Ledge Falls if so, and if not, hit a last swim spot just outside the park boundary at Togue Pond. You can grab a nice sandwich and some souvenirs from the North Woods Trading Post just outside the park toward Millinocket, and if you want a bigger meal, we recommend the friendly and affordable Sawmill Bar and Grill.

How to reserve your campsites:

Baxter State Park is popular, and as mentioned, entry is limited. To ensure you get your campsite, reserve far in advance. Baxter uses four month rolling reservations, so you’ll want to reserve exactly four months before you desired time. You can reserve online or by phone.

More tips:

  • If you’re day hiking Katahdin (staying in Millinocket), you’ll want to reserve your parking space (these are limited as well!). Here’s how. Parking reservations are only held for you until 7 am, then are given away on a first-come, first-served basis. Yes, you really need to start that early. If you’re camping in the park, you don’t need a parking reservation.
  • You’ll need to treat ALL your water in the park. Bring a good filter. We like the Sawyer Squeeze to bring on day hikes and the Platypus GravityWorks for in camp.
  • You cannot bring firewood into the park. You must purchase it in camp.
  • No pets are allowed, even in car camping campgrounds. Plan accordingly.
  • Check in at every ranger station as you hike. Bring a phone and treat it as an emergency device (you won’t get service in the park anyway).
  • Pack out all your trash…make it easier on yourself by reducing packaging on your food before you arrive. Store all food and trash in your car at night in the frontcountry, and on bear lines in the backcountry (use your sleeping bag stuff sacks to store food and hang it from the line provided).
  • Backcountry campgrounds DO include pit toilets with toilet paper. They were all in good condition during our visit.
  • Enjoy the Maine wilderness!


Family mountain biking tips and gear

Our family loves mountain biking. Many outdoor-focused resorts now offer mountain bike rentals and mountain bike single track, and we discovered the sport while traveling. Right away, our kids wanted to mountain bike at home, too. Here’s what we’ve learned about finding family mountain biking trails (at home and while on the road), how to best transport your bikes, and the gear it’s helpful to have with you.

canyons bike park

Where and how to mountain bike while on vacation:

Even if you can’t or don’t want to get into mountain biking at home (after all, there’s lots of gear to buy), all families can try mountain biking while traveling. Look for family resorts that focus on outdoor activities and nature, ski resorts in the summer, and state parks. Many resort towns offer bike rental shops, and ski resorts will often have rentals available slope side. Our favorite resorts for mountain biking offer gear for kids, a variety of single track for all abilities, and amenities for after biking, like pools or spa services.

The Lodge at Eagle Crest, Oregon: This Central Oregon family resort has everything you’d want, including a full bike rental shop with sizing for young kids to adults. There are easy paved bike loops for those who want a tame experience, plus miles of single track (dirt paths) accessible directly from the property for those who want a challenge. Plus, Eagle Crest has golf, pools, restaurants, and playgrounds. Read a full review.

Northstar California: We love to mountain bike at ski resorts! Northstar, located in North Tahoe, CA, has some of the best gravity-based mountain biking for families. What does ‘gravity-based’ mean? It means the trails all run downhill, with lifts to carry you (and your bike) back up. The trails are marked easy (green) to advanced (black), just like during the ski season. You’ll also find fun elements like bridges and berms to play with. We recommend taking a lesson at a ski resort like Northstar. Another favorite location: Park City Mountain Resort! Read a full review.

canyons bike park

State parks: State parks in many states offer easy access to mountain biking trails. The only downside: usually you’re on your own for bikes, so bring them with you or look for a local bike rental shop. To find state parks with the best single track, try state park pages by state, such as this one for Florida or this one for Utah.

How to get into mountain biking at home:

Once you’ve tried out the sport on vacation, I bet you’ll want to check out the mountain biking scene near your home as well. We’ve found that the best way to enjoy family mountain biking at home is to:

  • Get a bike rack for easy transport to trails
  • Get to know your local bike shop
  • Join a Facebook group or club

You can read below for detailed info on getting a bike rack to fit your car. But first, a word on the importance of a local bike shop: these establishments serve several purposes. The staff at a good bike shop can help you maintain your bike, whether it’s a fancy model or just a starter bike, and educate you on bike tire pumps, locks, and the best trails near your home. We could learn a lot about caring for our bikes ourselves, but instead, we just bring our bikes into our local shop for inexpensive tune-ups every so often. Our bike shop also posts information about local bike clubs and groups for fun rides, plus maps of area trails.

The best way to find local single track trails is to ask people in the know, whether that be your neighbor whose always on his bike to the bike shop pros. We have several mountain bike and hiking networks within a few miles of our house, and our teens will often load up the bikes and ride for a few hours in the evenings.

Gear you’ll need to mountain bike on your own:

park city mountain biking

If you want to mountain bike at a resort, likely the only thing you’ll need is a water bottle. Everything will be provided. But at home, here’s the very basics of what you’ll want:

Mountain bike: I’m a firm believer that mountain bikes don’t have to be top of the line…to start out with. Look for a bike with good shocks, mountain biking tires, and a fairly lightweight frame. You don’t need full suspension on your first bike, and kids’ bikes can have even fewer frills. This guide to buying your first mountain bike is helpful.  Our kids started out with Trek bikes with just a few gears, and grew into their bikes with more bells and whistles.

Helmet and pads: Helmets while mountain biking, are of course, essential. Do you need a motorcycle-style helmet with face guard? Probably not, at least until you start doing some serious vertical. However, it’s worth investing in a good pair of padded shorts. We have been happy with G-Form Pro-X compression shorts. These breathable, thin compression shorts fit well under athletic shorts or pants and give kids (and adults) just enough added padding to make those inevitable falls less painful. Best of all, G-Form’s shorts are versatile: invest in them once, and your kid or teen can wear them during biking, skiing, skating, and even sports like soccer. With three active boys, they’re now a staple in our closets.

g-form

We also recommend knee pads and shin guards, ever since our oldest bashed his shin hard enough to leave a scar when falling (the pedal hit his shin bone). At very least, plan to ride with long pants and a lightweight but long-sleeved shirt.

G-Form-review

Bike rack: If you’re biking as a family, you’ll need a bike rack for your car sooner rather than later. When we got ours, we started mountain biking at least twice as often, because suddenly, it wasn’t a hassle to get out there. The easiest and cheapest way to transport bikes on your car is with a trunk-mounted bike rack. Our favorite is the Yakima Fullback. It fits on most cars, and is easy to take on and off. The downside: you have to remove it to access other things in your truck or far-back of your car. If you have a hitch mount and can spend a few more bucks, opt for a hitch-mounted rack that swings away from your vehicle for ease of use. Our favorite is the SportRack Ridge Swing. Roof-top racks are also available, but most only hold one bike per rack.


Teach Proper Technique:

Kids who have previously only biked on pavement need to learn proper mountain biking technique before tackling single track. Teach kids what’s commonly known as “default position” or “attack position”: stand with pedals level, elbows bent, and weight centered over the bike. Remind kids to remain relaxed; no stiff muscles or death grips allowed.

No matter the terrain, whether it be steep, rocky, or technical, teach kids to keep their head up and their eyes focused on the trail ahead of them, not on the obstacles they’re currently trying to avoid. Looking at obstacles such as trees, trail edges, or boulders just about guarantees you’ll hit them. Encourage kids to practice often, even if just at home. Grass, dirt, and even curbs, gutters, and stairs can be great places to hone mountain biking skills between trips to the trail.

Safety first

Mountain biking can seem intimidating to some kids. Others will be fearless. Both reactions can end in injury. Hesitant kids may try to navigate tricky terrain too slowly, losing balance in the process, and overconfident kids can tackle terrain at too high a speed, resulting in a spill. Help fearful kids by encouraging plenty of practice at home, on flat ground. Repetition is key to gaining confidence. Teach overconfident kids by example, displaying caution where relevant. Never push kids onto terrain they don’t feel ready for, or into a group of riders above their ability level.

Pin for later!


Source: Fix.com Blog

Do you mountain bike as a family? What are your tips?

Hiking to AMC huts: how to plan your Appalachian Mountain Club adventure

After our East Coast Pit Stops for Kids family tried out Appalachian Mountain Club (AMC)’s Highland Center Lodge during a winter break, they knew they had to come back for a summer stay, hiking to AMC huts! What are AMC huts? They’re a network of hike-in lodges operated by Appalachian Mountain Club. Hikers can depart for huts from trailheads, or from the Highland Center Lodge. We sent our nine-year-old, Tobias, along for the ride, and they spent three days in the White Mountains of New Hampshire experiencing what AMC has to offer with three generations: grandparents, parents, and kids ages 4-9.

Highland Center Lodge in summer:

While the Highland Center offers winter outdoor activities in the snowy months, it has even more activity in summer. Upon arrival, all the kids gravitated toward their large outdoor play structure, with bridges, ropes, and other challenges. Day hikes from Highland Center are manageable for young kids, and daily nature hikes are offered at 9 am and 1 pm. Our crew really enjoyed these 1.5 hour hikes with guides, learning fun facts about flora and fauna along the way. Tip: kids can participate in the Junior Naturalist program while at the Highland Center and in the huts. Like the Junior Ranger program, the naturalist program involves filling out a workbook and participating in free activities.

Meals: Meals at the lodge are communal, cafeteria-style affairs. Breakfast and dinner are included in your stay. Meals aren’t particularly kid-friendly, but note this unadvertised fact: parents can ask for a PB&J sandwich at any time.

Lodging: Families reserve bunk rooms at the Highland Center. Our group had a six-person bunk room with three bunk beds. They had linens, pads, towels and pillows. There were plugs/lighting, and lots of hooks to put stuff on. Bunk rooms share a bathroom with showers with shampoo and soap dispensers. Some bunk rooms do have their own bathrooms. The lodging was very comfortable, and as a bonus, included free wifi.

highland-center-lodge

AMC huts:

Part of the appeal of staying at the Highland Center is the chance to venture further…to an AMC hut. AMC runs a whole network of these huts (and when we say ‘hut’, don’t think small: some sleep as many as 60 or more!). Some can be accessed via trail directly from the Highland Center, and others require a short shuttle ride to the trailhead. Our take: the huts are what make the AMC experience in the White Mountains truly special. While our group had the youngest children we encountered, they were easily up for the challenge: don’t be afraid to try!

mizpah-spring-hut

Which hut is right for you? The right hut (or huts) to visit will depend on how many miles you want to hike, and what you want to do when you get there. Our group decided to hike to the Mizpah Spring hut, because the trail could be accessed from the lodge, and was a distance we knew would be manageable. (Huts are approximately 1.5-6 miles from trailheads.) While our crew liked the hut, we’ll try Zealand Falls or Lonesome Lake next time, as these destinations may have more for the kids to do once we get there. At Mizpah Spring, fewer outdoor ‘entertainment’ options existed (such as swimming).

The heart of the hut experience lies within the staff. The Mizpah Spring hut ‘Croo’, as they’re called, were fantastic. This enthusiastic bunch of young people clean and cook, play with kids, and generally add to the lively, fun atmosphere of the hut vibe. Apart from a few families, most of the hut guests were young adults hiking in small groups, and the atmosphere was low-key, friendly, and very outdoor oriented. Tales were told in the evening of best hikes, great views, and exciting adventure. Tip: if you have a kid working on a Junior Naturalist workbook, have him or her finish it at a hut. The Mizpah Spring Croo did a whole ceremony for our kids, including a silly skit and a ‘swearing in’. They loved it!

mizpah-hut-trail

Meals: Like at the lodge, meals are communal, but in our opinion, food is even better! The Croo is focused on eco-friendly dining; there are no paper products and all trash is carried out.

Lodging: Each hut is different, but at Mizpah (with 60 occupancy) there are eight rooms with triple bunk beds. Expect to share rooms with others! Our group shared a room with three strangers (who were probably sorry to see a bunch of kids, though they behaved well!). There are pads, blankets and pillows, but no electricity in the rooms. Expect compost toilets, and sinks with running cold water in the hall.

Keep in mind: the AMC hut experience differs from a traditional backpacking or camping experience, in that you will be with other people much of the time. The shared experience is part of the fun, but come prepared: you’ll be sharing the space with many others.

nature-hike

How to book: Book (early!) through the AMC website. We recommend calling ahead of time to ask questions about routes and sleeping arrangements. The staff is very friendly and helpful.

How to get there: The Highland Center Lodge is about 20 miles off I-93 at exit 35 between Lincoln and Franconia, NH.

What you’ll need:

  • Backpacks (day packs will work) with clothing
  • Sleeping bag or sleep sack
  • Sturdy hiking boots
  • Toiletries and insect repellent
  • sun hats and beanies for chilly mornings

What we wished we’d known beforehand:

  • The trail to the Mizpah Spring hut is steep! Our four-year-old was basically bouldering the whole time!
  • Bring a trash bag
  • Bring snacks and water bottles

Nearby attractions:

While in the area, stop by any of the following in the White Mountains!

  • Diana’s Bath: very fun swimming holes and waterfalls for kids!
  • Franconia Notch: Flume Gorge and Echo Lake await!
  • Pinkham Notch: try the Mt. Washington Railway!
  • North Conway: the Cranmore Adventure and Ariel Park is perfect for older kids!

Two ways to ski backcountry terrain on your next ski trip

If you’re one of those skiers or snowboarders who looks up at the most distant peak from the chairlift and says, “How do I get up there?” or notes tracks in fresh powder and wishes you’d put them there, you may want to elevate your next ski trip to include a day of backcountry terrain. Or, if you have teens (16 or older) who are yearning to learn what AT or touring skiing is all about, it might be time to try a backcountry experience as a family.

Backcountry skiing off-piste and outside ski resort boundaries can expand your ski horizons exponentially, but it’s crucial to go with a guide until you’ve become trained in reading snow conditions and have the right gear (which often includes an avalanche beacon, shovel, probe, and AT or Alpine Touring skis and boots with skins and a backpack to put it all in). I explored two gorgeous backcountry regions with two fantastic guide services, and highly recommend them both.

Two ways to ski backcountry terrain on your next ski trip

Alpenglow Expeditions, North Lake Tahoe:

Alpenglow Expeditions operates out of Squaw Valley Alpine Meadows in California, and offers both backcountry tours and a variety of snow safety courses. I joined them for a full day in the Squaw Valley backcountry, where we did two laps of the National Geographic Bowl.

I arrived at their office in the Village at Squaw Valley at 8:30 am, ready to ski…minus the gear. Alpenglow can outfit you, which is nice if you don’t already own AT gear. It allows you to try a full backcountry experience before committing to the equipment. The guides at Alpenglow set me up with a ski pack with all the necessities, plus AT skis and boots. I brought my own helmet, goggles, lunch, water, and ski apparel.

The nice thing about Alpenglow’s location is that you can ride the Squaw lifts to where you need to start, saving time and effort. We headed out by 9 am on the Squaw lifts and reached the top of Granite Chief lift by 9:30 am. From here, we boot packed to the top of Granite Chief Peak (approximately a 20 minute, fairly strenuous hike) with our skis strapped on our backs. At the ridge, the snow was fabulous (despite fairly challenging conditions on the lift-served areas). We transitioned into our skis (the guides will help you do this if you haven’t skied AT before). We skied down the bowl, and at the bottom, transitioned again to skin up the trail that led to a side ridge, where we could ski back down to the Granite Chief lift. The skinning uphill took longer…probably an hour or so, and if you haven’t used skins on your skis before, there is a learning curve here. Your heel is freed and the skins on your skis give you traction, so the climb feels similar to cross-country skiing (but a bit more difficult).

When we reached the ridge, we skied down to the chair and did it again! This time, we boot packed a bit farther to explore a different descent, and at the bottom, we enjoyed our packed lunch in the sunshine. We achieved two laps by 1:30 pm, and were back at the village by 2:30 pm. We probably had time for one more lap, but my legs didn’t have the power!

The day proved to be an excellent introduction to Squaw’s backcountry, and since my teenage boys are interested in exploring terrain outside ski area boundaries, I’d definitely sign them up next time. All tours are individual (with either just yourself or just your group) so you can customize as needed. All guides are highly trained in avalanche certification and first aid, and carry radios. I was given an avi beacon and shown how to use it.

Ski Utah Interconnect, Cottonwood Canyons

Headed to Utah instead of Tahoe? I also tried out Ski Utah’s Interconnect tour, which allows you to check out backcountry terrain on your downhill (Alpine) skis. You can read about the Ski Utah Interconnect here, and watch a helpful video starring Deb Lovci, lead guide, but even after doing your research, the Interconnect is hard to explain. It really needs to be experienced. It’s part backcountry adventure, part (permitted) rope ducking, part on-piste hidden tracks, and part off-piste (as in way, way off). No matter what way you look at it, you’re in for seven hours of breathtaking views of the Wasatch Front Range and Heber Valley. Along the way, you get a ski resort sampler platter, with 1-3 runs in each of Deer Valley, Park City, Snowbird, Alta, Brighton and Solitude.

You start your day at Deer Valley Ski Resort, where you meet up in a base lodge and are briefed by your guides. As noted, you can use your own downhill gear, but you’re given a beacon to use for the day. In contrast with my Alpenglow trip, I didn’t need a shovel or probe of my own, so I could use my own small backpack, and I didn’t need to carry a lunch, as it’s provided on the trip.

We started out by skiing a few Deer Valley groomers to get warmed up, then ducked the rope (with permission) and traversed through the backcountry to Park City resort, where we rode another chair up before skiing off-piste through pristine powder toward our next resort on our itinerary. We boot packed a few short times (holding our skis) before making it to Solitude for a delicious lunch at their Roundhouse mid-mountain lodge, which serves up Himalayan mountain cuisine (included). We rode the lifts here to access a backside bowl to Brighton, then rode up again to take the most beautiful traverse, the Highway to Heaven trail toward Alta and Snowbird.


This part of the journey definitely proved most strenuous, but we were rewarded with more gorgeous backcountry on the descent. We skied through Alta and reached Snowbird by 3:30 pm. Skiing six resorts in one day definitely made for a long ski tour, but it didn’t feel that long, thanks to some lift access along the way.

What to know before you book:

For both of these tours, it’s important to be a strong skier, able to ski ungroomed runs with confidence (intermediate or advanced). Perhaps even more importantly, you do need to be fit. The uphill boot packing, skinning, and/or sidestepping will work up a sweat and leave you legs like jell-o! For the Interconnect, you need to be a skier, not a snowboarder, due to restrictions on snowboarding in several of the resorts.

If you’re used to getting plenty of exercise and are a decent (don’t need to be great) skier, don’t hesitate to try one of these tours! It will open your eyes to new skiing possibilities, and greatly enhance your ski trip. Take a day to enjoy the backcountry, then return on-piste with more confidence.

Call the office of either tour to ask any specific questions; they’re eager to help walk you through the process and explain what gear you’ll need and what lift tickets might be required. Let them know of any limitations of your group and be honest with them about capabilities, and they can answer any doubts you may have.

Want a taste of non-lift-served terrain by exploring some side country (within ski area boundaries)? You can expand your limits on downhill skis by signing up for a Hidden Tracks guided day. I checked this out at Solitude Mountain Resort and had a blast with my private guide, who could show me all the hidden stashes and boot-pack trails to (mostly) uncharted terrain. He showed me Solitude’s many gated areas, and we hiked to several pitches of fresh powder. The rest of the time, we traversed and side-slipped to new-to-me slopes within boundary. At Solitude, you can opt for a full day or half day tour; I went half-day, which gave me a nice balance of challenging terrain and some nice groomers after my legs got tired.

Central Oregon activities: kayaking the Cascade Lakes with Wanderlust Tours

If you’re enjoying a Central Oregon vacation and wondering what to do with kids in Bend or the surrounding areas, Wanderlust Tours offers outdoor excursions that will introduce you to Oregon’s Cascade Lakes and other wilderness areas while everyone has fun. Located in Bend, Wanderlust offers a full range of outdoor excursions, including cave tours, kayaking Cascade Lakes, canoeing, volcano sightseeing, and brew bus excursions for adults. In winter, they also offer snowshoe trips.

Wanderlust tours Bend

We booked a kayaking tour of the Cascade Lakes during an autumn weekend stay at House of Metolius. Because our resort was located past Sisters, Oregon, we drove into Bend and met our Wanderlust guides in town. (If you’re staying at a Mt. Bachelor-area resort, they’ll pick you up at your door.) Our guides Courtney and Chris were friendly and eager to show us all the wilderness this area has to offer.

kayaking with Wanderlust Tours

After a short van ride up Century Drive and past Mt. Bachelor ski resort to the Cascade Lakes, we unloaded at Hosner Lake. (Wanderlust Tours is the only operator permitted in this region.) It was chilly and raining lightly, but we had come prepared for weather (Wanderlust Tours depart rain or shine!) and the enthusiasm of Courtney and Chris kept us optimistic. We were right not to fret the weather: the serene lake with its mist of cloud and rain was spectacular, and we had the water nearly to ourselves. It was quiet and peaceful, and our kayaks glided nearly effortlessly over the still lake. Courtney was a book of knowledge on local flora and fauna: we loved learning about the different uses of moss and lichen, and the differences between the trees surrounding us.

Wanderlust tours bend

She was great with the kids too. Toby, age 7, kayaked tandem with her, and even though he has a habit of talking guides ears off, she didn’t mind (or at least didn’t let on that she minded!). She sang songs with him, pointed out wildlife, and generally got everyone in our group enthused about what we were seeing and hearing out of the water. Our 11 and 13-year-olds were happy too, because they were allowed to kayak tandem together. We had only eight kayakers in our group in addition to the two guides, allowing everyone lots of attention and keeping us all safe.

We kayaked for over an hour (or until our hands were numb!) and Courtney assured us that Wanderlust Tours continues to operate their kayak tours as late into the season as possible, as long as there’s demand. While I’m sure a summer tour would have been enjoyable, I’d recommend an autumn excursion: we saw aspects of lake life that would have eluded us in a busier time of year.

We have been on many kayaking trips across the country, and my kids rated Wanderlust Tours as tops. Why? The fun they had with Courtney, and the uniqueness of seeing the lake in October. Courtney did an excellent job of showing us just how much life was out in the Cascade Lakes at this time of year, and her love of the outdoors was obvious.

If you’re coming from the Sisters area, you’ll want to allow for a full half-day for this tour, including driving time. If in the Bend area, it will take about four hours, from 9 am to 1 pm. Food is not included in the kayak tour, so bring a few snacks to store in the van…along with extra dry clothing or extra jackets. Note: kids generally need to be eight years old for this tour.

kayaking Central Oregon

Tour rates: The kayak tour at Cascade Lakes is $55 per person, and includes all transportation, gear, and instruction.

Directions: Call Wanderlust Tours to schedule your tour, and they’ll pick you up or send you a pick-up location. They’re always available at 1-800-962-2862.

As I disclose whenever applicable, we experienced kayaking in the Cascade Lakes as guests of Wanderlust Tours. This compensation came with no expectation of a positive review.

What to expect on an O.A.R.S. river rafting trip

Earlier this month, we enjoyed our fourth multi-night rafting trip with O.A.R.S. If you do something four times, it’s because you love it, and there are very few vacations we’ve loved as much as O.A.R.S. trips. This unique family vacation combines some of our favorite things: outdoor exploration, adventure, isolation and off-the-grid family time, and conservation. And it packages all these elements into a vacation where my husband and I don’t have to worry about directions, dining, or any other major decisions.

oars river rafting

If you’ve read our previous reports from O.A.R.S. trips, which include our two times on the Rogue River, our trip on the Salmon, and our trip in the Tetons, and you still haven’t booked a river rafting trip with your family, maybe it’s because you’re not quite sure what to expect, are not quite convinced such an outdoor trip will be in your family’s comfort zone, or maybe just fear the unknown. I understand. I’m here to help, and I’m going to get really nitty-gritty with you, because knowledge is power, right?

What to expect on an O.A.R.S. river rafting trip:

What to expect from your guides: The night before your trip begins, you’ll meet your trip leader and fellow rafting companions at a nearby hotel or resort. I’ll go into more detail about those fellow rafting companions in a bit, but first: the trip leader. This is an individual, male or female, who has the most authority during your trip. Trip leaders rotate throughout the season, so keep in mind that some of your additional guides on your trip may also have trip leadership experience and be every bit as competent. In my experience, O.A.R.S. trip leaders are ruggedly outdoorsy types between age 30-45, who have often made the outdoor recreation industry their career choice. Your trip leader will go over logistics for the launch the next day, issue your dry bags (more on that soon, too), and tell you any updates on weather, packing, or water conditions.

oars river rafting trip

You’ll meet your additional guides the following day, at the put-in location. Sometimes, the put-in is nearby, just a short van ride away, and sometimes, as is the case on the Salmon River in Idaho, it’s a charter plane flight away. On our trips, which ranged from as few as 10 guests total to 18 guests, we always had 3-4 additional guides. These guides are generally younger (with the exception of any guides who are also trip leaders). Some are college students, but most are in their 20s. We’ve had some great guides and some just ok guides, but never a bad guide.

What to expect from your fellow guests: Well, you can expect just about anything and everything, which is one of the ‘unknown variables’ of commercial river rafting. In a small group, in a fairly intimate setting of camping together, it is frankly a big bummer to get saddled with people you don’t get along with or don’t like for whatever reason. It’s a risk, no way around that. However, while we have been on O.A.R.S. trips with guests who occasionally annoy us, we have never experienced a downright ‘bad’ guest. I believe this is because in general, the individuals and families who book multi-night river rafting trips have something essential in common: we all value the outdoors and the opportunity to explore the scenic river.

rapid-scouting-oars

If you do encounter a guest who is, shall we say, difficult, there are a few things you can do to help the situation. First, trust the guides. If a guest is difficult, they are aware of it, and are the best authority to curb any unwanted behavior. Best to allow the guides to be the ones to tell guests where to place their trash, not to hog the kayaks, or to stop diving headfirst into the water. Second, if both you and the other guests have kids, it can help to set some basic shared rules in place right away. That way, kids don’t feel frustrated when rules are different for others. Most of the time, this happens naturally, because O.A.R.S. sets the rules for rafting, swimming, use of PFDs and helmets, and even how many sodas and snacks are consumed (by kids). There’s very limited ability to be on screens on an O.A.R.S. trip, so likely, you won’t have to contend with varying electronics rules. A few times, we’ve encountered families with vastly different parenting styles from us, but all it took was a brief family meeting to remind our kids that our rules would remain in place for our kids, and that was that.

What to expect from meals and drinks: Aside from group dynamics, people worry most about food on trips, don’t you think? On each of our O.A.R.S. trips, we ate better on the river than we do at home. Every meal was made from scratch with whole food ingredients, and all were cooked and prepared swiftly and efficiently by our guides. Between meals, GORP (trail mix) was available, and before each meal, ‘appetizers’ were set out, even at breakfast and lunch. For example, at breakfast, coffee came out first, along with dry cereal (usually Cheerios and granola), yogurt, and orange juice. When ‘real’ breakfast followed, it might be French toast, eggs Benedict, or pancakes. At lunch, while our guides prepared the meal, snacks were set out such as cut veggies and dip, chips, fruit, and cookies. A typical lunch would include sandwich fixings and/or a hearty salad. Before dinner, a cooler with sodas, beer, and wine was available (with a ration of approximately one soda per day for kids and 2 drinks for adults), along with appetizers such as chips and salsa, bruschetta and toast points, or veggies, followed by salmon and cous cous, steak and potatoes, or enchiladas, always followed by dessert.

OARS-food

If you want to bring additional drinks, families are free to do so, with the general understanding that they’ll be willing to share. Guides store your additional drinks for you, keeping them cooled.

What to expect from the camping experience: On our last O.A.R.S. trip on the Rogue River, we rafted with a family who had never camped outside before, and they rocked it! You get tents from O.A.R.S., which you set up yourself after a demo, at each campsite. You can also rent a sleep kit, which includes a sleeping bag and paco pad (big thick rafting pad) and liner. Or, you can bring your own sleeping bag and pad (though if you do, I still recommend using a paco pad for comfort…you can rent this solo). Most nights on the Rogue and Salmon, we didn’t even bother sleeping in our tent, the weather was so nice. We slept under the stars, setting up a tent only for changing clothes and storing belongings.

OARS

Within each campsite, it’s easy to find a little corner for your family, but you’ll want to remember that you won’t have total isolation or much privacy. Expect to still see the other tents, the guides’ sleep pads, and the camp kitchen area. I promise this is no big deal: you get to know fellow guests very quickly on an O.A.R.S. trip, and you can always set up your tent for some privacy.

What to expect from the bathroom experience: Okay. Let’s get real: this is the issue people are afraid of most. How do you take care of your bathroom needs when you’re in complete wilderness, away from any plumbing whatsoever? Two ways: first, you pee in the river, as mandated by Leave No Trace (dilution is the solution to pollution). This is easy to do during the day…after all, you’re in the river most of the time. It’s harder during the evenings and mornings at camp, especially for women. Men tend to just walk a few paces downriver and stand to pee into the current from the shore…no biggie, no one even notices. Women, here’s what you do…and sorry for going here, but I’m in the outdoors a lot, and very comfortable with this stuff: if you need to pee and you’re out of the water for the day, you go behind one of the rafts, which will be ‘parked’ at the shoreline for the night. Behind their protective wall, you squat by the water, facing the camp. This ensures you moon the river, not the camp. After a few tries, I promise you’ll get good at this and no one will see a thing. When you’re getting used to this technique, it helps to wear a skirt or sarong, so you can eliminate even the mooning part.

For #2, O.A.R.S. sets up what they call the Groover (so named because it used to be a simple bucket or square metal box that would leave grooves on your backside). Now, it has a toilet seat (luxury!). The guides always set up the Groover at camp, in a discreet (but rarely discreet as you’d like) location from the hub of camp activity. You’ll know where the Groover is because there will be a hand wash station (two buckets of water with a foot pump and soap)…and the Groover will be a short walk from this station, hidden as best as possible behind trees, willows, or other natural barriers. It is by no means completely private, with doors that lock, etc, and I know that’s hard to handle at first. But I promise you’ll get used to it. And the thing is, everyone is in the same boat. You’ll know you won’t be interrupted because if you have the TP, others know someone is using the Groover, and when you’re done, you bring the TP back to the hand wash station. The Groover is for solid waste only, as everything in it is packed back out (per Leave No Trace rules), so no peeing in the Groover. However, if you would rather not pee in the river, there is a pee bucket next to the Groover, for that use. I know, this is so gross, but this is the nitty-gritty part, and I bet it helps to know what to expect ahead of time.

salmon-river

What to expect on the river: The actual river is probably what people worry least about, but I’ll cover a few things anyway. Depending on your destination, most O.A.R.S. trips include paddle rafts (where lots of people can paddle together, with a guide), oar rafts (with a guide rowing only), and IKs or duckies (inflatable kayaks), paddled by guests individually. Sometimes, there are also stand-up paddle boards. IKs and paddle boards provide the most adventurous way to experience the river, but all the methods of river transportation are fun. Guides do a good job of making sure popular boats are shared evenly, but you can help by not ‘hogging’ certain things, like IKs. Often, rafters using IKs will need to take a ‘ducky test’ or ‘ducky practice’, where they’re required to purposely flip it over, flip it back upright, and get back in, in water over their head. This is not as hard as it sounds, and most people can do it with some practice and instruction. Kids usually need to be 12 to ‘ducky’ on their own, but tandems to be shared with parents are also available. Most of the time, you paddle the river for a few hours in the morning and a few hours in the afternoon, with the remainder of the time used for lunch, short side trip hikes, and swimming time.

Have additional questions about what to expect on an O.A.R.S. river rafting trip? Ask me in the comments! 

SaveSave

Deschutes river rafting with Sun Country Tours

During our recent visit to Pronghorn Club, we were fortunate enough to enjoy the Big Eddy rafting trip with Bend, Oregon’s Sun Country Tours. ‘Short but sweet’, the Big Eddy trip is only 1.5 hours long (2.5 door-to-door from Sun Country) but promises more whitewater than most families see on the average float or raft trip (at least it was more than we had seen!).

Deschutes river rafting:

Our trip began with a short bus ride from Sun Country to the Big Eddy drop-in site on the Deschutes River (near majestic Mt. Bachelor), conducted by a friendly bus driver. Once on the water, we met with our guides (one per raft of 4-6 guests), donned lift jackets and were assigned oars (kids must be taller than the handle to be issued one), then started down the 3 mile stretch of river on the tour. Both the beginning and ending feature calm, still water ideal for swimming, and our guide encouraged the kids (and adults) to jump from the raft and float downstream. The kids especially loved being spun around while standing on the bow of the raft, one at a time.

The river offers a few ‘warm up’ class 1 and 2 rapids before the class 3 Big Eddy, before which the guide pulled us over to the river bank to dock and overlook the rapids before tackling them. The kids loved seeing what we were going to raft, and our guide used the opportunity to instruct the adults in the group on where to paddle and when (though I promptly forgot). Once back on-board our raft, the kids were secured in safe spots (Toby was given a special rope to hold) and we were on our way.

The whitewater of the Big Eddy was truly like a wall after wall of water; we were bounced from crest to crest, and the kids shrieked with more delight on each one! I loved the experience, despite continually looking back in the boat to ensure my kids were still in it! Afterward, everyone was laughing with relief at surviving the thrill (including the six-year-olds in our group who hadn’t been too sure about the whole thing). We celebrated with a few more small rapids, during which the kids were allowed to ‘ride the bull’ (I.E. sit on the front of the bow with no hands). We docked after the last of the rapids, and were transferred back to Sun Country.

Distance from the interstate: Five minutes from Hwy 97.

Cost per person: The Big Eddy tour is $46 per person. Other Sun Country tours start at $73.

Dining options: None. The Big Eddy tour is easily fit in between lunch and dinner or breakfast and lunch. Full day tours include lunch.

Directions: Sun Country is located at 531 SW 13th St., Bend, OR. From Hwy 97, take exit 138 toward Downtown/Mt Bachelor, then turn right onto NW Hill St. Continue onto NW Colorado Ave. At the traffic circle, continue straight onto SW Colorado Ave. Turn right onto SW Emkay Dr., then take the 1st left onto SW Donovan Ave. Take the first right onto SW 13th St.

As I disclose whenever applicable, we experienced the Big Eddy tour as guests of Sun Country Tours and Pronghorn Club. While we appreciate their hospitality, this compensation came with no expectation of a positive review.

Summer in the Berkshires: Bousquet Mountain Adventure Park review

Bousquet Ski Area’s Adventure Park is a vertical playground of high rope courses, zip lines, nets, and ladders, all set against the backdrop of the beautiful Berkshires. With three levels of course ‘elements’ to master, everyone will be challenged here, and everyone can get a taste of what ropes courses are all about.

Bousquet mountain


Bousquet Mountain Adventure Park review:

We met first with our instructor, who fitted us in harnesses and gloves and explained to us how our clips and ropes worked. It seemed complicated at first (and we’d done this before!), but once we’d had time to go through the steps with her and review what we’d learned on the practice cables and zip line (very low to the ground), we felt very confident about maneuvering through the course. I loved that due to Bousquet’s cable and clip safety system, it’s virtually impossible to be completely unclipped from the cable at any given time. I felt completely at ease allowing Nate (12) and Calvin (9) loose on the course, always with instructors nearby.

Of course, I wasn’t about to miss out on the opportunity to play on a high ropes course, so I joined in, too. The first level is relatively low to the ground, and a great place to get the hang of things. Participants go in one direction through the elements, which eliminates traffic jams (a non-issue since there were only a few other people on the course at the time) and ensures you experience everything. Once you’ve completed Level 1, you’ll want to try Level 2 (straight above you), though of course, if you opt out, you can experience Level 1 again. Level 2 was certainly more challenging to me, and by Level 3, I was ready to leave it to the kids (i.e. monkeys).

One of the best parts of Adventure Park are the zip lines that connect elements. We’d experienced zip lines and high ropes courses before, but not together! Attached to each of our harnesses were zip line apparatuses (apparati?) which we used to zip ourselves from area to area on short zip lines. (Note: on the higher elements, some ‘commando’ work is required for lighter, shorter people; you’ll zip part way, then need to pull yourself the rest of the way, which takes some upper body strength!)

We couldn’t help but compare Bousquet’s Adventure Park to Big Sky, Montana’s high ropes course, and though the scenery was certainly more stunning at Big Sky, the kids preferred Bousquet’s multi-level course. I found Big Sky’s course to be more dramatic (it’s higher, for one, and accessible only by rope ladder), and had a hard time directly comparing them.

The Adventure Park is awesome, but what makes Bousquet great for traveling families are the multitude of other activities to do on-site in summer! Toby (age 6) and our nephew Homer (age 2) were too young to explore the Adventure Park (where participants must be 70 pounds and at least 48 inches tall), but with mountain day passes, had free rein of the water slides, activity pool, and miniature golf course. Day passes also include three activity tickets to be used for the bungee trampoline, bounce house, climbing wall, go-kart track, or Frisbee golf course. Everything is located in one place (including the Adventure Park), which makes it easy for families to pick and choose how they spend their day based on interest and age, while still staying together.
Bousquets-adventure-course

Note: We were told that kids under five feet tall could only experience Level 1 of the Adventure Park, but after completing this level, our instructors allowed Calvin (just shy of five feet) to continue on up. It was explained to me that the height requirement is in place not due to safety, but due to cable placement; some cables on the higher elements are spaced in such a way that the reach from the child’s harness to the cable might be uncomfortable. Also, kids’ lower weight ensures they will need to complete some upper zip lines ‘commando’ style. We didn’t find the former to be a problem, and Calvin enjoyed the latter! I always recommend following an operation’s guidelines and deferring to their instructors’ judgment.

Ticket costs: Adventure Park passes are $35 per adult (over 5 feet tall) and $29 for juniors (under 5 feet tall). Day Mountain Pass tickets (which include the above listed, minus the Adventure Park) are $28. Activities can be purchased ‘a la carte’ as well, but the day pass is by far the best deal! In fact, we’ve reviewed many zip line and ropes course locations, and I can say without doubt that Bousquet’s offers the best value on a high ropes course I’ve ever seen!

A spectator pass can be purchased for those not experiencing the activities for $7.50. (I always appreciate when an operation offers this!) And be sure to check Bousquet’s ‘deals’ page before planning your trip: they offer $10 Mondays on their Mountain Passes and $20 Tuesdays for the Adventure Park!

Hours: Bousquet’s summer hours are 10 am to 5 pm, daily.

Reservations: 413-442-8316. We didn’t need reservations arriving when the park opened at 10 am on a week day, but to be safe, call ahead!

Website: http://www.bousquets.com/

Directions: Bousquet is located at 101 Dan Fox Drive, Pittsfield, MA. From Boston, take Exit 2 off the Massachusetts Turnpike to Routes 20 & 7 North. Follow signs for Bousquet and Pittsfield Airport (left at light onto Dan Fox Drive for 1 mile).

As I disclose whenever applicable, we experienced the summer activities, including the Adventure Park, as guests of Bousquet Ski Area. While we appreciate their hospitality, it in no way guaranteed a positive review.

Dominican Republic with kids: 27 Waterfalls of Damajagua

Located in the countryside outside of Puerta Plata, Dominican Republic, the 27 Waterfalls of Damajuana is the most talked-about experience on the north side of the island. Is it worthy of the hype? In a word, yes.

27-waterfalls

What is the 27 Waterfalls of Damajagua?

The 27 Charcos of Damajagua is exactly what it sounds like: 27 waterfalls in a row in the middle of the Dominican jungle. Unregulated until 2004, the waterfalls are now controlled by a private company thanks to Peace Corps volunteer Joe Kennedy (yes, of those Kennedys), and there’s quite the operation at the site. When you arrive, either by tour group or on your own, you’ll now find a dirt parking lot, tour booth, bathrooms and lockers, and outdoor dining area. Your group is paired with a guide from the falls, and you opt between navigating 27, 12, 7, or just one waterfall.

We wanted to do all 27, but the water level restricted us to 12. We went with Iguana Mama, and had a fun-loving guide, Raul. Our group of about 10 people were fitted with life vests and helmets (required), and we trekked almost two miles up a dirt trail. (The trail is around 3 km.) The youngest person in our group was eight, and the oldest was probably me, at age 40. The trail included steep wooden steps, rocks, and pretty severe inclines and declines, but overall was in good shape. The way was shaded as we hiked into the jungle canopy, and we were joined by a second guide, plus our guide who came with us from our cruise port.

charcos

When we reached the end of the trail to the 12 waterfalls (which took about 45 minutes), we climbed down another steep staircase and entered the river. In places, the water was only ankle deep, and in other places, over our heads. We began making our way back toward the ‘camp’ via the river, alternatively wading, swimming, jumping, sliding, and climbing in, over, under, and through the river. It was amazing.

At each of the 12 waterfalls, our guides would stop us and explain our options, which usually included leaping off a rock or outcropping into a deep pool of water below, sliding on our butts along naturally carved waterslides in the rock, or taking the ‘chicken’ way around waterfalls on questionable-looking ladders and staircases. Honestly, I think the most dangerous route was via those ladders!

climbing-waterfalls

Most of the time, I opted to jump (sometimes as much as 10 feet), but I also enjoyed sliding. The kids loved both options, and often, we’d climb back up ladders or ropes to do certain waterfalls a second time. There were groups ahead and behind us, which meant we had to keep to a schedule (see ’tips’ section below), but overall, we didn’t feel rushed. I don’t love heights, but I’m used to jumping off ledges, so the experience didn’t daunt me. If you REALLY don’t like heights, there are work-arounds for each waterfall, but they’re in the form of the aforementioned ladders, which, honestly, are just as scary.

In some places, you can swim underneath the waterfalls or explore partial caves carved out of the rock, and throughout the whole experience, the jungle canopy is above you, shading you and sheltering you. The sunlight cuts through gently (you don’t need sunglasses), and we didn’t find the hike or the swim to be buggy. The water is refreshing but not too cold.

waterfall-slide

The route down through the waterfalls took us about 1.5 hours, and afterward, we had a short hike back to the camp where we changed and had an included lunch of Dominican beans and rice, BBQed chicken, and a few kid pleasers like (oddly) spaghetti. Soda and rum and coke were included.

How to book a tour:

You can either arrive to the waterfalls on your own, taking a taxi from Amber Cove or an autobus from Puerto Plata, or you can book an excursion through Iguana Mama or Marysol Tours. The latter option is more expensive, but what you’re paying for is the convenience of the transportation (and the expensive gasoline required to make that happen). If you opt to arrive solo, you simply pay as you arrive (about $480 Dominican pesos for all 27), and guides are assigned to you on a first-come, first-served basis. This means you may have to wait a bit for the next guide.

waterfall-hiking

Tips for the waterfalls:

  • Book a tour early in the day to play in the water with fewer crowds. This ensures you won’t wait for a guide if you’re going solo, either.
  • Bring waterproof shoes (like Keens or Chacos) or an old pair of sneakers to get wet.
  • Put on bug spray and sun screen ahead of time.
  • Keep everything but your waterproof camera on the bus or in a locker.

Cost:

We booked a tour through Iguana Mama, because we wanted the convenience of a port pick-up. Our tour included lunch and cost just over $50 US per adult. If you opt out of a tour, the cost is significantly less per person (around $10), but does not include transportation or lunch. We were quoted everything from $40-100 US for a cab ride for five people from Amber Cove. It IS possible to negotiate a flat rate from taxis on the highway.

waterfalls

How to get there:

If you go on your own, get up-to-date directions at 27charcos.com. More information is found here.

27-waterfalls-of-Damagua

Aboard a small ship cruise: Day by day with Alaskan Dream Cruises

When I told friends and family we’d be experiencing SE Alaska on a cruise ship, the image that came to everyone’s mind included a huge ocean liner, busy ports of call, fancy restaurants, kids clubs, and maybe a climbing wall. After all, kids don’t go on those intimate small ship cruises you read about, right? Wrong! (You knew that was coming, didn’t you?) Small ship cruise options are more accessible to families with Alaskan Dream Cruises family cruise itineraries.

small-ship-cruise

Why book a small ship?

Small cruise ships can go where the mega ships cannot, offer a more personal travel experience, afford families with hands-on learning and intimate ports-of-call, and include educational and cultural experts to enrich the travel experience. The cruise industry defines small ship cruising as 150 passengers or less; our Alaskan Dream cruise carried a whopping 28. Itineraries are more flexible, excursions are more in-depth, and service is more personal. A small ship cruise is also more expensive, and we know families need all the information they can gather before making such an investment. In this first of a three-part series, we offer our day-by-day Alaskan Dream Cruise experience, to help you decide if small ship cruising is for you.

An overview: nine days on the Baranof Dream in three minutes:

Day 1: Sitka to embarkation

An Alaskan Dream Cruise starts before your family boards one of their three cruise vessels. We arrived in Sitka, Alaska the day prior to our sailing, and were met at the airport by an Alaskan Dream representative. She quickly tagged all our luggage, loaded us into a van, and drove us to our hotel for the night, the Totem Square Inn. We explored the town during the evening on our own before bedtime.

Sitka alaska

The first morning of our cruise, we met our Expedition Leader Emily and our fellow passengers for a morning of Sitka sightseeing. (Our tagged luggage went directly to the ship, and we held onto only our day luggage.) Together, we toured Sitka, seeing the Alaska Raptor Center, Sitka Sound Science Center, and Sitka National Historic Park. This was a good way to get to know the other families (six families in total, with members ranging from grandparents to children; the young people ranged in age between 6-19).

Sitka Alaska

At lunchtime, we boarded an Allen Marine Sea Otter and Wildlife Quest vessel (Alaska native-owned Allen Marine is a sister company of Alaskan Dream Cruises) for a tour of Sitka Sound and a rendezvous with our home for the next nine days, the Baranof Dream.

One of the most exciting moments of our cruise arrived when our Allen Marine vessel turned a corner around a small island in beautiful Sitka Sound to the sight of the Baranof Dream waiting for us. We boarded at sea, and explored our 144-foot ship. The Baranof Dream has 25 cabins, but only a handful were in use for our family cruise itinerary (passengers are generally capped at 30 during family cruises). With 28 guests onboard, we found the common spaces (such as the dining room, lounge, and sun deck) to be comfortable and never crowded.

Baranof Dream

Cabins sleep 2-3 people, depending on the type, so our family of five had two. Kids cannot occupy a cabin alone (none are connecting) so we slept three of us in the more spacious Lydonia cabin and two in a standard cabin. While cozy, Baranof Dream cabins have adequate storage space as long as you put things away after using them and assign everything a space. We met our crew and experienced our orientation to the Baranof after embarking, and learned more about our course through SE Alaska thanks to a GPS-enabled interactive map always on screen in the lounge.

Baranof Dream

Our first meal set our expectations high (they were never disappointed). All meals (and wine or beer with dinner) are included in your cost, and the dining room is casual and friendly. Kids can order off the adult menu, which always offers three choices for a main course, or the kids’ menu (with both the adult offerings and staples such as burgers, hot dogs, and excellent mac and cheese). In addition to three meals per day, ample snacks, appetizers, and drinks are offered in the lounge.

We learned to go to bed our first night with the sun still trying to set (sunset is after 11 pm) but it wasn’t hard; we were all exhausted after our first day!

Day 2: Juneau

We awoke to the Baranof Dream cruising into Juneau, Alaska, where the mega cruise ships dwarfed our small vessel. Our itinerary of a Mendenhall Glacier tour followed by time exploring the city included a last-minute surprise (not unusual on small ship cruises): we’d also be visiting a sled dog and mushers’ camp. All transportation was provided to us: we took a guided bus ride to Mendenhall Glacier, where we hiked to Nugget Falls, then were issued tickets to the Mt. Roberts Tramway in Juneau. We found the tram to be overrated, but enjoyed the excellent views and ample hiking at the top of Mt. Roberts. We enjoyed vouchers for lunch at a restaurant of our choice (we opted to watch the float planes land from The Hanger), then made our way through touristy downtown Juneau to meet our bus to Sled Dog Discovery and Mushers Camp.

Mendenhall Glacier

We spent the better part of two hours in this beautiful camp in the Tongass National Forest, where we met sled dogs, learned about their training, and held Alaskan sled dog puppies. On every Alaskan Dream cruise are both scientific and cultural expedition leaders who spend every day with you; ours, naturalist Emily and Tlingit Alaskan Native Howard (Koo Hook) were accompanied by two youth expedition leaders, Jess and Sophia, as well. Throughout the day, they offered guidance, friendship, and knowledge.

Juneau Alaska

Days on the Baranof Dream usually end with a post-dinner presentation by the expedition leaders to help us prepare for the day ahead; in this case, it ended with a special treat. Forty-five minutes after departing Juneau, we docked at a private day lodge, Orca Point Lodge, for a king crab dinner. The kids explored the rocky beach with their youth expedition leaders and learned about the intertidal zone at a touch tank, and the adults enjoyed getting to know each other better over wine and beer and gorgeous views. We loved seeing the kids try new foods at dinner, and afterward, everyone enjoyed a beach bonfire.

Day 3: Hobart Bay

hobart bay

Hobart Bay is a private section of Alaskan Native-owned shoreline only native-owned Alaskan Dream Cruises can access. On the itinerary: playtime! Following breakfast, each family was issued a schedule, rotating through kayaking, Zego-riding (a Zego is a personal motorized watercraft), and RTV-riding. Kayaking offered a peaceful escape onto the water, where we shared the space with a Stellar sea lion, salmon, and sea birds, and the RTVs (though too noisy for my taste) took us on a fun adventure along logging roads to view black bears and pick berries. The kids loved the Zegos best, which they could drive as we zipped around the many narrow passage-ways surrounding Hobart Bay.

Hobart Bay

In the late afternoon, crew and passengers alike gathered to participate in (or watch) the ‘Killer Whale Club’ initiation, which involved a leap into the 38 degree water of the bay. Between events, we enjoyed a BBQ lunch, and after dinner, we sat around a second bonfire with s’mores. The bartender, John, made friends with the kids onboard by making smoothies with the berries they picked, and the pastry chef, Lemmick, followed suit with a muffin-making class. During free time on the Baranof Dream, anyone can access the bridge to talk with the captain, Stu, and his crew; our boys especially loved learning to tie knots from crew member Hank.

fathom-cruise

Pages: 1 2 3