PCT section hiking with teens

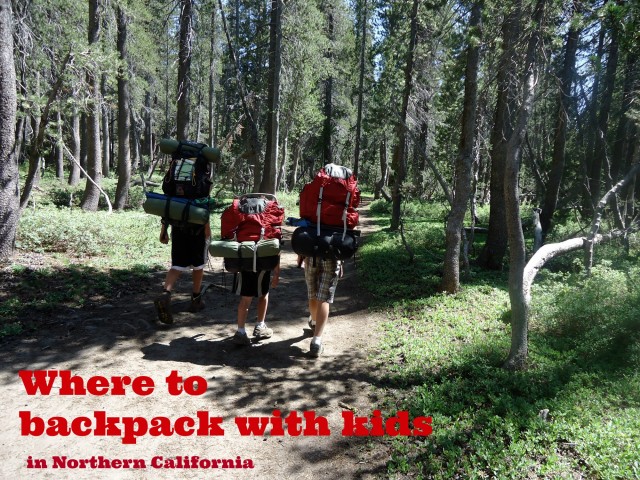
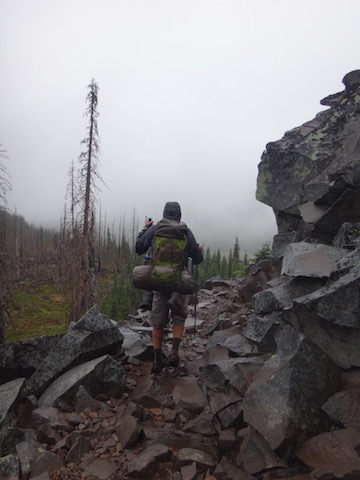
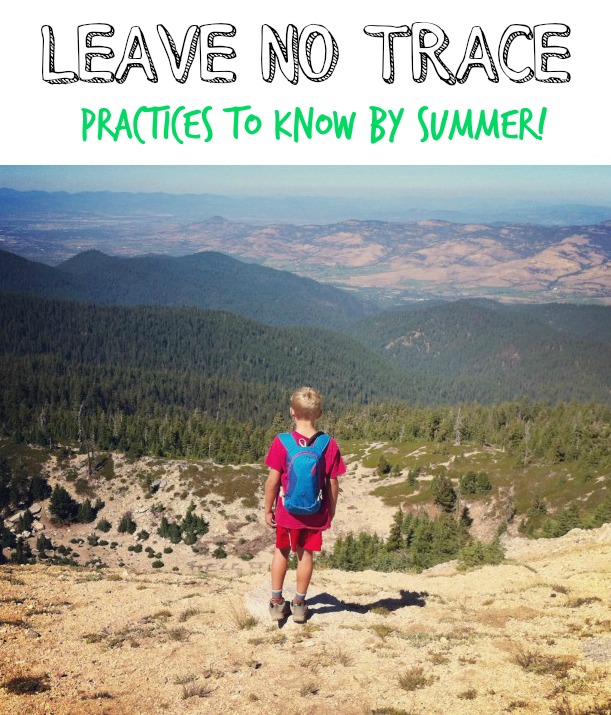
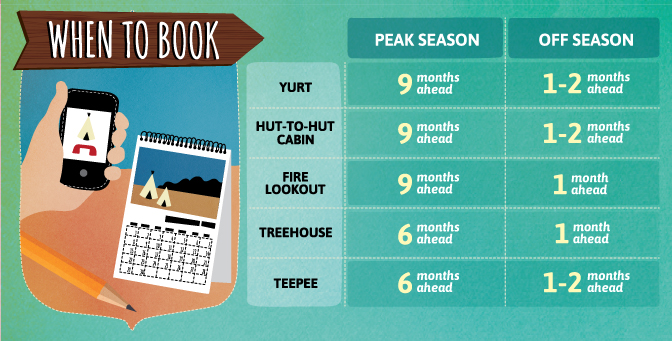
We’ve been wanting to backpack on the Pacific Crest Trail (PCT) long before it was cool. This summer, my 16-year-old and I finally set out, tackling almost 70 miles of the PCT in Central Oregon. We built up to this trip with years of family backpacking, including several 3-4 night trips, starting when my son was just a toddler. How did we fare? We had one of our best backpacking trips ever!

hiking-PCT

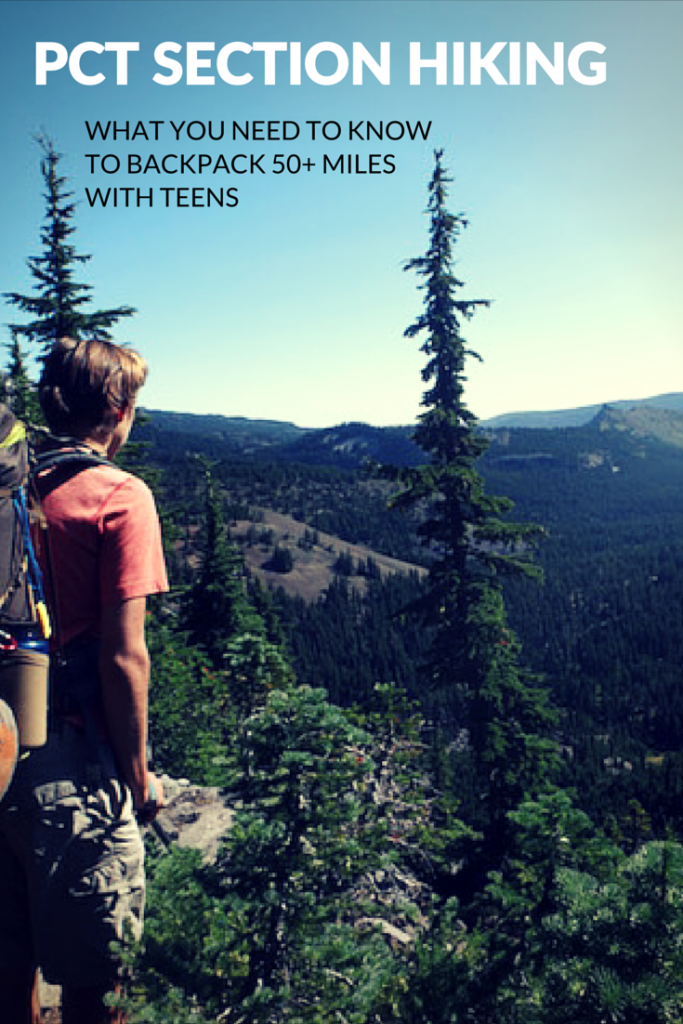
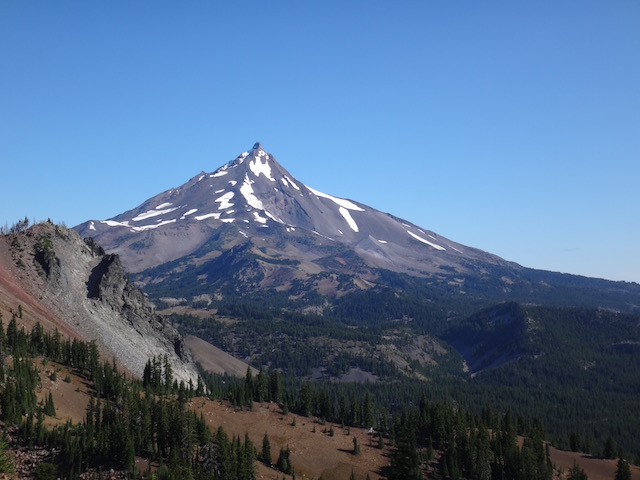
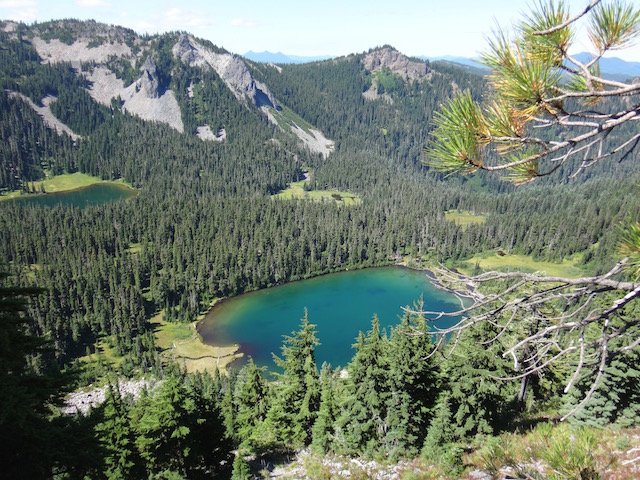
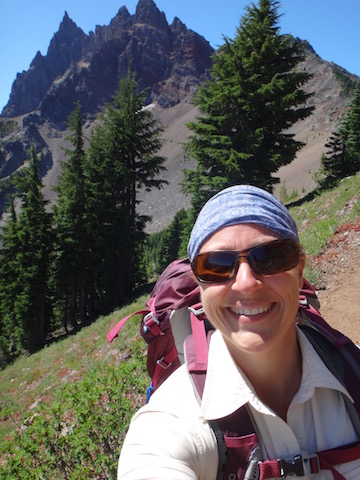
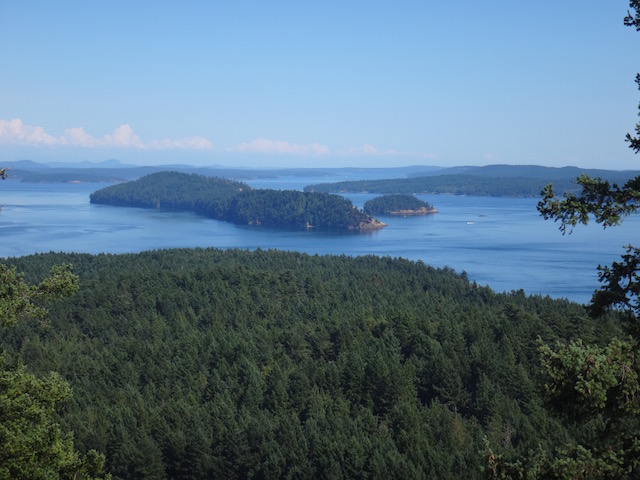
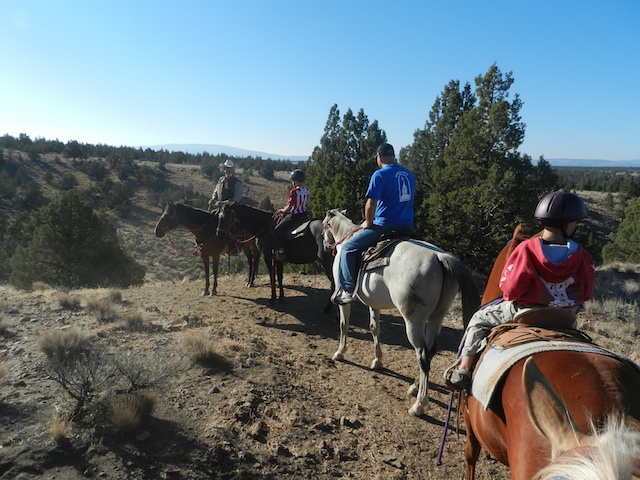
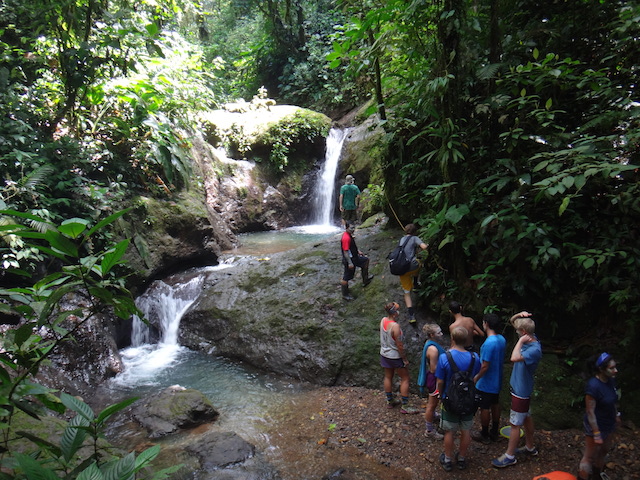
Our PCT section hike spanned over 65 miles from Central Oregon’s Mckenzie Pass by Sisters to Olallie Lake, outside Detroit, Oregon. It took us through the Jefferson National Forest and Jefferson Park, past the three Sisters peaks, Broken Top, Three Fingered Jack, Mount Washington, and Mount Jefferson. Every day brought new scenery, from forests depleted by fire to mountain meadows still filled with wildflowers, to rushing creek crossings, to mountain ridge lines, saddles, and peaks.

Jefferson-peak

My son and I felt a keen sense of accomplishment as we navigated landmarks along the trail with our PCT data book and topographical maps, found our own water resupplies, made and broke down camp every night and morning, carried everything we needed on our backs, and relied entirely upon each other for basic survival. This trip was a chance for my son to shine as a young man, for me to let go a bit as a mom, and for both of us to bond. We met amazing people on the PCT, both fellow section hikers like us and thru-hikers going to Canada. The community spirit was uplifting, the scenery breathtaking, and the uninterrupted time in the wilderness invigorating.

A day in the life of a PCT section hiking with teens:

PCT-hike

Each section hike will look different, depending on where you start and end, of course, but a typical day on the PCT for us looked something like this:

7 am: Wake up. Stumble out of sleeping bags on stiff legs, retrieve the food bag (hung in the night to discourage critters from nibbling), and start boiling water for coffee and oatmeal (assuming we had enough water to spare for a hot meal).

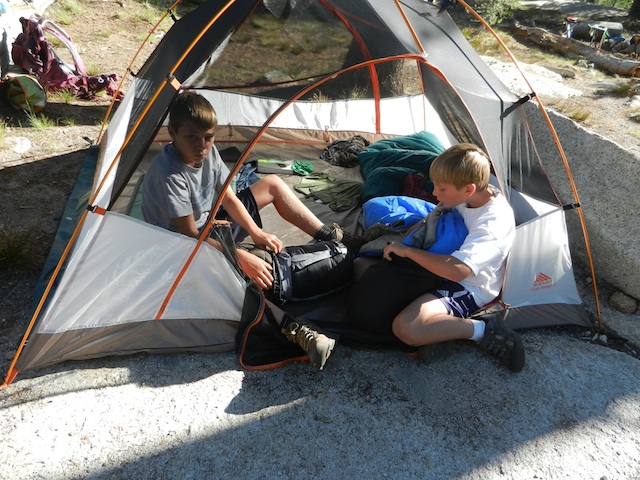
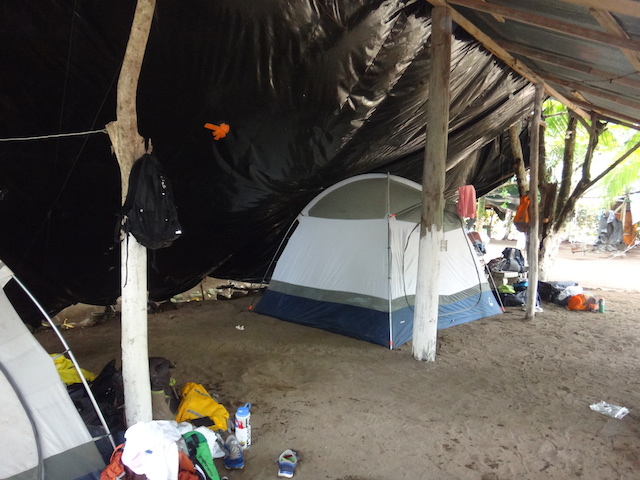
8 am: Change into hiking clothes (our only hiking clothes), doctor any blisters on our feet, and tear down camp. This involves washing any dishes (we quickly learned to have as few as possible), putting away our stove and cooking pot, stuffing our sleeping bags and pads, taking down our little tent, and filling our water bottles for the day.

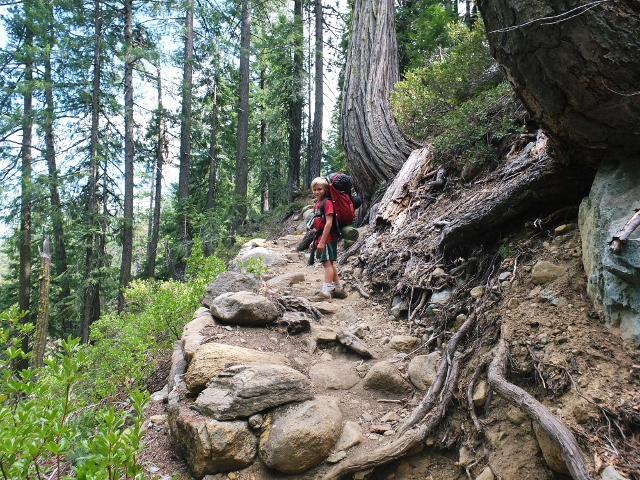
8:30 am: Hit the trail. Depending on the day, we hiked between 10-15 miles. Some days, we took a break mid-morning at a water source to cook a meal if we hadn’t had enough water to do so earlier, other days we hiked straight until lunch. When is lunch? When we were hungry. Regular rules about meals and routine don’t matter on the PCT: our bodies very quickly adjusted to a natural rhythm of eating when we were hungry and sleeping when we were tired.

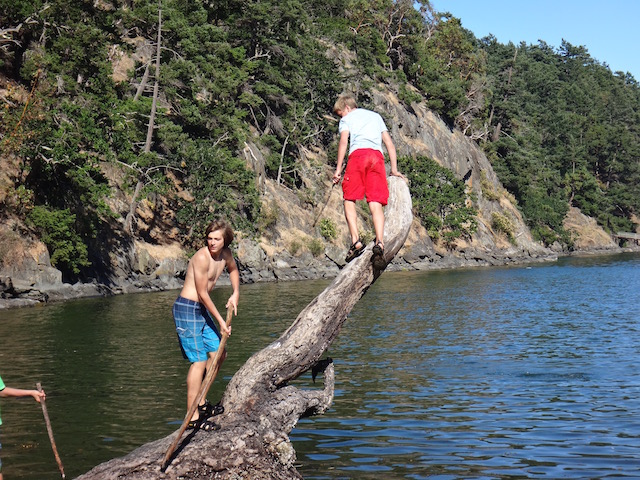
Mid-day stop at a vista, lake, stream, or otherwise interesting landmark: Some days, we’d go for a swim in a lake if one crossed our path, other days we washed our clothes in a creek or sat on the saddle of a ridge, taking in the view.

Late-day stop: We’d always stop at least once or twice per day to filter more drinking water as the opportunity arose. We had to keep a steady eye on our drinking supply and the water sources listed in our data book. Every day, we ran into others on the trail, and we always stopped to talk a bit. We met wonderful people, all on the PCT for essentially the same reasons as us: to commune with nature, to challenge themselves, and to live deliberately and peacefully.

lake-on-PCT

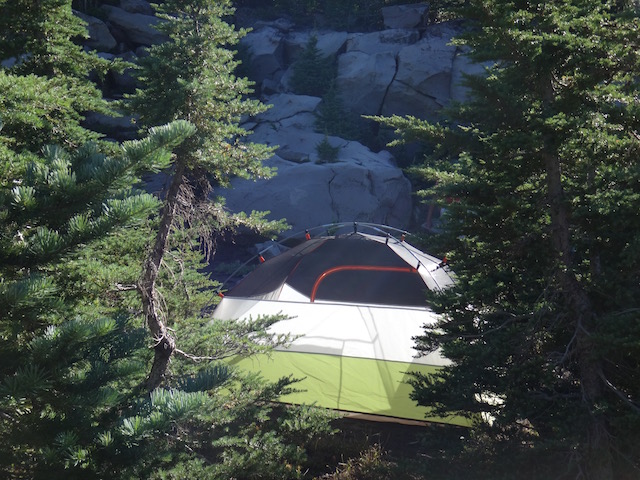
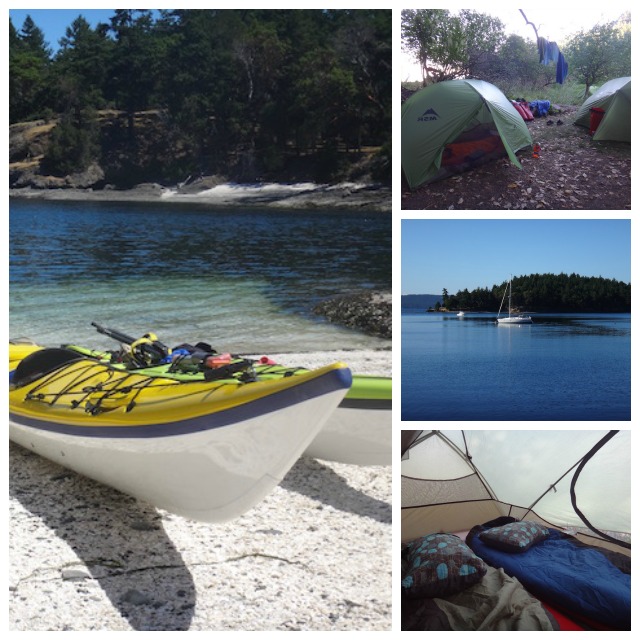
5-6 pm: Arrive at the night’s camp. Where was camp? Wherever we could find one. We always had an ‘ending mile’ planned (aka, mile 14 of the day, for instance) that was near some landmark desirable for camping, such as a lake or stream. However, campsites didn’t always appear on cue. We sometimes stopped shy of our goal, but more often hiked further, in order to come to a good campsite.

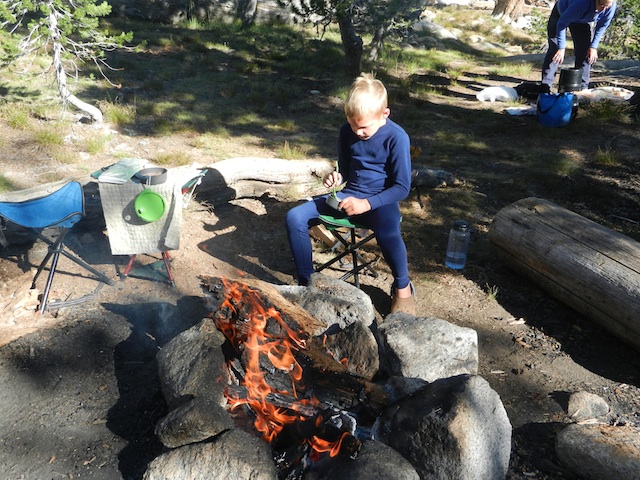
7 pm: Set up camp, make dinner (usually mashed potatoes or noodles, as we always craved carbs), and filter water, unless at a dry camp. If we had wet clothes we’d washed in a lake or stream, we hung them to dry.

8 pm: Do any dishes (remembering to follow Leave No Trace practices), string up the food bag, make sure all our supplies are tucked away in our bags, get in our sleeping bags. Once in our sleeping bags, we’d study our topographical map to get a preview of the next day’s hike, then read our books until we fell asleep (usually as the sun went down around 9 pm).

campsite-on-PCT

How to plan:

Readers of Pit Stops for Kids may remember we started planning our PCT section hike months ago, using information gleaned from PCTA.org. Click on our post, ‘How to plan a multi-night PCT hike with kids’ for details on how we chose when and where to hike.

Since that post, our section hike plan changed a few times. We lost some participants, making the trip a mother-son endeavor, and gained support via car in the form of a trailhead drop-off on Day 1, a check-in and resupply late Day 2, and a pick-up on Day 6.

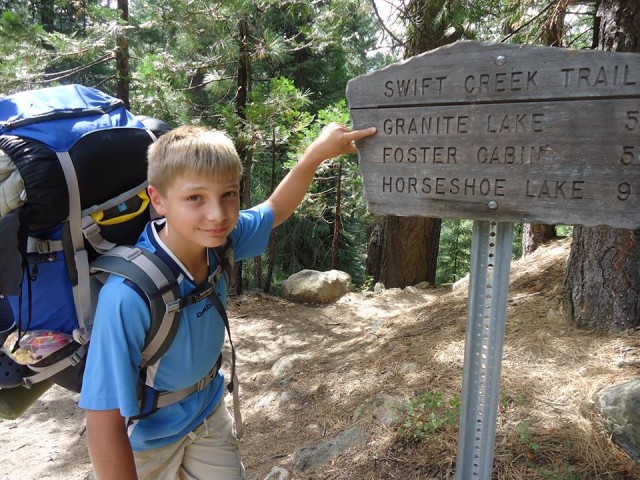
Once we knew where we wanted our hike to start and end, and how many days we had to accomplish our goal, it was a simple task to break down the trip in miles per day. We then cross-referenced this information with the possible ‘drops’ along the trail (places we could be met by others who could give us aid), and determined to have just one drop during our 6 days out. To do all this, we used the Pacific Crest Trail Data Book and the topographical map dedicated to Central Oregon’s section of the PCT (available at outdoor stores or online).

three-fingered-jack

The data book will tell you where along the trail water will be available (in the form of a creek, stream, pond, or lake), but does not tell you where to find campsites (though some GPS programs do). In many sections of the PCT, hikers are permitted to camp anywhere they find an established campsite. You can tell an established site because the ground will be packed down and there may be a small spur trail leading to it from the PCT. Often, other hikers will mark good campsites with cairns (piles or rock), handmade signs using sticks for arrows on the dirt, or trail marking tape.

How to pack:

When we backpack for a weekend or up to three days, we like a few luxuries in our packs, such as hammocks, camp chairs, and java presses. I know, I know. But when we section hiked the PCT, we went bare bones, in order to be as lightweight as possible. Here was what was in our packs (and nothing else), for a total of about 25 pounds per pack:

Clothing:

  • 1 set of hiking clothing (quick dry pants, t-shirt)
  • 3 pairs wool hiking socks
  • 2 pairs underwear
  • 1 set of base layers (long underwear, preferably wool)
  • 1 down or down-alternative jacket (lightweight, easily stuff-able)
  • 1 rain jacket
  • 1 pair of lightweight sandals
  • 1 pair hiking boots
  • sunglasses
  • sun hat
  • thin gloves

Equipment (divided between two people):

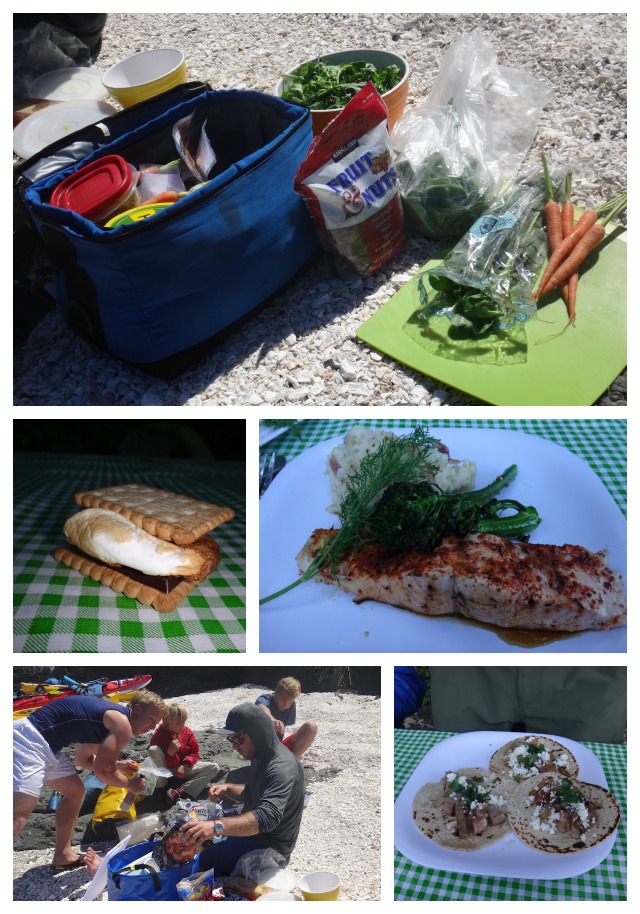
Food (again, divided between us):

We have a tendency to over-pack food, and we managed to do this again, even though we meticulously planned our meals. We have much smaller appetites than we anticbackpacking-food
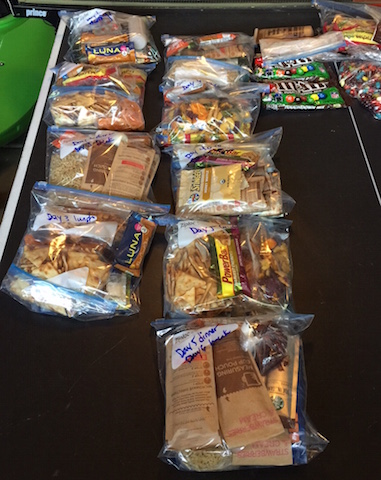
ipated, given how much we worked on the trail. We could barely manage to eat about 300 calories each during the evening meal, and we calculated double this amount. Whoops.

Breakfasts:

  • instant oatmeal packets (mix the hot water right into the paper sleeves if they’re the lined kind)
  • instant coffee (for us, only Starbucks VIA will do)
  • handful of dried fruit

Lunches:

  • protein bar of your choice
  • dried fruit
  • veggie chips or pita chips
  • tube of peanut butter to spread on chips
  • envelope of tuna
  • beef jerky
  • snickers bar or M&Ms to snack on

Dinners (one of the following):

  • instant mashed potatoes (we like Idahoan)
  • Top Ramen
  • dehydrated backpacking meal
  • mac and cheese
  • instant soup
  • envelope of smoked salmon or jerky to add to the carb-heavy meals

We essentially rotated these basic foods over and over. And yes, we got tired of them.

Tips we learned on the trail:

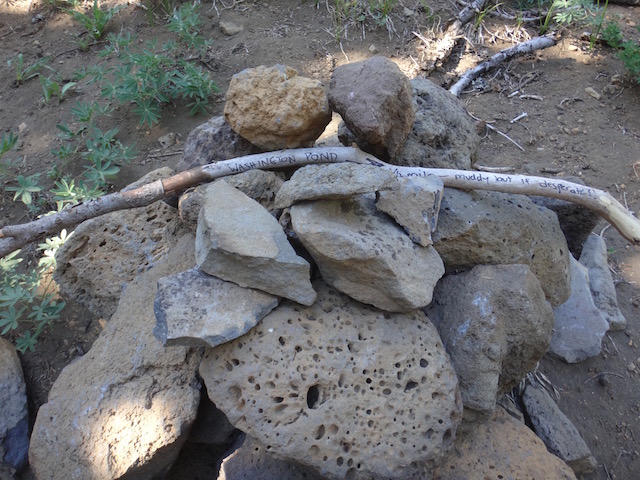
Look for trail signs: while many places along the PCT are not officially marked with mileage and other helpful tidbits, other hikers have often left signs to follow. Look for cairns that will direct you to the correct trail, or hand-scratched ‘pct’ letters in logs or even rocks. During one lucky moment, someone just ahead of us on the trail had made an arrow of sticks to indicate a hidden spur trail to an excellent camping site. When we met her later, we thanked her! Another time, we were almost out of water when we ran across a stick with these words in Magic Marker: “Washington Pond: 1/4 mile, muddy but if desperate?!” We were!

sign-on-PCT

Stop to talk with other hikers. They’re awesome, down to a person.

Let your kids have responsibilities. During our hike, my son was pretty much an equal with me, making important decisions and partnering in all the tasks and work. We both loved this. He’s preparing for bigger and longer hikes in his future, and I will know he’s prepared.

Stop to rest when it feels right. A few times on the trail, we pushed ourselves for no reason other than to ‘make good time’. When the only task of the day is to hike to the day’s destination, don’t be afraid to spend the whole day doing it.

Eat when you’re hungry. Once, we stopped at a creek mid-hike and decided to get out the stove and make a big bowl of chowder at 3 pm. It was supposed to be our dinner, but we wanted it then. We didn’t regret it.

Don’t duplicate equipment. It seems silly now, but we brought two stoves (very small and lightweight) and two pots (not so lightweight). We thought we might want to convenience of boiling two pots of water simultaneously (to have coffee and oatmeal at the same time, for example). We ended up preferring to have patience rather than carry the extra weight.

Issues to be prepared for:

When hiking most of the day, every day (regardless of mileage), certain physical issues may occur. It’s not fun to talk about, but…

rain-PCTChaffing: Skin rubbing against skin for hours at a time can cause major discomfort in sensitive areas. The solution: antibiotic ointment or Vasoline applied before hiking. It can also help to change underwear.

Diarrhea: Lots of water, plus lots of physical exertion, plus exposure to the elements and different food than usual can wreak havoc on the digestive system. Give it a day or two before worrying, making sure you continue to hydrate. Of course, make sure to filter or boil all water.

Bad moments: There will be low moments. Maybe the incline in the trail will seem endless, or a wind and hailstorm will beat down. Maybe you’ll be thirsty or hungry or your feet will be in agony. It’s good for kids (and adults) to remember that pain, discouragement, and suffering can be temporary, and that they can get through these times. Truly.

Blisters: AKA, the bane of my existence on the trail. I always get blisters, no matter what preventative measures I take. Bring lots of moleskin and athletic tape, use skin-tac to make your skin around the blister tacky before applying moleskin or bandages, and make sure your shoes fit properly. If you have tips for avoiding or fixing blisters on the trail, please let me know.

Dehydration: Ask your hiking partner when he or she peed last. Trust me, it’s an acceptable question on the trail.

Was it all worth it? Absolutely. Would we do it again? We definitely will, in-between more 2-3 day backpacking trips with all the kids.

Multi-day kayaking in the San Juan Islands

Families will always see more detail of the area they’re traveling by car rather than by plane, and even more by bicycle than by car. In the San Juan Islands, there’s no better way to explore this vast network of islands than by kayak.

overnight-kayaking

On our previous trips to the San Juan Islands, we arrived by ferry, then visited two islands: Orcas and San Juan. This time, we decided we were ready for the bigger adventure of a multi-day kayak trip in the San Juan Islands, camping on remoter islands en route. We embarked with Crystal Seas Kayak, setting out on a perfectly sunny June morning. For two nights and three days, nothing stood between us and the tides, islands, sea, and sky.

What to expect on a Crystal Seas Kayak trip:

After booking our Crystal Seas trip, we were emailed a detailed packing list and FAQs, so we’d know what to bring. In a nutshell, we needed personal items such as clothing, sleeping bags, headlamps, sun protection, and toiletries. Crystal Seas provided everything else, including all food (and meal preparation), tents, sleeping pads, kayaks, and of course, guidance in the form of two guides.

crystal-seas

We met our guides, Brett and Corey, at a designated pick-up location on San Juan Island. This location is usually the ferry dock at Friday Harbor, but Crystal Seas will work with you if a different pick-up location is more convenient. Both Brett and Corey are local to the islands; having grown up in the San Juans, they knew all the ins and outs of the many islands, currents, and tide flows. We were happy to spend three days with both of them.

We shuttled by van to our put-in spot, the San Juan County Park campground and kayak launch on the east side of the island. We transferred our gear to dry bags, and learned how to load our sea kayaks (they’re like clown cars…it’s amazing how much gear fits!). We headed off by mid-morning, paddling to adjacent Henry Island for our first lunch. We then continued across a few miles of open water to reach Stuart Island, our home for the next two nights.

kayaking-san-juans

We paddled approximately 14 miles from our launch site on San Juan Island, but we took most of the day to do it, stopping to look at interesting sites in our kayaks and taking occasional land breaks. As an occasional kayaker (not a total newbie), I didn’t find the distance too strenuous, but we did find it satisfyingly challenging.

Our kids, ages 16, 13, and 10, fared just as well, if not better, than me and my mom, who joined us for this multi-generational trip. The paddling was less challenging for the teens of course, but it was crucial that they listen to instructions by our guides, because while the water looks calm in this part of the Salish Sea most of the time, the currents and tides are to be respected. Without our guides, we absolutely would have made big mistakes, even though we could see land of some sort at all times.

The ‘marine trail’ campsites at Stuart Island’s Reid Harbor are dedicated for human-powered watercraft only, which means kayaks, not motorboats, sailboats, or yachts. The latter can anchor in the bay, and we enjoyed seeing all the watercraft there, but appreciated that the campsites were more isolated, tucked away in the trees just past the beach.

We set up camp before dinner, each group of two finding a spot for their tent and setting it up. We explored the beach and dock, the kids taking a swim (brrr!) and spotting seals, sea stars, and seabirds of all sorts. After appetizers (yes, really!), we sat down to a dinner of salmon, freshly mashed potatoes, and salad with local greens and homemade dressing. Dessert was a pecan pie brought from a local bakery in San Juan (more on food later).

kayaking-crystal-seas


We settled in for the night by 10 pm (when it starts getting dark at this time of year), and while I woke at first light, the kids all slept in. We planned to remain camped in cozy Reid Harbor, taking a day paddle to explore nearby islands and hike. We enjoyed this more leisurely day, but Brett and Corey also offered an alternative itinerary, which would have included packing up and camping at another island, Jones. While Crystal Seas has a general itinerary set for each trip, we found there was a lot of flexibility when possible.

stuart-island

Our Day 2 included a beautiful paddle around Johns Island, where we floated past a colony of seals and looked for orcas in the strait (no luck this time!). We picnicked lunch on a tiny island (I’m sure it has a name, but I don’t know it, and my map shows it only as a speck!), then paddled ‘home’ to Reid Harbor, where we rested (and they kids played on the beach) before our hike up the nearest ridge to view the islands from 800 feet above sea level. This may have been one of my favorite moments on the trip: the view looked like the most perfect 3D map of the islands I could have asked for. In the sunlight under a blue sky, we could see all the way to the Olympics in one direction and Mt. Baker in the other. We spotted all the islands we’d paddled by, and Brett and Corey pointed out Roche Harbor, on the east side of San Juan. It looked surprisingly close, which is a lesson we learned kayaking in this area: distances are very hard to gauge on the water.

san-juans

We enjoyed another amazing meal, then rewarded the kids with a full buffet of s’mores ingredients. Our teens loved making campfires each night, and having the freedom to explore the campsites and nearby trails.

One of the things that makes backcountry trips, of any sort, so special for our family is the together-time. Without electronics, friends, or schedules in the way, the kids play together like they used to when they had less responsibilities and less social life. This trip was no different. Our youngest got his brothers back, and the teens got their childhood back.

They made swords out of sticks, skipped pebbles, spotted schools of fish, jumped off the dock, and wrestled on fallen logs. In other words, they had untethered ‘boy’ time.

reid-harbor-camping

Our last day, we packed up camp early, in order to paddle back to San Juan with the current in our favor. Thank goodness for Brett and Corey, who know these things! We paddled hard the distance back, with few breaks, necessary in this direction, but again, it felt satisfying to accomplish a hard day’s paddle in just a morning! We picnicked lunch back at the put-in spot, then shuttled back to our car. Looking out over the view of the Salish Sea while we ate our last meal together, we weren’t quite ready to leave!

Food on Crystal Seas trips:

In a word, the food is fantastic. We’ve been on several multi-day rafting and kayaking trips, and the food is always good, but Crystal Seas takes it a step further, serving as many local foods as possible. I’d estimate 70% of the foods served were locally sourced or grown. In addition to our salmon meal, we had a wonderful meal of beef and veggie tacos, plus lunches of caprice sandwiches and salmon wraps and breakfasts of bagel sandwiches and yogurt parfaits. There was always fresh fruit, fresh veggies, and snacks like organic chips, top quality trail mix and bars, and spread and dips.

crystal-seas-food

Note: no alternatives to the meal served were offered to children, so if you have a pick eater, let them know ahead of time. They absolutely accommodate all dietary needs, so I’m sure they could accommodate a child who needs a simpler meal. Our teens ate everything in sight, and our 10-year-old like 90% of the meals, but would have been happy with a plain PB&J a few times.

Helpful planning tips:

If you book at multi-day kayak trip with Crystal Seas, here are a few tricks and tips we learned along the way:

  • If you have a car, but you’ve checked out of your accommodations, park at the courthouse parking lot in Friday Harbor. We parked here on recommendation of Crystal Seas, and our car was secure without a parking fee. They picked us up here, too.
  • Organize your gear the night before. While you won’t have your dry bags until you’re at the put-in spot, you don’t want to be organizing your gear from your suitcase or duffle full of clothes at the dock. We set aside all the clothing and personal items we’d need for each person, and packed them in one large packing cube per person. They we only had to transfer the packing cube to the dry bag.
  • You’ll get a separate dry bag for your sleeping bag. The best type to bring is a lightweight down or down alternative bag, which packs down smaller than a camping bag.
  • Don’t forget any medications you might need. We all needed allergy medication during the trip, and luckily we had it with us. The guides will have a medical kit, so we probably could have left ours in the car.
  • Be prepared to get dirty! The campsites are rustic, and there are no showers (though there is a composting toilet at the campground). We brought Wilderness Wipes with us to freshen up a few times.
  • Be prepared for all weather. We lucked out with three perfect days, but we all had rain jackets and down sweaters with us, as well as gloves and beanie knit hats for everyone. On the flip side, we also had sunglasses (a must on the water!) and sun hats.
  • You’ll have a ‘skirt’ on in the kayak, keeping your lower half dry, so don’t worry about being wet and cold while paddling. Arms will get a bit wet from the paddles, but if it makes you cold, wear a rain jacket under your life vest.
  • Don’t forget to tip your guides. Our worked so hard…they definitely deserved it!

Disclosure: we experienced Crystal Seas on a media rate, for the purpose of review. As always, all opinions are our own.

Earth Day every day: outdoor adventures that teach kids to love nature

In our part of the world, Earth Day usually dawns chilly and soggy. For many years, I dutifully took my kids out to the local celebration (always held outdoors, of course) so we could freeze for a few hours while batting around an oversized globe-patterned beach ball, learn about sustainable housing and bio-diesel, and eat local produce. Don’t get me wrong: there’s nothing wrong with any of that. But in the past few years, we’ve found a better way to celebrate. We now strive to honor Earth Day every day.

majestic ocean kayaking in Ucluelet

How? By teaching our kids to appreciate nature and the outdoor world that surrounds us. When kids have seen, felt, and interacted with nature firsthand, they’re much more likely to relate to it and strive to protect it as they get older. It’s true that as an outdoor columnist for OutdoorsNW, I have ample opportunity to expose my kids to the wilderness in our region, but the great thing about the outdoors is how accessible it is. Outdoor adventures are usually low-cost (or free), within easy driving distance, and great exercise. The following are our favorite ways to get outside with kids:

1. Go camping.

Camping is cheap, it’s available no matter where you live, and while it takes some effort, it’s a major kid-pleaser. Check out our favorite campgrounds along the Pacific coast, or check your own state park listings for a one-tank-of-gas-or-less getaway. If you’re ambitious, plan a multi-night backpacking adventure.

2. Kayak or river raft.

Kayaking and rafting are great ways to introduce kids to water sports. Families can start on still lakes and rivers, and most locations include a guide who can help you get started. You can opt to be on the water for only a few hours if desired, and can return to comfortable lodging afterward. Kids dig kayaking and river rafting because it’s more exciting than hiking, with the same explorative benefits. Our top favorite kayaking and river rafting adventures have included a family float along the Deerfield River in Massachusetts with Zoar Outdoor, an autumn kayaking trip in Oregon’s Cascade Lakes with Wanderlust Tours, and kayaking Vancouver Island Canada’s Ucluelet harbor with Majestic Ocean Kayaking.

zoar-outdoor-deerfield-river

3. Hike!

It doesn’t get more basic than this. Take the kids, give them a backpack and walking stick (both optional), and drive to the nearest trail head. Don’t know where to find one? Start at your local outdoor store and pick up a local hiking guide or simply ask the salesperson. Bring sunscreen, water bottles, and a picnic, and you’re all set. To keep kids motivated and entertained en route, allow them to set the pace and stop to explore, even if it means climbing every third tree or stopping to build (and dismantle) a dam along a creek. If you want to make a vacation of it, start with our top five Western mountain lodges, and spend your days on the trail and your nights in comfort.

Brasada trail rides

4. Horseback ride.

Many rustic or outdoor resorts now offer horseback riding. For roughly the cost of any outdoor excursion (or round of golf or spa treatment) you can introduce your kids to the cowboy (or girl) lifestyle…for a few hours. We love horseback riding while on vacation because it accomplishes two important goals: fun for the kids and the chance to see more of the outdoors up-close. Even kids as young as five can often ride solo. Our favorite horseback riding operations have included those at Brasada Ranch and Colter Bay in Grand Tetons National Park.

5. Mountain bike.

Mountain biking is an expensive way to enjoy the outdoors if you own your own bikes and equipment, but surprisingly affordable to rent for the day at most local bike shops (whether you’re on vacation or at home). Because you can’t always mountain bike on pedestrian trails (but sometimes can), it’s important to pick up a cycling trail map where you rent your bikes. If you want to go extreme, try gravity-based mountain biking at a ski resort in summer. It’s one of the activities my kids (and I) have enjoyed most in the past few years! Learn more by checking out our biking experience at Northstar California.

How to plan a multi-night PCT hike with kids

If you backpack with kids, your family will eventually become interested in tackling an iconic backpacking route such as the Pacific Crest Trail. Unless you have a lot of time and stamina, you probably aren’t ready to through-hike the PCT, but a shorter PCT hike with kids is absolutely possible.

backpacking-trail

Planning a PCT backpacking trip is complicated, so we turned to the experts before planning ours. The folks at pcta.org put us in touch with trail expert Dana Hendricks, who has led volunteer crews for AmeriCorps, the Appalachian Trail Conservancy, and the American Hiking Society. She has through-hiked much of the PCT herself. We asked Dana the following questions as we set to work planning our hike.

Who should go?

Dana recommended anyone planning to hike a section of the PCT ‘warm up’ with day hikes or shorter overnight backpacking trips. Our family backpacks regularly, but never more than four days at a time. Because this trip would be at least one week on the trail, we decided two adults and the teens would backpack the entire trip, and another adult and the youngest (10 years old) would meet us for three days of the trip.

Where should we go?

The PCT is three states long, and not all sections are created equal. Our first question for Dana focused on where we should spend the seven days we decided to devote to the PCT. The good news: many people opt for day or section hikes on the PCT, so there’s a lot of research out there. Dana suggested we pick up PCT books at pcta.org to find the best section for our needs. The Day and Section Hikes series are excellent: we found detailed information on starting and ending points, and trail conditions and elevations.

Dana told us the PCT was designed as a stock trail, so the grade is 10% or less. This means most sections are suitable for kids who are used to hiking. There were no sections she felt were ‘off limits’ due to terrain. There are, however, dry sections which require carrying more water, and sections where snow may be a factor. For the sake of simplicity, we decided to eliminate these areas (the CA desert, Crater Lake, and the high Sierras). We also eliminated any areas without many landmarks to make the hike interesting, or areas that may be crowded with day hikers.

stuffing backpacking bags

After studying day and section hike books, and looking at our own needs for bodies of water (lakes or streams) and forest, we decided on a section in Central Oregon. Our route, which we’ll tackle in July, spans approximately 90 miles from Elk Lake Resort, through Sisters, to Olallie Lake. Here’s a screen shot of our route:

PCT-section-hike

How long to stay out?

How long our 90 mile route would take us depended entirely on our hiking speed, of course. While many PCT hikers crush the trail, hiking up to 20 miles a day or more, we wanted a more leisurely pace. We used PCT Planner (above) to gauge our distance and time on the trail. It was easy: we just input our starting and ending points, then added our planned hiking time per day. At the pace we felt comfortable with, we’d spend seven days on the trail. This would be longer than our longest backpacking trip so far, which led us to our next question…

How to plan food drops?

backpacking with kids bear canisters

Dana explained that most PCT hikers arrange to have food drops well before their trip. Hikers can mail food to themselves to post offices along the trail, but the idea of leaving the trail and restarting during such a short trip didn’t appeal to us. Instead, we’ve decided to have friends and family meet us on the trail with a resupply of food. We have this luxury because the PCT section we’ve decided to hike is within a few hours’ drive of our home. We know we can comfortably carry four days’ worth of food from previous trips. We will be met on the trail by family members at the end of Day 3, which will coincide with our path through Sisters.  We couldn’t arbitrarily decide when they’d meet us, however: there are set places where it’s easy to access the PCT, and we needed to plan our reunion accordingly. Another way to tackle food drops is to have a non-hiking friend or family member meet you with food at a designated trailhead en route. All re-entry points along the trail are listed on PCT Planner.

How light should we pack?

While we backpack regularly, we’re not what you’d call ultra-light backpackers. We like our luxuries, like hammocks and coffee presses. While Dana agreed with me that some of these items will need to be left at home to leave room for more food, she did remind me not to compromise on any items that keep us warm and dry. A full list of tips for backpacking with kids can be found here. In short, we needed layers, waterproof clothing, shelter in the form of a lightweight tent, food and cooking supplies. We will bring books and a deck of cards, but no other major luxuries. By keeping our packs light, we’ll adjust more quickly to seven days of hiking. Tip: For basics in backpacking gear for kids, check our Backpacking Gear page and How to Plan a Multi-Day Backpacking Trip.

How best to follow Leave No Trace principles on the trail?

We always practice Leave No Trace while in the wilderness, and we wondered whether it would be harder than usual to find established camp sites en route on the PCT. Dana says no: we’ll be able to find established sites virtually everywhere on the trail. She reminded me to camp 100 feet from water sources, and to leave recovering sites alone if possible.

Additional PCT hikes suggested by Dana and PCTA:

There are many other route options for families looking to hike a section of the PCT, of course. Dana also suggests Mt Hood National Forest from Lost Lake to Wahtum Lake to Eagle Creek (a PCT alternate) into the Columbia Gorge or Rock and Snag Creeks, near Bridge of the Gods in Washington.  Dana describes the latter as kid-friendly, as either a short out and back day trip or a 22 mile section hike. Find additional staff recommendations here.

Leave No Trace principles every family needs to know

With Earth Day coming up later this month, April is the perfect time to talk about caring for our public lands. My kids have heard the Leave No Trace mantra since early childhood, but it’s always good to brush up on best practices for preserving the wilderness we love.

leave-no-trace


This season, Leave No Trace launches a multi-year, Leave No Trace in Every Park campaign. Subaru/Leave No Trace Traveling Trainers will be visiting ‘hot spots’ across the country (severely impacted areas), giving them attention and helping educate the public. I was lucky enough to sit down with one of them to ask top questions most families have about leaving a lesser impact on the wilderness.

Q: I am aware of the seven principles of Leave No Trace. Is there a ‘crowning’ principle in particular families would bear in mind while in the outdoors?

We encourage people to think of the cumulative impact as a crowning idea for the principles. Over one billion people visit federal and state lands each year. If one person leaves an impact such as litter, feeds wildlife, takes an item out the environment, or walks on a non-durable surface it will not impact the outdoor area significantly, but the cumulative effect of these impacts happening repeatedly over time would have a dramatic impact.

leave-no-trace

Q: How does trail cutting or ‘bush-whacking’ hurt the wilderness environment?

We encourage people to walk in the middle of the trails even when they are muddy. If you walk around the mud you will erode the sides of the trail making it wider and you could crush vegetation on the edge of trails.

As trails widen vegetation diminishes and eventually land management agencies will have to fix the trail. Along the same lines, we encourage people to not cut switchbacks since it can result in the hillsides between the trail to erode.

If a group of people wants to hike off trail we encourage them to disperse, rather than hike in a single file. By dispersing people won’t step on the same spot, which can cause a new undesignated trail to form.

learning-leave-no-trace

Q: Could you describe best practices for finding a suitable campsite in backcountry situations when established sites are rare?

If established sites are rare and the land management agency does not have designated spots that are provided for campers to use we recommend the following considerations. Camp 200 feet (the equivalent to 70 adult paces and 100 kid paces) away from water, trails, and other campsites. Find the most durable surface available such as rock, sand, snow, or dry grass to camp on. If you find a site that is showing some signs of impact, such as significant soil compaction, stay there, but if it is only showing small signs of impact leave it alone for the area to recover. Move on to another more durable site that is showing no signs of impact. Bonus: dish washing tips and car camping tips!

Q: What’s the best way to completely put a fire to ash and ensure it’s safely out before leaving?

Fires are a great part of camping; they give us light, warmth, and s’mores! Making sure that we are responsible with our fires ensures safety for you, other visitors, and wildlife.

Before having a fire, ensure that they are allowed in the area you are camping in.

Ensuring that your campfire is out completely before you leave or go to bed is a very important part of camping. First, choose firewood that is no larger than your wrist as it will burn to ash more easily than larger wood. Check local firewood regulations as some areas do not allow wood not from the area to be brought in as it may harbor invasive insects.

backpacking foods for kids

Be sure to burn all wood to ash. Then, you want to guarantee your campfire is out cold. First, use plenty of water and sprinkle it over the ashes: to help the process use a stick to stir the ashes while pouring the water. If the fire area is too hot to touch, it is too hot to leave or go to bed. Bonus: how to build a mound fire.

Q: Tips for carrying out all trash? For instance, our family always unwraps food items as much as possible before departure, so there’s less trash to carry out later. 

We encourage people to take a trash bag along with all of their other essential items for any outing. Repackaging food before heading to the trail helps decrease the amount of trash you will have to pack out. We also encourage people to even pack out all food scraps. Human food is unhealthy for wildlife; they become dependent on humans for food and become attracted and conditioned to human food and trash. Which is unhealthy for both the wildlife and humans. Fruit peels can take up to 2 years to biodegrade and most are not native to the areas they are left.

We like to say, if you weren’t there would it be there?

Q: Young kids naturally enjoy making forts, rock dams, or other ‘structures’ at backcountry campsites…how can they channel this desire to create and explore in line with Leave No Trace practices?

We get this question all the time. It is important to educate children on the importance of Leave No Trace while still inspiring creativity and fostering a sense of adventure to connect kids to the outdoors. We still encourage children to play in nature and still follow Leave No Trace. Kids can still build forts or structures at campsites and then before leaving they can simply dismantle the structures.

If kids want to collect items, first make sure to check the rules and regulations of the area to make sure it is ok to collect something.

We encourage only taking one item instead of several, this generally also makes that one item more important to the child as they often attach a special memory to one item they have really given some thought to during an adventure.

Q: A nitty-gritty bathroom-related question: Leave No Trace has always stated that human waste and soap or shampoo should be 100 feet from water sources. What about rafting companies’ ‘dilution is the solution to pollution’ method? 

Usually in the backcountry, we want to be 100 feet away from any water sources, trails, and campsites when doing dishes or bathing.

However, western river corridors sometimes have different recommendations for human waste and gray water. In river corridors, the river is usually the most durable surface. The rivers in deep canyons present difficulties for the normal recommendations because you usually cannot get 100 feet for gray water or 200 feet for human waste disposal away from the water.

Leave No Trace recommends packing out all solid human waste with a reusable, washable toilet system. Always follow local regulations as some areas allow the use of bag-type systems to pack out human waste. Often, urine and strained gray water are required to be deposited directly into the river.

The old saying goes, “dilution is the solution to pollution.”


Thank you, LNT, for helping educate Pit Stops for Kids families!

Five unusual outdoor lodging picks for families

Ever wanted to stay the night in a yurt, overlooking the ocean? How about a rustic cabin in the mountains, a tree house in the woods, or even a fire lookout with sweeping views? All of the above are easily accessible to all travelers – no wilderness experience necessary! Extend the camping season with these year-round lodging experiences, and learn where and when to book them.

Yurts: Comfortable Camping Without the RV

Yurts are not just in rural Mongolia anymore! These canvas-sided circular shelters have been popular additions to many state parks across the U.S. and Canada, offering four-season lodging for those without an RV or camper. Perfect for families with young children, yurts come in rustic or deluxe models, all with electricity, beds (bring your own bedding), and heat. Arriving late to the campground? No need to hassle with tent setup! Want to experience the outdoors without sleeping on the ground? Yurts are the perfect solution.

How to book: Search for yurt lodging by state park on ReserveAmerica.com.

Top yurt: Harriman State Park, an Idaho nature reserve outside Yellowstone National Park, offers a select few deluxe yurts, complete with wood-burning stoves inside. Families can bask in solitude, just miles from Yellowstone crowds.

Unusual Campsite Booking Schedule
Source: Fix.com

Cabins and Huts: Cozy Wilderness Lodging

Channel your inner Little House on the Prairie when sleeping in cabins in private campgrounds like KOA Kampgrounds or state parks and reserves. Like yurts, cabins range from simple shelters to “glamping-style” cottages with one to three rooms. Some, such as select KOA cabins, offer full bathrooms and kitchens in their deluxe models. State park cabins typically offer a room, beds, and a porch or balcony, plus a fire pit and picnic table for cooking and dining. Campers wanting to get further afield can opt for a hut-to-hut hiking experience. Run by private companies on both coasts, hut-to-hut operations allow backpackers to hike anywhere between three and ten miles to various backcountry huts. Depending on the operation, huts can include hot meals, full bedding, or simple shelter.

How to book: Reserve KOA Kampground cabins via their official website or by phone, and reserve state park cabins on ReserveAmerica.com. For hut-to-hut lodging, reserve directly through each private operation, such as Outdoors.org or Cascadehuts.com.

Top cabin: For an upscale cabin experience in a resort setting, stay in a KOA deluxe cabin in Jackson Hole/Snake River, Wyoming.

Top hut-to-hut: Appalachian Mountain Club’s network of AMC lodges and huts offers pristine hiking without the heavy packs in Vermont, New Hampshire, and Maine.

Have we whet your appetite for more? Find three more outdoor lodging ideas in our article on fix.com. 


Source: Fix.com

Flying for the fun of it: Take a trip with San Juan Airlines

Yes, you read that right: flying can be fun! In an era when it’s 99% hassle (even for kids!), I had a great time remembering what I love about flying when I spent a morning with San Juan Airlines. Check out my flight from Seattle to Friday Harbor, WA:

Yes, I’m smiling. Actually, I grinned most of the flight. Why? On a small plane–in this case, a Cessna 172 three-seater–it’s easy to remember why flying is fun! Gone are the barriers between you and the act of flight, such as large airline cabins, in-flight service, and movies on your laptop. Gone, too, are the discomforts: overcrowded conditions, delays, and grumpy fellow passengers. Instead, it’s just you and the pilot, an empty runway before you, and the heady sense of disbelief when you actually do defy gravity.

flying-san-juan-airlines

Do I really do this all the time?

san-juan-airlines

Not like this!

San Juan Airlines, like several other small carriers in the Northwest, operate flights primarily between the small islands that dot the landscape between Seattle and Canada. They fly out of Bellingham, with stops in Anacortes, Friday Harbor, and smaller island and mainland destinations. However, they are also available for charter flights to over 16 destinations, from Spokane to Kamloops BC. Occasionally, they fly out of Boeing Field in Seattle, which is where I caught a ride.

san-juan-airlines

When to consider a small carrier flight:

Obviously, flying on a 2-3 passenger airline is rarely going to be the economical choice. However, it’s worth considering whenever you’re traveling to hard-to-reach destinations, because sometimes, it will make the most sense. When I flew San Juan Airlines, I did so because I needed to be on San Juan Island at a specific time, and had I driven and taken a ferry, I would have had to leave my home 24 hours earlier in order to make the schedule work for me! In this case, time was indeed money.

san-juan-airlines

Other times, flying instead of driving may be the best choice if you want to make your travel day as memorable as your vacation. On my San Juan Airlines flight, my pilot, Brett, doubled as a tour guide, pointing out many landmarks as we flew. When I wanted to see something closer, he happily did a circle around the harbor, allowing me to get all the photos I wanted. We’ve paid for scenic helicopter flights when on vacation before; I’d consider a flight with San Juan Airlines to be just as exciting and fun (plus you’re actually getting to your destination!).

Plus, consider this: no security lines, no boarding passes, no baggage carrousels…no waiting! Now that’s flying!

How to book with San Juan Airlines:

Their website makes it pretty clear, especially if you’re traveling their regular route. If you’d like a charter flight, simply fill out their form or give them a call. They’re a small operation, which means you’ll talk to a real live person when you pick up the phone. Tell them what you need, and they’ll work with you to find the route that’s best. Since I had flown into Seattle at SeaTac, for instance, I needed a flight from Boeing Field (in Seattle), not their regular location in Bellingham. Luckily, a flight was available for me!

How to find San Juan Airlines at Boeing:

Boeing Field is located less than 10 miles from SeaTac, but it’s a big place. San Juan Airlines operates out of the Landmark Terminal, which is located at 7149 Perimeter Road. Give your cab driver the exact address, or you could be circling around Boeing for a while! If you don’t get lost, the cab fare will be about $25 in normal traffic conditions. The waiting room is casual and comfortable, with fresh fruit, coffee, and wifi available.

Have you taken a charter flight? Where?

Educational Travel: Sending your child on a teen service trip

Remember that post from a few months back, where I discussed our preparation for our teen Nate’s teen service trip with Adventures Cross Country? We’re back with a full trip report! If you’re considering sending your teen on a service trip next summer, read on! Spoiler alert: he loved it!

arcc-costa-rica-trip

Last July, Nate embarked on Adventures Cross Country’s Costa Rica Classic trip, which comprised of 14 days of awe-inspiring jungle, cultural immersion, new friendships, and character-building insects throughout rural Costa Rica. Were we nervous when we sent him so far from home, without anyone he knows? I’ll admit it: yes. Even though we travel fairly extensively, it was harder than I anticipated to leave Nate solo at San Francisco International, en route to San Jose, Costa Rica (where he met his leaders and group). He had a rocky travel day, which turned into an overnight delay in Dallas/Fort Worth (which you can read about here), but thanks to stellar communication from the Adventures Cross Country (ARCC) team, he was quickly caught up with the group and off and running.

pacuare-river

Service, adventure, and fun:

I really like the structure of ARCC trips, which combines service projects with cultural interactions and fun outings. Nate’s trip was basically broken down into four sections of approximately three days each:

  • river rafting along the Pacuare River, including zip lining and a river lodge stay
  • teaching English at a rural grade school, which including play time with the kids
  • helping better a mountain community as they harvested crops and repaired buildings
  • learning to surf at a Costa Rican surf camp

costa-rica

During each of these travel segments, Nate’s team leaders, Sally and Bolo, built group community and bonds without the kids even realizing it was happening. They had fun everywhere they went, engaging local kids in soccer games, playing silly games among themselves, and taking side trips to waterfalls. So much was packed into their two weeks, in fact, that even now, over a month later, Nate is still remembering details and regaling us with tales of adventure.

surf-camp-costa-rica

Read about Nate’s day-to-day itinerary in his own words.

I’ve detailed what to look for in a teen service trip, and why we picked ARCC. But what I could not have known before Nate’s trip is this: teen travel changes lives. True, service trips may or may not change the lives of the local residents of the countries visited on a long-term scale, but one thing is undoubtably clear: it changes the life of the teen. Nate was a responsible kid before ARCC, but after, we noticed a quiet confidence in him that wasn’t there before (or at least wasn’t well established). He told us that while in Costa Rica, he observed other teens who “knew who they were, and were strong enough to be themselves,” a trait he decided he wanted to own himself.

costa-rica

In order to get himself to San Jose unaccompanied, he had to be strong, make decisions, and be responsible for himself in confusing airports, stressful situations, and sometimes, in a foreign language. He had to navigate customs solo, and meet a brand new group of people on the other side. Was he nervous? You bet! Did he come out of it stronger and more self-assured? Definitely.

costa-rica

Nate talks about his time in Costa Rica with a smile or a laugh as he tells antedates about snakes and bunkmates and funny jokes, and sometimes, with downright wonder. “I learned how different cultures can be, and how that’s ok,” he told me, “and I was so grateful how the Costa Rican kids accepted me and brought me into their world.” Will the service projects Nate helped with stand the test of time? Maybe. He hopes the beans he picked in the mountains can be sold for insulin for the farmer, Pepe’s, wife. Will the kids remember the English nouns and phrases he taught them? Perhaps. He’s optimistic, as he reports “all his kids were super smart”. But either way, the change in Nate is permanent.

costa-rica-surfing

Still not sure about sending your teen on a service trip?

Consider this: before Nate left, he knew no one (some kids arrived with friends from home), and had never been out of the country without his parents before. Even so, he was not homesick (they’re too busy!), and at the end of the trip, he said he’d recommend it to anyone and everyone he talked to. Check out his video:

Nuts and bolts of an ARCC trip:

I can’t speak for every ARCC trip, but on Nate’s, here’s how things broke down:

  • Nate’s Costa Rica Classic trip comprised of 13 kids (4 girls and 9 boys ages 15-16)
  • The trip lasted two weeks (14 days)
  • The trip cost was $3895, plus airfare, and included all meals, accommodations, projects, activities, everything
  • Nate had two leaders (check out ARCC’s leader criteria)
  • The kids on Nate’s trip were from all over the US, and lasting friendships were formed
  • The ARCC home office is quick with communication and assistance, professional, and competent
  • We were given a very detailed packing list, and offered everything we needed to prepare
  • cell phones were permitted for planned phone calls home only, and held by leaders otherwise
  • recommended spending was about $75 per week: Nate didn’t spend all of his
  • communication between phone calls came in the form of a private blog to parents, with updates

I felt very comfortable with ARCC at all times, and never questioned Nate’s safety or well-being. Yes, I worried about him so far from home (I told him I was homesick on his behalf!), but my worries were unfounded. Nate grew up profoundly in two weeks, and we highly recommend ARCC to others. In fact, Nate’s younger brother is now eying the catalogue!

Disclosure: Nate attended his ARCC trip as a guest of the company, for the purpose of review. Our opinions are our own.


How to make a 5 item outdoor survival kit for $5

survival-kit-for-kids
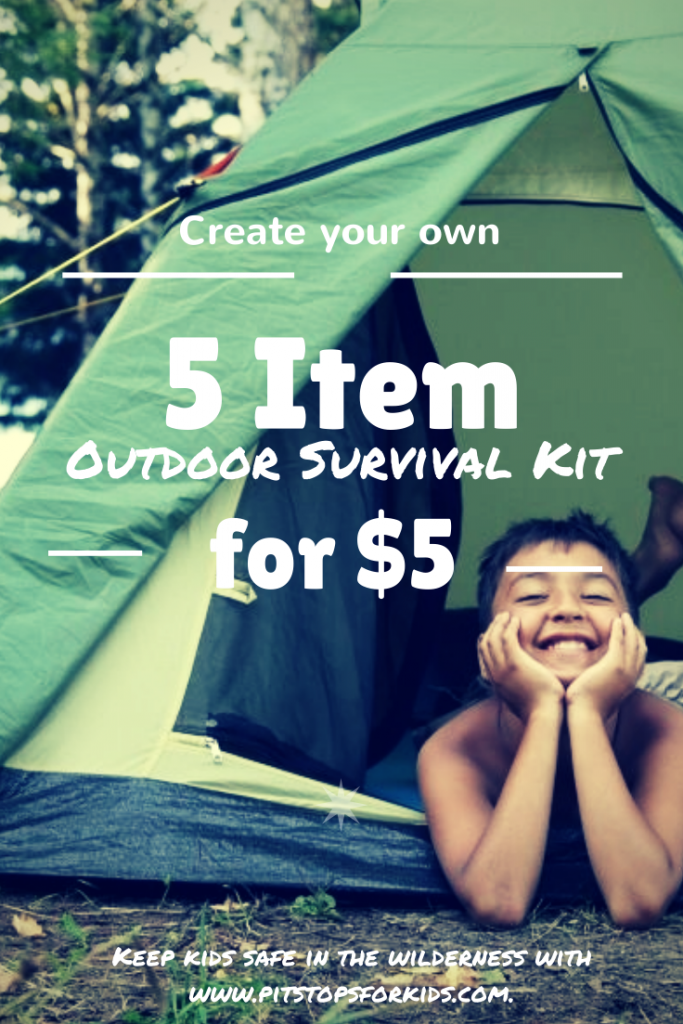
We love getting kids into the outdoors! At Pit Stops for Kids, we’re fans of backpacking, camping, climbing, mountain biking, geo-caching…you get the idea. But as a one-time Search and Rescue volunteer who has spent countless hours teaching school kids how to stay safe in the woods, I want families to be prepared. Kids can occasionally get lost in the wilderness, but by heeding the following advice and being prepared, almost all are found almost immediately by their parents.

The best advice to give your kids: if you get lost, stay in one place. 


The second best thing to do: make your kids this 5 item outdoor survival kit for $5. These items fit easily into a waist pack or into any day pack.

5 item outdoor survival kit for kids:

1. Whistle

Go to your local sports equipment store or dollar store, and buy a cheap whistle. Let your kids know this is an emergency whistle: not to be used for play. The sound of a whistle in the wilderness carries 10x further than a shout or scream, and doesn’t wear down with use. Instruct kids to blow their whistle in blasts of three if lost.

2. Plastic poncho

Is an expensive jacket better protection than a dollar store poncho? Sure, but chances are, your kid won’t want to bring it along on a hot summer day. A plastic poncho fits down to the size of a fist (or smaller) and weighs almost nothing. When needed, it retains body heat well.

3. Glow stick

Grab a cheap glow stick and put it in your kid’s kit. Glow sticks don’t require any batteries, and will give off light in 360 degree direction. A glow stick will last 12 hours, getting  a kid through a night if necessary.

4. Bandana

Search and Rescue volunteers are trained to look for anything out of the element when searching in the wilderness. Therefore, a bright color, such as neon green or yellow, will stand out and alert searchers to the presence of a person. Instruct kids to hang their bandana on a tree limb, wearing it on their head, or spread it out in the open. Alternative item: a used or blank music CD or DVD can be used as a cheap reflecting device, often seen by spotters in helicopters.

5. Non-perishable snack

Why not water? Because for almost any hike or outdoor excursion, parents have already thought to pack a water bottle for their child. In addition to water, a non-perishable snack is cheap and light to pack. We keep a Nature’s Valley granola bar in each of our kids’ packs. Power Bars or other energy bars last a long time, too. Alternative: a bouillon cube.

99% of the time, kids are completely safe in the wilderness. But for piece of mind, the above items in your kid’s pack will go a long way. For more information on kids’ wilderness safety, check out the Lost But Found Search and Rescue program I’ve been a part of.


Where to backpack with kids in Northern California

Will you be backpacking with kids this coming summer? Most families who love backpacking with kids are familiar with backpacking options in popular regions such as Yosemite National Park, but the following lesser known areas offer backpacking just as scenic and often crowd-free.

where-to-backpack-with-kids

Tahoe and Northeastern Sierra Nevada:

Our favorite section of the Northeastern Sierra Nevada mountain range is located in California’s Plumas County, adjacent to the town of Graeagle. The Lakes Basin Recreation Area, just south of Graeagle up Gold Lake Road, offers 47 trails and over 30 alpine lakes. Some of these trails are available only for day hikers, but link families to backpacking regions. To start out directly on a backpacking route, begin at the Jamison Mine Trailhead en route to historic Johnsville (10 miles from Graeagle) and hike approximately three miles uphill to beautiful Rock Lake. This alpine lake offers idyllic camping, swimming, and rock jumping. Adjacent Jamison Lake offers great trout fishing.

Tip: consider renting a Tahoe vacation home before or after your backpack trip. We like to spend a few days pre-trip in a home, where we can organize backpacking foods, pack our backpacks, and enjoy a few luxurious days before entering the backcountry.

Trinity Alps and Marble Mountains:

Further north near the California/Oregon border, the Trinity Alps Wilderness in Shasta Trinity National Forest consists of chiseled granite peaks and alpine lakes, with elevations from 2,000 feet in creek drainages to 9,000 feet at summits. This wilderness offers many different trails ranging from 1.5 miles to 15 miles at varying levels of difficulty. Spring backpacking is often an option here (in the lower elevations) and mid-week trips are encouraged to beat crowds. Our pick: the five mile hike to Granite Lake on the Swift Creek trailhead. Tip: families will want to arrive early on weekends or during mid-week to secure the prime campsite lakeside.

granite-lake-backpacking

The nearby Marble Mountains are less populated, and easily accessed from I-5. Our favorite backpacking route through the Marble Mountains is to Campbell Lake, located off the Shackleford Creek Trail (three hour hike). Visibly stunning, Campbell Lake offers great swimming. The Trinity Alps and Marble Mountain region offers many loop trails perfect for families wanting to adjust their trip to suit kids’ abilities.

Lassen National Park:

Lassen National Park is one of the least visited in the US, and we have no idea why! However, families can take advantage of the low crowds and find prime backpacking wilderness with relative ease. Grab a wilderness backpacking permit when you enter the park, and then head east, to where the top backpacking loop trails depart. You’ll find alpine lakes, creeks, and lodgepole pine forests in ample supply. The weather tends toward hot and dry, which means families will encounter fewer mosquitos than in damper areas. If you head toward geothermal regions of the park, bear in mind that camps cannot be set within 1/4 mile of geothermal activity (bubbling pots, etc).

backpacking-trail

No matter where you backpack, be sure to get the necessary permits at the ranger station or forest service station nearest your trailhead, and check conditions before arriving. Make sure you have a water filtration system or means of fresh water, and bear canisters where required. For more general backpacking tips, read How to Plan a Multi-Day Backpacking Trip with Kids. For gear suitable for kids while backpacking, check out our Travel Gear We Use series.

The above post is written in partnership with VacationRoost.com.