ATV adventures and snorkeling with Punta Venado

There are as many Riviera Maya eco-tours as there are amazing natural wonders along this part of the Caribbean, and each offer something a little bit different. We’ve reviewed the fast-action activities with Alltournative, but for a change of pace, a day with Punta Venado offers both ATV adventures and snorkeling, plus relaxation.

blue venado beach club

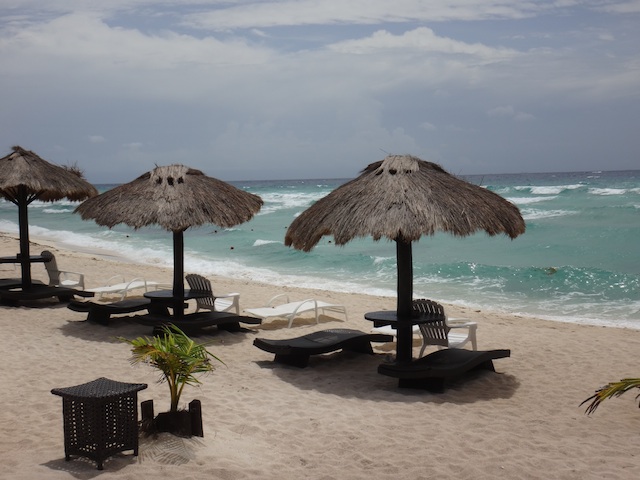
Don’t worry: the kids will still be highly entertained with Punta Venado, located on almost 2000 acres and along 2.5 miles of pristine private beach. But you’ll enjoy some downtime as well. The eco-park is comprised of two sections: the Punta Venado ranch, with activities ranging from horseback riding, ATV-riding, and snorkeling, to the Blue Venado Beach Club, which sits on pristine white sand and offers a lovely open-air restaurant, cabanas, and miles of coastline. Families looking to get the most of their stay will take advantage of both.

punta venado

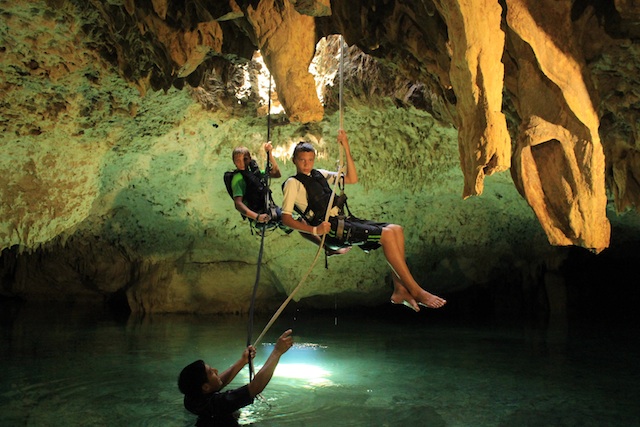
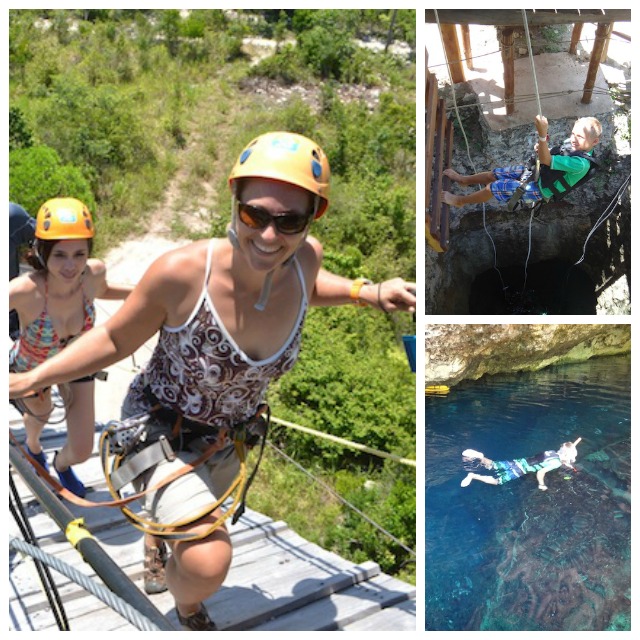
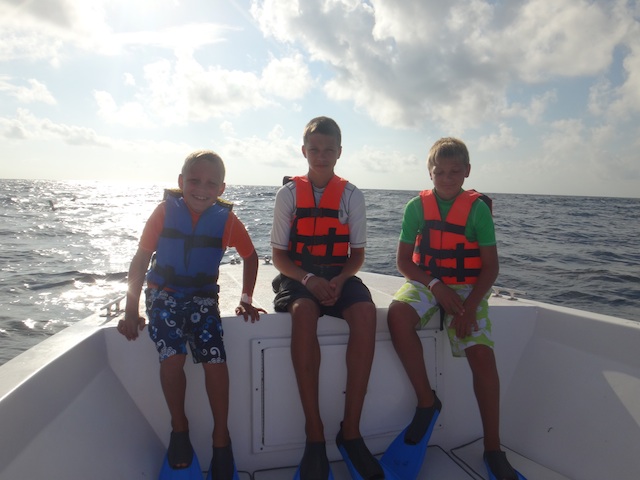
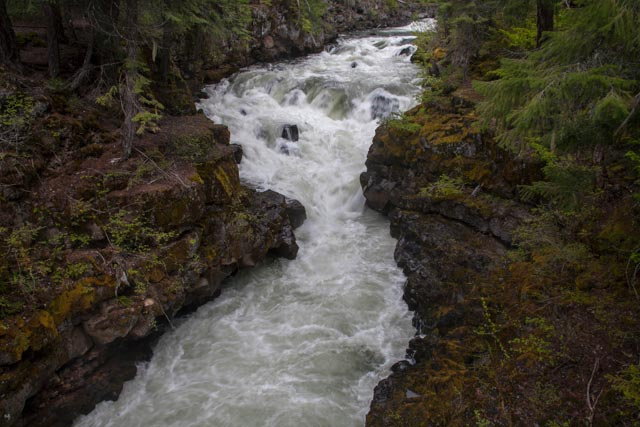
We started our day at Punta Venado with an ATV tour through the jungle. Since we experienced a brief downpour during our tour, the dirt paths were nice and muddy…perfect for some messy fun! The ATVs seat two, and adults must drive (age 16 and up). A guide takes your through the jungle to a dry cenote cave, where you get off the ATVs to explore a bit. If you’ve been swimming in cenotes earlier in your trip, this field trip isn’t too big of a thrill, but still fun. We then continued on ATVs to a cenote pool, where we jumped into the fresh water to cool off and wash the mud off our legs from the drive. This pool was very fun for the kids to explore, as it included a small creek-like waterway at one end, surrounded by jungle.

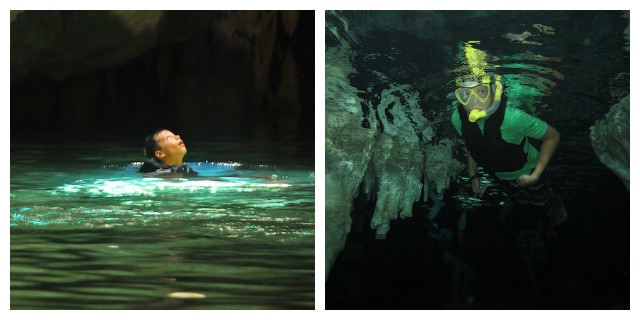
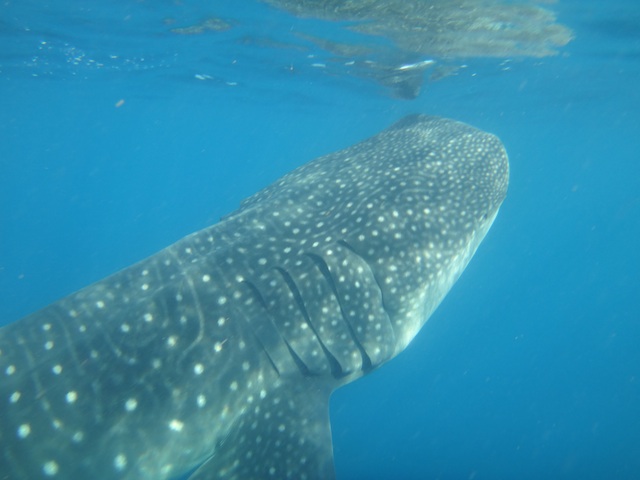
We rode on to Punta Venado’s private beach (as pretty as any along the Riviera Maya) where their snorkel and dive shop team outfitted us to snorkel on the Mayan Reef. The reef sits only feet off the shore at this location, making Punta Venado the only place we knew of in the Riviera Maya to snorkel the reef directly from shore. Even though the water was choppy after the morning storm, we were able to reach the reef area fairly easily (we were given fins and life jackets in addition to snorkels and masks), and our guide offered recycled water bottles filled with soggy tortillas…perfect fish food! The tropical fish surrounded us to access the food (which is squeezed from the bottle), making for a very impressive showing.

punta venado

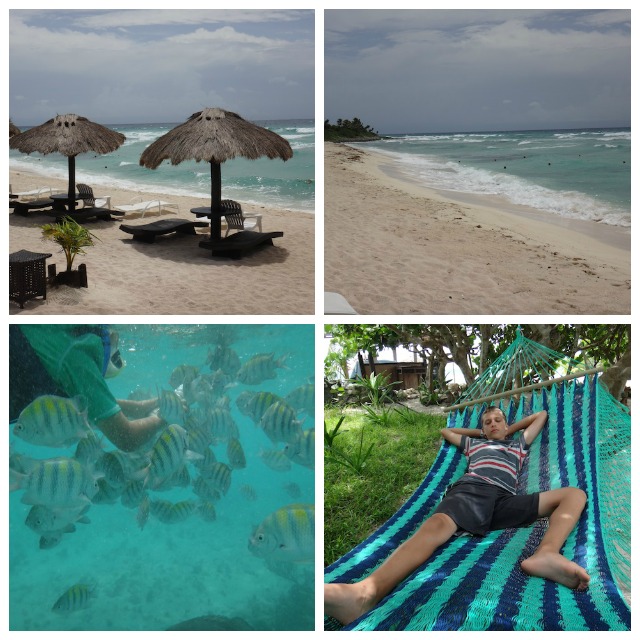
On a calmer day, we could have accessed more of the reef, but even in not-ideal conditions, we saw hundreds of fish. We swam back to shore to ride the ATVs back to the ranch area.

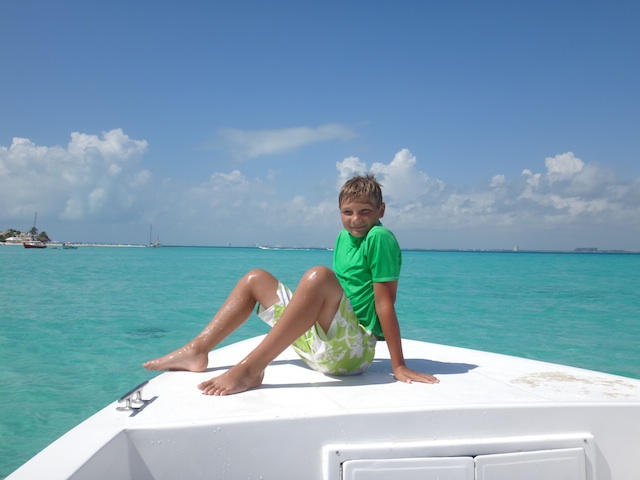
When booking a Punta Venado tour, families can choose between a menu of options: in addition to ATVing and snorkeling, we opted for lunch at the Blue Venado Beach Club, a short dirt road drive away. This private beach club is directly on the water, offers bathrooms, showers, a restaurant, a bar, and beach cabanas. After lunch, you’re invited to stay as long as you’d like. If you have your own snorkel gear, you could certainly snorkel off the shore here as well, and if not, the body surfing is great.

Tip: Eco-tours are expensive: if you want a more economical day, opt for the beach club only. Access is free: we were told the only requirement is to buy $20 worth of food or drinks per person from the restaurant. At $20/person, this is the cheapest excursion in Riviera Maya. If you have a car or rent a taxi, access to the beach club is directly off the coastal highway linking Cancun to Tulum.

Date last visited:

August 2013

Cost:

Punta Venado ATV tours are $83/per person. They also have an option called All In, which includes everything on offer for $150/per person.

Directions:

Look for the Punta Venado and Blue Venado Beach Club sign right after Calica on the Riviera Maya.

Disclaimer: we experienced Punta Venado as guests of the tour company, for the purpose of review. All opinions are our own.

A day with Alltournative tours: Tulum and Jungle Maya adventure with tweens and teens

Mexico’s Riviera Maya is rich with geological and cultural excursions for active families. It’s system of cenotes (underground rivers) and abundance of Mayan ruins are accessed by many tour operators, but which one to pick? We spent the day with Alltournative Tours, a leading eco-archaeological guide service specializing in active, adventurous tours.

Like most local tour companies, Alltournative works with Mayan property owners and archaeological sites to gain access to some of the most impressive (and most fun) sites along the Yucatan peninsula. We opted for their Tulum and Jungle Maya tour, which offers a history lesson at ancient Tulum and explorative fun in the jungle in their Mayan eco park.

We started the day at Tulum, the beautiful Mayan ruins on a cliff overlooking the Caribbean Sea. (Alltournative will pick up from most Cancun and Riviera Maya hotels.) Right away, we knew our bilingual guide, Robbie, would be fantastic: a native of Mexico City who is part-Mayan himself, Robbie was passionate about the Mayan culture, knowledgeable about their history, and great about tailoring the educational content to kids. Tulum is open to the public and easy to access on your own, but once on-site, we saw the value of a guide: many of the sites have little information in English to explain their significance. Without Robbie, we wouldn’t have known what we were looking at most of the time. We toured the sites for approximately 45 minutes, then Robbie left us to explore on our own for another hour. We opted to take a much-needed dip in the ocean at the beach on-site (voted by National Geographic as one of the most beautiful in the world!) then took advantage of some photo ops.

Tulum

We rejoined Robbie and the Alltourative transportation and drove the short distance to the Sac-Actun xenote cave system. Located on Mayan property at a small eco park run by Alltournative, we were given lockers, took showers to rinse off, then met the Mayan family who owns the property for a short purifying ceremony in the Mayan language. (The cenotes are spiritual to the Mayans, and treated with upmost respect.)

rappel into cenote


We were then led to an opening in the underground xenote system, where we rappelled down to swim in the cool, fresh water. Popping out through a cave entrance a few meters away, we climbed into the back of a Mercedes Benz all-terrain truck called an Unimog and enjoyed a bumpy ride through the jungle to Alltournative’s series of zip lines.

cenote

I expected this jungle ride to be merely a means to an end (the park is divided into two sections), but instead, it was one of the kids’ favorite parts, due to driver Willi’s sense of fun. Willi took the Unimog along the pot-holed dirt road at a rolling pace, to the delight of the boys.

Once we’d departed the vehicle, we were outfitted for zip-lining (still with our faithful guide Robbie) and shown how to climb the steep ramps to the zip line towers. We took two lines across the jungle, then were surprised by an entirely new-to-us zip-line experience: zipping into water. The last line concluded in the cool water of an open xenote, which was all kinds of fun. We swam to the shore, then grabbed snorkels and masks for a swim through the Nohoch Nah Chiich cenote cavern. Note: If this itinerary seems whirlwind, that’s because it is! We recommend Alltournative to families who have active kids looking for fast-paced outdoor fun.

alltournative activities

The Nohoch Nah Chiich is renown to divers (scuba is offered at this location for cave-certified divers), but for snorkelers, it’s a pretty easy swim through open-air caves with the guide. The swim takes about 15 minutes, and stalactites and stalagmites are pointed out along the way, in addition to hanging bats. Using your mask, it’s an unique experience to see the cave bottom as well as look up at the ceiling.

By this time in our day, we’d worked up quite an appetite. Last but not least, we were shown to the Mayan dining area and kitchen on-site, where the family owning the land prepares authentic Mayan cuisine. Tables as communal, and food is buffet-style, with a traditional Mayan soup, empanadas, beans, rice, chicken, and tortillas. Beware the hot sauce…it’s truly hot!

zip line with alltournative

After the meal, guests are returned to the first section of the park to retrieve the items in their locker, offered a MAYArita (their version of a margarita), and invited to rest a while in the many hanging hammocks and lounge chairs dotting the landscaped jungle space.

Alltournative has photographers who shadow you during your tour, and they ask you to view your photos on computer stations before leaving. The photo packages are expensive, but if you don’t have your own underwater camera or video camera to capture the action, they may well be worth it. (You can always take your own photos.)

A word about sustainability and ecotourism: We were impressed by how well the flora and fauna were cared for at the Alltournative eco park site, and liked hearing how our ecotourism aided the Mayan people who owned the land. The xenotes here are spotless, and while they don’t have a completely ‘wild’ feel due to being part of a tour, they are clearly authentic (as opposed to aided by human construction at the large eco parks along the coast). If you have dive experience, you can certainly seek out more isolated xenotes on your own, but for an introductory family experience in a safe environment, Alltournative will fit the bill nicely.

A note about Coba: Alltournative also offers a tour of Coba, the Mayan ruins further inland. This tour does take longer, with a longer drive, which is why we opted to tour Tulum instead. However, it is still possible to climb the ruins in Coba, which can be a draw to families.

Date last visited:

August 2013

Cost:

the Tulum and Jungle Maya tour we experienced runs $129 for adults and $99 for kids. Alternatively, families can book the Jungle Maya only for less, but we don’t recommend skipping Tulum.

Directions:

It’s not possible to drive to Alltournative’s eco park on your own, so leave the rental car at your hotel and let them pick you up.

Disclaimer: we experienced Alltournative as guests of the tour company, for the purpose of review. All opinions are our own.

Swim with whale sharks in Cancun Mexico

One of the most memorable excursions in Cancun for my family was to swim with whale sharks. These harmless giants can be found in the open water approximately 20 miles off the coast of Cancun (past Isla Mujeres) from May to September, and if you’re visiting the Riviera Maya area during this time period with older kids and teens, it’s definitely an activity to consider.

swim with whale sharks

Who to book with:

We booked our swim with whale shark excursion with Solo Buceo, a dive and snorkel operation located in Dreams Cancun. The dive shop is located in the heart of the Cancun hotel zone across the street from the hotel (right on the water) and is easy to reach via taxi from most area resorts.

We liked that Solo Buceo departs directly from their shop for the whale shark areas, so there’s no shuttle transfers to waste any time. The shop is scenic in itself, set against the bay with plenty of thatch roof cabanas to sit under while getting ready, signing waivers, and the like. The staff was all very friendly during our visit, and very efficient. Our reservation was listed on a dry erase board behind the counter with our guide already assigned to us before we even approached the counter. Our guide Santiago was fluently bilingual, and the whole experience was very professional.

At Solo Buceo, whale shark excursions leave early in the morning. Our boat departed promptly at 7 am, which meant a 5 am wake up call at our Puerto Morelos hotel room. It’s not fun to get up so early on vacation, but the early departure had a purpose: we were the first boat to set out in search of the whale sharks, and when we arrived at the snorkel site, only one additional boat had beat us there. By the time we left, we were surrounded by a dozen or more boats, with more arriving by the minute. A whale shark excursion is not cheap, so we appreciated this added touch of a semi-private experience.

solo buceo

What to expect:

Our guide Santiago explained some of what we should expect before we got on the boat: whale sharks are gentle and harmless, but they’re also wild animals…it may take time to find them, and there’s no guarantee of a sighting. The boat ride out to the open water where they swim takes approximately an hour, and snacks and drinks are provided. The small boats hold about 10 passengers max.

What we were not told: the ride through the open water can be very choppy, and it’s very easy to get seasick. I had read reviews suggesting a motion-sickness remedy, so we did have sea-bands on, but they were of little help. While we didn’t get too sick on the ride out, our stomachs were queasy enough that once in the water, a few of us felt quite sick. Remember, this is open ocean, so it’s not possible to see the bottom of the ocean floor: once you have a mask on and are looking down, you’re bobbing on the water (with some significant waves) without the aid of a horizon to orient yourself. This combination makes seasickness more likely. I was not surprised to feel seasick, as I succumb to motion sickness easily, but even the more hearty in our group were affected, as well as several additional people on our boat. The remedy: lose your breakfast in the ocean, not the boat, please!

Swim with whale sharks:

Seasick or not, swimming with the whale sharks was an amazing experience. About an hour out into open ocean, we spotted a group of about 30-40 sharks and entered the water. Our guide went with us and was invaluable in his help pointing out where the sharks were (look down!, under you!, over you!) and keeping kids (and adults) out of their way. Swimmers may not touch the sharks (doing so purposefully will get you a seat back on the boat), but it’s sometimes hard to get out of their way! By avoiding the tail, we got the hang of it eventually.

We spent approximately 1 hour in the water, taking breaks in the boat as needed, allowing the whale sharks to swim under us, around us, and even over us. When in a lucky position, it was possible to see their huge, gaping mouths open to eat the baleen they feast on, and we even spotted manta rays as well. We were given life jackets to wear (it’s optional to upgrade to wet suits at an additional cost), so even the youngest among us (age 8) had no trouble on the open water. We appreciated that all the child equipment fit well (not always the case) and that all our masks and snorkels were in great working order. Younger children might be afraid given the open ocean and depth (not to mention the huge animals) but once we’d taken the plunge, all our worries were put to rest. These whale sharks are truly peaceful to swim with, and our guide in the water was very attentive, helping to keep kids close.

On the return trip to Cancun, sandwiches and sodas or waters were handed out to those of us who could keep a lunch down, and we stopped for 15-20 minutes just off Isla Mujeres to take a warm-water dip in the crystal clear, shallow water off the island. For those of us who had felt ill, this swim was very refreshing.

swim with whale sharks

When we arrived back into the bay, we could still see boats departing for the whale shark area, and were so glad to have spent time with these giants solo. Expect to spend about four hours total from the time you depart the bay to the time you return.

Tip: Bring an underwater camera, and wear biodegradable sun screen. For some reason, sun screen cannot be applied in the boat, so remember to apply while still on the dock. It’s easy to burn in the morning sun.

Date last visited:

August 2013

Cost:

$119 for adults, $89 for kids

Directions:

Any taxi can take you to Dreams Cancun, where the doorman or bell services staff can point out Solo Buceo. From Puerto Morelos, the ride was $40 US (though this rate had to be negotiated ahead of time…when we made the mistake of asking only at the end of our drive, the rate had climbed to $90).

Disclaimer: we experienced swimming with whale sharks as guests of Solo Buceo, for the purpose of review. All opinions are our own.

Bouldering with kids: Mill Creek and Avenue of the Boulders OR

When I say ‘bouldering’ I don’t exactly mean the sport catching on among the outdoorsy type from Colorado to New Mexico. I mean ‘clambering’ or maybe ‘scrambling’, as we really weren’t climbing high enough to need mats or helmets. However, I have learned that if you tell kids they’re going bouldering, they hike much faster! Any way I can add some excitement to a nature walk or hike, I do so! Tip: another great way to get kids to enjoy the outdoors is geo-caching.

Mill Creek Oregon

Bouldering with kids is easy in Southern Oregon, where many volcanic rock formations await. Tobias (age 8) spent the day bouldering and hiking with his grandpa in Prospect, Oregon, which is located on Highway 62 en route to Crater Lake National Park. This part of the drive to the lake is a great place to stop and stretch legs with a moderate hiking/climbing experience.

Mill Creek Falls and Avenue of the Boulders

These falls are a short hike from the parking lot, but from the falls you can hike further to the Avenue of Boulders at the base. This veritable ‘city’ of boulders fall in a neat row, then in a group, looking like a skyline from afar. Between the boulders are  calm pools of water, sandy beaches, and lots of opportunities to climb around, up, and over. If you plan to do serious bouldering here, definitely bring mats and helmets, but kids can get pretty adventurous and still be safely close to the ground.

bouldering with kids

Natural Bridge

Next, head over to Union Creek, Oregon, just up the road along Highway 62. This area offers a trailhead at Natural Bridge Trail to a series of lava tubes that wind under and through the often fast-flowing Rogue River. Not only are the tubes beautiful, but they’re fascinating for kids. Challenge kids to find hollow lava rocks and see if they’ll float in the calmer water at the end of the hike. Families can take a 2.4 mile loop, or just walk across two bridges to observe the lava tubes and the rapids. There’s a primitive campground adjacent, and bathrooms with pit toilets. In the summer months, you’ll want to picnic. Tip: grab a piece of pie or a berry smoothie after your hike at Beckie’s, world famous for their food (or at least world famous in Southern Oregon!).


Travel Gear We Use: Stonz Wear Rain Bootz and Linerz:
new-masthead.logo.042513Stonz is a children’s outerwear and boot company homegrown in Vancouver, BC. Our Pit Stops’ kids wore Stonz rain boots on our Mill Creek adventure. Stonz rain boots are made of natural rubber, and parents can buy them with optional soft, fuzzy liners that kids love. They slide on easily, but stay put while exploring creeks, muddy river banks, and other outdoor destinations. Best of all, they can be sprayed down with water after you get home, and the liners are machine washable. Buy Stonz Rain Bootz on Amazon or Zapposor find more Travel Gear We Use.


Directions: Once on Highway 62 (grab this from I-5 in Medford, Oregon), follow marked signs to all the above destinations.

Also nearby: Take a hike along the Upper Rogue River.

The above post was written in partnership with Stonzwear.com. Photo credit: flickr.com/AlaskanDude

Outdoor exploration with kids: Eastern Mountain Sports Schools

EMS rock climbing

 EMS is one of my favorite outdoor gear stores, and I look to them whenever we need something new for backpacking, hiking, or climbing. But did you know that they have special “schools” for climbing (rock and ice), skiing (avalanche training, back country, telemark), kayaking, and biking? These EMS schools are located throughout New England and New York and are available to everyone from experts to newcomers. When you join a class, all equipment is provided (except personal clothing, jackets, raingear, etc.) so it’s a great way to get started in a sport without making a big investment. Half day, full day, and even overnight classes are offered. So whether you live in the area, or are spending some time here on vacation, check out the EMS website to see what’s available near you!

We recently took a half-day beginner rock climbing class in Lake Placid, NY after introducing our five-year-old to the sport at the local climbing gym. (Tip: we paired our EMS schools class with a stay at Lake Placid’s Golden Arrow Lakeside Resort.) Our instructor was friendly and great with kids, and was able to give instructions without skimping on fun. He knew of a great beginner site that was just a short hike off the road, and Homer got to try out a number of different ascents, ranging in difficulty. He must have climbed that cliff 15 times before he asked for a break!

An EMS climbing class may seem expensive ($350 for a family of 4 or 5 people, full day), but when you consider the cost of equipment, and the importance of an instructor who is going to do a lot of the grunt work for you (think of all the ropes that need to be fixed at the top before you even start!), the price sounds pretty reasonable. Overall, it was a great experience, and I’ll definitely check out what is offered by EMS schools before my next New England/New York getaway!

Check out their website to see what’s on offer near you. Classes are located in Massachusetts, New Hampshire, Connecticut, Rhode Island, Vermont, and New York.

EMS rock climbingDate last visited: August 29, 2013

Distance from the interstate: Lake Placid is pretty remote, and is not really on the way to anything, but it’s still worth a visit! It’s about a 2 or 2 ¼ hour drive from Albany, about 30 miles off Interstate 87.

Where to stay: Read our review of Golden Arrow Lakeside Resort!

Directions / Contact:

See the EMS website for information on an activity near you. The Lake Placid store is located at 2453 Main Street, Lake Placid, NY 12946; tel: (518) 523-2505

As we disclose whenever applicable, we experienced EMS Schools as guests of EMS, for the purpose of review. 

Cave spelunking at Craters of the Moon National Monument

For families driving through Southern Idaho en route on I-84 or toward Yellowstone National Park, a stop at Craters of the Moon National Monument is well worth the time. This park of lava tubes and geological displays is visually stunning with its rocky volcanic landscape and cinder cone, but the true wonders are below ground. The highlight for our family was certainly the cave exploration within the park.

spelunking at Craters of the Moon

Start at the visitor’s center at the park entrance, and watch a short film on the park, then obtain a cave permit. (Permits are required to enter any caves in the park in an effort to protect bats from a common bat disease.) Once you have your permit (and enough flashlights or headlamps for everyone in your party), head out on Crater Loop Road, and follow signage to the cave area. You’ll see a parking area and paved path to the lava field with five caves. We toured the Dewdrop Cave (small and good to start with), the Indian Tunnel (large but still well-lit), and the Boy Scout Cave (dark, icy, and requiring much scrambling). If you have adventurous kids in your group like we have, they’ll also want to explore additional lava tubes running throughout the beds.

lava beds

Note: You’ll want sturdy shoes with good grip in the caves, as well as lights (headlamps are best). Keep kids close to you, because there are many ways to go inside the caves and many small tunnels that are tempting to explore. Be aware of icy rocks.

If cave spelunking isn’t your thing, the Crater Loop Road also includes numerous view points, a short hike up a cinder cone, and day hikes. There is a campground at Craters of the Moon which is visually beautiful but low on shade or wind protection; I’d recommend it for RV campers, not tent campers. The visitor’s center has an indoor atrium where families can eat bag lunches, but no outdoor picnic areas. Don’t forget to get the kids’ National Parks Passports stamped!

Craters of the Moon

Date last visited:

June 2013

Distance from the Interstate:

1.5 hours (right on US Highway 20).

Admission:

Car fee is $8. Campground fees may apply.

Operating hours:

Visitor’s Center: 8 am to 6 pm during summer months. Call for opening season dates: 208-527-1335

Directions:

Craters of the Moon is located off US Highway 20/26 between Arco and Carey, Idaho.

Five day guided rafting trips Rogue River review with O.A.R.S.

If deciding whether multi-day guided rafting trips are right for you, you’ve no doubt read all the information available on numerous river rafting websites, scanned itineraries, and compared reviews. But which to pick? Nothing beats a day by day report from ‘the field’: we spent five days in July on the Wild and Scenic Rogue River with O.A.R.S. 5 day Rogue River trip. Read on for our full experience, plus river rafting tips.

Day 1:

Day 1 actually starts the evening before departure, with a meeting at departure point Morrison Rogue River Lodge. We met our lead guide Laurie at this point, who handed out dry sacks in which we were to pack our personal belongings and sleep kits. (Families can bring their own sleeping bags and pads, or rent from OARS.) Laurie answered any last-minute questions, and let us know our departure time for the river the following day (8:30 am). This was also the point at which we met our fellow rafting partners. On our July trip, we had a total of 11 clients in the group: a family of four (kids aged 7 and 10), family of three (kid aged 10), family of two (myself and son Calvin, aged 12), and couple of two.

We departed from Almeda Bar the next morning (a very short van ride from Morrison’s), and met our additional three guides, Alyssa, Noah, and Jenae. After a safety talk from guide Alyssa and an introduction to our modes of transportation on the river: oar (gear) boats and inflatable single and double kayaks (or duckies), we floated through mild riffles and flat water, a good warm-up for our first challenge: Rainie Falls. Rainie is a Class V rapid, but there is an optional Class IV route, which we took. Rafters 12 and up had the option of ‘duckying’ through; the rest of us rode as passengers on the sturdy gear boats. Calvin opted to ducky: it’s worth noting that lead guide Laurie had, in only a few hours time, already been able to access his ability level as competent for this challenge.

OARS river rafting

We stopped for our first lunch shortly after Rainie Falls, where we were introduced to food procedures. OARS always has a hand-washing station set up by the food table, as well as ice-cold water and a ‘juice of the day’. Rafters use assigned OARS mugs throughout the trip. Lunch blew us all away: delicious cold cuts and pulled pork sandwiches, along with appetizers of crackers and cheese and fresh fruit. There’s always a cookie option for dessert!

We rafted another few hours, stopping periodically where our guides knew of good ‘jumping rocks’ and swimming holes, then made camp at a sandy beach overlooking the water. We were introduced to the ‘groover’, the portable toilet system (if you’re used to camping, this will be no big deal), and our first of many delicious dinners (baked salmon with cobbler for dessert). Wine, beer, and soda are available at dinner.

Day 2:

By Day 2, we felt we had gotten our feet wet (pun intended) and more people were eager to try the duckies. We had mild water in the morning, making for a perfect opportunity for the younger kids to kayak. Our guides stopped for lunch near a short hike to a historic cabin (Whisky Cabin) and excellent swimming hole in a nearby creek. We spotted rattlesnakes on Day 2, as well as bald eagles and osprey. We camped on Day 2 on a gravel bar on the shore, perfect for the fishermen in our group. The rest of us swam, played games with the guides, and played cards.

River Rafting OARS

Day 3:

During our evening pow-wow the night before (during which the guides let us know the plan for the following day), we learned that we’d have a short river day on Day 3, allowing us to reach our desired campsite before others (its beauty and location make it popular). While I was initially disappointed to be stopping before lunch, I quickly realized that a day off the water still meant a day of fun. Our camp was between the river, a sandy beach, and a creek, with the historic Rogue River Ranch (with museum) above us. We explored the ranch, played games, swam, and creek hiked all afternoon, with no worry about ‘what’s for dinner’, food prep, or clean-up. Our energetic guides had everything under control. I loved having time for journal writing and novel reading while the guides led field games at the ranch.

food on OARS trip

Day 4:

By Day 4, our small group had really gelled, and the kids very much enjoyed each other’s company. We had a big day on the river: exciting Blossom Bar rapids and scenic yet challenging Mule Creek Canyon. Our morning started with a swim test (after a breakfast of eggs benedict), necessary for anyone wanting to ducky through the canyon. Calvin and one adult tried and passed. (The swim test involves purposely tipping over your kayak, swimming, flipping it back over in the water, and getting back in.)

We scouted Blossom Bar before rolling up the duckies and taking the gear rafts through, then re-inflated them for Mule Creek Canyon. Our ‘ducky-ers’ did great, despite our guide losing an oar boat oar to the jagged rocks. We emerged from Mule Creek Canyon at Paradise Lodge, a unique lodge accessible only by river, and enjoyed ice creams on the sunny deck overlooking the water. We camped nearby, celebrating the 4th of July with yet another gourmet dinner and dessert. The guides surprised us with a corn-on-the-cob eating contest and birthday cake for Calvin and another rafter. Their culinary skills were truly amazing.

adventure with OARS trip

Day 5:

Our last day took us through more beautiful scenery and our best ‘rock jump’ yet: up Tate Creek to a swimming hole with a rope climb to a natural water slide. We pulled off the river once more for yet another jump into the Rogue, photos by yet another waterfall, and yet another excellent lunch (tuna salad sandwiches and lox). Departing the river at Foster Bar, none of us were quite ready to be done.

River rafting tips:

1. Ask about your fellow rafters before booking. We had a great group of people, but don’t just hope to get lucky: inquire about the demographic of your group before committing. Definitely aim for a trip with other kids attending if you’re bringing your own. Kids will have fun even if they are the only ones underage, but a big part of the enjoyment for us was the fellow rafters.

2. Leave modesty at home. If you’re not squeamish about the ‘groover’, you’ll have a better time. The unit is always set up somewhere private, but it’s still in the outdoors (no walls or doors to lock). Toilet situation aside, you’ll be spending multiple days camping with strangers; after Day 1, we were quite comfortable with one another.

3. Follow the packing list. The OARS packing list is very thorough, and we found it very useful. Even if you don’t think you’ll need rain gear or a jacket, bring what’s on the list. It’s also helpful to have comfortable shoes for in camp at night. Opt to use one of OARS sleeping pads instead of a Therma-Rest style: they are three-times as thick and comfortable!

4. Bring camp toys. Even following the packing list to a ‘T’, you’ll have room for a few toys. Bring a Nerf ball or deck of cards, or even lawn games. If you think you’d like to fish, bring your equipment (room will be made on the boats) and a license.

5. Definitely have a good hat and two pairs of sunglasses each. We lost two pairs on the water, and we were thankful for our hats from day 1.

6. Don’t bring food. You won’t need any. Really.

7. Bring a tip. I put mine (cash) in an envelope inside a small dry back (available at sports stores). The lead guide does not return home with you on the van after the trip, and it’s best to give it directly to him or her to distribute. These guides earn their tips (and more) and it will be safe on the trip.

Disclaimer: We experienced OARS as guests of the tour operation, for the purpose of review.


Uncrowded Yosemite: backpacking Yosemite National Park with kids

Would you believe that in July, in the center of Yosemite National Park, we enjoyed an entire day where we never saw another soul? It’s possible, provided you depart from the usual tourist destinations in the valley and explore Yosemite backcountry.

Yosemite backcountry with kids

Backpacking Yosemite National Park with kids:

We chose to hike a portion of The John Muir Trail, a 211 mile path between Happy Isles in Yosemite Valley and Mt. Whitney in the California desert. While hardcore backpackers will hike the entire length in as little as 15 days, the Yosemite National Park portion of the John Muir Trail makes for a nice escape for backpackers with less time (or young kids). Backpackers hiking the John Muir trail in Yosemite traditionally start at the base of Vernal Fall in Yosemite National Park, and climb upward past Vernal and Nevada falls, Half Dome, and Little Yosemite Valley campground while making their way toward Tuolumne Meadows. For our John Muir Tail trip with young kids, we decided to tackle the John Muir Trail in reverse, which allowed for more downhill sections of trail and fewer crowds until the end of our journey.

Planning a Yosemite backcountry trip:

Backpacking the Yosemite National park backcountry with kids involves planning. Anyone planning to hike any portion of the John Muir Trail must obtain a Yosemite wilderness permit. Permits can be secured up to 168 days prior to the date desired, and for summer backpacking in Yosemite, reserving a permit the full 168 days out is recommended.

Upon arrival to Yosemite, you’ll need to check in at a Yosemite National Park Wilderness Center, where you’ll pick up your permit as well as bear canisters if you don’t have your own. Bear canisters must be used to store all food and scented items such as toothpaste, medications, and lotion, and can be rented (for only the price of a deposit). You’ll need to leave space in your packs for these.

If you plan to hike Half Dome, Half Dome permits are required, and they are separate from backcountry permits (though you can obtain both simultaneously). And if you plan to stay a night before or after your backpacking trek in Yosemite National Park (recommended), be sure to secure lodging early, as this is one of the most crowded national parks in America. Backpackers can also make use of free backpacker campgrounds the day before and after their backpacking trip.

Mist Trail Yosemite National Park

On the John Muir Trail:

Day 1: Tuolumne Meadows to Sunrise Lake (3 miles)
In order to start our Yosemite backpacking trip in Tuolumne Meadows, we began at the Sunrise Trail Head at Tenaya Lake on Tioga Road. We followed the Sunrise Trail up steep switchbacks to connect with the Forsyth Trail near beautiful Sunrise Lake (a great first night camping option).

Day 2: Forsyth Trail to Clouds Rest and beyond (8 miles)
From Sunrise Lake, we continued to follow the Forsyth Trail to intersect with the Clouds Rest junction, leading 2 miles to arguably the best viewpoint in Yosemite National Park. From Clouds Rest, hikers can see the entire Yosemite Valley, including an unique view of Half Dome. Note: the pinnacle of Clouds Rest is fully exposed, with steep drop offs on each side. This is not a place for young children or anyone with vertigo or a fear of heights. Since I fall into that category (hiking with a small child), we viewed the Yosemite landscape from just .2 mile below the top, which also offers wonderful vistas.

Hikers can continue past Clouds Rest to intersect with the John Muir Trail several miles later, but as this section of trail is still exposed and at great heights, we opted to return the 2 miles back to the Forsyth Trail and join the John Muir Trail much earlier. This first section of John Muir winds through old growth forest alongside Sunrise Creek, and affords several nice camp sites adjacent to this water source. This section of the John Muir Trail is less traveled, but we were still surprised to find we didn’t encounter a single hiker all evening, night, or morning.

Clouds Rest Yosemite National Park

Day 3: Sunrise Creek to Little Yosemite Valley (5 miles)
Day 3 took us along the John Muir Trail from Sunrise Creek into Little Yosemite Valley. This backpackers’ haven offers numerous campsites along the Merced River (perfect for swimming in after a long day hiking!). Though lively, Little Yosemite is a fun oasis for hikers, offering conversation and companionship around the communal fire pit after days of relative isolation.

En route to Little Yosemite Valley, the John Muir Trail offers views of Half Dome, and the steady accent of hikers navigating its cable system to the top. Should you wish to ascend Half Dome yourself, the trail intersects with the final 2 miles of the Half Dome Trail mid-way through your hike down to Little Yosemite. Note: this is another steep, exposed trail. Though children can ascend it, be advised that very small kids may not be able to reach the cables, essential to a safe ascent. Our 13 and 11-year-olds could make the trek, but not our seven-year-old. For those not challenging Half Dome, it’s fun stop on John Muir Trail or Little Yosemite Valley and use binoculars to watch the climbers.

Day 4: Little Yosemite to Valley Floor (4.5 miles)
Our final day on the John Muir Trail led us down from Little Yosemite Valley to spectacular Nevada Fall, where the trail splits into the John Muir or the popular Mist Trail. We opted for the Mist Trail in order to glimpse the best views of nearby Vernal Fall, but the steps descending both falls are steep and can be slippery when wet. Be advised that the Mist Trail gets crowded with day hikers, and can be hard to navigate with overnight backpacks. The option of continuing on the John Muir Trail has its own set of disadvantages: it’s a longer route to the valley floor, and more exposed, providing little shade.

Safety on the John Muir Trail and in the Yosemite backcountry:

In addition to dizzying heights, bears, and crowds near the valley floor, backpackers need to be aware of the significant elevation gains to be experienced on the Yosemite section of the John Muir Trail. Elevations reach over 9,000 feet, necessitating plenty of water intake to prevent headaches and nausea. Other wildlife can pose a threat if hikers are not alert, including rattlesnakes — we encountered the biggest we’ve ever seen at Little Yosemite Valley.

Getting to and from Your Car:

Whether you hike the John Muir Trail from the valley floor up or from Tuolumne Meadows down, as we did, you’ll need transportation back to your car at the end of your trip. Yosemite National Park offers free shuttle service throughout the valley, but to travel to Tuolumne or vice versa, you’ll need to take Yarts, a paid shuttle service with stops in Yosemite Village and points throughout Tuolumne. Hikers cannot make reservations in advance for Yarts, and though we were told busses never fill up, that was not the case. Be sure to be at the stop before the allotted time and have cash in hand. One-way tickets were $8 at the time of our visit.

Big White Dog Sled Tours

I thoroughly enjoyed every outdoor activity I tried during our family vacation at Big White Ski Resort, but I think flying down a nordic trail pulled by a team of sled dogs was my favorite (don’t tell). I arrived for my Big White dog sledding experience with my mom, a long-time follower of the Iditerod and dog-lover. We met with Tim, Big White’s resident dog musher, and his team of dogs at their kennel situated near the multi-use trails. From the minute we arrived, we were both entranced.

Big White dog sled tour

Unlike some sled dogs, Tim’s team is friendly and enthusiastic to meet people, so we were able to become acquainted while Tim gave us some background on the dogs (some of which are retired Iditerod athletes), his mission as a musher, and the kinesiology behind what makes a great sled dog. Some dog sledding ventures will simply put you on a sled and take your money, but as soon as we started talking to Tim, it was obvious that he cares as much about educating guests on sled dogs and the sled dog culture as he does about ensuring you have a great ride.

After learning what the dogs eat (let’s just say they probably eat better than you and me), where they sleep (in cozy crates nested with straw), and whether they get along with one another (better than my kids), Tim started the process of harnessing them for our sledding trip. As soon as he got the slip of paper out of his pocket on which he’d listed today’s ‘line-up’, the previous calm and quiet kennel erupted in noise rivaling that of a soccer stadium after a goal. “No matter if they just ran, they want to run again,” Tim explained, and my mom and I both noted that this canine characteristic–unbridled enthusiasm–is one of the things that makes us love dogs.

With the team finally picked, the dogs on the ‘sideline’ set to wailing and barking while Tim explained to us the process of departing. With a brake set in the snow to prevent the excited dogs from sprinting away immediately (or yesterday, if they had their way), my mom and I settled in the sled and Tim positioned himself on the runners at the back. With one command, the team took off.

Mushing the BIg White dog sled team

The first thing I noticed: how fast we were going. The second: how silent the previously barking dogs had become. We could hear a pin drop (or more accurately, only our own shrieks of joy) as we sailed over the packed snow. I’d never get tired of watching the dogs run before me (and the beautiful Monashee mountain scenery), but halfway through our 5K (3.2 mile) run, Tim slowed the team and stopped them, offering me a turn at the back of the sled.

Tim had warned me that ‘there’s nothing quite like being on the runners’ and he was right. Without any means of stopping or controlling the well-trained dogs, you can truly feel their power as they pull. (Just don’t look down at the snow whizzing by below your boots!)

My mom got her turn ‘behind the wheel’, and before we knew it, we were arriving back at the kennel. Tim showed us how he rewards the team with a tasty frozen meat snack, and we talked more as he unharnessed and praised the dogs. We appreciated how clearly Tim loved his animals, and we came away from the experience with a greater respect for this species, this sport, and the humane people who give it the heart it has.

Big White dog sledding

The details:

Each sled has a weight limit (rather than a person limit), so depending on your family, you might need 1-2 sleds. (Weight limit is 340 pounds.) Until recently, only one sled could depart at a time, but now Tim’s wife is available most days, allowing entire families to sled together. (For reference, my mom and I, two average-sized adults, could easily fit in one sled.) If you have a larger group, bear in mind that you may need to stagger your start times, though you could all enjoy the dogs at the kennel together.

The dog sled experience can be booked nearly any day during the ski season, and reservations can be made ahead of time at the Village Centre Mall Activities Desk and through Central Reservations. Cost is $195 per sled (regardless of number of people). Young kids are welcome, but if some family members would rather not ride, they could come (supervised) with you to visit with the dogs before departure.

Wear ski gear (snow pants, warm gloves, jacket, and googles). A hat or helmet is also recommended, and you’ll need snow boots.

As I disclose whenever applicable, we were hosted for our dog sledding experience. Though we’re grateful for this opportunity to recommend this experience to our readers, it did not come with expectation of a positive review.

Big White Ice Tower Climb: a family activity (yes, really!)

Among the many unique outdoor activities offered at Big White Ski Resort in Kelowna BC is their 60 foot Ice Tower. The only such tower in North America, this structure is looms as a huge, contoured block of ice in the center of Big White’s Adventure area, and yes, it’s intimidating! But here’s the best part: anyone can try to climb it…no experience necessary!

Big White Ice Tower

Ice climbing is normally an unapproachable sport for most people, which makes its inclusion at Big White all the more unique. While most of us have tried (or at least seen) man-made rock climbing walls, seeing an ice tower ready to climb is eye-opening. Looking at it straight up, it’s hard to imagine climbing it halfway, let alone to its pinnacle (where you can ring a bell to signal your victory), but the friendly staff here (as well as your cheering family and bystanders) make it possible.

Ice Tower Big White

To start our ice climbing experience, the whole family (yes, everyone…from my husband and me at 38 and 36 to our kids ages 13, 11, and 8) were outfitted with harnesses, ice picks, and ice climbing boots. We then made our way out to the tower, where our ice climbing experts showed us how to use our toe clamp-ons and picks to dig into the ice, and gave us tips (like use your legs, not your arms). We were then paired up with the correct side of the tower (there are varying degrees of difficulty), and took turns ascending.

Here’s how it went:

I won’t lie: it was hard! There were several times when I wasn’t sure where to put my foot or hand, and because the tower is made from frozen water (dripping as it wished), the ‘terrain’ is authentic. I didn’t look down–no way–and needed a few helpful boasts from the ice climber manning my rope (you’re constantly tied in). I made it however (though far behind my 13-year-old, who had youth on his side), and it definitely felt satisfying to ring that bell!

When I descended (repelling on the rope), my arms were shaky…clearly I hadn’t followed the ‘use your legs’ advice. My whole family made a strong effort, and my 11-year-old even made the whole climb with the use of only one arm (his right is broken and in a cast). This feat put him on the Big White Ice Tower record board, of which he was very proud.

Ice tower climbing

We all came away from the experience feeling on top of the world, having tried something completely new to all of us. I met with the owner of the tower, who reinforced that this is not unusual: he wanted to build the tower so that people could be introduced to the sport of ice climbing. If you get a taste for it, daily and season passes are available: many seasoned climbers use the tower as practice between climbs.

The details:

A single climb is only $20, and comes with all equipment needed. The Ice Tower is located in the Adventure zone area of Big White, adjacent to the Happy Valley Day Lodge. (And across from the Mega Coaster tubing area.) If not all family members are up for a climb, kids can be tubing while parents climb, or vice versa…though you’ll want to watch, trust me!

As I disclose whenever applicable, we climbed Big White’s Ice Tower as guests of Big White. While appreciated, this compensation did not come with expectation of a positive review.