Summer in the Berkshires: Jiminy Peak summer activities

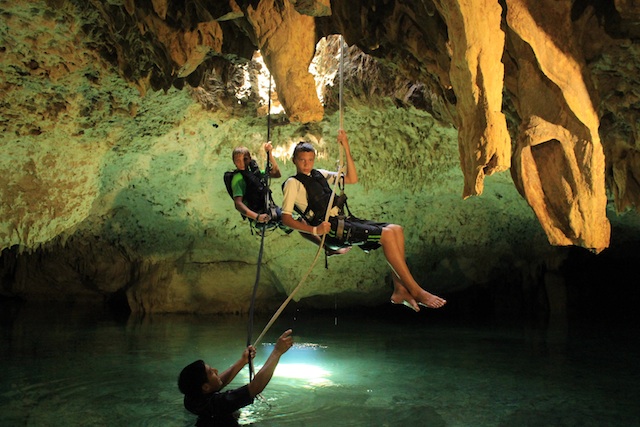
We love summer fun at ski resorts! In the Berkshires of Massachusetts, we’ve reviewed the summer activities at Bousquet, and now, can review in detail all that’s on offer in summer at Jiminy Peak.

summer-in-the-berkshires

Located in the heart of the Berkshires, Jiminy Peak is a well-known ski resort. In summer, it’s transformed into a full-scale outdoor playground, with mountain biking trails, hiking, and an array of kid-friendly only-in-summer activities. Jiminy Peak’s Mountain Adventure Park includes:

  • a mountain coaster
  • an alpine slide
  • the Soarin’ Eagle ‘roller coaster’
  • a giant swing
  • bouncy houses
  • a climbing wall
  • a bungee trampoline
  • a kids’ climb

Jiminy-peak-adventure-park

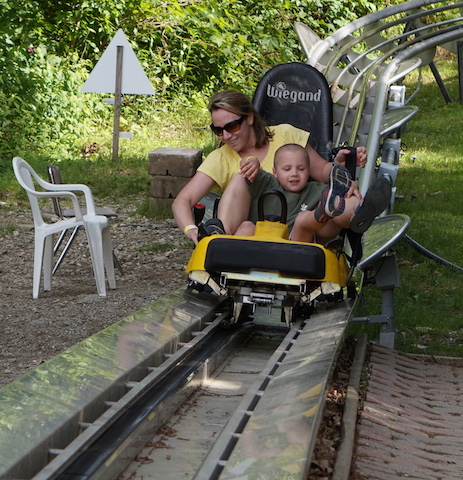
Most of the above activities have a height restriction of 38″, which means that most three-year-olds are old enough to enjoy most of it. The exceptions are the Soarin’ Eagle (42″) and the giant swing (48″).

jiminy-peak-adventure-park

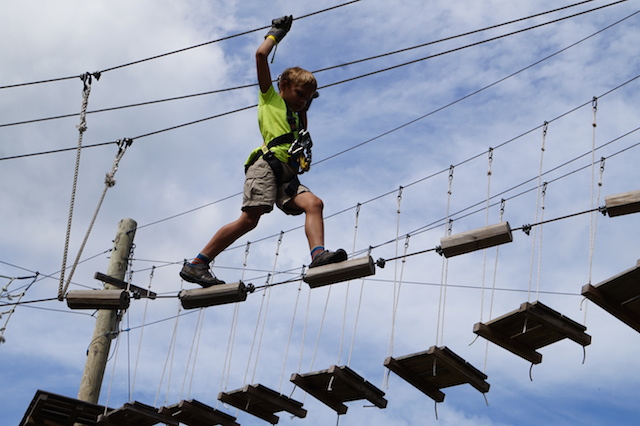
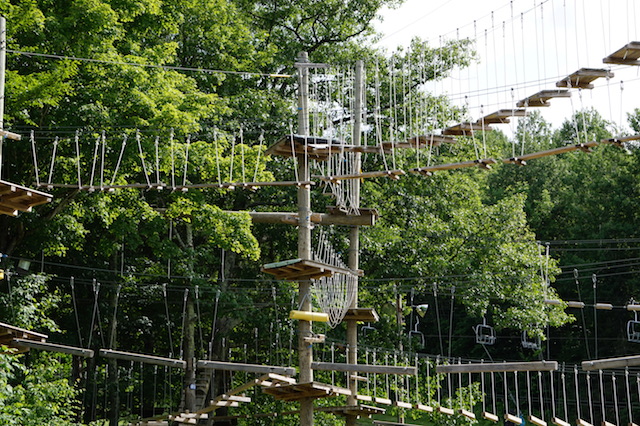
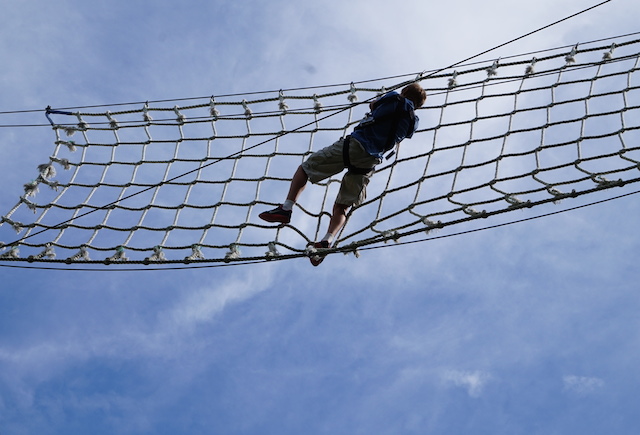
In addition to all this, Jiminy Peak also sports an entire additional complex of high ropes courses (no fewer than seven!) and zip lines. This Aerial Adventure Park is geared toward the older set, with courses ranging from ‘green’ to ‘black’ and various height and age requirements. A height of 48″ is required to get you in the door (so to speak). All participants start with the easier level courses, and move up. A height restriction of 5′ is required for the black course (because kids have to reach the cables). There’s also an age restriction of six years old at the lower level and 16+ for the black course, but we found the ages to be suggestions…it’s the height that matters.

aerial-park-jiminy-peak

We spent the day at Jiminy Peak with kids ranging in age from 3-12. We got our three-year-old and five-year-old passes to the Mountain Adventure Park and our 12-year-old a pass to the Aerial Park. Our nine-year-old opted for the full pass to both, so he could split his time between attractions. The Aerial Park pass give you access to all the courses you’re allowed to try, and the Adventure Park pass gives you access to all the rides listed above, plus scenic chair lift rides and hiking trails. The Aerial pass is good for two hours, but as far as we could tell, the Adventure pass was good all day. You’ll want to spend at least two-three hours.

black course aerial park

We loved that both parks were adjacent to one another, so the kids could spend time watching each other and cheering each other on. The grandparents or parents can walk from park to park easily. We found all the attendants to be courteous, professional, and safe. As my sister put it, “visiting Jiminy Peak in summer is like going to the carnival…only classy, and in a beautiful setting.”

jiminy-peak-summer

We didn’t eat on site, but did notice a quick-service snack bar open with the regular fare of hot dogs, ice cream, and the like. Other than the ticketing booth and lodging options, we didn’t notice much else open that the resort, but we did visit in early summer.

Date last visited:

June 2014

Admission:

Passes range from $43 to $65 for All Parks passes, and $29-$49 for Aerial Park passes or Adventure Park passes. Single tickets are also available for $6 each. Check current pricing here.

Hours:

Check summer hours.

Directions:

Jiminy Peak is located at 37 Corey Road, Hancock, MA.

Sending your kid on a teen service trip

This July, my 15-year-old son, Nate, will take his first trip out of the country without me. He’ll be flying solo to San Jose, Costa Rica, where he’ll meet up with a small group of like-minded teens and adult leaders to embark upon a two week teen service trip with Adventures Cross Country.

During the trip, Nate will be reporting for Pit Stops for Kids, taking video and recording his experiences. His first-hand impressions of his trip will be published here for other teens and parents to read. In the meantime, I’m experiencing the Adventures Cross Country process for parents: including questions to ask, paper work to fill out, and what to expect from the trip leadership.

adventures-cross-country

All parents feel some trepidation before sending their child on a trip without them, and I’m no exception. Nate won’t know anyone before he goes, will need to make an airline connection and navigate customs on his own, and will be relying on two years of high school Spanish. But I’m not worried about him–just jealous, really!–because I trust in the program and people we’ve selected for this adventure. On the Costa Rica Classic trip, Nate will help build structures in a mountain village, teach Costa Rican school kids English, and explore the country by way of a river rafting expedition and surf camp.

Nate’s trip departs in two months, and I’ve learned the following about selecting a teen service trip and the pre-trip process at Adventures Cross Country:

1. Shop around before you select a program.

Teen service trips are expensive and require a serious investment of time, too. There are many companies offering trips these days, and Adventures Cross Country encourages parents to shop around. What we looked for:

  • Proven safety track record
  • Long history working with kids
  • Well trained staff
  • Meaningful service
  • Good communication with the home office

We absolutely found all of the above with Adventures Cross Country. Before we’d selected which trip to send Nate on, we were able to join a live webinar with the president of Adventures Cross Country, Scott von Eschen, during which each type of trip offered was described in detail. After we’d selected the Costa Rica Classic trip, we were immediately assigned a regional director. Ours is Bridget Reynolds, and we’ve experienced frequent, consistent communication from her. Bridget makes sure we understand (and turn in) all our paperwork, is on-hand for any destination-specific questions, and basically holds our hand. She also orchestrates an additional webinar just for the families of our particular trip. Thank you, Bridget! Adventures Cross Country has one of the best safety records in the business and their leaders are carefully selected and highly trained. Of course, we’ll have first-hand knowledge of the latter after Nate returns.

2. Budget time and money.

We recommend making a plan at least one year in advance of a teen service trip in order to save money and allow your teen to earn money for the experience. Kids are encouraged to fund raise locally; the upside of a program that brings kids together from all parts of the US is that there’s no local competition for fund raising. Kids can also write letters to friends and family members explaining the trip and asking for donations.

The paperwork involved in applying for a service trip isn’t terrifying, but it is extensive. The good news: Adventures Cross Country makes it easy by giving parents (and teens) their own portal, where all paperwork lives. In the portal, you can upload documents, print them, and see which are still due. Here’s what ours looks like:

teen-service-trip

Kids will need to plan ahead to get letters of recommendation and a physical from their doctor. Depending on the destination of the trip, immunizations may be required. What I love about Adventures Cross Country: kids are required to write a short essay (within a form) explaining why they want to go on the trip. This process, sometimes combined with a phone call from an Adventures Cross Country leader, eliminates kids who are only applying because their parents want them to attend.

3. Study up before your child goes!

The preparation process is part of the fun and excitement: Nate and I have had a good time purchasing the clothes he’ll need, selecting what backpack to take, and making sure he has a good camera to use. But just as important are the books on Costa Rica that have been recommended to him by Bridget. During the first few weeks of summer, Nate’s Kindle will be loaded with guides on Costa Rica to add to his excitement and knowledge base.

4. Secure airfare based on your location and your child’s comfort levels.

With Adventures Cross Country, the trip officially starts when kids arrive at the destination airport. However, a chaperoned flight is offered from the US for those who want it. While we would have rather Nate take this accompanied flight, it departs from Miami, and doesn’t make sense for us from the West Coast. Instead, he’ll be flying to San Jose unaccompanied. Nate is well-traveled, and feels comfortable flying solo. However, we downloaded a map of the airports he’ll be in to help orient him before he goes, and we’ll be checking gate information more than usual to help him from afar. He’s never navigated customs in a foreign country on his own, so that gives me pause, but I know it will be part of this great adventure, and will boost his confidence in later travel.

A basic timeline for preparing for an Adventures Cross Country trip:

To use as a general guide, here’s the timeline we’ve experienced from first signing up with Adventures Cross Country to putting Nate (in a few short weeks!) onto the plane:

7-9 months out:

  • Select a program
  • apply
  • ‘meet’ your regional director via email
  • fund raise if you haven’t already
  • first payment will be due

4-6 months out:

  • get all paperwork in
  • order your child’s passport if he or she doesn’t have one
  • remaining payments will be due
  • join a live webinar on your destination
  • secure your child’s airfare

No more than 1 month out:

  • final call for paperwork
  • shop for packing list items
  • read up on the destination

1-2 weeks out:

  • double-check airline connections, prepare teen for any layovers, gate changes, etc
  • pack
  • make sure the passport arrived!

Disclosure: Nate will be attending this trip as a guest of Adventures Cross Country, for the purpose of review. He’ll be writing about his experiences for other kids at Pit Stops for Kids and Trekaroo.com.

A day with Santa Fe Walkabouts: tour of Santa Fe

Families looking for an active way to see the New Mexico desert outside of Santa Fe will definitely want to book a tour with popular local tour company Santa Fe Walkabouts. These guys offer more than a tour of Santa Fe: they take you outside the city limits either on foot (for a hiking tour), on bike, or in their unique Pinzauer off-road vehicle.

santa-fe-walkabouts

We decided to try their half-day (3 hour) Pinzauer Tour to La Bajada Mesa, which takes families from downtown Santa Fe to the historic (original) Route 66 in the high desert. This 4×4 adventure starts out calmly enough along dirt roads to the national forest boundary, where the Swiss military vehicle gets the challenge the rocky, steep, and sometimes daunting descent down the La Bajada hill road. Guests ride in the back of the Pinzauer, on cushioned benches with lap seat belts. There are roll bars to hang onto. We were in great hands with our driver (and owner of the tour company) Georges. During the tour, it was clear to me that Georges and his partner Sue love their jobs: they were able to point out many natural and historical sights along the way, while keeping us safe in the vehicle.

Santa-Fe-Walkabouts

The ride in the Pinzauer was certainly windy, but not uncomfortable. I recommend the tour for families with older kids, as there are long periods of sitting and riding. My tweens and teens would get a big kick out of the many steeps grades and rugged terrain navigated. At times, the vehicle listed (safely) over 20-40% in either direction, and took at least 30% grades.

Along the way, we were lucky enough to have a Route 66 expert with us, who was able to point out remains of the original Camino Real trading route and road. We also stopped to see petroglyphs and even spotted a rattlesnake (and then gave it a wide berth).

Keep in mind that bathrooms are not available during the tour, and you’ll want to bring layers to wear during the windy ride. Sunscreen and sunglasses are a must!

camino-real-santa-fe

Tip: for parents who want to dig deeper into area history and culture (and have a sitter at the hotel), we recommend attending a lecture by Southwest Seminars . The team here has rich knowledge of the region, and incredible insight. Lectures are held almost every Monday evening at 6 pm at the Hotel Santa Fe.

Tour cost:

The 3-hour Pinz ride and hike we experienced costs $83/person, very standard for this quality of tour. We were offered bottled water as needed, but bring your own snacks if you’ll want them. You’ll be back in time for lunch.

Contact information:

Santa Fe Walkabouts picked us up at our hotel. Call the company to book a tour and find out where to meet them: 505-216-9161.

As I disclose whenever applicable, Santa Fe Walkabouts hosted me during my tour, for the purpose of review. Without their hospitality, I would not be able to share this experience with my readers.


How to make a 5 item outdoor survival kit for $5

survival-kit-for-kids
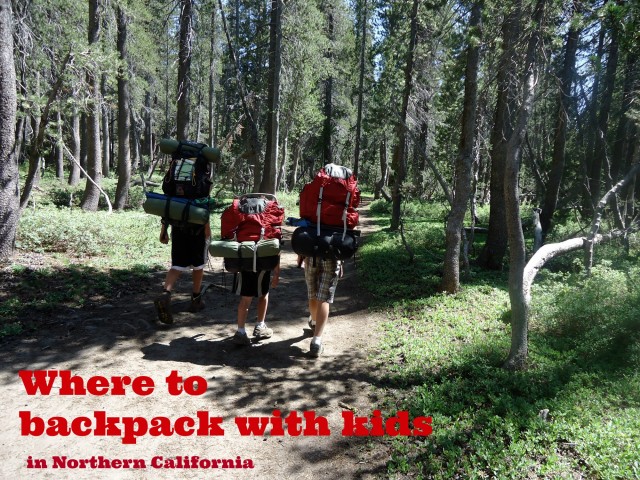
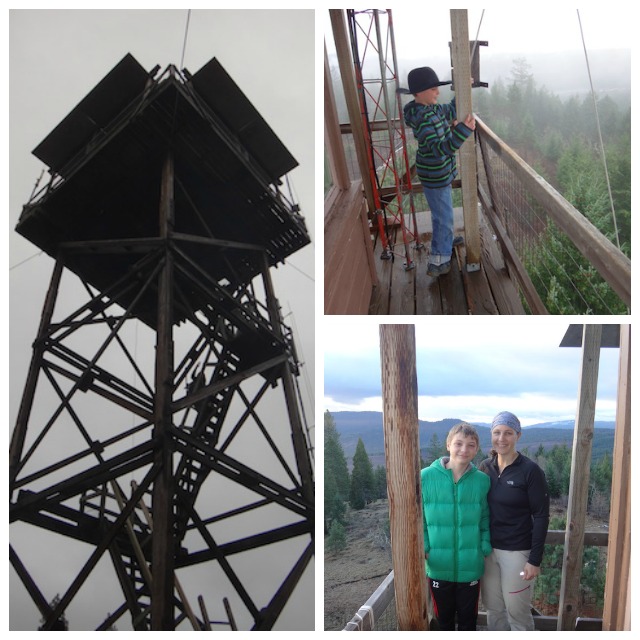
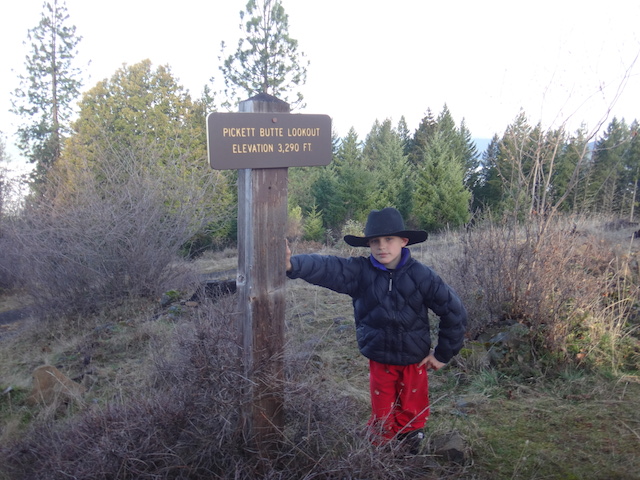
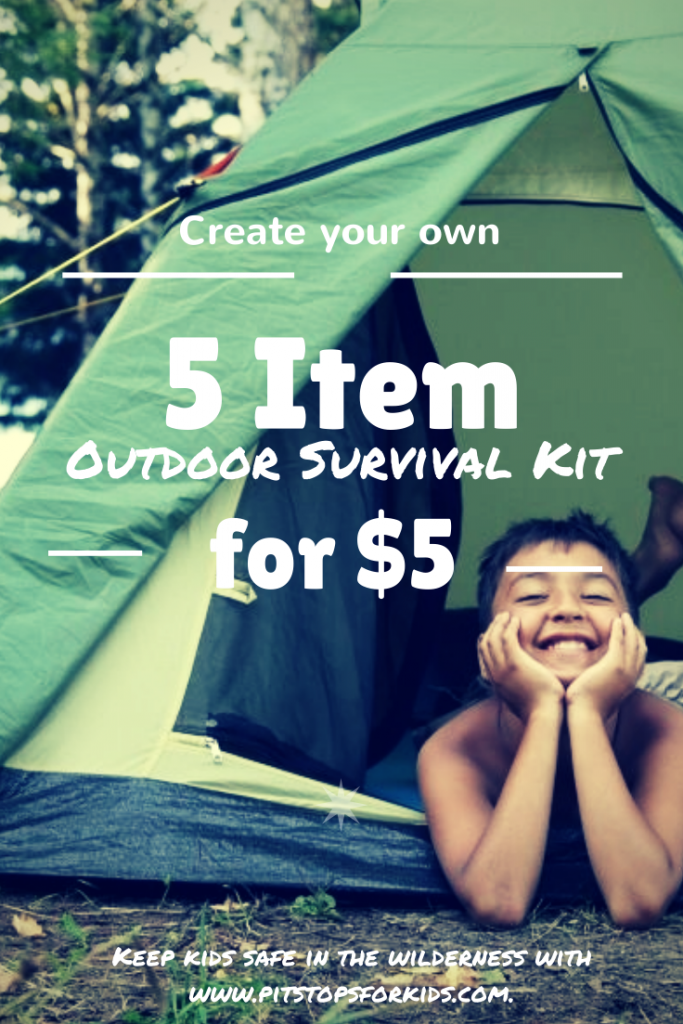
We love getting kids into the outdoors! At Pit Stops for Kids, we’re fans of backpacking, camping, climbing, mountain biking, geo-caching…you get the idea. But as a one-time Search and Rescue volunteer who has spent countless hours teaching school kids how to stay safe in the woods, I want families to be prepared. Kids can occasionally get lost in the wilderness, but by heeding the following advice and being prepared, almost all are found almost immediately by their parents.

The best advice to give your kids: if you get lost, stay in one place. 


The second best thing to do: make your kids this 5 item outdoor survival kit for $5. These items fit easily into a waist pack or into any day pack.

5 item outdoor survival kit for kids:

1. Whistle

Go to your local sports equipment store or dollar store, and buy a cheap whistle. Let your kids know this is an emergency whistle: not to be used for play. The sound of a whistle in the wilderness carries 10x further than a shout or scream, and doesn’t wear down with use. Instruct kids to blow their whistle in blasts of three if lost.

2. Plastic poncho

Is an expensive jacket better protection than a dollar store poncho? Sure, but chances are, your kid won’t want to bring it along on a hot summer day. A plastic poncho fits down to the size of a fist (or smaller) and weighs almost nothing. When needed, it retains body heat well.

3. Glow stick

Grab a cheap glow stick and put it in your kid’s kit. Glow sticks don’t require any batteries, and will give off light in 360 degree direction. A glow stick will last 12 hours, getting  a kid through a night if necessary.

4. Bandana

Search and Rescue volunteers are trained to look for anything out of the element when searching in the wilderness. Therefore, a bright color, such as neon green or yellow, will stand out and alert searchers to the presence of a person. Instruct kids to hang their bandana on a tree limb, wearing it on their head, or spread it out in the open. Alternative item: a used or blank music CD or DVD can be used as a cheap reflecting device, often seen by spotters in helicopters.

5. Non-perishable snack

Why not water? Because for almost any hike or outdoor excursion, parents have already thought to pack a water bottle for their child. In addition to water, a non-perishable snack is cheap and light to pack. We keep a Nature’s Valley granola bar in each of our kids’ packs. Power Bars or other energy bars last a long time, too. Alternative: a bouillon cube.

99% of the time, kids are completely safe in the wilderness. But for piece of mind, the above items in your kid’s pack will go a long way. For more information on kids’ wilderness safety, check out the Lost But Found Search and Rescue program I’ve been a part of.


Where to backpack with kids in Northern California

Will you be backpacking with kids this coming summer? Most families who love backpacking with kids are familiar with backpacking options in popular regions such as Yosemite National Park, but the following lesser known areas offer backpacking just as scenic and often crowd-free.

where-to-backpack-with-kids

Tahoe and Northeastern Sierra Nevada:

Our favorite section of the Northeastern Sierra Nevada mountain range is located in California’s Plumas County, adjacent to the town of Graeagle. The Lakes Basin Recreation Area, just south of Graeagle up Gold Lake Road, offers 47 trails and over 30 alpine lakes. Some of these trails are available only for day hikers, but link families to backpacking regions. To start out directly on a backpacking route, begin at the Jamison Mine Trailhead en route to historic Johnsville (10 miles from Graeagle) and hike approximately three miles uphill to beautiful Rock Lake. This alpine lake offers idyllic camping, swimming, and rock jumping. Adjacent Jamison Lake offers great trout fishing.

Tip: consider renting a Tahoe vacation home before or after your backpack trip. We like to spend a few days pre-trip in a home, where we can organize backpacking foods, pack our backpacks, and enjoy a few luxurious days before entering the backcountry.

Trinity Alps and Marble Mountains:

Further north near the California/Oregon border, the Trinity Alps Wilderness in Shasta Trinity National Forest consists of chiseled granite peaks and alpine lakes, with elevations from 2,000 feet in creek drainages to 9,000 feet at summits. This wilderness offers many different trails ranging from 1.5 miles to 15 miles at varying levels of difficulty. Spring backpacking is often an option here (in the lower elevations) and mid-week trips are encouraged to beat crowds. Our pick: the five mile hike to Granite Lake on the Swift Creek trailhead. Tip: families will want to arrive early on weekends or during mid-week to secure the prime campsite lakeside.

granite-lake-backpacking

The nearby Marble Mountains are less populated, and easily accessed from I-5. Our favorite backpacking route through the Marble Mountains is to Campbell Lake, located off the Shackleford Creek Trail (three hour hike). Visibly stunning, Campbell Lake offers great swimming. The Trinity Alps and Marble Mountain region offers many loop trails perfect for families wanting to adjust their trip to suit kids’ abilities.

Lassen National Park:

Lassen National Park is one of the least visited in the US, and we have no idea why! However, families can take advantage of the low crowds and find prime backpacking wilderness with relative ease. Grab a wilderness backpacking permit when you enter the park, and then head east, to where the top backpacking loop trails depart. You’ll find alpine lakes, creeks, and lodgepole pine forests in ample supply. The weather tends toward hot and dry, which means families will encounter fewer mosquitos than in damper areas. If you head toward geothermal regions of the park, bear in mind that camps cannot be set within 1/4 mile of geothermal activity (bubbling pots, etc).

backpacking-trail

No matter where you backpack, be sure to get the necessary permits at the ranger station or forest service station nearest your trailhead, and check conditions before arriving. Make sure you have a water filtration system or means of fresh water, and bear canisters where required. For more general backpacking tips, read How to Plan a Multi-Day Backpacking Trip with Kids. For gear suitable for kids while backpacking, check out our Travel Gear We Use series.

The above post is written in partnership with VacationRoost.com.

Stay the night in a fire lookout: a weekend on Pickett Butte, OR

We love camping in all seasons, but we also like to be (reasonably) comfortable. A number of years ago, we discovered Oregon state park yurts, and this year, we’ve added national forest fire lookouts to our off-season camping picks. If you might stay the night in a fire lookout, read on!

stay-the-night-in-a-fire-lookout

Fire lookouts available for civilian stays are located across the US. To find one in your state, start with this US Forest Service list, then click over the Recreation.gov to reserve (you’ll want to plan way ahead, and reserve as early as possible). We stayed at Pickett Butte fire lookout in Southwestern Oregon, located in Umpqua National Forest.  Pickett Butte served well for a winter fire lookout stay because of its relatively low elevation of 3,200 feet; while it sits at the highest rise in the surrounding forest and towers three steep stories into the air, it usually is accessible in all seasons. We loved that the immediate terrain around the tower was open and accessible to play in: we could stage air soft ‘wars’ and games of tag, plus build fun forts. There is also room for a tent and you get a campfire ring and picnic tables.

pickett-butte-fire-lookout

Pickett Butte is accessed via seven miles of winding forest service roads (do not use a car navigation system to find it), and is very isolated. We were the only people within miles, which meant we could enjoy peace and solitude (and also meant our chocolate lab could run freely). The lookout consists of a single 12×12 room at the top of one of the steepest towers we’ve ever experienced: the three flights of stairs are more like ladders. Our dog we spoke of? He couldn’t ascend them, and opted to sleep in the car. The lookout features a nice pulley system to help you haul your stuff up, which was fun for our kids, and you can drive directly to the base of the tower. The single room features gas-powered lanterns, stove, oven, and fridge, plus a heater. There’s a single bed, and plenty of floor space for sleeping bags. The wrap-around observation deck and floor-to-ceiling windows offer incredible views (plus a great flight deck for homemade wooden airplanes we built during our stay).

pickett-butte-stay

Preparation before arriving at any lookout:

Before arriving at your lookout, call the ranger station or forest service office closest and ask about conditions. Depending on your lookout, you may need to ask for a combination lock code or key access as well. We’re very glad we called ahead before our Pickett Butte stay; had we not had the correct combination lock code, we’d have been forced to retrace our steps back to the ranger station for information.

Find out what provisions you’ll need. For instance, at Pickett Butte, gas fuel is in ample supply, so we didn’t need to bring our own. Ditto for pots and pans and some utensils, including a can opener and bottle opener. However, no potable water was available, so we knew we needed to bring our own. Tip: three gallons for two nights was not enough for our family of five. We ended up boiling water from a creek 1.5 miles away for our last breakfast of oatmeal and hot cocoa (be sure to boil water a full five minutes). We also brought more cooking tools than needed, but didn’t want to be caught unprepared.

fire-lookout-stay

At Pickett Butte, it’s understood that each guest will try to leave something to better the experience for the next person; when we arrived, we found a half-bottle of wine awaiting us. We left a set of balsa wood airplanes for the next kids to fly off the top of the tower. In the cupboards, we found canned goods, instant soups, and an assortment of batteries.

Before packing your gear for any lookout, ask whether a campfire is allowed, and make plans for purchasing local firewood. Determine your menus based on what appliances you have at your disposal. We opted to cook over the fire one night, and used the oven and stove top the next. Don’t forget about the details: is there an outhouse? Will you need to bring toilet paper? (We wished we’d brought wet wipes for easy hand washing.)

Pack plenty of dry clothes if camping in the off-season; the small heater in Pickett Butte would not have been up to the challenge of drying all our clothing. We packed rain and snow gear, just to be safe, and plenty of pairs of socks, gloves, and hats.  Bring extra garbage bags in order to haul out all garbage from your stay. Print out directions to your fire lookout before departing home, and don’t rely on your navigation system. Enjoy!

stay-in-a-fire-lookout

Date last visited:

February 2014

Distance from the interstate:

Pickett Butte is located approximately 20 miles from I-5 off the Canyonville exit.

Rate:

Cost of a fire tower lookout stay in Oregon is $40/night.

ATV adventures and snorkeling with Punta Venado

There are as many Riviera Maya eco-tours as there are amazing natural wonders along this part of the Caribbean, and each offer something a little bit different. We’ve reviewed the fast-action activities with Alltournative, but for a change of pace, a day with Punta Venado offers both ATV adventures and snorkeling, plus relaxation.

blue venado beach club

Don’t worry: the kids will still be highly entertained with Punta Venado, located on almost 2000 acres and along 2.5 miles of pristine private beach. But you’ll enjoy some downtime as well. The eco-park is comprised of two sections: the Punta Venado ranch, with activities ranging from horseback riding, ATV-riding, and snorkeling, to the Blue Venado Beach Club, which sits on pristine white sand and offers a lovely open-air restaurant, cabanas, and miles of coastline. Families looking to get the most of their stay will take advantage of both.

punta venado

We started our day at Punta Venado with an ATV tour through the jungle. Since we experienced a brief downpour during our tour, the dirt paths were nice and muddy…perfect for some messy fun! The ATVs seat two, and adults must drive (age 16 and up). A guide takes your through the jungle to a dry cenote cave, where you get off the ATVs to explore a bit. If you’ve been swimming in cenotes earlier in your trip, this field trip isn’t too big of a thrill, but still fun. We then continued on ATVs to a cenote pool, where we jumped into the fresh water to cool off and wash the mud off our legs from the drive. This pool was very fun for the kids to explore, as it included a small creek-like waterway at one end, surrounded by jungle.

We rode on to Punta Venado’s private beach (as pretty as any along the Riviera Maya) where their snorkel and dive shop team outfitted us to snorkel on the Mayan Reef. The reef sits only feet off the shore at this location, making Punta Venado the only place we knew of in the Riviera Maya to snorkel the reef directly from shore. Even though the water was choppy after the morning storm, we were able to reach the reef area fairly easily (we were given fins and life jackets in addition to snorkels and masks), and our guide offered recycled water bottles filled with soggy tortillas…perfect fish food! The tropical fish surrounded us to access the food (which is squeezed from the bottle), making for a very impressive showing.

punta venado

On a calmer day, we could have accessed more of the reef, but even in not-ideal conditions, we saw hundreds of fish. We swam back to shore to ride the ATVs back to the ranch area.

When booking a Punta Venado tour, families can choose between a menu of options: in addition to ATVing and snorkeling, we opted for lunch at the Blue Venado Beach Club, a short dirt road drive away. This private beach club is directly on the water, offers bathrooms, showers, a restaurant, a bar, and beach cabanas. After lunch, you’re invited to stay as long as you’d like. If you have your own snorkel gear, you could certainly snorkel off the shore here as well, and if not, the body surfing is great.

Tip: Eco-tours are expensive: if you want a more economical day, opt for the beach club only. Access is free: we were told the only requirement is to buy $20 worth of food or drinks per person from the restaurant. At $20/person, this is the cheapest excursion in Riviera Maya. If you have a car or rent a taxi, access to the beach club is directly off the coastal highway linking Cancun to Tulum.

Date last visited:

August 2013

Cost:

Punta Venado ATV tours are $83/per person. They also have an option called All In, which includes everything on offer for $150/per person.

Directions:

Look for the Punta Venado and Blue Venado Beach Club sign right after Calica on the Riviera Maya.

Disclaimer: we experienced Punta Venado as guests of the tour company, for the purpose of review. All opinions are our own.

Whale watching in Southern CA with Dana Wharf Sportfishing & Whale Watching

Luck was with us the late December day we boarded the whale watching boat out of Dana Wharf. Winter is prime time for whale watching in Southern CA, and the ocean was as calm as glass and the sun was shining warmly. I grinned at the many passengers wearing green and sporting Michigan State gear in prep for the Rose Bowl to be held several days later. I was sure they were basking in the warmth of the SoCal sun and 75 degree temps.

whale-watching-in-southern-ca

The captain of the Dana Pride coasted the vessel north along the shore and we enjoyed seeing the beaches that we love to visit. He stopped at a buoy with sun bathing sea lions that barked and swam in the water next to our boat. It was another 30 minutes or so of smooth cruising as we listened to the captain tell us the pattern of the grey whales we were searching for. Between the months of November and April, they make their migrations north and south from the feeding grounds of Alaska to the warm lagoons where they give birth in Mexico. Typically they swim close to shore and thus we were looking for them there.

family-whale-watching

The water was so calm that day and the inversion layer so unique that suddenly the captain turned the ship out to sea. He had spotted a whale spout far off the coast. We spent the next 30 minutes speeding out the 5 miles to follow the grey whale swimming south. The boat pulled up alongside the whale and we watched with fascination as it spouted, surfaced several times, then fluked (showed it’s tail), and dove to the bottom to eat. Captain Todd is one of the cofounders of the Grey Whale Foundation and he shared lots of great information with us about their migration, speed, breeding, eating, and more. School groups have the opportunity through the Foundation to get classroom experience and to take field trips with Dana Wharf Whale Watching to see the grey whales in person.

Spotting the whale spout 5 miles off the coast was a truly magical opportunity. We might not have seen a whale that day if it hadn’t been for such calm water. Regardless of the luck of future trips, whale spotting is guaranteed. If a whale isn’t found on a trip, passengers receive free passes for a return trip to spot a whale. As luck would have it, Michigan State won the Rose Bowl on New Year’s Day. Must have been partly due to the luck of the whale!

dana-point-whale-watching

Taking kids on a whale watching cruise is a fun experience, but planning ahead can ensure a good trip without some of the difficulties that can arise. It is great for kids at least 3 years or older. It’s helpful if you don’t have to worry about your child running around on a bumpy ship, falling down, or not being interested in seeing a whale (which can be far off and with only the top of it visible).

  • Wear layers. No matter the weather or sun, speeding along the ocean can feel very cold. Bring beanies to keep their heads warm and tuck long hair into pony tails or braids.
  • Bring sunscreen, sunglasses, binoculars, chapstick, and snacks. Drinks, snacks, and burgers are available for sale in the small galley. Salty snacks and full tummies can help prevent seasickness.
  • Most trips are calm and short enough that seasickness isn’t a problem. We prefer using SeaBands because they can relieve and prevent symptoms without the drowsiness of medications.
  • Plan on needing to hold your kid’s hand and have your own hand free to hold a rail. It can get bumpy and you will need to walk around (to go inside if it’s too windy and cold, go to the restroom, etc.) Carry a backpack or bag that is hands-free.
  • Take a few pictures but don’t hold your iPhone over the railing to take a picture. Need I say why? (No, it didn’t happen to me but my heart stopped when I saw other people doing it!)
  • Don’t stress about getting to the front of the boat. There were way too many people up there for us to get to see anything. Ask a crew member which side of the ship to stand on. They know which side of the whale the captain will pull the ship up alongside.

Grey whale watching season is from November to April but going whale watching is a great experience all year long. Blue whales, humpback whales, fin whales and more can be spotted during different seasons. Dolphins typically are found daily and seeing them swim, jump, and play in the boats wake is a thrilling experience. It’s like a front row seat at a SeaWorld dolphin show.

Dana Wharf Sportfishing & Whale Watching is one of the first outfitters taking guests whale watching since the 70s. Call (888) 224-0603 or book online for future dates.

Date last visited:

December 2013

Distance from the interstate:

Dana Point is located right on the Pacific Coast Highway (Highway 1).

Rate:

$45/person. Call Dana Wharf for tour times and departures, or check the schedule here.

Michelle McCoy lives in sunny SoCal with her husband and four kids. They love finding all the quiet corners in Orange County when they have time after school, work, and church. Michelle is the SoCal Destination Guroo for Trekaroo and loves sharing her findings with other families. 

Disclosure: Michelle and family experienced whale watching as guests of Dana Wharf, for the purpose of review. All opinions are her own.

A day with Alltournative tours: Tulum and Jungle Maya adventure with tweens and teens

Mexico’s Riviera Maya is rich with geological and cultural excursions for active families. It’s system of cenotes (underground rivers) and abundance of Mayan ruins are accessed by many tour operators, but which one to pick? We spent the day with Alltournative Tours, a leading eco-archaeological guide service specializing in active, adventurous tours.

Like most local tour companies, Alltournative works with Mayan property owners and archaeological sites to gain access to some of the most impressive (and most fun) sites along the Yucatan peninsula. We opted for their Tulum and Jungle Maya tour, which offers a history lesson at ancient Tulum and explorative fun in the jungle in their Mayan eco park.

We started the day at Tulum, the beautiful Mayan ruins on a cliff overlooking the Caribbean Sea. (Alltournative will pick up from most Cancun and Riviera Maya hotels.) Right away, we knew our bilingual guide, Robbie, would be fantastic: a native of Mexico City who is part-Mayan himself, Robbie was passionate about the Mayan culture, knowledgeable about their history, and great about tailoring the educational content to kids. Tulum is open to the public and easy to access on your own, but once on-site, we saw the value of a guide: many of the sites have little information in English to explain their significance. Without Robbie, we wouldn’t have known what we were looking at most of the time. We toured the sites for approximately 45 minutes, then Robbie left us to explore on our own for another hour. We opted to take a much-needed dip in the ocean at the beach on-site (voted by National Geographic as one of the most beautiful in the world!) then took advantage of some photo ops.

Tulum

We rejoined Robbie and the Alltourative transportation and drove the short distance to the Sac-Actun xenote cave system. Located on Mayan property at a small eco park run by Alltournative, we were given lockers, took showers to rinse off, then met the Mayan family who owns the property for a short purifying ceremony in the Mayan language. (The cenotes are spiritual to the Mayans, and treated with upmost respect.)

rappel into cenote


We were then led to an opening in the underground xenote system, where we rappelled down to swim in the cool, fresh water. Popping out through a cave entrance a few meters away, we climbed into the back of a Mercedes Benz all-terrain truck called an Unimog and enjoyed a bumpy ride through the jungle to Alltournative’s series of zip lines.

cenote

I expected this jungle ride to be merely a means to an end (the park is divided into two sections), but instead, it was one of the kids’ favorite parts, due to driver Willi’s sense of fun. Willi took the Unimog along the pot-holed dirt road at a rolling pace, to the delight of the boys.

Once we’d departed the vehicle, we were outfitted for zip-lining (still with our faithful guide Robbie) and shown how to climb the steep ramps to the zip line towers. We took two lines across the jungle, then were surprised by an entirely new-to-us zip-line experience: zipping into water. The last line concluded in the cool water of an open xenote, which was all kinds of fun. We swam to the shore, then grabbed snorkels and masks for a swim through the Nohoch Nah Chiich cenote cavern. Note: If this itinerary seems whirlwind, that’s because it is! We recommend Alltournative to families who have active kids looking for fast-paced outdoor fun.

alltournative activities

The Nohoch Nah Chiich is renown to divers (scuba is offered at this location for cave-certified divers), but for snorkelers, it’s a pretty easy swim through open-air caves with the guide. The swim takes about 15 minutes, and stalactites and stalagmites are pointed out along the way, in addition to hanging bats. Using your mask, it’s an unique experience to see the cave bottom as well as look up at the ceiling.

By this time in our day, we’d worked up quite an appetite. Last but not least, we were shown to the Mayan dining area and kitchen on-site, where the family owning the land prepares authentic Mayan cuisine. Tables as communal, and food is buffet-style, with a traditional Mayan soup, empanadas, beans, rice, chicken, and tortillas. Beware the hot sauce…it’s truly hot!

zip line with alltournative

After the meal, guests are returned to the first section of the park to retrieve the items in their locker, offered a MAYArita (their version of a margarita), and invited to rest a while in the many hanging hammocks and lounge chairs dotting the landscaped jungle space.

Alltournative has photographers who shadow you during your tour, and they ask you to view your photos on computer stations before leaving. The photo packages are expensive, but if you don’t have your own underwater camera or video camera to capture the action, they may well be worth it. (You can always take your own photos.)

A word about sustainability and ecotourism: We were impressed by how well the flora and fauna were cared for at the Alltournative eco park site, and liked hearing how our ecotourism aided the Mayan people who owned the land. The xenotes here are spotless, and while they don’t have a completely ‘wild’ feel due to being part of a tour, they are clearly authentic (as opposed to aided by human construction at the large eco parks along the coast). If you have dive experience, you can certainly seek out more isolated xenotes on your own, but for an introductory family experience in a safe environment, Alltournative will fit the bill nicely.

A note about Coba: Alltournative also offers a tour of Coba, the Mayan ruins further inland. This tour does take longer, with a longer drive, which is why we opted to tour Tulum instead. However, it is still possible to climb the ruins in Coba, which can be a draw to families.

Date last visited:

August 2013

Cost:

the Tulum and Jungle Maya tour we experienced runs $129 for adults and $99 for kids. Alternatively, families can book the Jungle Maya only for less, but we don’t recommend skipping Tulum.

Directions:

It’s not possible to drive to Alltournative’s eco park on your own, so leave the rental car at your hotel and let them pick you up.

Disclaimer: we experienced Alltournative as guests of the tour company, for the purpose of review. All opinions are our own.

Swim with whale sharks in Cancun Mexico

One of the most memorable excursions in Cancun for my family was to swim with whale sharks. These harmless giants can be found in the open water approximately 20 miles off the coast of Cancun (past Isla Mujeres) from May to September, and if you’re visiting the Riviera Maya area during this time period with older kids and teens, it’s definitely an activity to consider.

swim with whale sharks

Who to book with:

We booked our swim with whale shark excursion with Solo Buceo, a dive and snorkel operation located in Dreams Cancun. The dive shop is located in the heart of the Cancun hotel zone across the street from the hotel (right on the water) and is easy to reach via taxi from most area resorts.

We liked that Solo Buceo departs directly from their shop for the whale shark areas, so there’s no shuttle transfers to waste any time. The shop is scenic in itself, set against the bay with plenty of thatch roof cabanas to sit under while getting ready, signing waivers, and the like. The staff was all very friendly during our visit, and very efficient. Our reservation was listed on a dry erase board behind the counter with our guide already assigned to us before we even approached the counter. Our guide Santiago was fluently bilingual, and the whole experience was very professional.

At Solo Buceo, whale shark excursions leave early in the morning. Our boat departed promptly at 7 am, which meant a 5 am wake up call at our Puerto Morelos hotel room. It’s not fun to get up so early on vacation, but the early departure had a purpose: we were the first boat to set out in search of the whale sharks, and when we arrived at the snorkel site, only one additional boat had beat us there. By the time we left, we were surrounded by a dozen or more boats, with more arriving by the minute. A whale shark excursion is not cheap, so we appreciated this added touch of a semi-private experience.

solo buceo

What to expect:

Our guide Santiago explained some of what we should expect before we got on the boat: whale sharks are gentle and harmless, but they’re also wild animals…it may take time to find them, and there’s no guarantee of a sighting. The boat ride out to the open water where they swim takes approximately an hour, and snacks and drinks are provided. The small boats hold about 10 passengers max.

What we were not told: the ride through the open water can be very choppy, and it’s very easy to get seasick. I had read reviews suggesting a motion-sickness remedy, so we did have sea-bands on, but they were of little help. While we didn’t get too sick on the ride out, our stomachs were queasy enough that once in the water, a few of us felt quite sick. Remember, this is open ocean, so it’s not possible to see the bottom of the ocean floor: once you have a mask on and are looking down, you’re bobbing on the water (with some significant waves) without the aid of a horizon to orient yourself. This combination makes seasickness more likely. I was not surprised to feel seasick, as I succumb to motion sickness easily, but even the more hearty in our group were affected, as well as several additional people on our boat. The remedy: lose your breakfast in the ocean, not the boat, please!

Swim with whale sharks:

Seasick or not, swimming with the whale sharks was an amazing experience. About an hour out into open ocean, we spotted a group of about 30-40 sharks and entered the water. Our guide went with us and was invaluable in his help pointing out where the sharks were (look down!, under you!, over you!) and keeping kids (and adults) out of their way. Swimmers may not touch the sharks (doing so purposefully will get you a seat back on the boat), but it’s sometimes hard to get out of their way! By avoiding the tail, we got the hang of it eventually.

We spent approximately 1 hour in the water, taking breaks in the boat as needed, allowing the whale sharks to swim under us, around us, and even over us. When in a lucky position, it was possible to see their huge, gaping mouths open to eat the baleen they feast on, and we even spotted manta rays as well. We were given life jackets to wear (it’s optional to upgrade to wet suits at an additional cost), so even the youngest among us (age 8) had no trouble on the open water. We appreciated that all the child equipment fit well (not always the case) and that all our masks and snorkels were in great working order. Younger children might be afraid given the open ocean and depth (not to mention the huge animals) but once we’d taken the plunge, all our worries were put to rest. These whale sharks are truly peaceful to swim with, and our guide in the water was very attentive, helping to keep kids close.

On the return trip to Cancun, sandwiches and sodas or waters were handed out to those of us who could keep a lunch down, and we stopped for 15-20 minutes just off Isla Mujeres to take a warm-water dip in the crystal clear, shallow water off the island. For those of us who had felt ill, this swim was very refreshing.

swim with whale sharks

When we arrived back into the bay, we could still see boats departing for the whale shark area, and were so glad to have spent time with these giants solo. Expect to spend about four hours total from the time you depart the bay to the time you return.

Tip: Bring an underwater camera, and wear biodegradable sun screen. For some reason, sun screen cannot be applied in the boat, so remember to apply while still on the dock. It’s easy to burn in the morning sun.

Date last visited:

August 2013

Cost:

$119 for adults, $89 for kids

Directions:

Any taxi can take you to Dreams Cancun, where the doorman or bell services staff can point out Solo Buceo. From Puerto Morelos, the ride was $40 US (though this rate had to be negotiated ahead of time…when we made the mistake of asking only at the end of our drive, the rate had climbed to $90).

Disclaimer: we experienced swimming with whale sharks as guests of Solo Buceo, for the purpose of review. All opinions are our own.