Family travels in my own backyard: Crater Lake to the Rogue River

If gas or airline prices are keeping you closer to home this summer, you’re not alone. Soaring prices and family commitments necessitate staying in our home region of Southern Oregon this July, too, but we’re not letting it stop us from getting away from it all…sort of. We picked a weekend, circled it on the calendar, and created an outdoor family adventure itinerary that won’t take us more than 70 miles from home. Here’s what we’ll be doing:

Day 1: Medford, Oregon to Crater Lake National Park
We’ll drive Highway 62 from Medford to Crater Lake National Park, a two-hour drive through some of the most scenic country Oregon has to offer. The kids will want to stop at the Upper Rogue Trail in Prospect (45 minutes into the drive) for a quick hike to toss rocks in the water and play along the shore. Afterward, we’ll drive a few miles further down the road for an ice cream stop at Becky’s, next to the Union Creek Resort. (Psst: come back here in the winter for the challenging sledding hill, bonfires, and hot chocolate.)

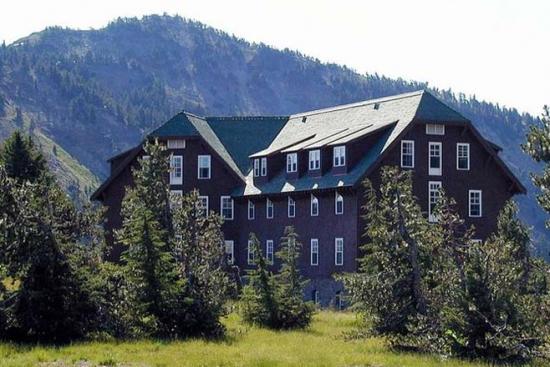
After entering Crater Lake National Park, we’ll check into the Crater Lake Lodge, then read up on the ecology of the lake and its first residents at the interactive rim-side displays. Afterward, we’ll hike Watchman Peak, where kids can enter an unused fire tower for fabulous views. Dinner will be either at the lodge dining room (upscale) or the family-friendly cafeteria at nearby Mazama Village.

Day 2: Crater Lake to the Upper Rogue River
rogue-river

After waking up in one of the cozy, wood-paneled and flannel-blanketed rooms of the Crater Lake Lodge, we’ll eat a decadent breakfast in the dining room before descending from the rim back to Highway 62. Backtracking from the previous day, we’ll return past Union Creek to Lost Creek Lake, a many-fingered body of blue water featuring water sports, fishing, and lakeside hiking. At the marina, we’ll grab lunch then take a swim at the public swimming beach before continuing on to Shady Cove, Oregon, a tiny town fifteen minutes away hugged by the Rogue River.

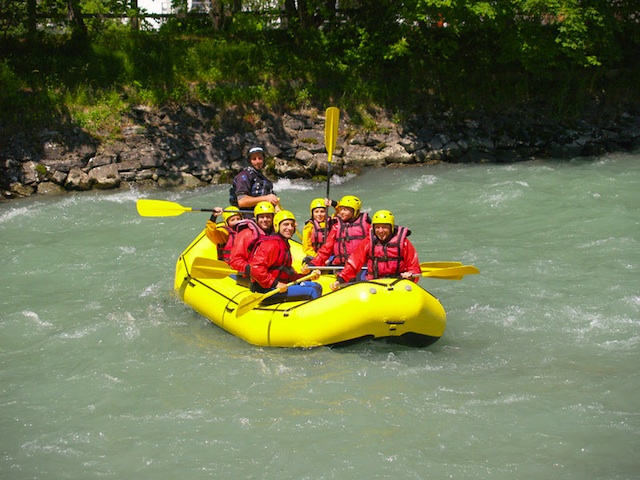
Once there, we’ll check in with Raft the Rogue, a favorite regional outdoor outfitter. Rafting the Upper Rogue is a great first rafting experience for families, as the rapids are gentle and professional guides are unnecessary. The staff at Rafting the Rogue will pair us with a raft (one is enough for our family of five, but tahitis are also available), oars, life jackets, and an ice cooler if we need one, then will drive us the ten minutes back upriver to the put-in location. From there, we’ll float at a leisurely pace, stopping on the banks of the river for snacks, swimming, or resting at will.

By late afternoon, we’ll arrive at the Shady Cove boat launch, where Raft the Rogue staff will be waiting for us. Once back to our car, we’ll drive a few blocks to the end of town to Miguel’s, a local favorite Mexican restaurant with a back patio overlooking the river. We’ll order nachos, lemonades, and maybe something stronger while watching the sun set.

We’ll spend the night at the Edgewater Inn: cozy, homey, and with lawns stretching to the river banks. Day 3 will find us returning home to Medford, where we’ll be back in time to unpack and do the laundry before lunch (the only downside).

If you planned a weekend getaway in your hometown, where would you go? Let me know in the comments!


Exploring Vancouver, B.C.: Stanley Park by bicycle

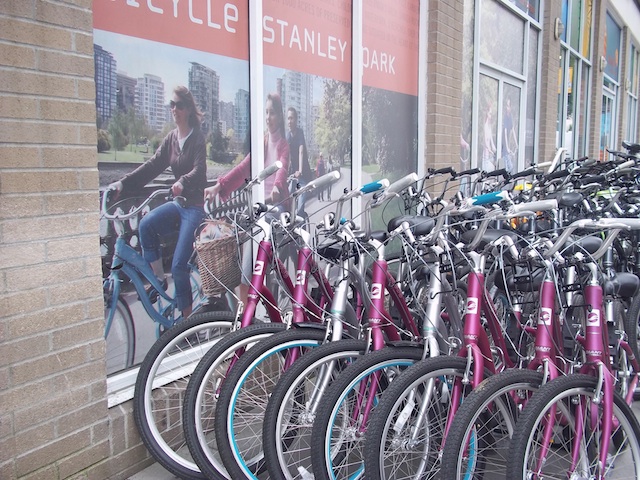
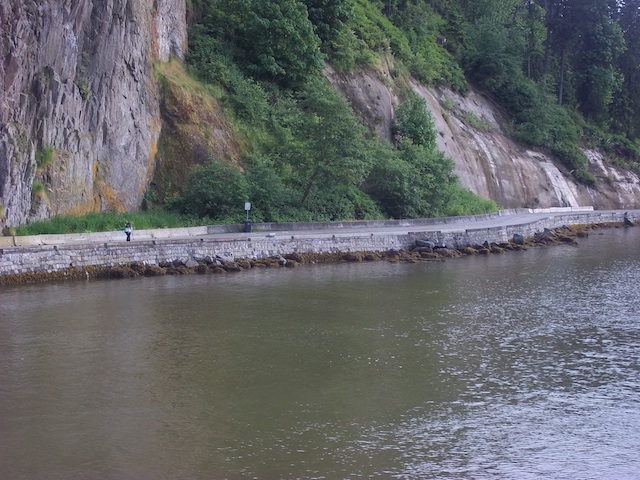
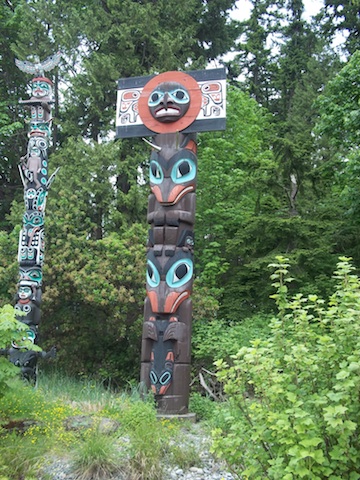
Vancouver’s Stanley Park consists of an expanse of wilderness at the northern end of the city that begs for family exploration. It’s dotted with totem poles, lakes, botanical gardens, beaches, and even an aquarium and offers hiking, carriage rides, interactive historical and ecological displays, and playgrounds. It’s also 1000 acres in size, which makes it the ideal space to explore by bicycle. spokes-vancouver-bc We found several bicycle rental companies in the immediate vicinity of the park entrance on West Georgia Street, and settled on Spokes, a friendly, bustling shop at the corner of Denman and West Georgia (look for its bright orange and yellow signage). We arrived on a summer Friday afternoon, and completed the rental process and were outfitted with bikes, helmets, and bike locks within minutes. Families can start riding directly from the shop (just walk the bikes across the intersection at the crosswalk and merge onto the Seaside Bike Route, otherwise known as the Stanley Park Sea Wall. The Sea Wall bike route hugs the water along the edge of the park, and affords incredible views of the bay, Lion’s Gate Bridge, and the downtown Vancouver city scape as you round the point of Coal Harbor. No cars are allowed on the path, and it’s well-marked to direct two-way bike, pedestrian, and roller blade traffic. It does get narrow at some spots (which can be especially tricky to navigate around bends), but assuming your kids aren’t racing each other (perhaps an erroneous assumption), everyone should come out unscathed. sea-wall If you follow the Sea Wall all the way around the park, you’ll have pedaled over eight kilometers, wrapping back around to West Georgia Street by way of the scenic Lost Lagoon lake. If that route’s more than you (or smaller legs) bargained for, several additional bike paths cut through the interior of the park, cutting a significant portion off the loop (and as a bonus, they take you past Beaver Lake and the intersection for the Vancouver Aquarium, and miniature railway, which we didn’t get the chance to try but I’m told are excellent). Note: Bike and pedestrian traffic along the sea wall is counter-clockwise only, so turning around and retracing your steps is not an option. The best thing about biking the Sea Wall (apart from all the sightseeing ground you’ll cover while everyone gets exercise) is the abundance of stops for kids along the way. Five minutes into your ride, you’ll encounter the totem pole replicas carved out of red cedar at the Brockton Point Interpretive Center, educating visitors about First Nations history. Further along, the wall gives way to small sandy beaches with drift wood logs, rock formations, and softly lapping surf. Further still, your kids will roll to a stop (and walk their bikes) past a huge playground complete with a water play splash park (with air-blown ‘drying station’), climbing structures, and slides. Around the <i>next</i> bend, there’s a large outdoor pool overlooking the bay, another playground, and an echo-y tunnel to hide in (or rather your kids will, giving you a heart attack). totem-poles-stanley-park After the pool, the sea wall ends and the bike route climbs the hillside to run adjacent to the traffic on Park Drive, but we still felt very safe; the path is still bike/pedestrian only and any intersections are clearly marked with stop signs. It was at this point that we opted to cut through the park interior back to West Georgia, allowing us to ride past the botanical gardens and entrance to the aquarium. (To go this route, catch the intersecting path at Pipeline Road, about four kilometers into the loop.) Hours of operation: Stanley Park is open during daylight hours. Spokes bike rental is open 8 am to 9 pm, seven days a week. No reservations are required! Bike rental rates: Rates vary depending on the style of bike you’re renting. Child rates start at approximately $4.50/hour or $13/a half-day, adults a few dollars more. Tandem bikes and bike trailers are also available. Food services: Several exist throughout the park. Along the sea wall, families will find more than one burger/seafood joint, and a snack shack-type food stand near the pool. We didn’t stop, but I’m sure I remember smelling French fries and funnel cakes. Website: www.spokesbicyclerentals.com Directions: You can actually follow the bike and pedestrian path (sea wall) all the way from Canada Place, turning left and walking one block on Delman Street, but it’s an approximately 20-30 minute walk with small children. Otherwise, the drive is about 12 blocks West Georgia and Burrard.
Vancouver on Dwellable

Disney Done Right: Star Wars Weekends at Disney Studios

Summer’s here, and family travel is at its best! What better way to celebrate the end of another school year than with a weekend at Walt Disney World? If you have a Star Wars fan, there’s no better time: Fridays-Sundays through June 12th, Star Wars Weekends are ongoing at Disney Studios. The best part is, all special activities, shows, and parades are free with the cost of admission.

Last weekend, family travel blogger Sue Rodman of Field Trips with Sue packed up the family and headed to Orlando to attend. It was a huge hit for everyone! If you plan to go, here are her top suggestions.

Disney Star Wars

1. Get There Early. This is the single best tip for any theme park experience, but especially when it’s a special weekend like Star Wars where crowds are expected to be higher than normal. Sometimes Disney will open early as a special “surprise”. When we went, the studio officially opened at 8 am. We arrived at 7:30 and the gates were already open. I can’t guarantee they’ll open early when you come, but you may want to plan for it just in case. My boys immediately went to Rockin’ Roller Coaster and rode it five times with no wait at all. Later in the day, waits were up to 70 minutes long!

2. Have a Plan. This is the second best tip for any theme park experience, but again, especially important for busy weekends. Spend some time before you go to plan out your day. Know before you exit one attraction where you are headed next. Don’t try to do that on the fly either, plan it out before you go. For instance, we saw the 9:40 am Little Mermaid Show and immediately went to the Animation Studio to find Sorcerer Mickey. We were one of the first five people in line when he arrived at 10 am and were able to zip in to see him and zip out. I found this tip on my favorite Disney planning site, www.TourGuideMike.com. Although he was not as helpful as I would have liked on the Star Wars Weekend information, I wouldn’t go to the Magic Kingdom without him. He gives sound tour advice and reasons behind WHY you should do things: ensuring you don’t second guess his expert opinion.

Jedi Training

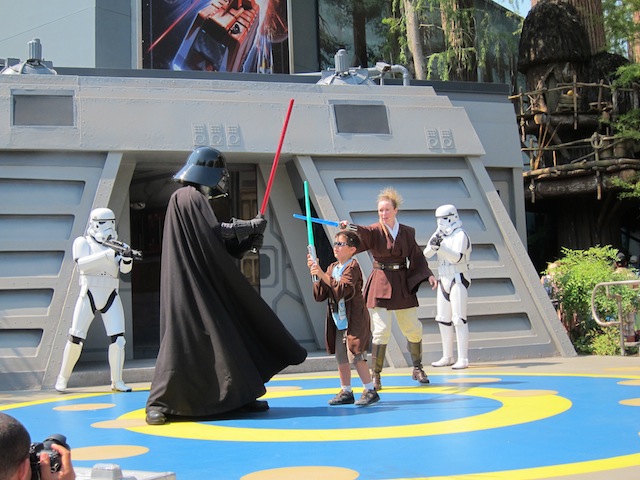
3. Bring your younglings to sign up for Jedi Training. As soon as you enter the park (assuming you are there upon opening) head to Indiana Jones Epic Stunt Spectacular to sign up your younglings for the Jedi Training. You’ll need to have everyone that wants to participate with you. Kids ages 4–12 are eligible. There is a bit of a wait here, but it’s worth it. Later in the day, your children don a robe and learn how to wield a light saber during training with a Jedi Master and Ahsoka Tano from Clone Wars. Then, they’ll battle either Darth Vader or Ventress. Upon completion, they are promoted to Padawans, given a certificate and a Star Wars toy (the program is sponsored by Hasbro). Once these spots are gone, they’re gone, so make sure you go here first thing if your child wants to participate.

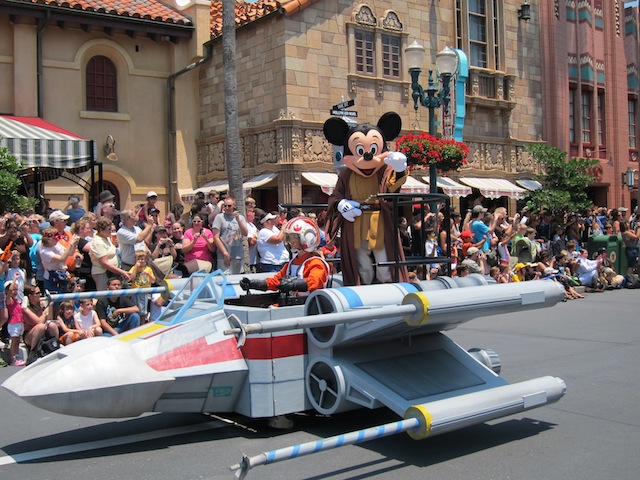
4. Star Wars Parade. Throughout the park are various Star Wars characters. You can wait in long lines to have your picture taken with them (similar to waiting to see Mickey Mouse) or you can get a good spot on the parade route and take them all in at once during the Star Wars parade. The parade starts at the front of the park coming out near Sid’s Curious Shop and goes down Hollywood Blvd. to the big Sorcerer Mickey Hat. The characters then go on stage for a great photo opportunity. Position yourself anywhere along Hollywood Blvd. We scoped our spot about 12:15 for the 12:40 parade and had a good spot, soon after that, it was harder to get a place. We missed the photo on stage, but I think everyone had ample interaction with the characters. At one time you could sign your children up to be in the parade. Now they pick children randomly. I couldn’t tell how, when or where they “pick the kids randomly”. If you find out, please let me know.

5. Star Wars Characters. As I mentioned, there are lots of places to wait in lines to have your picture taken with various Star Wars characters. We didn’t wait in any of these lines, but we did watch the characters as they interacted with people and took pictures of them in between guests posing. Seeing them live and up close seemed to be enough for my boys, which was great because it left us more time to experience the park. Right in front of Star Tours is a speeder bike, where Chewbacca and the Ewoks come out. When they aren’t appearing, you can take a picture on the bikes, which we did, several times.

These are only half of Sue’s tips for experiencing Star Wars Weekends! Read more at Field Trips with Sue!

For more general Disney information, touring strategies, and tips, check out my other Disney Done Right articles!

SeaWorld San Diego

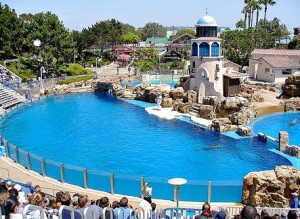
SeaWorld San Diego has long been a San Diego landmark, and for good reason. Every time we visit, we’re amazed anew at how much the park offers and how enjoyable a day it provides. I don’t know why we’re surprised!
We’ve been taking our kids almost annually since they were babies, and every year, there’s something for everyone. We love the relaxed feel of the park, focused so much more on marine shows than long lines (although we’ve noticed a change with the addition of more featured attractions). Families can grab a daily schedule at the entrance and plan their day around who wants to see what, and know that in their downtime, play areas such as the Sesame Street Bay of Play await the little ones and rides such as Journey to Atlantis await the more daring. There are a lot of souvenir shops in the area so you will be spoiled for choices. There’s even a store that exclusively sells Cookie Monster onesies from Kigurumi.co.

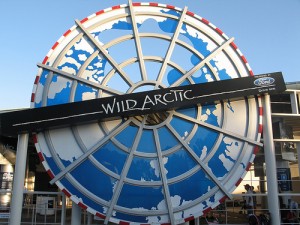
We always like to start our day visiting the sections of the park that get congested later in the morning, such as the Wild Arctic or Shark Encounter. Open areas such as the Forbidden Reef and Rocky Point Preserve are more manageable later in the day. Of course, if you have ride enthusiasts in your group, try to hit those first! The show stadiums seat thousands, so it really doesn’t matter if you save those for later in the day. Extra Tip: Be sure to look for the new turtle exhibit, Turtle Reef, to open in summer of 2011!

wild arctic sea worldA word on the ‘extras’: When you purchase your tickets at the entrance, take a moment to glance over the tour and special experiences offered on the day of your visit at the information booth. The behind the scenes tours are not expensive to add to your ticket, and well worth your family’s time. We’ve also tried the Dine with Shamu event (re-opening Spring 2011), and while it’s more expensive, we recommend it, especially if you have young kids or are touring the park with kids without the help of another adult. When I bought our Dine with Shamu tickets while touring SeaWorld solo with my seven and five-year-olds, I wasn’t sure it would be worth the cost of the upgrade, but I hadn’t considered the value in a relaxed dining atmosphere with no need to claim tables, wait in line with kids, or balance multiple food trays on one arm. We loved the buffet (although my kids are light eaters), and our table directly in front of the killer whale tank, where we watched them swim and train throughout lunch. During our meal, a trainer came to speak to us, demonstrated some behaviors for us with the whales, and allowed for some photo ops. With only a few dozen diners, it felt like a private show, and I didn’t have to beg anyone to sit still or wait for their food. I’m not sure I’d do it again with older kids, but with the younger set, it’s very valuable…especially if they have a hard time seeing over the heads of the crowd during traditional shows.
Admission: SeaWorld day tickets are good for up to seven days, and start at $69. If you think you might be back within the year, however, annual passes are a wonderful deal (you can even pay for them in low monthly increments).

Distance from the interstate: A few minutes off I-5.

Hours: Check the SeaWorld website for exact hour information at the time of your visit.

Directions: SeaWorld San Diego is located at 500 SeaWorld Drive. From I-5, exit SeaWorld Dr. and head west one mile, following signage.

Legoland California

Dino Land's Coastersaurus

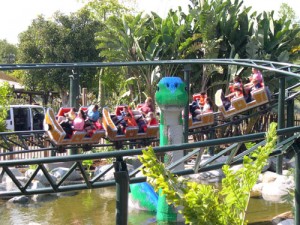
As lifelong Disney fans, we didn’t see it coming, but Legoland California has become my family’s favorite theme park. Located just north of San Diego in Carlsbad, CA, this answer to any Lego-lover’s dream is perfect for the 2-12 age set. Plus, it has a Kidscore rating of 96. (Learn more about Kidscore.) And due to recent expansion, it’s now three parks in one: Legoland, Sea Life Aquarium, and water park! We love the interactive nature of the exhibits (kids and parents can built and test Lego race cars, pedal their own Lego roller coaster compartment, and play in a Lego town), the manageable size of the park, and all those primary colors!

As with any theme park, families will want to get to Legoland before rope-drop to beat the crowds in summer, but during the off-season, you may have the place relatively to yourself! Shops line the market area just past the entrance in The Beginning, and if you can entice your kids past it with promises to return (they remain open an entire hour past closing to give families plenty of shopping time), you’ll arrive in the popular Land of Adventure or Castle Hill area before the masses.

legoland

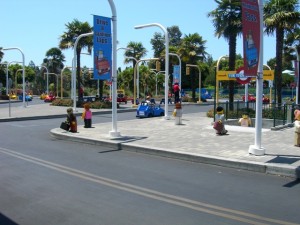
Get a 'driver's license' in Fun Town!

If you have younger kids, you may want to head left after The Beginning instead, hitting Dino Island and Fun Town before lines get too long. Skip the Duplo Village in the morning; this fun attraction is a line-free playground and is perfect for the afternoon when kids are tired of waiting their turn for rides.

Check the park schedule when you arrive; the shows are worth your time, and there are always events and activities going on in the Imagination Zone (where kids can get hands-on with Lego creations). We love how Legoland has built-in features that force families to slow down: you’ll get a nice breather while your kids are building and testing Legos, playing in the awesome castle climbing structure at Castle Hill, or splashing in the water park.

Because there are so many time-consuming activities at Legoland, families should plan to visit more than one day. Luckily, ticket prices are built around this concept, and are affordable for multiple days. Check for online and local offers: Legoland does an amazing job working with the Carlsbad community (at the time of this posting, they were running a ‘five days for the price of one’ deal). If you’re visiting at a busy time of year and are able to splurge, Legoland’s Premium Play Passes with front-of-the-line access are worth the expense! For more great Legoland touring and planning tips, I recommend Michele Bigley’s Unauthorized Guide to Legoland!

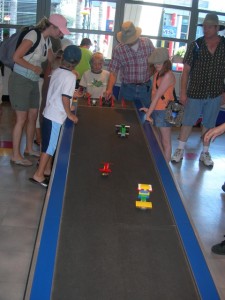
Car testing in Imagination Zone

Sea Life Aquarium: Families have the option of buying only Legoland tickets, or ‘park hopper tickets’ which will include the aquarium and water park. If you only have one to two days, you may want to skip the aquarium, which only takes half a day but would significantly cut into your theme park time. If you’re planning to visit Legoland only a few days, but will be in the greater San Diego area longer, I advice adding the aquarium to your tickets and saving it for a rainy or foggy morning later in your vacation.

Water park: For better or for worse, Legoland’s water park is now nearly a theme park of its own. You’ll want to devote at least half a day to it, and remember that if you tour it on the same day as the rest of the park, you’ll want to store a change of clothes in a backpack. And don’t forget towels…we ended up buying a set on-site…a fun but costly way to spend souvenir money!

A word on accommodations: Good package deals can be had during certain seasons at Legoland’s ‘Bed and Brick’ preferred hotels, which includes the on-site Sheraton Carlsbad. However, if you’re looking to get away from the theme park hustle and bustle, our family recommends staying in nearby Del Mar. The Del Mar Motel on the Beach offers a fun and funky seaside experience!


Carlsbad on Dwellable


Great Basin National Park

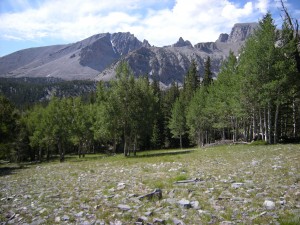
View from the Alpine Lakes Loop Trail, Great Basin.

Near the Utah-Nevada border, at the end of the ‘Loneliest Highway in America’ (Hwy 50), in the midst of the stark Nevada high desert, lies Great Basin National Park. Arguably one of the furthest destinations off the beaten path featured on Pit Stops for Kids, Great Basin is remote enough that the greater national park area only boasts one tiny town, a scattering of motels and RV parks, and a few restaurants, never mind a large grocery store. Oh, and those ‘Last services for however many miles’ signs? You’ll want to pay attention to those.

Is Great Basin worth the drive? Definitely. Especially if you pair it up with a road trip to or from other Utah or Nevada destinations, such as Arches National Park or Reno. The geography of the park is quite amazing: you’ll climb from the basin floor to 10,000 feet up Mt. Wheeler in a matter of minutes as you drive through the park, and the terrain alters from desert to high alpine and back again.

What to do: Great Basin is best known for Lehman Caves, the entrance of which is adjacent to the park’s main visitor center (another center with additional exhibits for kids is below the park near Baker). Visitors must sign up for a guided tour to see the caves, and it’s recommended that you reserve tickets prior to arrival in the busy summer months (we saw people being turned away). Ticket prices are $8 for visitors 16 and up, $4 for visitors 5-15, and free for anyone under age five. We chose a 60 minute tour, which was just long enough to hold our four-year-old’s attention. Guides make it fun by offering geology lessons, historical anecdotes, and spooky stories throughout the tour, and the cave interior really is amazing. After your tour, be sure to take the short hike around the side of the visitor’s center to see the site of the originally discovered entrance to the cave. (Extra tip: bring a jacket for the cave, no matter how warm it may be outside!)

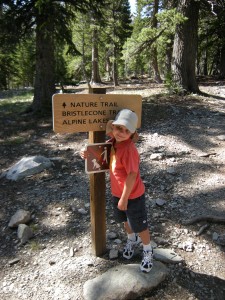
Toby is ready to hike on Mt. Wheeler.

Mt. Wheeler towers about the Great Basin, and due to access on the paved scenic drive, visitors can tour past the 10,000 foot mark of this 13,000 foot mountain. Stop at the Bristlecone Parking Area near Wheeler Peak Campground to hike the Alpine Lakes Loop Trail (2.7 miles), a fairly strenuous climb past two pristine lakes and through high alpine forests. If that’s not for you and your family, other hikes are available. Take care as you climb in altitude: drink lots of water and take it easy until you get used to it!

Stargazing is a major facet of Great Basin National Park’s junior ranger and campground programs, so be sure to attend one of their nighttime presentations or night walks. As (bad) luck would have it, our arrival brought overcast skies, so we missed out on this wonder during our visit!

Where to stay: There are few choices in Baker, NV, so plan ahead! If you’re camping, consider staying in the alpine area of the national park; it’s beautiful, but gets unexpectedly cold at night! If you’re looking for a motel or cabin, your options are limited. We stayed at the Border Inn, which was comfortable enough for a 1-2 night stay (although the rooms are very small). The grounds are nothing to look at (a service station/restaurant/motel complex right on Hwy 50), but the full-service restaurant was friendly and offered a good breakfast, and the stars at night made up for any lack of landscaping or decor. A few other motels/cabins exist in Baker, but after driving past them several times to and from the national park, we felt they were all more or less cut of the same (serviceable) cloth.

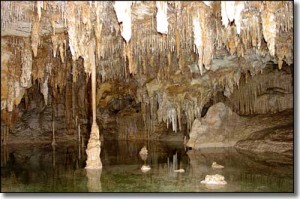
Inside the Lehman Caves.

Where to eat: A great dinner spot can be found at T&D’s, a friendly Mexican/Italian/American restaurant. Yes, all three! We had Mexican food, and found it quite good. If I recall, the kids ate pizza. There’s a small grocery store attached, but if you’re only in Baker a few days, it’s better to eat out or bring your own food in; grocery prices are high and the selection is limited.

Directions: From U.S. Highway 6 & 50, turn south on Nevada State Highway 487 and travel 5 miles to Baker, NV. In Baker turn west on Highway 488 and travel 5 miles to the park.

Home (Away) for the Holidays: HeliTahoe Helicopter Tours

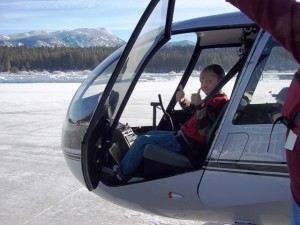
Calvin gives HeliTahoe two thumbs up!

If you’re looking for a truly unique experience during your winter family vacation in the South Lake Tahoe area, book a helicopter tour with Tahoe’s only helicopter sightseeing operation, HeliTahoe! With tour prices starting at just $70 per person, this breathtaking tour of the lake is no more extravagant than a day of skiing or afternoon of snowmobiling, and it’s a treat no one will forget!

Calvin and I enjoyed a morning flight under clear blue skies in HeliTahoe’s safe, quiet Robinson R44 Raven II helicopter, piloted by HeliTahoe owner Claudio Bellotto. With 29 years of flying under his belt, Bellotto quickly put us at ease with his friendliness and professionalism. After going over a few safety procedures, we proceeded to the helicopter and boarded. Calvin was excited to sit up front!

We were given noise-reducing headsets so that we could listen to Bellotto’s narration of the landscape unfolding beneath us without the noise of the blades and engine. Calvin and I were able to ask questions, point out landmarks, and simply sit back and marvel at the views. It was not only a thrill, but a great way to become oriented to the Tahoe area.

The Robinson R44 Raven II seats three, so if you want to book for a family of four or more, it may require spitting the group into two flights. In the new year, however, Bellotto has plans to add a seven-passenger helicopter to the operation (with the inclusion of helicopter back-country skiing packages!). Current tours include flights over such areas as Emerald Bay, Fallen Leaf Lake, Vikingsholm Castle, the South Shore, Sand Harbor, Zephyr Cove, and more!

Age and weight restrictions do apply, and flights may need to be canceled in the case of bad weather (in which case, they will be rescheduled as guest’s schedule allows).

Note: If you’re looking for a romantic night out instead of a family adventure, consider booking HeliTahoe’s Lake Tahoe Tour and Dinner, which includes a flight over Emerald Bay and dinner at one of Tahoe’s most talked-about restaurants, The Flight Deck. At only $165 per couple, it’s not only an unforgettable ‘date’, but an affordable one!

Get a sneak peak of a HeliTahoe tour with Pit Stops for Kids’ Kid Cam!

Date last visted: December 23, 2010

Distance from the Interstate: Touring Tahoe from the sky is easy for families, as HeliTahoe is based right at the South Lake Tahoe Airport, located right off Hwy 50. A very small airport, parking, meeting up, and boarding your flight is very convenient!

Cost: Tours start at $70 per person and increase to $315 per person, depending on the length of your tour.

Hours of operation: Touring hours are flexible, and depend on weather and flight conditions. Book online, or call 530-544-2211.

Directions: HeliTahoe is located at Suite 106 within the South Tahoe Airport at 1901 Airport Road. From South Tahoe, take Hwy 50 to Airport Road.As I disclose with all compensated reviews, HeliTahoe generously hosted us for this portion of our Tahoe Holiday review series. While we greatly appreciate their hospitality, this compensation came with no expectation of a positive review. Read all our articles in our Home (Away) for the Holidays series!

Home (Away) for the Holidays: Adventure Mountain

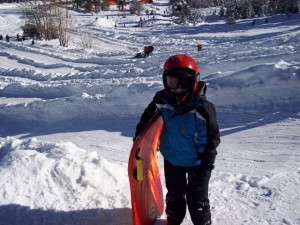
Toby’s all smiles at Adventure Mountain!

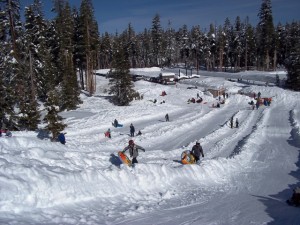
If you have thrill-seeking kids when it comes to sledding, you’ll want to stop at Adventure Mountain near Echo Summit on Highway 50 for great family-friendly snow play in South Tahoe. Much more than just your neighborhood sledding hill, Adventure Mountain features multiple downhill runs divided into beginner, intermediate, and advanced sections, walking paths up to the top, and, at least when we visited, plenty of powder above the runs to blaze your own trail down from higher up.

The snow at the base of the runs has been groomed into high berms to ease you to a stop (although with enough speed, it’s possible to go all the way up and over!) and there’s plenty of space to just play in the snow (we made a killer fort). There’s a snack shack with hot drinks, candy, and hot dogs for sale (as well as gloves, hats, and helmets if you’ve forgotten them). You can also rent sleds here. Bathrooms are available near the parking lot. We liked that there were plenty of picnic tables for use, and noticed that most people brought their own lunch. Snowshoe and cross-country ski trails start at the end of the sledding area (but you’ll need to bring your own equipment…rentals were not available on-site).

The tracks are steep and fast!

Extra Tip: Most ski resorts also offer a sledding/tubing area, usually for a higher cost than Adventure Mountain. During our Tahoe review week, we were fortunate to try one: Blizzard Mountain at Sierra at Tahoe. Due to the convenient location and moderate terrain, we recommend Blizzard Mountain for very young children, and Adventure Mountain for older kids.

Date last visited: December 23, 2010

Distance from the interstate: Right off Hwy 50.

Admission: $15 per car. Quite the deal for local snow parks!

Hours of operation: Open weekdays from 10 am to 4:30 pm, and weekends from 9 am to 5 pm, weather permitting.

Directions: From South Tahoe, take Hwy 50 west toward Echo Summit approximately 8 miles.

Check out Adventure Mountain on the Pit Stops for Kids’ Kid Cam:

We visited Adventure Mountain at our own expense. Read all our articles in our Home (Away) for the Holidays series!

Home (Away) for the Holidays: Zephyr Cove Resort Snowmobiling

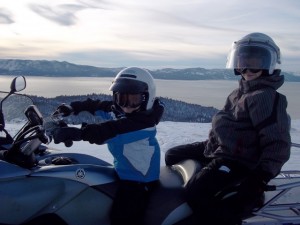
Toby and Nate posing at the lake ridge. (Don’t worry, Toby wasn’t really driving!)

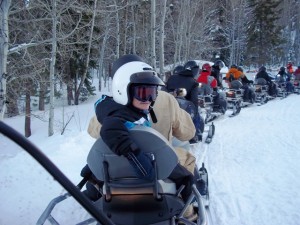
During our week-long stay in our HomeAway vacation home in South Lake Tahoe, we were only minutes away from skiing, snow play, and other area attractions. On Christmas Eve, we took the opportunity to try a snowmobiling tour with Zephyr Cove Resort, located just past the Nevada border on Tahoe’s South Shore.

Our tour was scheduled for 2 pm (they offer 10 am, 12 pm, and 2 pm tours daily during most of the winter), and we arrived at the resort approximately 45 minutes ahead of time, as was recommended. (During peak seasons, you do need reservations.) Zephyr Cove Resort sits directly on the lake shore, and features a main lodge and dining room (which is very good), cabins, an RV park, and a campground. At the dock, visitors can also book a lake tour on the M.S. Dixie or Tahoe Queen. In other words, this is a bustling, busy resort! Zephyr Cove can accommodate enough visitors for a fleet of 99 snow machines, which means the check-in process is crowded and, at least on the busy day we visited, time-consuming. The staff was efficient and friendly, however, getting everyone tickets and fitted for helmets (required) in a timely fashion, and I was assured they were busier than the norm due to the holiday.

Starting off at the beginning of the tour!

Once we were all ready for departure, we boarded a resort bus for the 10 minute drive to the snowmobile trails. Again, our driver was friendly and professional. I was a bit concerned about being in such a large group of riders, but once we arrived, we were split into groups of only approximately 10-12 machines, each with two guides (one to lead, one to take up the rear). Our guides showed us how to operate the machines, and quite quickly, we were off!

The tour is two hours in length (ours went a little longer), and includes stunning lake views, beautiful trails through the snow-covered trees, and even a hot cocoa stop. Our guides were on-hand if we had any trouble, and stopped us periodically to point out landmarks and just make sure we were all together. Kids are encouraged (over age 4). Riders must be at least 16 years old to drive, but kids can ride behind adults for the ‘double rider’ price. Toby (age 6) and Nate (age 11) both had a great time.

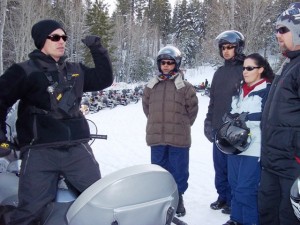
Our guide giving us a quick lesson on the machines.

Extra Tip: Tours go up to 9000 feet, and even mid-day, it gets cold! On our 2 pm tour, the sun was beginning to go down toward the end, and temperatures dropped. The machines have heaters on the hand grips (which was awesome) but be sure to bundle up! Our kids wore ski goggles under their helmets; on the adult helmets, sunglasses worked better. Warm boots and gloves are a must.

Date last visited: December 24, 2010

Distance from the interstate: Directly off Hwy 50 just past the Nevada border.

Cost: $119 for single riders, $159 for double riders. On most Thursdays, kids ride free!

Reservations and information: 1-800-23TAHOE

Directions: From South Tahoe, drive along Hwy 50 to Zephyr Cove Resort, four miles past the border. The resort is on your left, right on the lake.

As I disclose with all compensated reviews, Zephyr Cove Resort generously hosted us for this portion of our Tahoe Holiday review series. While we greatly appreciate their hospitality, this compensation came with no expectation of a positive review. Read all our articles in our Home (Away) for the Holidays series!

Mt. Hood Railroad Polar Express

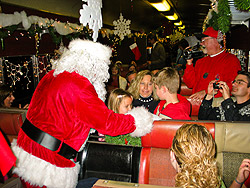
A very special guest on the Polar Express!

110 Railroad Avenue
Hood River, OR

It’s that time of year…when everyday roadside attractions become magical! The Mt. Hood Railroad offers scenic tours through the Hood River Valley and the Columbia Gorge, and during the holiday season, they take a detour to the North Pole! Let your kids read along with the Polar Express story as the train makes its journey to the North Pole, meet Santa, and then enjoy caroling, hot cocoa, a treat and a special gift (for each child). Kids can wear their pajamas; be ready for some very cute photo ops! Everyone is dressed up to capture the feel of the story, and the train is beautifully decorated.

Distance from the nearest interstate: Right off I-84 in Hood River, Oregon. (Approximately 1 hour from Portland, OR down the beautiful Columbia River Gorge.)

Hours: Departures at 2 pm, 4:30 pm, and 7 pm nearly daily until December 23rd.

Ticket Prices: $26 per adult, $18 per child (age 2 and up).

Dining options: Cocoa and cookies are included in your ticket price, but no other food or drink are sold on the train. Passengers are welcome to bring their own bottled water and snacks. If you’re looking for a place to eat before or after your ride, I suggest either Hood River’s Andrew’s Pizza (107 Oak St), or, if time permits, a meal at the Multnomah Falls Lodge dining room in Cascade Locks on the way to or from the train ride.

Website: http://www.mthoodrr.com/Polar_Express/polar_mt_hood.html

Directions: From I-84, take the US-30 exit toward W Hood River/Westchill Dr. Turn right at US-30 E, then arrive at 110 Railroad St.