Out ‘N About Treesort

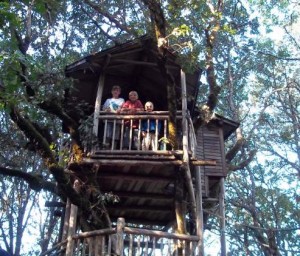
Hanging out in the trees in the Swiss Family tree house!

Last weekend, the Pit Stops for Kids crew had the opportunity to stay in one of the most unique locations we’ve ever experienced: a tree house high in the air! At Out ‘N About Treesort near Cave Junction, Oregon, guests have their pick of one of 15 tree houses, elevated yurts, cabins, and tree ‘gazebos’ in which to spend the night. Each one is different, offering different views, different features, and different amenities (or as they say there, ‘amenitrees’).

It only took us approximately ten minutes to reach the resort from Highway 199 (which runs between I-5 and the Oregon coast), or 40 minutes from I-5. When we arrived, we were greeted by the friendly resort staff and shown around the beautiful property of mountain meadows, sugar pine trees, pasture, and hillside. It didn’t take us long to realize that Out ‘N About is all about making guests feel at home: in addition to the main lobby with couches, games, TV, freshly brewed coffee, and wireless, a ‘Central Amenitrees’ cabin is situated adjacent to a communal fire pit housing a full kitchen for guest use, a spacious bathroom with shower for those guests without plumbing in their tree house, and numerous BBQs, dishes, wood, charcoal, and the like.
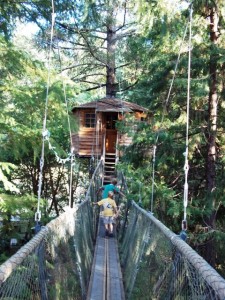
Exploring the rope bridges at Out ‘N About!

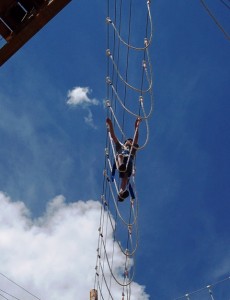
Further exploration of the resort yielded elevated tree platforms, rope bridges high in the air, a rope swing the kids couldn’t get enough of, stables, an expansive zip line course, and a swimming hole beautifully landscaped and fed by the nearby Illinois River. Put simply: this is kid paradise.

Of course, we were anxious to see our tree house. We stayed in the ‘Swiss Family’ complex, which comfortably slept the five of us in two distinct tree house cabins: the upper two-story adult unit has a double bed along with a child size single and rocking chair on the landing and large covered open deck below. ‘The kids’ unit, connected by a swinging bridge, has a bunk bed and a small table with chairs like the playhouse all kids want. We used the bathroom facilities in the ‘Central Amenitrees’ (only 75 feet away), but had electricity and heat.

The older two kids loved having their own ‘place’ connected by the bridge, and Toby was more than happy to curl up on the cozy bench bed in the main unit. And while this was a tree house in the truest sense of the word (we had to climb a ladder to enter our unit by a trap door), it was comfortable and all our needs were met: fresh towels and sheets awaited us, and we had plenty of warm blankets to accompany our heater. We even had a fridge and the kids had a fire pole to shimmy down to the ground! (See more photos of the tree houses and even virtual tours of the interiors!)
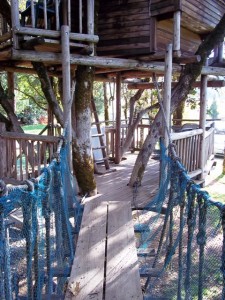
Bridge from the Swiss Family kid suite to the main complex and lower deck.

Date Last Visited: October 2, 2010

Distance from the Interstate: 40 minutes from I-5.

Room Rates: Tree house rates range from $120-$250 per night.

Dining Options: ‘Central Amenitrees’ is stocked with everything you need to cook or BBQ a meal (minus the food), and breakfast is served daily (included in the price of your tree house). We found the breakfast to be delicious (in fact, the kids went back for a ‘second breakfast’ about an hour later!). Completely homemade, during our stay we had our pick of quiches, egg dishes, french toast, muffins, fresh fruit, and cereal. If you want to dine elsewhere for lunch or dinner, nearby Cave Junction offers several choices. Our pick: Wild River Pizza on Hwy 199.
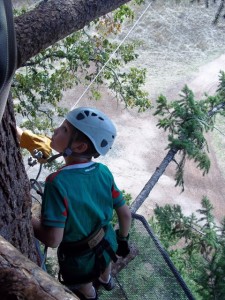
Calvin listens to final instructions before zipping across the meadow.

Activities: There’s plenty to do at Out ‘N About. In addition to simply letting your kids have the run of the place (kids under 8 need to be with an adult while exploring), families can sign up for a number of activities and classes on the grounds, all listed daily in the main lobby. During our visit, horseback rides were offered, in addition to a mosaics and felting class and the activity my kids were most looking forward to: the zip-line.

Out ‘N About has an extensive network of zip-lining courses on their property, designed to put a smile on the face of both novices and experts. We signed up for their ‘Basics Course’, which gave us five long zip-line experiences over the meadow and through the trees. The zip-lines soared over 70 feet over the ground in some places, and we had an absolute blast zipping from tree platform to tree platform high in the air.

The Out ‘N About zip line staff were professional, capable, and very friendly, putting the kids (and us) instantly at ease and making the afternoon all the more fun. We felt very safe in their hands as they suited us up in harnesses and taught us the basics on a practice line. Even Toby (only 35 pounds) was able to join the fun (and had a blast!). After completing the Basics Course, guests have the option of more zip-lining fun on their more advanced lines.)
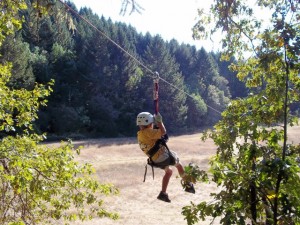
Toby soars through the air!

Zip-lining starts at $45 per person, and you don’t have to be a guest to give it a try. If you are driving along Hwy 199 and have a few hours to spare, it’s well worth the pit stop! (Call ahead to reserve a spot!)

Other Attractions in the Area: There’s a lot to do in Southern Oregon, from swimming in the Illinois River in the summer to picking blackberries in the fall. We combined our stay at Out ‘N About with a day trip to Oregon Caves National Monument, located approximately 20 miles away on OR-46. Check out our review of Oregon Caves and consider making it a stop!

Website: http://www.treehouses.com/

Phone: 541-592-2208

Directions: Out ‘N About is located at 300 Page Creek Road, Cave Junction OR. From I-5, take Grants Pass exit 55. Take Hwy 199 28 mi. to Cave Junction. South of Cave Junction about 1/2 of a mile, take a left on Rockydale Road. Go 7.5 miles to the stop sign at Waldo Road and make a left. About a mile to next stop sign, make a right on Takilma Road. In 2.5 miles you will see Page Creek Road on the left; turn left and go about 1/4 mile. You will see mail boxes and 300 Page Creek Rd. Turn left on gravel road and take it to the end.

From the south on HWY 199, turn right just past the flashing light and old cop car at the O’Brien store onto O’Brien st. O’Brien street dead ends on Waldo Rd. Take a right onto Waldo Rd. Stay on Waldo for about 4 miles until you hit the stop sign at Takilma Rd. Make a right on Takilma Road, and in 2.5 miles you will see Page Creek Road on the left. Turn left and go about 1/4 mile; you will see mail boxes and 300 Page Creek Rd. Turn left on gravel road and take it to the end.

As I disclose with all compensated reviews, Out ‘N About generously compensated us for the price of our rooms and my zip lining adventure. While we greatly appreciate their hospitality, this compensation came with no expectation of a positive review.

Oregon Caves National Monument

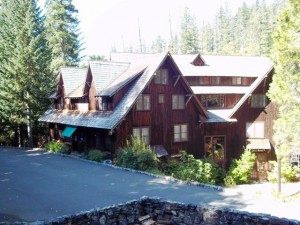
Oregon Caves Chateau on a sunny October afternoon.

If you’re driving along Hwy 199 to or from the California or Oregon coast and I-5, a stop off the beaten path at Oregon Caves National Monument is well-worth a few hours of your time! A beautiful 20 mile drive from the highway (up OR-46), Oregon Caves offers cave tours of one of the few marble caves in the world, easy hiking trails, a gorgeous lodge with dining, and breathtaking scenery.

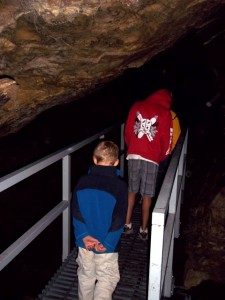
The cave is definitely the main attraction, but keep in mind that kids MUST be at least 42″ to take the tour. Our five-year-old was finally tall enough this fall, so we spent a beautiful Sunday here just last weekend. The tour is 90 minutes, and the cave temperature is approximately 45 degrees, so dress warmly even in summer! (Jackets are available to borrow in the Visitor’s Center, which we found to be a nice touch.) The tour, which winds its way almost a mile through the extensive cave system, was very interesting and kept all our kids’ attention despite its length. Our guide, Suzan, was very knowledgeable and great with the kids in our tour, and encouraged lots of questions. The kids loved climbing all the stairs, ducking in the narrow sections, and spotting bats! The tour is lighted, but at several points, they’re turned off to give visitors a feel of how dark it actually is in the cave. Our kids couldn’t get enough; even my youngest, who’s afraid of the dark!

Toby and Nate head into the interior of the cave!

Adjacent to the cave, the Oregon Caves Chateau is a National Park Landmark and a truly beautiful place to stay. We enjoyed looking around, checking out the gift shop, and taking in the view from the main lobby before returning to our tree house accommodations at Out ‘N About Treesort in nearby Cave Junction.

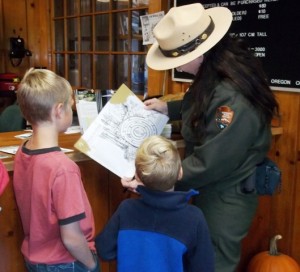
If caving isn’t for you, try one of the many moderate hikes in the area (trail heads start at the Visitor’s Center). And don’t forget: ask a ranger about their Junior Ranger program! Kids are rewarded with pins and an impromptu award ceremony upon completing their material! We can’t recommend this program enough: no matter what park you visit, your kids will come away from the experience with a better understanding of the area’s history and natural treasures after completing Junior Rangers!

Distance from the nearest interstate: On OR-46, approximately 20 miles for Hwy 199 and 50 miles from I-5.

Date Last Visited: October 2010

Hours: The monument is a seasonal attraction. Tours are offered spring, summer, and fall, from 9 am to as late as 6 pm.

Calvin and Toby earn their Junior Ranger badges in the Visitor’s Center.

Admission Prices: Admission to the monument is FREE. Cave tours are $8.50 for adults, $6.00 for children (under 17).

Dining options: The Oregon Caves Chateau offers both fine dining and a casual diner with fun atmosphere, which we recommend. Otherwise, several options can be found in Cave Junction (20 miles), including locally famous Wild River Pizza (on Hwy 199).

Website: http://www.nps.gov/pwr/orca/

Directions: From I-5, take exit 58 to merge onto NE 6th St/OR-99/Redwood Hwy. Continue to follow Redwood Hwy (3 miles), then turn right at US-199 to Cave Junction (28 miles). Turn left on OR-46 (a gas station is on the corner) and follow OR-46 for 20 miles to the monument.

A Pit Stop a Day (Day 19): Hiking in Zion Canyon

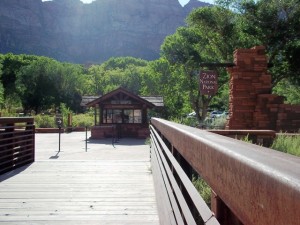
Foot path bridge to national park entrance booth.

We devoted Day 19 to morning hikes in Zion National Park and the afternoon to floating along the Virgin River behind our room at the Cliffrose Lodge.

We began our day at the visitor’s center, where we consulted the shuttle route (also found in the park newsletter) and planned our hike to the Emerald Pools on the Zion Lodge shuttle stop.

The Emerald Pools is a great hike for kids because you can adjust it to your needs/abilities. There are three pools on the trail: the lower pool is only .6 mile from the trailhead (although it does climb quite a bit), or the second pool is only 1 mile. From either of these, ambitious families can continue to the third pool (another .5 mile) or return. When we visited in July, the pools weren’t much to look at, but the dripping water from the overhangs of rock were very impressive (and a great way to cool off!).

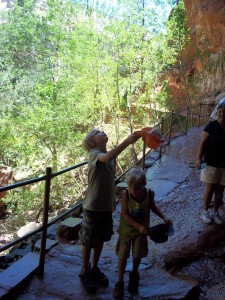
The kids catch spring water in their hats at the first of three Emerald Pools.

Weeping Rock is another easy hike for kids, which my boys explored with a ranger as part of their Junior Ranger curriculum. This trail is short (.4 mile) but steep, and very beautiful. Definitely worth a stop!

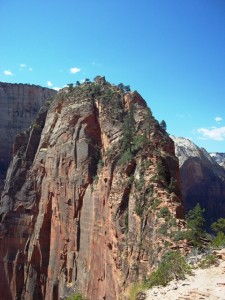
For more daring families (or more likely, adults), try the Angel’s Landing trail from the Grotto shuttle stop. A strenuous 2 mile hike up the canyon, this trail ends at the top and affords amazing views of Zion. From there, hikers can continue an additional .5 mile up the sandstone rock utilizing chain supports. This section of the trail follows a knife-edge of path with drop-offs on either side. If you’re at all fearful of heights, you can skip this last section (I did).

Final section of the climb to Angel\’s Landing.

Note: We did not take our kids on the Angel’s Landing trail. Our older two (11 and eight) could have climbed the first 2 miles, but the last .5 really is not appropriate for anyone under age 14-15, in our opinion. This final climb involves sharing a tight space of trail with many others, hanging onto a chain, and strenuous climbing (drops offs stretch to 1400 feet). Of course, use your own judgment with your children (we did see a few attempting it), but we felt safer saving this hike for when they are teens.

Extra Tip: Due to Zion’s high temperatures, we embarked on all hikes by 8 am and returned to our pool/air-conditioning/river by 1 pm. It appeared that most other families did this as well. In addition, water bottle filling stations are available at most shuttle stops. You’ll need to drink lots of water, and the stations are a fun way to get kids involved in filling bottles!

Date last visited: July 2010.

Distance off the interstate: About 30 minutes from I-15 off Hwy 9.

Bathrooms: Pit toilets are located at most shuttle stops.

Food Services: Zion Lodge (shuttle stop) serves all meals. There’s also a quick service ice cream and snack location on-site. The visitor’s center at the entrance to the park has a convenience store nearby. The Grotto (shuttle stop) has a nice picnic area.

Directions: Zion National Park is located on Hwy 9 in Springdale, Utah. From I-15, follow signs onto Hwy 9.

Up Next: We arrive in Laguna Beach, CA and explore the lesser-known kid-friendly locations in Orange County.


A Pit Stop a Day (Day 18): Zion National Park’s The Narrows

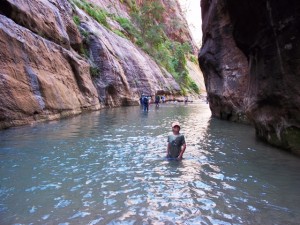
Nate navigates the ‘Narrows’!

On Day 18, we woke up in Cliffrose Lodge and Gardens with a full day of exploring in Zion National Park ahead of us. Our primary destination was Zion’s ‘Narrows’, a hike up the Virgin River deep into the canyon. (Zion has many great hikes for families.)

We walked the few yards from Cliffrose to the park entrance and visitor’s center, where we paid our $25 park entrance fee (good for seven days) and picked up maps, junior ranger booklets, etc. We then took Zion’s mandatory shuttle (we wish all national parks would adapt this policy!) to its last stop, The Temple of Sinawava.

From there, we hiked the short Riverside Walk (paved and fairly even terrain) to the start of the ‘Narrows’. At this location, the trail simply ends and you continue up the canyon by wading through the river. It’s slow going, but tons of fun. The kids loved this style of ‘hiking’ because they had to pick and choose their own route up the river, and every step was an adventure. You can continue as far as you’d like (up to a boundary at the 2 hour mark; if you wish to continue further, you need to register for an overnight permit). Nate, Calvin, and I hiked about 30 minutes up the river, and in many places the water went up past our waist! The current was not fast, but it was present in many places.

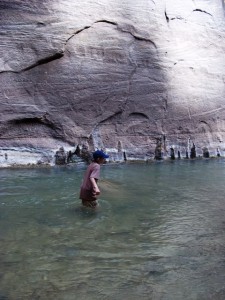
Calvin about 1/2 mile into the ‘Narrows’.

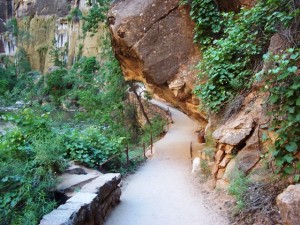
Riverwalk Trail which leads to the entrance to the ‘Narrows’. (Suitable for all ages.)

Toby (age 5) only ventured about 10 minutes up the river before finding a nice place to stop and play in the banks with grandma and grandpa. What went to our waists went over his head, and he would be essentially swimming if he went further! Needless to say, visitors need to be very careful with young children, especially if they aren’t strong swimmers.

The water wasn’t warm by any means, but given the high temperatures in Zion, we quickly got used to it and enjoyed it. In many places, the canyon walls ‘narrow’, which doesn’t allow for any bank of the river, during which times you’re completely confined to the water. The national park closes the ‘Narrows’ when there’s threat of flash floods (storm clouds or rain), so be prepared for closures, especially in August.

Toby talks about his experience on the Pit Stops for Kids Cam:

Note: You can rent river hiking gear in Springdale (water shoes meant for hiking the Narrows and walking sticks). We opted to use decent hiking shoes (just resign yourself to getting them wet!) and extra socks in our pack. Sandals with good traction (think Keen or Teva) would work, too. If we had planned to hike any further than about 1 hour into the Narrows, we would have rented specialized equipment.

Extra Tip: If you’re visiting when the river is high (spring through July), go ahead and wear swimsuits/wading clothes. We were in shorts and t-shirts, and while we certainly didn’t get cold, it would have been simpler to be in swimsuits!

Date last visited: July 2010.

Distance off the interstate: About 30 minutes from I-15 off Hwy 9.

Bathrooms: Pit toilets are located at the shuttle stop before you start the hike.

Food Services: None. Pack food in or plan to stop for lunch at the Zion Lodge, located within the park (on a shuttle stop).

Directions: From the park entrance, take the shuttle to the last stop (The Temple of Sinawava) and take the Riverwalk trail.

Up Next: More hiking opportunities in Zion, including one not suitable for young kids!


A Pit Stop a Day (Day 14): Grand Teton Horseback Ride

Setting off on our 1 hour trail ride through the Tetons.

On Day 14, we treated Nate and Calvin to a horseback ride through the Tetons (something they’d been wanting to try since Glacier National Park). Luckily, Colter Bay Village has stables on-site, making it easy!

We made reservations at the Activities Center near the Colter Bay Village store (be sure to sign up ASAP: we signed up the night we arrived and got the last three slots for the entire weekend). For our 9 am ride, we were told to be at the stable at 8:45. Our ‘wranglers’ were very friendly and experienced horsemen and women, and took us through the ropes. We were each told which horse we’d be riding (they decide based on temperment, experience of the rider, age, etc) and mounted one by one.

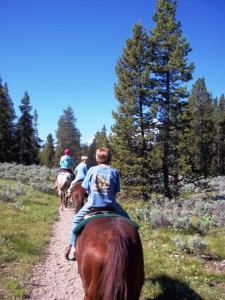
It took about 20 minutes to get everyone on their horse and lined up, then we set off down a narrow trail for our 1 hour ride. The horses were well trained, and everyone (even my kids…first time riders) easily managed their horse. We followed our wrangler single-file (another wrangler made up the rear) and they told us information about the surrounding area and the horses as we rode.

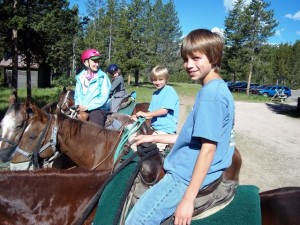
The wranglers made sure to keep family groups together.

The ride took us past a great view of the Tetons, a small pond where you can often spot moose (we didn’t) and the side of Jackson Lake (where we saw Toby canoeing with Grandma). The kids enjoyed the experience of controlling their own stead, and had fun bonding with their horses (named Quarter and Chuck Norris…mine was Claire).

The one hour ride was just about enough for us. Much longer, and we’d get sore and the kids might have gotten bored. The scenery was beautiful, and being horseback afforded a different view (not to mention new trails). We’d definitely do it again!

Note: Kids have to be eight years old to ride. Younger kids can ride a pony in the stable area (with an adult present). Backpacks are not permitted, and you’ll want to move things from back pockets (or the saddle will do it for you en route).

Extra Tip: Bring water. We made the mistake of thinking we’d have no place to put it, but the wranglers issue saddle bags and/or water bottle holders for those who ask for them. The trail meanders through some exposed sections of valley, and the morning was warmer than we anticipated!

Date last visited: July 2010.

Distance off the interstate: About 30 minutes from Hwy 89.

Bathrooms: Pit toilets located at the stables. Be sure to go before trail riding!

Costs: One hour rides cost $35 per person. (Canoe rentals, which Toby did instead with his grandparents, are $18/hour.)

Food Services: None. Two restaurants (one cafeteria-style) are located nearby in Colter Bay Village.

Directions: The stables are just past the tent village at Colter Bay Village Resort. From anywhere in the park, take Teton Park Road to Colter Bay, and follow the signs.

Up Next: We drive from Grand Teton National Park to Utah and enjoy a stay at Westgate Park City.

A Pit Stop a Day (Day 13): Hidden Falls Hike, Grand Teton NP

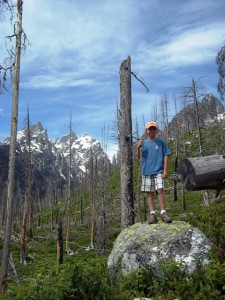
Calvin poses along the Hidden Falls hike.

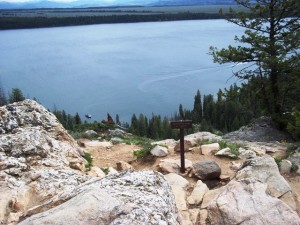
On Day 13, we set off from Colter Bay Village Resort to hike to Hidden Falls and Inspiration Point on Jenny Lake.

This two mile (each way) moderate hike culminates near the Jenny Lake ferry boat shuttle dock on the far side of Jenny Lake, where the trail climbs up from the lake, following swift-moving Cascade Creek to Hidden Falls. From there, hikers can continue .5 mile to Inspiration Point, which overlooks Jenny Lake.

Inspiration Point truly is inspiring, but then again, so is the whole hike. From the very start of the trail, you enjoy a stunning view of the Tetons, rushing streams, kayakers on the lake, then a beautiful waterfall.

Toby (age 5) got a bit tired on the return trip, but in general, this is a great hike for families. You’ll want to grab a hand or carry very little ones on the short section of trail leading up to and at the falls (and further up to Inspiration Point…see below), but otherwise, the terrain is easy to manage.

Nate records his experience on the Pit Stops for Kids’ Cam:

Note: The last part of the hike (from Hidden Falls to Inspiration Point) is very steep and fairly dangerous. The trail hugs the side of the granite, exposing hikers to drop-offs in some places and rocky in all places. We didn’t take our five-year-old (instead, he stayed at Hidden Falls with his grandmother).

Extra Tip: The hike is beautiful, but if your group isn’t up for the full two miles (each way), there is the option of taking the ferry boat shuttle across Jenny lake. From there, you need only hike .2 miles to Hidden Falls (additional .5 to Inspiration Point).

View from Inspiration Point.

Date last visited: July, 2010.

Distance off the interstate: About 30 minutes from Hwy 89.

Bathrooms: Full bathrooms at the picnic area (see below).

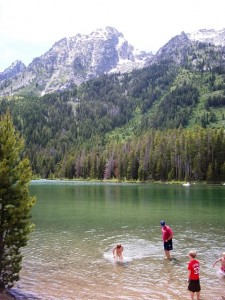
Food Services: None on-site. There is a picnic area at the far end of the Leigh and String Lakes parking lot (right on String Lake). The kids swam there (but I found the water to be freezing!)

String Lake picnic and swimming area.

Directions: From Teton Park Road, take the North Jenny Lake Junction and park at the Leigh and String Lakes trailhead. If you opt for the ferry boat ride, continue on Teton Park Road to the South Jenny Lake Junction.

Up Next: We take a horseback ride through high alpine forests!

Need to catch up? Find all ‘A Pit Stop a Day’ posts by searching ‘a pit stop a day’ in the search box!

A Pit Stop a Day (Day 11): Yellowstone National Park

Day 11, we drove the short distance on Hwy 191 from Big Sky Resort to Yellowstone National Park.

Yellowstone crowds swarm the Old Faithful hub of this massive park, so after entering at the West Entrance, we drove north from the Madison hub to Artists’ Paintpots, then back-tracked to Firehole River for a wonderful swimming hole.

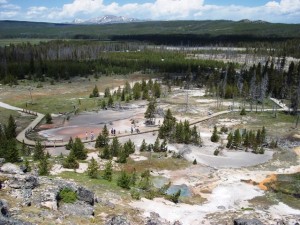
At Artists’ Paintpots, you’ll find a well-maintained loop trail taking you to steaming and bubbling ‘pots’ in the earth, as well as mud-holes that gurgle and spew (my kids’ favorite!). The hike is easy, and you get much closer to these interesting geothermal wonders than you can at nearby Geyser Basin (in our opinion).

Artists’ Paintpots is an easy hike for kids!

Upon reaching the top of the trail, you can see all the geothermal pools below!

Toby talks a bit about the paintpots on the Pit Stops for Kids Cam:

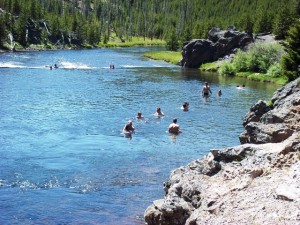
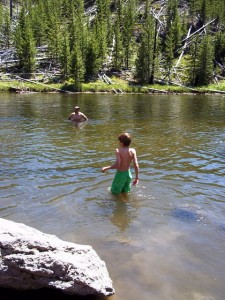
Once our kids were tired of being in the car (because Yellowstone is large and crowded and often doing road construction, long drives are unavoidable), we made a stop at the Firehole River Swimming Hole along Firehole Lake Drive (approach from the north, as this drive is one-way). This wonderful spot is warmed by the run-off of distant geysers, and one of the only places in the park where swimming is permitted.

Younger kids can wade and swim in the still waters of the hole, while older (more adventurous) kids will want to float a bit down the current. We did see people jumping from the rocks of the canyon upstream, but would not recommend it.

The geothermal waters combining with cold river water makes the water…less cold!

Nate still needs to ease into it!

Note: There are pit toilets at the swimming hole, but we had the kids change into swimsuits in the car instead.

Extra Tip: Pack a picnic lunch and plan to stay awhile once you’ve found a parking spot!

Date last visited: July 2, 2010.

Distance off the interstate: Right off Hwy 191 or Hwy 89.

Admission Prices: Only the $25 per car National Park fee (also good for Grand Teton NP).

Food Services: Plenty in the park. None at either location described above. We ate a meal at The Lake House in Grant Village in the southern end of the park before exiting, and found it much quieter than in the central hubs.

Website: Yellowstone National Park

Up Next: We enter Grand Teton National Park and check in to the Colter Bay Resort!


A Pit Stop a Day (Day 10): Big Sky High Ropes Course

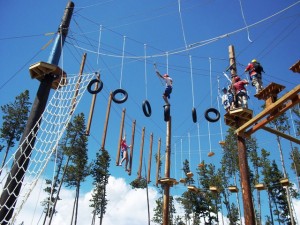
The High Ropes Course is like a kids\’ play structure on steriods!

Before we started our session on the High Ropes Course at Big Sky Resort, I wasn’t sure whether it would be too challenging for my kids (ages 11 and 8)…and myself! The apparatus–a maze of ropes, logs, planks, and even tires suspended in the high alpine air–was certainly intimidating! But from the moment I saw Calvin and Nate shimmy up the rope ladder to enter the array of elevated challenges, I knew it would be a blast!

Just like with the zipline, we started our adventure at BaseCamp, geared up (today our guides were Tanner and Trey), and hiked up the slope to the high ropes course. Once there, we all went through a hands-on safety lesson before we could begin. Our group of approximately a dozen participants included all adults with the exception of two teens, a 10-year-old, and Nate (11) and Calvin (8). Kids who want to try the ropes course have to be tall enough to reach the cables above them (to move their safety clips from one section of the apparatus to another) and must have the presence of mind to follow instructions and remember safety rules.

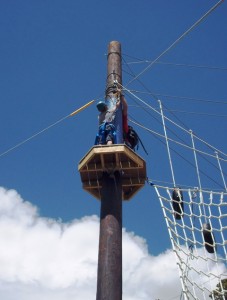
Calvin reaches the first platform after climbing the cargo net.

The way the course works is this: each participant has a safety harness on which two safety clips are attached. When you wish to move from element to element on the apparatus (in any order or repetition…there’s no ‘right’ way), you need to unfasten your clips from one cable to another one at a time (so that you’re never unattached from your harness at any time). It takes some dexterity and maturity to do this.

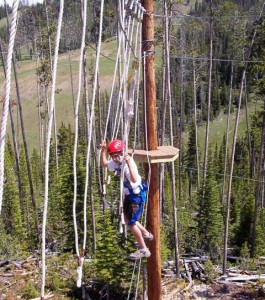
Nate makes his way across the \’monkey tails\’ feature.

Once up on the structure, the kids were cautious for only a matter of seconds before getting the hang of things (literally!) and scampering around like monkeys. I will admit I was less graceful, but had just as much fun. The most challenging part for me was getting up there…once I was standing on the platforms and had mastered moving my clips (intimidating at first), I, too, was stepping, jumping, and swinging from one section of the course to another.

Nate on the rope bridge…by far my favorite feature!

Afterward, the kids ranked the high ropes course even above ziplining, declaring it ‘the most fun thing they’ve ever done’. I have to agree. It’s an experience unlike any other, and well worth a try at Big Sky! I was smiling for hours afterward. If you want to take a moment to get out of your element and have a blast with your family, I cannot recommend this enough.

Note: Big Sky Resort is currently only offering one high ropes session per day (at 1 pm), and space is limited. Reservations in advance are almost always needed. Call 406-995-5769.

Extra Tip: Allow plenty of time for the high ropes course (at least the 2 hours listed). It takes time to brief everyone and get all the participants up on the structure. Expect to be patient, but as a big plus, the guides let all the kids in the group get up there first!

Costs: $59 per person

Date last visited: July 2010.

Distance off the interstate: Big Sky Resort is ten minutes off Hwy 191. It’s easy to access from anywhere in the Big Sky/Yellowstone area.

Website: Big Sky Resort

Directions: From Hwy 191 (near Bozeman), drive 39 miles to Hwy 64. Turn right (west) and drive nine miles to the Mountain Village.

If the High Ropes Course isn’t for you (or isn’t in your budget): The Big Sky area has many wonderful hiking trails. We had the pleasure of walking to see Ousel Falls in the Meadows section of Big Sky (from Big Sky Resort, follow Lone Mountain Trail Road to the Meadows community, then turn right onto Ousel Falls Road). The hike was under two miles on a well-maintained trail with many picnic areas en route, and the falls were stunning!

As I disclose with all compensated reviews, our family experienced the Big Sky High Ropes Course at no cost. This compensation came with no expectation of a positive review.

Up Next: We drive into Yellowstone National Park!

A Pit Stop a Day (Day 9): Zipline and Bungee Trampoline!

Nate gets some serious air!

We were all excited to wake up at the Big Sky Resort’s Summit Hotel and get going with an activity-packed day…without getting in our car for a change! We grabbed a quick bite to eat in the Mountain Mall, then arrived at BaseCamp (located right next door on the plaza) for our first two activities of the day.

If you’re a guest at Big Sky Resort (or a day guest), you’re going to want to spend some time getting acquainted with BaseCamp…your information and reservation center for all kinds of outdoor fun.

First up for us? A 9 am reservation for the Big Sky Zipline and Bungee Trampoline.

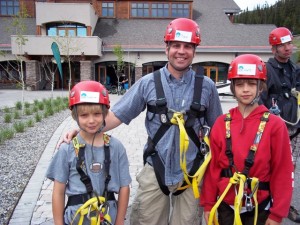
Calvin (left) and Nate (right) with our Big Sky host Dax Schieffer, all geared up and ready to go!

Having never tried a zipline before, we really had no idea what to expect, but our three guides quickly put the group (of approximately 12 guests) at ease with their friendliness and professionalism. While still at BaseCamp, they assisted us in putting on our harnesses and helmets (on which they attached name tags so everyone got to know each other that much faster), then we set off on a short (but fairly strenuous) hike up into the forest to the first line.

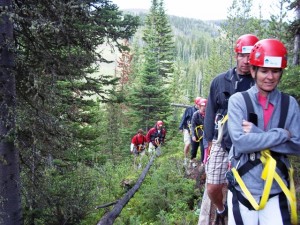
Hiking through the trees to our first zipline.

After a safety talk and demonstration by one of the guides, we lined up for our first ‘zip’ over the lodge pole pines. Calvin was determined to go first (and didn’t chicken out!). After his 12-point safety check (which the guides performed for every guest at every line), he took off 60 feet over the ground!

I was too rattled to get a good video, but by Nate’s turn, I did my best to capture his ‘take off’ on our Pit Stops for Kids Cam, along with the 12-point safety check for any anxious parents!

When my turn came, I will admit to a few nerves, but it was the most fun I’ve had in a long time! The sensation of flying over the trees was spectacular! Of course, the boys quickly wanted to get fancy; the guides were more than happy to teach them how to fly with no hands and even upside-down!

The session includes three separate zip lines (the second two in close walking distance to the first). In all, you sail over 1250 feet over streams and forest!

Calvin takes about his experience on the cam:

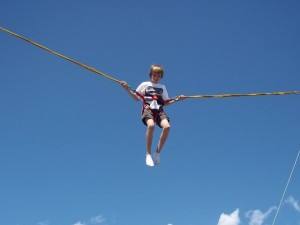
Plan on the entire event taking 1.5 hours. Kids have to be at least 45 lbs to participate. If you, like me, have a little one who is not big enough (but definitely brave enough), he or she can try the bungee trampoline (one ride for $10) located directly at BaseCamp while the others zipline. (But word of warning, when they get back, they’ll want to try this out, too!)

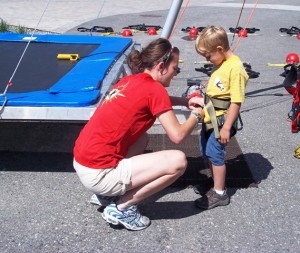
Toby gets in gear for his bungee trampoline session.

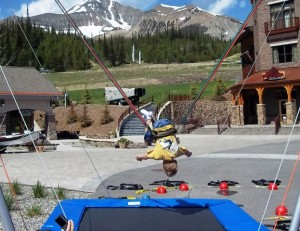
And promptly manages a flip!

Note: Reservations in advance are almost always needed. Call 406-995-5769.

Extra Tip: If you have a parent or other adult who would like to watch but not participate, the guides are happy to have you along. You can’t hike all the way to the lines, but they guide you to a great location lower down the mountain to catch all the action.

Costs: $59 per person

Other on-site activities offered at BaseCamp:

High Ropes Course (review to come!)
Bungee Trampoline
Climbing Wall
Paintball (11 years and older)
Scenic Lift Ride
Mountain Bike and Equipment Rentals (separate building)

If you think you’ll want to do more than one, BaseCamp offers ‘Adventure Paks’ (bundled deals) on the above activities. Choose any two activities for $109/person or any three for $149/person. Another great deal for families staying outside the resort is the ‘Family Fun Pool and Lift‘ Package, which combines a scenic lift ride with use of the Huntley Lodge outdoor pools, starting at only $5 for ages 10 and under to only $20 for adults.

Date last visited: July 2010.

Distance off the interstate: Big Sky Resort is ten minutes off Hwy 191. It’s easy to access from anywhere in the Big Sky/Yellowstone area.

Website: Big Sky Resort

Directions: From Hwy 191 (near Bozeman), drive 39 miles to Hwy 64. Turn right (west) and drive nine miles to the Mountain Village.

As I disclose with all compensated reviews, our family experienced the Big Sky Zipline at no cost. This compensation came with no expectation of a positive review.

Up Next: We tackle the High Ropes Course!

Family Vacation
Big Sky

A Pit Stop a Day (Day 6): Logan Pass, Glacier National Park

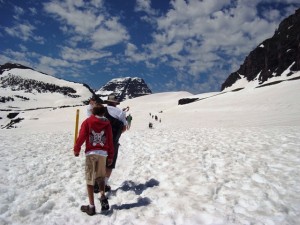
The climb up the snow is challenging (and the trail is single file)!

Day 6 was our last full day at the Many Glacier Hotel in Glacier National Park. For today’s featured pit stop, we decided to hike from Logan’s Pass to Hidden Lake.

We drove the approximate 21 miles back to the St. Mary Visitor Center Park Entrance, then another few to the Logan Pass Visitor Center at the peak of the famed Going to the Sun Road (en route, we stopped to let a black bear cross the road!).

The Hidden Lake Nature Trail begins directly behind the visitor’s center. It consists of a fairly steady incline for 1.5 miles to the Hidden Lake overlook. It’s a strenuous hike (some people were carrying skis and snowboards up the trail so they could ski or board down, if that gives you an idea), but the return route is a breeze! We opted to eat a picnic lunch at the overlook; there are no tables, but the viewing platform serves as a nice spot to sit down and take in the view (which is spectacular). We ended up sharing our spot (but not our lunch) with three mountain goats who loped over to see what we were doing!

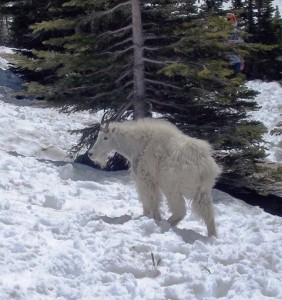
The resident mountain goats at Logan Pass were not shy!

Note: As you can see, the entire trail was covered in snow at the time of our visit. This made for an extremely challenging 3 mile hike! Rangers told us that by mid-July, most of the surface snow has melted, allowing visitors to hike on raised boardwalks instead. If you plan to go when snow is likely, be sure to wear hiking boots with a good grip and sunglasses (the glare is fierce, and the trail is exposed to sun).

Extra Tip: If the Hidden Lake Nature Trail seems too challenging to your group, and easier (but very beautiful) option is the Sun Point Nature Trail to Barring Falls. An easy .9 mile hike (one way), the trail follows the lake shore to stunning Barring Falls. Flat terrain. You can find the trail head approximately 10 miles back toward St. Mary on the Going to the Sun Road at the Sun Point parking lot.

Calvin reports his opinion on the hike on our newPit Stops for Kids Cam’:

Date last visited: June 2010.

Distance off the interstate: Approximately 20 miles from Hwy 89.

Admission Prices: Only the $25 per car National Park fee.

Food Services: None at the visitor’s center. If you don’t pack food in, the nearest food is back in St. Mary, where you’ll find the Park Cafe (our ranger told us they have the best pie she’s ever had).

Bathrooms: Available at the Logan Pass Visitor’s Center.

Website: Hidden Lake Nature Trail

Directions: From St. Mary (Hwy 89), enter the park at the St. Mary Visitor Center. Follow the Going to the Sun road past St. Mary Lake and up toward the pass. The Logan Pass Visitor’s Center is on the left.

Up Next: We drive south to Big Sky, Montana, stopping at Boulder Hot Springs to sample their soothing geothermal waters!