Five outdoor travel experiences any family can try

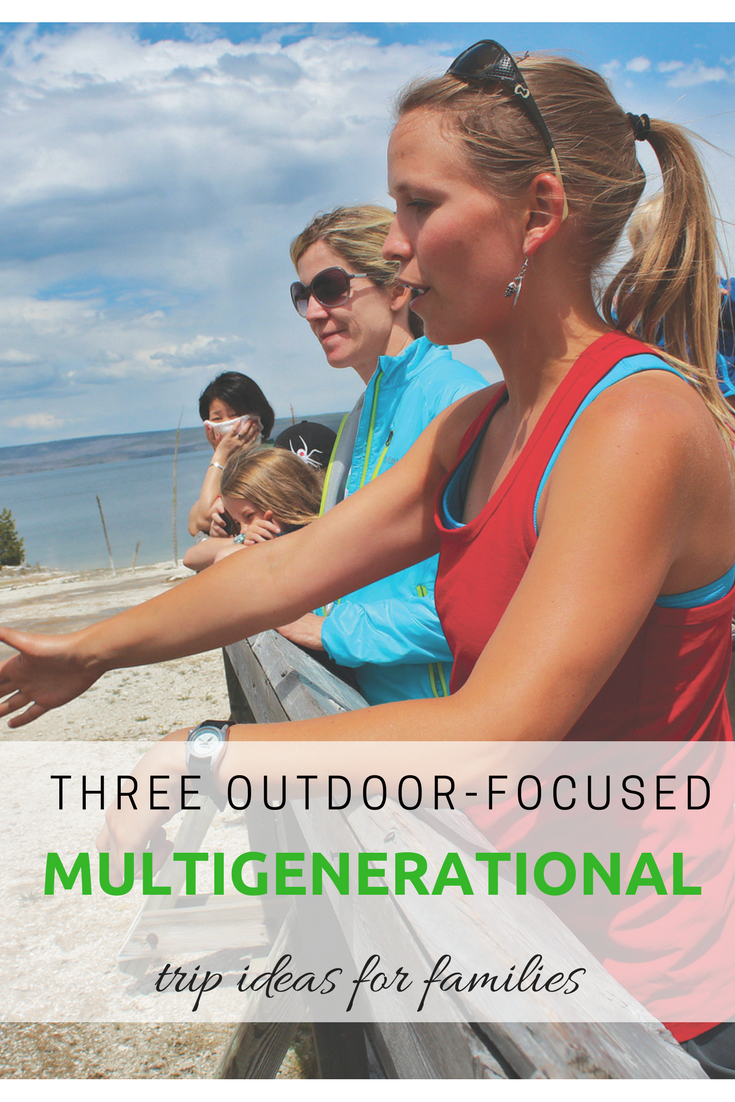
Good news parents: Most kids’ favorite vacations involve sleeping bags and campfires instead of five-star luxury and turn-down service. Traditional camping trips are a crowd favorite, but if you’re looking for something a bit further off the beaten path of family travel, check out one of the following outdoor travel experiences any family can enjoy, no prior wilderness knowledge necessary.

outdoor travel experiences

1. Spend a night in a fire tower lookout.

2014-02-18-pickettbuttebed.jpg

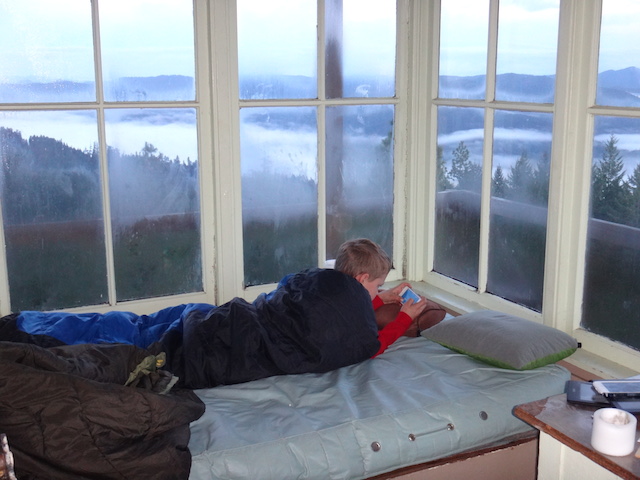
Un-used or seasonally manned fire tower lookouts dot US Forest Service lands, especially in the Western states. Many of these lookouts are available for seasonal rental. Our fire lookout stay at Pickett Butte, Oregon included two nights in an isolated three-story high tower, with plenty of room to play, hike, and let our dog roam. We enjoyed downtime, plenty of paperbacks, roaring campfires, and the excitement of sleeping above the treetops while the wind blew. Fire lookouts are available to reserve via Recreation.gov, just like state campground sites.

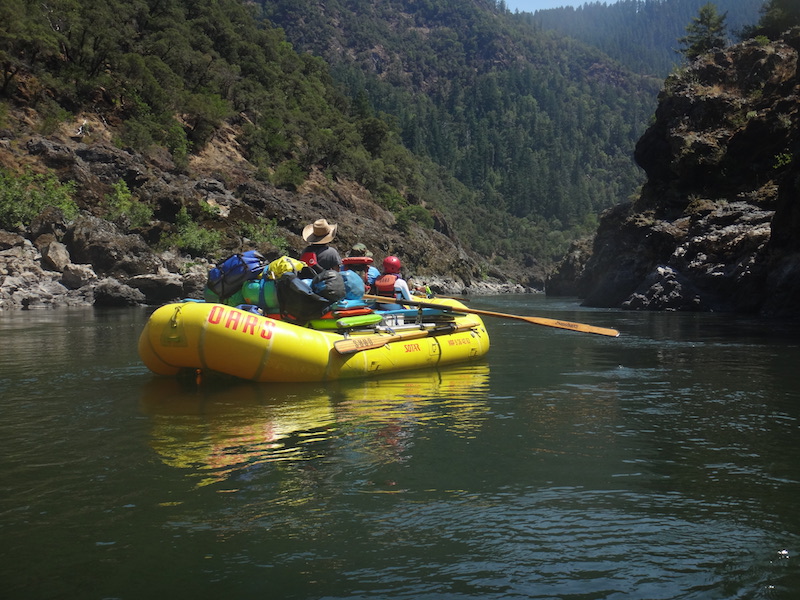
2. Book an overnight river rafting trip.

2014-02-18-rafts.jpg

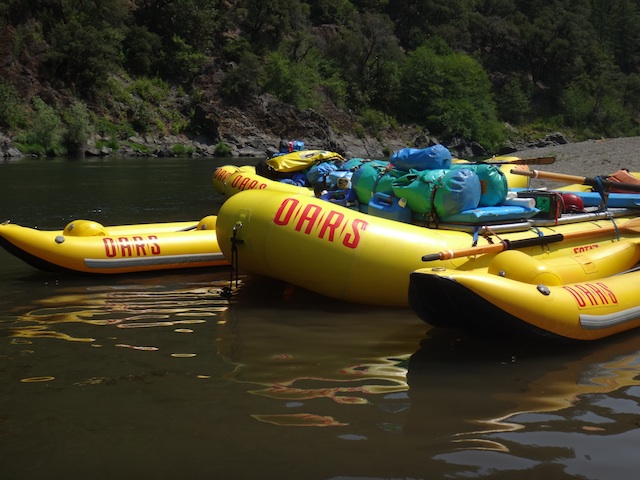
Untried on the river? Don’t try to plan an overnight float trip by yourself. We’ve seen the results first-hand (and they usually involve stuck rafts and miserable families). When we wanted to explore Oregon’s backcountry via the Rogue River, we entrusted our vacation to OARS, who took care of everything from experienced rafting guides to three-course meals. Rafting tours are available in most states, with the most popular overnight trips for families in California, Oregon, Utah, and Idaho.

3. Go dog sledding.

2014-02-18-BigWhitedogsledtrip.jpg

A day trip that involves speed, snow, and happy, barking canines? Sign us up! The best dog-sledding tours will include educational opportunities for kids to learn about the history and practice of dog sledding, as well as time to greet the dogs, learn about their care, and see where they eat and sleep. We loved our dog sledding tour in Big White, British Columbia, as well as our summer tour of a dog sledding training facility in Juneau, Alaska.

4. Rent a state park yurt.

2014-02-18-yurtstay.jpg

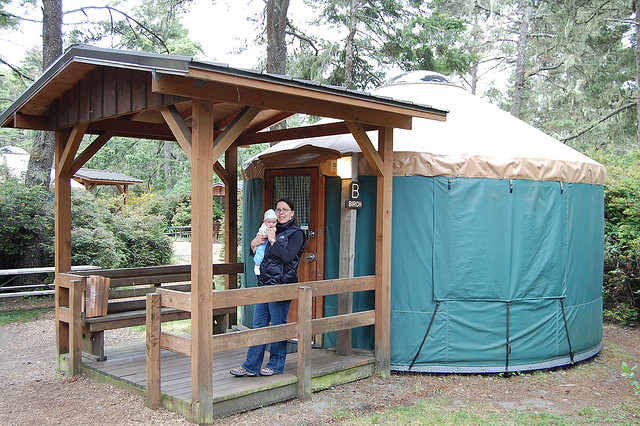
Want to camp in the Pacific Northwest in the off-season, but don’t have an RV or camper to keep warm? No problem: rent a state park yurt. Reservable via Recreation.gov, state park yurts in Washington and Oregon (as well as other states across the US) provide families with just enough comfort to still be considered a camping trip. Yurts along the Pacific coast provide heat, electricity, and beds… perfect for a weekend of whale watching or winter storm viewing. Reserve early: yurts are very popular!

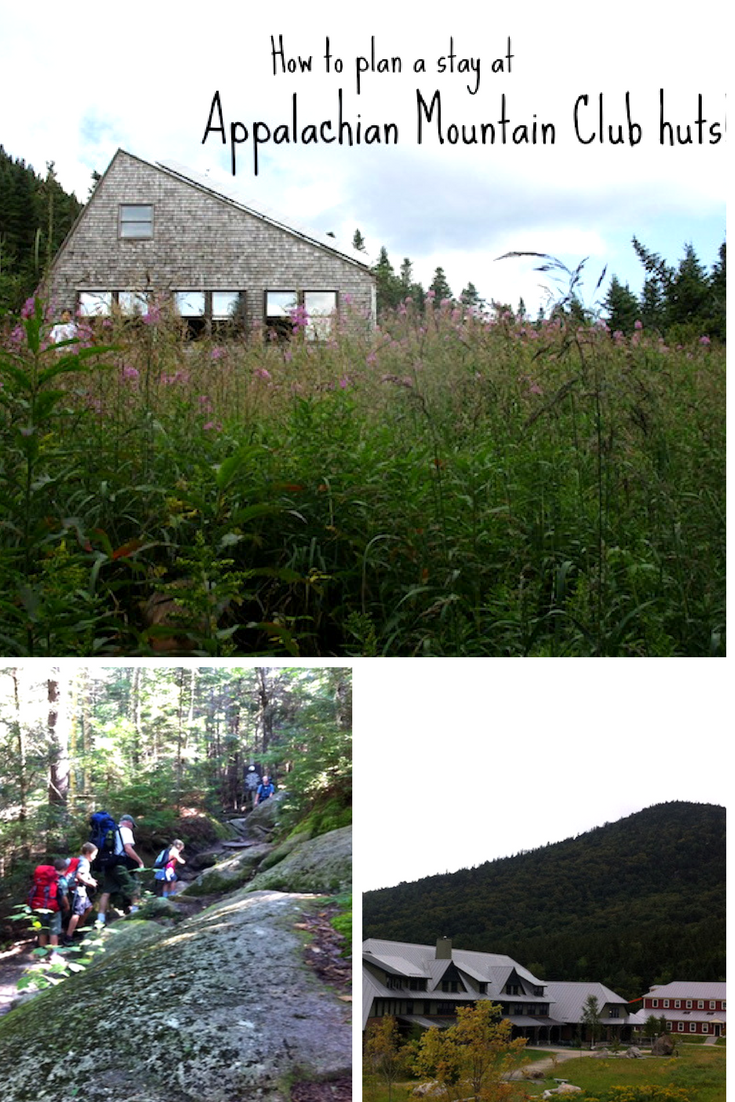
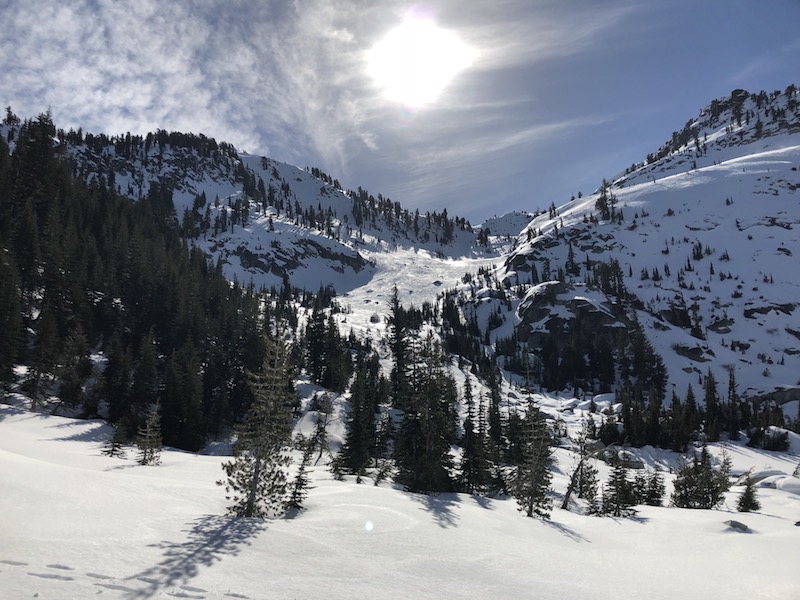
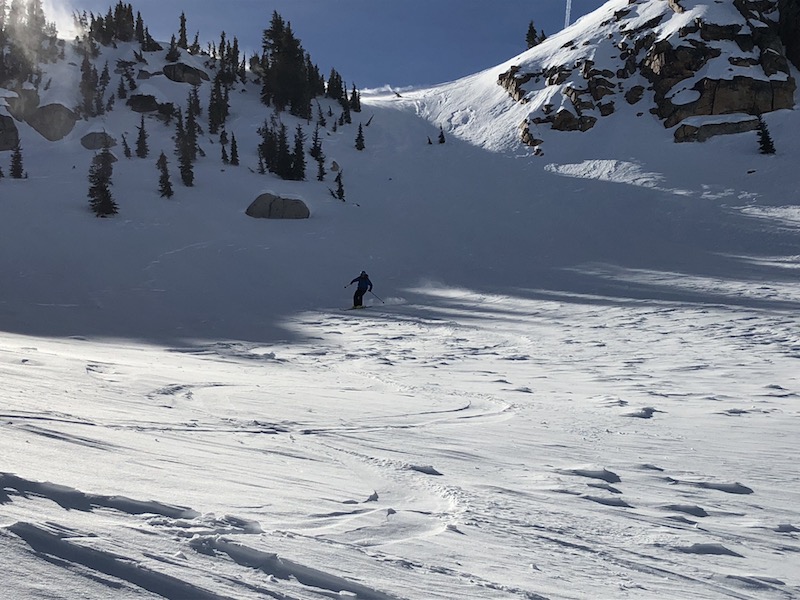
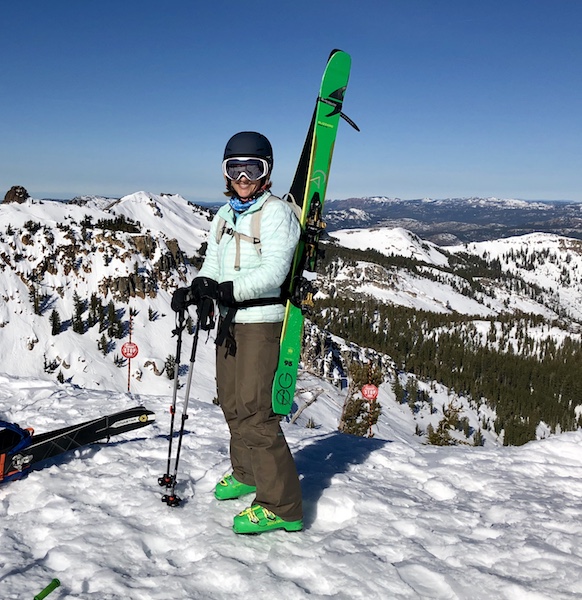
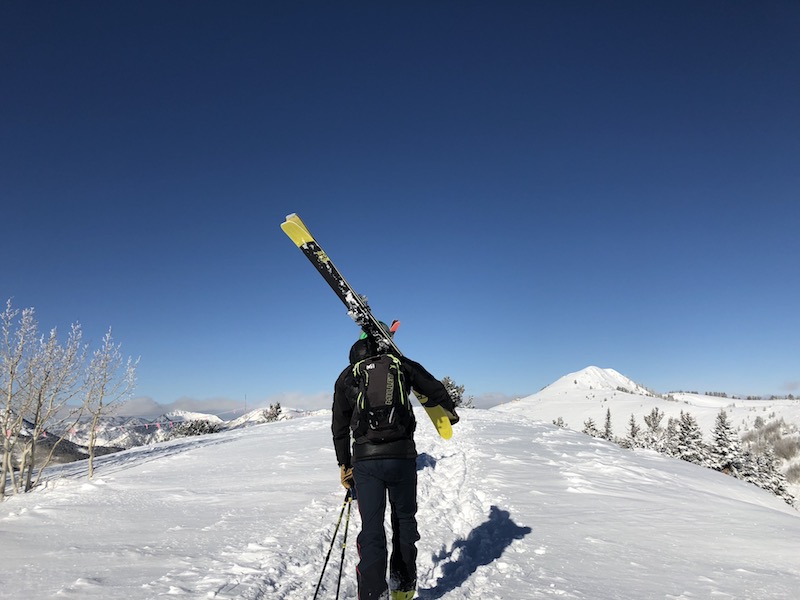
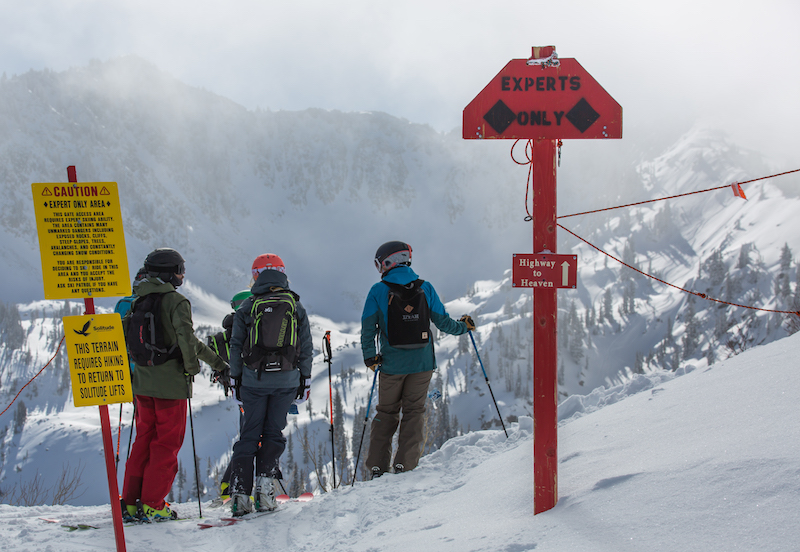
5. Take a hut-to-hut ski or hike tour.

2014-02-18-amc.jpg

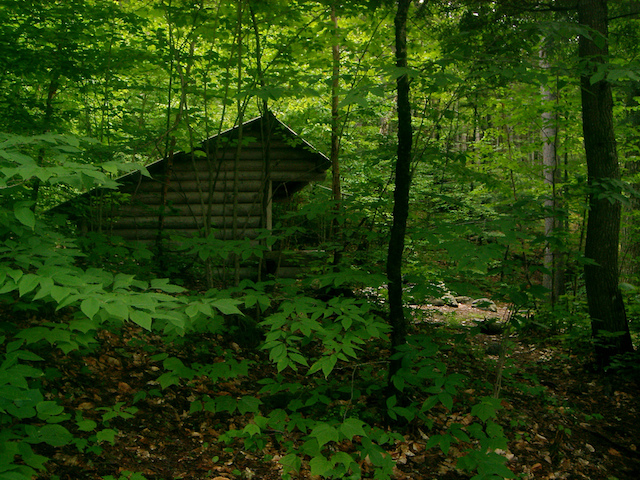
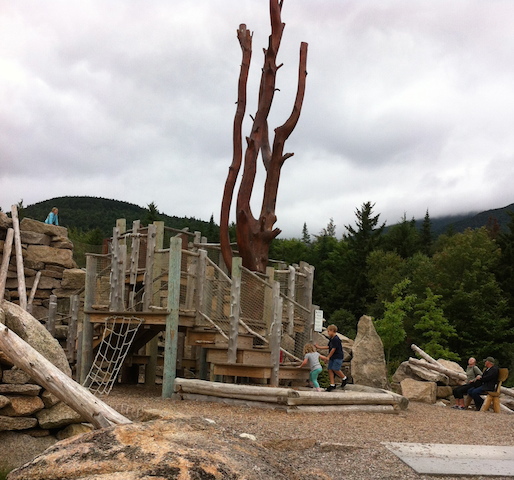
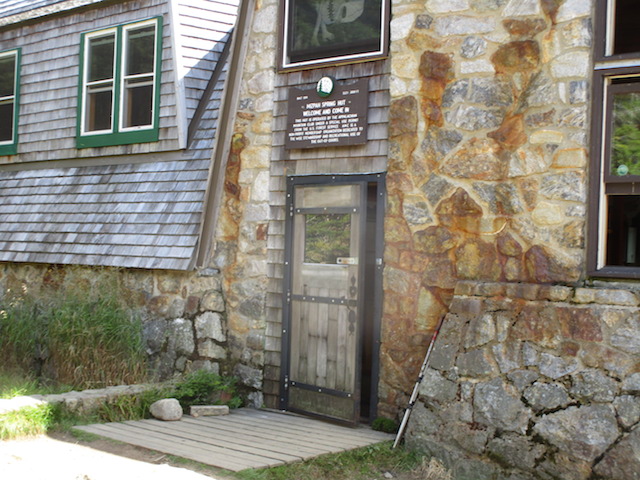
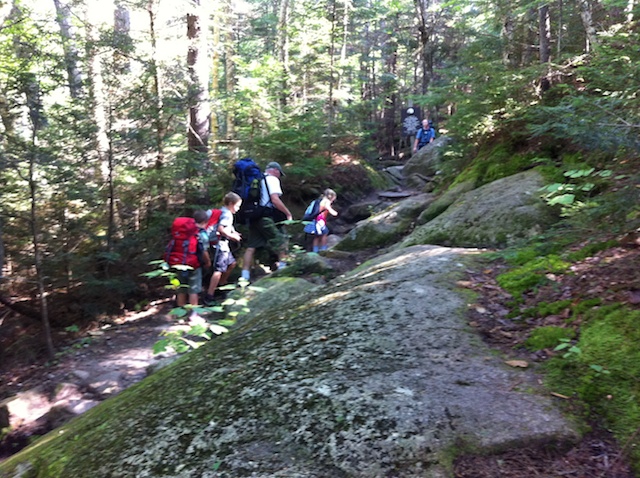
Perhaps you grew up taking overnight backpacking trips, but your children aren’t quite old enough to carry full packs of gear (yet). Or maybe you’d like to get into the sport, but are first-timers. Enter hut-to-hut hiking or skiing, where families can enjoy the backpacking experience combined with the comfort and security of a winterized (and sometimes stocked) hut at the end of each day’s journey. Our favorite hut-to-hut trips are located in the heart of the White Mountains, run by the Appalachian Mountain Club. Families can opt to trek on their own, or base in one of AMC’s family-friendly lodges such as the Highland Center Lodge for a guided day trip. Just in time for summer, AMC has extended their guided family vacations.

Photo credit: Amy Whitley, Flickr Creative Commons

Maine with kids: Baxter State Park backcountry itinerary for families

Baxter State Park is Maine’s largest expanse of untamed public wilderness. With almost 210,000 acres to explore, where do you start? Our Baxter State Park backcountry itinerary for families includes days in the frontcountry enjoying Baxter’s car camping options, several days in Baxter’s backcountry, then a rest day to play and explore before departure.

Baxter’s scope and size is on a national park scale, but unlike national parks, almost every lake, pond, waterfall and stream in the park is accessible only by trail. In very few places in Baxter can you drive up to see anything, and even then, you must drive miles upon miles on dirt roads. In other words, you earn you sightseeing! Baxter limits the number of visitors to the park daily, which means you won’t be rubbing elbows with crowds of tourists. It also means you have to be organized about your trip and get the required permits you need early. Here’s how!

The best way to experience Baxter State Park is by camping, though day permits are available as well (if you opt for that, stay in nearby Millinocket). Here’s our suggested itinerary, after doing most things right and a few things wrong during our five days in Baxter.

Day 1: Frontcountry camp at Roaring Brook Campground

In case you’re not sure, when I say ‘frontcountry camp’, I mean ‘car camp’, or camping via car access. Roaring Brook Campground is about eight miles into the park after you check in at the ranger station at the Togue Pond entrance, past Millinocket via dirt road. The campground, like all in Baxter, is remote and basic, with nicely-kept pit toilets, a place to purchase firewood (bring cash), and a staffed ranger station, but no other amenities, such as showers or potable water.

You can pick between tent sites and lean-to sites, and I recommend the latter, because they’re on the brook. You get a basic wooden shelter with a platform for each site, plus a picnic table and fire pit. We loved the shelters (lean-tos) throughout Baxter, as they provided just enough protection from the afternoon rainstorms and gave us a place to roll out our sleeping bags off the dirt. They’re not enclosed, however, and you won’t be safe from mosquitos there, so you can opt to set up a tent inside the shelter (but not outside of it). Roaring Brook is cold and clear, and we loved swimming in it.


Tip: You MUST enter Baxter State Park before 8:30 pm, so time your arrival accordingly. Also, the entirety of Baxter is ‘carry out’ for all your trash, so bring trash bags and plan on storing your trash in your car at night. You must also stow away all your food at night.

Day 2: Hike Mount Katahdin

If summiting Mount Katahdin is on your to-do list in the park, do it early in your trip, while you’re still fresh. It’s 5.5 miles (pretty much straight up) from the Roaring Brook Campground, and it took our family (seasoned hikers) 12 hours to complete. The trail is extremely strenuous, and the final mile of the summit hike is along a ‘knife edge’ with some scary-looking drops. If you go: bring tons of water, and a means to filter more on the trail (you’ll need it). Also bring headlamps in case you’re caught hiking after dark. We took the following route: Roaring Brook to the Helon Taylor Trail, to the Knife Edge, to the Saddle Trail, to the Chimney Pond to Roaring Brook trail. It was 11 miles that took us forever to complete.

Note: Kids under age six are NOT ALLOWED above the treeline at Katahdin, though on our visit, we did not see a ranger monitoring this. I’m told there usually are. We took a seven-year-old, my niece, who rocked it, but she’s unusual in her awesomeness.

If you don’t want to tackel Katahdin, I recommend the Chimney Pond trail from Roaring Brook (3.3 fairly strenuous miles) to enjoy a picnic lunch at Chimney Pond, which has fantastic views of Katahdin right at the base of the mountain.

Day 3: Recover from Katahdin

This is where we made a mistake in our itinerary. We didn’t give ourselves a rest day after summiting Katahdin. Stay one more night in Roaring Brook and plan on sticking around camp. Enjoy the swimming and maybe go .2 mile to Sandy Pond, to try to spot the moose who like to hang out there at twilight. No nothing more!

Day 4: Head into the backcountry

If you’re prepared for backpacking in Baxter, depart Roaring Brook today, hitting the Russell/Sandy Stream trail. The destination: either Russell Pond Campground with lean-tos (7.2 miles away), or, if you don’t want to go quite so far, reserve at Wassataquoik Stream, which offers several more lean-tos with great swimming (5 miles away). If you’re ambitious, you could aim for Wassataquoik Lake, 9 miles distant, which doesn’t have a campground but does have several more lean-tos. Russell Lake has a staffed ranger office and lean-tos, a bear line, and pit toilets, and we settled in at two of them, adding a tent site for our group of 10.

Note: Baxter State Park is VERY strict about group size and where you can camp. This is a good thing, as it eliminates big groups in campsites they don’t fit into. If you reserve a lean-to made for four, you can ONLY have four people sleep there. Ditto for six-person lean-tos and tent sites.

At Russell Pond, you can use the provided canoes at the dock for a small fee (I believe it was $1/hour, on the honor system) and you can swim, though we don’t recommend it (there are many leeches here). It is, however, a good place to spot moose. The Wassataquoik Stream lean-tos are better for swimming, and theWassataquoik Lake lean-tos offer a bigger lake (better for swimming) and more canoes.

Alternatively, you could backcountry camp at Chimney Pond instead of Russell Pond (see description above). It’s a shorter distance, though a rockier trail.

Day 5: Day hike from Russell Pond

We enjoyed hanging around camp and day hiking from Russell Pond to Wassataquoik Lake (2 miles) on this day. We played board games and cards in our lean-tos, picked blueberries in the wild patches nearby, and tried to spot moose.

Day 6: Hike back to the frontcountry

Return to Roaring Brook today, and spend the late afternoon cooling off in the brook. Pack up and depart Baxter the next morning, checking out additional parts of Baxter if time allows. We recommend Blueberry Ridges or Ledge Falls if so, and if not, hit a last swim spot just outside the park boundary at Togue Pond. You can grab a nice sandwich and some souvenirs from the North Woods Trading Post just outside the park toward Millinocket, and if you want a bigger meal, we recommend the friendly and affordable Sawmill Bar and Grill.

How to reserve your campsites:

Baxter State Park is popular, and as mentioned, entry is limited. To ensure you get your campsite, reserve far in advance. Baxter uses four month rolling reservations, so you’ll want to reserve exactly four months before you desired time. You can reserve online or by phone.

More tips:

  • If you’re day hiking Katahdin (staying in Millinocket), you’ll want to reserve your parking space (these are limited as well!). Here’s how. Parking reservations are only held for you until 7 am, then are given away on a first-come, first-served basis. Yes, you really need to start that early. If you’re camping in the park, you don’t need a parking reservation.
  • You’ll need to treat ALL your water in the park. Bring a good filter. We like the Sawyer Squeeze to bring on day hikes and the Platypus GravityWorks for in camp.
  • You cannot bring firewood into the park. You must purchase it in camp.
  • No pets are allowed, even in car camping campgrounds. Plan accordingly.
  • Check in at every ranger station as you hike. Bring a phone and treat it as an emergency device (you won’t get service in the park anyway).
  • Pack out all your trash…make it easier on yourself by reducing packaging on your food before you arrive. Store all food and trash in your car at night in the frontcountry, and on bear lines in the backcountry (use your sleeping bag stuff sacks to store food and hang it from the line provided).
  • Backcountry campgrounds DO include pit toilets with toilet paper. They were all in good condition during our visit.
  • Enjoy the Maine wilderness!


Family mountain biking tips and gear

Our family loves mountain biking. Many outdoor-focused resorts now offer mountain bike rentals and mountain bike single track, and we discovered the sport while traveling. Right away, our kids wanted to mountain bike at home, too. Here’s what we’ve learned about finding family mountain biking trails (at home and while on the road), how to best transport your bikes, and the gear it’s helpful to have with you.

canyons bike park

Where and how to mountain bike while on vacation:

Even if you can’t or don’t want to get into mountain biking at home (after all, there’s lots of gear to buy), all families can try mountain biking while traveling. Look for family resorts that focus on outdoor activities and nature, ski resorts in the summer, and state parks. Many resort towns offer bike rental shops, and ski resorts will often have rentals available slope side. Our favorite resorts for mountain biking offer gear for kids, a variety of single track for all abilities, and amenities for after biking, like pools or spa services.

The Lodge at Eagle Crest, Oregon: This Central Oregon family resort has everything you’d want, including a full bike rental shop with sizing for young kids to adults. There are easy paved bike loops for those who want a tame experience, plus miles of single track (dirt paths) accessible directly from the property for those who want a challenge. Plus, Eagle Crest has golf, pools, restaurants, and playgrounds. Read a full review.

Northstar California: We love to mountain bike at ski resorts! Northstar, located in North Tahoe, CA, has some of the best gravity-based mountain biking for families. What does ‘gravity-based’ mean? It means the trails all run downhill, with lifts to carry you (and your bike) back up. The trails are marked easy (green) to advanced (black), just like during the ski season. You’ll also find fun elements like bridges and berms to play with. We recommend taking a lesson at a ski resort like Northstar. Another favorite location: Park City Mountain Resort! Read a full review.

canyons bike park

State parks: State parks in many states offer easy access to mountain biking trails. The only downside: usually you’re on your own for bikes, so bring them with you or look for a local bike rental shop. To find state parks with the best single track, try state park pages by state, such as this one for Florida or this one for Utah.

How to get into mountain biking at home:

Once you’ve tried out the sport on vacation, I bet you’ll want to check out the mountain biking scene near your home as well. We’ve found that the best way to enjoy family mountain biking at home is to:

  • Get a bike rack for easy transport to trails
  • Get to know your local bike shop
  • Join a Facebook group or club

You can read below for detailed info on getting a bike rack to fit your car. But first, a word on the importance of a local bike shop: these establishments serve several purposes. The staff at a good bike shop can help you maintain your bike, whether it’s a fancy model or just a starter bike, and educate you on bike tire pumps, locks, and the best trails near your home. We could learn a lot about caring for our bikes ourselves, but instead, we just bring our bikes into our local shop for inexpensive tune-ups every so often. Our bike shop also posts information about local bike clubs and groups for fun rides, plus maps of area trails.

The best way to find local single track trails is to ask people in the know, whether that be your neighbor whose always on his bike to the bike shop pros. We have several mountain bike and hiking networks within a few miles of our house, and our teens will often load up the bikes and ride for a few hours in the evenings.

Gear you’ll need to mountain bike on your own:

park city mountain biking

If you want to mountain bike at a resort, likely the only thing you’ll need is a water bottle. Everything will be provided. But at home, here’s the very basics of what you’ll want:

Mountain bike: I’m a firm believer that mountain bikes don’t have to be top of the line…to start out with. Look for a bike with good shocks, mountain biking tires, and a fairly lightweight frame. You don’t need full suspension on your first bike, and kids’ bikes can have even fewer frills. This guide to buying your first mountain bike is helpful.  Our kids started out with Trek bikes with just a few gears, and grew into their bikes with more bells and whistles.

Helmet and pads: Helmets while mountain biking, are of course, essential. Do you need a motorcycle-style helmet with face guard? Probably not, at least until you start doing some serious vertical. However, it’s worth investing in a good pair of padded shorts. We have been happy with G-Form Pro-X compression shorts. These breathable, thin compression shorts fit well under athletic shorts or pants and give kids (and adults) just enough added padding to make those inevitable falls less painful. Best of all, G-Form’s shorts are versatile: invest in them once, and your kid or teen can wear them during biking, skiing, skating, and even sports like soccer. With three active boys, they’re now a staple in our closets.

g-form

We also recommend knee pads and shin guards, ever since our oldest bashed his shin hard enough to leave a scar when falling (the pedal hit his shin bone). At very least, plan to ride with long pants and a lightweight but long-sleeved shirt.

G-Form-review

Bike rack: If you’re biking as a family, you’ll need a bike rack for your car sooner rather than later. When we got ours, we started mountain biking at least twice as often, because suddenly, it wasn’t a hassle to get out there. The easiest and cheapest way to transport bikes on your car is with a trunk-mounted bike rack. Our favorite is the Yakima Fullback. It fits on most cars, and is easy to take on and off. The downside: you have to remove it to access other things in your truck or far-back of your car. If you have a hitch mount and can spend a few more bucks, opt for a hitch-mounted rack that swings away from your vehicle for ease of use. Our favorite is the SportRack Ridge Swing. Roof-top racks are also available, but most only hold one bike per rack.


Teach Proper Technique:

Kids who have previously only biked on pavement need to learn proper mountain biking technique before tackling single track. Teach kids what’s commonly known as “default position” or “attack position”: stand with pedals level, elbows bent, and weight centered over the bike. Remind kids to remain relaxed; no stiff muscles or death grips allowed.

No matter the terrain, whether it be steep, rocky, or technical, teach kids to keep their head up and their eyes focused on the trail ahead of them, not on the obstacles they’re currently trying to avoid. Looking at obstacles such as trees, trail edges, or boulders just about guarantees you’ll hit them. Encourage kids to practice often, even if just at home. Grass, dirt, and even curbs, gutters, and stairs can be great places to hone mountain biking skills between trips to the trail.

Safety first

Mountain biking can seem intimidating to some kids. Others will be fearless. Both reactions can end in injury. Hesitant kids may try to navigate tricky terrain too slowly, losing balance in the process, and overconfident kids can tackle terrain at too high a speed, resulting in a spill. Help fearful kids by encouraging plenty of practice at home, on flat ground. Repetition is key to gaining confidence. Teach overconfident kids by example, displaying caution where relevant. Never push kids onto terrain they don’t feel ready for, or into a group of riders above their ability level.

Pin for later!


Source: Fix.com Blog

Do you mountain bike as a family? What are your tips?

Hiking to AMC huts: how to plan your Appalachian Mountain Club adventure

After our East Coast Pit Stops for Kids family tried out Appalachian Mountain Club (AMC)’s Highland Center Lodge during a winter break, they knew they had to come back for a summer stay, hiking to AMC huts! What are AMC huts? They’re a network of hike-in lodges operated by Appalachian Mountain Club. Hikers can depart for huts from trailheads, or from the Highland Center Lodge. We sent our nine-year-old, Tobias, along for the ride, and they spent three days in the White Mountains of New Hampshire experiencing what AMC has to offer with three generations: grandparents, parents, and kids ages 4-9.

Highland Center Lodge in summer:

While the Highland Center offers winter outdoor activities in the snowy months, it has even more activity in summer. Upon arrival, all the kids gravitated toward their large outdoor play structure, with bridges, ropes, and other challenges. Day hikes from Highland Center are manageable for young kids, and daily nature hikes are offered at 9 am and 1 pm. Our crew really enjoyed these 1.5 hour hikes with guides, learning fun facts about flora and fauna along the way. Tip: kids can participate in the Junior Naturalist program while at the Highland Center and in the huts. Like the Junior Ranger program, the naturalist program involves filling out a workbook and participating in free activities.

Meals: Meals at the lodge are communal, cafeteria-style affairs. Breakfast and dinner are included in your stay. Meals aren’t particularly kid-friendly, but note this unadvertised fact: parents can ask for a PB&J sandwich at any time.

Lodging: Families reserve bunk rooms at the Highland Center. Our group had a six-person bunk room with three bunk beds. They had linens, pads, towels and pillows. There were plugs/lighting, and lots of hooks to put stuff on. Bunk rooms share a bathroom with showers with shampoo and soap dispensers. Some bunk rooms do have their own bathrooms. The lodging was very comfortable, and as a bonus, included free wifi.

highland-center-lodge

AMC huts:

Part of the appeal of staying at the Highland Center is the chance to venture further…to an AMC hut. AMC runs a whole network of these huts (and when we say ‘hut’, don’t think small: some sleep as many as 60 or more!). Some can be accessed via trail directly from the Highland Center, and others require a short shuttle ride to the trailhead. Our take: the huts are what make the AMC experience in the White Mountains truly special. While our group had the youngest children we encountered, they were easily up for the challenge: don’t be afraid to try!

mizpah-spring-hut

Which hut is right for you? The right hut (or huts) to visit will depend on how many miles you want to hike, and what you want to do when you get there. Our group decided to hike to the Mizpah Spring hut, because the trail could be accessed from the lodge, and was a distance we knew would be manageable. (Huts are approximately 1.5-6 miles from trailheads.) While our crew liked the hut, we’ll try Zealand Falls or Lonesome Lake next time, as these destinations may have more for the kids to do once we get there. At Mizpah Spring, fewer outdoor ‘entertainment’ options existed (such as swimming).

The heart of the hut experience lies within the staff. The Mizpah Spring hut ‘Croo’, as they’re called, were fantastic. This enthusiastic bunch of young people clean and cook, play with kids, and generally add to the lively, fun atmosphere of the hut vibe. Apart from a few families, most of the hut guests were young adults hiking in small groups, and the atmosphere was low-key, friendly, and very outdoor oriented. Tales were told in the evening of best hikes, great views, and exciting adventure. Tip: if you have a kid working on a Junior Naturalist workbook, have him or her finish it at a hut. The Mizpah Spring Croo did a whole ceremony for our kids, including a silly skit and a ‘swearing in’. They loved it!

mizpah-hut-trail

Meals: Like at the lodge, meals are communal, but in our opinion, food is even better! The Croo is focused on eco-friendly dining; there are no paper products and all trash is carried out.

Lodging: Each hut is different, but at Mizpah (with 60 occupancy) there are eight rooms with triple bunk beds. Expect to share rooms with others! Our group shared a room with three strangers (who were probably sorry to see a bunch of kids, though they behaved well!). There are pads, blankets and pillows, but no electricity in the rooms. Expect compost toilets, and sinks with running cold water in the hall.

Keep in mind: the AMC hut experience differs from a traditional backpacking or camping experience, in that you will be with other people much of the time. The shared experience is part of the fun, but come prepared: you’ll be sharing the space with many others.

nature-hike

How to book: Book (early!) through the AMC website. We recommend calling ahead of time to ask questions about routes and sleeping arrangements. The staff is very friendly and helpful.

How to get there: The Highland Center Lodge is about 20 miles off I-93 at exit 35 between Lincoln and Franconia, NH.

What you’ll need:

  • Backpacks (day packs will work) with clothing
  • Sleeping bag or sleep sack
  • Sturdy hiking boots
  • Toiletries and insect repellent
  • sun hats and beanies for chilly mornings

What we wished we’d known beforehand:

  • The trail to the Mizpah Spring hut is steep! Our four-year-old was basically bouldering the whole time!
  • Bring a trash bag
  • Bring snacks and water bottles

Nearby attractions:

While in the area, stop by any of the following in the White Mountains!

  • Diana’s Bath: very fun swimming holes and waterfalls for kids!
  • Franconia Notch: Flume Gorge and Echo Lake await!
  • Pinkham Notch: try the Mt. Washington Railway!
  • North Conway: the Cranmore Adventure and Ariel Park is perfect for older kids!

Oregon Cowboy vacation: Wilson Ranches Retreat

Guest post by travel writer Sarah McCully-Posner.

Wilson Ranches Retreat  is a really special place. It is an authentic, family owned, working ranch just outside of the small town of Fossil in Eastern Oregon. The ranch lies within the beautiful Butte Creek Canyon and on your drive in you not only see the cattle grazing lazily in the fields, but song birds flying above, and quail scurrying across the road.

wilson-ranches-retreat

We signed in at the registration desk and made our way to our lovely room.

Tip: if you don’t have a reservation when you arrive, pick an available room in the book and make yourself comfortable. Weekends get very busy, so reservations are recommended. 

The Wilson Family takes “Pioneer Hosipitality” very seriously; your kids will be hugged and they love to tell funny stories that bring about big belly laughs. The family has an incredible sense of humor that we all enjoyed. They are available to the guests at all times and do their very best to help in every way possible.

Guest rooms:

Rooms are tidy and sweet and each offers a little something different than all of the rest. Each room had lovely, soft robes for guests to use and extra blankets for chillier nights. Rooms on the main and second levels have air conditioning for warm summer nights. Some rooms have TVs, but the main TV and VCR are in the living room and there is a large library of videos for people of all ages. Board games can be found in the day light basement for more entertainment and there is a lawn where we enjoyed throwing the Frisbee and football. There are 3 bathrooms in the house which are shared by everyone. BBQs, microwave, guest fridge, coffee makers and tea pot are always available.

wilson-ranches-retreat

Dining:

Breakfast in the morning is served at 8:00am. You will wake up to the sweet smell of fresh coffee and bacon being fried up. Nancy and Phil cook for all of the guests and everyone sits down family style to share the meal and lots of stories. Prepare to laugh! Farm fresh eggs, bacon, oatmeal, peaches, biscuits, gravy, juice and all of the toppings make for full, happy bellies which will sustain you throughout your ride and much of your day.

Activities:

wilson-ranches-retreat

Wilson Ranches Retreat offers horseback riding for adults and kids age four and older, which we were quick to take advantage of as we have a little city slicker with a big cowboy heart. We did an hour and a half ride, but ride times can vary. Just talk to your wonderful hosts and they will help you organize everything. The horses are calm and gentle and I had no worries about my six-year-old riding on his own. The horses are matched up to you based on your size and experience. If you do not have boots or hats, they have them for you to borrow for your ride. Rides for younger kids are scenic, although you might get a chance to ride among some of the cows. Families with older kids can enjoy cattle drives, checking fence lines or for strays, and taking part in pasture moves. Riders in groups of 1-3 are $45/hour each, riders in groups of 4 or more are $40/hour each.

riding-at-wilson-ranches-retreat

There are so many other things to do off the ranch as well. You can dig for fossils of ancient flora on the hill behind the high school. Cost is $5/person, or $15/family of four. They have tools there for you to use and as you can dig as long as you like. This is like searching for treasure, but you always come away with something amazing! We also had a look at the Painted Hills National Monument. The hour drive each way is worth it for an incredible sight everyone should see. The intense colors and textures had our heads spinning. There is also rafting, fishing, hiking, biking, museums, fairs, rodeos, and more. Wilson Ranches Retreat is a great home base for all of it.

Rates:

This B&B house is not your standard B&B. We have never really considered staying in one as a family since most are usually set up for couples. Wilsons Ranches Retreat has six rooms that can accommodate anywhere from 1-6 people. Room prices start at $105/night for the cozy Wrangler Room (sleeps 1-2 people) and go up to $185/night for the massive Homestead Room (sleeps 1-6 people). The prices are based on a double occupancy and include breakfast. Each additional person (including kids) is $10 which includes their breakfast.

Directions:

The ranch is accessible from both I-84 and Highway 97, making the drive from Bend or Portland very easy! For full directions to Fossil, start here!

Sarah and her family stayed at Wilson Ranches Retreat as guests of the B&B, for the purpose of review. We thank them for trekking to Eastern Oregon to explore (and hope to do the same soon)!

Three multigenerational trip ideas in the outdoors

Multigenerational travel is so important in today’s reality of extended family often living great distances away, and kids becoming more and more scheduled, with less opportunity for quality time with parents and grandparents. We’ve written extensively on the type of trips that make for ideal multigenerational trips, the best of which include group tours led by experts in the outdoors. Why do these work so well? Because putting someone else in charge takes the pressure and stress off the adults, and spending your vacation in the wilderness (or even just outdoors) eliminates the distraction and intrusion of screens, kids’ clubs, and activities that separate family members.

And guess what? Your kids won’t fight you on it. At least not for long. Because we’ve taken a ton of trips of various types, and here’s what they love: simplicity, togetherness, unstructured free time, and most of all, chilled parents.

Three multigenerational trip ideas:

1. At a national park. Can you DIY a national park trip? Of course. But you won’t always want to, especially if you’re visiting a very popular park in peak season. Take Yellowstone and Grand Teton national parks as an example. These are among our all-time favorite parks, but the traffic jams in summer can be off-putting. How to remedy this situation: book a Yellowstone trip with a guided service like Austin Adventures. When we visited Yellowstone with a family vacation expert leading our tour, we enjoyed a fully catered experience that left the adults relaxed and happy and the kids engaged. With the insider knowledge of an expert, we planned a trip that skipped the popular attractions like Old Faithful when they were most crowded, bringing us to view the geyser when the crowds had dispersed. We got off the beaten path into the wilds of the parks, and best of all, my parents never had to worry about driving and my husband and I never had to give a thought to what was for dinner.

Dan Austin, the founder of Austin Adventures, has been leading Yellowstone trips for 25 years. Now, his capable son and daughter are running the show. A Yellowstone trip with them lasts almost a week, and you don’t miss any of the traditional national park fun your family looks forward to, like participating in Junior Rangers or checking out the museums and gift shops. You just get more: more park, more family time, more insider knowledge.

2. On a small ship cruise. Any cruise is a good bet for a multigenerational group, as it has so much for everyone to do. But on mega cruise ships, sometimes there can be too much of a good thing. What I mean by this: with so many different directions to scatter, families find themselves just as busy as at home, and spending just as little time together. When we embarked on a small ship cruise (we’ve done two: one with Alaskan Dream Cruises and one with Uncruise), we found that we were busy and engaged together, with active grandparents participating right alongside the kids. Destinations for small ship cruises are endless, though we do recommend nature-focused cruises to locations like Alaska and Costa Rica because kids become so entranced by the wildlife and hiking and adventuring. When grandparents need a break, ship time is relaxed and pampering, and everyone eats meals together; a great time to compare notes on the day.

safari-voyager


3. On the river: If you really want to get away with your family without distractions, go on a river rafting trip. We’ve done many, all with O.A.R.S. Rafting and we’ve loved them all, from Oregon’s Rogue River to Idaho’s Salmon River to points in-between. We’ve gone on river trips as a mother-son adventure, with grandparents, and even as a couples-only getaway. O.A.R.S. takes care of everything, so there’s no experience required, and you’re truly in remote country, so you can say adios to your cell phone, laptop and any other screens. The detox from technology is amazing.

oars


Have you planned a multigenerational trip in the outdoors? Where have you gone?

Disclosure: This post written in partnership with Austin Adventures, to help spread the word about the importance of family travel vacations.

Two ways to ski backcountry terrain on your next ski trip

If you’re one of those skiers or snowboarders who looks up at the most distant peak from the chairlift and says, “How do I get up there?” or notes tracks in fresh powder and wishes you’d put them there, you may want to elevate your next ski trip to include a day of backcountry terrain. Or, if you have teens (16 or older) who are yearning to learn what AT or touring skiing is all about, it might be time to try a backcountry experience as a family.

Backcountry skiing off-piste and outside ski resort boundaries can expand your ski horizons exponentially, but it’s crucial to go with a guide until you’ve become trained in reading snow conditions and have the right gear (which often includes an avalanche beacon, shovel, probe, and AT or Alpine Touring skis and boots with skins and a backpack to put it all in). I explored two gorgeous backcountry regions with two fantastic guide services, and highly recommend them both.

Two ways to ski backcountry terrain on your next ski trip

Alpenglow Expeditions, North Lake Tahoe:

Alpenglow Expeditions operates out of Squaw Valley Alpine Meadows in California, and offers both backcountry tours and a variety of snow safety courses. I joined them for a full day in the Squaw Valley backcountry, where we did two laps of the National Geographic Bowl.

I arrived at their office in the Village at Squaw Valley at 8:30 am, ready to ski…minus the gear. Alpenglow can outfit you, which is nice if you don’t already own AT gear. It allows you to try a full backcountry experience before committing to the equipment. The guides at Alpenglow set me up with a ski pack with all the necessities, plus AT skis and boots. I brought my own helmet, goggles, lunch, water, and ski apparel.

The nice thing about Alpenglow’s location is that you can ride the Squaw lifts to where you need to start, saving time and effort. We headed out by 9 am on the Squaw lifts and reached the top of Granite Chief lift by 9:30 am. From here, we boot packed to the top of Granite Chief Peak (approximately a 20 minute, fairly strenuous hike) with our skis strapped on our backs. At the ridge, the snow was fabulous (despite fairly challenging conditions on the lift-served areas). We transitioned into our skis (the guides will help you do this if you haven’t skied AT before). We skied down the bowl, and at the bottom, transitioned again to skin up the trail that led to a side ridge, where we could ski back down to the Granite Chief lift. The skinning uphill took longer…probably an hour or so, and if you haven’t used skins on your skis before, there is a learning curve here. Your heel is freed and the skins on your skis give you traction, so the climb feels similar to cross-country skiing (but a bit more difficult).

When we reached the ridge, we skied down to the chair and did it again! This time, we boot packed a bit farther to explore a different descent, and at the bottom, we enjoyed our packed lunch in the sunshine. We achieved two laps by 1:30 pm, and were back at the village by 2:30 pm. We probably had time for one more lap, but my legs didn’t have the power!

The day proved to be an excellent introduction to Squaw’s backcountry, and since my teenage boys are interested in exploring terrain outside ski area boundaries, I’d definitely sign them up next time. All tours are individual (with either just yourself or just your group) so you can customize as needed. All guides are highly trained in avalanche certification and first aid, and carry radios. I was given an avi beacon and shown how to use it.

Ski Utah Interconnect, Cottonwood Canyons

Headed to Utah instead of Tahoe? I also tried out Ski Utah’s Interconnect tour, which allows you to check out backcountry terrain on your downhill (Alpine) skis. You can read about the Ski Utah Interconnect here, and watch a helpful video starring Deb Lovci, lead guide, but even after doing your research, the Interconnect is hard to explain. It really needs to be experienced. It’s part backcountry adventure, part (permitted) rope ducking, part on-piste hidden tracks, and part off-piste (as in way, way off). No matter what way you look at it, you’re in for seven hours of breathtaking views of the Wasatch Front Range and Heber Valley. Along the way, you get a ski resort sampler platter, with 1-3 runs in each of Deer Valley, Park City, Snowbird, Alta, Brighton and Solitude.

You start your day at Deer Valley Ski Resort, where you meet up in a base lodge and are briefed by your guides. As noted, you can use your own downhill gear, but you’re given a beacon to use for the day. In contrast with my Alpenglow trip, I didn’t need a shovel or probe of my own, so I could use my own small backpack, and I didn’t need to carry a lunch, as it’s provided on the trip.

We started out by skiing a few Deer Valley groomers to get warmed up, then ducked the rope (with permission) and traversed through the backcountry to Park City resort, where we rode another chair up before skiing off-piste through pristine powder toward our next resort on our itinerary. We boot packed a few short times (holding our skis) before making it to Solitude for a delicious lunch at their Roundhouse mid-mountain lodge, which serves up Himalayan mountain cuisine (included). We rode the lifts here to access a backside bowl to Brighton, then rode up again to take the most beautiful traverse, the Highway to Heaven trail toward Alta and Snowbird.


This part of the journey definitely proved most strenuous, but we were rewarded with more gorgeous backcountry on the descent. We skied through Alta and reached Snowbird by 3:30 pm. Skiing six resorts in one day definitely made for a long ski tour, but it didn’t feel that long, thanks to some lift access along the way.

What to know before you book:

For both of these tours, it’s important to be a strong skier, able to ski ungroomed runs with confidence (intermediate or advanced). Perhaps even more importantly, you do need to be fit. The uphill boot packing, skinning, and/or sidestepping will work up a sweat and leave you legs like jell-o! For the Interconnect, you need to be a skier, not a snowboarder, due to restrictions on snowboarding in several of the resorts.

If you’re used to getting plenty of exercise and are a decent (don’t need to be great) skier, don’t hesitate to try one of these tours! It will open your eyes to new skiing possibilities, and greatly enhance your ski trip. Take a day to enjoy the backcountry, then return on-piste with more confidence.

Call the office of either tour to ask any specific questions; they’re eager to help walk you through the process and explain what gear you’ll need and what lift tickets might be required. Let them know of any limitations of your group and be honest with them about capabilities, and they can answer any doubts you may have.

Want a taste of non-lift-served terrain by exploring some side country (within ski area boundaries)? You can expand your limits on downhill skis by signing up for a Hidden Tracks guided day. I checked this out at Solitude Mountain Resort and had a blast with my private guide, who could show me all the hidden stashes and boot-pack trails to (mostly) uncharted terrain. He showed me Solitude’s many gated areas, and we hiked to several pitches of fresh powder. The rest of the time, we traversed and side-slipped to new-to-me slopes within boundary. At Solitude, you can opt for a full day or half day tour; I went half-day, which gave me a nice balance of challenging terrain and some nice groomers after my legs got tired.

Riding Amtrak: how and when to enjoy an affordable rail trip with kids

I love rail travel: I find a train journey to be restful, peaceful, and productive for a work-from-the-road type like myself. My kids enjoy it as well: they appreciate the mobility afforded (compared to air travel), the extra leg room, and the fun dining and panoramic cars. However, train travel today is not always the economical choice it was just a few decades ago. Price a multi-day rail journey across a portion of the US or Canada on Amtrak or VIA Rail, and your jaw is likely to drop. It’s cheaper for an entire family to fly to a far-flung destination than travel by train. However, there are ways to experience a rail journey in the US or Canada for less. Here’s how to enjoy an affordable rail trip with kids:

amtrak-with-kids

1. Take a day trip.

Coach seats on Amtrak and VIA Rail are very reasonable. It’s when parents book passage in the sleeper cars that rates skyrocket. We don’t advise booking coach tickets for overnight travel with young kids—trust us, you’ll be miserable—but day journeys are perfectly comfortable in coach class. We like to utilize Amtrak to commute from our hometown in Southern Oregon to Portland International Airport (PDX) for more affordable air tickets, and save on long term parking fees. The trip takes us six hours (instead of the usual four by car) but no one has to drive, the kids enjoy the scenery through the Cascades, and we make up the train fare in the lack of parking fees.

riding-amtrak

As coach passengers, families don’t get meals included, but food packed from home is permitted, and a lounge car always has causal meals and snacks on offer. On Amtrak, when all sleeper car passengers have booked their meal reservations in the dining car, the crew opens reservations for coach passengers. Dining car meals are a fun affair, but costly. Parents pay a la carte if traveling coach. We find a happy medium bringing our our lunch and supplementing with a treat from the lounge.

2. Book early for Super Saver tickets.

amtrak-lounge-car

Unlike air travel, for which the best ticket prices are usually offered during a 6-8 week window pre-trip, families can save the most by booking rail tickets as far ahead as possible. Look for Super Saver tickets, or book your train travel in the off-season. In June-August, families will pay top dollar for both coach and sleeper tickets.

3. Try a single overnight.

If your crew really wants to spend the night on the train—and yes, it is fun—24 hours is usually enough. We spent a memorable day and night riding VIA Rail’s Canadian route, and while we loved watching the stunning scenery go by and enjoying the dining car and comfortable berths (yes, really!), we were more than ready to hop off and stretch our legs after 24 hours. Check Amtrak and VIA Rail routes online to find a one-night itinerary that works for your family: there are more station stops than most people realize.

A few rail travel tips:

amtrak-trip

Don’t be in a hurry:
If you have a tight schedule, this is not the time for a rail trip. Amtrak runs at its own pace, stopping en route for freight trains (they have priority), at stations, and slowing through towns. Becoming behind schedule is the norm. We never book a rail trip on the same day of a flight departure.

2. Know what you’ll have access to:
Coach passengers are usually offered electrical outlets at each seat, plus pillows and blankets. Seats recline and have foot rests. A lounge car offers snack foods and ceiling to floor windows. Restrooms are in every car. Sleeper passengers also enjoy access to a parlor car with additional dining, a dining car with included meals (3x daily) and wifi. Check the information on the train you’ll be taking online before you go.

amtrak-trip-with-kids

3. Pack carry-on only if possible:
Amtrak and VIA Rail both offer checked luggage service, but in our personal experience, getting your luggage back can take a while. Because passengers are allowed two carry-ons (just like when flying), and there’s ample space for your carry-on (unlike when flying), we recommend carrying luggage on board.

4. Let kids bring their own camera:
Our kids love taking photos aboard trains, and the freedom of movement afforded by rail travel makes it possible for kids to walk from car to car taking photos. In most lounge cars, docents are on-hand to offer knowledge about the vistas and landmarks passing outside the window. Encourage kids to ask questions or follow along on a map.

5. Board early for panoramic car or lounge car seats:
Cars with public access, like lounge cars with great views, fill up fast. Usually, boarding a train is a casual affair, with ample time. Instead of sitting in the train station lounge until the last minute, board early to snag good seats.

6. Opt in for Amtrak schedule notifications:
Because Amtrak considers the posted schedule only a suggestion (as noted, they are restricted by many factors, including freight schedules) it’s helpful to sign up for schedule change email alerts or texts. Knowledge of delays can save families from early wake-up calls or long waits.

Have train travel tips to share? Leave them in the comments!

Photo credit: Amy Whitley, Jim Guest

Central Oregon activities: kayaking the Cascade Lakes with Wanderlust Tours

If you’re enjoying a Central Oregon vacation and wondering what to do with kids in Bend or the surrounding areas, Wanderlust Tours offers outdoor excursions that will introduce you to Oregon’s Cascade Lakes and other wilderness areas while everyone has fun. Located in Bend, Wanderlust offers a full range of outdoor excursions, including cave tours, kayaking Cascade Lakes, canoeing, volcano sightseeing, and brew bus excursions for adults. In winter, they also offer snowshoe trips.

Wanderlust tours Bend

We booked a kayaking tour of the Cascade Lakes during an autumn weekend stay at House of Metolius. Because our resort was located past Sisters, Oregon, we drove into Bend and met our Wanderlust guides in town. (If you’re staying at a Mt. Bachelor-area resort, they’ll pick you up at your door.) Our guides Courtney and Chris were friendly and eager to show us all the wilderness this area has to offer.

kayaking with Wanderlust Tours

After a short van ride up Century Drive and past Mt. Bachelor ski resort to the Cascade Lakes, we unloaded at Hosner Lake. (Wanderlust Tours is the only operator permitted in this region.) It was chilly and raining lightly, but we had come prepared for weather (Wanderlust Tours depart rain or shine!) and the enthusiasm of Courtney and Chris kept us optimistic. We were right not to fret the weather: the serene lake with its mist of cloud and rain was spectacular, and we had the water nearly to ourselves. It was quiet and peaceful, and our kayaks glided nearly effortlessly over the still lake. Courtney was a book of knowledge on local flora and fauna: we loved learning about the different uses of moss and lichen, and the differences between the trees surrounding us.

Wanderlust tours bend

She was great with the kids too. Toby, age 7, kayaked tandem with her, and even though he has a habit of talking guides ears off, she didn’t mind (or at least didn’t let on that she minded!). She sang songs with him, pointed out wildlife, and generally got everyone in our group enthused about what we were seeing and hearing out of the water. Our 11 and 13-year-olds were happy too, because they were allowed to kayak tandem together. We had only eight kayakers in our group in addition to the two guides, allowing everyone lots of attention and keeping us all safe.

We kayaked for over an hour (or until our hands were numb!) and Courtney assured us that Wanderlust Tours continues to operate their kayak tours as late into the season as possible, as long as there’s demand. While I’m sure a summer tour would have been enjoyable, I’d recommend an autumn excursion: we saw aspects of lake life that would have eluded us in a busier time of year.

We have been on many kayaking trips across the country, and my kids rated Wanderlust Tours as tops. Why? The fun they had with Courtney, and the uniqueness of seeing the lake in October. Courtney did an excellent job of showing us just how much life was out in the Cascade Lakes at this time of year, and her love of the outdoors was obvious.

If you’re coming from the Sisters area, you’ll want to allow for a full half-day for this tour, including driving time. If in the Bend area, it will take about four hours, from 9 am to 1 pm. Food is not included in the kayak tour, so bring a few snacks to store in the van…along with extra dry clothing or extra jackets. Note: kids generally need to be eight years old for this tour.

kayaking Central Oregon

Tour rates: The kayak tour at Cascade Lakes is $55 per person, and includes all transportation, gear, and instruction.

Directions: Call Wanderlust Tours to schedule your tour, and they’ll pick you up or send you a pick-up location. They’re always available at 1-800-962-2862.

As I disclose whenever applicable, we experienced kayaking in the Cascade Lakes as guests of Wanderlust Tours. This compensation came with no expectation of a positive review.

Open Air Adventure Park Estes Park

Estes Park, Colorado, is known as the gateway to Rocky Mountain National Park. But mountains aren’t the only outdoor adventures you can find in this small town. Tucked off highway 36 on the way out to the Beaver Meadows entrance of the park is the compact but surprisingly extensive Open Air Adventure Park.

Open Air Adventure Park is a web of 32 aerial obstacles arranged around a central hub. There are two levels; the lower is 10 feet off the ground, the upper 21. What kind of obstacles? A row of chairs. A suspended canoe. A saddle attached to a zipline. A vertical net to pick your way across. A trail of tires, both vertical and horizontal. There’s even a rappel line to get you quickly from the upper level to the lower, or to ground level. Each element is labeled green, blue, or black to indicate difficulty.

open air adventure park

Open Air Adventure Park Estes Park review:

Your Open Air Adventure lasts an hour and a half and begins with detailed instruction on the safety equipment. A staff member will check everyone’s harness and understanding of procedures on a ground-level mockup of the safety lines you’ll be using up in the matrix. This takes the first fifteen minutes of your time slot, but once you’re cleared, you climb a ladder to level one and are set loose to explore at will.

My oldest son and I have done three aerial adventures now, and what’s nice about Open Air is the freedom to choose your own adventure. If there’s an element you particularly like, you can return to it as often as the crowd allows. The distance across elements is relatively short, so if you’re new to the sport, you might find it less intimidating than launching yourself over a zipline so long, you can’t even see the other end.

Open Air staff members are stationed in several places on the course to monitor safety and help navigate transitions. And of course, the view of the mountains is incomparable.

open air

Age Limits:

Technically, the minimum age is six, but exceptions can be made if a parent is willing to move around the matrix with a five-year-old. In order to explore independently, a child has to be able to hook their carabiners to lines 6 feet above the platform. I needed to shadow (and shepherd) both my 5 year old and my 8 year old, because neither of them could reach the safety lines.

I recommend that if you have small children and/or children who are new to aerial adventures, keep a one-to-one ratio of adult to child. My younger two turned out to be extremely timid, and we ended up causing quite a backlog of people waiting on us to get moving. We also didn’t get to explore as much as I would have liked, because it took them a long time to overcome their fear. A one-to-one ratio will facilitate a more enjoyable experience for everyone.

Either way, minimum weight for participants is 40 pounds, and maximum is 250.

Preparing for your adventure:

Plan to arrive at least 15 minutes early, and be prepared for anything: an Open Air Adventure goes on rain or shine, stopping only for lightning. Wear sunscreen. Gloves are not required, but they’re a good idea. You’ll also need to sign a waiver for yourself and your children (it can all be done on a single form), which can be completed online ahead of time. The Open Air crew loans out lanyards with clear plastic phone cases attached so they are safe on your person while you’re up in the air.

Reservations and Fees:

Tim, one of the owners, told me Open Air tends to be busiest at opening time and in the evenings, but usually it’s less busy around the noon hour. Reservations are made online, with adventures starting every half hour. Fees are refundable with 24 hour notice

An Open Air adventure costs $35 per person, with a discount for parents who come up to shepherd their younger kids around the matrix. Not sure if you can handle the heights? If you try, but can’t make it off the first platform, Open Air offers a “scared out of my mind!” refund of $25.

Location:

Open Air Adventure Park lies at 490 Prospect Village Dr, Estes Park, CO 80517, just behind Fun City, adjacent to Highway 36 (Moraine Ave.). Parking is available on site.

Disclosure: We visited Open Air at a discounted rate, for the purpose of review. All opinion remains our own.