National parks of Canada: Jasper National Park, Alberta

Parks Canada calls Jasper National Park the ‘gentle giant of the Canadian Rockies’, but it seems pretty mighty to us. A gateway for outdoor adventure in all seasons, Jasper is known for backcountry backpacking and skiing, but also plays host to a number of family friendly destinations of the less extreme variety. Here’s what to do in Jasper National Park with kids:

Jasper National Park

Start at visitor’s centre.

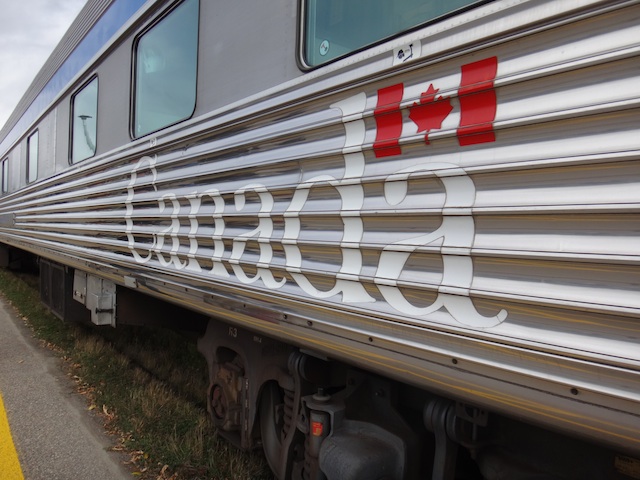
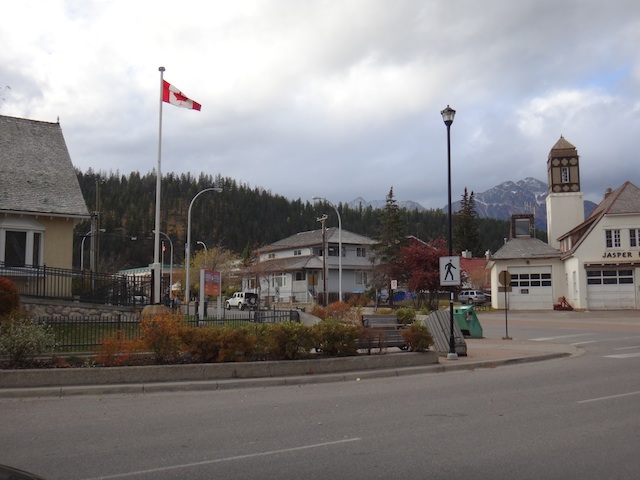
When you arrive in Jasper, head to the information and visitor’s center in the heart of town, across from the VIA Rail train station. The Parks Canada staff here can point you in the direction of area hikes and any closures at the time of your visit (such as campgrounds or picnic areas). Pick up maps and ask questions, because we found Jasper National Park to be less well marked than its neighbor Banff.
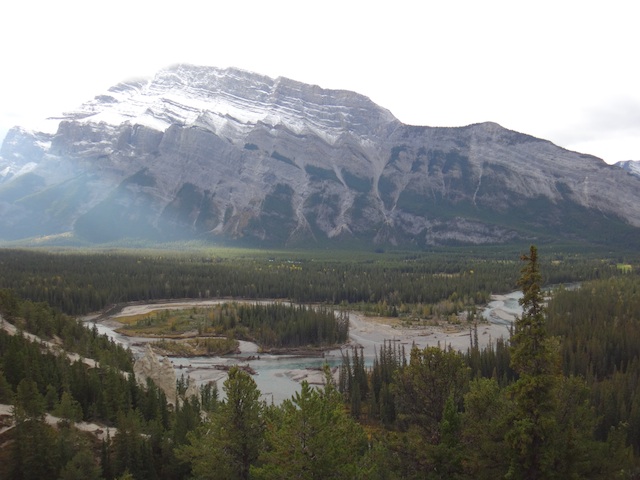
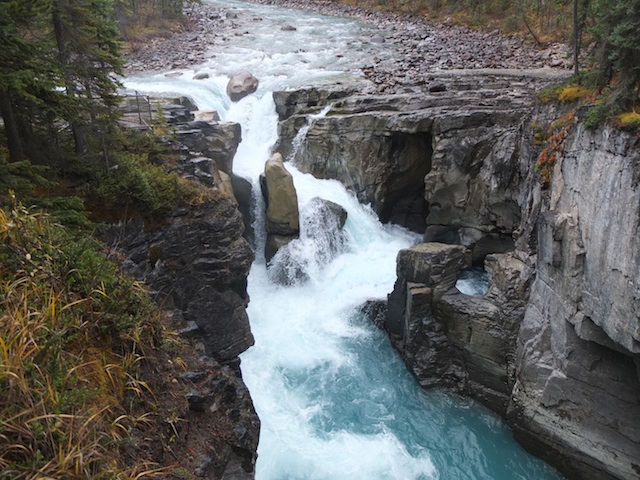
Jasper Alberta

Maligne Canyon:

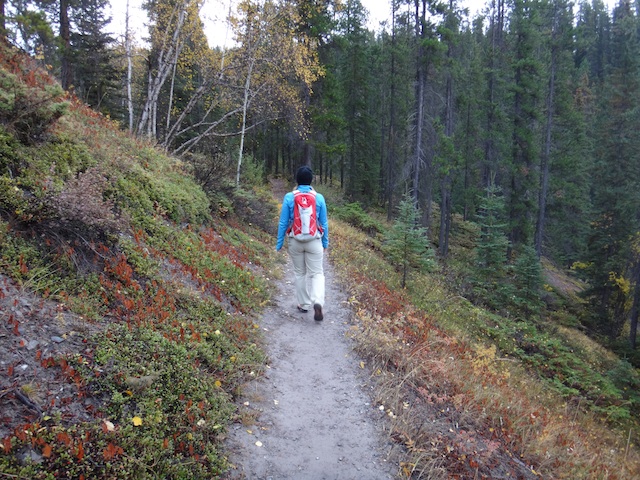
Our favorite destination in Jasper National Park is, hands-down, Maligne Canyon. This hike takes visitors through a deep gorge through which Maligne River flows, and thanks to its network of interconnecting looped trails, can be as long or short as you need it to be. Start at the trailhead and tea house, and hike to a series of marked bridges spanning the river (we went as far as number 6), then either retrace your steps or loop back via a horse trail. The views are stunning–you’ll see waterfalls and pools, as well as places where the water disappears underground. The path can be slippery, but there are rails in place to keep young kids safe. Bring a camera!

maligne canyon

Maligne Lake:

Above Maligne Canyon lies Maligne Lake, a summer playground with boat rides, canoe rentals, and restaurants. Picnic here in the autumn, or set out for a short hike from the adjacent trailhead.
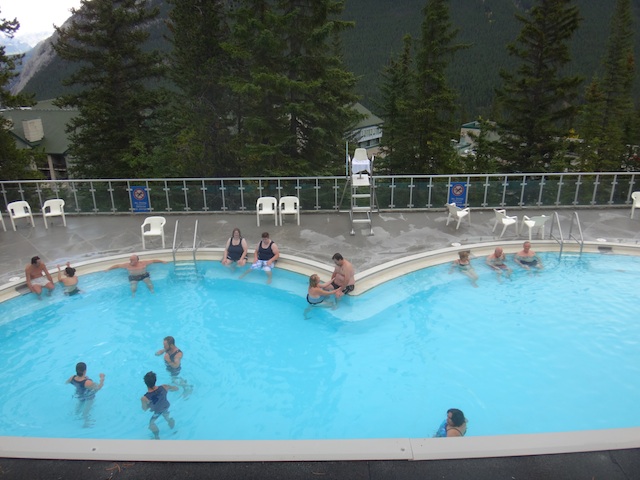
Miette Hot Springs:

Miette Hot Springs is open May through October and is located just a short drive from Jasper in the eastern mountain range. The outdoor pool offers towering peak views while you soak in the naturally heated waters. Pair this destination at the end of a day of hiking!

Watch our Jasper and Banff National Parks video:

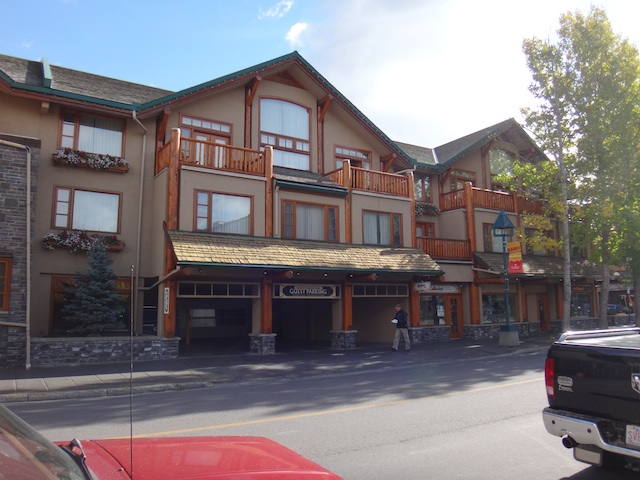
Where to stay in Jasper: the Tonquin Inn:

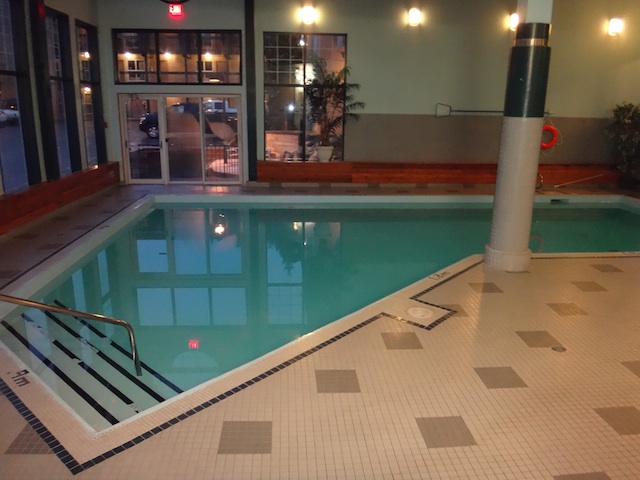
The Tonquin Inn lies just a few blocks from downtown Jasper, within 2-3 minutes by car from area destinations. A perfect blend of old school mountain motel charm and modern upgrades, the Tonquin has everything parents need: a great indoor pool and hot tub complex (complete with changing rooms), two additional outdoor hot tubs, spacious rooms with free wifi, and an excellent complimentary breakfast buffet in their attached restaurant.

tonquin inn

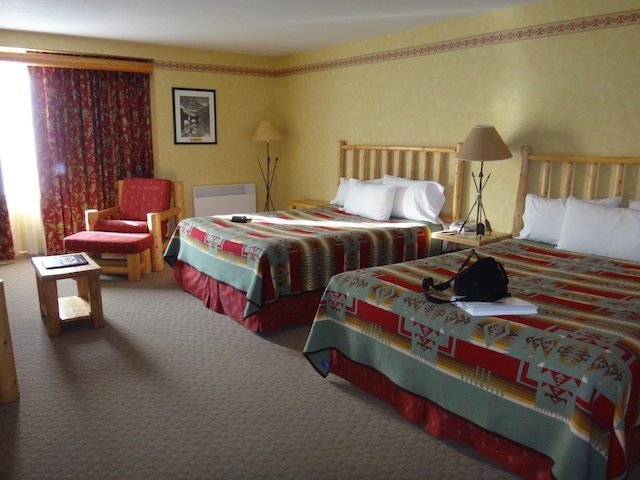
Our standard room was large enough for a couch and seating area in addition to beds, and had a large TV and spacious bathroom. We were steps from the pool building and dining, and we could walk into town if desired. In the morning, we woke to elk grazing outside.

As I disclose whenever applicable, we were hosted at Tonquin Inn for the purpose of review. While we appreciate the hospitality, all opinions are our own.

Four days in the Canadian Rockies: Jasper and Banff National Park road trip

It’s very hard to plan a trip to the Canadian Rockies. Why? No matter how ambitious your itinerary, there’s always one more place to visit just a few kilometers down the road. But if you do have to scale your trip to under one week, here’s how to spend four days in and around Lake Louise and the Icefields Parkway, during a Jasper and Banff National Park road trip.

Jasper National Park

Start in Jasper:

The small town of Jasper is a gateway to outdoor adventure in every season. From late spring through early fall, hiking and lake visits reign, and in winter snowshoeing, skiing, and ice climbing can be found throughout the area. We visited in October and loved the beautiful scenery to low crowd ratio.

Maligne Canyon:
Head just a few minutes outside of Jasper on Highway 16 to Maligne Canyon. In winter, this is where you’ll see ice climbers navigating the frozen waterfalls, but in all other seasons, the flowing water of the Maligne River bubbles and falls over rocks and through gorges before disappearing underground (just to emerge again in blue pools). The trail loops with several options for return, allowing families to choose how long they hike. We hiked for approximately one hour and made it to five of six bridges that traverse the river.

The water is fast-flowing, but railings are in place to keep kids from getting too close. The incline can be steep and slippery at times, but the scenery is absolutely worth the effort.

Town of Jasper:
You don’t have to leave town to see wildlife and enjoy trails. Take the Discovery Trail through town, which includes interpretive signs throughout to teach about the history of the area. Look for elk strolling town in the early evenings and mornings; they often stop traffic! And when you’re back from your hike, stop for ice cream or shop for souvenirs or hiking gear in the easily-navigated 2-3 block downtown.

jasper

Where to stay:

The Tonquin Inn is located just a few blocks from downtown and has everything parents with kids need: a large indoor pool and hot tub, additional outdoor hot tubs, a comprehensive complimentary breakfast buffet, and comfortable rooms with scenic views.

Make the most of driving the Icefields Parkway:

The Icefields Parkways has been rated as one of the most scenic drives in the world, but that doesn’t mean you don’t need a pit stop for two. Break up the four-hour drive from Jasper to Banff with a stop midway along the Icefields Parkway. Located at the border between the two national parks, the Columbia Icefields Centre is hard to miss. Here’s what to expect:

glacier adventure

The Columbia Icefields Centre is where you can stop for a meal and clean bathrooms, plus a great view of the Athabasca Glacier. Kids (and parents) will immediately notice the ‘Ice Explorers’ navigating the glacier surface…and want to ride in one. This attraction at the Centre is Brewster’s Glacier Adventure, and tickets can be bought in the lower level. The tour takes you on a short bus shuttle to the edge of the glacier, where you transfer to specially-designed Ice Explorers (souped up ATV-bus hybrids, for lack of a better description). The Ice Explorers take you on a short but exciting drive out onto the ice, where they stop and let you get out and walk around in a very contained circle. Because the space where visitors can stand on the ice is so small (and feels much like a parking lot with multiple Ice Explorers parked), most kids will find the ride out the most exciting part. Guides do a very good job of educating you on the glacier in an entertaining way, but the actual ice walk can be a let-down.

Closer stops to Jasper include either the Athabasca or Sunwapta falls. Both scenic falls are located roadside, necessitating only a short walk to the view points. At Sunwapta, a restaurant and other roadside facilities make for welcome additions. Closer to Banff, Bow Lake is an easy stop, and can include swimming in summer and short hiking options.

Up next, continuing your road trip to Banff National Park! Click on the button below to continue.

banff-road-trip

Pages: 1 2

Traveling the Canadian Rockies on VIA Rail

Overnight passenger train travel can be more expensive and slower than air travel today. So why should you go? And where?

Train across Canada: after spending two nights traveling the Canadian Rockies on VIA Rail‘s Canadian, the ‘why’ is easy to answer: in an age when traveling to a destination has become only about getting from Point A to Point B in a rushed, often stressful manner, a few days (or more) aboard a passenger train is a vacation in itself. The pace is relaxed, the scenery can be fantastic, and the service is friendly. After my experience aboard The Canadian, I would venture to say passenger train travel is in fact the sole remaining mode of idyllic transportation from the golden age, outlasting air and cruise travel.

The Canadian

Incorporating a VIA Rail journey into a Canadian vacation itinerary will greatly enrich your trip. There are many routes to choose between, the longest being the four day journey from Vancouver to Toronto on the Canadian. We opted for a fraction of this trip, embarking in Vancouver and departing in Jasper, Alberta (then returning on the same route after days of sightseeing in the Canadian Rockies). The 20-hour one-way trip was spent taking in the scenery from one of several observation cars with 360 degree views, dining in the relaxed yet elegant dining cars, getting to know fellow passengers, and sleeping, reading, working, or napping. We found that the ‘rail level’ views and relaxed pace afforded a more intimate experience with the British Columbia and Alberta wilderness.

observation dome

Who to take with you:

If you’re bringing kids, I wouldn’t recommend this trip for kids under age six (though as always, parents know their own children best). During the rail trip, passengers are definitely confined to a series of train cars, and young kids would certainly get restless. Is there enough for older kids to do? Here’s what we found: a variety of board games in the ‘activity cars’, on-going snacks and juices in the lounges, and interesting sights out the window, whether it be scenery whizzing by or temporary stops at stations or through towns. In other words: not a lot of on-board entertainment.

If you travel with kids, we recommend downloading a few movies onto a computer, iPod, or iPad, and bringing plenty of reading material, activity books (such as coloring books) and card games. Plan on several hours between each meal that you’ll need to fill. Expect a primarily-adults-only passenger list: during our October trip, we saw only two children aboard the Canadian. This is not to discourage families from bringing kids: rather, know you’ll need to bring diversions and entertainment as needed. WiFi was not available aboard our train, though 3G and 4G service could be found via roaming off and on.

panorama car

Which fare to book:

Determining which fare is right for you can be tricky. On the Canadian, there are two basic options: sleeper or economy. In economy, you’ll get a seat that reclines, access to an observation car with upper deck, access to a lounge with tables and chairs, and the option to buy food at the Starlight Cafe, serving meals and snacks to go. Passengers sleep in their seats, and share bathroom facilities. Economy is obviously the more affordable option, but quite frankly, didn’t look too appealing (despite the fact that VIA Rail seats are considerably more comfortable than airline seats).

Sleeper fare offers three bed configurations (each a different price) in the Sleeper Plus category. Passengers can opt between a one-passenger or two-passenger private cabin, or a semi-private upper or lower berth (closed with curtains). We experienced Sleeper Plus in a two-passenger cabin. We had a tiny-yet-functional cabin space with two chairs and a large window, a private bathroom with toilet, and a sink. Also included: a small amount of storage space and two outlets (yay!). In the evenings, a train steward comes by to lower your beds, which in the two-passenger cabin is bunk-bed style: upper and lower single beds. Beds are fully made-up each evening, and very comfortable (provided you’re not quite tall).

two passenger cabin

The one-passenger private cabin features one bench-like seat that flattens to accommodate a bed, plus a sink and toilet (the latter of which features a cushioned cover to become an ottoman during the day, but is covered up by the bed at night…a definite downside). Both the two-passenger and one-passenger cabins share one shower per car.

The last sleeper option is to book an upper or lower berth. These compartments feature bench seats (two facing each other) during the day, which fold out to become a lower berth bed at night. The upper berth bed folds out from the wall by the ceiling. These berths are made up at night and feature thick curtains for privacy. They share a public toilet and shower (one per car).

VIA Rail food

All Sleeper Plus fares include meals in the dining car (breakfast, lunch, and dinner, depending on when you’re onboard), snacks in the lounge, access to several observation cars and lounges, and complimentary champagne and appetizers upon embarkation.

Here’s a photo depicting 1. a two-passenger cabin made up for bed, 2. a lower berth made up for day, 3. coach seats:

VIA Rail

Which to book will depend on your comfort level (how much privacy do you need?) and your meal needs. We absolutely recommend the all-inclusive dining: if you opt out of this, you can buy meals a la carte in the cafe, but this option would get old (and expensive) if traveling more than one night. We enjoyed the privacy of a cabin, but could have been comfortable in an upper and lower berth as well. Keep in mind that only up to two passengers fit in a cabin: families of four or more will need to book two (or more) cabins or opt for two or more upper/lower berths in a row. (The latter option will allow for more freedom of movement between beds as needed, but you’ll only have access to a shared bathroom.

View our VIA Rail experience video:

Tips:

1. Carry-on sized bags only are allowed onboard. Full-sized bags will need to be checked, so plan accordingly. Cabins have space for up to two carry-on bags, but if you opt for a berth, you’d be better off with only a large tote or backpack.

2. Bring a water bottle to refill. While coffee, tea, and juice is on offer at all times, I found the need to also keep a water bottle filled to prevent dehydration. If you like to sip coffee or tea all day, bring a small thermos or insulated mug.

3. Bring a hair dryer if you’ll need one: in cabins, towels, shampoo, and soap are provided, but not hair dryers.

4. Be prepared for plenty of motion and some train noise at night. We slept surprisingly well onboard, but you’ll definitely feel the movement.

Date last visited:

October 2013

Fare cost:

Calculate Via Rail fares here. Definitely plan early and check for fare discounts, offered several times per year. What we found: VIA Rail is not more economical than flying, so you need to consider the fare cost a part of your vacation experience, not part of your transportation costs.

Directions:

If embarking in Vancouver on the Canadian, you’ll depart from Pacific Station. Located next to Science World, it’s easy to get here from SkyRail from either the airport or the Waterfront station in downtown Vancouver.

As I disclose whenever applicable, we experienced The Canadian as guests of the VIA Rail, for the purpose of review. All opinions are our own, and we hope our experience inspires and equips other traveling families to make great decisions about rail travel.

Five stops along the Icefields Parkway in Jasper and Banff National Parks

If you’re visiting both Jasper and Banff national parks on your Canadian Rockies vacation (and you should be!), you will drive the Icefields Parkway connecting the two parks. This 3 hour stretch has been described as one of the most scenic highways in the world, and after our fall 2013 visit, I concur. The parkway takes approximately 3.5 hours to drive, but families will definitely want to stop along the way. Where to plan you pit stops:

Icefields parkway hiking

Sunwapta Falls:
About 30 km from Jasper, you’ll come to Sunwapta Falls. Signage clearly marks this point-of-interest, but you can also spot it by the resort and restaurant sitting roadside. Stop for a snack or trip to the restroom, but definitely drive beyond the resort to the falls, which can be viewed from above next to the parking lot or from a footbridge a few yards down. The falls are impressive (yes, even if you’ve been to Jasper’s Maligne Canyon), and even though this isn’t a hiking location, it’s a great place for photos and to let kids stretch their legs.

Icefield Centre:
Athabasca Glacier lies at the approximate halfway point of the Icefields Parkway, as visitors steadily climb up into the mountains from either direction. At the glacier you’ll find the Icefield Centre, a huge building run by Brewster’s Canada. On-site is a restaurant and cafe, plus hotel rooms and a large observation deck. On the ground level is Brewster’s Glacier Adventure.

brewsters glacier adventure

One look out onto the glacier from the deck, and your kids will see what Glacier Adventure is, and probably want to do it: visitors board bus-sized all-terrain vehicles and drive out onto the ice, where they can stand out on the glacier. Sounds cool, but is it worth the $49/adults and $25/kids ticket price? That depends on what you want out of it: if you want to be able to say you’ve walked on a glacier or simply love cool vehicles, the answer is yes. If you expect an adventurous experience or a hike, the answer is no.

glacier adventure

The vehicles, called Ice Explorers, take you along a short but steep road (the second steepest commercial road in North America, to be exact) leading onto the ice. Once there, they park in a snowplowed area the size of a small parking lot along with other Ice Explorers and let you out to walk on the snow. What we liked most about the experience: the interesting facts presented by our guide. Note: Expect to get your feet wet unless wearing waterproof boots, and bring gloves and a jacket.

Parker Ridge trailhead:
There are multiple trailheads along Icefields Parkway, all clearly marked (and most with parking areas and decent pit toilets). One of manageable length for a brief stop is Parker Ridge, which lies just beyond the Icefield Centre toward Banff. The 3 km round-trip hike offers views of the Saskatchewan Glacier and Mt. Castleguard on a clear day.

Peyto Lake and Bow Summit:
Peyto is a short road-side hike to the lake, with the option of hiking further toward Bow Summit for alpine wildflower viewing and meadows. This is the highest point on the Icefields Parkway. Picnic tables make this a great place to stop and picnic and photographers will be happy!

lake louise

Lake Louise:
Only 57 km from Banff, Lake Louise is a must-do stop, if not an overnight or all-day excursion. From the Lake Louise exit, the lakeshore is only a few kilometers away. Park in the large parking lot and walk to the lake to take in the views and snap some photos, gawk at beautiful Fairmont Chateau Lake Louise, and, if time permits, take a hike. The lake loop is an easy walk for kids of all ages, but if you have time, we recommend the 7 km round trip ascent to Lake Agnes (trail departs directly from Lake Louise). For your efforts, you’re rewarded with tea, coffee, or a snack at the picturesque Lake Agnes Tea House at the top.

See our video review of more things to do in the Canadian Rockies:

Tip: Remember that you’ll pass the national park ticket booth on either end of the Icefields Parkway. At the time of this writing, admission to the parks was almost $10 per day for adults (almost $5 for kids) or a family fee of under $20 per day. You only need to pay once, and display a receipt on the dashboard of your car.

As I disclose whenever applicable, we were hosted for some activities along the Icefields Parkway, for the purpose of review.

Where to stay in Banff National Park: Brewster’s Mountain Lodge

During a vacation in Banff National Park, visitors have three main lodging options: camping, hotels and lodges outside of the town center, or Banff town hotels. Because Banff can get crowded and parking and driving can be a hassle even in the off-season, we recommend a hotel in town to be within walking distance of dining, shopping, and tour departures. Brewter’s Mountain Lodge is located in the heart of town on Caribou Street, adjacent from the Banff Park Lodge and within a block of great restaurants, souvenir shopping, outdoor gear shops, and the movie theater.

Despite its location on a city block, Brewter’s Mountain Lodge has a very mountain lodge feel inside. The two-story lobby is light and airy, with wood plank and log fixtures and accents and a fireplace and seating. The entire lodge is clean and modern, and the front desk staff during our visit was friendly and helpful.

Brewter's Mountain Lodge

Amenities:

On the second floor landing above the lobby, Brewster’s features a small but well-appointed reading room with lending library and a computer for guest use (for a whopping $5 per 30 minutes). But don’t worry: free wifi for guests is available. Note: I had a hard time connecting at first; the desk staff kindly rebooted for me, which fixed the problem. Adjacent to the lobby is a sauna and whirlpool hot tub, perfect for use after a day of hiking, mountain biking, or skiing. Parking is in an underground lot directly below the hotel and free. The room rate includes a complimentary breakfast buffet located in a nice dining area at the bottom of the hotel, featuring cold breakfast offerings like yogurt, fruit, cereal, and pastries/toast. Coffee and juice is also available.

Brewster's Mountain Lodge

Rooms:

We had plenty of space in a standard room with two double beds and a large bathroom complete with jacuzzi tub. The bathroom configuration features a spacious main area with sink and counter space and tub, then a separate door to the toilet and shower. It’s nice to have the separate areas, but the toilet/shower space is quite tight. In the main room, there’s plenty of space for a table and chairs plus couch. Some rooms feature balconies, but even without, the large windows offer nice views of the street below. Rooms include 3/4 sized fridges, plus TVs.

Brewster's Mountain Lodge

Distance from the interstate:

Brewter’s is located just minutes from the TransCanadian Highway (1) in Banff.

Room rates:

At the time of our visit, room rates for a standard room were listed at $151 to $171. Rates vary by season.

Directions:

From TransCanada Highway, take the exit into Banff town center. Take Banff Avenue to Caribou Street.

As I disclose whenever applicable, we experienced Brewster’s Mountain Lodge as guests of the resort, for the purpose of review. All opinions are my own.

How to spend two days in Banff National Park, Alberta

Hopefully, you have more than two days to explore Banff National Park with kids, but if you are limited on time, here’s what you should do first.

Whyte Museum of the Canadian Rockies:

Whyte Museum is a great place to start. It may be small, but does an excellent job with both an art gallery and exhibits detailing the history of the park, starting with the First Nations’ presence and continuing through the establishment of the park and the role of the Canadian Pacific Railroad. When you enter, you first walk through the art gallery, which showcases Banff’s rich art history. An interesting section covers mountaineering and climbing in the park, as well as the practice of heli-skiing and backcountry winter exploration. The museum is fairly small, but you’ll still want at least 45 minutes to tour. Best of all, admission is by donation. Whyte Museum is located at 111 Bear Street.

whyte museum

Cave and Basin National Historic Site:

Cave and Basin marks the birthplace of Canadian national parks, with the discovery of a hot springs underground by railroad employees (of course, this cave was not a new discovery to First Nations’ tribes). Now, this hot springs is closed to swimming due to preservation of a species of snail, but visitors can learn about the history of the site and the creation of Parks Canada in exhibits in the former bathhouse changing rooms and see the site of the former pool. You can also walk through a tunnel to see the still-bubbling sulphuric water in the original cave, as well as view the outdoor basin where the water pools. Admission is affordable, and there are boardwalks adjacent for a short hike around the site. Plan to spend about 45 minutes, then head to Banff Upper Hot Springs, where you can swim in even warmer waters. Cave and Basin is located at 311 Cave Avenue.

Banff Upper Hot Springs:

The Upper Hot Springs features a large outdoor pool located at a historic Banff bathhouse (that now also houses a spa). The temperature of the water is a respectable 104 degrees (40 C), and admission is very affordable. We forgot a bathing suit, and found out traditional bathing costumes of the ’20s and ’30s can be rented for just $1.90…fun and a deal! You can also rent towels, and there are large, clean locker rooms for changing. If you want to stay awhile, there’s a cafe upstairs in the bathhouse, and hiking trails nearby. If the weather is clear, pair an afternoon at the hot springs with a ride up the gondola, located nearby. Banff Upper Hot Springs is located on Mountain Avenue.

Banff Upper Hot Springs

Surprise Corner:

So named for the surprise view of the beautiful Bow Valley and Banff Springs Hotel, this corner along Tunnel Mountain Road has a dedicated pull out and parking lot and observation deck. Take some photos and tell the kids about the role the hotel and the railroad had in Banff tourism (the hotel was built to lure rail passengers to the area). Look for wildlife here!

surprise corner

Hoodoos:

The Hoodoos feature geological formations similar to those found in Bryce Canyon in Utah, but more enticing is the amazing view of the Bow River and valley. Park and take the short walk to the viewpoint, bringing binoculars along; during our visit, we spotted elk grazing by the river bank far below. The loop hike starting from this location is a great option for wooded terrain and the chance to spot wildlife.

hoodoos Banff

Sulphur Mountain:

For a longer, more challenging hike that’s still close to town, the 11 km round-trip up Sulphur Mountain includes winding switchbacks for amazing views of the Bow River and valley. At the top, walk over to the Cosmic Ray Station (used to take meteorological readings) and take the gondola back down to save some distance.

Tunnel Mountain:

Tunnel Mountain is located near the heart of the town and takes families up a fairly steep but short hike to the top of–you guessed it–Tunnel Mountain. The distance is 4 km round trip. The main draw? The view of the town of Banff from the top. Due to use, you’re not likely to spot a lot of wildlife on the Tunnel Mountain trail, but it is guaranteed to give you a good lay of the land.

Lake Minnewanka:

During summer, Lake Minnewanka is the place to go for canoe rentals, a guided boat ride, or picnicking. During fall, it’s far less busy, and can get windy (ask to hear the First Nations’ legends surrounding this lake), but is a good place to spot big horn sheep, and, if you’re lucky, mountain goats. Take the short drive a bit further to Two Jack Lake for even more seclusion in the off-season.

Tip: If you have more time, booking a tour with Discover Banff Tours is a good way to get oriented and learn more about the park and its wildlife. The three-hour tour may be too lengthy for very young kids, but school-aged kids will enjoy the wildlife talks, and parents will get a feel for which destinations they’d like to revisit on their own time.

Wondering where to stay in Banff? Our Banff National Park hotel pick.

As I disclose whenever applicable, portions of our activities in Banff were hosted for the purpose of review. All opinions are our own.

Everything you need to know about visiting Toronto

There is really so much to like about Toronto. Toronto is the capital city of Ontario and it offers a wealth of fun activities. Plus, it is known for its diverse population. Within this guide, you will learn all about visiting Toronto and having a blast.

Toronto waterfront

When To Visit?

To ensure that your trip is enjoyable, you’ll want to visit Toronto at the right time. Thankfully, Toronto is amazing throughout the year. You can visit in fall, late spring or early summer and have a great time. During these periods, you’ll have little to no trouble walking through the city. You should also think about visiting during September. After all, this is when the city hosts the Toronto International Film Festival and others.

Transportation

It is also pertinent to make sure that you’re going to be able to travel from attraction to attraction. Thankfully, Toronto offers plenty of transportation options. Renting a vehicle is a good idea if you’ve got the money and want extra freedom. However, you can also rely on the local transportation. There is an underground subway system. Or, you can take advantage of the buses and streetcars. If you want a little more privacy, you can always rent a taxi or an Uber. Either way, you shouldn’t have any problem traveling through the city.

tour Toronto harbor

The Weather

A lot of people are not fond of cold weather. Others hate hot weather. With this in mind, you need to learn a little more about the weather that Toronto experiences. July tends to be the hottest month. The average high is right around 70 degrees. January is the coldest. If you do not want to experience the extremes, you’ll definitely want to stay away during these times. Visit somewhere in the middle and you’ll enjoy your trip even more!

Before You Go

Before you head for Canada, you’re going to need to make sure that you have everything you need. You’ll need to pack the right clothing and you’ll need the required documentation. While it depends on where you’re traveling from, you’ll probably need a visa and an ETA. You can fill out the Canada ETA application online pretty easily. Getting your visa shouldn’t be too difficult either. With that being said, you should not let these speedbumps hold you back!

Finding Lodging

Unless you’re going to be sleeping on the street or with a family member, you’ll need to rent lodging in Toronto. Most of the major chains will have several locations in Toronto. If you want to get away from the crowds, you’ll probably want to avoid the downtown area and Malton. You can find some great motels at good prices on Younge Street. This is a good option for tourists, because you won’t have to walk far to reach the major attractions.

Family Apres Ski at Whistler Village

After a full day of skiing or boarding, nothing is so satisfying as unbuckling your boots and shedding your coat to warm up amid the lively ambiance of fellow skiers and perhaps a live band. Add a cold brew or warm beverage, and you just might be in heaven. We’ve already told you where to eat on a budget at Whistler, but you don’t have to pass up the fun of apres ski drinks and appetizers, even if you do have a full kitchen at your Whistler home rental. Check out the following family-friendly apres ski at Whistler Village locations.

apres ski with kids

1. Mallard Lounge, Fairmont Chateau Whistler:

Located within the elegant lobby of the Fairmont (right off Blackcomb’s Wizard chair), the Mallard offers cozy couches fireside and a designated family seating area. In fact, the whole lounge is kid-friendly until 8 pm. On Friday nights until peak season, parents can order $5 drink specials while the kids sip gourmet hot chocolates and listen to nightly live entertainment.

2. Earl’s:

Earl’s is hard to miss coming down from any of Whistler’s main runs into the Village. Ski right to the front door, and grab a spot by the fire. The atmosphere here is very casual and fun; no one minds kids underfoot and the crowd is very family-oriented in the early evening after the lifts stop turning. Stay for dinner or depart after a drink or two (the burgers are great, but pricy).

3. Elements:

Located off the beaten path in Whistler Village North, Elements manages to be both casual and upscale, with inventive cocktails and appetizers that don’t break the bank. Kids will like the tapas that are disguised as finger foods. Unlike some of the noisier bars and pubs along the Village and Upper Village (think Wizard Bistro), Elements remains full without feeling crowded.

While you wait for drinks or while you’re still deciding where to go, let the kids play on one of the many snow hills piled up along the pedestrian streets of the Village Stroll. They’ll have a blast playing ‘king of the hill’ or sledding down them in their ski pants even after a full day on the slopes. (If only I had that sort of energy!)

Photo credit

10 tips for using ferries for Northwest travel with kids

If you travel extensively throughout the coastal northwest, your route will eventually necessitate using Washington State (WSDOT) ferries or BC Ferries. Both are well-run ferry transportation options, but can seem intimidating to the occasional Northwest traveler. My family and I learned the ropes (at least, most of them) the fun way on a 10 day trip throughout coastal BC and Washington islands. What we found families need to know before traveling by ferry with kids in the Pacific Northwest:

10 tips for using ferries:

tips for using ferries


1. Know which ferry passages can be reserved in advance.

Most BC Ferry routes can be reserved ahead of time (though not all…more on that below), whereas most Washington State ferries cannot. If you’re traveling during peak tourist season (summer), reservations are at very least helpful, and sometimes crucial. BC Ferry schedules are listed clearly, and travelers can create an account on the BC Ferry website to make reservations for most routes. Reserving ahead of time is helpful not only because it ensures your passage, but also because it allows you to use the website to receive email alerts for any schedule changes to your route. Smaller routes, such as the ‘most scenic short-cut in the Northwest’ from Mill Bay, BC to Brentwood Bay, BC, are not reservable, but the heavily traveled routes, such as Vancouver to Nanaimo, always are.

Schedule your ferry passages at the time you plan your travel itinerary.

Ferry passages (and their schedules) just might change your plans. For instance, I was surprised to find out that my preferred route of travel from the San Juan Islands straight to Seattle was not possible, despite being geographically close by, nautically-speaking. Neither was my plan to traverse from Victoria to Friday Harbor. No worries: once I’d seen where offered ferries do travel, I was happy to adjust my plans. After all, there’s really no bad place to be along the Pacific Northwest coast.

bc ferries

3. Be on time.

And by on time, I mean at least 1 hour early, if you’re driving a car onto the ferry. Yes, even if you have a reservation. And yes, even on the small ferry routes. This seems inconvenient, but on our recent trip throughout Vancouver Island, Washington, and Vancouver BC, we didn’t mind. Once you’ve queued, you’re free to turn off your engine and get out of your car. At every ferry terminal we encountered, restrooms were available at minimum. At maximum, we enjoyed restaurants, scenic views, gift shops, and more.

4. Consider purchasing a Waves2Go or Experience Card if you’ll be using ferries for an extended time (or numerous passages).

Waves2Go is WSDOT’s monthly pass, and the Experience Card is BC Ferries convenient swipe card that can be preloaded with fare (at a discount).

bc ferries

5. Budget in the cost of bringing your car along for the ride.

The most expensive passenger on any ferry ride is your car. On our BC Ferry passage from Horseshoe Bay (Vancouver) to Nanaimo, our car cost us $75, and our Washington ferry ride from Sidney BC to Friday Harbor, WA cost us $45 in car fare. (Passengers are typically around $15 on longer passages, and as low as $7.50 on shorter passages.

6. Consider your ferry passage as both transportation and a scenic tour.

Northwest ferry passages are downright beautiful, and often wildlife can be spotted. (We saw jelly fish swimming on our shorter passage, and harbor seals in the San Juans.) In poor weather, most viewing decks have covered areas; go outside rain or shine!

bc ferries

7. Get out of your car as soon as you’re given the go-ahead by ferry personnel.

We quickly learned that there’s precious real estate on every ferry: window seats. The sooner you’re up from the car decks, the better your chances of snagging some. A few seats do have outlets, so don’t forget to bring any devices that need charging from the car. The ‘get out of the car early’ rule goes double on large BC Ferries if you’re planning to purchase a meal (at mealtime) onboard. Lines at breakfast and lunch go long.

bc ferries

8. Entertainment on board a Northwest ferry varies.

On large BC Ferries, you can expect gift shops, child play spaces (similar to what you’d find in airports) and even small arcades. Inter-island and Anacortes ferries in Washington will have snack shops and viewing decks, but little else. Tip: look for partially completed jigsaw puzzles on random ferry tables…they’ve been left for the next passengers. See how many pieces you can contribute before disembarking.

9. Remember to convert your money before leaving BC for Washington, or vice versa.

Washington ferries no longer take Canadian currency for on-board purchases, and shops and restaurants on the Sidney, BC side will not take American as a rule.

10. Don’t forget your passports.

Crossing the border by sea requires the same documentation and immigration process as crossing by land. All adults will need a passport, and kids will need a passport or birth certificate. If you’re traveling without one custodial parent, a letter of consent is required. (We didn’t have one from my husband, who was not with us, and we were allowed to enter Canada anyway, but the officer let us know it is needed.)

Whistler Blackcomb Ski Resort: what not to miss with kids

Twenty minutes before lifts stopped turning on a perfect Whistler ski trip, we were still finding fresh powder. Whistler Blackcomb is just that big. Everywhere we skied at Whistler Blackcomb, the kids discovered new routes, new glades, and new jumps. After spending two full ski days exploring the duel mountains, we could only say we’d had a ‘sampler’ of what this resort offers to families.

Whistler Blackcomb skiing with kids

Whether you have an ideal 3-4 ski days at Whistler Blackcomb, or just a short few like we did, Pit Stops for Kids is happy to share our top sections of the mountain for families, including runs, lifts, lodges, and dining.

Where to ski or snowboard on a Whistler ski trip:

The best thing about Whistler Blackcomb’s mountain layout is the fact that no matter where you are on either of the mountains, from peak to base, beginner (green), intermediate (blue), and advanced (black) runs are available. This means families can ride the lifts together even if they’re of different ability levels, and even young kids and novice skiers and riders can experience the whole resort. Our favorite sections of the two peaks for kids (of any level):

Blackcomb skiing

1. Jersey Cream area of Blackcomb: This area is accessed by the Solar Express lift (from Wizard Express at the base), and provides expert to beginner runs situated high enough on the mountain to be challenging but just below the tree-line (to keep out of the wind). We spent the majority of our time here, alternating between the double-black-diamond Jersey Cream Bowl and its many side runs (most of which are intermediate). The Green Line (beginner) offers a fun alternative to those not so sure about moguls and steeps. For those wanting to go higher up, the Glacier Express loads adjacent to Jersey Cream.

Family Zone at Whistler Blackcomb

2. Whistler Family Zone: Located on Whistler Peak directly across from Blackcomb after off-loading from the Peak 2 Peak Gondola (or off the Whistler Village Gondola), this Family Zone is a relaxing place to try out new skills without fear of fast skiers or riders nearby. Marked by bright green flags, the Family Zone offers groomed slopes and is placed next to one of Whistler Blackcomb’s many Nintendo Terrain Parks. It’s easy for kids to dip in and out of the terrain park (every feature is clearly marked as S (small), M (medium) or L (large) and still meet up with non-jumping family members. If your kids like easy glided skiing or riding, look for the large wooden arch marking the entrance to a not-so-steep tree glade filled with powder and trails (when snow levels permit).

3. Blackcomb lower mountain: Younger kids will like the numerous intermediate runs off the Wizard Express (and parents will like that the Blackcomb lower mountain gets less traffic than the Whistler lower mountain). When they’re ready, take intermediate and beginner kids up Solar Express for new terrain, including another Nintendo Terrain Park. (Look for the magic ‘castle’ play area nearby…though we had trouble finding it in deep snow, even with signage!)

Tip: If you’re new to the mountain, a great way to orient yourself is to ride to the top of Blackcomb and take the Green Line (beginner) all the way down. This cat-track trail, marked ‘Easiest Way Down’, traverses the entirety of Blackcomb while winding slowly down. Parents can get a feel for the mountain while kids get their ‘feet wet’. Plus, we clocked it: it’s a 30 minute run!

Rendezvous Lodge, Blackcomb

Where to eat and rest:

Whistler Blackcomb is very big, which means that traversing to your favorite pit stop could take a while, depending upon where you are on the mountain. Families will waste time getting from Point A to Point B if they’re not careful. The good news is, there are dining options on both mountains, of course. Our best advice: no matter where you eat, try to avoid the two largest lodges, Roundhouse and Rendezvous, during peak lunch hours (12-1pm).

1. Glacier Lodge: Located at the base of Jersey Cream and Glacier lifts, this smaller lodge is just enough off the beaten path to be an ideal lunch spot for families. (Also recommended is Crystal Lodge, but it’s so far off the main lifts it may take too much time to get to.)

2. Rendezvous Lodge: As long as you avoid the peak lunch hour, Rendezvous is a good bet (and easy to get to from either Whistler–take the Peak 2 Peak–or Blackcomb). Even during the busy holiday season, we didn’t have trouble finding a table or getting through the cafeteria-style dining area. Tip: even adults can order kid meals, which are a great value at $8.99 and include an entree, two snacks (all healthy options), a piece of fruit, and a drink. If the kids finish eating before you do, let them go downstairs to the Nintendo gaming area, where they can play the latest Wii and Nintendo DS 3D games for free!

Nintendo play area Whistler

3. Try to avoid Whistler Village at lunch, as this congested area will delay your return to the slopes. The exception: if you’re staying at a ski-in-ski-out hotel. During our stay at the Fairmont Chateau, we were able to ski down to the hotel, eat a healthy meal in our room, and be back on the hill within 45 minutes. It was worth returning to the base to skip the lunchtime crowds (and hassle).

Riding the Peak 2 Peak:

At some point, you’ll want to cross between Whistler Peak and Blackcomb Peak, and while you can return to the Whistler Village and ride the Excalibur Gondola to the Blackcomb side, you’ll have far more fun riding the Peak 2 Peak. Located between the Rendezvous and Roundhouse lodges, the Peak 2 Peak takes about 20 minutes to ride. This is a great time to adjust clothing and gloves, eat a snack, or simply warm up! The views are jaw-dropping (as is the height!). Your lift ticket includes the Peak 2 Peak, so take advantage of it!

Peak 2 Peak

Don’t be surprised if you experience less than 30 percent of Whistler Blackcomb in one day, and don’t be afraid to ride lifts all the way to the peaks (when open). There will be an easy way down option every time!

As I disclose whenever applicable, my family and I experienced Whistler Blackcomb as guests of the resort. While we appreciated this opportunity to share tips and advice with other traveling families, it not come with the expectation of a positive review.