The wonders of Wall Drug, South Dakota (in photos)

Have you stopped at Wall Drug, in Wall, South Dakota? If you’ve driven along I-90 in either direction, even hundreds of miles out, you probably have stopped. This fantastical roadside pit stop is absolutely worth a stop, or even a detour, to explore with the kids.

wall-drug

I was lucky enough to meet the third and fourth generation owners of Wall Drug, which is still owned by the original Hustead family. The story of how this sprawling place came to be is as uplifting as the place itself: in the 1930’s, when Wall Drug was the very humble, one-room Hustead Drug Store owned by Ted and Dorothy Hustead, customers were scarce, due to the Depression and drought. Faced with closing their doors, Dorothy Hustead came up with the idea of offering free ice water to passing travelers. She put up a few roadside signs, and the rest is history. Today, roadside advertising is still the #1 way customers find Wall Drug, and trust me, these signs are abundant…and entertaining on the interstate.

wall-drug entrance

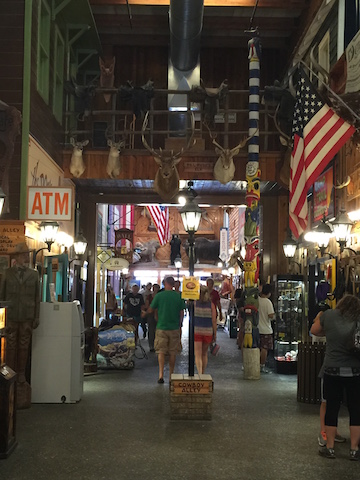
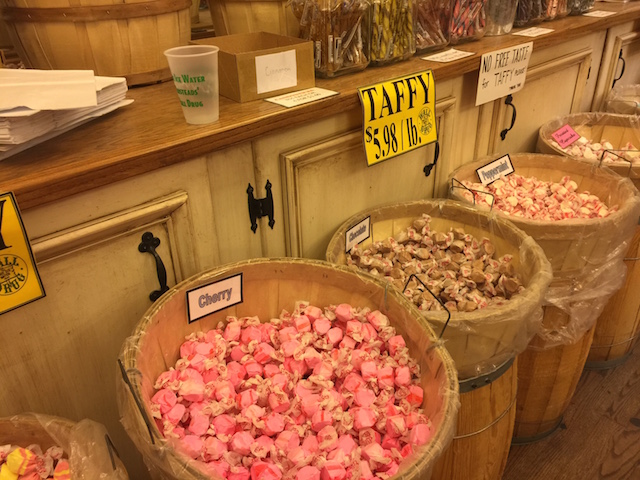
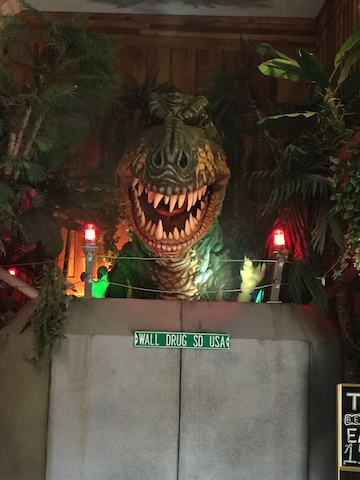
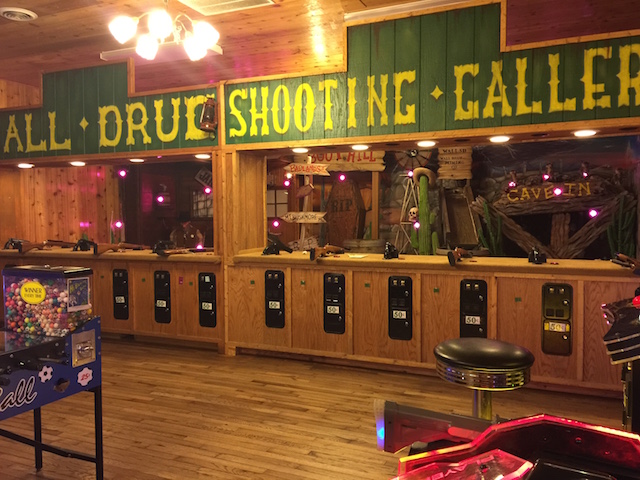
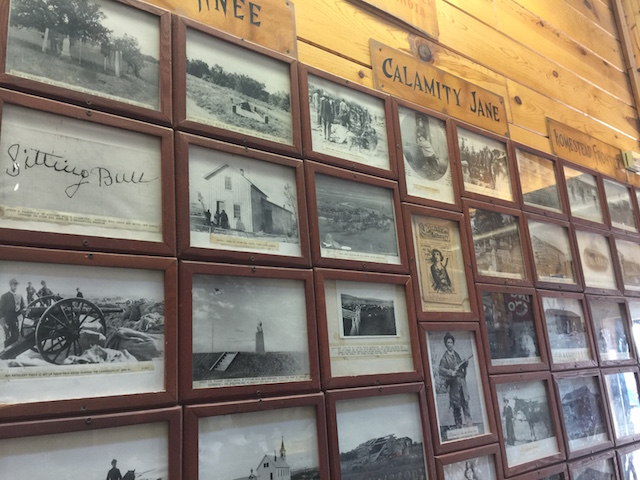
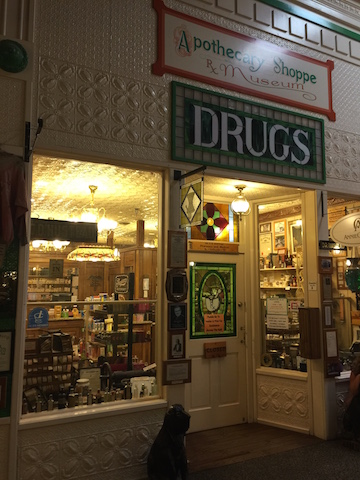
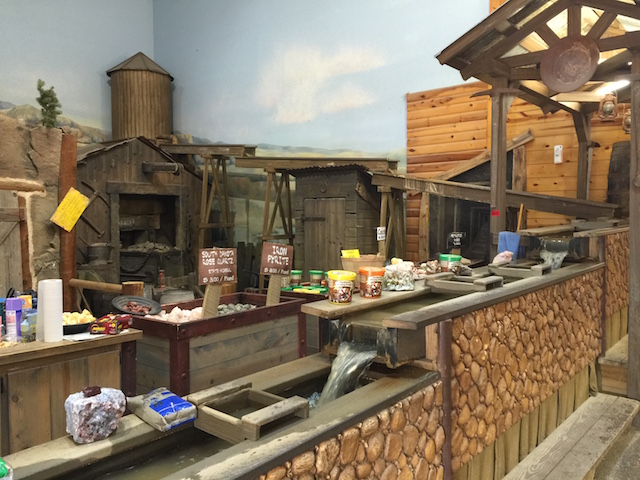
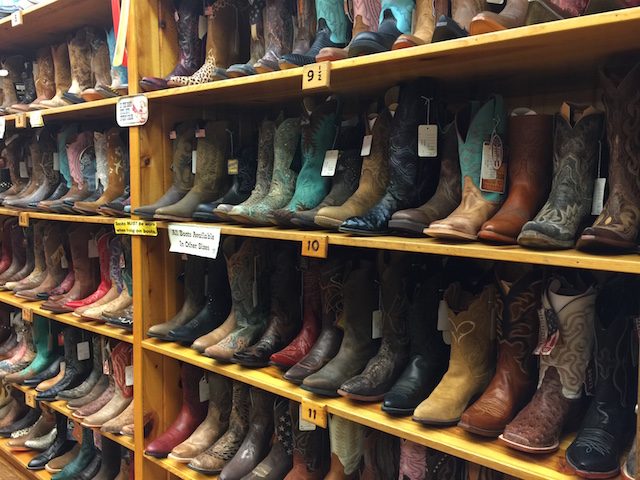
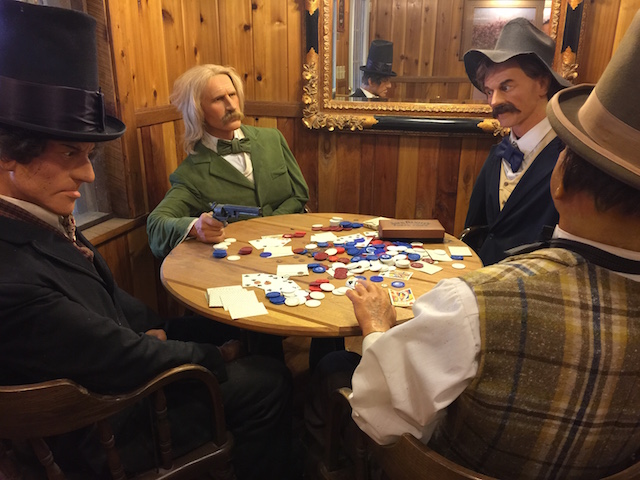
You can still get free ice water at Wall Drug, and coffee is still five cents. What else is there? Um…everything? There are departments for Western wear, jewelry, toys, clothing, candy, art, and more. There’s still a working pharmacy, plus a pharmacy museum of sorts, a mining attraction for kids, a play area with water features, a shooting gallery, an arcade, multiple dining options, a soda fountain, and thousands of historic photos of South Dakota history. Prepare to get lost a few times! Honestly, Wall Drug defies explanation, so we’ll show you the place in pictures.

wall-drug-candy

wall-drug

wall-drug

wall-drug

wall-drug

wall-drug

wall-drug

wall-drug

wall-drug

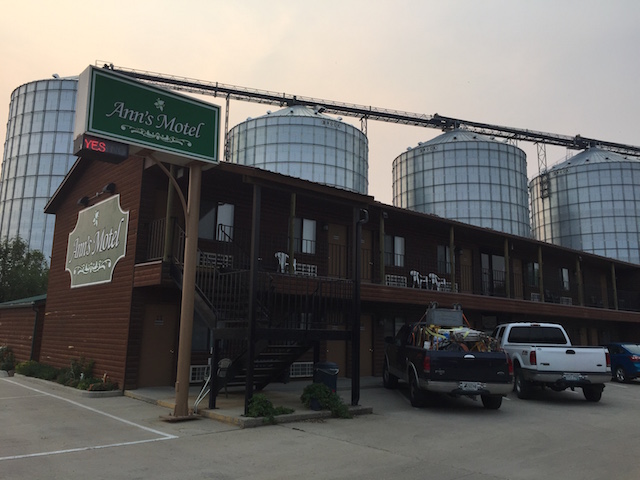
Wondering where to stay while in Wall? Head to Ann’s Motel. This charming throwback to bygone eras of road trip travel lodges is clean and affordable, and best of all, Ann still checks you in with a real key and a friendly smile. Ann’s is just down the street from Wall Drug.

anns-motel

While in the Wall area, definitely head to Badlands National Park!

Black Hills mountain biking for families

The Black Hills of South Dakota never fail to surprise…and impress. This western region of South Dakota is known as the home of Mount Rushmore, Custer State Park, and of course, for its Wild West history (Wild Bill Hickok and Calamity Jane called the Black Hills home). More recently, however, the Black Hills have been recognized as an emerging mountain biking region, known for its amazing range of trails that includes everything from accessible paths and great beginner terrain for families to more advanced trails for avid bikers . Here’s where to go…

black hills mountain biking

Mickelson Trail

george-s-mickelson-trail-652

Families looking to add some mountain biking to their Black Hills road trip or vacation should start with the Mickelson Trail. This 109-mile trail curves through several Black Hills historic towns, including Deadwood, Hill City, and Custer. It’s a rail trail, which means it follows an abandoned railroad line, and is therefore a good grade for family riding (in other words, it’s not too steep).

There are 15 trailheads at which you can start your rail trail journey, assuming you’re not going to do the whole thing. Along the way, trestle bridges and rail tunnels add fun for kids, and the scenery is always gorgeous as the trail cuts through the limestone and granite of the Black Hills. It’s easy to follow the Mickelson Trail for a full day, stopping for a nice lunch and some sightseeing en route.

We recommend: Take the section from Hill City to Custer, which is about 15 miles from the Burlington Northern Hill City trailhead to the Harbach Park trailhead in Custer. This map is a useful planning tool.

black hills

Alkali Creek Trail

Families who have intermediate riders and are ready for a bigger challenge than the flat Mickelson Trail may want to try Alkali Creek. The entire length of the trail is 18 miles, but there’s not too much elevation gain. From I-90, you’ll want to take exit 34 near Black Hills National Cemetery, turn right (north) and follow the road for about one mile. For a bigger challenge, try Terry Peak, which is located past Deadwood by the Terry Peak Ski Area in the town of Lead.

Hanson-Larsen Memorial Park Trail Network

For families with beginner and intermediate riders who want a trail system that has a bit of everything, and is based close to Rapid City, the Hanson-Larsen network is located just outside town and offers great views of the city. Head up Skyline Drive to find it (park at Founders Park on Omaha), and be ready for some elevation gains and losses. The circuits are short however, allowing families to tailor the length of the ride to suit. Note: The Skyline Drive Trail is located just past Dinosaur Park in Rapid City, but its trails are more advanced.

Where To Rent Bikes

For families not road tripping with their mountain bikes, there are numerous places to rent bikes while on vacation in the Black Hills. We rented bikes at Rabbit Bicycles in Hill City because this shop is directly on the Mickelson Trail, making it very easy to go from renting to riding. They also offer a shuttle service for families who want to go one way on the trail and then be transported back.

Alternatives certainly exist: If you think you’ll want to ride bikes in many locations, and are flying or driving into Rapid City, consider renting at ACME Bicycles or Black Hills Bicycles in Rapid City. We also noted rental locations in Spearfish and Sturgis.

Tip: Make sure everyone in the family has a properly fitting helmet while riding, as well as shin guards and arm pads for single track (not necessary on the Mickelson Trail). We recommend G-Form pads.

This post was written in partnership with Travel South Dakota, and based on my personal experience in the Black Hills region. Interested in traveling to South Dakota? Get a free travel guide!

Main Salmon River rafting trip with O.A.R.S.

The best—and nearly only—way to experience the 2.3 million acre Frank Church River of No Return Wilderness of Central Idaho is by whitewater raft down the Main Salmon River. The route along the Wild and Scenic section of the Salmon runs 80 miles and requires extensive whitewater experience and permits…or can be booked with an adventure outfitter like O.A.R.S.

oars-salmon-river

Why choose the Main Salmon with O.A.R.S.?

The O.A.R.S. Main Salmon River trip takes five nights, six days and delivers families through pristine high desert and forested wilderness. Multiple outfitters take this course, but we recommend O.A.R.S for many reasons, including stellar guest service, the comfort of good food and camps, and river expertise.

The Salmon River remains undammed for over 400 miles, and the Frank Church Wilderness is alive with prehistoric, native, and pioneering history, as well as wildlife. O.A.R.S. guides are knowledgeable about both, able to educate guests along the way with nature talks, history lessons, and wildlife spotting. If that’s not enough for you, this O.A.R.S. itinerary employs no fewer than five modes of transportation down the river: guests can ride in an oar boat, dory, paddleboat, inflatable kayak (called a ducky), or stand-up paddle board (SUP).

salmon-river

What to expect on the Main Salmon:

All five nights along the Main Salmon with O.A.R.S. are spent on sandy beach campsites along the river, with tents and sleeping bags and pads provided. Guests start the trip in McCall, Idaho, where a pre-trip meeting takes place the night before departure. This is the time to ask last-minute questions, get your dry bags to pack belongings in, and meet your trip leader. During our meeting, we met Trip Leader Diego, as well as the other guests on the trip. Diego gave us a weather report—our trip would be hot and dry—and final tips on packing—we’d need two water bottles each, plus lots of sun protection. Our trip included 11 guests total: my multigenerational family of two teens, myself, and my father, plus one more father and son, one mother with two sons, and one couple. In total, we had five kids ages 12-16 and six adults.

salmon-river

The next morning, our trip started at 7 am with an amazing chartered flight from McCall to Salmon, Idaho in 2-8 passenger planes. We watched out the windows as the rugged peaks and mountain meadows passed below us, knowing we were essentially being deposited into our wilderness area. From Salmon, a rather brutally long bus ride took us to the put-in point along the river, where we were set to depart at the start of the Wild and Scenic section at Corn Creek. We stopped along the way of this two-hour ride at a small store where we could purchase any extra drinks we’d like on the trip. O.A.R.S. provides enough soda, wine, and beer for guests to have approximately two drinks per evening; extra is allowed in moderation. We could also grab any extra items we’d forgotten at this point, such as batteries, sunscreen, sunglasses, or water bottles. All extra drink purchases become communal unless requested otherwise.

dory-rafting

Once we arrived at Corn Creek, we met the rest of our guides who’d be joining us for our week on the Salmon. We had a great crew, as I always have with O.A.R.S.: guides Amber, Morris, and Prester, as well as college-aged gear guides (rowing only gear, not guests) Rose and Dakota. All are essential to the trip and all interact with the guests. We got dialed in on rafting safety (Day 1 of any trip includes multiple talks on protocol and safety) and were on the river before lunch.

river-trip

We rafted only an hour or so before stopping to eat on a sandy bank, during which we learned about dining protocol—hand washing, water bottle filling, and trash clean up—and were introduced to the inflatable kayak ‘duckies’. These solo-passenger rafts are popular but require just a bit of skill. Anyone wanting to raft the river in duckies needed to take a ‘swim test’ before we left the lunch spot. This test involves paddling the ducky in an eddy, purposely flipping it over, and getting oneself back in in deep water. This sounds intimidating, but with tips from the guides, everyone in our group who took the test, from the teens to the grandfather, passed.

oars-rafting

We rafted another three hours or so, navigating through our first rapids, Killum, Gunbarrel, and Rainer, before landing at our first night’s camp. Here, we learned all about camping protocol, including how to create a ‘fire line’ to off-load the boats of gear (everyone helps) to how to set up our tents and where to find our sleep kits (which included sleeping bags, tarps, and pillows). We also became acquainted with the ‘Unit’ at this point, sometimes called the ‘Groover’. This portable toilet system is required by all rafting parties on the river as part of the Leave No Trace principles followed. It takes some getting used to if you don’t spend a lot of time in the outdoors, but embrace the Unit: after all, it’s the only option.

oars-camp

After setting up camp, we found ample time to play, swim, and get to know one another better through conversation over cold beers and sodas. Our guides surprised us with several beach toys brought out from the depths of the boats, including frisbee games and a fun washer game similar to horseshoes. A salmon dinner was followed by more community time around the ‘circle’ (of chairs), where adults conversed and kids brought out card games. Around 8 pm, the summer heat was broken by a spectacular thunderstorm and hail storm: we all dug out rain jackets and scurried to the sanctuary of our tents to wait it out. For most of us, this was the only night on the trip we didn’t sleep out under the stars and bright moon.

river-rafting-camp

The next morning, the coffee call came around 7 am, followed by breakfast of huckleberry pancakes, sausage, and fruit at 8 am. We packed up camp around 8:30, filled up our water bottles with filtered river water, and were back on the boats before 9 am. The next five days followed the same general routine: coffee call, breakfast, camp breakdown, rowing on the water interspersed with challenging rapids, hikes to historic points, or wildlife, lunch, more river time, arrival at camp, playtime both in the water and on the sand, appetizers and drinks, dinner, and community time. As guests, we set up our own tents and helped on and offload boats, but never cooked or planned any of the itinerary.

oars-food

Each day on the river brought something new: on Day 2, we floated past a hot springs (and would have stopped had the temperature not been nudging 100 degrees) and stopped to look at Native American petroglyphs, on Day 3, we toured a historic cabin and ranch once owned by river legend Jim Moore, on Day 4, we stopped at hermit Buckskin Bill’s homestead and store, and on Day 5, we hiked a short distance to an old-growth yew tree grove and the foundation of a Chinese mining claim.

oars-river-rafting

Each morning and at each lunch break, guests can decide which type of raft to ride in or paddle: I liked to alternate between the paddle raft, where guests help paddle, the dory, which sits higher on the water and cuts through rapids with precision and grace, and the duckies, which takes more concentration with bigger rewards. When we needed a break, we could sit back and relax on a gear boat, rowed by guide Morris, who regaled his passengers with stories and tales. The kids gravitated to Morris’ boat as well, but mostly clamored for time in the duckies and on the SUP (allowed in small rapids and riffles, after kids have proven themselves).

history-salmon-river

Evening entertainment took on varied forms as well: we played games of ultimate frisbee and card games, played in the water during kayak wars and SUP practice, and even made a ‘raft slide’ of an overturned paddle raft. During two magical evenings, we were treated to talks by the campfire circle on local history and conservation by geology teacher turned river guide Morris. Meals were excellent and varied from Day 1 to Day 6, and to a person, our six guides were hard working, fun-loving, and responsible.

oars-rafting

By Day 3, we’d hit a stride of river life that truly fell into pace with the current. Without screens or smart phones, we slowly felt the tethers of day-to-day demands fall away, to be replaced by a quiet rhythm of sunshine, river water, and fun companionship. By Day 6, we felt so acclimated to river life it felt odd to return to civilization: trucks on the road overlooking the river on the last day felt jarring after so many days without the sound of them and day trippers felt like intruders. While we were ready for a shower and to call loved ones with news of our trip, we never felt uncomfortable on the river: with some much time in the water, we didn’t feel as dirty or grimy as we might backpacking.

rapid-scouting-oars

Tips for a successful O.A.R.S. trip:

  1. Remember you’re in a communal environment. This means helping out with gear, respecting rules and people, being considerate (please don’t cut in line at lunch or take the best tent site every night), and acting to keep rafts and camp clean and safe. O.A.R.S. makes sure a hand-washing station (a rather ingenious bucket and hose contraption) is available before every meal and at every ‘bathroom’ location, and everyone is expected to use it to keep germs at a minimum in such an intimate environment. Parents, don’t just do all the above yourself; teach kids to follow rules and be considerate as well.
  2. Expect to follow Leave No Trace guidelines. This means all trash, even ‘micro-trash’ such as table scraps, must be disposed of in the designated containers, because everything packed in will be packed out. It also means you’ll be expected to follow Unit protocol, which does have some rules involved. For instance, liquid waste goes in a different place than solid waste, as does toilet paper and feminine products. Yes, this is gross to think about, but the sooner you leave your inhibitions behind, the better. The Unit is always set up in a discrete place at camp, and while it’s odd to go to the restroom in a place without walls or a door, it affords a beautiful view, and there’s a system to ensure some privacy. Wondering what the ‘Unit’ is, exactly? It’s a metal bucket with a toilet seat attached, which can be seated shut between camps. Does it smell? Not as badly as a pit toilet or port-a-potty. Is plumbing preferable? Sure, but it’s better than being the cause of waste left in camps that will be used by numerous rafters all summer.
  3. Follow the packing list. Our trip was a hot one, with days over 100 degrees, but I was still glad to have my rain gear when we encountered that thunderstorm. And you never know when the weather will change, so you can bet I had my fleece and base layers at the bottom of my bag, albeit untouched.
  4. Don’t expect showers, cell service, or cold water in your water bottle, though you can expect excellent, fresh food and cold drinks at the end of each day. It’s amazing what can be packed into the O.A.R.S. coolers: we had steak on our last night, and fresh nectarines our last morning.
  5. Bring two sun hats and two pairs of sunglasses each. Sunglasses get lost or broken easily, and sun hats are just to precious to be without. Sunscreen is crucial as well, of course.
  6. Don’t expect O.A.R.S. to control the weather or the river (though you can expect them to navigate it with expertise). The natural elements of any river trip must be respected.
  7. Expect rules. There’s an inherent danger in any whitewater rafting trip, and while many freedoms are afforded on the water and in camp, rules are in place for a reason. We found that when we proved to our guides that our teens would listen to and respect rules right from Day 1, more privileges were granted. We love rafting with O.A.R.S. because we feel safe, but not coddled. Our boys were able to push themselves on the water, rafting every rapid in duckies if they wished, and some on the SUP. They were able to explore around camp and even sleep solo on a beach around the corner from us. They loved the freedoms they’d earned.

oars-camp

A comparison of O.A.R.S. Salmon River to O.A.R.S. Rogue River:

Both river trips are excellent family trips, though the Salmon requires kids be age 12 and up in high water (spring and early summer). Both offer 5-6 day trips filled with incredible scenery, though the Salmon is largely high desert and canyon while the Rogue is more heavily forested with more dramatic canyon walls. We found the same level of guide service on both rivers.

On the Salmon, the trip begins with the scenic flight from McCall, a bonus treat, and includes rafting on dories in addition to rafts. Duckies and SUPs can be found on both rivers.

Ready to book? Get more generalized O.A.R.S. booking tips and read our Rogue River report.

As we disclose whenever applicable, we experienced the Salmon River as guests of O.A.R.S., for the purpose of review.

Road Trip Travel Hack: Stay nights at KOA Kampgrounds!

We love to review destination hotels and resorts, but let’s face it: roadside motels booked solely for the purpose of an overnight pit stop en route on a road trip are usually nothing to write home about. Plus, an average motel stay is now over $100 per night. In the last year or so, we’ve been thinking outside the box (or motel room) and booking cabin, yurt, or campground stays instead.

koa jackson hole

I know what you’re thinking: you don’t want to pack everything needed for a camping overnight during your road trip, right? And you’re not keen on the dirt and work involved, just for one night. But wait, we have a solution: campgrounds with cabins.

Many state parks and wildlife reserves have wonderful cabin or yurt options (check out this one right outside Yellowstone National Park), and most well-traveled interstates and highways now have KOA Kampgrounds en route. A number of years ago, I would not have considered staying at a KOA. But times truly have changed. We stayed at our first KOA in a decade two years ago, while traveling through Oregon to Mt. Hood in winter. We needed a low-cost, fun, and friendly place to stay the night, and a KOA cabin in Redmond fit the bill. Last week, we repeated the process, staying at a KOA cabin in Mountain Home, Idaho en route to Wyoming. Both of these cabins were listed as one of their standard options, which include electricity, heat, and beds for 4-6 people. They are not deluxe, and meals need to be cooked outside the cabin. Bathrooms are located in a different building close by.

koa-interior

For us, standard cabins work just fine. We usually have our own sleeping bags with us, and when we’re road tripping, we like to grab dinner out and eat a simple breakfast in our cabin that doesn’t require a kitchen. The Mountain Home and Redmond KOAs offered room to run around for the kids, a friendly community atmosphere, and the basic supplies we needed, like groceries, sunscreen, and bug spray in their stores. Some KOA locations aren’t anything special, but I’ve never experienced one that did not include a friendly, welcoming staff and clean amenities.  The rate is about half that of a motel room.

But what if you don’t want to rough it?

Try a KOA Deluxe Kabin! On our same Wyoming road trip, we stayed at the Jackson Hole/Snake River KOA in Jackson, and upgraded to a cabin with two rooms, a bathroom, and a full kitchen. Our cabin was located right on the Snake River, and when we arrived, the kids could immediately go play while we unloaded. We could cook our own dinner (the kitchen includes everything but an oven, and there’s a great BBQ, too) and sit outside at night, watching the stars come out instead of being stuck in a small motel room.

koa deluxe cabins

At KOA Jackson Hole/Snake River, there’s guided river rafting on-site, and in late summer, when the Snake River is running less rapidly, families can rent inner tubes to float down the river right next to the campground. The tent sites are located right on the banks (try to get site #1 for the best creekside playing) and the deluxe cabins overlook the river on higher ground. You can also opt for a standard cabin at this location, of course. We loved the friendly staff, and the fun activities on-site for kids. For instance: if kids find one of the painted rocks on property, they can turn it in for free ice cream!

deluxe-cabin

Deluxe cabins are as nice as you’d expect from an upscale rental home booking. Who knew? But be aware: these cabins can cost as much as, or more than, a motel room. It’s important to decide what your vacation goals are. If you’re booking primarily for budget reasons, opt for a standard cabin, and if you’re booking primarily for the outdoor experience instead of a motel experience, upgrade to a deluxe. Not all KOAs offer both, but you can get a good indication of the range of options by checking out the Jackson Hole camping cabin page.

koa-bedroom

What KOAs have you stayed in? Have your tried a cabin? We’d love your recommendations!

American Colonial and Revolutionary History Road Trip

Touring Boston, Philadelphia, and Virginia with kids!

Looking for a ready-made American history road trip itinerary? We’ve got it! This itinerary starts in Boston, MA and ends in Williamsburg, Virginia, and hit highlights of American colonial and Revolutionary history. Civil War history can be added, as well!

paul-revere-freedom trail

Days 1-3:

Start your trip in historic Boston. Walk the Freedom Trail, visit Faneuil Hall, and see Old Ironsides. Older kids will love seeing Paul Revere’s house and the historic cemetery.

Where to stay: be part of history when sleeping in the Custom House building, which is now operated by Marriott Vacation Club.

Days 4-6:

Drive down the Eastern Seaboard to Philadelphia to continue your Revolutionary history. In Philly, see where America began in Independence Hall where the Declaration of Independence was signed. Tour the Constitution Center, see the Liberty Bell, and visit the site of Ben Franklin’s home and offices.

Where to stay: Hotel Monaco Philly is located directly across the street from Independence Hall. Need we say more? 

valley-forge

Day 7:

Head out of Philly and stop at Valley Forge, PA. Spend half a day on the self-guided auto tour of Washington’s winter camp, including his officer’s quarters and many bunkhouses of enlisted men. In the afternoon, drive either to Gettysburg, PA to learn about the Civil War battle (plan to stay two days), or take the long road trip down to Williamsburg, VA.

colonial-williamsburg-with-kids

Day 8-10:

Spend three days touring Colonial Revolutionary City in Williamsburg, VA. Take the time to visit the various shops and tradesmen, eat in the pubs, and book an evening tour or two. Definitely walk from the Visitor’s Center to Great Hopes Plantation, and play RevQuest if you have older kids or teens.

Where to stay: Williamsburg Woodlands is within walking and shuttle distance of Revolutionary City, plus includes a splash play area, mini golf, and a pool. 

Day 11:

Devote one full day to touring Jamestown, VA. Located adjacent to Williamsburg, this original site of the Jamestown Settlement has two parts: the original national historic site, where kids can see ongoing excavation in progress, and the recreated historic settlement and fort. Take time to tour the museum as well!

colonial-american-history


If there’s time, round out your historic road trip with a visit to Washington DC to see the actual Declaration of Independence and the flag that inspired the Star Spangled Banner.

Georgia road trip: Five pit stops from the mountains to the coast

The following is a guest post by Sue Rodman, managing editor of 365 Atlanta Family.

Why rush to get to your destination when there is so much to see and do along the way? For those who like to enjoy the journey, we’ve put together a Georgia road trip that will take you on winding mountain roads, zipping along the highways, and cruising toward the sunshine coast. Yes, Georgia does have a coast, and we promise you’re going to love it.

Georgia road trip

North Georgia Route 76

Our journey begins in the North Georgia Mountains along the east-west Route 76, which is easy to get to from the north-south I-75 or I-85. This winding trail takes you through the friendly mountain towns of Ellijay, Blue Ridge, Blairsville, Hiawassee and Clayton. Here are some places you’ll want to get out and stretch your legs along this mountain highway.

Ellijay, Ga. This is the apple capital of the state. In fall, pull over at Red Barn Apple House for a peck and some apple cider. Note, Georgia’s apple season begins in late August and runs through the beginning of October.

Blue Ridge, Ga. About 15 minutes off Route 76 down Rock Creek Road is the Fall Branch Falls. This is a great family-friendly hike, and even young kids can make it to the lower falls section. The seclusion here is a nice break from the road.

Blairsville, Ga. Along Route 76 (also called Young Harris Hwy or Route 515) is a quick stop at Sleepy Hollow Enterprises. Explore the whimsical “fairy houses” made by this former Disney Imagineer, and then tour the store. The colorful creations will delight your soul.

Hiawassee, Ga. Along Route 76 in Hiawassee is the Georgia Mountain Fairgrounds. The Georgia Mountain Fairgrounds is open for year round camping along Lake Chatuge, but what it’s best known for are the big events it hosts every year, including the Georgia Mountain Fair, the Superstar Concert Series in the Anderson Music Hall, the Georgia Mountain Fall Festival and Georgia’s State Fiddler’s Convention. If you aren’t visiting during any of these events, check the website, they offer lots of smaller events too.

Clayton, Ga. As you make the turn to get on Route 23 toward I-85, take a break at the Clayton Pharmacy. Tucked inside this pharmacy is an old-fashioned soda shop with milkshakes, hot dogs, and more. I also read their egg salad sandwiches are awesome for packing on a hike.

georgia road trip

Atlanta Georgia I-75/I-85

Whether you take I-75 or I-85 south, they’ll merge together for a bit between Midtown and Downtown Atlanta. If you hit things during rush hour (could be anytime, depending on what’s going on in the city that day), grab a bite from the car hops at the Varsity. You’ll see the sign from the highway on the North Avenue exit. And if you want to spend more time in the city, choose from these 140+ Things to do in Atlanta.

In Atlanta you have two choices, stay on the highway or continue to follow the road less traveled and head east on I-20 toward Augusta where you’ll take Route 25 to Savannah. Along this route you’ll pass the antebellum towns of Social Circle, Madison and Rutledge. Stretch your legs with some shopping at Rutledge Hardware. My favorite things, like a 1940’s ledger, peanut warmer and letter from the 1800’s aren’t for sale, but you can get any number of other essentials. Do yourself a favor and go next door for a piece of buttermilk pie from Yesterdays before hitting the road again.

Middle Georgia I-16

If you’d rather take the shortest route possible to the beach, stay on I-75, but plan to make a pit stop in Macon to learn a bit about the city’s musical roots on a Rock Candy Walking Tour. Macon was once home to Little Richard, James Brown, and Otis Redding — and let’s not forget the Allman Brothers Band! — so there is plenty to see and learn from these local tour guides.

In Macon, you’ll veer off I-75 onto I-16 toward Savannah where you’ll pick up I-95 South. It’s worth a slight detour to Savannah to walk among the live oaks dripping with Spanish moss in the city’s many squares. If you only have a little time, combine a ghost tour with a history lesson and a meal at the Pirates House. Some say it’s a bit touristy, but we love the stories of drunken locals carried off to sea, and they have delicious fried chicken, plus pirate hats for the kids.

Georgia Coast Route 17

From Savannah you can take Route 17 for a back road path through the towns of Richmond Hill, Milton and Darien, or go straight down I-95 to the coast. Follow the signs to St. Simons or Jekyll Islands. On St. Simons look for tree spirits on a very unusual scavenger hunt. These spirits are carved into the live oaks around the island. Be sure to look for the lovely full-sized mermaid!

For a more structured outing, we love the Tidelands Nature Center on Jekyll Island. It’s a bit less flashy than it’s better known cousin the Georgia Sea Turtle Center (which is also excellent). Be sure to check out the special programs like guided kayak tours and dock studies.

Photo credit: Sue Rodman

Winter backcountry skiing: a stay with Cascade Huts

As soon as I was made aware of Cascade Huts, a system of backcountry cabins in the Mt. Hood wilderness near Government Camp, Oregon, I knew we had to review it! Set miles away from civilization, each of Cascade Huts’ three rustic cabins are situated along backcountry ski and bike trails accessible in winter from any of three area sno parks. Overnight guests snowshoe or cross-country ski in, stay a night (or two or three!), and hike out on any of several available routes.

Cascade Huts outdoor adventure

We’re avid backpackers, but even so, the idea of packing in overnight supplies (even to a shelter) in winter with the kids was intimidating. From the moment I contacted owners James and Don, my worries were set aside. James emailed me many times, answering all my questions in a very professional and knowledgable manner. One of the nicest things about the Cascade Hut system is its flexibility: guests can opt to hike a short or long distance, choose difficult or easier (note I didn’t say easy) terrain, and even navigate their own routes if they’re skilled in GPS navigation.

cascade huts

Since we’re not expert navigators, I asked James to choose the best route for our single overnight to the White River Hut. Because I was trekking in with kids who are new to cross-country skiing, and I’d be using the provided maps and directions instead of a GPS unit, he suggested we travel the historic Barlow Road from the Barlow Pass Sno-Park, on Highway 35 (longer in distance, but easier to navigate). On the provided maps, I noted that this route was marked as ‘intermediate’, as opposed to the ‘expert’ route also available.

Even so, the Barlow Road was no joke: we navigated the six mile wet powder trail (with multiple small creek crossings and over 1000 feet of elevation change) in just over five hours, needing to stop often to make adjustments, carefully cross creeks, and pick each other up! Luckily, we had planned to be on the trail most of the day, so we’d gotten an early start and made sure to have a picnic lunch ready for the route. Note: even in winter…especially in winter…make sure you include enough water for all members of your group, and keep hydrated.)

cascade hut

We arrived at the White River Hut before sundown, and trust me, it was a welcome sight! The kids (with their endless energy) made snow forts outside while we prepped the cabin: detailed instructions await you upon arrival, and include turning on the propane to run the heater, stove, and gas lanterns. The hut is 256 square feet and sleeps up to eight people. Four bunks line two walls, a third wall features a kitchen counter, supplies, and a stove, and the fourth houses the front door and wall-mounted propane heater. Small windows provide adequate light and ventilation (be careful of CO2 poisoning while using propane!), and a table and chairs provide a nice space to eat and play games.

Cascade Huts

While staying in Cascade Huts, there’s no need to overpack! I admit, we did just that; not being certain what would be provided (better safe than sorry), we packed in more equipment and water than necessary. Though there is no running water (or electricity), the cabin-side creek was running freely in February, and we were able to both pump clean water and boil snow on the stove for drinking water. In the cabin are sleeping bags (just bring liners), lots of board games (we didn’t need to haul in our poker chips and cards!), all kitchen utensils, pots, pans, plates, and mugs (could have saved pack space there!). Also stocked was a good first aid kit, toilet paper, a snow shovel, and plenty of extra gas cylinders for the portable heater. There’s also an outhouse about 40 yards down the trail, but we found it very difficult to access in the winter, due to a nearby stream.

Note: Summer guests are provided with food and water as well, but in the winter, it would freeze!

Once we figured out the propane and various features of the cabin, we were quite comfortable (cozy, even!) all night. It’s important to bring plenty of layers of clothing for each person, as drying out wet gear is tough. We brought two sets of gloves, hats, and under layers for everyone, and were glad we did, when we were caught in a snow/rain storm on our hike back out.

Barlow Road Cascade Hut

If you go:

1. Make sure you feel comfortable in the backcountry. The Mt. Hood wilderness is very remote, and all guests should be comfortable following topographical maps and/or GPS units. We had several maps as well as a compass, and used all three. You won’t get cell phone service at the cabin, but it still doesn’t hurt to bring one along. My iPhone didn’t get a signal (though my compass app came in handy), but T-Mobile BlackBerry phones or other smart phones might. Cascasde Huts does a great job of preparing guests (and putting them at ease), and every guest signs a waiver, which isn’t only due to liability, but also ensure their location is known on the date they’ve reserved the cabin(s), an important safety step.

2. If cross-country skiing or snowshoeing is new to you, take a trial run. Since we’re expert downhill skiers, we underestimated the difficulty of cross-country skiing. Though I grew up with the sport, it was Nate (12) and Calvin’s (10) first time, and there was a slight learning curve. The terrain to the huts is steep in places, involves obstacles like logs, creeks, and rocks, and shouldn’t be taken lightly.

3. If you need to rent equipment, go to MountainTracks in the nearby town of Government Camp. You can reserve what you need ahead of time online, making for an easy pick-up!

4. If you’re going the distance (six miles or more), opt for skis instead of snowshoes. Maps of all routes will be sent to you from Cascade Huts, but I also recommend picking up a snowshoe and backcountry trail map at MountainTracks.

Check out the Pit Stops for Kids’ Kid Cam video for a better glimpse of our experience:

Date last visited: February 20, 2012

Distance from the interstate: The Barlow Pass Sno Park (trailhead) is on Hwy 35 (just shy of Hwy 26). The area is approximately 1 hour from Portland, OR.

Nightly Rate: In winter, a Cascade Hut cabin can be reserved for $150 per night (for up to eight people). Additional nights (up to three) can be reserved for a discounted price. In summer, mountain bike routes are available, and prices start at $300 per person for a 4-day, 3-night itinerary that includes meals.

Directions: Depending on your route and hut destination, trailheads are located at any of three area sno parks. Our adventure began at the Barlow Pass Sno Park, located one mile from Government Camp on Highway 35. Be sure to get a sno park permit!

Thanks to Cascade Huts for providing us with one night’s lodging at the White River Hut. This compensation came with no expectation of a positive review.

Guide to skiing Breckenridge with teens (by teens)

Breckenridge Mountain is a huge ski resort with something for absolutely every type of skier and rider. On our latest trip, we went with our teens and pre-teen, who are all expert skiers and riders. I thought I’d let them tell readers their favorite places on the mountain from their perspective. If you have older kids and teens who like steeps and deeps, this is the post to read!

guide-to-skiing-breck

Note to parents with beginning skiers and riders: Breckenridge’s ski school is among the best we’ve seen, and entire sections of the resort are devoted to green and blue (beginner and intermediate) runs. While this is not the ‘Breck’ we’re covering in this post, learners will be right at home!

Guide to skiing Breckenridge, according to kids who like moguls, trees, and bowls:

The bowls above the tree line are amazing, but only if conditions are right. On windy days or when they’re not open, due to avalanche control, head into the trees! Our favorite tree skiing at Breck is probably the Windows off Peak 9. From the Mercury SuperChair or the E Chair, take the trail to Window 1 and 2, and ski through trees into our favorite place in all of Breck: the ravine bordering a creek! There are winding trails, jumps, and bumps here and it goes on for ages!

breckenridge-bowls

There is a lot of out-of-boundary terrain at Breck, and there are gates to access these areas in designated spots. Don’t duck the rope! At the top of Peak 9, there’s a gate where you can hike for about 20 minutes to access some fun stuff, but remember: you have to have a pack, beacon, and shovel with you (and a friend). Our parents’ rule is that we have to take an avalanche safety course before they’ll buy us beacons, so we had to skip this spot.

But: if you still want to hike to great terrain, there are places to do this without leaving the resort boundary. If Imperial chair is not running, we like to hike from Peak 9 at the top of E Chair to the Back 9. The hike is long and hard (about 20 minutes, but it feels longer and you’ll get sweaty) but then you get to ski down your choice of double blacks that haven’t been skied out. After the open bowls, you’ll end up in the same creek run from above.

For lots of steep, mogul runs, head to Peak 10. This was our mom’s favorite peak. Go left at the top of Falcon SuperChair, and try Black Hawk or Dark Rider (double black diamonds).

Breck-skiing

Peak 7 is an intermediate hill, but at the top is lots of good stuff you can access if Imperial is open. We also liked 6 Chair, which had more moguls and above-tree stuff, on the side of Peak 8.

There are several terrain parks, but be warned: the large and medium ones are HUGE! We like terrain parks but had to stay on the small one…which was like our medium one at home! You can find the small one on Peak 9, called the Highway.

If you like bowls with plenty of spots to find trees to run through, get yourself to the T Bar. Riding the T Bar can be tricky at first, but just watch the people ahead of you, and don’t forget to stay standing…you don’t sit on the T. It’s harder to ride for snowboarders than skiers. When snowboarding, we place the T closer to our hip than our behinds. Riding the T Bar is entertaining, too, because about 1 in 10 people fall off.

breckenridge

Even if you are a very good skier, Breck’s kid zones are a lot of fun. Look for the small terrain trails throughout the family zones and intermediate runs. We found one with a mock mine tunnel to ski through and one with an ore bucket. It’s just lots of fun.

Disclosure: We skied and rode Breck as guests of the resort, in order to report back on where to go for the best runs. All opinions are our own! 

Skiing in Utah: Eagle Point ski vacation planning

When planning a ski vacation in Utah, families are spoiled for choice. There are over a dozen major resorts in the Salt Lake City area alone, and many of them are probably on your radar. We love Salt Lake ski resorts, but before you make the decision to head to one of the big destination resorts of Utah, consider a little gem in the southern end of the state.

Eagle-Point

What is Eagle Point, where is it, and why should we go there?

Ready to get your Eagle Point ski vacation planning on? Eagle Point is a small, boutique ski resort just outside of Beaver, Utah. It’s about three hours’ drive from Las Vegas and Salt Lake City, depending on which way you’re coming on I-15, followed by a winding, steep access road that you’ll want to ascend in the daylight. I’m using the word ‘boutique’ in the sense that Eagle Point is small, personalized, and niche, not that it’s upscale…because it’s not. In fact, it’s delightfully rustic, with a rough-around-the-edges feel that makes me think of my childhood ski trips.

Why bring your family all the way to Eagle Point? The easy answer would be, price. Families can still ski Eagle Point for under $50 for an adult lift ticket (around $30 for kids), and the resort’s ski-in, ski-out condos are incredibly affordable. You could spend a week at Eagle Point for a fraction of the cost of a week at a larger ski resort. But an affordable price is not the full story.

canyonside-lodge

Eagle Point is a resort that still retains the friendly, everyone-knows-each-other, hey-welcome-back atmosphere that’s been lost in many places. When you arrive at the check in desk at Canyonside Lodge, you might just be checked in by one of the resort’s enthusiastic owners, and the friendly waitress at the bar just might be your ski instructor the next day. The relatively small staff all know each other and seem to interact like family, and the small size of the resort means your kids will feel right at home in no time.

Lodging at Eagle Point:

I stayed at a condo in Wooded Ridge, which is one of the condo development options at Eagle Point. There are a few full houses to rent, but otherwise, Eagle Point is all condos, many of which are ski-in, ski-out, or close to it. A free shuttle goes back and forth between condos and both base areas every 20 minutes.

Eagle-Point-loding

My condo slept at least five; we had a bedroom downstairs and a loft with bunk beds for three. It also had a full kitchen and living room with dining space, and ample storage space for ski gear. I loved the views of aspen trees from the outdoor balconies, and the fact that the kitchen was fully stocked with spices, cooking oil, all the pots and pans needed, a crock pot, a dishwasher with detergent, and a full-sized washer and dryer (also with detergent).

Tip: If you want to be close to Canyonside Lodge and its dining options and hot tubs, book a Canyonside area condo. You’ll be ski-in, ski-out on the Canyonside part of the resort. If anyone in your family is a beginner, however, you’ll want to start at Skyline, which will require a shuttle ride (this is explained in more depth below).

eagle-point

At Eagle Point, you’ll cook in your condo most of the time, so definitely stop in Beaver to buy groceries before coming up the mountain. There’s not much in the way of provisions once you’re at Eagle Point, with the exception of a small mercantile and a few dining venues (more on that in a minute). Condo renters have access to two hot tubs, which are outside behind Canyonside Lodge. There are bathrooms to change there, and a fireplace in the dining area where you can warm up after soaking.

wooded-ridge

Note: There is very limited cell service and no wifi at Eagle Point. I am told wifi is coming in 2018, but for now, plan to be off-line during your stay. Time to get out the board games!

Skiing at Eagle Point:

Eagle Point, like many Utah ski resorts, has two distinct sections, each with its own base area. The Canyonside Lodge, where you check in to your lodging, is the gateway to the expert terrain, served by Lookout lift, and a few miles up the road, the Skyline Lodge is where you’ll find the beginner and intermediate terrain, as well as the ski rentals and lessons. You’ll use the Skyline chair and Monarch chair on that side.

A ski tunnel connects the two sides, and there is a small amount of intermediate runs off Lookout chair, though not as many as we’d like. Everyone in your family really needs to be an expert skier or rider to have fun together for more than a few runs on Lookout. Gates off Lookout lead to backcountry terrain, in cooperation with the forest service, so that’s an option for expert skiers who are prepared to go outside the resort boundary.

eagle-point

Because the Skyline Lodge is at the TOP of the Skyline area and the Canyonside Lodge is at the bottom  of the Canyonside area, getting from Canyonside to Skyline requires a shuttle ride. (You can, however, get from Skyline to the Canyonside Lodge on intermediate terrain,  through the tunnel followed by a lift.) This would come in handy if the family divided up in the morning and wanted to meet for lunch.) From the Skyline side, it’s possible to ski down to most condos in the resort.

skiing-eagle-point

Note: Eagle Point is conservative about grooming runs. The Skyline area with beginner and intermediate terrain will all be groomed, but during my visit, only a few runs were groomed on Canyonside. This makes for a lot of non-groomed black diamonds.

Dining at Eagle Point:

For ski lunches and even breakfast, if you don’t prepare it in your condo, Skyline Lodge has the Skyline Cafe, which serves your basic ski fare. We found three options on the breakfast menu, plus coffee and drinks, and another handful of options at lunch. It’s counter service only. At Canyonside Lodge, the Outpost Grill has a full bar and dining room, with moderate pricing for burgers, wraps, and pizza, and slightly higher prices for steaks, salmon, and pasta dishes. It’s open both lunch and dinner. The food was good here, and I recommend eating out for dinner at least once during your trip, to save on the hassle of cooking in your condo.

Note: if you come back to Canyonside for dinner, remember that the free ‘mountain taxi’ shuttle only runs until 5 pm. You’ll need to drive your car or walk the short distance. 

What you sacrifice in the name of low lift ticket prices at Eagle Point:

Great value in pricing comes at a cost, of course. It’s important that parents know what they WON’T find at Eagle Point, so they can make an educated decision for their family. Eagle Point does not have:

eagle-point

  • Wifi or much cell service: you can get a cell signal at Skyline Lodge area, but that’s it for most carriers. Bring DVDs to watch in the condo, because you won’t have Netflix. You may not even be able to make a call or send a text, so plan accordingly.
  • Fine dining: the Outpost Grill is friendly and has decently good food, but it is not gourmet.
  • Convenient access to hot tubs or any access to a health center: the hot tubs at Canyonside Lodge are stand-alone tubs in the snow out back of the building, with a fun, low-key atmosphere. Close to your condo they are probably not.
  • Terrain for advanced-intermediate skiers and riders. This is a biggie: Eagle Point has a wonderful array of beginner and easy intermediate terrain at Skyline and incredibly steep, ungroomed expert terrain at Canyonside…but not too much in-between.
  • Easy access from lodge to lodge. (See explanation above.)

What you WILL get is challenging skiing at a great price, with comfortable, mostly convenient lodging and a down-to-earth vibe.

Getting here:

Eagle Point is located 18 windy, steep miles off I-15 past Beaver. Take the access road slowly, as it can be difficult in ice and snow. The commute on I-15 is easy from both Las Vegas and SLC.

I was a guest of Eagle Point for the purpose of review. All opinion remains my own.

Photo credit: Amy Whitley and Paul Marshall/Ski Utah

Where to ski in Utah: Brighton Resort

If you just read my post reviewing Utah skiing at Solitude Mountain Resort, you know that Brighton Resort is its closest neighbor, nestled right next door in Big Cottonwood Canyon outside of Salt Lake City. Both resorts offer incredible ski terrain for experts and backcountry skiers and snowboarders, both offer a friendly, local vibe, and both have enough skiable terrain for a family to be happy for days.

brighton-resort

Brighton Resort differs in that it does not offer on-site lodging, apart from private home rentals. There’s a big base area with a day lodge and a separate lodge with gear rentals and a snow sports shop, and a smaller lodge at an adjacent base area on the other end of the parking area. The resorts are only five minutes’ drive apart, so families can certainly stay in the Solitude village if they’re looking to stay in the canyon, and can even ski between the resorts with a resort hopper pass.

So who is Brighton Resort for?

Take a look at the Brighton mountain map, and you’ll see a sea of black diamonds. Like Solitude, Brighton is big and bold, with incredible pitches, glades, bowls, and backcountry for serious, expert skiers and riders. If you’re looking for challenge and seemingly endless skiable terrain during big snow years like 2017 has proven to be, you’ve found your place. But what if you’re a beginner or intermediate skier? The good news is that there are green circle runs even at the top of the resort, a nice touch for those who get tired of always being at or near the base while they’re learning. You’ll find green runs off the Snake Creek chair, and even off the Milly chair, which also has some of the steepest, deepest runs in the resort. Intermediate skiers and riders will want to focus on the blue-friendly Crest and Majestic chairs; this is also where you’ll find a surprisingly big selection of terrain park features.

If you’re an expert skier or rider:

Trust us, you could do laps all day on the Milly Express chair, and never get tired of the terrain. Your legs will, however, get tired. This chair was our favorite, with double-blacks on both sides of the chair, hike-to terrain along the ridge, and back bowls accessible for backcountry skiers with touring skis. Of course, all of this is dependent on conditions, and it’s essential to look at signage to see what’s open. This is big avalanche country, and the mountains should be respected.

Brighton

Over on the Great Western chair, some of the steepest pitches take you down wide, mogul-filled black diamonds, and there are more tree glades with powder stashes along the far end of the resort. However, some of my favorite skiing all day at Brighton was found in what I deemed the ‘peaceful powder forest’, located near the top of Snake Creek and Crest. The woods here seemed to go on and on, with lots of powder between the trees and a more relaxing pitch.

If there’s less snow, you’ll definitely find less variety, but even then, the groomers along Crest and Big Western and Milly proved excellent. I loved the rollers and gentle curves to these runs, which got great sun throughout the day. We opted to break for lunch at the base of Milly, where the newest lodge of Brighton was far less crowded and offered excellent burgers and soups.

Planning your day at Brighton Resort:

As noted above, there is no overnight lodging at Brighton, so it will probably be a day trip for you. If you’re driving up Big Cottonwood Canyon (i.e., not staying at Solitude or in a nearby home rental), plan at least 25 minutes on an average day, and up to an hour on a holiday weekend…the traffic goes slowly on really great ski days.

Tip: Big Cottonwood Canyon is 15 miles of pretty curvy, mountainous roadway, and 4×4 drive or chains ARE required fairly regularly. You can opt to take a bus from the base of the canyon, where there’s a convenient park and ride parking lot for your car.

Because Brighton Resort is a day use resort, the parking lot does fill up on busy days. We skied Brighton on a holiday weekend after a big dump of snow, and were glad we arrived just after 9 am…by 11 am, the parking lot was completely full and people were parking on the road.

brighton-resort

Lift tickets are under $80 per day per adult, which is relatively reasonable, by ski resort standards. Better yet, you can ‘reload’ your day pass the next day for $10 less. Kids 10 and under are FREE at Brighton, which is a fantastic perk. To save money, consider a Brighton pass if you plan to ski regularly there, because it includes free ski bus access, or, if you have a pass elsewhere, see if it’s a M.A.X. Pass resort and do a M.A.X. Pass add-on for the best value. You can get a Solitude-Brighton ticket for under $100, and ski between the two resorts, but I bet you’ll have enough to keep you busy right at Brighton.

Pin it for later!

Why Brighton: Top resorts for experts

Disclosure: I visited Brighton as a guest of the resort for the purpose of reviewing M.A.X. Pass resorts. All opinions are my own.