Camping in Death Valley National Park: Furnace Creek Campground review

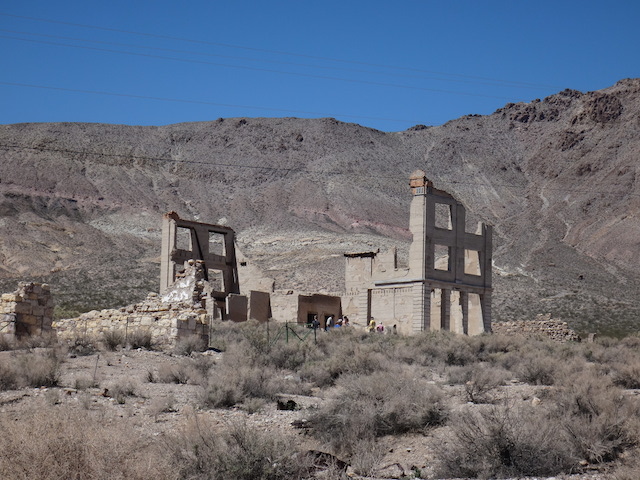
We love Death Valley National Park’s Furnace Creek Ranch, but as room rates for this family-friendly Death Valley lodging option rise (justifiably…it’s a great place to stay), we’ve been exploring camping in Death Valley. Here’s what we discovered about fantastic Furnace Creek Campground!

furnace-creek-campground

Families have their pick of several Death Valley campgrounds, including Stovepipe Wells campground, and all fill up fast in the primary season from February through May. Families with RVs or trailers may do fine at one of the more exposed first-come, first-served campgrounds, but for tent camping in Death Valley, Furnace Creek Campground is the clear choice.

Families can reserve a site at Furnace Creek Campground up to six months in advance, and I highly recommend doing so. The campground is comprised of both hook-up rv sites and tent-only sites, with the tent sites sectioned off in their own walk-in loop. (There are also a few drive-in tent-only sites, but they are directly adjacent to RV spots.)

The walk-in loop includes sites 115-150, and offers the full range of site quality: from fully-exposed and completely non-private to shaded and reasonably secluded. After spending four nights tent camping in Furnace Creek Campground, we recommend sites 133, 134, and 130 as prime location, with 121, 120, and 119 coming in a close second. These sites offer the most shade and comfort. It’s important to note that while these tent sites are labeled as ‘walk in’, the distance is only a matter of feet from the sites to the parking area. It’s also worth noting that sites are organized three deep: if you’re in 134, for instance, you’ll walk through the camp of 131 and 133 before arriving at your site. We disliked this structure, but it’s the nature of the beast: the desert terrain is wide and open. A walkway would be welcome, however.

furnace-creek-campground

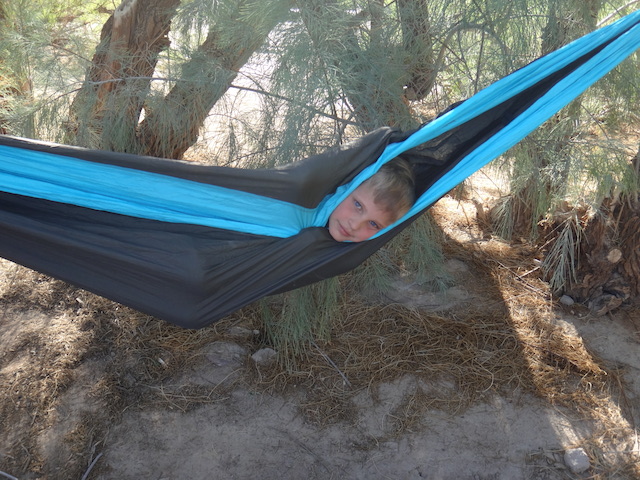
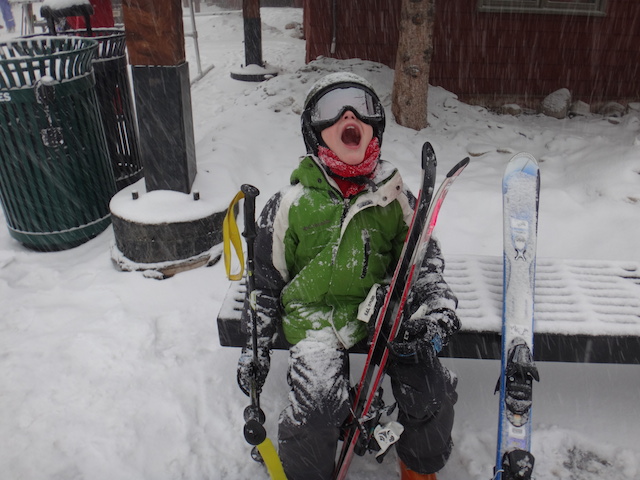
In our site of 133, we had three alcoves shaded by mesquite trees for smaller tents, space for a large tent, and room to hang two hammocks. While we wished for more space from our neighbors, everyone camping during busy spring break in this section of the campground was respectful and fairly quiet, as patrons of tent-only sections of national park campgrounds tend to be.

Amenities you need to know about:

Every loop at Furnace Creek Campground has restroom facilities with flush toilets, sinks, and water stations for filling drinking water containers, doing dishes, and the like. There are no showers. Every site has a fire pit with grate, and firewood can be bought at the Furnace Creek Ranch store. Garbage bins are located at the end of the tent-only loop, as well as camp stove fuel recycling bins.

Want more camping info? Get Pit Stops for Kids’ camping gear list!

The Furnace Creek Visitor Center is located adjacent to the campground, and offers an amphitheater, evening campfire programs, the Junior Ranger program, and a nice video overview of the park. This is definitely worth being your first stop.

Bonus! Using Furnace Creek Ranch facilities:

furnace-creek-pool

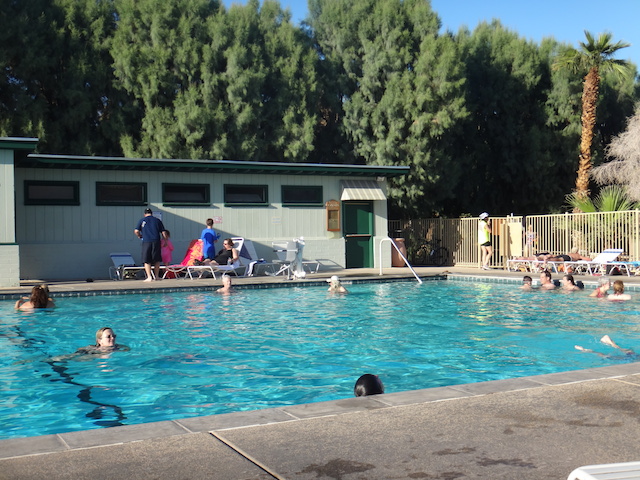
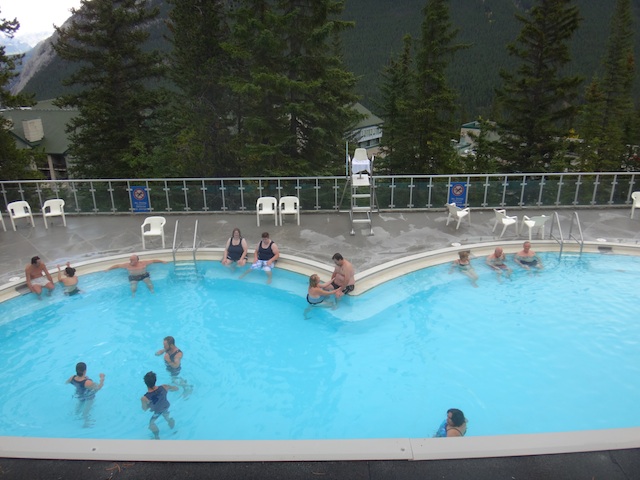
The campground is a five to ten minute walk from Furnace Creek Ranch, which houses motel-style rooms, a few restaurants, a general store, gas station, and a park-like setting with tennis courts, lawn games, a basketball sport court, and spring-fed swimming pool. Can campground guests use these facilities? Yes, but read on for details:

Obviously, the store and restaurants are open to all (more on that below), and while technically the tennis and other sport facilities are designated for ranch guests, there’s nothing to stop campground guests from enjoying them with their own sport equipment.

To use the Furnace Creek Ranch pool (which you definitely will want to do), campground guests need to buy day passes from the Registration building. Passes are on a first-come, first-served basis, so it’s worth stopping in during the morning before heading out to hike or otherwise explore the park. Use the pass in the afternoon. The pool house also houses showers, so take advantage of that amenity as well.

Tip: Don’t forget about gear! Everyone in your family will need quality hiking socks, and you can get additional camping and hiking gear information in our travel gear section!

Dining:

Obviously, campers will be cooking most meals in camp, but a dinner or breakfast out at Furnace Creek Ranch can be a welcome treat. Expect higher prices at the 49er Cafe (and even higher at the buffet restaurant next door), but you’re paying for the convenience of skipping dish washing, right? Fare ranges from burgers to pasta and steak dishes, and breakfasts are typical: omelets, griddle favorites, etc. There is no kids’ menu at breakfast, so consider ordering for young children a la carte. Grab dessert from the store next door: they have a soft-serve station we enjoy. You can also grab perishables here, such as milk, ice, and cold drinks.

Distance from the interstate:

Furnace Creek Campground is on Highway 190, about 30 minutes from Beatty (Highway 95).

Rates:

Tent-only sites were $16/night at the time of our visit. (Room rates at Furnace Creek Ranch were approximately $225.)

Directions:

From Highway 95 at Beatty, follow signs to Death Valley National Park (along Highway 190).

Death Valley National Park with kids: top hikes for active kids

We love exploring Death Valley National Park with kids! And no, you won’t swelter in the heat if you follow our tips! After our fourth visit with kids (stay at either Furnace Creek Ranch or Furnace Creek Campground), we’ve narrowed down our list of favorite Death Valley hikes to our top three. These hikes–detailed below–are best for active, school-aged kids who love exploring, climbing, scrambling, and otherwise giving their parents heart attacks.

Tip: For younger kids, we recommend attempting the same hikes, but adjusting expectations of hike length.

Golden Canyon to Zabriskie Point and Glower Gulch:

golden-canyon-death-valley

The hike up Golden Canyon to the lookout area at Zabriskie Point is 2.5 miles one-way, but multiple alternative routes exist to make it either shorter or longer. If you have two cars, the shortest route is to park one on each end and do the hike one-way. To extend the hike, travel the 2.5 to Zabriskie, then backtrack one mile to the Glower Gutch turn-off, which returns you to the parking area via a different canyon. The Glower Gutch section takes families along a dry wash and then into a very narrow canyon with plenty of scrambling down a dry waterfall. The last 1/2 mile is exposed as you hike along the Alluvial Fan of the mountainside back to the car. The trailhead starts on Hwy 190 just past Furnace Creek Inn.

glower-gulch-mine

What active kids love: the Golden Canyon section of the hike comprises of the first mile or so, and offers lots of exploring up side chutes of the canyon. Kids can scramble nearly to the top of the canyon along these routes. Further up, the trail skirts Manly Peak then offers alternative trails along the ridges of smaller fans (parents can see kids from the main trail). When it gets steep, it’s time to return to the main trail up to Zabriskie. At the beginning of the Glower Gutch section, kids should keep an eye out for a man-made stone wall. Around the back of it exists the entrance of a deep mine tunnel (barred now, to keep humans out and allow access for bats).

Mosaic Canyon:

Mosaic Canyon is one of the most beautiful canyons in the park, with challenging scrambling at the beginning before opening up to a deep wash. The first half of the hike is shaded in the canyon, but the second half is definitely exposed. The hike is just a few miles each way, but you’ll want to stop often to let kids explore.

mosaic-canyon-death-valley

What active kids love: Rock scrambling and climbing abounds in Mosaic Canyon. Numerous side trails take hikers to narrow ridges (careful!) and the beginning of the hike offers challenging climbing for those who seek it. (Otherwise, it’s fairly easy to manage on the main trail.) In the wash, the side trail to the right (as you go up) offers a thrilling walk along the edge of a fairly steep side canyon.

Titus Canyon and Falls Canyon:

Titus Canyon is often driven (26 miles or so from the one-way entrance), but can also be hiked from the ‘exit’ side. The trailhead is located en route to Scotty’s Castle and Ubehebe Crater (also great stops), and families can go as far or short a distance as desired. The steep canyon walls are fun to play on, though be aware that cars can drive past. (They are easy to hear coming, however.) For an alternative without cars, try Falls Canyon, accessible from the same trailhead. Backpackers enjoy this canyon, but it will largely be empty. Either is a one-way route for most families.

titus-canyon

What active kids love: The rock climbing possibilities are more like scrambling here, with kids able to reach impressive heights without much effort. Just be sure young kids don’t get so high that they’re afraid to get down! Geodes can be found in this canyon as well.

Tip: For a non-hike that feels like a hike and looks like a hike (but doesn’t involve a set trail), take kids to Mesquite Sand Dunes near Indian Wells. The trek from the parking lot to the highest dune is 2 miles, but kids can pick their own path (and go up and roll down as many dunes as they’d like in the space between). Bring plenty of water and a hat for shade, as this ‘hike’ is 100% exposed.

For all Death Valley hikes:
Plan to hike early in the day, exiting most trails by lunchtime. Wear sun protective clothing and hats, and insist on everyone carrying water.

Bonus pit stop!

rhyolite-ghost-town

A trip to Rhyolite Ghost Town on the edge of the national park is well-worth a stop on the way in (near Beatty). Kids can explore ruins at-will for the most part, and there’s a short walk to a mine tunnel on the hill outside the ‘town’. Kids can also check out a jail cell and a brothel (whether you explain that last one is up to you!). There are no services here expect toilets, but it’s a nice place to picnic. Beware of rattlesnakes!

Tip: Wondering where to stay in Death Valley National Park? Read our reviews for Furnace Creek Ranch and Furnace Creek Campground.

How to spend two days in Banff National Park, Alberta

Hopefully, you have more than two days to explore Banff National Park with kids, but if you are limited on time, here’s what you should do first.

Whyte Museum of the Canadian Rockies:

Whyte Museum is a great place to start. It may be small, but does an excellent job with both an art gallery and exhibits detailing the history of the park, starting with the First Nations’ presence and continuing through the establishment of the park and the role of the Canadian Pacific Railroad. When you enter, you first walk through the art gallery, which showcases Banff’s rich art history. An interesting section covers mountaineering and climbing in the park, as well as the practice of heli-skiing and backcountry winter exploration. The museum is fairly small, but you’ll still want at least 45 minutes to tour. Best of all, admission is by donation. Whyte Museum is located at 111 Bear Street.

whyte museum

Cave and Basin National Historic Site:

Cave and Basin marks the birthplace of Canadian national parks, with the discovery of a hot springs underground by railroad employees (of course, this cave was not a new discovery to First Nations’ tribes). Now, this hot springs is closed to swimming due to preservation of a species of snail, but visitors can learn about the history of the site and the creation of Parks Canada in exhibits in the former bathhouse changing rooms and see the site of the former pool. You can also walk through a tunnel to see the still-bubbling sulphuric water in the original cave, as well as view the outdoor basin where the water pools. Admission is affordable, and there are boardwalks adjacent for a short hike around the site. Plan to spend about 45 minutes, then head to Banff Upper Hot Springs, where you can swim in even warmer waters. Cave and Basin is located at 311 Cave Avenue.

Banff Upper Hot Springs:

The Upper Hot Springs features a large outdoor pool located at a historic Banff bathhouse (that now also houses a spa). The temperature of the water is a respectable 104 degrees (40 C), and admission is very affordable. We forgot a bathing suit, and found out traditional bathing costumes of the ’20s and ’30s can be rented for just $1.90…fun and a deal! You can also rent towels, and there are large, clean locker rooms for changing. If you want to stay awhile, there’s a cafe upstairs in the bathhouse, and hiking trails nearby. If the weather is clear, pair an afternoon at the hot springs with a ride up the gondola, located nearby. Banff Upper Hot Springs is located on Mountain Avenue.

Banff Upper Hot Springs

Surprise Corner:

So named for the surprise view of the beautiful Bow Valley and Banff Springs Hotel, this corner along Tunnel Mountain Road has a dedicated pull out and parking lot and observation deck. Take some photos and tell the kids about the role the hotel and the railroad had in Banff tourism (the hotel was built to lure rail passengers to the area). Look for wildlife here!

surprise corner

Hoodoos:

The Hoodoos feature geological formations similar to those found in Bryce Canyon in Utah, but more enticing is the amazing view of the Bow River and valley. Park and take the short walk to the viewpoint, bringing binoculars along; during our visit, we spotted elk grazing by the river bank far below. The loop hike starting from this location is a great option for wooded terrain and the chance to spot wildlife.

hoodoos Banff

Sulphur Mountain:

For a longer, more challenging hike that’s still close to town, the 11 km round-trip up Sulphur Mountain includes winding switchbacks for amazing views of the Bow River and valley. At the top, walk over to the Cosmic Ray Station (used to take meteorological readings) and take the gondola back down to save some distance.

Tunnel Mountain:

Tunnel Mountain is located near the heart of the town and takes families up a fairly steep but short hike to the top of–you guessed it–Tunnel Mountain. The distance is 4 km round trip. The main draw? The view of the town of Banff from the top. Due to use, you’re not likely to spot a lot of wildlife on the Tunnel Mountain trail, but it is guaranteed to give you a good lay of the land.

Lake Minnewanka:

During summer, Lake Minnewanka is the place to go for canoe rentals, a guided boat ride, or picnicking. During fall, it’s far less busy, and can get windy (ask to hear the First Nations’ legends surrounding this lake), but is a good place to spot big horn sheep, and, if you’re lucky, mountain goats. Take the short drive a bit further to Two Jack Lake for even more seclusion in the off-season.

Tip: If you have more time, booking a tour with Discover Banff Tours is a good way to get oriented and learn more about the park and its wildlife. The three-hour tour may be too lengthy for very young kids, but school-aged kids will enjoy the wildlife talks, and parents will get a feel for which destinations they’d like to revisit on their own time.

Wondering where to stay in Banff? Our Banff National Park hotel pick.

As I disclose whenever applicable, portions of our activities in Banff were hosted for the purpose of review. All opinions are our own.

Dinosaur National Monument with Kids

Spanning both Utah and Colorado, Dinosaur National Monument is a national park destination too massive to tackle in a day, or even a few days. During our visit, we opted to check out only one section of the park, on the Utah side, but we tasted just enough of this park to know we’ll be back. Here’s how to plan a trip to Dinosaur National Monument with kids:

Know the lay of the land:

There are two visitors centers in the monument: Quarry and Canyon, which also represent the major points of access to the park. Quarry is located on Highway 40 in Utah near Vernal, at Jensen. It’s a short drive from the highway. Canyon is located further east on 40 on the Colorado side, with Deerlodge Park even further east. The Gates of Lodore access is on the opposite end of the park, to the north off 34 in Colorado. The entire park is filled with rivers and canyons (the Green River as well as the Yampa). Here’s what to do at each section.

Quarry:

This is your spot for viewing the dinosaur fossils Dinosaur National Monument is known for. Start at the visitors center and watch the short film on the discovery of dino fossils, then check out the exhibits until you’re ready to board the free open-air shuttle to the Quarry Exhibit Hall. This is a must-do: here, you’ll see the great wall of dinosaur bones embedded in the rock (preserved in this way so visitors can see how the ‘log jams’ of bones came to be, under layers of soil). You can even touch some of the 149-million-year-old fossils. Additional exhibits explain what you’re looking at, as do park rangers on duty.

After shuttling up to the exhibit hall, we recommend taking the short Fossil Discovery Trail on the way back down. It’s not shaded, so plan on this one early in the day, but it’s downhill, and there are three spur trails that will lead you to more fossils and even some petroglyphs along the trail. Take the free audio driving tour next, which leads you to more petroglyphs, or the longer Sound of Silence Trail or Desert Voices Trail. Shaded picnic areas are adjacent to the visitor center.

Canyon:

Aptly named, this is the gateway to Dinosaur National Monument’s canyon country. There are no dino fossils in this section of the park. You can drive the 31-mile Harpers Corner Road and hike a Harpers Corner (a short hike suited for kids). This section of the park is open seasonally however, as it gets very wet and sometimes impassible.

Deerlodge Park is the launching point for Yampa River trips, whereas the Gates of Lodore area is the launching point for Green River trips.

If you want to add a river rafting trip to your exploration of Dinosaur National Monument, we suggest going on OARS Rafting’s Gates of Lodore or Yampa rafting trip, to be fully immersed in the park in ways not possible by car on one’s own.

Guide to Iceland national parks

Nearly ALL of Iceland looks like a national park, so families can’t go wrong finding beautiful outdoor experiences on an Iceland vacation with kids. But Iceland national parks do pack in a lot of interesting natural features you won’t want to miss. Here’s what to see in each.

guide to Iceland national parks

Þingvellir National Park:

Þingvellir is easily accessed from Reykjavik, and is located on the Golden Circle, so expect to share space with plenty of tour buses. However, it’s absolutely worth the trip. Start with the main attractions: the rich Viking history in various sites and the location where you can see the shifting of the tectonic plates (over the course of millions of years). There are several walking paths here (we wouldn’t quite call them hikes), the largest of which will take you up to a viewpoint (which is where they put the visitor center and parking lot, disappointingly) where you can see the deep ravines cut into the landscape. Taking the other paths, you can see Drekkingarhylur pool, the site where women were once drowned for offenses such as adultery, and the waterfall Oxararfoss.

Iceland national park

Next, explore the valley and lake, where you’ll see the historic sites, including one of Iceland’s first churches. Along the Oxara River, you can find the ruins of Viking camps, called budir.

Top extra activity outside the park: Laugarvanshellir Cave People Tour

This lovely tour is still unknown to most tourists (as its new in 2017). Located outside the park on 365 toward Laugarvatn, you’ll see the little house (think hobbit house) cut into the hillside before you arrive at the small parking lot. Go into the tent that houses a small tea room to purchase a tour, which is led by an enthusiastic guide. In fact, days later, our kids commented he was their ‘favorite Icelander they’d met’. The tour takes about 40 minutes, and takes you up the hillside to see the cave an Icelander couple made into a rudimentary home at the turn of the 20th century. Later, another couple inhabited it for a short time. The single room house is historically restored, and includes a sheep barn and cow barn built into the rock. While it’s interesting the see the house, the story behind it is even more fascinating; this really is a story of Icelandic pioneering. Learn more at http://www.thecavepeople.is

iceland cave people

Vatnajokulsthjodgardur National Park:

This was our favorite Icelandic national park, thanks to its dramatic volcanic history and glacier. The visitor center at Skaftafell has a lot of good information: start here and pick a day hike to try. We opted for a loop of about 6 km that took us high up the mountain to spectacular views of Iceland’s largest glacier, Skaftafellsjokull, then cut along a high ridgeline to dip back down to stunning Skaftafoss (certainly a highlight of the park). You can opt for shorter hikes, or longer ones, but for any length, be sure to pack many layers for all types of weather, as you’ll be completely exposed to the elements (as you are in most of Iceland).

Glacier tour operations are located in the parking lot of the visitor center, which can take you onto the surface of the glacier for about $40-60 per person. You are not permitted to walk on the glacier without a guide, as fissures and cracks can be unpredictable. We opted to skip the glacier tour and were satisfied with our excellent views via the hike.

This national park is pretty massive, and offers plenty of F-road goodness for those venturing north, but families can certainly get a feel for the area from the southernmost Skaftafell entrance without venturing beyond Jokulsarlon glacial lagoon.

Top extra activity outside the park: LAVA Centre

Before you enter the national park, stop at the brand new LAVA Centre located at Hvolsvollur. This highly interactive, tech-heavy museum answered a lot of our questions about the geothermal and volcanic nature of the region, which really helped us understand the lava fields, glaciers, and volcanos we saw the following days. The fairly steep entry price (still on par with entry to other museums we visited) is well worth it: get the family pass if it applies to you, to save some money.

LAVA Centre

The museum is divided into several rooms you walk through in order, each with hands-on activities and digital displays. It’s truly hard to describe how great these exhibits are, but I’ll try: one room mimics the properties of ash, giving you a taste of how it feels to be blinded by it in an eruption, and another room allows you to spin a giant globe, showing the shifting of tectonic plates over millions of years. Start with the 15 minute film and follow the map through the rooms from there. All displays are in English.

Snæfellsjökull National Park:

Located on the west side of Iceland on the Snæfellsnes Peninsula, Snæfellsjökull features a big daddy volcano (unfortunately covered in cloud during our visit), as well as black sand beaches with interesting rock formations, caves and lava tubes, and cinder cones. The park is located past the fishing village of Olafsvik, with a visitor center located at the space ship-looking lighthouse about three-fourths of the way through the park. See great views of the ocean and sea stacks here, then book a cave tour a few meters down the road. If you don’t want to spend the money (it’s not cheap), do as we did and take the short self-guided tour of the main cave entrance. All around the cave are smaller lava tubes you can (but probably shouldn’t) climb into.

Iceland

There’s also a well-marked cinder cone in the park, which is an easy climb with metal steps, and affords great views. We loved that at the top, a circular plaque names all the nearby mountains and volcanoes so you can identify each one.

Top extra activity outside the park: Settlement Center 

At the bottom of the peninsula, you’ll first enter Borgarnes on 60. Go to the Settlement Center, one of the best museums in the region. It’s located by the harbor in a warehouse, but inside, you’ll see the history of the Icelandic settlement era and learn more about its famed Sagas.

Where to ski in Utah: Brian Head Resort with kids

Deciding where to ski in Utah is a little like deciding which tropical island to buy…you really can’t go wrong, wherever you choose.  That said, there are distinct differences between Utah resorts, and perhaps an even bigger difference between Salt Lake City and Provo area resort and Southern Utah resorts. For the first time, I explored the skiing options in Southern Utah, where I loved the friendly, relaxed, and sometimes almost eccentric vibe.

brian-head

Brian Head Resort with kids:

Brian Head Resort has the highest base elevation in Utah (you’ll be at over 9000 feet at all times, and up to 11,000+ feet while skiing). It offers 650 acres with eight chairs. It’s not the largest Utah ski resort, and also not the most challenging in terms of expert terrain, but it has something distinct going for it that really plays in its favor: isolation.

brian-head

Because Brian Head is pretty far from a metropolis (you’re 3.5 hours from SLC and 3 hours from Las Vegas), your closest neighbors during your stay are national parks and monuments. Brian Head has the distinction of being a Dark Sky location, which means you’re free from light pollution. All this isolation means Brian Head Resort makes its own fun. Events, apres ski dining options, live bands, and special programming seems to be scheduled for just about every night. Need proof? Just take a look at their event schedule.

Getting the lay of the land:

When skiing Brian Head resort with kids, it’s important to note Brian Head has two distinct base areas: Navajo and Giant Steps. They are separated by the highway, with a ski bridge that links them. Base lodges are at both locations. The simplest way to categorize them is to say that Navajo offers the beginner and intermediate terrain, and Giant Steps offers intermediate and expert terrain. There’s a meeting place for the winter sports school at both locations, but the kids’ camp is at Navajo. The two Brian Head hotel lodges are a couple minutes’ drive from the Navajo side, but there are many house rentals and condos available at both base areas.

brian-head

You can absolutely ski between the two sides using the ski bridge, but it does take a few chairs and some traversing. There is also a  free shuttle that connects the base areas, convenient if you have family members skiing at different levels but want to meet up for lunch or apres ski.

Skiing at Brian Head:

Brian Head is one of those resorts that seems to double its size on powder days…there are just so many open areas to ski. (The openness of the resort is actually due to the need to remove many trees during a beetle infestation years ago.) But of course, not every day can be a powder day. During my visit, we stuck mostly to groomed runs, which were plentiful and pleasant. There are a number of great chutes near the top of Giant Steps, and even after the fluffy powder is skied out, hidden stashes remain in the trees. On the Navajo side, the green beginner runs are some of the most interesting I’ve seen…think winding paths through forests and fun curves.

brian-head

From both sides, skiers are rewarded with views of classic Southern Utah red rock, and glimpses of nearby Cedar Breaks National Monument. On clear days, it’s possible to see all the way to Great Basin National Park in Nevada. What you won’t see often are crowds. We visited on a Saturday in January, and it felt like a quiet Tuesday morning.

Other things to do at Brian Head:

Remember how close you are to Cedar Breaks while in Brian Head? If you want to take an afternoon off from skiing, you can actually take a snowmobile tour from the resort area to High Mountain, which offers incredible close-up views of the red rock of Cedar Breaks. Thunder Mountain Motorsports offers 1.5 hour, 3 hour, and all day rides. We found 1.5 hours to be just enough time to go through the backcountry of Brian Head to High Mountain and back, with time to play around in snow-filled meadows and learn about the natural history of the area. Our guide was fantastic: the perfect mixture of helpful and informative but also lighthearted and fun. Tours start at $85/machine, which families can ride double for only $15 extra. If you have it, you can even take your own machine and follow the tour for $20.

snowmobiling

If snowmobiling isn’t your thing, you can also snowshoe or cross-country ski in Cedar Breaks. It’s best to call for up-to-date info on road conditions and where to start your winter exploration: 435-586-9451.

Brian Head also offers snow tubing, which I’m told is on a steeper track than most. (I didn’t get a chance to try it.) However, one of the best things I did at Brian Head was their free ‘Star Party’. Held once a month at Navajo base lodge, star parties are a fun and informative viewing of the night sky. Because Brian Head is a Dark Sky location, the view on clear nights is fantastic. They bring out ‘dark rangers’ (like park rangers) to lead short talks, in which they point out constellations and planets and give families time to look through telescopes. There are fire pits and hot chocolate as well.

Where (and what) to eat at Brian Head:

Remember how I said Brian Head was just a bit eccentric? This characteristic is most evident in their dining and entertainment scene. Brian Head was bought by a new owner a few years ago; owner John Grissinger has brought his love of Kansas City BBQ to the resort, and everyone benefits! At least once a week (and usually more often), families can find ‘John’s KC style BBQ’ on the events calendar. Held at Last Chair Saloon at Giant Steps base, this BBQ meal is not to be missed. You may get two choices on the menu, but don’t expect more. What you’ll get is amazing BBQ meat (usually ribs, catfish, or tri-tip) served with sides. It’s accompanied by live music, and the whole event is very family-friendly.

When you can’t get BBQ, you have other options: Giant Steps lodge and Navajo have your standard ski day fare, and if you want to dine out in the evening, the Grand Lodge offers a simple but solid menu at their Lift Bar and Grill. Cedar Breaks Lodge offers a restaurant as well.

Where to stay at Brian Head:

As noted above, there are many condo rentals and home rentals in Brian Head. If you opt for a hotel, you have the choice between the Grand Lodge and Cedar Breaks Lodge. We stayed at Grand Lodge, which has a great indoor pool and hot tub, plus an outdoor hot tub. Their spa was closed for the season, but it is on offer in summer months. They have a decent continental breakfast at the Lift Bar and Grill, which is convenient before your ski day, though it does cost extra (around $10 pp). I found this price to be too high for the standard fare; at some chain hotels, you can get a similar spread complimentarily). However, our waitress did charge less for those who were eating less, which was nice.

grand lodge

Rooms are standard, with mini fridges and microwaves, which is nice to have, and the lodge has fun live music and a pretty hopping bar on weekends. It’s a friendly, welcoming vibe. You’re about a one minute drive to the base of Navajo, or you can get on the free Brian Head shuttle.

Getting to Brian Head: Take I-15 to Parowan, then Highway 143 to Brian Head. It’s about 3.5 hours from Salt Lake City or 3 hours from Las Vegas.

Pin it for later:

Ever heard of Brian Head? Here's why you should take note of this small ski resort!

Disclosure: I experienced Brian Head as a guest of the resort, for the purpose of review. All opinions are my own.

Exploring Shasta Cascade: Whiskeytown National Recreation Area

Northern California hosts wonderful outdoor recreational opportunities for families, from Lassen National Park to Mount Shasta hiking trails and ski areas. If you only have a day, and want a taste of the area’s lakes, trails, and mining history, head to Whiskeytown National Recreation Area, just outside Redding, CA.

whiskeytown-lake

Whiskeytown is located just 20 minutes from I-5, and I’m ashamed to say I didn’t realize it was there for years! As residents of Southern Oregon with family in Northern California, we drive this stretch of I-5 regularly. We will now add stops at Whiskeytown more often. Here’s why:

Hiking trails and waterfalls:

We visited Whiskeytown in spring, the ideal time to hike to its many waterfalls. However, summer is still a great time to explore this aspect of the park, as the creeks provide excellent swimming holes. Whiskeytown boasts numerous hiking trails of various lengths. Below are our favorites for families:

whiskeytown

  • Brandy Creek Falls: Brandy Creek is located an easy drive from the Whiskeytown visitor center on South Shore Drive, and is only 1.6 miles. You can go out and back and turn around earlier to make the hike shorter, if needed. The trail follows Brandy Creek, which has a series of smaller but beautiful cascading waterfalls, most of which result in tempting swimming holes. There are picnic spots along the way. In summer, this trail provides lots of shade, and I know it would be a good tucked-away spot to spend the day, provided you get there early enough to snag a spot!
  • Boulder Creek Falls: When Mill Creek Road is open (in the late spring and summer months), the trail to 138 foot Boulder Creek Falls is only one mile. You can also access a trail that ends at the falls via South Shore Drive, but the hike will be 2.75 miles.
  • Mill Creek Trail: This trail is over six miles, but the first mile takes families past a historic stamp mill, mine, and water ditch, which makes the walk very interesting. If you want to shorten it, just take an out-and-back approach, and stop when you’re ready.

Brandy Creek

Note: Watch for poison oak on all trails, during all times of year. It’s very active in this area.

Historic buildings and mining artifacts:

The Tower House Historic District at the top of the park is accessed via Highway 299 and features the homestead and mining claim of pioneering friends Charles Camden and Levi Tower. They made their fortune both in mining and in supporting others who came for mining, opening a hotel on the premises and stamp mill. You can tour through their orchards, Tower’s gravesite, the El Dorado Mine (on the Mill Creek Trail), and the hotel and homestead. The buildings are closed in winter, but open on select days for interior tours in summer.

el-dorado-mine

Stop by the visitor center when you enter Whiskeytown to pick up a family guide to the Tower House Historic District. This single paper has talking points for families. It gives a basic itinerary for viewing the area, with suggested questions for parents to ask kids and suggested activities in the site.

After leaving Whiskeytown, be sure to take 30 minutes or so to stop at the historic town of Shasta. This historic state park on Highway 299 (between Whiskeytown and Redding) has the remains of mining era buildings to explore.

Creek and lake swimming:

If you’re visiting Whiskeytown during Redding’s hot summer months, there are four designated swimming beaches along the lake. Only Brandy Creek beach has lifeguards. We suggest taking one of the hiking trails to find a swimming hole a mile or so inland on foot…the crowds will be much smaller and the shade will be fantastic. There are multiple campgrounds within the park as well.

Admission fee:

There’s a $10 per car fee to enter the park, good for up to seven days. Pay this fee at the visitor center at the entrance. If it’s closed, there’s a self-serve fee station at the parking lot. Note: as a National Recreation Area, kids can get national park stamps at the visitor center, and participate in Junior Ranger programming.

Directions:

From Redding, Whiskeytown is on Highway 299, about 20 minutes from downtown. It’s an easy detour from I-5, but will be at least a half-day pit stop if you’re on a road trip.

Mount Rainier National Park two-day itinerary

On the right day, Mount Rainier National Park can rival the scenery beheld at National Park greats such as Glacier and Canada’s Banff or Jasper.

mount-rainier

Often hidden in cloud, the mountain framed by blue skies is nothing short of breathtaking, and on clear days, the views from the Paradise end of the park reach from Mt. St. Helens to Mt. Hood to Mt. Baker. The day we arrived, looking from volcano to volcano across the Pacific Northwest, we felt awe and respect standing along the famed Ring of Fire.

Mount Rainier National Park is large, but 97% of the park is dedicated wilderness, which means families can reasonably see the best day hikes and visitors centers in two full days, or one full day and two half-days. The order in which you tackle these attractions will depend on how you enter and exit the park. We entered from the north (Seattle) through the White River Entrance, and exited to the south via the Stevens Canyon Entrance. Our lodging was located on the south end, so we toured what we could on the north end (Sunrise) after we arrived, then concentrated on the south end (Paradise and Longmire) for the remainder of our trip.

mount-rainier-national-park

Mount Rainier two-day itinerary suggestions:

Day 1:

Arrival through White River:

white-river

We enjoy entering the park at White River, as this milky-white river gives a good introduction to the volcanic activity on Mount Rainier. The river gets its name from the chalky powder that rubs off granite higher up due to glacial activity. Stop for a picnic at any one of the White River turnouts along Mather Memorial Parkway toward the Sunrise Road turn-off.

Sunrise area hike:

If you’re staying in the Sunrise area, skip the Sunrise Road for now, and head south to sample some Ohanapecosh or Paradise hikes, which will enable you to concentrate on Sunrise on Day 2. However, if you’re staying on the Paradise side, as we did, take the time to detour to the Sunrise Road now, to avoid needing to backtrack tomorrow.

The Sunrise Visitors Center is a good one to hit up for Junior Ranger booklets. Afterward, head to the Sourdough Ridge Nature Trail, which is an easy one-mile loop starting near the Sunrise complex parking lot. You’ll get nice views of Rainier and interpretive signs educating on the flora and fauna. As an alternative, Silver Forest is a two mile out-and-back hike, which starts with informative exhibits en route then moves through an area once-damaged by forest fire. What still stands are the ‘silver sentinels’; long-dead but erect trees that are surprisingly beautiful.

If you want a longer hike, the Naches Peak loop is about five miles, and offers small lakes, views of Rainier, and plenty of subalpine forests. Plus, it takes hikers on a portion of the Pacific Crest Trail, which can be fun.

Ohanapecosh-area hike:

silver-falls-hike

As you drive through the park toward the south, plan to stop for a short hike at either Grove of the Patriarchs or Silver Falls, near the Ohanapecosh Campground. The Grove of the Patriarchs is best if you’re short on time or have very young kids; it’s an easy one mile walk to see old-growth forest along the Ohanapecosh River.

For a longer and more satisfying hike, go into the Ohanapecosh Campground to the day-use/trailhead parking. Take the Silver Falls loop hike, which is about three miles. At the very start, you’ll be rewarded with hot springs activity. Feel the water temperature of the various springs as you go…they get progressively warmer as you get closer to the source of the hot springs. Be sure to detour onto the hot springs loop trail about a quarter mile into the Silver Falls loop, just to the bigger pool that’s jacuzzi-hot. Continue along the Silver Falls trail to the thundering falls along Ohanapecosh River; it’s absolutely worth the mileage! The loop will deposit you back at the campground.

silver-falls

Day 2:

Paradise Visitors Center:

For the Paradise portion of your visit, start early, as the Sunrise parking lots fill up fast in summer. (See below for best time of year to visit.) The Visitors Center offers a nice area of exhibits upstairs, and a 20 minute video that plays several times per hour. We always recommend watching videos to introduce visitors to new parks.

Skyline Trail hike:

skyline-hike-mount-rainier

Right outside the Visitors Center, a network of trails are on offer. The Skyline Trail is one of the most popular hikes in the park, and while we usually shy away from potentially crowded areas, this one is worth it. This loop is over five miles, and takes hikers up in elevation from the Paradise parking lots seemingly to the edge of Mount Rainier itself. The first two miles are steep, but the continuous views of Rainier make this workout less painful, and the crowds drop away the further you go. There are a number of turn-around options in these first few miles; hikers could detour onto the Dead Horse or Alta Vista Trail, and return to Paradise. Everything is well-marked, and rangers are often on-hand at junctions to explain options. Note: the beginning and end of this loop are paved trail, to accommodate shorter hikes for all visitors.

For those wanting to go the distance (recommended if possible), continue up Skyline to Panorama Point, where you can opt between the Low Skyline Trail or High Skyline Trail. Either will continue your loop, but in early season, only Low Skyline is open. When we hiked in June, Low Skyline offered lots of snow across the Nisqually Glacier, which the kids loved. Cramp-ons are not necessary for the Low Skyline Trail, but be prepared to walk through snow (trekking poles are useful).

marmots-mount-rainier

The Low and High Skyline trails merge again to start the long descent back toward Paradise, with an option to cut 1.5 miles off your loop by taking the more direct Golden Gate Trail down to Myrtle Falls, then the lodge area. We opted to stay on the Skyline loop, and were not sorry. The views continue to be spectacular, with creek crossings and wildflowers in the early season. At Myrtle Falls, the trail becomes crowded with visitors for the final few tenths of a mile. Look for marmots along the entire hike: we saw 4-5!

Rampart Ridge Trail Hike:

If you have time to venture further from Paradise to the Longmire section of the park, or if Skyline is simply too crowded on the day you’re visiting,  the Rampart Ridge Trail is a good alternative. This trail is often hiked in summer by the many visitors who do not receive Wonderland Trail permits, and in early season or fall, it’s blissfully empty. The 4.6 mile loop begins at the Trail of the Shadows trailhead, and takes hikers through both wetlands and old-growth forest. The climbs along the loop start out quite gentle, then progress to a series of switchbacks. The reward: views of the valley below and Tumtum Peak. Further along the trail, the views continue, offering sweeping vistas of Longmire and Eagle Peak. When families reach the junction with the Wonderland Trail, a steep descent returns them to Longmire.

Best time to go:

The best time to visit Mount Rainier National Park is mid-June, early July, or September. While coming in June is a gamble (not everything will be open yet, depending on snow pack), it’s far less crowded. Mid-July through August are peak season. Come in fall, and the park will be yours alone!

Where to stay:

Campgrounds:

The campground facilities in the park are fantastic. We really liked the relative isolation and quiet of Ohanapecosh Campground, which is set apart from any visitors centers. The White River Campground is one of the most popular, but with the river nearby, we understand why. Check the national park site for campground information, including which can be reserved ahead of time.

mount-rainier-with-kids

Paradise Lodge:

This national park lodge is beautiful, but located in the thick of things. You’ll get pristine views of Rainier, and have immediate access to some of the best trails (no parking worries!) but also be staying in the midst of the crowds.

Packwood area:

We opted to stay three miles outside the Stevens Canyon park entrance, in the Timberline community of seasonal cabins outside of the town of Packwood. We rented our cabin via VRBO, and were cozy in a retro cabin sleeping six. Renting in the Timberline community, we had access to a community outdoor pool and tennis courts, and enjoyed a nice deck and mountain views, plus a full kitchen for cooking our own meals. There are a few dining options in Packwood (we tried the Blue Spruce Cafe, which served traditional pub food like burgers, fish and chips, and pizza), but you’ll want to do some grocery shopping. Note: AT&T customers will have no cell service in this area.

Have you visited Mount Rainier? Where did you hike and stay?

Wilson’s Creek National Battlefield

Southwest Missouri hosts a great deal of rich history, including more Civil War history than we realized. While visiting in the Springfield or Branson area, plan to spend at least half a day, if not more, at Wilson’s Creek National Battlefield.

wilsons-creek

In case you need to brush up on your Civil War history (as I always do), Wilson’s Creek was the site of the second major battle of the war fought west of the Mississippi River, on August 10, 1861. It was significant in several ways: it was one of the fiercest, ugliest battles according to war historians, and it marked the death of the first Union general in battle, Nathaniel Lyon. Lyon’s death the Union’s defeat at Wilson’s Creek led President Lincoln to send reinforcements to Missouri, thus securing the state for the Union.

civil-war-history

The visitor’s center is small, with only a short hall of exhibits, but does have an excellent 28-minute film running continuously that depicts the battle and the days leading up to it. Directed by Ken Burns, it’s well-worth your time. It’s here you can pick up the information needed for the self-guided auto tour as well. Designed much like the Gettysburg Pennsylvania driving tour, albeit on a much smaller scale, the Wilson’s Creek driving tour is 4.9 miles of paved road with stops along the way to see important points of the battle. (You’ll see once you set out why it’s crucial to view the film first.)

wilsons-creek

There are multiple stops along the tour, but the highlights include the Ray House homestead, which became a temporary field hospital. Stand on the front porch where John Ray allegedly watched the battle rage in his cornfield, then walk to the view point to see the Ray spring house where they drew cool water for wounded soldiers. Further on, see the Edwards Cabin, which served as General Price’s headquarters (it was here he was interrupted while eating breakfast to the sound of Union cannons), and Bloody Hill, where 4,200 of Lyon’s men held high ground, holding off the Confederacy before their commander lost his life (along with 1,700 soldiers).

battlefield-trails

The grounds are beautiful and somewhat sacred-feeling, but a nice feature are the many walking trails criss-crossing the landscape. With one stop in the car, we could walk between several batteries and the Edwards Cabin, for instance, with views of Bloody Hill to boot.

wilsons-creek

These trails often connect to the Wire Road (a small dirt road) that troops originally marched along. All trails have clear signposts, and most are no more than 1/2 mile from site to site. Families can do as much or little walking as desired. In several places, trails and even the road cross Wilson’s Creek.

wilsons-creek

Hours:

The Visitors Center is open 8 am to 5 pm, seven days a week. The Battlefield Tour Road is open 8 am to 5 pm in winter, and until 7 pm in spring and 9 pm in summer.

Entrance fee:

Entry to the park is $5 per adult, or $10 total per car load. Because this is a National Park site, be sure to get your National Park Passport stamped!

wire-road-wilsons-creek

Dining:

There are no food services, but in nice weather, families can absolutely picnic along the Battlefield Tour Road, or at the Visitor’s Center.

Reading on Wilson’s Creek and other historic sites:

It’s always a great idea to read up on historic sites before planning a trip. When you do, you often find that there are additional sites nearby that also may be worthy of a visit. A great way to research a historic trip is with a travel guide that focuses on history in a particular region, as opposed to with a history book that may not tie sites together in an itinerary. Before leaving to see Southern Missouri, I had the chance to read through The Big Divide: A Travel Guide, which focuses on the Missouri-Kansas border region. Thanks to its section on Springfield, I learned there’s a national Civil War cemetery near Wilson’s Creek.

Directions:

The battlefield is located at 6424 West Farm Road 182, in Republic, Missouri. From I-44, take Exit 70 south to MO-ZZ. Turn right on ZZ to the park.

Best of 2014: Best destinations for families you can book now!

best-destinations-for-families

Every December, we take time to reflect upon the past year of travel, and select five experiences—yes, just five!—that we crown the best of the year. Last year, our top travel experiences of 2013 took us from Alaska to the Caribbean. This year, we’re focusing on the American West and MidAtlantic, showcasing everything from five-star city hotels to cabins. We stand behind these picks as the best destinations for families, 2014.

Best Destinations for Families: our picks from 2014

Experience Grand Teton National Park ‘behind the scenes’:

OARS

You’ve heard it from us before: no outdoor tour operation does family adventure better than O.A.R.S. We loved their Rogue River itinerary, so we embarked on their OARS Jackson Lake 2 night adventure confident we’d have an amazing time. What makes it so great? Beyond the near perfect guest service we’ve found consistently with O.A.R.S., the Jackson Lake kayaking adventure allows families to see a new side of Grand Teton National Park. We slept literally in the shadow of the peaks of Grand Teton, hiked to lakes less traversed by car camping families, and swam on the far banks of the lake, inaccessible to anyone without a boat. Check out our full review of the O.A.R.S. Jackson Lake 2 night kayak tour.

Play cowboy or cowgirl for a week:

riding-at-triangle-x

Also located within the boundary of Grand Teton National Park, Wyoming, Triangle X Ranch is has been around for generations as a working ranch and guest ranch. For many, it’s become an annual summer tradition; when we visited, we were surprised to learn that almost 80% of guests are on a return visit. That’s your true review, right there! While at Triangle X dude ranch, we got to ride our personal horses for the week two times per day, hike, relax at the ranch, go on Snake River float trips, and enjoy plenty of family bonding time around the campfires, in the kitchen and dining rooms, and while on the trail. Want to take your whole family to summer camp? This is it. Read our full review of Triangle X Ranch.

Learn US government and history in our nation’s capital:

hyatt ceiling

School-aged kids get so much out of Washington DC! Truth be told, so do parents. I didn’t expect to love our time in the nation’s capital as much as I did; Washington DC is safe, walkable, and family-friendly. Best of all, almost all the attractions you’ll want to visit are free to the public. Many tours do require advanced planning, however, so best get started for your spring or summer visit! We recommend a Club-level stay at Grand Hyatt Washington: it’s a spurge, but also makes good travel sense. You’ll be close enough to the action to walk everywhere, and can eat most meals in the relaxed atmosphere of the club. Read our full review of Grand Hyatt DC.

Step back in time in Gettysburg:

gettsyburg-battlefields

What a sobering, awe-inspiring, and important historical landmark to visit with kids! Gettysburg, PA is a must-do with kids old enough to learn about Civil War battles in the context of US history. We recommend this trip for kids ages 8 and up, and suggest families stay 2-3 days before or after a trip to study more American history in Williamsburg or Philadelphia. The Gettysburg historic battlefield is best toured with a  licensed battlefield guide; book one to ride with you in your car for the absolute best experience. Be sure to leave time to explore the town, too. Read our full review of our time in Gettysburg.

Play in the snow in the Colorado Rockies:

keystone-resort-vacation

Keystone Colorado is arguably the most family-friendly ski resort in the Rockies. It certainly goes out of its way to cater to kids. However, this doesn’t mean Keystone isn’t up to the challenge of serious skiers and snowboarders: behind kid-centric Dercum Mountain, two more peaks await, with steeps and deeps, cat-accessed terrain, and plenty of bumps. After each ski day, Keystone pulls out all the stops, with daily Kidtopia activities geared just for kids 12 and under, weekly parades, and even fireworks displays. No wonder Keystone has been compared to Disney…on ice. Check out our long weekend at Keystone.

 Where did your family’s 2014 travel take you? What are your top picks?