John Day Fossil Beds National Monument

Clarno palisades, John Day Fossil Beds Nationa...
John Day Fossil Beds (Image via Wikipedia)

Kimberly, OR

Eastern Oregon offers much in the way of outdoor exploration for families, but the John Day Fossil Beds National Monument is often overlooked. There are 3 locations along Hwy 26, but the visitor center and main displays are at the Sheep Rock Unit on Hwy 19 off of Hwy 26 (about 70 miles east of Prineville). There is a fantastic visitor center kids really enjoy with huge dioramas with sound effects depicting the area millions of years ago. There is also a big room with art projects and hands on displays for kids. Short (1 mile round trip) hikes and an even shorter nature trail are in the area.

Note: These fossils have nothing to do with dinosaurs! So don’t let the little ones get their hopes up for dinosaur bones!

Distance off the interstate: On Hwy 19, two miles from Hwy 26.

Admission: Free!

Tip: The visitor center is free and has nice restrooms, but no food services.

Hours: Summer: 9am-5pm Winter: 9am-4pm

Food Services: None on-site. A nice pit stop on the way is at Prineville (on Hwy 26 between Redmond and John Day). There’s an indoor McDonald’s Play Place and Dairy Queen, but even better is the lovely city park. (Make a left on N. Elm off Hwy 26 to Ochoo Creek Park). The park boasts a community pool, restrooms and a creek. There is also a fire fighters memorial for 9 local smoke jumpers who died in a Colorado fire.

Website: http://www.nps.gov/joda/

Directions: The Visitor Center at the Sheep Rock Unit is located on Highway 19 between the towns of Dayville and Kimberly, 2 miles from the junction of Highway 26 and Highway 19.
View Larger Map

This post included in Trekaroo’s Talking Trekaroo for Spotlight Thursdays!

Junior Rangers: One of the Best Kept Secrets of National Parks!

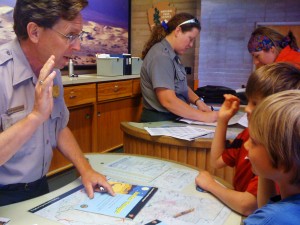
Nate and Calvin get sworn in as new rangers at Death Valley National Park.

In honor of this weekend’s free admission to National Parks, Pit Stops for Kids would like to remind readers about one of the best programs the National Park system offers: Junior Rangers! It’s easy to sign up, it’s (usually) free, and it’s an excellent way to learn about aspects of the park you might otherwise miss.

Signing up is simple: you can find Junior Ranger booklets at nearly any park’s visitor center. Depending on the child’s age, they’re required to complete a certain number of pages in the booklet, then turn it in to a ranger. The tasks range from simple mazes and puzzles relating to the park to more difficult trivia questions (which your grade schooler may have to research to find the answers to). Most parks require that kids attend at least one ranger-led activity, campfire program, or guided tour while visiting in order to earn their ranger badge, but if you don’t have time or ability to get to one of these, a simple chat with any ranger is usually sufficient. Some parks even offer specially-designed Junior Ranger hikes and games, which your kids can attend (with an adult).

Our favorite Junior Ranger programs:

Zion National Park (where there was an extensive list of kid-oriented programs and times).

Mesa Verde National Park (where kids had to search through the Mesa Top museum scavenger-hunt style to find answers to questions).

The most extensive Junior Ranger program:

Yellowstone National Park, where earning that badge involves serious time and investment for older kids!

The friendliest Junior Ranger program:

Great Basin National Park, where the rangers presented the badges in full ceremony!

Be sure to take advantage of this great opportunity next time you’re visiting a national park! It adds much to the experience (and adults learn a lot more than they otherwise would as well). And if you’re taking advantage of this weekend’s free admission (August 14-15), enjoy!

A Pit Stop a Day (Day 19): Hiking in Zion Canyon

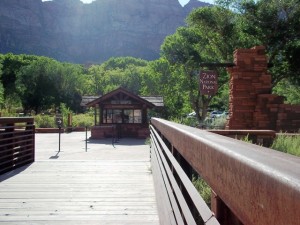
Foot path bridge to national park entrance booth.

We devoted Day 19 to morning hikes in Zion National Park and the afternoon to floating along the Virgin River behind our room at the Cliffrose Lodge.

We began our day at the visitor’s center, where we consulted the shuttle route (also found in the park newsletter) and planned our hike to the Emerald Pools on the Zion Lodge shuttle stop.

The Emerald Pools is a great hike for kids because you can adjust it to your needs/abilities. There are three pools on the trail: the lower pool is only .6 mile from the trailhead (although it does climb quite a bit), or the second pool is only 1 mile. From either of these, ambitious families can continue to the third pool (another .5 mile) or return. When we visited in July, the pools weren’t much to look at, but the dripping water from the overhangs of rock were very impressive (and a great way to cool off!).

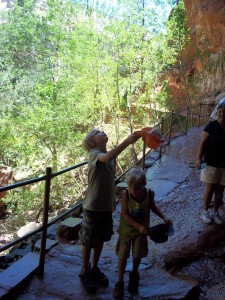
The kids catch spring water in their hats at the first of three Emerald Pools.

Weeping Rock is another easy hike for kids, which my boys explored with a ranger as part of their Junior Ranger curriculum. This trail is short (.4 mile) but steep, and very beautiful. Definitely worth a stop!

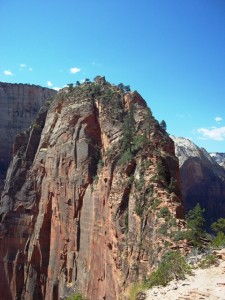
For more daring families (or more likely, adults), try the Angel’s Landing trail from the Grotto shuttle stop. A strenuous 2 mile hike up the canyon, this trail ends at the top and affords amazing views of Zion. From there, hikers can continue an additional .5 mile up the sandstone rock utilizing chain supports. This section of the trail follows a knife-edge of path with drop-offs on either side. If you’re at all fearful of heights, you can skip this last section (I did).

Final section of the climb to Angel\’s Landing.

Note: We did not take our kids on the Angel’s Landing trail. Our older two (11 and eight) could have climbed the first 2 miles, but the last .5 really is not appropriate for anyone under age 14-15, in our opinion. This final climb involves sharing a tight space of trail with many others, hanging onto a chain, and strenuous climbing (drops offs stretch to 1400 feet). Of course, use your own judgment with your children (we did see a few attempting it), but we felt safer saving this hike for when they are teens.

Extra Tip: Due to Zion’s high temperatures, we embarked on all hikes by 8 am and returned to our pool/air-conditioning/river by 1 pm. It appeared that most other families did this as well. In addition, water bottle filling stations are available at most shuttle stops. You’ll need to drink lots of water, and the stations are a fun way to get kids involved in filling bottles!

Date last visited: July 2010.

Distance off the interstate: About 30 minutes from I-15 off Hwy 9.

Bathrooms: Pit toilets are located at most shuttle stops.

Food Services: Zion Lodge (shuttle stop) serves all meals. There’s also a quick service ice cream and snack location on-site. The visitor’s center at the entrance to the park has a convenience store nearby. The Grotto (shuttle stop) has a nice picnic area.

Directions: Zion National Park is located on Hwy 9 in Springdale, Utah. From I-15, follow signs onto Hwy 9.

Up Next: We arrive in Laguna Beach, CA and explore the lesser-known kid-friendly locations in Orange County.


A Pit Stop a Day (Day 18): Zion National Park’s The Narrows

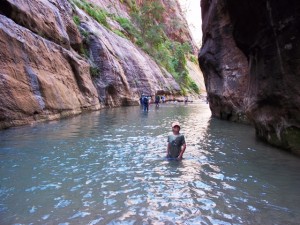
Nate navigates the ‘Narrows’!

On Day 18, we woke up in Cliffrose Lodge and Gardens with a full day of exploring in Zion National Park ahead of us. Our primary destination was Zion’s ‘Narrows’, a hike up the Virgin River deep into the canyon. (Zion has many great hikes for families.)

We walked the few yards from Cliffrose to the park entrance and visitor’s center, where we paid our $25 park entrance fee (good for seven days) and picked up maps, junior ranger booklets, etc. We then took Zion’s mandatory shuttle (we wish all national parks would adapt this policy!) to its last stop, The Temple of Sinawava.

From there, we hiked the short Riverside Walk (paved and fairly even terrain) to the start of the ‘Narrows’. At this location, the trail simply ends and you continue up the canyon by wading through the river. It’s slow going, but tons of fun. The kids loved this style of ‘hiking’ because they had to pick and choose their own route up the river, and every step was an adventure. You can continue as far as you’d like (up to a boundary at the 2 hour mark; if you wish to continue further, you need to register for an overnight permit). Nate, Calvin, and I hiked about 30 minutes up the river, and in many places the water went up past our waist! The current was not fast, but it was present in many places.

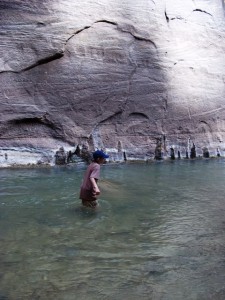
Calvin about 1/2 mile into the ‘Narrows’.

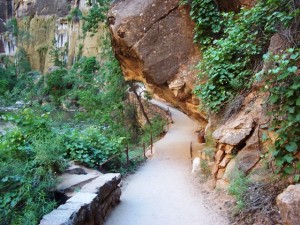
Riverwalk Trail which leads to the entrance to the ‘Narrows’. (Suitable for all ages.)

Toby (age 5) only ventured about 10 minutes up the river before finding a nice place to stop and play in the banks with grandma and grandpa. What went to our waists went over his head, and he would be essentially swimming if he went further! Needless to say, visitors need to be very careful with young children, especially if they aren’t strong swimmers.

The water wasn’t warm by any means, but given the high temperatures in Zion, we quickly got used to it and enjoyed it. In many places, the canyon walls ‘narrow’, which doesn’t allow for any bank of the river, during which times you’re completely confined to the water. The national park closes the ‘Narrows’ when there’s threat of flash floods (storm clouds or rain), so be prepared for closures, especially in August.

Toby talks about his experience on the Pit Stops for Kids Cam:

Note: You can rent river hiking gear in Springdale (water shoes meant for hiking the Narrows and walking sticks). We opted to use decent hiking shoes (just resign yourself to getting them wet!) and extra socks in our pack. Sandals with good traction (think Keen or Teva) would work, too. If we had planned to hike any further than about 1 hour into the Narrows, we would have rented specialized equipment.

Extra Tip: If you’re visiting when the river is high (spring through July), go ahead and wear swimsuits/wading clothes. We were in shorts and t-shirts, and while we certainly didn’t get cold, it would have been simpler to be in swimsuits!

Date last visited: July 2010.

Distance off the interstate: About 30 minutes from I-15 off Hwy 9.

Bathrooms: Pit toilets are located at the shuttle stop before you start the hike.

Food Services: None. Pack food in or plan to stop for lunch at the Zion Lodge, located within the park (on a shuttle stop).

Directions: From the park entrance, take the shuttle to the last stop (The Temple of Sinawava) and take the Riverwalk trail.

Up Next: More hiking opportunities in Zion, including one not suitable for young kids!


A Pit Stop a Day (Day 14): Grand Teton Horseback Ride

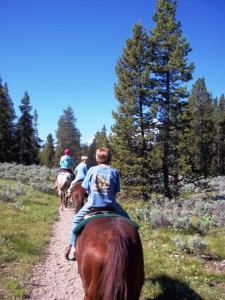
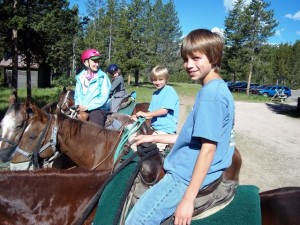
Setting off on our 1 hour trail ride through the Tetons.

On Day 14, we treated Nate and Calvin to a horseback ride through the Tetons (something they’d been wanting to try since Glacier National Park). Luckily, Colter Bay Village has stables on-site, making it easy!

We made reservations at the Activities Center near the Colter Bay Village store (be sure to sign up ASAP: we signed up the night we arrived and got the last three slots for the entire weekend). For our 9 am ride, we were told to be at the stable at 8:45. Our ‘wranglers’ were very friendly and experienced horsemen and women, and took us through the ropes. We were each told which horse we’d be riding (they decide based on temperment, experience of the rider, age, etc) and mounted one by one.

It took about 20 minutes to get everyone on their horse and lined up, then we set off down a narrow trail for our 1 hour ride. The horses were well trained, and everyone (even my kids…first time riders) easily managed their horse. We followed our wrangler single-file (another wrangler made up the rear) and they told us information about the surrounding area and the horses as we rode.

The wranglers made sure to keep family groups together.

The ride took us past a great view of the Tetons, a small pond where you can often spot moose (we didn’t) and the side of Jackson Lake (where we saw Toby canoeing with Grandma). The kids enjoyed the experience of controlling their own stead, and had fun bonding with their horses (named Quarter and Chuck Norris…mine was Claire).

The one hour ride was just about enough for us. Much longer, and we’d get sore and the kids might have gotten bored. The scenery was beautiful, and being horseback afforded a different view (not to mention new trails). We’d definitely do it again!

Note: Kids have to be eight years old to ride. Younger kids can ride a pony in the stable area (with an adult present). Backpacks are not permitted, and you’ll want to move things from back pockets (or the saddle will do it for you en route).

Extra Tip: Bring water. We made the mistake of thinking we’d have no place to put it, but the wranglers issue saddle bags and/or water bottle holders for those who ask for them. The trail meanders through some exposed sections of valley, and the morning was warmer than we anticipated!

Date last visited: July 2010.

Distance off the interstate: About 30 minutes from Hwy 89.

Bathrooms: Pit toilets located at the stables. Be sure to go before trail riding!

Costs: One hour rides cost $35 per person. (Canoe rentals, which Toby did instead with his grandparents, are $18/hour.)

Food Services: None. Two restaurants (one cafeteria-style) are located nearby in Colter Bay Village.

Directions: The stables are just past the tent village at Colter Bay Village Resort. From anywhere in the park, take Teton Park Road to Colter Bay, and follow the signs.

Up Next: We drive from Grand Teton National Park to Utah and enjoy a stay at Westgate Park City.

A Pit Stop a Day (Day 13): Hidden Falls Hike, Grand Teton NP

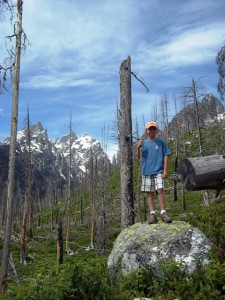
Calvin poses along the Hidden Falls hike.

On Day 13, we set off from Colter Bay Village Resort to hike to Hidden Falls and Inspiration Point on Jenny Lake.

This two mile (each way) moderate hike culminates near the Jenny Lake ferry boat shuttle dock on the far side of Jenny Lake, where the trail climbs up from the lake, following swift-moving Cascade Creek to Hidden Falls. From there, hikers can continue .5 mile to Inspiration Point, which overlooks Jenny Lake.

Inspiration Point truly is inspiring, but then again, so is the whole hike. From the very start of the trail, you enjoy a stunning view of the Tetons, rushing streams, kayakers on the lake, then a beautiful waterfall.

Toby (age 5) got a bit tired on the return trip, but in general, this is a great hike for families. You’ll want to grab a hand or carry very little ones on the short section of trail leading up to and at the falls (and further up to Inspiration Point…see below), but otherwise, the terrain is easy to manage.

Nate records his experience on the Pit Stops for Kids’ Cam:

Note: The last part of the hike (from Hidden Falls to Inspiration Point) is very steep and fairly dangerous. The trail hugs the side of the granite, exposing hikers to drop-offs in some places and rocky in all places. We didn’t take our five-year-old (instead, he stayed at Hidden Falls with his grandmother).

Extra Tip: The hike is beautiful, but if your group isn’t up for the full two miles (each way), there is the option of taking the ferry boat shuttle across Jenny lake. From there, you need only hike .2 miles to Hidden Falls (additional .5 to Inspiration Point).

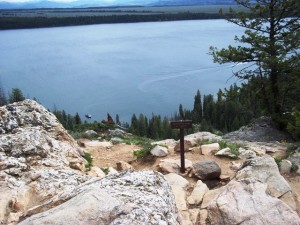
View from Inspiration Point.

Date last visited: July, 2010.

Distance off the interstate: About 30 minutes from Hwy 89.

Bathrooms: Full bathrooms at the picnic area (see below).

Food Services: None on-site. There is a picnic area at the far end of the Leigh and String Lakes parking lot (right on String Lake). The kids swam there (but I found the water to be freezing!)

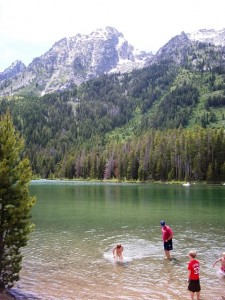
String Lake picnic and swimming area.

Directions: From Teton Park Road, take the North Jenny Lake Junction and park at the Leigh and String Lakes trailhead. If you opt for the ferry boat ride, continue on Teton Park Road to the South Jenny Lake Junction.

Up Next: We take a horseback ride through high alpine forests!

Need to catch up? Find all ‘A Pit Stop a Day’ posts by searching ‘a pit stop a day’ in the search box!

A Pit Stop a Day (Day 12): Colter Bay Village, Grand Teton

Toby carts luggage into our double room cabin.

Day 12 found us crossing the national park border from Yellowstone to Grand Teton to check in at Colter Bay Village Resort.

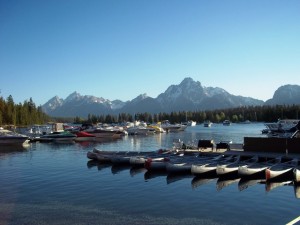
Located within the park boundary and managed by Grand Teton Lodge Company (go through them when booking), Colter Bay Village Resort comprises of a campground, tent village, and cabin village clustered around the shore of Jackson Lake. The resort also includes a marina, visitor’s center, store, horseback riding stables, and two restaurants. There is lake access along the marina.

Kayaks for rent along the marina.

The moment we arrived and found our double cabin (one bedroom on each side of a shared bathroom (fits 6), we knew the kids were going to love this place. The winding paved roads joining the various cabins were similar to those of any standard campground, which made meeting other campers, riding bikes, etc easy and fun. Plus, it probably goes without saying, since we never saw a bad view in all of Grand Teton, but the location of Colter Bay is stunning. We had a perfect view of the Tetons and Jackson Lake from the marina (just yards from our cabin).

Jackson lake with view of the Tetons (from marina).

The cabins had an air of authenticity, which we soon learned was earned: each one was salvaged from area Teton ranches and brought to their current location when the village was constructed. In the restaurants, you can find framed photos of some cabins in their original locations.

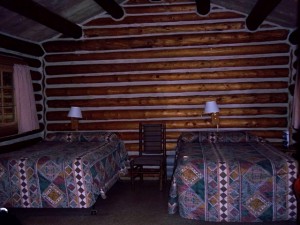
The interiors are rustic, but comfortable. There is no air conditioning (you rarely need it this high in the mountains), but each cabin does have a heater unit. Our bathroom had it’s own hot water heater, but no bath tub (shower stall only). There are no TV units, microwaves, or fridges. Free wifi is available in the cabin check-in office and in the guest lounge located adjacent to cabin 451.

Cabin interior.

Depending on your cabin location, you may be in easy walking distance to the two restaurants, the marina, the visitor’s center, and the store. If you opt to stay in the campground or tent village instead (canvas tents with wooden porches, bunks, and communal bathrooms), you may have to drive to these amenities.

During our stay, we utilized the many hiking trails, rented a canoe at the marina to explore the lake, and took the kids horseback riding (review to come).

Note: There are two other accommodations within this side of the national park. Jenny Lake Lodge is located on Jenny Lake, and is what I’d describe as a ‘make sure your kids are on their best behavior’ type of place. Jackson Lake Lodge is more family friendly, but does not sit directly on the lake. You do have great lake views, however, and our waiters at Colter Bay told us that more wildlife can be spotted there.

Extra Tip: Nights get cold in Grand Teton! We visited in July, but still needed jackets and long pants several times. You also want to make sure to pack warm pajamas for all: the heaters work, but you are in a rustic cabin with little insulation!

Date last visited: July 3-5, 2010.

Distance off the interstate: Right off Hwy 89.

Room Rates: Rates vary from $60 a night for semi-private cabins (share a communal bathroom) to $209 a night for a two-room private cabin (what we had).

Food Services: We were very pleased with the food at the resort. The Ranch House offered two ‘tiers’ of a breakfast buffet (you could opt for pastries, fruit, and cereals for $7 or a full buffet for $12…kids’ prices $5 and $7, respectively) and was very good. Dinner entrees were more expensive ($12-18 range) but the soup and salad bar option was very reasonable (and very filling). Kids’ menu prices were low. We bought food from the store for lunches, and ate at the cafeteria-style Colter Cafe Court only once: they have sandwiches, Mexican fare, and burgers in addition to a lunch take-out option.

Website: Colter Bay Village

Up Next: We hike to Inspiration Point on Jenny Lake!

Need to catch up? Read all ‘A Pit Stop a Day’ posts along our 22-day road trip by entering ‘a pit stop a day’ into our search box!

A Pit Stop a Day (Day 11): Yellowstone National Park

Day 11, we drove the short distance on Hwy 191 from Big Sky Resort to Yellowstone National Park.

Yellowstone crowds swarm the Old Faithful hub of this massive park, so after entering at the West Entrance, we drove north from the Madison hub to Artists’ Paintpots, then back-tracked to Firehole River for a wonderful swimming hole.

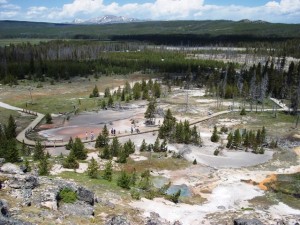
At Artists’ Paintpots, you’ll find a well-maintained loop trail taking you to steaming and bubbling ‘pots’ in the earth, as well as mud-holes that gurgle and spew (my kids’ favorite!). The hike is easy, and you get much closer to these interesting geothermal wonders than you can at nearby Geyser Basin (in our opinion).

Artists’ Paintpots is an easy hike for kids!

Upon reaching the top of the trail, you can see all the geothermal pools below!

Toby talks a bit about the paintpots on the Pit Stops for Kids Cam:

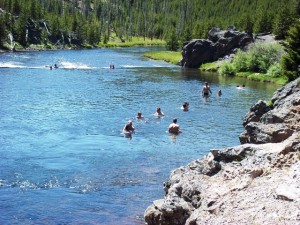
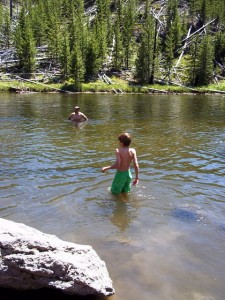
Once our kids were tired of being in the car (because Yellowstone is large and crowded and often doing road construction, long drives are unavoidable), we made a stop at the Firehole River Swimming Hole along Firehole Lake Drive (approach from the north, as this drive is one-way). This wonderful spot is warmed by the run-off of distant geysers, and one of the only places in the park where swimming is permitted.

Younger kids can wade and swim in the still waters of the hole, while older (more adventurous) kids will want to float a bit down the current. We did see people jumping from the rocks of the canyon upstream, but would not recommend it.

The geothermal waters combining with cold river water makes the water…less cold!

Nate still needs to ease into it!

Note: There are pit toilets at the swimming hole, but we had the kids change into swimsuits in the car instead.

Extra Tip: Pack a picnic lunch and plan to stay awhile once you’ve found a parking spot!

Date last visited: July 2, 2010.

Distance off the interstate: Right off Hwy 191 or Hwy 89.

Admission Prices: Only the $25 per car National Park fee (also good for Grand Teton NP).

Food Services: Plenty in the park. None at either location described above. We ate a meal at The Lake House in Grant Village in the southern end of the park before exiting, and found it much quieter than in the central hubs.

Website: Yellowstone National Park

Up Next: We enter Grand Teton National Park and check in to the Colter Bay Resort!


A Pit Stop a Day (Day 6): Logan Pass, Glacier National Park

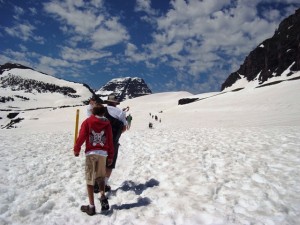
The climb up the snow is challenging (and the trail is single file)!

Day 6 was our last full day at the Many Glacier Hotel in Glacier National Park. For today’s featured pit stop, we decided to hike from Logan’s Pass to Hidden Lake.

We drove the approximate 21 miles back to the St. Mary Visitor Center Park Entrance, then another few to the Logan Pass Visitor Center at the peak of the famed Going to the Sun Road (en route, we stopped to let a black bear cross the road!).

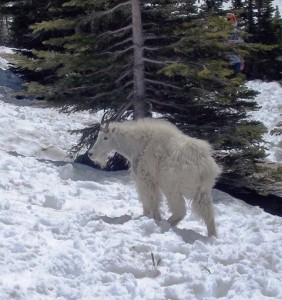
The Hidden Lake Nature Trail begins directly behind the visitor’s center. It consists of a fairly steady incline for 1.5 miles to the Hidden Lake overlook. It’s a strenuous hike (some people were carrying skis and snowboards up the trail so they could ski or board down, if that gives you an idea), but the return route is a breeze! We opted to eat a picnic lunch at the overlook; there are no tables, but the viewing platform serves as a nice spot to sit down and take in the view (which is spectacular). We ended up sharing our spot (but not our lunch) with three mountain goats who loped over to see what we were doing!

The resident mountain goats at Logan Pass were not shy!

Note: As you can see, the entire trail was covered in snow at the time of our visit. This made for an extremely challenging 3 mile hike! Rangers told us that by mid-July, most of the surface snow has melted, allowing visitors to hike on raised boardwalks instead. If you plan to go when snow is likely, be sure to wear hiking boots with a good grip and sunglasses (the glare is fierce, and the trail is exposed to sun).

Extra Tip: If the Hidden Lake Nature Trail seems too challenging to your group, and easier (but very beautiful) option is the Sun Point Nature Trail to Barring Falls. An easy .9 mile hike (one way), the trail follows the lake shore to stunning Barring Falls. Flat terrain. You can find the trail head approximately 10 miles back toward St. Mary on the Going to the Sun Road at the Sun Point parking lot.

Calvin reports his opinion on the hike on our newPit Stops for Kids Cam’:

Date last visited: June 2010.

Distance off the interstate: Approximately 20 miles from Hwy 89.

Admission Prices: Only the $25 per car National Park fee.

Food Services: None at the visitor’s center. If you don’t pack food in, the nearest food is back in St. Mary, where you’ll find the Park Cafe (our ranger told us they have the best pie she’s ever had).

Bathrooms: Available at the Logan Pass Visitor’s Center.

Website: Hidden Lake Nature Trail

Directions: From St. Mary (Hwy 89), enter the park at the St. Mary Visitor Center. Follow the Going to the Sun road past St. Mary Lake and up toward the pass. The Logan Pass Visitor’s Center is on the left.

Up Next: We drive south to Big Sky, Montana, stopping at Boulder Hot Springs to sample their soothing geothermal waters!

A Pit Stop a Day (Day 5): Swiftcurrent Lake Cruise

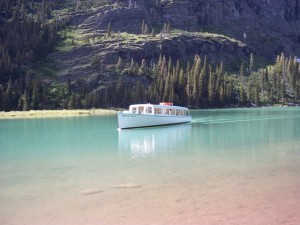
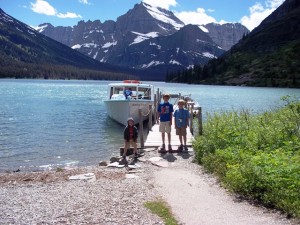
The Morning Eagle: a wonderful way to see the park interior.

Day 5 found us lucky enough to wake up once again at the Many Glacier Hotel in Glacier National Park. We spent the morning hiking nearby trails, then boarded Chief Two Guns for a Swiftcurrent Lake Cruise offered by the Glacier Park Boat Company.

What a great way to combine sightseeing, a guided tour, hiking, and boating! We departed from the dock of the Many Glacier Hotel on Swiftcurrent Lake and cruised to the opposite side (approximately 15 minutes). Passengers then walked .2 mile over a hill to nearby Josephine Lake, where we boarded the Morning Eagle, another cruise boat. From there, we crossed Josephine Lake and passengers were offered the choice of returning to Many Glacier or hiking 2.3 miles (round trip) to Lake Grinnell.

Boarding the boat after a .2 mile walk from Swiftwater Lake to Josephine Lake.

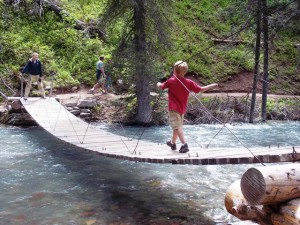
We opted for the latter (as did most passengers¦we had a group of about 30). The guided hike was simply stunning. Before we had walked ten yards, our naturalist (guide) was pointing out a moose and her calf in the reeds by the lake. Later on, we encountered moose and elk prints, many waterfalls on the mountainsides, a swinging and swaying wooden bridge, and Lake Grinnell itself. Our guide was knowledgeable, and while I usually prefer hiking without a large group, it was nice to gain the information. Besides, we were in bear country, so I didn’t mind the extra people (safety in numbers, right?).

The hike to Grinnell Lake includes a wooden cable bridge over icy glacial waters!

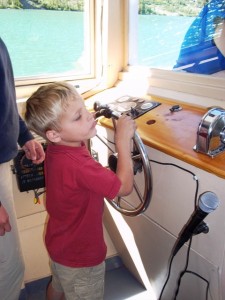
The kids had fun on the boats (and Toby once again got to take a turn at the helm). Despite the substantial cost, we give this tour a thumbs up: we’d do it again!

Toby at the helm of Chief Two Guns.

Note: You can access Lake Grinnell and the surrounding area without taking a boat cruise. From the Swiftcurrent Lake loop trail (which begins at the Many Glacier Hotel), it’s only approximately 1.3 miles (one way). In fact, Calvin, Nate, and my dad opted to walk back from the Lake boat dock instead of waiting for the return boat: it took them 45 minutes.

Date last visited: June 2010.

Distance off the interstate: 21 miles from St. Mary, 12 miles from Hwy 89.

Admission Prices: $22 per adult, $11 per child (under 12)

Hours: Cruises across Swiftcurrent Lake and adjacent Lake run multiple times daily. Cruises with guided hike to Lake Grinnell depart at 9 am and 2 pm daily.

Food Services: None. Bring your own snacks and water, as you’re out for 3.5 hours.

Bathrooms: Pit toilets are located at two locations along the trail. They were as clean as pit toilets reasonably can be!

Website: Glacier National Park lake cruises

Directions: See directions to the Many Glacier Hotel.

Up Next: It’s winter in the end of June as we hike on a glacier!