Exploring Pompeii with kids

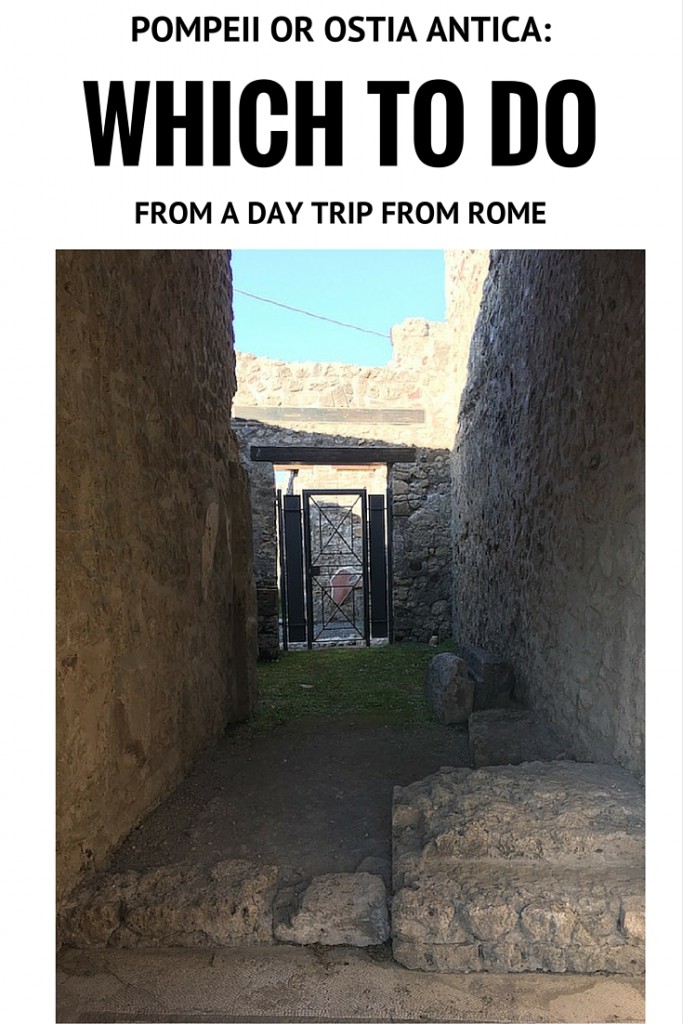
The ancient city of Pompeii, under the looming shadow of (what remains of) Mount Vesuvius, was not precisely as we imagined it. The layout, exhibits, and interpretive materials were not clearly marked, and it took some persistence to find what we were looking for (and even then, we missed things). It’s also most certainly a lengthy and expensive commute from Rome. All this said, we were glad we went. Here’s what to expect if you make the day trip:

pompeii-planning

From Naples, Pompeii is a short and simple metro/train ride away. It won’t, however, be a terribly pleasant one. We found that the local train system that connects the central train terminal in Naples to the outskirts (where you’ll find Pompeii) to be a bit grimy, even as far as metros go. Don’t expect a cushy journey, and do expect a lot of stops. However, it’s a straight line to the Pompeii Scavi stop (the second of two that are listed as Pompeii), and once deposited there, you’re directly in front of the ticket booth and entrance. In the Naples train station, head downstairs for their metro line, and buy tickets at the kiosk. At the time of our visit, metro tickets were €2,50 each (each way).

pompeii-casts

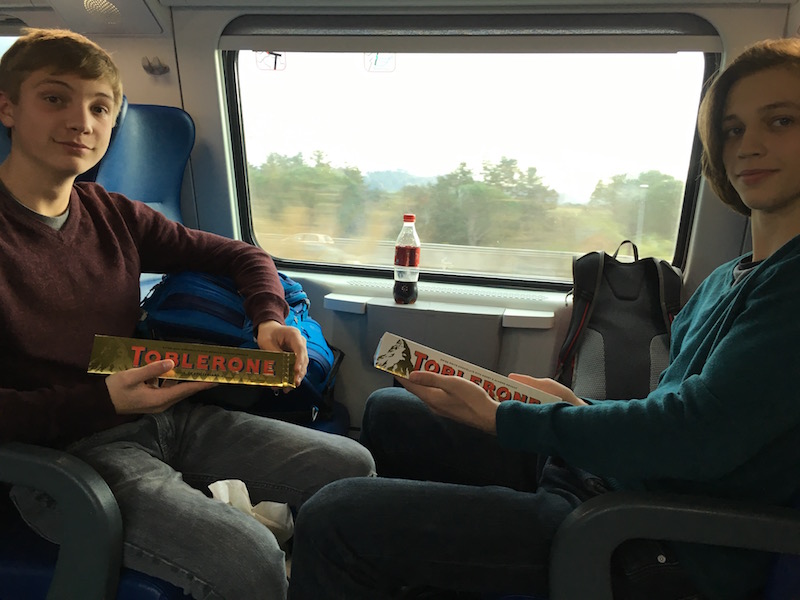
If you’re coming from Rome, as we were, you’ll first need to take the fast train from Rome’s Termini station, operated by TrenItalia. We took several journeys on this line, and both were very pleasant. The train is very fast, very comfortable, and yes, a bit expensive. You’ll want to book your tickets for this leg of the trip ahead of time. You can print these tickets at home (you’ll want it to show a bar code) or at the station, using one of the many TrenItalia kiosks. At the time of our visit, tickets for this leg of the flight were approximately €25 each.

Once at the Pompeii stop, you’ll see a line of food stalls, as well as a small cafe and vending machines. Pick up some water if you need some. Tickets for entry to the Pompeii ruins are just a few yards away, at the official ticketing booth. Don’t buy at the train station…this is a scam. There’s another entrance by Pompeii’s amphitheater, for those with tickets bought online. The ticket line is sometimes long, but it moves pretty fast. This is a good time to eat a quick snack.

pompeii-with-kids

There are also audio guides for 5 euros each. We picked these up, and while the audio program has some flaws, we still felt it to be money well-spent. First, the flaws: the locations where you can listen to information are numbered, but they’re pretty haphazard (don’t expect it to go numerically very often). Also, many descriptions instruct the user to ‘step inside’ to see certain artifacts or architecture, or to turn down this or that hallway. In reality, many of the dwellings in Pompeii are gated to the public. You can look in, but not step in (there are exceptions I’ll describe below). All this said, if you go with the flow and listen as you wish (and as you see numbers), you’ll learn a lot. We really liked the actual information presented. It was interesting to kids, too.

Once in the Pompeii ruins, visitors are left to their own devices to wander at will. This is both a blessing and a curse. It’s nice to have the freedom to explore on one’s own, in whatever direction desired, but it can also mean you’ll miss things. There are maps available, but they’re not terribly user-friendly. It’s best to enter and make your own path, listening as you go. Depending on which entrance you come through, you’ll either be near the basilica (meeting space) and forum by the main Porta Marina entrance, or by the amphitheater. Either way, here’s what not to miss:

Pompeii with kids:

In the amphitheater area, Piazza Anfiteatro,look through this entertainment space, then enter the wooden pyramid building that houses the molds of human remains, discovered by archaeologist Giuseppe Fiorelli in 1863. Keep in mind, these plaster ‘people’ are neither replicas or remains…Fiorelli made casts of the empty spaces they’d left behind, capturing their positions at time of death. It’s very sobering, and young kids may not be ready for it.

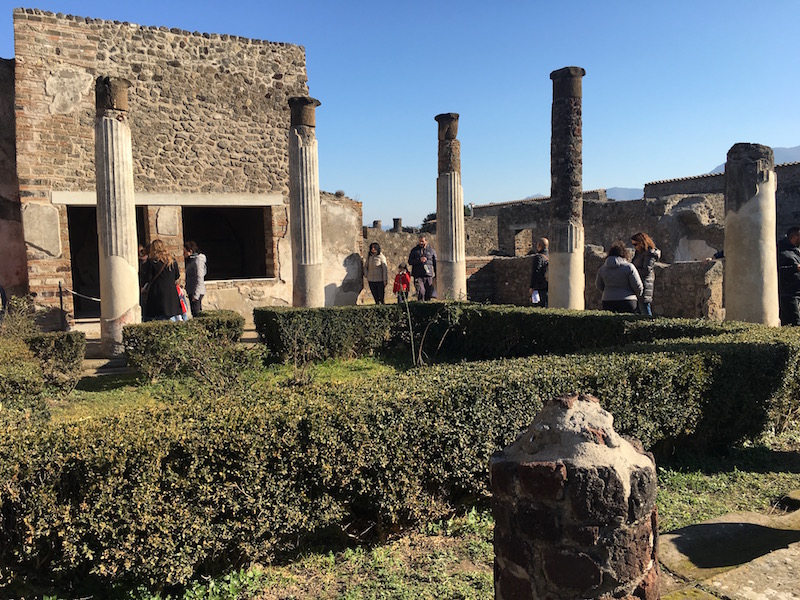
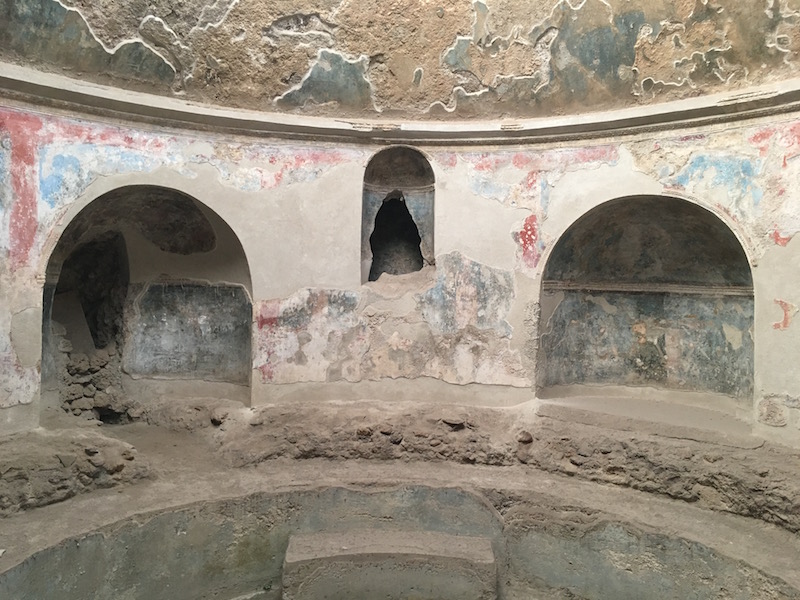
The Palestra Grande is nearby, as well as the domus of Marcus Lucrezius Fonto, both of which help tell the story of the daily lives of those who inhabited them and used them. The main street through Pompeii is probably the via dell’Abbondanza, which will link you with the forum side of the ruins. On this side, you’ll want to see the public bathhouses, the temples (what’s left of them) and basilica, and the simpler buildings that housed ‘cafeteria’ counters, sporting arenas, and more modest homes. In this area, we only had access to the bathhouses for interior entry.

pompeii-ruins

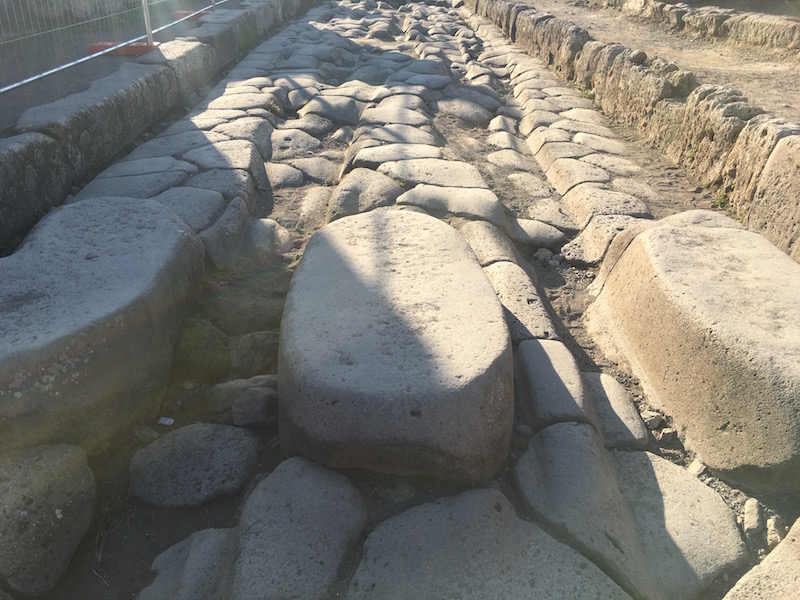
It’s also very interesting to simply walk the streets. You can learn about the city’s water systems, traffic systems, and other public works by listening to the extra materials in the audio guide (you’ll be prompted to these after listening to numbered entries). Don’t skip these…they’re among the most interesting. You’ll see the indentions of chariot wheels in the stone streets, and learn about the ‘crosswalks’ of Pompeii. Certainly, the quality of life was generally high.

If you go:

  • Be sure to allow enough time. We had three hours, and it wasn’t enough. Grab a painfully early train from Rome if you’re making it a day trip, or go in summer when the ruins are open longer per day. While we were happy to do this in one day, we wished we had more time.
  • Pack a lunch if you can. The cafeteria onsite is overpriced and not very good (no huge surprise here), and the lines can get long, cutting into your time in the ruins. It’s permitted to picnic just about anywhere along the roads. There IS a size limit on day packs, but if you have a large bag with lunch, you can keep it at the bag check and retrieve it any time. While mildly inconvenient, I believe going back for it would take less time than we wasted in lunch lines.
  • Validate your metro tickets from Naples to Pompeii. You;ll see the green or yellow validation machines in the station.

pompeii-baths

Hours and pricing:

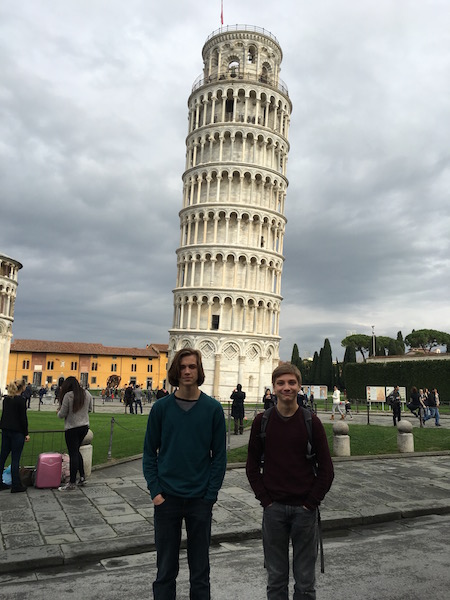
Tickets are €20 per adults at the time of our visit. Kids 18 and under are free. If you have tall teens like I do, have them bring an ID. We were asked at several locations in Italy to show ID for free admission. The hours are as follows:

1st April – 31st October:    daily from 8.30 am to 7.30 pm (admission closes at 6 pm)
1st November – 31st March: daily from 8.30 am to 5 pm (admission closes at 3.30 pm)

Directions:

For the entrance to Porta Marina and Piazza Esedra:
Circumvesuviana Naples-Sorrento (Pompei Villa dei Misteri Stop)

For the entrance to Piazza Anfiteatro:
Circumvesuviana Naples-Poggiomarino (Pompei Santuario Stop)
FS (Italian railways) Naples – Salerno (Pompei Stop)

Have you been to Pompeii with kids? What was your favorite part?

Getting from Pisa to Florence with a side trip to the Leaning Tower of Pisa

If you’re flying into Pisa’s airport and then getting from Pisa to Florence Italy, you have several options, all of which are pretty cheap and pretty fast. However, if you want to take advantage of your time in the town to see the Leaning Tower of Pisa, there’s really only one way to do it. Here’s how (and why it’s worth the time):

leaning-tower

From Pisa International Airport (PSA), also called Galileo Galilei Airport, you’ll need to go to the bus ticket window/newsstand directly past the baggage claim, in the arrivals area. This booth can sell you bus fare for the Rossa (red) line, that goes from the airport to Pisa Centrale railway station, the city’s biggest train depot. It’s a five minute ride, and costs just a few euros, but from the rail station, the Rossa line continues through town, to the Leaning Tower.

Note: bus rides are FREE all morning in Pisa, with fare only needed after noon. During our visit, we started our bus ride in the morning, but returned in the afternoon, so we bought one-way fare. If your trip will be all in the afternoon, buy return bus fare from this booth as well.

Step outside with your tickets, and you’ll see the bus stop directly across the small parking lot (this is a small airport). Look for a red circle on the front of the bus. They are being literal when they say it’s the Rossa line.

Once on the bus, note the stop at Pisa Centrale, because you’ll want to get off here on your return from the tower, in order to get to Florence. But for now, stay on the bus. Unfortunately, we were given incorrect information on another website, and thought we needed to get off the Rossa line here and access the tower via the trains. Not so.

Stay on the bus another few stops, until you get to the Torre stop. There’s usually an outdoor market directly in front of the tower complex, called Piazza del Duomo, partially obscuring your view. We didn’t even see the tower the first time we got to this stop, and thought it was the wrong one! (We had all sorts of navigational issues this day!)

leaning-tower

At Torre, get off the bus and walk through the marketplace to the gate to the tower and cathedral. You’ll clearly see it at this point. It’s free to walk around the base of the Leaning Tower and into the cathedral. A funny note: the tower began leaning during construction, but they kept on anyway!

You can buy tickets online to go inside the tower…you can even climb to the top and see the view from outside. We didn’t have time for this, as we were due in Florence at a certain hour, but if you budget a few hours at the piazza, I recommend going up the tower and into the cathedral. There’s a baptistry as well. Of course, you’ll also see plenty of vendors with booths of touristy souvenirs.

Once you’re ready to depart, take the same Rossa bus line back to Centrale. This bus line goes in a loop, so you can’t go wrong. Once at Centrale, go to the ticket sales window and ask for the first train to Florence. They typically run every hour or so, so we didn’t find any reason to book ahead of time. At the time of our visit, tickets were approximately €18 for adults and half that for kids. You’ll need to be at the correct platform for your train 10 minutes before departure.

Note: Be sure to validate your train ticket once you’re on the platform. You’ll see green validation machines. There’s a steep fine if you’re caught with an unvalidated ticket, though we never saw anyone checked during our trip.

The ride on TrenItalia to Florence took under an hour, and we were able to charge devices and access WiFi onboard. We took TrenItalia many times in Italy, and found it comfortable and convenient every time. We ate lunch on the train, finding several food options at a food court at the Centrale station.

trenitalia

The kids couldn’t help showing off their favorite train snacks!

Once in Florence, get off at the main station, Santa Maria Novella. Almost every point in the city center is walkable from this station, which is lovely! Enjoy Florence!

Worth noting: if you do NOT want to stop in Pisa to see the Leaning Tower, you can take either TrenItalia to Florence exactly as we did from Centrale, or you can buy cheaper bus tickets for buses that depart directly from the airport. We were even given the option of buying these tickets onboard our plane. They are approximately five euros each (one euro more if bought once you land), and by far the cheapest route to Florence. However, the bus takes longer and you miss out on Pisa.

Exploring Rome with kids: Overome Colosseum tour review

Touring Rome’s Colosseum and Forum is always in the top three attractions for families. This center of ancient Roman history is a must-do, but also big, crowded, and complex. We were very glad we opted to see the Colosseum and Forum with a small group tour. If Rome is in your family travel plans, read on for our Overome Colosseum tour review.

rome-colosseum

We chose to see the Colosseum with Overome based on recommendations from other travel writers. I’d heard Overome’s tour guides work hard to make the content of the tour relevant to kids, are reliable and timely, and are knowledgable. We were steered right, because our guide Federica was all this and more.

Overome Colosseum tour review:

Overome’s Colosseum and Ancient City Tour starts at the Colosseum metro station, directly under the shadow of the great arena. We met Federica (Feddie) here; she was easy to spot with her Overome sign. Our group consisted of only our family of seven, plus three other guests. After brief introductions, we were off…and by off, I mean just across the street to the arena.

Note: I highly recommend booking small group tours instead of large ones. We saw many large groups walking through the sites, and it didn’t look fun to be in a herd.

The Overome tour includes all entrance tickets and fees, so we didn’t have to wait in the imposing ticket line. We did, of course, have to wait in the security line, but although it snaked halfway around the base of the Colosseum on the day we visited, it took less than twenty minutes to get through. During that time, Federica (Feddie) gave us an overview of the structure and its history. While we patiently moved up in the line, we heard other tour guides getting agitated with the wait, and their guests getting impatient. I knew right then, only minutes into our three hour tour, that we were in good hands with Feddie.

overome-tour

Once in the Colosseum, Feddie took us slowly from level to level, explaining how the arena was built and by whom, its architecture and design, and its uses over the years of its history. Even though the complex was crowded, it was easy to hear what she was saying because we were given earbuds and radios.

Everyone knows at least a little about this colosseum of gladiators, emperors, and prisoners, but we learned quite a few new tidbits, especially about the many exotic animals who entertained and died there, as well as specific stories about certain victims of the games.

Feddie used illustrations on an iPad to help explain her points, which really helped us visualize what she was describing. By no means were we looking at the screen all the time, but it was definitely a useful tool. This tour doesn’t take visitors down to the bottom floor of the Colosseum, be we did spend time on the upper levels with views of the labyrinth of rooms and levers and one-time elevators that made the Colosseum function in its heyday. We actually wished we had more time in the Colosseum when it was time to move on to the Forum.

colosseum-rome

The Forum is the section of the ancient city center for which I most wanted (and needed) a guide. Without one, it’s an expanse of half-ruined buildings and rubble. Even with a guidebook in-hand, it’s not done justice without someone knowledgable to explain it. I know, because the first time I visited the Forum ten years ago, I did it on my own. I learned far more with Feddie.

We started at the far end, where she pointed out major landmarks in the Forum and showed us more images on her iPad to give us an idea of what it once was. After we could visualize it, we could see how the remains of marble and stone had once been grand buildings and streets. She explained what each structure had been used for, including the House and Temple of Vestrals, Arch of Titus, and the alter with Julius Caesar’s ashes. We learned about the multiple ‘layers’ of the Forum, and for the first time, I could really see how much of the area had been buried in mud and soil for centuries at a time.

We spent more than an hour in the Forum, which left us with little time for Palatine Hill. We were given an overview, however, and when Feddie left us, we were still inside the complex, so we were free to explore it more on our own. Instead, we were worn out and hungry by this time, so we asked her for a lunch recommendation in the area. After leaving Feddie, we happily dined on pizza at nearby Pizza Forum.

Our Overome tour definitely confirmed my suspicion that we needed an expert to fully experience this part of the city. And we couldn’t have been happier with Feddie; it was clear she likes her job and knows her stuff.

overome-rome-tour

Cost:

The Overome Colosseum and Ancient City tour is $52 per person, and I believe the value is definitely there. At the time of our visit, we departed from the metro station at 9 am, and were done by 12 pm.

As I disclose whenever applicable, our tour with Overome was complimentary, for the purpose of review. Without this type of hospitality, we would not be able to write personalized and up-to-date reviews.


Why you should tour Castel Sant’Angelo in Rome with kids

While visiting Rome with kids, the time will come when you’ll face a full-on mutiny if you suggest even one more museum. This is the moment to head to the Castel Sant’Angelo. This underrated and overlooked site in Rome is a must-do. We are so glad we tried it!

castel-d-angelo-rome

Unlike the Colosseum, Vatican, and Forum, kids are let loose at Castel Sant’Angelo. This mausoleum turned fortress dates back to AD 123, when it was used by Hadrian’s time, then later used for defense of the bridge to the Vatican and as a refuge for popes. You enter right along the Tiber, and almost immediately go across a steep bridge that once opened and closed. Inside, kids can run along the fortress walls, checking out battlements, a catapult, cubbies from which to shoot arrows…the works. Further inside, you can walk the interior hallways and imagine guards and knights, torches and prisoners in chains. Not much has changed, really. Even the flooring is original. There’s a huge hole in the floor where kids can glimpse the dungeon, and up higher, you can tour through papal rooms still decorated for the popes who hid out here over the years. This interior section is actually quite amazing.

roman-castle

At the very top of the Castel, the views of the city are stunning. Be sure to allow time to take photos and use the view to pick out landmarks you’ve visited during your time in the city. There’s even a small cafe where you can pause for hot chocolate and espresso along the battlement one floor below the top (they don’t let you linger here at the tables if you haven’t ordered, however). Near this cafe are the interior rooms housing armor and weaponry through the ages. Unfortunately the descriptions are in Italian only, but let’s face it…by this point in a trip to Rome, kids are done reading things.

We spent several hours here, and loved the freedom to run around and explore at will. Afterward, we walked across the pedestrian bridge into Centro Storico (the old city) where we weren’t far from the Pantheon and Piazza Navona.

touring-castel-d-angelo

Pricing and hours:

Tickets at the time of our visit were €10 for adults and half that for kids 18 and under. We found no line when we visited a few hours before closing. Check opening and closing time, as it varies by season. During our winter visit, the fortress was open until 7 pm, with last ticket sales at 6:30 pm. I recommend touring around 5 pm in winter to be there for the sunset.

Paris day trip: Touring Normandy D-Day battlefields

In each major city we visited during our European trip, we opted to take one long day trip outside the city limits. In Paris, many options for day trips vie for attention, but for our family, a tour of the Normandy D-Day battlefields won out. We have two teens who have studied WWII history, and this tour was their pick.

d-day-beach-tour

Touring Normandy D-Day battlefields:

We opted to go through Viator for our tour,, choosing their Normandy D-Day Battlefields and Beaches tour. One of the most respected and well-known tour companies operating across Europe, we trust Viator to provide a high quality experience. One thing for families to note that many don’t realize: Viator is a middle man. They don’t conduct the tours themselves, but rather outsource them locally. For travelers who expect to be led by a Viator guide from a Viator office, this can be unsettling or even alarming, but I think there’s a good reason behind it: Viator is a huge operation, and cannot be the expert on everything, everywhere. I appreciate that they seek out the best guides within each city. In any case, we had a tour with them in both Paris and Rome, and in both cases, our guides were top-notch.

For the D-Day tour starting and ending in Paris, Viator uses Paris City Vision. We met our group and guide at the Paris City Vision office by the Concorde in Paris at 6:30 am the day of our tour. Yes, painfully early, especially since we’d be late if we waited for the metro. We opted to call a car service so we’d be certain a ride would be ready and waiting for us. (We used Blacklane, which I highly recommend. Read more about our experience with them in this post on planning a Paris itinerary.)

After an easy check-in experience at Paris City Vision, we headed for Normandy on a luxury tour bus. I know, I know, everyone hates big tours in tour busses. But it was fine and I’ll explain why: we never, ever walked all around in a huge group at the sites. Our tour stopped at four locations, and our guide talked to us while the bus was in transit in each case, allowing us to tour as individual families. This is where the value of the tour came in: we didn’t have to figure out our own transportation to and from Normandy, we had all entry tickets taken care of, and we had expert commentary before each stop.

normandy-d-day-museum

The drive to the first stop, which is in Caen, takes almost three hours. Yes, ouch. But we slept, and found the bus very comfortable, with reclining seats and reading lights and a restroom onboard. The first stop on the tour is the Caen-Normandie Memorial museum at the site of a German bunker and stronghold during the French occupation, and covers WWII very much in depth, from pre-war time through the liberation. It does cover the holocaust in detail, so prepare children. In fact, I’d recommend this whole tour only to families with kids age 10 and up. We’d prepared them for D-Day battle details, but didn’t know we’d need to prepare them for some very sad details regarding Jewish ghettos and camps. This part of the museum was too much for our 11-year-old. It’s hard to bypass because exhibits are intermixed, but the area downstairs towards the end of the hall have the most holocaust stories. The violence of the D-Day battles are much less graphic, even in the film…he has no problem with those aspects of the museum.

An included lunch was served in the museum for our group privately. It was a sit-down affair, with a salad bar (French cafeteria style, with a second dessert and cheese station) and main dish. There was not a choice in the main dish. When we visited, it was a rustic French style cuisine of baked chicken or hen. Some of us loved it, others not so much, but there was plenty of food for those who didn’t enjoy the main dish.

The tour then drove us through very pretty Normandy countryside and villages to Pointe du Hoc, Omaha Beach, and Juno Beach. Pointe du Hoc is the region on high cliffs scaled by US Rangers and has extensive bunkers and bomb craters to look at and walk through. Omaha Beach has an excellent visitor center (be sure to leave time to go downstairs) and the US cemetery. Juno has the memorial to the Canadian forces and easy beach access.

The picturesque countryside and tiny villages (of which we drove through several) was an added bonus for me on this trip. I had wanted to find a way to explore more of the French countryside, and this way, we got to see some of this without renting a car for the day. Our guide pointed out WWII-related landmarks in and around the villages, such as the hedgerows that cost so many lives as smaller battles were fought through and between them.

d-day-beaches

The entire day was certainly sobering, but also beautiful and impressive. We learned a lot, and as noted above, we had plenty of time for personal reflection and family time during the day, as we spread out from our larger group at each stop. As a family, we were able to decide our own itinerary through each memorial and museum, spending time together and digesting the information together. For families wishing to find a particular memorial marker or name, there is time for this. However, we found that at each stop, we didn’t quite have as much time as we’d like. Certainly, had we been staying in Normandy and had more time, we would have spent at least a half hour more at each stop.

We returned to Paris around 4 pm, stopping for a quick dinner at a service station along the interstate. This meal was on our own, and nothing more than a necessary stop. I was actually glad they hadn’t built in another longer meal, as we were ready to be back in the city by this point. We arrived back at the tour office around 8:30 pm.

Certainly, this tour was a very full day, but our sixteen-year-old lists it as one of the most memorable of our trip. Teens who have studied (or will study) this war will find it fascinating. Our 11-year-old was also old enough to understand and enjoy the tour, though he did get bored a few times. If you go, be prepared for some heavy subjects and hard questions, and do your best to prepare kids ahead of time. As noted above, there’s nothing visually graphic as far as war images go, but the stories and the cemeteries do take their toll. By the last stop at Juno, I will admit all we wanted to do was walk together as a family on the beach.

A few practicalities and pricing info:

Bring books or iPods for kids’ entertainment on the bus, or even a deck of cards. The bus seats have little trays like airplane seats do. I also suggest bringing bottled water, though our guide was great about pointing out where we could buy more along the way. The cost of the tour is on the higher side of Viator’s Paris offerings, due to the length of the tour and distance traveled. We felt the value was definitely there, provided you have older kids or teens.

Book on Viator.com, and print out your confirmation page. That’s all we needed at the tour office. When you book, you’ll receive an email from Viator letting you know which company is conducting your tour and where to meet.

At the time of our visit, pricing was $199 for adults and kids were approximately $99. This price includes all admission fees and lunch, plus the transportation. There’s an option to pay more for hotel pick up/drop off.

As we disclose whenever applicable, our Normandy tour was paid for by Viator, for the purpose of review. All opinions remain our own.

How to plan a Paris itinerary with kids

With its 20 arrondissements connected by a busy metro system, Paris can feel intimating at first. The key to planning a Paris itinerary with kids is to plan your days ahead of time, grouping destinations by proximity and utilizing walking tours to bridge the gaps (figuratively and literally).

paris-itinerary-with-kids

When planning our five days in Paris, I started by making a list of our must-do’s, which included the usual suspects: the Louvre, Eiffel Tower, Sacre Coeur, Notre Dame, and d’Orsay. Of course, at this point in my planning, I knew I was missing a lot. To properly fill out my itinerary, I utilized itinerary planning services that offer local recommendations, walking tours, and dining picks. Once I had ‘B list’ destinations and restaurants in the mix, I organized my days based on where we could walk after only one or two metro rides per day. Finally, I bought every ticket possible ahead of time, including Paris Museum Passes, which allowed us to skip every entrance queue we found (and we found quite a few).

Itinerary services we recommend:

Momaboard:

I’ve known the folks at Momaboard for years, and I was thrilled to learn they’d launched their trip planning program. Momaboard pairs traveling families with local experts with kids of their own. After a brief questionnaire about our trip, the ages of our kids, and our interests and goals, our Momaboard expert put together several days’ worth of itineraries for us, including detailed directions, dining recommendations, and fun facts en route.

How I used this information: certainly, families can use the itineraries ‘out of the box’. They’re ready to go. However, since I already had a very loose sketch of our our days would look, I instead mixed and matched the attractions suggested. For instance, our Momaboard itinerary suggested a morning in Montmartre followed by an afternoon near the Eiffel Tower. I did both, but broke them up into two different days. By far the most useful part of our Momaboard itinerary: the dining recs. We are not foodies, and we have hungry teens to feed, and all the restaurant picks were right on target for us.

notre-dame

TraveLove:

We also tried out Travelove on this trip. Similar to Momaboard in that Travelove uses local itinerary-builders and asks families questions ahead of time, Travelove printed us a multipage, bound guidebook with custom itineraries, walking tours, and maps…lots and lots of useful maps. They also put together a journal/activity book for our ten-year-old that included custom-built questions and activities based on our particular itinerary. He had a lot of fun with it.

By far, the best attribute of our Travelove service was the walking tours suggested. They went point-by-point, with great maps and descriptions. For instance, they put together an excellent walk from the Tuileries to the Lourve, which we actually walked in reverse. Starting at the Lourve after our morning there, we walked along the Seine past the booksellers, Latin Quarter, and Notre Dame, learning things along the way.

Here’s what our itinerary looked like by the time we’d implemented both these services and gathered ideas from other guidebooks. (I recommend Rick Steves.) Our must-dos we started with are highlighted.

louvre-with-kids

Day 1:

Metro from our neighborhood in Montmartre to Musee de Lourve. Morning at the Louvre, followed by a walking tour along the river through the Latin Quarter to Notre Dame. Dinner in the Hotel D’Ville area. Metro back ‘home’ in time to walk to Sacre Coeur at night to watch the Eiffel Tower sparkle.

Day 2:

Metro from our neighborhood to the Eiffel Tower area, where we booked a morning Fat Tire Tour of the Concorde and Invalides area. (See separate post.) Lunch at street vendors under the tower, followed by a stop at a creperie recommended by Momaboard. Timed tickets to go up the Eiffel Tower at sunset.

fat-tire-tours

Day 3:

Metro from our neighborhood to the d’Orsay Museum, followed by a shorter stint in the Rodin courtyard (recommended by a tour guide). Built-in ‘free’ afternoon; we spent it watching the new Star Wars movie followed by a visit to the Paris catacombs.

Day 4:

Toured the area near the Arc d’Triumph and Champs Elysees, including dining recommendations from Momaboard. We concluded our day with a boat tour along the Seine, and explored the seasonal Christmas markets. Almost all of this day was built out based on local recommendations.

Day 5:

Viator tour through Normandy to see D-Day beaches and museums (see separate post).

paris-metro-tips

Getting around:

We used the Paris metro system exclusively. We found it very easy to use once we got our bearings, with good signage and multiple stops. Each day, we hopped on the metro from our Montmartre neighborhood (Chateau Rogue stop) and rode it multiple times per day. To do this, we found multi-day metro passes to be crucial (see below).

A word on the Paris Museum Pass:

The Paris Pass allows families to skip the long lines at museums, and gives parents the freedom to plan shorter museum visits (with the pass, it’s no big deal if you only spend 30 minutes checking out 2-3 major works). Kids are free at almost all museums (18 and under) which is wonderful, but if they don’t have a kids’ Paris Pass, you’ll still need to wait in line to get them a ticket (silly, I know). Because the Paris Pass comes included with a multi-day metro pass, it may be worth it to pay for kids’ passes along with adults, so everyone can skip the lines. Without these passes, we would have waited over an hour to get into the Lourve and Notre Dame each (instead we walked in immediately). Look for the Paris Pass or advanced tickets queue, or ask for it. Note: a few locations indicate they ‘don’t guarantee line skipping’, such as Notre Dame. I asked the guard at the start of the line politely if we needed to wait in line, showing our Paris Pass, and he waved us right in.

General tips:

Seek out the less touristy cafes and food carts, but not at the expense of hunger. After hours in the Lourve, we knew we should go in search of a crepe or baguette, but everyone was hungry and tired and ready to revolt if we walked in the wrong direction. The museum cafe sufficed (and actually had very good takeaway sandwiches).

Give kids spending money: there are so many tempting treats as you walk along the streets in Paris, you’ll be saying ‘no’ every ten minutes if you’re asked to open your wallet that often. Give kids money of their own to spend on tasty but small change treats such as macarons, eclairs, and crepes.

What are your best tips for touring Paris with kids?

Touring Kilmainham Gaol in Dublin: Why this site should be on your itinerary

Few attractions in Dublin, Ireland feel more sobering to me than Kilmainham Gaol. An Ireland heritage site, Kilmainham’s influence spans from the 1780s to the 1920’s, serving as a backdrop to multiple tragic and heroic moments in Irish and European history. It’s now one of the largest unoccupied gaols in Europe, and a great place to start learning about Irish history, particularly the Irish Revolution.

kilmainham-gaol

Families will want to take a 60 minute tour of the gaol; this is definitely the way to understand what you’re seeing. However, some of the stories told on the tour can be upsetting. For instance, we learned about a man jailed here for starting a political riot in the early 1900s who was permitted to marry his fiancé while in the gaol…only to be executed minutes after the ceremony. We also learned about the harsh conditions of life in Kilmainham, including drafty cells, extreme discomfort and cold, and manual labor, such as moving rocks in the stone yard for hours on end. However, we also learned that during the Irish famine, conditions were so bad in Dublin, many people purposely placed themselves in Kilmainham by stealing bread or some other small crime, just so they’d have a roof over their head and humble meals.

stone breakers-yard

The halls and cells are dank and depressing, but the entire building is impressive to see. School-aged kids will be able to appreciate the stories and history and be wowed by the architecture (and the cool-factor of being in a big prison). Young kids may either lose interest or become frightened; you know you children and can be the best judge.

If you do opt for the guided tour, they are timed tickets, but cannot be booked in advance, unless you’re a group of over 10 people. Otherwise, groups are small: our tour had about 8 people present. We didn’t wait long for our tour time, even in the peak of summer. While you wait, there are exhibits to see.

Hours and Admission:

The gaol is open all year. Hours are:

kilmainham-crossApril – September: Daily 09:30 – 18:00 (last admission at 17:00)

October – March: Mon -Sat 09:30 – 17:30 (last admission at 16:30)

Sunday: 10:00 – 18:00 (last admission at 17:00)

Admission is very reasonable at €4.00 for adults, €2.00 for kids and students, or even better, €10.00 for families.

Getting here:

Most families will rent a car in Ireland. If this is the case for you, it’s easy to get to Kilmainham, which is only 3.5 km from Dublin. The address is Inchicore Road, Kilmainham, Dublin 8. It’s also possible to take public transit.

Photo credit

Pompeii or Ostia Antica: Which to include as a day trip from Rome

Click on just about any message board or forum about Roman travel, and you’ll see the question, “Should we go to Pompeii or Ostia Antica during our trip to Rome? After debating the question for ourselves last month as we planned our own Roman holiday, I can tell you there’s no easy answer.

pompeii-planning

For those in the early stages of planning, here’s the scoop: Pompeii is, of course, the site of the eruption of Mount Vesuvius, and the archeological remains are those of a civilization caught in time. Ostia Antica is the site of the one-time Roman seaport, which fell out of popularity slowly, as the sea receded (it’s now several miles away). Ostia Antica is also beautifully preserved, and somewhat more accessible in both location and visual layout. The bottom line: do you want to see your ruins with our without a volcano? Here are some questions to ask yourself as you plan:

How much time do you have?

Pompeii is easily a long full day trip from Rome, whereas Ostia Antica is just 30 minutes away. You’ll want to dedicate at least half a day to tour either location (the more the better), so take this into account. Some travelers even make Pompeii an overnight trip. It’s that extensive. To get to Pompeii, you’ll want to take the Frecciarossa line from Termini station in Rome to Napoli Centrale in Naples, then transfer to the local line. Be sure to start your trip early in the day, especially in the off-season, when exhibits at Pompeii closer earlier (as early as 3 pm). Advanced reservations are only needed for the first leg of the train trip. If you opt to rent a car in Italy, you’ll definitely save time and have more flexibility.

What’s your budget for a day trip?

Train tickets to Pompeii ran about $70 per adult and $30 for children in late 2015. Consider this cost in your considerations. Tickets to Ostia Antica are just a few euros, and the train line is included in the greater metro area of Rome. This means that if you have Roma Pass, you’ll travel there for free. Both locations charge entry fees, but they’re minimal. At both locations, it’s possible to either tour on your own or hire a local guide.

What type of preservation do you hope to see?

Pompeii is unique in that it’s literally a moment preserved in time. Ostia Antica was abandoned more slowly and naturally, as the port grew out of service (as the sea receded). Therefore, what you’ll see there is a more generalized ruin that represents many centuries. There’s more to physically see at Ostia Antica, because it’s all above ground and spread out in a city format. At Pompeii, much is still hidden under layers of ash and dirt, but what you can see is magnificent. So the question boils down to: do you want to show your children what a civilization looks like in mid-movement, when struck by a natural disaster, or what many centuries of commerce look like? There’s no wrong answer.

What we decided:

After much debate, we decided to take the plunge and go to Pompeii. Why? Several members of our traveling party were set on it, and when there’s that much enthusiasm for a site, that’s where we head. There’s something vey iconic about seeing Pompeii, and I didn’t want to damper this excitement. Would we have loved Ostia Antica? I have no doubt we would have. As I said before, there’s no wrong answer here.

pompeii

The above post was written in partnership with Alamo Europe. All opinions remain my own.

Best Mountain Towns: Breckenridge Colorado

Yes, Breckenridge, Colorado could certainly fall into Pit Stops for Kids’ Best Ski Towns category; however, this resort town truly is a four-season destination. While it’s best known for winter sports, Breckenridge shines in the warmer months as well, boosting hiking, rafting, biking, and lots of storied history.

breckenridge-colorado

Here’s what to do with kids and without in Breckenridge, truly a Best Mountain Town.

For all ages:

Hiking: The Tenmile Range, plenty of 14-ers, and a network of in-town hiking trails give families an entire vacation’s worth of hiking at their fingertips. We love that parents with young kids can access trails like the Burro Trail directly from Main Street in town, whereas serious hikers will be quite challenged at higher elevations. See our entire post on hiking in Breckenridge with kids.

mining-cabin

Shopping and eating: Always important activities on a vacation, shopping and dining options abound on Breckenridge’s Main Street and the blocks surrounding. Read our post on where to eat in Breckenridge, and be sure to take the time to walk along the Blue River Rec Path, taking in the fall colors in autumn and enjoying the snow in winter.

Skiing: Of course, Breckenridge Ski Resort is omnipresent in and around town. The peaks of this world class resort span across the town, and lift access is available at multiple points (making many lodging choices ski-in, ski-out. In addition to downhill skiing, Breckenridge’s hiking trails become snow shoe and nordic ski trails in winter. Pick up rental equipment at any one of a vast number of sporting goods stores in town.

Bike riding: There are miles of mountain bike trails around town (more on that below) but for families who don’t want to tackle this extreme sport, the Recreational Bike Path is paved, and connects Breckenridge with Frisco and even Keystone. Families can rent bikes and trailers and spend a day on the path. A rec bike path also winds through town, adjacent to the Blue River. Family tip: For families that pedal together, take a ride from the gate along Boreas Pass Road. It’s an old railroad grade, so the climb is mellow and you’ll see incredible views not far from where you start. The best part? It’s all downhill back to the car.

breck-single-track

Historical tours and sites: Everywhere you go in Breckenridge, you’re surrounded by early settler and mining history. Families can see remnants of mining on the area’s trails: an easy hike on the short but beautiful Reiling Drudge Trail boosts an actual drudge and hydraulic mining area, and a longer, steeper hike on the Spruce Creek loop yields mining cabins and an old bull wheel.

Tip! Kids and adults will love the zipline and Gold Runner Coaster at the Fun Park. For history on the town, families can participate in gold mine tours and try their hand at gold panning. There’s also an array of outdoor activities for families to enjoy including, full moon rafting, summer dog sledding, fly fishing, hiking, horseback riding and more.

In town, stop at the Breckenridge Welcome Center on Main Street to tour an excellent and free museum on the town’s mining history. Next, go to the Edwin Carter Discovery Center, where kids learn about one of the area’s first naturalists, and the Barney Ford Victorian Home, also both free. The latter offers a living history tour of the home of Barney L. Ford, an escaped slave who made his fortune in the West. His is an inspiring story for both kids and parents (one tidbit: his mother stole a dictionary for him, hoping it would lead to a better life). There’s also a schoolhouse replica in his home.

breck-history-tour

If you have school-aged kids, consider booking a walking tour with the Heritage Alliance. Tours are $10 for adults and $5 for kids, and take about an hour and a half. Our guide taught us about the historical buildings in town we didn’t even realize were of significance, and toured us through two 1880s homes not open to the general public. It was absolutely interesting and relevant to kids of about eight and up. See all tours offered.

Check out the Country Boy Mine, just outside of downtown, to tour an actual mine shaft and learn about mining conditions for miners in the late 1800s. Best for older kids who are not afraid of the dark!

For families with young kids:

Be sure to take time while walking along Main Street to play at the small but inventive playground at the River Walk and River Walk Square. In summer, kids can wade in the Blue River here, too, jumping between the stones. The Breckenridge Mountain Top Children’s Museum sits adjacent to the ski village, within easy walking distance of Main Street, and is a good option during bad weather.

breckenridge-river-walk

For families with older kids:

Rent mountain bikes if you’re family is comfortable on trails, and use Breckenridge’s excellent trail network. Trails are rated green, blue, and black, just like on the ski slopes, and are well-marked. Bike rentals can be found throughout town; we opted for Avalanche Sports. We love that you can ride directly from the rental shops (or your lodging) to the trails, but there are also trailheads with parking lots if you’re coming from further afield. Here are my favorites:

trails

  • Lower Flume: Access the Lower Flume trail directly from town via the recreational bike path (more on that below). From the Breckenridge Recreation Center, follow the path out of town to where it connects with Lower Flume. Or, follow Main Street down to the 7-Eleven, turn right, and access from the recycling center.
  • Betty’s Trail: Find this intermediate trail right off Reiling Road. It’s just under one mile, and parallels the road most of the way (you won’t get disoriented). While it goes up and down, it’s not too rocky, though you’ll want to take care on the sharp turns.
  • Turk’s Trail and Reiling Drudge Trail: Further up Reiling, a parking lot offers access to a wider network of trails, including intermediate Turk’s and easy (and short) Reiling Drudge. Turk’s has quite the incline and tends to be rocky, but intermediate to advanced riders will love that it connects to more in the blue category, or can be looped with easy B&B.The Reiling Drudge Trail is fun because of the historical plaques marking remnants of mining history in the area.
  • XLOU8: My favorite intermediate trail I experienced, XLOU8 can be accessed from the same Reiling Drudge parking lot, and connects to Minnie Mine trail. It’s up and down, fairly free of rocks, and has an interesting mine to ride past.
  • Pence Miller: This intermediate trail can be accessed directly from Mountain Thunder Lodge via a short access trail. It winds above the resort area at the bottom section of the ski runs.

If you go:

crystal-lake

Many families visiting Breckenridge in the summer months rent a car, but if you are flying in and out of Denver and the Breckenridge area is your only stop, a car is not necessary. We like to take Colorado Mountain Express to and from the airport (there’s WiFi onboard, so I can get work done on the drive) and once in town, we can access all hiking and biking via foot or with the Breckenridge Free Ride shuttle, which runs year-round!

Do you love Breckenridge? What time of year do you visit?

Wilson’s Creek National Battlefield

Southwest Missouri hosts a great deal of rich history, including more Civil War history than we realized. While visiting in the Springfield or Branson area, plan to spend at least half a day, if not more, at Wilson’s Creek National Battlefield.

wilsons-creek

In case you need to brush up on your Civil War history (as I always do), Wilson’s Creek was the site of the second major battle of the war fought west of the Mississippi River, on August 10, 1861. It was significant in several ways: it was one of the fiercest, ugliest battles according to war historians, and it marked the death of the first Union general in battle, Nathaniel Lyon. Lyon’s death the Union’s defeat at Wilson’s Creek led President Lincoln to send reinforcements to Missouri, thus securing the state for the Union.

civil-war-history

The visitor’s center is small, with only a short hall of exhibits, but does have an excellent 28-minute film running continuously that depicts the battle and the days leading up to it. Directed by Ken Burns, it’s well-worth your time. It’s here you can pick up the information needed for the self-guided auto tour as well. Designed much like the Gettysburg Pennsylvania driving tour, albeit on a much smaller scale, the Wilson’s Creek driving tour is 4.9 miles of paved road with stops along the way to see important points of the battle. (You’ll see once you set out why it’s crucial to view the film first.)

wilsons-creek

There are multiple stops along the tour, but the highlights include the Ray House homestead, which became a temporary field hospital. Stand on the front porch where John Ray allegedly watched the battle rage in his cornfield, then walk to the view point to see the Ray spring house where they drew cool water for wounded soldiers. Further on, see the Edwards Cabin, which served as General Price’s headquarters (it was here he was interrupted while eating breakfast to the sound of Union cannons), and Bloody Hill, where 4,200 of Lyon’s men held high ground, holding off the Confederacy before their commander lost his life (along with 1,700 soldiers).

battlefield-trails

The grounds are beautiful and somewhat sacred-feeling, but a nice feature are the many walking trails criss-crossing the landscape. With one stop in the car, we could walk between several batteries and the Edwards Cabin, for instance, with views of Bloody Hill to boot.

wilsons-creek

These trails often connect to the Wire Road (a small dirt road) that troops originally marched along. All trails have clear signposts, and most are no more than 1/2 mile from site to site. Families can do as much or little walking as desired. In several places, trails and even the road cross Wilson’s Creek.

wilsons-creek

Hours:

The Visitors Center is open 8 am to 5 pm, seven days a week. The Battlefield Tour Road is open 8 am to 5 pm in winter, and until 7 pm in spring and 9 pm in summer.

Entrance fee:

Entry to the park is $5 per adult, or $10 total per car load. Because this is a National Park site, be sure to get your National Park Passport stamped!

wire-road-wilsons-creek

Dining:

There are no food services, but in nice weather, families can absolutely picnic along the Battlefield Tour Road, or at the Visitor’s Center.

Reading on Wilson’s Creek and other historic sites:

It’s always a great idea to read up on historic sites before planning a trip. When you do, you often find that there are additional sites nearby that also may be worthy of a visit. A great way to research a historic trip is with a travel guide that focuses on history in a particular region, as opposed to with a history book that may not tie sites together in an itinerary. Before leaving to see Southern Missouri, I had the chance to read through The Big Divide: A Travel Guide, which focuses on the Missouri-Kansas border region. Thanks to its section on Springfield, I learned there’s a national Civil War cemetery near Wilson’s Creek.

Directions:

The battlefield is located at 6424 West Farm Road 182, in Republic, Missouri. From I-44, take Exit 70 south to MO-ZZ. Turn right on ZZ to the park.