Spooky Pit Stops: Find a corn maze in 47 states!

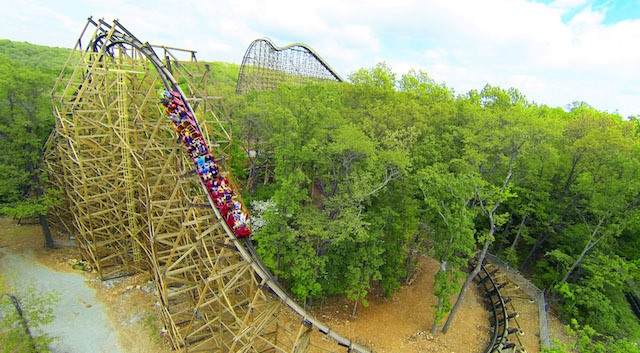
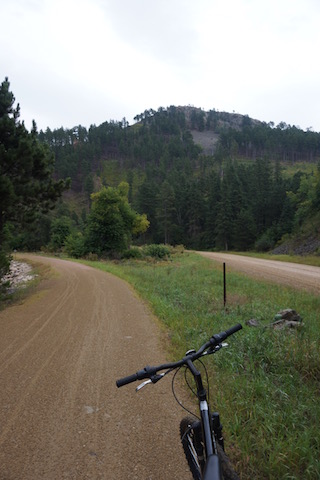
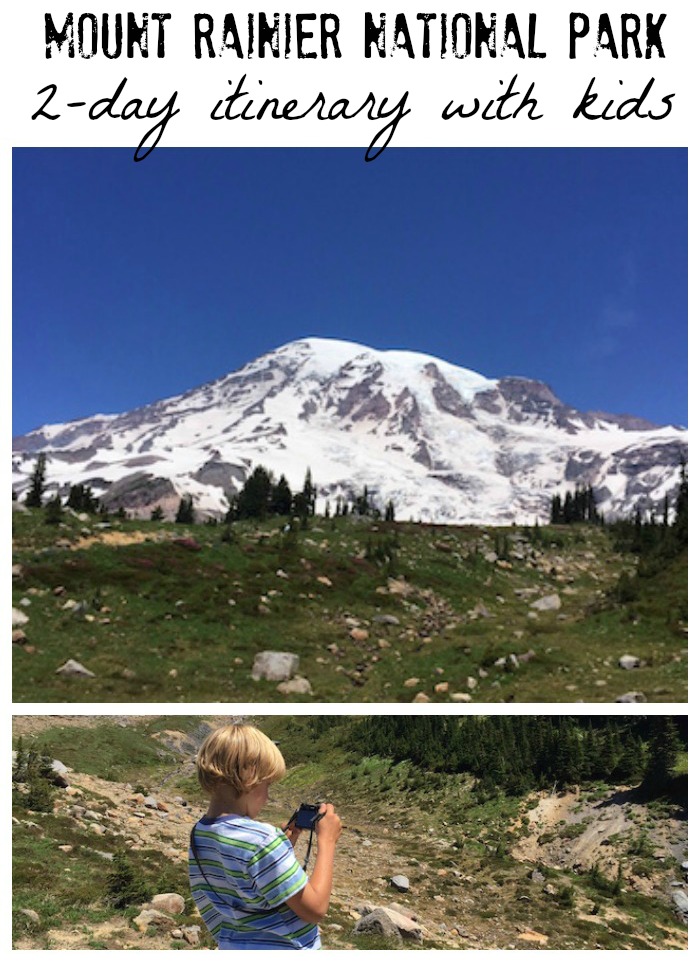
Even so-called ‘family friendly’ haunted houses have become more and more frightening in the past few years, making us less enthusiastic about recommending them. If you’re looking for some Halloween family fun that doesn’t involve ultra-scary haunted houses or ghost tours, look to corn mazes with nighttime operations (spooky without the scares).

The MAiZE

Ready for the travel hack? Find a corn maze near you easily with The MAiZE! If you haven’t heard of the MAiZE, it’s the world’s largest cornfield maze company, and it currently has locations in 47 states and several Canadian provinces. Chances are, you have a MAiZE near you, making it easy to find a fun maze pit stop or autumn activity that’s Halloween and harvest focused without the scary elements.

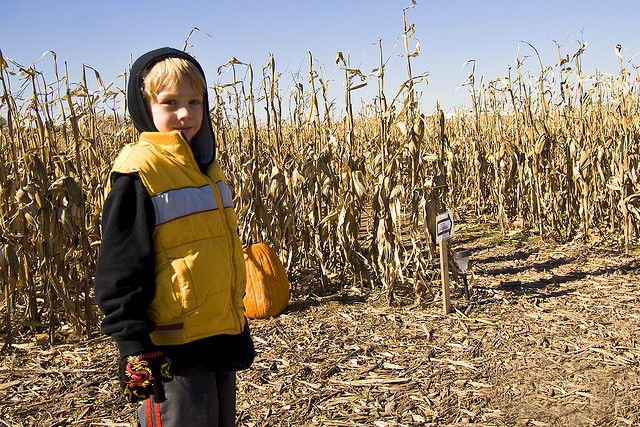
Our favorite MAiZE is the MAiZE at the Pumpkin Patch in Portland, Oregon. Located within one of the biggest harvest festival farms in the area, this MAiZE sports a Portland Timbers soccer club theme, which is a hit with my kids. Other MAiZEes feature local themes as well. The Timbers maze is cut in the shape of the Timbers’ logo, which kids need to weave their way through to find the exit.

What we love about MAiZE:

How to find a corn maze

1. All are located within a harvest festival or u pick farm, which means you can make a day of the adventure should you like, and families enjoy a nice ambiance.

2. All offer a family-friendly, non-scary option. Some are designed for younger kids exclusively, while other MAiZE routes have nighttime hours with haunted maze options or simply dark maze opportunities. Check with the MAiZE you plan to visit to find out what they offer and plan accordingly. During the day, every maze is kid-friendly, and all take approximately 1 hour to navigate.

3. They’re everywhere! Find the MAiZE nearest you.

Admission cost:

Admission varies by MAiZe. The Portland MAiZE cost $7 for adults, $5 for kids 6-12 (5 and under free) during the day, with the option of a haunted maze for $10 at night.

Find more spooky pit stops!

Photo credit: Flickr

Exploring Custer State Park with kids

Haven’t been to Custer State ParkGet ready to be impressed! This state park encompasses 71,000 acres, making it larger than some national parks. In fact, some argue that Custer should be a national park, and after visiting, I agree! Plan to stay at least two nights to see the majority of what this park has to offer, or at least one full day to see some highlights. Here’s how to tackle Custer State Park with kids:

custer-state-park

Start with the Needles Highway Scenic Drive:

It’s not often I recommend driving through a park with kids, but Custer’s Needles Highway is breathtaking, and easy to access from the western park entrance at Custer. Plus, it concludes at a great lake and hiking option (more on that later).

needles-highway

After driving past the stockade area and coming into the center of the park, the Needles Highway will head north, winding first through meadows and grassland where you’ll want to keep an eye out for bison. Then, it climbs into the more dramatic, rocky part of the park, taking you through several narrow stone tunnels and opening up on incredible vistas of the Cathedral Spires, Needles Eye, and Little Devil’s Tower. Definitely stop a few times along the way to snap photos (you won’t be able to help yourself), especially after the tunnel that delivers you to Needles Eye. This natural wonder is indeed a rock formation in the shape of a needle’s eye. Hint: mountain goats can often be spotted on the craggy peaks beyond.

needles-eye

Take a hike (or two or three):

Custer State Park is filled with kid-friendly hikes of various mileage and degree of difficulty. We’ll start with what may be the most spectacular:

Harney Peak: Harney Peak has the distinction of being the highest point east of the Rockies (at over 7000 feet elevation). There are several trails that will get you there, marked Trail 9, Trail 4 East, and Trail 4 West. The shortest route to the top of the peak is Trail 9, which is a 3.1 mile (one-way) trail starting at the Sylvan Lake.

harney-peak

The trail is well-maintained, and moderate in difficulty for the first two miles, then gets quite rocky and steep for the final mile. Young kids can absolutely do this hike with the right shoes and the right attitude, and teens will definitely be able to handle it. Most of the way is fairly shaded, but because the final stint is in the open, and because the trail gets very crowded as the day goes on, I highly recommend hitting this trail early in the morning. Pack a picnic lunch to eat at the top, which rewards you with a wonderfully constructed fire tower lookout built by the CCC in the 1930s.

view-from-harney

Cathedral Spires: This trail is also a one-way (out and back) deal, and families will see the trailhead right off the Needles Highway. It’s only 1.5 miles long, but strenuous and mostly open. Another to tackle in the first half of the day, the Spires rewards with amazing views and cool rock formations.

spires-of-Custer-State-Park

Centennial Trail: If you want to try the Centennial Trail, which actually winds 111 miles through the Black Hills from Bear Butte State Park in the north to Wind Cave National Park in the South, 22 miles of it is available within Custer State Park. The French Creek portion is 10 miles one-way, and moderate. It takes hikers through the Narrows, which requires either climbing a 60-foot embankment or wading 100 feet through the creek (way more fun). I recommend doing this trail with kids who are well-adapted to longer hikes and if you have two cars (so you can shuttle). You can do a shorter section of the trail at Badger Hole (approximately 4 miles, but it’s more strenuous).

Badger Clark Historic Trail: For those looking to get out of the car and stretch the legs with an easy loop, this one mile loop offers fun historical background in a pretty setting. The trail is located behind Badger Hole, home of Charles Badger Clark, South Dakota’s first Poet Laureate, and is mostly level, with some short climbs on an even trail.

Go jump in a lake:

Custer State Park is dotted with lovely lakes, all of which offer swimming, canoeing, kayaking, and picnicking.

sylvan-lake


Sylvan Lake: Sylvan is located near the trailhead for Harney Peak, and has a small marina and a trail circling the lake. There’s a general store and lodging, and while it gets crowded in summer, it can be a great place to spend a warm afternoon after hiking. If Sylvan looks familiar, that may be because it was featured (along with Mt. Rushmore) in National Treasure 2.

Legion Lake: Located toward the center of the park, Legion Lake also has swimming, fishing, and picnicking, plus dining at the lodge. If it’s crowded, try Center Lake, to the north up Needles Highway (turn on South Playhouse Road).

See wildlife:

You may see bison just while driving around the park (in fact, it’s very likely), but there’s also the Buffalo Corrals in the south end of the park to visit, and the Prairie Dog Town. Take the Wildlife Loop Road to easily hit both spots, and whenever you stop to get out of your car to snap photos, keep your eye trained on the rocks for mountain goats. We saw several, thanks to some eagle eyes.

Where to stay:

Custer State Park Resort, privately operated within the park, offers five lodges plus specialty cabins within the park. You can check them all out here, but they generally range from stately and elegant (yet still casual) Sylvan Lake to historic State Game Lodge, ranch-like Blue Bell, modern Creekside, and lake house Legion. All have the convenience of services like stores and casual dining.

rock-crest-cabins

If you plan to stay outside the park, I suggest staying in the town of Custer, near the west entrance to the park. I was very comfortable at Rock Crest Lodge. It was located on the highway, but close to town dining and had a nice playground and pool.

Have you been to Custer State Park? What do you recommend?

Beyond Mt. Rushmore: Custer, South Dakota

Mt. Rushmore is iconic, monumental, and inspiring. By all means, go and see it. Check out the museum below the viewing platform, and definitely stop for some vanilla ice cream made from Thomas Jefferson’s original recipe. (The shop is located directly in the monument cafeteria.) After you’ve crossed this landmark off your list, however, you’ll find an array of outdoor, active things to do in Custer, South Dakota and the surrounding area.

things-to-do-in-custer

Custer State Park: 

First and foremost, spend at least a day (two is even better) in Custer State Park. See our full post all about this fantastic park. (Coming soon!)

needles-highway

ATV riding:

Take to the 3,000 miles of ATV trails traversing the Black Hills. We toured the area with Black Hills ATV Adventures, starting at Custer Gulch resort…a private campground outside Custer with trails directly from the campground. Families can rent two or four-person UTVs (buggy-like vehicles with full harnesses and seats) for full or half-days. Trail maps are available on-site, and trails are wide and well maintained. We saw the rural outskirts of Custer this way, and loved checking out the area’s many well-kept ranches and homesteads. The UTVs were stable and safe, and easy and fun to drive. In some areas of trail, it’s possible to drive up to 50 mph. Rentals start at $225 for a four-seat UTV for a family for half-day, and may well be worth becoming your ‘big splurge’ attraction, provided you’re comfortable with driving.

custer-utv

Bringing your own ATVs or UTVs? Start here for more information on permits and trails. 

Biking on Mickelson Trail:

This rail trail runs over 100 miles from Deadwood to the Southern hills, and goes right through Custer. Ride a few miles down and back to get a sampling of the trail, as we did with a free morning, or tackle a larger portion of the trail to and from Hill City or Pringle. To access the trail in Custer, just head across the street from the Chamber of Commerce, downtown. The trail is highly interesting to kids, as it goes over bridges and through rail tunnels.

mickelson-trail

Maps are available in the Chamber building, and rentals can be found at Frontier Photos in Custer or Rabbit Bike in Hill City. Note: you’ll need a trail pass, which is only a few dollars and available at the Chamber.

Aerial Park in Keystone:

There’s a reason this post is centered around the town of Custer instead of the town of Keystone.  Keystone is closer to Mt. Rushmore, and as such, we found it far more touristy and busy than its neighbor, Custer. This said, the aerial ropes course park at Rushmore Tramway Adventures is worth the stop into Keystone. And afterward, if you’re in the mood for some fun souvenir shopping, take a stroll along Keystone’s kitchy downtown district for t-shirts and such. Prices start at $29 for kids, which is a good deal with over 80 elements to try.

Helicopter ride with Black Hills Aerial Adventure:

scenic-helicopter-ride

If it’s in your budget, seeing the Black Hills, Mt. Rushmore, and Custer State Park from the air is absolutely spectacular. We tried this the day we entered the Custer area, and it made for a wonderful introduction to the region. We saw the top of Harney Peak, which we planned to hike the following day, herds of bison, plus an elk and mountain goat, Sylvan Lake, the Crazy Horse memorial in progress, the towns of Custer and Hill City and the Mickelson Trail, and Mt. Rushmore. I had never seen Mt. Rushmore before, and seeing for the first time via helicopter was a very unique way to do it!

rushmore-by-helicopter

Black Hills Aerial Adventure has seven helicopters to use, which means that families can likely ride together, or if not, two helicopters can go simultaneously, so family groups can still enjoy flights at the same time…a big convenience if you’ve ever tried to schedule scenic flights.

crazy-horse-memorial

There are multiple flight packages to choose from; we chose the package that included all the sights above, but we could have downgraded and not seen Mt. Rushmore (if perhaps you’ve seen it). Check out flight options and pricing. The heliport is located at 24564 US Highway 16 in Custer.

Where to eat in Custer:

We found downtown Custer to be easily walkable and kid-friendly, with bison sculptures on the corners (don’t climb them, but admire their paint jobs) and pedestrian-friendly walkways. We ate a great meal at Bitter Esters Brewhouse, located at 607 Mt. Rushmore Road. This restaurant has local brews on tap, brewed on-site, and kid-friendly selections as well. Absolutely indulge in a plate of their potato chip nachos for a starter! Though we didn’t get a chance to try it, Black Hills Burger and Bun Co was also recommended to us.

purple-pie-place

If you have room for pie, head to the Purple Pie Place just down the street. You can’t miss it…the farmhouse-type building is bright purple. They have multiple flavors of pie always at the ready, plus ice cream and sundaes.

Just outside Custer in Hill City, Prairie Berry Winery and Miner’s Brewery are deserving of a dedicated afternoon or lunch stop. Prairie Berry specializes in berry and fruit wines (their Red Ass Rhubarb is quite famous in the area), and their free tasting is very fun. Kids are welcome, and there are even some toys and games set aside for their use while parents are tasting wines. Sandwiches and soups are available for lunch, and just next door, Miner’s brewery offers up great brews on tap, made on-site.

miners-brewery

Where to stay in Custer:

Head to Rock Crest Lodge, located at 15 West Mt. Rushmore Road (just at the edge of town). This roadside upscale motel has rooms and cabins available, plus a nice outdoor pool and playground. I stayed in a roomy cabin with a single bedroom/kitchenette with dining table and bathroom. It had a microwave, sink, and mini-fridge, but no oven or stovetop. However, cabins vary, and some do have full kitchens and multiple bedrooms. This page offers a full list.

We explored the Custer area as guests of the chamber office, for the purpose of review. All opinions remain our own.

Mount Rainier National Park two-day itinerary

On the right day, Mount Rainier National Park can rival the scenery beheld at National Park greats such as Glacier and Canada’s Banff or Jasper.

mount-rainier

Often hidden in cloud, the mountain framed by blue skies is nothing short of breathtaking, and on clear days, the views from the Paradise end of the park reach from Mt. St. Helens to Mt. Hood to Mt. Baker. The day we arrived, looking from volcano to volcano across the Pacific Northwest, we felt awe and respect standing along the famed Ring of Fire.

Mount Rainier National Park is large, but 97% of the park is dedicated wilderness, which means families can reasonably see the best day hikes and visitors centers in two full days, or one full day and two half-days. The order in which you tackle these attractions will depend on how you enter and exit the park. We entered from the north (Seattle) through the White River Entrance, and exited to the south via the Stevens Canyon Entrance. Our lodging was located on the south end, so we toured what we could on the north end (Sunrise) after we arrived, then concentrated on the south end (Paradise and Longmire) for the remainder of our trip.

mount-rainier-national-park

Mount Rainier two-day itinerary suggestions:

Day 1:

Arrival through White River:

white-river

We enjoy entering the park at White River, as this milky-white river gives a good introduction to the volcanic activity on Mount Rainier. The river gets its name from the chalky powder that rubs off granite higher up due to glacial activity. Stop for a picnic at any one of the White River turnouts along Mather Memorial Parkway toward the Sunrise Road turn-off.

Sunrise area hike:

If you’re staying in the Sunrise area, skip the Sunrise Road for now, and head south to sample some Ohanapecosh or Paradise hikes, which will enable you to concentrate on Sunrise on Day 2. However, if you’re staying on the Paradise side, as we did, take the time to detour to the Sunrise Road now, to avoid needing to backtrack tomorrow.

The Sunrise Visitors Center is a good one to hit up for Junior Ranger booklets. Afterward, head to the Sourdough Ridge Nature Trail, which is an easy one-mile loop starting near the Sunrise complex parking lot. You’ll get nice views of Rainier and interpretive signs educating on the flora and fauna. As an alternative, Silver Forest is a two mile out-and-back hike, which starts with informative exhibits en route then moves through an area once-damaged by forest fire. What still stands are the ‘silver sentinels’; long-dead but erect trees that are surprisingly beautiful.

If you want a longer hike, the Naches Peak loop is about five miles, and offers small lakes, views of Rainier, and plenty of subalpine forests. Plus, it takes hikers on a portion of the Pacific Crest Trail, which can be fun.

Ohanapecosh-area hike:

silver-falls-hike

As you drive through the park toward the south, plan to stop for a short hike at either Grove of the Patriarchs or Silver Falls, near the Ohanapecosh Campground. The Grove of the Patriarchs is best if you’re short on time or have very young kids; it’s an easy one mile walk to see old-growth forest along the Ohanapecosh River.

For a longer and more satisfying hike, go into the Ohanapecosh Campground to the day-use/trailhead parking. Take the Silver Falls loop hike, which is about three miles. At the very start, you’ll be rewarded with hot springs activity. Feel the water temperature of the various springs as you go…they get progressively warmer as you get closer to the source of the hot springs. Be sure to detour onto the hot springs loop trail about a quarter mile into the Silver Falls loop, just to the bigger pool that’s jacuzzi-hot. Continue along the Silver Falls trail to the thundering falls along Ohanapecosh River; it’s absolutely worth the mileage! The loop will deposit you back at the campground.

silver-falls

Day 2:

Paradise Visitors Center:

For the Paradise portion of your visit, start early, as the Sunrise parking lots fill up fast in summer. (See below for best time of year to visit.) The Visitors Center offers a nice area of exhibits upstairs, and a 20 minute video that plays several times per hour. We always recommend watching videos to introduce visitors to new parks.

Skyline Trail hike:

skyline-hike-mount-rainier

Right outside the Visitors Center, a network of trails are on offer. The Skyline Trail is one of the most popular hikes in the park, and while we usually shy away from potentially crowded areas, this one is worth it. This loop is over five miles, and takes hikers up in elevation from the Paradise parking lots seemingly to the edge of Mount Rainier itself. The first two miles are steep, but the continuous views of Rainier make this workout less painful, and the crowds drop away the further you go. There are a number of turn-around options in these first few miles; hikers could detour onto the Dead Horse or Alta Vista Trail, and return to Paradise. Everything is well-marked, and rangers are often on-hand at junctions to explain options. Note: the beginning and end of this loop are paved trail, to accommodate shorter hikes for all visitors.

For those wanting to go the distance (recommended if possible), continue up Skyline to Panorama Point, where you can opt between the Low Skyline Trail or High Skyline Trail. Either will continue your loop, but in early season, only Low Skyline is open. When we hiked in June, Low Skyline offered lots of snow across the Nisqually Glacier, which the kids loved. Cramp-ons are not necessary for the Low Skyline Trail, but be prepared to walk through snow (trekking poles are useful).

marmots-mount-rainier

The Low and High Skyline trails merge again to start the long descent back toward Paradise, with an option to cut 1.5 miles off your loop by taking the more direct Golden Gate Trail down to Myrtle Falls, then the lodge area. We opted to stay on the Skyline loop, and were not sorry. The views continue to be spectacular, with creek crossings and wildflowers in the early season. At Myrtle Falls, the trail becomes crowded with visitors for the final few tenths of a mile. Look for marmots along the entire hike: we saw 4-5!

Rampart Ridge Trail Hike:

If you have time to venture further from Paradise to the Longmire section of the park, or if Skyline is simply too crowded on the day you’re visiting,  the Rampart Ridge Trail is a good alternative. This trail is often hiked in summer by the many visitors who do not receive Wonderland Trail permits, and in early season or fall, it’s blissfully empty. The 4.6 mile loop begins at the Trail of the Shadows trailhead, and takes hikers through both wetlands and old-growth forest. The climbs along the loop start out quite gentle, then progress to a series of switchbacks. The reward: views of the valley below and Tumtum Peak. Further along the trail, the views continue, offering sweeping vistas of Longmire and Eagle Peak. When families reach the junction with the Wonderland Trail, a steep descent returns them to Longmire.

Best time to go:

The best time to visit Mount Rainier National Park is mid-June, early July, or September. While coming in June is a gamble (not everything will be open yet, depending on snow pack), it’s far less crowded. Mid-July through August are peak season. Come in fall, and the park will be yours alone!

Where to stay:

Campgrounds:

The campground facilities in the park are fantastic. We really liked the relative isolation and quiet of Ohanapecosh Campground, which is set apart from any visitors centers. The White River Campground is one of the most popular, but with the river nearby, we understand why. Check the national park site for campground information, including which can be reserved ahead of time.

mount-rainier-with-kids

Paradise Lodge:

This national park lodge is beautiful, but located in the thick of things. You’ll get pristine views of Rainier, and have immediate access to some of the best trails (no parking worries!) but also be staying in the midst of the crowds.

Packwood area:

We opted to stay three miles outside the Stevens Canyon park entrance, in the Timberline community of seasonal cabins outside of the town of Packwood. We rented our cabin via VRBO, and were cozy in a retro cabin sleeping six. Renting in the Timberline community, we had access to a community outdoor pool and tennis courts, and enjoyed a nice deck and mountain views, plus a full kitchen for cooking our own meals. There are a few dining options in Packwood (we tried the Blue Spruce Cafe, which served traditional pub food like burgers, fish and chips, and pizza), but you’ll want to do some grocery shopping. Note: AT&T customers will have no cell service in this area.

Have you visited Mount Rainier? Where did you hike and stay?

PCT section hiking with teens

We’ve been wanting to backpack on the Pacific Crest Trail (PCT) long before it was cool. This summer, my 16-year-old and I finally set out, tackling almost 70 miles of the PCT in Central Oregon. We built up to this trip with years of family backpacking, including several 3-4 night trips, starting when my son was just a toddler. How did we fare? We had one of our best backpacking trips ever!

hiking-PCT

Our PCT section hike spanned over 65 miles from Central Oregon’s Mckenzie Pass by Sisters to Olallie Lake, outside Detroit, Oregon. It took us through the Jefferson National Forest and Jefferson Park, past the three Sisters peaks, Broken Top, Three Fingered Jack, Mount Washington, and Mount Jefferson. Every day brought new scenery, from forests depleted by fire to mountain meadows still filled with wildflowers, to rushing creek crossings, to mountain ridge lines, saddles, and peaks.

Jefferson-peak

My son and I felt a keen sense of accomplishment as we navigated landmarks along the trail with our PCT data book and topographical maps, found our own water resupplies, made and broke down camp every night and morning, carried everything we needed on our backs, and relied entirely upon each other for basic survival. This trip was a chance for my son to shine as a young man, for me to let go a bit as a mom, and for both of us to bond. We met amazing people on the PCT, both fellow section hikers like us and thru-hikers going to Canada. The community spirit was uplifting, the scenery breathtaking, and the uninterrupted time in the wilderness invigorating.

A day in the life of a PCT section hiking with teens:

PCT-hike

Each section hike will look different, depending on where you start and end, of course, but a typical day on the PCT for us looked something like this:

7 am: Wake up. Stumble out of sleeping bags on stiff legs, retrieve the food bag (hung in the night to discourage critters from nibbling), and start boiling water for coffee and oatmeal (assuming we had enough water to spare for a hot meal).

8 am: Change into hiking clothes (our only hiking clothes), doctor any blisters on our feet, and tear down camp. This involves washing any dishes (we quickly learned to have as few as possible), putting away our stove and cooking pot, stuffing our sleeping bags and pads, taking down our little tent, and filling our water bottles for the day.

8:30 am: Hit the trail. Depending on the day, we hiked between 10-15 miles. Some days, we took a break mid-morning at a water source to cook a meal if we hadn’t had enough water to do so earlier, other days we hiked straight until lunch. When is lunch? When we were hungry. Regular rules about meals and routine don’t matter on the PCT: our bodies very quickly adjusted to a natural rhythm of eating when we were hungry and sleeping when we were tired.

Mid-day stop at a vista, lake, stream, or otherwise interesting landmark: Some days, we’d go for a swim in a lake if one crossed our path, other days we washed our clothes in a creek or sat on the saddle of a ridge, taking in the view.

Late-day stop: We’d always stop at least once or twice per day to filter more drinking water as the opportunity arose. We had to keep a steady eye on our drinking supply and the water sources listed in our data book. Every day, we ran into others on the trail, and we always stopped to talk a bit. We met wonderful people, all on the PCT for essentially the same reasons as us: to commune with nature, to challenge themselves, and to live deliberately and peacefully.

lake-on-PCT

5-6 pm: Arrive at the night’s camp. Where was camp? Wherever we could find one. We always had an ‘ending mile’ planned (aka, mile 14 of the day, for instance) that was near some landmark desirable for camping, such as a lake or stream. However, campsites didn’t always appear on cue. We sometimes stopped shy of our goal, but more often hiked further, in order to come to a good campsite.

7 pm: Set up camp, make dinner (usually mashed potatoes or noodles, as we always craved carbs), and filter water, unless at a dry camp. If we had wet clothes we’d washed in a lake or stream, we hung them to dry.

8 pm: Do any dishes (remembering to follow Leave No Trace practices), string up the food bag, make sure all our supplies are tucked away in our bags, get in our sleeping bags. Once in our sleeping bags, we’d study our topographical map to get a preview of the next day’s hike, then read our books until we fell asleep (usually as the sun went down around 9 pm).

campsite-on-PCT

How to plan:

Readers of Pit Stops for Kids may remember we started planning our PCT section hike months ago, using information gleaned from PCTA.org. Click on our post, ‘How to plan a multi-night PCT hike with kids’ for details on how we chose when and where to hike.

Since that post, our section hike plan changed a few times. We lost some participants, making the trip a mother-son endeavor, and gained support via car in the form of a trailhead drop-off on Day 1, a check-in and resupply late Day 2, and a pick-up on Day 6.

Once we knew where we wanted our hike to start and end, and how many days we had to accomplish our goal, it was a simple task to break down the trip in miles per day. We then cross-referenced this information with the possible ‘drops’ along the trail (places we could be met by others who could give us aid), and determined to have just one drop during our 6 days out. To do all this, we used the Pacific Crest Trail Data Book and the topographical map dedicated to Central Oregon’s section of the PCT (available at outdoor stores or online).

three-fingered-jack

The data book will tell you where along the trail water will be available (in the form of a creek, stream, pond, or lake), but does not tell you where to find campsites (though some GPS programs do). In many sections of the PCT, hikers are permitted to camp anywhere they find an established campsite. You can tell an established site because the ground will be packed down and there may be a small spur trail leading to it from the PCT. Often, other hikers will mark good campsites with cairns (piles or rock), handmade signs using sticks for arrows on the dirt, or trail marking tape.

How to pack:

When we backpack for a weekend or up to three days, we like a few luxuries in our packs, such as hammocks, camp chairs, and java presses. I know, I know. But when we section hiked the PCT, we went bare bones, in order to be as lightweight as possible. Here was what was in our packs (and nothing else), for a total of about 25 pounds per pack:

Clothing:

  • 1 set of hiking clothing (quick dry pants, t-shirt)
  • 3 pairs wool hiking socks
  • 2 pairs underwear
  • 1 set of base layers (long underwear, preferably wool)
  • 1 down or down-alternative jacket (lightweight, easily stuff-able)
  • 1 rain jacket
  • 1 pair of lightweight sandals
  • 1 pair hiking boots
  • sunglasses
  • sun hat
  • thin gloves

Equipment (divided between two people):

Food (again, divided between us):

We have a tendency to over-pack food, and we managed to do this again, even though we meticulously planned our meals. We have much smaller appetites than we anticbackpacking-food
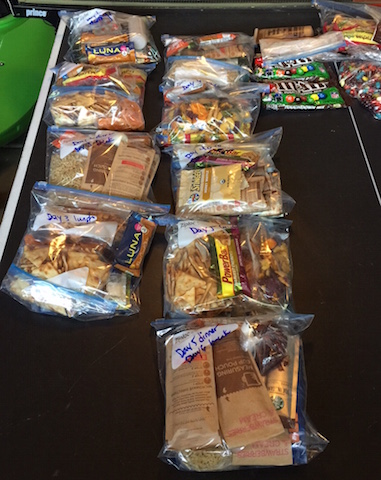
ipated, given how much we worked on the trail. We could barely manage to eat about 300 calories each during the evening meal, and we calculated double this amount. Whoops.

Breakfasts:

  • instant oatmeal packets (mix the hot water right into the paper sleeves if they’re the lined kind)
  • instant coffee (for us, only Starbucks VIA will do)
  • handful of dried fruit

Lunches:

  • protein bar of your choice
  • dried fruit
  • veggie chips or pita chips
  • tube of peanut butter to spread on chips
  • envelope of tuna
  • beef jerky
  • snickers bar or M&Ms to snack on

Dinners (one of the following):

  • instant mashed potatoes (we like Idahoan)
  • Top Ramen
  • dehydrated backpacking meal
  • mac and cheese
  • instant soup
  • envelope of smoked salmon or jerky to add to the carb-heavy meals

We essentially rotated these basic foods over and over. And yes, we got tired of them.

Tips we learned on the trail:

Look for trail signs: while many places along the PCT are not officially marked with mileage and other helpful tidbits, other hikers have often left signs to follow. Look for cairns that will direct you to the correct trail, or hand-scratched ‘pct’ letters in logs or even rocks. During one lucky moment, someone just ahead of us on the trail had made an arrow of sticks to indicate a hidden spur trail to an excellent camping site. When we met her later, we thanked her! Another time, we were almost out of water when we ran across a stick with these words in Magic Marker: “Washington Pond: 1/4 mile, muddy but if desperate?!” We were!

sign-on-PCT

Stop to talk with other hikers. They’re awesome, down to a person.

Let your kids have responsibilities. During our hike, my son was pretty much an equal with me, making important decisions and partnering in all the tasks and work. We both loved this. He’s preparing for bigger and longer hikes in his future, and I will know he’s prepared.

Stop to rest when it feels right. A few times on the trail, we pushed ourselves for no reason other than to ‘make good time’. When the only task of the day is to hike to the day’s destination, don’t be afraid to spend the whole day doing it.

Eat when you’re hungry. Once, we stopped at a creek mid-hike and decided to get out the stove and make a big bowl of chowder at 3 pm. It was supposed to be our dinner, but we wanted it then. We didn’t regret it.

Don’t duplicate equipment. It seems silly now, but we brought two stoves (very small and lightweight) and two pots (not so lightweight). We thought we might want to convenience of boiling two pots of water simultaneously (to have coffee and oatmeal at the same time, for example). We ended up preferring to have patience rather than carry the extra weight.

Issues to be prepared for:

When hiking most of the day, every day (regardless of mileage), certain physical issues may occur. It’s not fun to talk about, but…

rain-PCTChaffing: Skin rubbing against skin for hours at a time can cause major discomfort in sensitive areas. The solution: antibiotic ointment or Vasoline applied before hiking. It can also help to change underwear.

Diarrhea: Lots of water, plus lots of physical exertion, plus exposure to the elements and different food than usual can wreak havoc on the digestive system. Give it a day or two before worrying, making sure you continue to hydrate. Of course, make sure to filter or boil all water.

Bad moments: There will be low moments. Maybe the incline in the trail will seem endless, or a wind and hailstorm will beat down. Maybe you’ll be thirsty or hungry or your feet will be in agony. It’s good for kids (and adults) to remember that pain, discouragement, and suffering can be temporary, and that they can get through these times. Truly.

Blisters: AKA, the bane of my existence on the trail. I always get blisters, no matter what preventative measures I take. Bring lots of moleskin and athletic tape, use skin-tac to make your skin around the blister tacky before applying moleskin or bandages, and make sure your shoes fit properly. If you have tips for avoiding or fixing blisters on the trail, please let me know.

Dehydration: Ask your hiking partner when he or she peed last. Trust me, it’s an acceptable question on the trail.

Was it all worth it? Absolutely. Would we do it again? We definitely will, in-between more 2-3 day backpacking trips with all the kids.

Exploring Holland Michigan with kids

The following post is written by Pit Stops for Kids’ Midwest contributor, Kate Basi.

The town of Holland, Michigan was settled by Dutch immigrants in the mid-19th century, and has made a name for itself as a go-to destination for experiencing Dutch culture. Situated near Lake Michigan, three hours from both Chicago and Detroit and 35 minutes from Grand Rapids, Holland boasts two stand-out attractions for families.

Nelis’ Dutch Village

dutch-village

One part amusement park, one part living history, and one part quaint shopping district, the Dutch Village is a compact, charming replica of 19th-century Dutch culture.

Originally opened as a retail shop for the Nelis family’s tulip growing operation, the village now boasts a carillon, cafe, pub, extensive gift shop, and attractions for kids and adults alike.
 
Start your day by saying hello to the families of ducks paddling in the Village’s decorative canals. Then listen to a performance of the “Gouden Engel” (golden angel), a 1920s street organ. This wooden-piped, ornately carved and painted work of art includes drums and mechanical figures. Periodically through the day, costumed employees converge on the square in front of the organ to demonstrate klompen dancing. Afterward, the crowd is invited down to learn a basic dance.
dutch-village-with-kids

All-you-can-ride carnival-style swings, windmill-themed Ferris Wheel, small zip line and carousel are included in the admission price. For the little ones, there are also “petal pusher cars,” which run on railroad tracks and are powered by the children themselves.

It’s not all carnival rides, though. The Nelis family has set up a mock Dutch village where visitors can see short (5 minutes or less—perfect for little ones) demonstrations from cheese making to wooden clog making. You can even be weight on a scale to prove you’re not a witch. There’s also a petting zoo (hand sanitizer provided!).
Keep your eyes open for gems not included on the map. Behind the zip line stands a trio of old-fashioned water pumps attached to gutters for racing rubber duckies. Beside the school house you’ll find not only a bean bag toss, but a contraption that I can only call a “tandem” snow board.
Nelis’ Dutch Village is ideal for kids in the 3-10 age range. Plan at least four hours for your visit, and don’t be surprised if the kids clamor to stay until closing time.
Whether or not you have time to spend in the park, take time to visit the cafe and souvenir shops, which are accessible from outside the park. The cafe serves kid-friendly fare and Dutch specialties like Kroketten, a fried meat pastry, and Saucijzebroodjes, a sausage pig’n’bun. Kids can also make a “stroopwafel,” a thin waffle cookie spread with a cinnamon-sugar concoction.
The cafe offers the usual souvenir fare–t shirts, shot glasses and the like–but the real gems are found in the collection of Dutch gifts—blue china, cuckoo clocks, and other beautiful artwork.
Nelis’ Dutch Village is located at the corner of US Highway 30 and James Street. Hours vary by season and are posted on the website. (link: http://www.dutchvillage.com/park/hours.html.) Admission is $11 for adults and $9 for children 3-15.

Windmill Island Gardens

Windmill Island Gardens, operated by the city of Holland, Mich., is a beautiful preserve and botanical garden at the edge of the downtown area. 

Entering Windmill Island, you will drive through a marshland grown up in cattails. The scent of flowers greets you upon getting out of the car. A street organ sits at the head of a breathtaking flower garden and lawn, where the mysterious snow-board contraption makes another appearance, along with hoops and sticks. Both of these are unique play opportunities for kids to enjoy while parents listen to frequent organ concerts.
windmill-gardens
The highlight of the grounds is, of course, the picturesque De Zwaan (the swan) windmill. This 250-year-old structure was relocated from the Netherlands, still in working order, and actually grinds grain that can be purchased on site. Costumed guides give klompen dancing demonstrations and offer tours of the first five levels of De Zwaan. Kids can turn a miniature millstone, and you can see World War II bullet holes in some artifacts on display. Although the inner workings of the windmill are fascinating to adults, the highlight for kids is going out on the “gallery,” where you can touch the windmill blades when the windmill is not in operation.
Note: although the rest of the grounds are accessible, the upper floors of the windmill are reached via stairs; strollers will have to be left at ground level.
There are picnic tables, and visitors are encouraged to bring food. The carousel here is smaller than most, so it’s particularly good for little ones. Behind the carousel you’ll find a playground and a small courtyard where children are encouraged to water from a rain barrel and get up close and personal with herbs and edibles.
If you want to get out of the sun, a building adjacent to the gift shop houses a 1930s-era model town (think model railroad, but with boats instead of trains). The gift shop offers snacks and Dutch souvenirs as well as bags of De Zwaan bran, corn meal, wheat flour, and so on.
windmill-island-mi
While you’re on the grounds, you might well see people kayaking in the canal that flows through the property. Kayaks are not rented on site, but can be rented in town.

Windmill Island, located at 1 Lincoln Ave., is open 9:30a.m. to 6p.m. daily from mid-April to the beginning of October. Admission is $8 for adults and $5 for children 5-15, but residents of Holland are admitted free with proof of residency.

As we disclose whenever applicable, Kate and her family experienced Holland Michigan with compensated attraction tickets, for the purpose of review.

Silver Dollar City, Branson, Missouri

The town of Branson, Missouri is a curious mixture of overtly touristy and world-class attractions. I thought Silver Dollar City would fall in the former category. Instead, after spending a day there, I believe it fits in the latter. I’m going to state a pretty strong opinion here: this theme park is second only to Disney parks for quality, cleanliness, and character.

silver-dollar-city

Silver Dollar City began in much the same way as classic theme parks like California’s Knott’s Berry Farm or Oregon’s quaint Enchanted Forest: as a family business built around a simple, wholesome theme (in this case, the limestone Marvel Cavern and classic Missouri hospitality). But instead of commercializing to the point of soullessness or remaining in relative obscurity, Silver Dollar City somehow grew into itself without losing its heart and sense of purpose.

silver-dollar-city

Yes, there are rollercoasters. But there are also authentic, working craft artisans. There are gift shops selling trinkets, but there are also studios selling handblown glass and pottery fired on-site. With Silver Dollar City’s blend of craftsmen and women and thrill rides, it’s easy to see why it’s a beloved park for multigenerational travelers. And somehow, it all goes together nicely.

silver-dollar-city

The theme park’s premise is of a 1880s frontier town, and what could be hokey is instead charming. Its village of artisan shops and craft demonstrations encircle rides and shows, with dining venues weaved throughout. Somehow, the whole place remains peaceful, despite the bustle of attraction queues for the headliner coasters. In truth, visitors who are not interested in thrill rides can easily avoid them altogether. The Silver Dollar ‘streets’ are distinctly ‘Disney-like’ with pristine cleanliness, lush vegetation, and exceptional theming. A few authentically historical buildings are on display in the center of the park, with the rest of the structures carrying out the theme via replica. At the heart of the park lies Marvel Cave, the original attraction that brought people to the area, but you might actually miss it if you’re not careful: the entrance is actually in the center of the large gift shop near the entrance. This is my only real beef with Silver Dollar City; I’d love to see this limestone feature given more limelight.

silver-dollar-city

In the park’s craft and artisan areas, families can see demonstrations on everything from pottery to glass blowing to bread baking, and just about everything in-between. The artisans in the many shops are not simply dressing in period costume and explaining how things such as lye soap, honey, leatherwork, woodwork, and metalwork items are made…they are actual master craftsmen and women. It’s fascinating to watch them work, browse the shops, and buy souvenirs in stores that are not junky tourist traps (they have those too, though, if you’re partial to that). In addition to the crafts, many food vendors demonstrate their skills as well; Silver Dollar City has a working bakery, grain mill and bread baking facility, creamery, and food stalls serving authentic recipes like succotash and apple dumplings alongside the classics like funnel cakes and kettle corn.

silver-dollar-city-rides

Dedicated ‘lands’ for kids are plentiful: near the artisan areas is an upscale country fair style area with a giant swing and plenty of kiddie rides, and the new Fireman’s Landing features a semi-thrill ride, water splash area, and more children’s classics. Down a ‘holler’ past the park railroad lies an area celebrating Tom Sawyer and Huck Finn, with a giant treehouse, river raft ride, and two higher intensity water rides. Beyond all this lie the thrill rides, which consist of three high-quality rollercoasters on par with the top theme parks I’ve been to. In fact, the newest ride, Outlaw, won an award for best new ride of 2013 worldwide. It’s certainly the most intense rollercoaster I’ve ever been on. Two additional high-adrenaline rollercoasters are joined by several smaller rides and Silver Dollar City’s oldest ride, an indoor dark ride that tells the local legend of Missouri hobnobs (up to no good vigilante bandits). It’s a bit scary…mostly because it’s dated and dark, but I can see why long-time park goers are fond of it.

outlaw-rollercoaster

If you want to see all of the park in a day, it’s certainly do-able if you plan correctly. Start with the thrill rides in the morning, while the artisan areas are quieter (you’ll want to hit this area when demonstrations are in full force). After the headliners, ride the smaller rides, grab lunch, then spend the afternoon touring the artisans or the cave. No matter where you are during the day, plenty of higher-the-usual quality theme park fare is on the menu, and shows are regularly scheduled (of the comedy and musical variety). Everywhere you go, you’ll be greeted by big leafy trees and beautiful grounds. In fact, take a look around while ascending to the peak of the rollercoaster mountains…instead of viewing parking lots and city scenes below you, you’ll see miles of rolling Ozark mountains. It’s truly lovely.

Dining:

silver-dollar-city

You can’t go too wrong dining in the park…there are a lot of options, and most of it is very good. If you want an all-you-can-eat-buffet, you’ll find two on the grounds, but I’d opt for finding the street food vendors who sell homemade items unique to Silver Dollar City (you’d find many of these in the buffets, too). Items I liked best include the apple dumplings and cinnamon ice cream, baked beans, and fried okra, plus I was told anything BBQed was excellent. The traditional theme park fare is good too, but trust me, get some of the ‘eats’ unique to the park.

Admission:

silver-dollar-city

Daily admission is $60 for adults, $49 for kids 4-11, and free for kids under three. The value is there, but for $45 more each, you can upgrade to season passes. If you think you’ll make it to the park even twice, absolutely upgrade. Silver Dollar City also posts special offers continuously.

They do offer a ‘front of the line’ pass they call the Trailblazer pass, which allows families to enter in a separate ‘fast pass’ line for up to eight rides for $35 extra per ticket. I’m a fan of these types of passes in the peak of summer when time truly is money, but most of the time, I don’t believe they will be needed at Silver Dollar City. Simply get to the park at opening and ride your favorites first. I was told lines don’t get longer than 1.5 hours even in summer. (This is not an official stat, but was told to me by a senior park staff member.)

bakery

Hours of operation:

The park is seasonal, operating from late spring through December 31. It’s closed Jan-April (except for spring break weeks). Check the calendar for exact hours.

Directions:

The park is located at 399 Silver Dollar City Parkway Branson, MO.

As I disclose whenever applicable, I toured Silver Dollar City as a guest of the theme park. All opinions are my own.

Ozarks with kids: Branson Zip Line

Driving into Branson from Springfield on Highway 65, families won’t be able to pass Branson Zip Line at Wolfe Creek Station without the kids noticing the tall towers and cables stretching over the beautiful Ozarks. Go ahead and stop, because if you plan to include zip-lining in your Branson stay, this is the place to do it.

branson-zip-line

A lot of zip lining operations have popped up in this area, but Branzon Zip Line sets the industry standard in the Branson area. Their guides have training on par with the most extensive operations across the US, and the location at Wolf Creek Station has some history to it, too.

Families will want to make reservations in the summer months, because this place gets popular. However, their check-in area and waiting areas are run smoothly, and there’s plenty to see and do while you wait…including nice outdoor areas. Even the gift shop has some interesting and unique items.

branson-zip-line

Kids need to be at least 70 pounds to take the tours, which is heavier than some zip line companies we’ve tried, so come prepared for this. Families choose form three main packages that range from three zip lines to seven, with sky bridges in-between, or can do a combo tour of all eight zip lines and 10 bridges. Alternatively, it’s possible to do the Blue Streak Fast Line and Free Fall separately or as an add-on. The latter is a zip line and tower free fall from 100 feet up. It’s the main structure visible from the highway, and yes, dare devil kids will beg to do it.

zip-line

Each tour is about 5-10 people, with 2-3 guides, depending on guest number. After a safety briefing and getting outfitted into harnesses and helmets, groups head to the zip lines in a Pinzgauer Swiss Army Troop Carrier. This ride alone is quite fun, as the jeep-like vehicle bumps along the rutted dirt roads up Wolfe Mountain.

branson-zip-line

Throughout the tour, the guides give history on the area and the Wolfe family who owned it. We had excellent guides who were fun, personable, and attentive…definitely among the best we’ve encountered on multiple zip line excursions throughout the US. Branson Zip Line is definitely one of the more ‘hands-off’ zip lines we’ve experienced; there’s very little guests need to be aware of, as guides will click and unclick you from the lines at all times, and it’s not necessary to stop yourself with gloved hands.

We opted for the ‘Ridgeline’ tour, which included three zip lines and several bridges, and took about 1.5 hours. We didn’t opt for the 100 foot free fall add-on, but the Ridgeline does include a smaller 40 foot drop. The free falls are actually a lot less scary than they sound: you’re attached to a mechanism that allows you to fall for a short period, then smoothly and gradually slows you down before you reach the ground. It’s not jarring or particularly frightening to most people, but can be detoured around should you wish.

zip-line-tower

Distance from the interstate:

The zip lines are located directly off Highway 65, seven miles from Branson.

Cost:

Prices vary by tour, of course, but check this price sheet for current info. Zip line prices start at $69 for adults, $59 for kids, with the Blue Streak single zip and free fall add-on for $44.99. The best deal in the place is the family pass, which is $199 for two adults and two kids, or $249 for two adults and three kids. Kids are considered 17 and under, which is really nice.

Hours of operation:

Hours vary by season, and the operation is closed in winter. Check the website for current hours, but at the time of our visit in early season (spring), tours began at 8 or 9 am.

Directions:

Simply head seven miles out of Branson toward Springfield on Highway 65.

As we disclose whenever applicable, Pit Stops for Kids experienced Branson Zip Line as a guest of the operation, for the purpose of review. All opinions are our own.

The family guide to Australia’s East Coast

The Australian East Coast is vast and diverse, with something to offer for every member of the family, even the moody teenager. From Melbourne to Cape Tribulation, from Sydney to Cairns, the east coast is packed with exciting holiday destinations for the whole family. The best and most fun way to discover all there is on offer is by taking a road trip. This is the family guide to Australia’s east coast:

The big cities

Ask most people doing an Australian East Coast trip and they are bound to tell you they are visiting the three east coast capital cities: Brisbane, Sydney, and Melbourne. All unique and beautiful in their own way, these three cities are well worth the visit.

Take Brisbane, the smallest of the three. What Brisbane loses in size, it makes up for in charm. The pride and joy of the Sunshine State, Brisbane has plenty on offer for young and old families. Whether you’re taking a dip at Southbank, or doing some shopping in trendy West End, Brisbane will not disappoint.

Next on the list is family favourite, Sydney. Australia’s largest city features tourist attractions including the Sydney Opera House, the Harbour Bridge, Bondi Beach, and much more.

Then there´s Sydney´s eternal rival, Melbourne, it’s not just for hipsters! Melbourne has plenty on offer for families too! From spending the day at St. Kilda’s Luna Park, to strolling through the array of world-renowned art galleries and museums, there is always plenty to do in Melbourne. It is also extremely easy and cheap for the whole family to catch trams around the city.

Coast

australia-coast

Any Australian East Coast trip is guaranteed to involve lots of beach time. So which beaches are the best? Starting from the top, there’s the pristine resort town of Airlie Beach. Here you’ll have the chance to take the kids sailing, swimming, or just relax by the pool at your resort! Close by are the Whitsunday Islands. The Whitsundays provide the perfect opportunity for you to set sail on one of the many yacht tours that sail through the breathtaking group of islands, allowing you to spend a few days scuba diving and soaking up the sun.

Around Brisbane, you and the family will have plenty of opportunities to hit the surf. Take a ferry to Fraser Island and camp out in comfort, with excellent facilities at hand. Drive along the beach, throw some snags on the BBQ, go fishing, or take a dip in Lake McKenzie. Or, perhaps you’d prefer the Gold Coast? The Gold Coast, just an hour drive from Brisbane, is home to fantastic surfing and swimming beaches, as well as a handful of amusement parks that the kids are sure to love.

For a more relaxed vibe, drive down the coast to Byron Bay and take a yoga lesson, go sea kayaking, or simply relax with some fish and chips on the beach. Northern NSW and Sydney also have some excellent spots for surfing, or just enjoying the view.

What else?

melbourne

So, now we’ve covered the big cities and the fantastic beaches of the Australian East Coast. But, that’s not all there is! Don’t forget the gorgeous country towns, valleys, and outback destinations scattered along the coast! For example, just outside Sydney you will find a charming little town called ‘Nundle’. Taking the family to Nundle Sheep Station for the night, you’ll have the opportunity to experience a shearing demonstration and learn about sheep farming from an expert shearer. You can even stay the night in the shearer’s quarters. Not far away, you can taste the wine of the Hunter Valley. For the kids, take a drive to Bingara, here you can try gold panning at a historic gold mine, go horseback riding, or take a swim in the local waterhole.

These are just a few of the highlights of the Australian East Coast. With hundreds of destinations and a million ways to do it, you’re sure to find an Australian East Coast holiday that will satisfy the whole family. So what are you waiting for? Book your flights and start planning for the road trip of a lifetime.

Photo credit: Cory LeopoldJodie Wilson and Ari Bakker.

Road Trip Through Spain: Madrid to Barcelona

Ask GoogleMaps how to get from Madrid to Barcelona, and you’ll be taken in a direct shot along the E-90. But take the road less traveled on a road trip from Madrid to Barcelona, and you’ll be rewarded with fewer tourists and a more authentic local scene. Starting in Madrid, take the E-901 from Madrid through Cuenca and Aragon before meeting up again with the E-90 or A-2 into the seaside city of Barcelona.

madrid-spain

Rent a car in Madrid, then set out from the city by mid-morning. You’ll want to budget at least an overnight for this road trip, but you could certainly stretch it to two nights if you really want to linger.

Cuenca:

The medieval town of Cuenca is less than two hours from Madrid, on E-901. Cuenca’s famous ‘hanging houses’ are located here; the walled town is on the UNESCO World Heritage List. Built by the Moors, Cuenca has Spain’s first Gothic cathedral, thanks to the Castilians who conquered the city in the 12th century. With kids, stop at the Parque Natural de la Serrania de Cuenca, where everyone can get out of the car for some hiking in this beautiful and visually interesting countryside. The narrow roads are steep in some parts of the park, but this just adds to the thrill for kids.

hanging-houses

Before driving on, see the Casas Colgadas for a lesson in unique architecture; these houses seem to hover over the cliffs, with layers of balconies and gables. You can see them best from the old town, past the Puente de San Paulo footbridge.

Teruel:

Continuing on from Cuenca, head toward Teruel on the N-320 (connecting to the N-420). This section of the drive is about two hours and 45 minutes, but I recommend continuing on to Aragon for an overnight stop. Stop in Teruel for a break, however, taking in the gorges rising up from the Rio Turia in this industrial city. During this part of the drive, you’ll enter the mountain valleys and vineyards of the Aragon region. The villages tucked away between earth-colored hills are ancient, and look sunk into their surroundings. When I went through, I had to remind myself I was still in modern-day Spain.

Aragon:

Approximately six hours’ drive time from Madrid (but more like eight hours after a few stops en route), you’ll arrive in Aragon. Stay the night, then get up with the sun so you have time to explore this city before getting back on the road. Start with the Basilica de Nuestra Señora del Pilar, the baroque cathedral where Catholic believers say Santiago saw the Virgin Mary. It opens at 7 am, so this makes for a nice pre-breakfast sight if you have early risers.

aragon-spain

About 30 minutes drive away, in Zaragoza, is the Museo Pablo Gargallo, as well as rafting trips and float trips down the Ebro River. Spending most the day in the area to combine a bit of culture with some outdoor adventure is a great way to go; head out toward Barcelona in the mid-afternoon.

The remaining drive is just over three hours. Arrive in Barcelona as the sun is setting!

This post was written in partnership with Enterprise rental cars. Itinerary is my own.

Photo credit: Felipe GabaldónAndrew GouldJorge Correa