Hiking the Kalalau Trail on Kauai’s Na Pali Coast (with teens to toddlers)

You don’t have to be a through-hiker with a backcountry permit and backpacking equipment to experience Kauai’s Na Pali Coast.Yes, the further you hike, the more you’ll see, but it’s entirely possible to hike just half a day and see enough to be wowed.

na pali coast

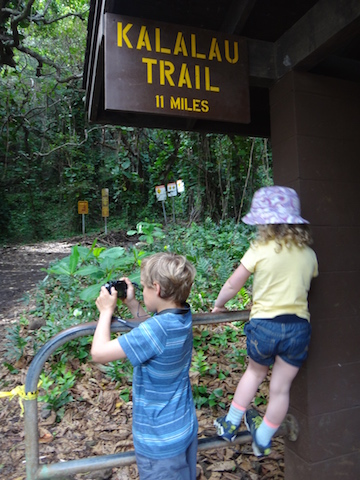
The Kalalau Trail runs 11 miles one-way along the stunning and steep Na Pali Coast, and provides the only means of traveling this section of Kauai coastline…on foot. Through-hikers either traverse the entire 11 miles in one day, camp at the end near the south shore, then hike back, or break up the adventure further, camping en route at about mile six, mile 11, and mile 18. It’s a route that requires the right gear, plenty of fresh water, and nerves of steel on some sections, where the trail hugs the mountains with steep drop-offs to the ocean.

Experiencing the Kalalau Trail with kids:

Most likely, you’re not prepared to make a multi-day adventure out of the Kalalau with kids in tow, but parents can certainly carve out a day of a Kauai beach vacation to see some of the trail. Start at Ke’e Beach on the North Shore, literally at the end of the road (you can go no further on Highway 56). The trailhead is well-marked, and you’ll likely see plenty of other hikers. Get to the trailhead early (before 9 am is best), as the parking lot fills up fast.

ke'e-beach

From the start of the trail at Ke’e Beach, families have multiple options on the length of their hike. We suggest:

  • hiking 1/2 mile in to the lookout point, then heading back for a 1 mile hike with preschoolers and young kids
  • hiking 2 miles in to Hanakapai’ai Beach, returning for a 4 mile hike with kids or teens
  • hiking 2 miles to Hanakapai’ai Beach, then an additional 2 miles up a side trail to Hanakapai’ai Falls and back, for a total of 8 miles with strong hikers

na-pali-coast

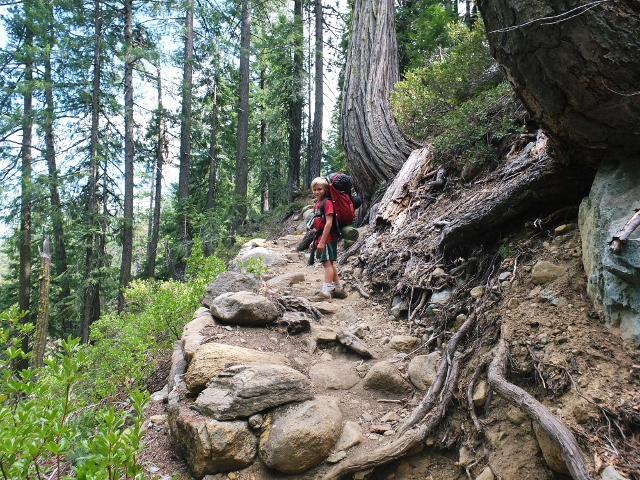
No matter which option you decide is best for you, note that the way will be steep. The Kalalau Trail rises and falls in elevation with every quarter mile (sometimes with every step!), with rocks, water runoff, and mud throughout. In many places, there are significant drops on the side of the trail to the ocean. There are not guardrails or other safety measures in place, so it’s crucial that young children are secured or holding a parent’s hand and older children follow directions and refrain from running along the trail.

hiking-in-kauai

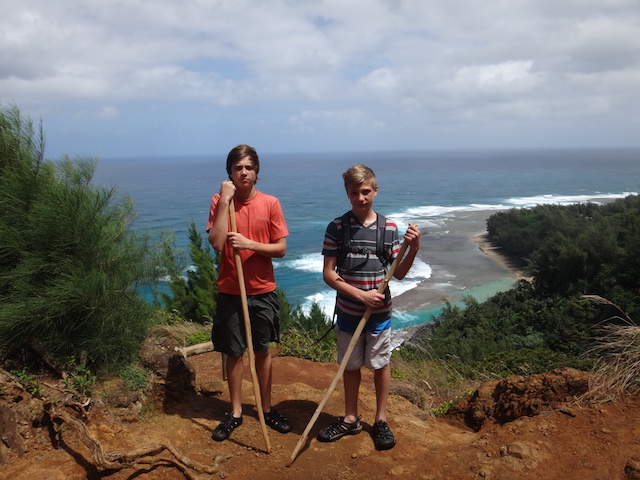
Our extended family of 11 set out on the trail on a March morning, with the plan to hike the four mile out-and-back with the option of some family members continuing on for the eight mile option. We made a family rule: all kids, even the teens, would be sandwiched between adults as we hiked. This prevented my teens from running ahead, and the preschooler and kindergartener from feeling left behind or getting too close to the edge. No where in the first two miles of the trail did we feel the trail was too dangerous, and I never felt too close to the edge, but a child running, jumping, or playing along the trail would not work.

hike-to-falls

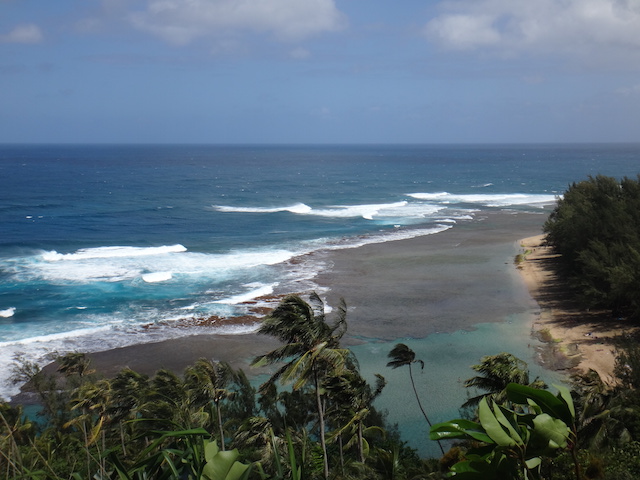
We hiked the first two miles slower than our usual pace, due to the steep trail but also due to the many photo opps along the way. At the 1/4 mile marker, families get their first glimpse of beautiful Ke’e Beach from above, but the even better views are yet to come at the 1/2 mile. The trail is mostly uphill for the first mile, then downhill for the second, as the trail drops down into Hanakapai’ai Valley and they rugged beach there.

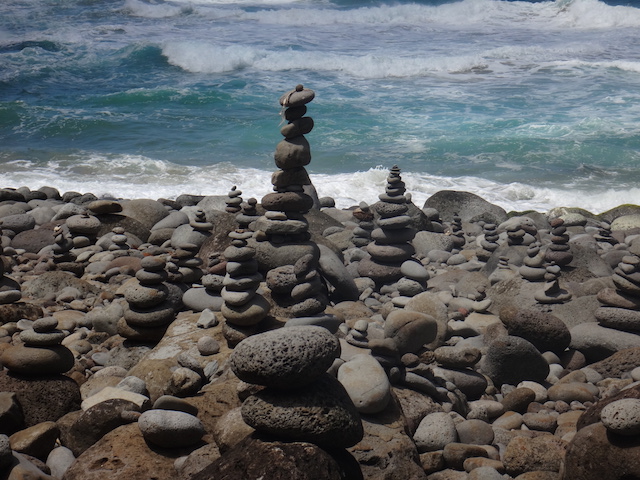
There’s a pretty major creek crossing right before arriving at the beach, which can be either an exciting reward for reaching the destination or a final obstacle, however you want to think about it. We had to help the young kids across, but the teens managed just fine. On the other side, there’s room for a picnic lunch and some ocean watching, but no swimming…the beach here is unsafe for swimming. Check out the lovely cairns other hikers have made from the smooth rocks lining the shore, instead.

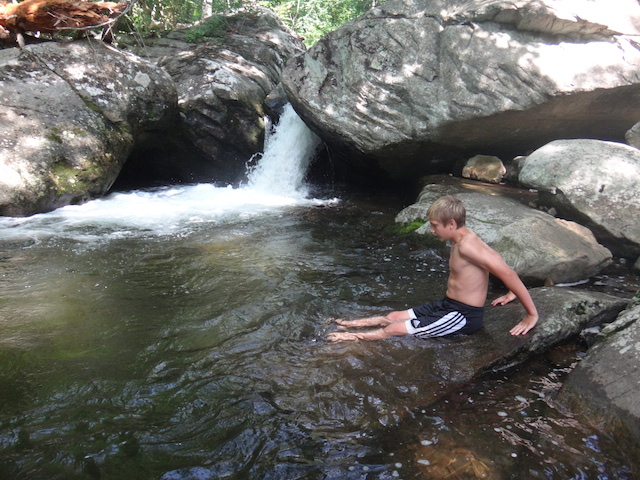
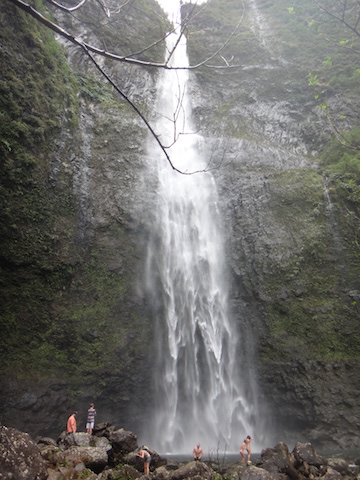
If you’re going on to Hanakapai’ai Falls, be sure to have plenty of water and adequate supplies, such as an extra layer of clothing, a small first aid kit, and snacks. The additional two miles to the falls is among the most strenuous I’ve encountered anywhere. There were at least six creek crossings, lots of muddy trail, slick rocks, and some actual bouldering to get up to the falls. The reward: one of the most beautiful falls I’ve ever seen, with space to take a dip in it’s pool. (Though if you opt not to get in the chilly water, you’ll get wet from the spray coming off the falls anyway!)

Retrace your steps to return to the beach, then retrace again to return all the way back to Ke’e Beach where you’ll end your eight mile day. We found the experience amazing, and would recommend the falls to anyone in good shape and used to hiking. The youngest hiker in our group for the extended hike to the falls was age 13. However, all kids, from age 4 and up, made it to and from the beach for a total of four miles.

What to wear:

Don’t wear your swimsuit, unless it’s comfortable to hike in. The only swimming is at the falls, and even that’s primarily a quick dunk. Be sure to have hiking shoes or very sturdy, rugged sandals, such as Keens or Tevas. Running shoes are a good bet, if you prefer them to hiking boots. (Browse more good stuff at Runnerclick.) I wouldn’t recommend anything without a closed toe. Wear sunscreen and sun protective clothing, and consider a bug repellent. We didn’t encounter many insects, but the area is known for them in certain times of year.

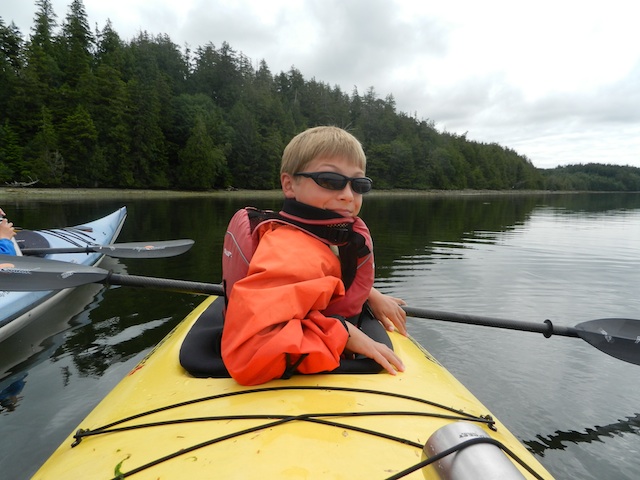
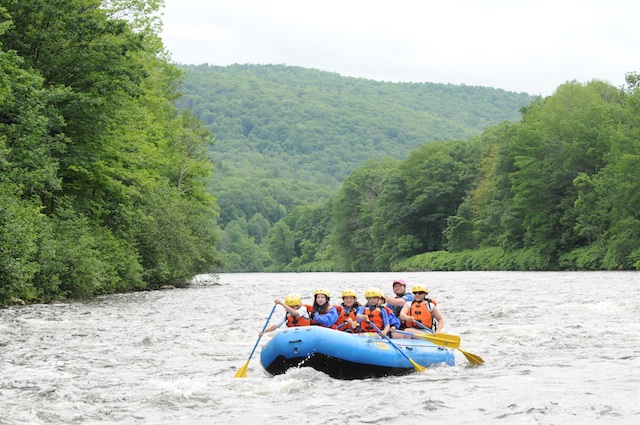
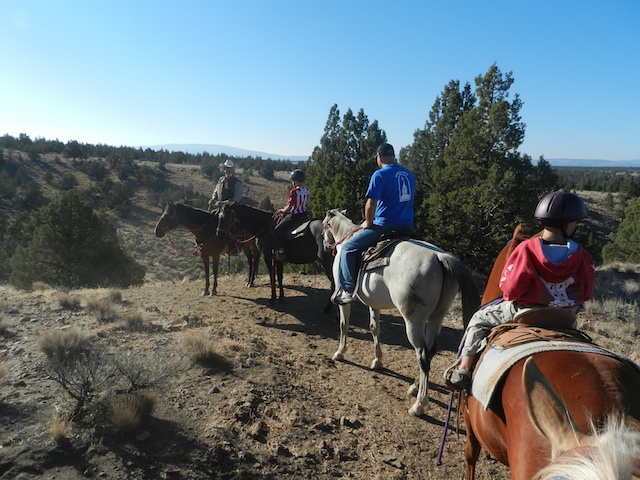
Additional activities and excursions to try on Kauai:

Cost of trail:

Free

Hours of operation:

Daylight hours. Note that the trailhead is often closed, depending on weather. The trail closes in severe rain, due to slippery mud and heavy flow of the creeks along the route (hikers have been swept all the way out to sea via flooded creeks along the trail). If the trail is closed when you arrive, wait a while. It usually opens. This was the case on our visit: at 9 am it was closed following a rainfall. We snorkeled at Ke’e Beach for a while, then the trail opened at about 10:30. This gave us a later start than we’d like, so please note possible trail closures when planning your trip.

Directions:

From Hanalei, continue along 57 to the end of the road, at Ke’e Beach.

Earth Day every day: outdoor adventures that teach kids to love nature

In our part of the world, Earth Day usually dawns chilly and soggy. For many years, I dutifully took my kids out to the local celebration (always held outdoors, of course) so we could freeze for a few hours while batting around an oversized globe-patterned beach ball, learn about sustainable housing and bio-diesel, and eat local produce. Don’t get me wrong: there’s nothing wrong with any of that. But in the past few years, we’ve found a better way to celebrate. We now strive to honor Earth Day every day.

majestic ocean kayaking in Ucluelet

How? By teaching our kids to appreciate nature and the outdoor world that surrounds us. When kids have seen, felt, and interacted with nature firsthand, they’re much more likely to relate to it and strive to protect it as they get older. It’s true that as an outdoor columnist for OutdoorsNW, I have ample opportunity to expose my kids to the wilderness in our region, but the great thing about the outdoors is how accessible it is. Outdoor adventures are usually low-cost (or free), within easy driving distance, and great exercise. The following are our favorite ways to get outside with kids:

1. Go camping.

Camping is cheap, it’s available no matter where you live, and while it takes some effort, it’s a major kid-pleaser. Check out our favorite campgrounds along the Pacific coast, or check your own state park listings for a one-tank-of-gas-or-less getaway. If you’re ambitious, plan a multi-night backpacking adventure.

2. Kayak or river raft.

Kayaking and rafting are great ways to introduce kids to water sports. Families can start on still lakes and rivers, and most locations include a guide who can help you get started. You can opt to be on the water for only a few hours if desired, and can return to comfortable lodging afterward. Kids dig kayaking and river rafting because it’s more exciting than hiking, with the same explorative benefits. Our top favorite kayaking and river rafting adventures have included a family float along the Deerfield River in Massachusetts with Zoar Outdoor, an autumn kayaking trip in Oregon’s Cascade Lakes with Wanderlust Tours, and kayaking Vancouver Island Canada’s Ucluelet harbor with Majestic Ocean Kayaking.

zoar-outdoor-deerfield-river

3. Hike!

It doesn’t get more basic than this. Take the kids, give them a backpack and walking stick (both optional), and drive to the nearest trail head. Don’t know where to find one? Start at your local outdoor store and pick up a local hiking guide or simply ask the salesperson. Bring sunscreen, water bottles, and a picnic, and you’re all set. To keep kids motivated and entertained en route, allow them to set the pace and stop to explore, even if it means climbing every third tree or stopping to build (and dismantle) a dam along a creek. If you want to make a vacation of it, start with our top five Western mountain lodges, and spend your days on the trail and your nights in comfort.

Brasada trail rides

4. Horseback ride.

Many rustic or outdoor resorts now offer horseback riding. For roughly the cost of any outdoor excursion (or round of golf or spa treatment) you can introduce your kids to the cowboy (or girl) lifestyle…for a few hours. We love horseback riding while on vacation because it accomplishes two important goals: fun for the kids and the chance to see more of the outdoors up-close. Even kids as young as five can often ride solo. Our favorite horseback riding operations have included those at Brasada Ranch and Colter Bay in Grand Tetons National Park.

5. Mountain bike.

Mountain biking is an expensive way to enjoy the outdoors if you own your own bikes and equipment, but surprisingly affordable to rent for the day at most local bike shops (whether you’re on vacation or at home). Because you can’t always mountain bike on pedestrian trails (but sometimes can), it’s important to pick up a cycling trail map where you rent your bikes. If you want to go extreme, try gravity-based mountain biking at a ski resort in summer. It’s one of the activities my kids (and I) have enjoyed most in the past few years! Learn more by checking out our biking experience at Northstar California.

How to plan a multi-night PCT hike with kids

If you backpack with kids, your family will eventually become interested in tackling an iconic backpacking route such as the Pacific Crest Trail. Unless you have a lot of time and stamina, you probably aren’t ready to through-hike the PCT, but a shorter PCT hike with kids is absolutely possible.

backpacking-trail

Planning a PCT backpacking trip is complicated, so we turned to the experts before planning ours. The folks at pcta.org put us in touch with trail expert Dana Hendricks, who has led volunteer crews for AmeriCorps, the Appalachian Trail Conservancy, and the American Hiking Society. She has through-hiked much of the PCT herself. We asked Dana the following questions as we set to work planning our hike.

Who should go?

Dana recommended anyone planning to hike a section of the PCT ‘warm up’ with day hikes or shorter overnight backpacking trips. Our family backpacks regularly, but never more than four days at a time. Because this trip would be at least one week on the trail, we decided two adults and the teens would backpack the entire trip, and another adult and the youngest (10 years old) would meet us for three days of the trip.

Where should we go?

The PCT is three states long, and not all sections are created equal. Our first question for Dana focused on where we should spend the seven days we decided to devote to the PCT. The good news: many people opt for day or section hikes on the PCT, so there’s a lot of research out there. Dana suggested we pick up PCT books at pcta.org to find the best section for our needs. The Day and Section Hikes series are excellent: we found detailed information on starting and ending points, and trail conditions and elevations.

Dana told us the PCT was designed as a stock trail, so the grade is 10% or less. This means most sections are suitable for kids who are used to hiking. There were no sections she felt were ‘off limits’ due to terrain. There are, however, dry sections which require carrying more water, and sections where snow may be a factor. For the sake of simplicity, we decided to eliminate these areas (the CA desert, Crater Lake, and the high Sierras). We also eliminated any areas without many landmarks to make the hike interesting, or areas that may be crowded with day hikers.

stuffing backpacking bags

After studying day and section hike books, and looking at our own needs for bodies of water (lakes or streams) and forest, we decided on a section in Central Oregon. Our route, which we’ll tackle in July, spans approximately 90 miles from Elk Lake Resort, through Sisters, to Olallie Lake. Here’s a screen shot of our route:

PCT-section-hike

How long to stay out?

How long our 90 mile route would take us depended entirely on our hiking speed, of course. While many PCT hikers crush the trail, hiking up to 20 miles a day or more, we wanted a more leisurely pace. We used PCT Planner (above) to gauge our distance and time on the trail. It was easy: we just input our starting and ending points, then added our planned hiking time per day. At the pace we felt comfortable with, we’d spend seven days on the trail. This would be longer than our longest backpacking trip so far, which led us to our next question…

How to plan food drops?

backpacking with kids bear canisters

Dana explained that most PCT hikers arrange to have food drops well before their trip. Hikers can mail food to themselves to post offices along the trail, but the idea of leaving the trail and restarting during such a short trip didn’t appeal to us. Instead, we’ve decided to have friends and family meet us on the trail with a resupply of food. We have this luxury because the PCT section we’ve decided to hike is within a few hours’ drive of our home. We know we can comfortably carry four days’ worth of food from previous trips. We will be met on the trail by family members at the end of Day 3, which will coincide with our path through Sisters.  We couldn’t arbitrarily decide when they’d meet us, however: there are set places where it’s easy to access the PCT, and we needed to plan our reunion accordingly. Another way to tackle food drops is to have a non-hiking friend or family member meet you with food at a designated trailhead en route. All re-entry points along the trail are listed on PCT Planner.

How light should we pack?

While we backpack regularly, we’re not what you’d call ultra-light backpackers. We like our luxuries, like hammocks and coffee presses. While Dana agreed with me that some of these items will need to be left at home to leave room for more food, she did remind me not to compromise on any items that keep us warm and dry. A full list of tips for backpacking with kids can be found here. In short, we needed layers, waterproof clothing, shelter in the form of a lightweight tent, food and cooking supplies. We will bring books and a deck of cards, but no other major luxuries. By keeping our packs light, we’ll adjust more quickly to seven days of hiking. Tip: For basics in backpacking gear for kids, check our Backpacking Gear page and How to Plan a Multi-Day Backpacking Trip.

How best to follow Leave No Trace principles on the trail?

We always practice Leave No Trace while in the wilderness, and we wondered whether it would be harder than usual to find established camp sites en route on the PCT. Dana says no: we’ll be able to find established sites virtually everywhere on the trail. She reminded me to camp 100 feet from water sources, and to leave recovering sites alone if possible.

Additional PCT hikes suggested by Dana and PCTA:

There are many other route options for families looking to hike a section of the PCT, of course. Dana also suggests Mt Hood National Forest from Lost Lake to Wahtum Lake to Eagle Creek (a PCT alternate) into the Columbia Gorge or Rock and Snag Creeks, near Bridge of the Gods in Washington.  Dana describes the latter as kid-friendly, as either a short out and back day trip or a 22 mile section hike. Find additional staff recommendations here.

Leave No Trace principles every family needs to know

With Earth Day coming up later this month, April is the perfect time to talk about caring for our public lands. My kids have heard the Leave No Trace mantra since early childhood, but it’s always good to brush up on best practices for preserving the wilderness we love.

leave-no-trace


This season, Leave No Trace launches a multi-year, Leave No Trace in Every Park campaign. Subaru/Leave No Trace Traveling Trainers will be visiting ‘hot spots’ across the country (severely impacted areas), giving them attention and helping educate the public. I was lucky enough to sit down with one of them to ask top questions most families have about leaving a lesser impact on the wilderness.

Q: I am aware of the seven principles of Leave No Trace. Is there a ‘crowning’ principle in particular families would bear in mind while in the outdoors?

We encourage people to think of the cumulative impact as a crowning idea for the principles. Over one billion people visit federal and state lands each year. If one person leaves an impact such as litter, feeds wildlife, takes an item out the environment, or walks on a non-durable surface it will not impact the outdoor area significantly, but the cumulative effect of these impacts happening repeatedly over time would have a dramatic impact.

leave-no-trace

Q: How does trail cutting or ‘bush-whacking’ hurt the wilderness environment?

We encourage people to walk in the middle of the trails even when they are muddy. If you walk around the mud you will erode the sides of the trail making it wider and you could crush vegetation on the edge of trails.

As trails widen vegetation diminishes and eventually land management agencies will have to fix the trail. Along the same lines, we encourage people to not cut switchbacks since it can result in the hillsides between the trail to erode.

If a group of people wants to hike off trail we encourage them to disperse, rather than hike in a single file. By dispersing people won’t step on the same spot, which can cause a new undesignated trail to form.

learning-leave-no-trace

Q: Could you describe best practices for finding a suitable campsite in backcountry situations when established sites are rare?

If established sites are rare and the land management agency does not have designated spots that are provided for campers to use we recommend the following considerations. Camp 200 feet (the equivalent to 70 adult paces and 100 kid paces) away from water, trails, and other campsites. Find the most durable surface available such as rock, sand, snow, or dry grass to camp on. If you find a site that is showing some signs of impact, such as significant soil compaction, stay there, but if it is only showing small signs of impact leave it alone for the area to recover. Move on to another more durable site that is showing no signs of impact. Bonus: dish washing tips and car camping tips!

Q: What’s the best way to completely put a fire to ash and ensure it’s safely out before leaving?

Fires are a great part of camping; they give us light, warmth, and s’mores! Making sure that we are responsible with our fires ensures safety for you, other visitors, and wildlife.

Before having a fire, ensure that they are allowed in the area you are camping in.

Ensuring that your campfire is out completely before you leave or go to bed is a very important part of camping. First, choose firewood that is no larger than your wrist as it will burn to ash more easily than larger wood. Check local firewood regulations as some areas do not allow wood not from the area to be brought in as it may harbor invasive insects.

backpacking foods for kids

Be sure to burn all wood to ash. Then, you want to guarantee your campfire is out cold. First, use plenty of water and sprinkle it over the ashes: to help the process use a stick to stir the ashes while pouring the water. If the fire area is too hot to touch, it is too hot to leave or go to bed. Bonus: how to build a mound fire.

Q: Tips for carrying out all trash? For instance, our family always unwraps food items as much as possible before departure, so there’s less trash to carry out later. 

We encourage people to take a trash bag along with all of their other essential items for any outing. Repackaging food before heading to the trail helps decrease the amount of trash you will have to pack out. We also encourage people to even pack out all food scraps. Human food is unhealthy for wildlife; they become dependent on humans for food and become attracted and conditioned to human food and trash. Which is unhealthy for both the wildlife and humans. Fruit peels can take up to 2 years to biodegrade and most are not native to the areas they are left.

We like to say, if you weren’t there would it be there?

Q: Young kids naturally enjoy making forts, rock dams, or other ‘structures’ at backcountry campsites…how can they channel this desire to create and explore in line with Leave No Trace practices?

We get this question all the time. It is important to educate children on the importance of Leave No Trace while still inspiring creativity and fostering a sense of adventure to connect kids to the outdoors. We still encourage children to play in nature and still follow Leave No Trace. Kids can still build forts or structures at campsites and then before leaving they can simply dismantle the structures.

If kids want to collect items, first make sure to check the rules and regulations of the area to make sure it is ok to collect something.

We encourage only taking one item instead of several, this generally also makes that one item more important to the child as they often attach a special memory to one item they have really given some thought to during an adventure.

Q: A nitty-gritty bathroom-related question: Leave No Trace has always stated that human waste and soap or shampoo should be 100 feet from water sources. What about rafting companies’ ‘dilution is the solution to pollution’ method? 

Usually in the backcountry, we want to be 100 feet away from any water sources, trails, and campsites when doing dishes or bathing.

However, western river corridors sometimes have different recommendations for human waste and gray water. In river corridors, the river is usually the most durable surface. The rivers in deep canyons present difficulties for the normal recommendations because you usually cannot get 100 feet for gray water or 200 feet for human waste disposal away from the water.

Leave No Trace recommends packing out all solid human waste with a reusable, washable toilet system. Always follow local regulations as some areas allow the use of bag-type systems to pack out human waste. Often, urine and strained gray water are required to be deposited directly into the river.

The old saying goes, “dilution is the solution to pollution.”


Thank you, LNT, for helping educate Pit Stops for Kids families!

Adventures for Kids in Costa Rican National Parks

Costa Rica has a landscape brimming with opportunities for active adventure. National parks provide safe and pristine environments for rambunctious children to explore. If your youngsters have exhibited interest in climbing, jumping, gliding, or bouncing, make sure to fit some of these activities into your Costa Rica itinerary.

costa-rica

You can usually find a tour that offers some combination of the following activities, and your tour guide can provide you with all the equipment you need.

Of course, family vacations in Costa Rica don’t only cater to visitors with boundless energy. If you get a moment to yourself, take a tour of a coffee plantation, or unwind on the beach, or go for a holistic soak in a volcanic hot spring.

But while you’ve got your kids along for the ride, take them on expeditions that will leave an indelible impression. For most kids, that means experiences that send them into totally new environments. Costa Rica’s National parks will invite them to explore their appetite for outdoor excitement.

Suspension Bridges

Look for hikes that will take you high up in the jungle canopy. Walking over a suspension bridge will add excitement to your hike, and offer spectacular views of the surrounding landscape. In Arenal National Park, the view will include the ancient, snow-capped Arenal Volcano.

Visit suspension bridges in Monteverde National Park to voyage into the heart of the park’s cloud forest – a rare environment that develops when high humidity combines with a high elevation. Cloud forests create a habitat for some of the world’s rarest plants and animals.

costa-rica

Tubing and Rafting

Tubing down a river in Costa Rica will let you see the lush landscape from your own tubular oasis. This is an especially good way to see the jungle – you’ll get to observe the wildlife on the banks of the jungle while you move at a leisurely pace.

Older kids can try something a little more advanced with a white water rafting trip. Your guide will make sure everyone has taken all the necessary safety precautions before you begin your rollercoaster ride down the white water rapids of the Naranjo, Pacuare, or Sarapiquí River.

Kayaking and Surfing

Kayaking allows you to get up-close to the twisted trees that make up Costa Rica’s exceedingly rare mangrove forests. You’ll see marine birds, like spoonbills and pelicans, as well as monkeys. There’s even a chance you could catch a glimpse of a crocodile. Guanacaste National Park and Marino Las Baulas National Park are both good destinations for kayaking around mangrove forests. Manuel Antonio National Park has mangrove forests as well as opportunities for ocean kayaking.

While you’re visiting Manuel Antonio National Park, sign up for surfing lessons. Beaches here offer easy-going waves and plenty of qualified surfing instructors. Even if your kids have never tried it before, they’ll be excited to get into the clear, blue waters of Costa Rica’s Pacific coat.

Rock-climbing

In the midst of the dense Costa Rican jungle, visitors can make an afternoon of rock climbing in a canyon. Surrounded by deep green vegetation, these rocky destinations serve as a habitat for colorful birds and plants. Gorgeous jungle canyons are the perfect place for your kids to push themselves to get to the top.

And as you scramble up the side of the rock face, you’ll have the noisy jungle to serve as the soundtrack to your expedition.

Rappelling in a Waterfall

Waterfalls are easily the most refreshing natural formations. And rappelling down a waterfall is, without a doubt, the best way to recover from a steamy hike through the jungle. Have your kids wear quick-drying clothing so they’ll be ready to spend part of their day conquering the cascade.

Zip-lining

No trip to the jungle canopy is complete without a zip-line ride through the treetops. After admiring the plumage of Costa Rica’s tropical birds, you can join your feathery friends on a flight of your own. This is a thrilling activity, and a good source of motivation for a youngster on a hike.

Molly Kendrick is a part-time traveler and freelance writer for Anywhere Travel. Anywhere can help you discover destinations in Costa Rica, Panama, Peru, and Guatemala, and will create your customized travel plan for free. 

Ashland Centennial Ice Skating Rink

If you’ll be traveling along I-5 this winter season, you’ll need a festive place to stop and let the kids play. Our pick: Ashland Oregon’s Rotary Centennial Ice Skating Rink, located outdoors adjacent to lovely Lithia Park.

ashland-ice-skating

Located near the Oregon/California border, Ashland is a vibrant town best known for its Shakespeare Festival and university campus, but families will find much to enjoy outdoors as well. In addition to the cheery, community-centric ice rink, Lithia Park (located just past the Plaza on the main strip), is beautiful at any time of year; the extensive walking trails and playground are accessible in winter as well as summer. Purchase hot cocoa and other snacks at the counter next to the rink, and plan on a great meal at one of the town’s many restaurants before or after. Definitely spend a whole afternoon between the ice skating rink and the adjacent playground and park, followed by a nice meal out. Be sure to bundle up!

Distance from the nearest interstate: Three minutes from I-5.

Hours: Open seven days a week from mid-November through March. View a complete schedule listing specific skating times.

Ticket Prices: $4.00/adult, $3.25/children (skate rental $2.50 extra per person)

Dining options: Dining options in downtown Ashland abound; our favorite for families is Martolli’s pizza, located just blocks away at the end of the Plaza.

Website: Centennial Ice Skating Rink

Phone: 541-488-5340 (best way to contact rink personnel during business hours)

Directions: From I-5, take exit 19 toward Ashland, merging onto S. Valley View Rd. Turn left at OR-99 S/Rogue Valley Hwy 99 N, then continue to follow OR-99 S (Main) to Wilburn Way. Turn right onto Wilburn and follow it past the Plaza to Lithia Park.

Things To Do
Ashland

Hometown ski resort: Badger Pass Ski Area

Ever wanted to downhill or nordic ski in Yosemite National Park? How about a morning of skiing followed by an afternoon of hiking on the valley floor? I spent a day at Badger Pass Ski Area, located in the center of Yosemite National Park, to see what it was like. What I found: wonderful ski culture, local enthusiasm, and lots of love for the outdoors. I guess that should come as no surprise!

badger-pass-ski-area

Badger Pass boasts just 10 runs and four lifts (plus one rope tow). It features one lodge (two stories), a rental shop, and a nordic center. All the downhill runs funnel down to the same general base area by the lodge, and the entire feel is friendly, welcoming, and relaxed. This is hometown skiing at its best: just like at the tiny ski resort I grew up skiing in the Sierras, Badger Pass is all about the outdoor experience. Kids were skiing solo the day I visited, their parents content with the knowledge they really couldn’t get lost. Newbies were trying out the sport in first-timer lessons, and telemark skiers were almost as ample as downhill skiers.

badger-pass-yosemite

The nordic center was bustling: with over 350 miles of cross-country trail in the park, most of which starts at Badger Pass, this is a hot sport! The nordic center staff will get you completely outfitted (downhill and snowboard rentals are available as well, in the adjacent downhill rental shop). Grab a trail map, and decide how far and fast you want to go.

Badger Pass offers one small terrain park, and the majority of the runs are intermediate, with a few black diamond runs. I was told tree skiing and backcountry skiing was abundant, given the correct snow conditions. In the lodge, visitors will find lots of lounge space, a nice big sun deck on both levels, and friendly food service where you can order standard ski fare: burgers, wraps, and a burrito bar. I recommend the homemade veggie burger and fries.

badger-pass-deck

Lift ticket costs:

Downhill lift tickets are currently $48 for adults, $43 for youth, and $25 for kids (all day). XC ski rentals are available, as stated, as are Pulk sleds if you want to bring the younger kids along for the ride.  Ski rental pricing. 

badger-pass-nordic-ski

Directions:

Badger Pass is easy to find from Highway 41 by the South Entrance to the park, or from the Valley Floor. From Wawona Road, take Glacier Point Road.

As I disclose whenever applicable, I experienced Badger Pass Ski Area as a guest of the resort, for the purpose of review. I hope my firsthand knowledge helps you plan a better trip!

Guide to Whidbey Island State Parks

Whidbey Island, Washington is known for its picturesque coastline and pastoral setting. It’s true that Whidbey, located north of Seattle, offers abundant farm stands and a healthy agri-tourism trade, but many families –including mine!– had no idea how many beautiful, exciting state parks fill this small island! We recommend coming to stay at least three days in order to experience most of them.

Fort Casey State Park:

If you arrive via Washington State Ferry at Coupeville, you’ll notice Fort Casey State Park right away. This large park sits on the island’s west coast, and centers on the region’s military history. There are numerous batteries (created for defense but never used) lining the coast line, which contributed to the ‘triangle of defense’ offered by Fort Casey, Fort Worden (across the water in Port Townsend, WA) and Fort Flagler.

admiralty-lighthouse

What to do here: Families will want to check out the batteries and commanders’ station, but should also visit the beach access and Admiralty Head Lighthouse. The light sits at Red Bluffs, and during day time hours in season, visitors can go inside and even climb the spiral stairs to the light. From here (and elsewhere in the park), kids can watch the ferries come and go from the landing.

whidbey-island

Campground: Yes! It’s right next to the ferry landing (which can be a good thing or a bad thing…).

Ebey’s Landing:

Ebey’s Landing National Historic Reserve encompasses the entirety of the town of Coupeville, Ebey’s Prairie, and Fort Ebey State Park. It marks the homestead and founding location of the Ebey family, and protects the historical significance of this entire section of the island. Fort Ebey includes coastline, hiking trails, and more batteries.

batteries

What to do here: At Fort Ebey, play on the beach! This section of protected coastline offers up oversized driftwood perfect for building a beachside hut or fort of one’s own, and the picnic areas are protected from wind and surf. The bluff-side trail is one mile long, and takes families from the beach to the batteries overlooking it. It’s worth getting back in the car to check out Jacob Ebey’s House. The house is open seasonally, but the adjacent cemetery is worthy of a visit in its own right. Families can overlook the prairie, and step inside one of the many ‘blockhouses’ the Ebeys built as protection from Native American conflict.

Campgrounds: Camping is available on the beach (in a protected forested area) at Fort Ebey, and on the prairie at Rhododendron Park (near the Whidbey Island Naval Air Station).

Deception Pass State Park:

deception-pass

On the north tail of the island, Deception Pass State Park may be the most well-known. This breathtakingly beautiful park focuses around the Deception Pass bridge. Hiking trails are abundant, and the park hosts a busy marina with sightseeing vessels doing business.

What to do here: Park at the visitor’s center (stand) on the south side of the bridge, and hike down to North Beach (.2 mile). From here, families will get a great view of the bridge before they cross it. It’s also fun to see the many fishing boats in the current that flows quickly here. Additional hiking trails take you further afield, or you can opt to cross the bridge. Cross either on foot using the pedestrian walkway (an exciting experience!) or drive.  Head to the marina dock on the other side, and take a Deception Pass Tours boat out on the water. This 45 minute tour in a catamaran Island Whaler takes you under the bridge and past the challenging water that churns there to the bay. During our tour, we saw porpoises and harbor seals, and many tour groups see whales. Tours are priced right at $24.95, and don’t last too long for young kids.

deception-pass-tours

Campgrounds: campsites range from forested to open, on or near the water. Like the rest of the park, they’re gorgeous!

South Whidbey Island State Park:

South Whidbey Island State Park is smaller and quieter, and feature shoreline and forested areas. Primarily, it serves as a campground. Families get great views of the Olympic mountains!

whidbey-beaches

What to do here: This state park is popular for clamming, but there’s also about three miles of hiking trails, fishing, and swimming.

Campgrounds: There are 46 tent camping spaces at South Whidbey. Of note: families may hear air traffic from the nearby naval base.

whidbey-island

While enjoying any Washington State park, you’ll need a Discover Pass. Passes are $10 per day, or just $30 for a year!


Shenandoah National Park: Nicholson Hollow hike

Shenandoah National Park is massive, and popular Skyline Drive necessities many hours in and out of the car. Everyone knows Old Rag Mountain offers one of the best day hikes on the East Coast, but it takes most of a day and is very strenuous…not the right fit for every itinerary or every family. However, few people know about the much shorter, much more kid-friendly hike of Nicholson Hollow, accessed right from Old Rag Mountain parking lot.

nicholson-hollow-hike

We got the inside scoop on Nicholson Hollow from the staff at Belle Meade Farm in nearby Sperryville. Instead of the tough uphill mileage of Old Rag Mountain, Nicholson Hollow follows a wide creek through the woods at a modest incline. It’s in shade, and during our June visit, the bugs weren’t bad. The trail starts 1/2 mile from the Old Rag Mountain parking lot (you follow the paved road to the sign post), then at 1.5 miles, you see a large boulder by the creek. Here, a great swimming hole spills from a short waterfall. The depth during our visit was enough for jumping off the big rock and others in the vicinity. If you continue up the trail, it leaves the creek and continues to a Y, where more trails convene. Go as far (or short) as you like.

old-rag-mountain

The first half mile of the trail is on private property; it’s fine to hike it, but remember there is no fishing allowed in this section. After that, you enter Shenandoah National Park.

Where to stay: Shenandoah National Park cuts a long path through Virginia. In order to be centrally located, it’s good to have a home base in the countryside surrounding it. Check out these options from VacationRoost.

Entrance Fee:

You will need to pay the national park entrance fee at the kiosk at the parking lot. The fee is $14 per car, or $8 per adult (kids are free).

Directions:

The Old Rag Mountain parking lot can be accessed from the Thorton Gap park entrance of Shenandoah National Park, or from the county road access off F.T. Valley Road outside Sperryville (follow signage). From the parking lot, walk up the paved road 1/2 mile to the Nicholson Hollow sign.

Disclosure: this post written in conjunction with partner VacationRoost.com.

The north shore of Kauai with babies and toddlers

The north shore of Kauai, Hawaii, is undoubtedly one of the most beautiful places on earth for a Hawaiian holiday, but it can be tricky to manage a kid-friendly family vacation without a few insider tips! Kauai is a small island, but indirect, winding, two-lane roads and local traffic can slow families down, making outings longer than they appear on the map. We’ve put together a brief list of some of our kid-tested favorite beaches and attractions to help you chose activities that will cater to your babies and toddlers, and help you get a little relaxation while you’re at it!

north-shore-kauai

Note: family travel with small kids is just easier when staying at a vacation rental, with room to spread out and a kitchen in which to prepare meals. Check out Kauai vacation rental options from VacationRoost.

Anini Beach (Anini Road, Kalihiwai, HI): As any guidebook will tell you, Anini Beach is one of the best beaches for very small kids. The beach is narrow, but there is a grassy lawn for ball games, and the water is more like a zero entry pool than a beach. No waves, soft sand, and some decent snorkeling make this a great beach for the younger set.

Ke’e Beach (HI 560, just past Ha’ena): This one surprised us—it’s not listed as being particularly kid-friendly in any of the guidebooks, and from the parking lot, it doesn’t look like much. It’s at the trailhead of the famous Kalalau Trail, at the start of the spectacular Na Pali Coast. We didn’t notice the beach until we were at the first lookout along the trail and looked down at a beautiful, sheltered beach with clear water and a protective reef about 100 yards off-shore. After our hike, we returned to stop at Ke’e Beach, and it was probably the calmest, most picturesque beach we visited during our vacation. It might be rougher in the winter months, but in late summer the water was calm enough for swimming with a baby!

north-shore-kauai

Hanakapi’ai Beach and Kalalau Trail: About two miles in on the Kalalau Trail (trailhead located at Ke’e Beach, literally at the end of the road that travels across the north shore) is picturesque Hanakapi’ai Beach. Although not recommended for swimming (strong currents and a remote location make swimming extremely dangerous), this is a spectacular beach, with a freshwater creek and shallow caves to explore. The hike was steep and muddy in places, but we were able to arrive at our destination (Hanakapi’ai Beach) in the morning, eat a snack and explore, and make it back to Ke’e Beach in time for a midday lunch. The hike is extremely beautiful, but tough and often dangerous for kids, and I wouldn’t recommend it for the very young without a carrier of some sort (strollers are definitely not an option on the trail!). Keep in mind: a trip to Kauai isn’t complete without seeing the spectacular Na Pali Coast!

Kilauea Lighthouse and Wildlife Refuge (Kilauea Road, Kilauea): At the northernmost point of Kauai, the Kilauea Lighthouse sits on a bluff with views of the north shore all the way to the Na Pali Coast. There is a short walk from the parking lot to the lighthouse, with great views for bird, seal, and even whale-watching (in the right season). This is a fun toddler activity: everything is fenced in, and the walk is easy, so you can let the kids loose. There is a little information center at the lighthouse that even has coloring paper and crayons for the artists in your group! Note: Kilauea Lighthouse has a $5 entry fee for adults 16 and over; those under 16 are free.

kauai-north-shore-lighthouse

Lydgate State Park (Nalu Road, accessed via Leho Drive off Route 56 in Kapaa): I was surprised to find that there were not many playgrounds on or near the beaches in Kauai. Of course, the beaches and hikes alone are enough entertainment for most of us, but for the very young (who might be too young to swim or hike in their own right), nothing beats a good old-fashioned playground. Kamalani Playground at Lydgate State Park is a huge wooden maze-like structure with slides, swings, and ropes to climb. It’s actually on the eastern shore of the island, but is only about a 20-30 minute drive from the north shore, and is by far the best playground around. We spent a blissful afternoon letting our three-year-old run wild while the baby happily watched from the swing. The only down side to this park is that the beach directly across the street from the playground is too rough for inexperienced swimmers, although heading north through the parking lot will reward you with a more sheltered swimming area. Tip! Be sure to stop for some shave ice in Kapaa on your way back to the north shore!

General information: All beaches in Kauai are public, and therefore free. The above (unless otherwise indicated) are located just off the main road that travels along the coast from Kapaa to Ke’e Beach (Rt 56/HI 560). Food services vary: none of the locations above have food available, but there are places to eat in the towns throughout the north shore. The Kilauea Fish Market and Foodland in Princeville are some that we enjoyed for lunch and dinner.

Kalihiwai on Dwellable