Ultimate family vacation in Pittsburgh for the younger set

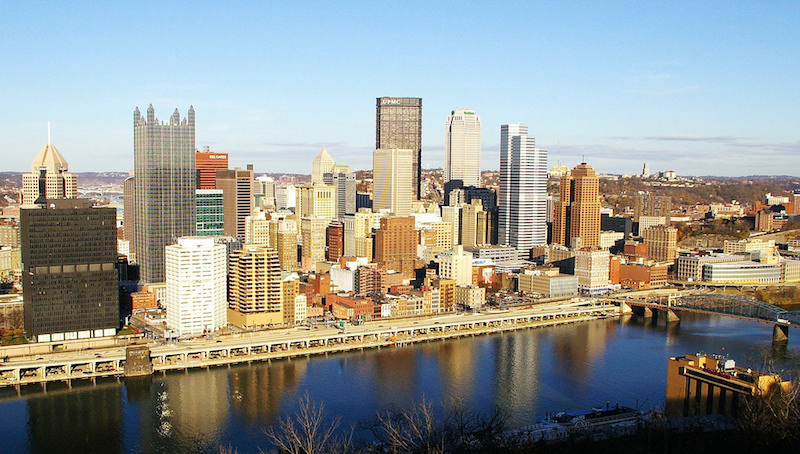
If you have toddlers and preschoolers who love Daniel Tiger and visiting kid-friendly attractions like children’s museums, consider an easy-to-plan summer getaway to Pittsburgh.
pittsburgh

How to plan a vacation in Pittsburgh:

If you’re not sure where to start in the planning process, or aren’t familiar with this kid-friendly city, Visitpittsburgh.com/Kidsburgh is your one-stop destination to book your perfect family vacation. You’ll find savings up to 50% on tickets to Pittsburgh’s top family attractions when you book a hotel through the website. Plus, you can create a personalized itinerary so you won’t miss a single attraction on your Pittsburgh adventure.

What to do in Pittsburgh with young kids:

From scientific learning to stepping inside Daniel Tiger’s Neighborhood, there’s fun for family members of every age. The highly rated Children’s Museum of Pittsburgh is perfect for younger explorers and Daniel Tiger fans won’t want to miss the visiting exhibition: Daniel Tiger’s Neighborhood: A Grr-ific Exhibit. Meanwhile, teens and young children alike will adore Kennywood Amusement Park’s historic and exhilarating rides. From indoor fun at the educational Carnegie Science Center to outdoor excursions at the Pittsburgh Zoo & PPG Aquarium, summer in Kidsburgh offers non-stop family fun. Be sure to explore Pittsburgh’s famous three rivers on the Gateway Clipper or on a Just Ducky Tour. Climb to new heights and see award-winning views on 140-year-old cable cars of the Duquesne Incline. Meet more than 500 birds at the National Aviary and step into your favorite fairy tale with Idlewild & Soakzone. Adults and children alike find the interactive Senator John Heinz History Center amazing and visitors of all ages love the original set pieces from Pittsburgh’s own Mister Rogers Neighborhood! Explore visual botanical art, meet friendly butterflies, and get interactive at Phipps Conservatory and Botanical Garden. No matter what your interests or age, Kidsburgh has a full summer of family fun!

Book the perfect adventure for your family through VisitPITTSBURGH.com and keep your family vacation affordable and fun with discounted attraction tickets, hotels and more.

Photo credit

Guide to Villa Borghese with teens who want to do everything extreme

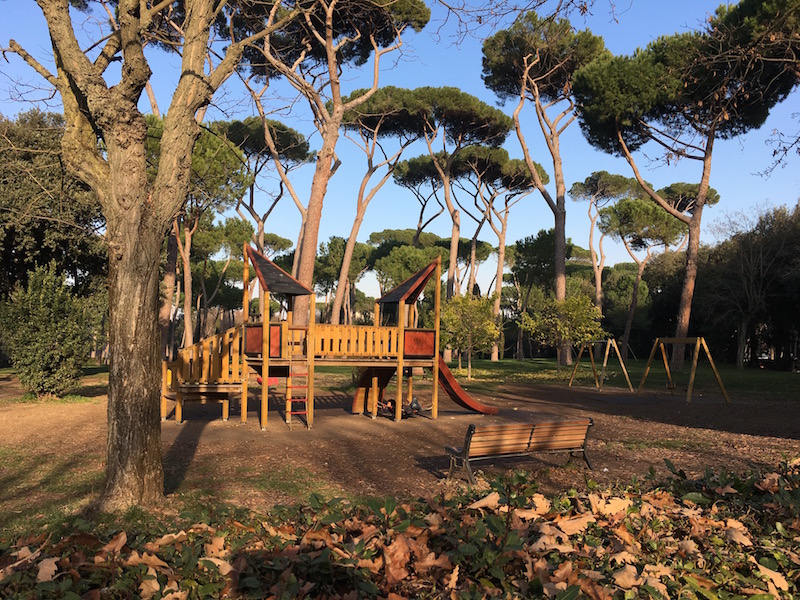
We’re a very active family who spends significant time outdoors when we travel. In Rome, we noticed the lack of green spaces right away. Luckily, our apartment rental was located directly across the Tiber from Piazzo Popolo with an entrance to Villa Borghese. This sprawling green space and garden is Rome’s version of Central Park, and if you have active kids and teens who need to burn off energy, this is your place.

villa-borghese

We visited Villa Borghese several times during our five days in Rome, using it as our backyard after mornings in museums and historical sites. Originally a private vineyard and most elegant villa in the city for the Borghese family, the park is technically a historical site in its own right, but we admit we didn’t take advantage of its Galleria Borghese or other museums. We were simply there to play.

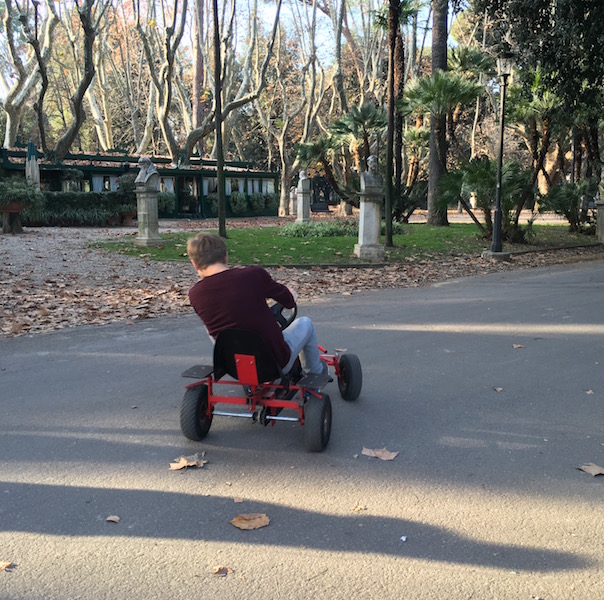
From the Piazza Popolo entrance, you’ll head up a series of steep steps to enter the park at a beautiful overlook. This is, in our opinion, the place to watch the sunset over St. Peter’s dome. You’ll find a number of vendors in this wide space at the top, as well as fountains and paths that lead you further into the park. Younger kids will appreciate the free puppet shows at the little theater in this section, and this is also where you can rent bikes and pedal-powered go-karts.

villa-borghese

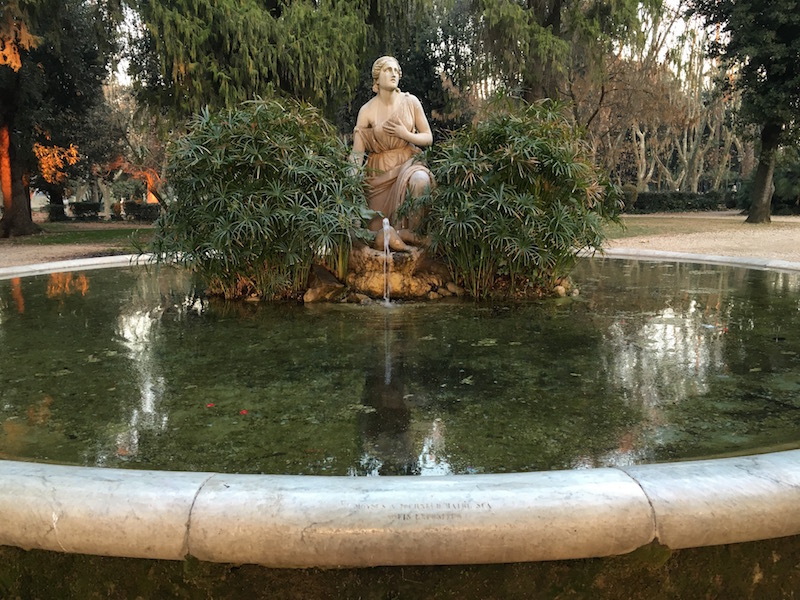
Garden features like this one are featured amid all the touristy offerings. You’ll see a wide pedestrian bridge adjacent to the bike rental stands, which will lead you across a round-about (with some traffic) to the center of the park. Explore this area on wheels, or your feet will get tired! It’s huge. You’ll find another theater, this one with movies, touted as ‘the smallest cinema in the world’. I don’t know whether this is true, but it’s pretty tiny. It runs kids’ movies in the day and intellectual stuff like documentaries and foreign language films in the evenings. There’s a playground, several cafes, and many more gardens and fountains. In a second section, you’ll find a lake with boat rentals; we visited in winter, so this wasn’t a main draw for us.

villa-borghese

Rent bikes, surreys, and go-karts:

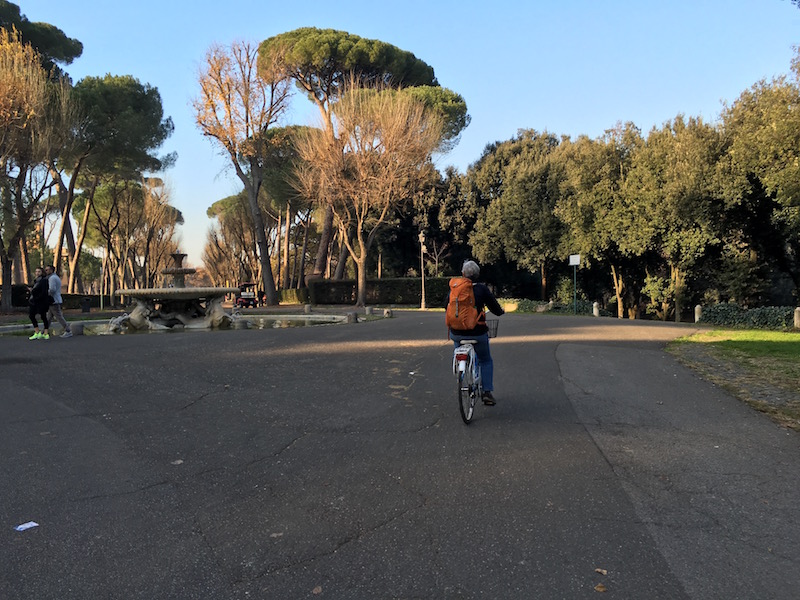
The first thing we did was rent bikes so we could explore. Rental stands are plentiful, so you shouldn’t have trouble finding one, no matter where you enter the park. At the time of our visit, rentals were approximately €7 per hour. We found one hour to be enough to ride around and get the lay of the land. On subsequent visits, we walked where we wanted to go. Go-kart and surrey rentals were similarly priced, with the exception of the four-person surreys, which were more. You leave your ID with the attendant when you rent (I gave my driver’s license, as my passport doesn’t leave my sight when possible) and pay when you return on time. The teens had a blast with the petal-powered go-karts…mostly, they played ’tag’ with them on the wide dirt paths around the park.

Rent Segways:

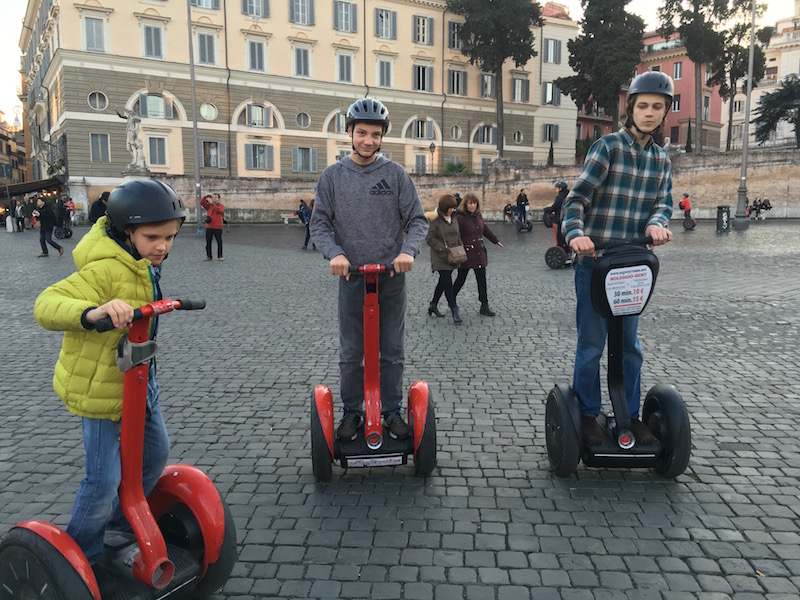
In Piazzo Popolo, you can rent Segways by the half hour or longer. You don’t need to go with a guide, and very little to no instruction is given. To the teens, this was awesome. Rentals were €10 for 30 minutes. We rented three (one for each kid). If you rent for longer, you can actually take them from the piazza up to the park, which we saw many families doing, but our budget only allowed for half an hour. The kids loved riding these around the piazza…while undoubtedly a touristy thing to spend money on, we considered it money well-spent. For a total of €30, three kids were in heaven. Like with the bike rentals, we were asked to leave an ID, and the kids were told ‘not to zig-zag and not to run into each other’. If seen doing either, they’d be given one warning, then taken off the Segway. Even though the kids hadn’t used Segways before, they’re easy to learn, and we had no problems until the moment we returned them, during which our 11-year-old ran into the back of our 16-year-old while distracted by the guy’s instructions for parking. He was sternly admonished. We were glad it hadn’t happened earlier.

piazza-popolo

Watch street performers with serious skills:

All over the park, street performers with various talents show off their skills. We enjoyed a pretty good roller blade demonstration and some great juggling. We heard some good music and some very bad music, then returned to watch the roller bladers in time to see some wince-inducing crashes by some amateurs. Either way, it was entertaining.

Buy a soccer ball or play at a playground:

For about €5 (though they’ll ask for ten, initially), many street vendors have cheap soccer balls for sale. We bought one at the beginning of our stay in Rome, and the boys used it in the park several times before giving it away to another child before we departed. You’ll find plenty of grass areas in which to start a game, and we found other kids joined in almost every time. In fact, when Calvin dribbled it around the city, about every other restaurant waiter standing outside their dining establishments jumped in to pass it around and start conversations with us. Money well spent!

villa-borghese

What to eat:

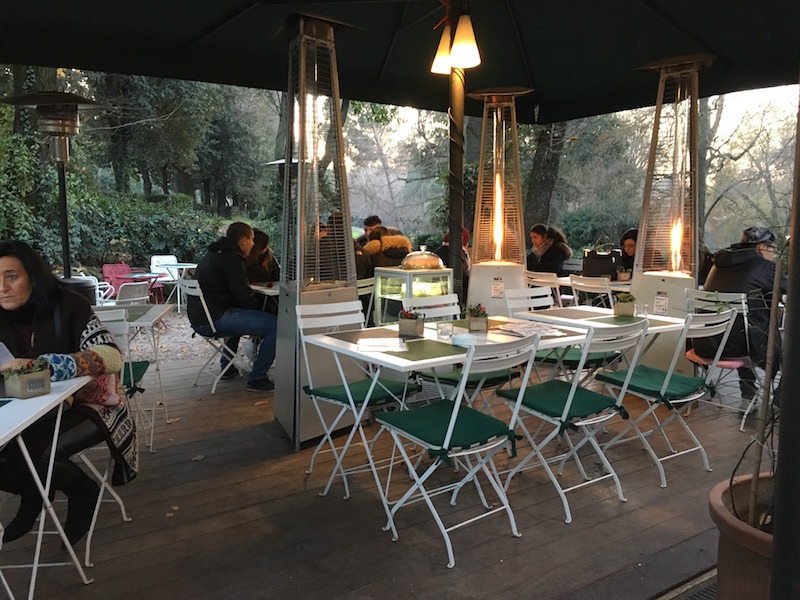
There’s a sit-down cafe by the playground, plus many other carts and stands throughout the park. My favorite was by the round-about and pedestrian bridge. It had outdoor seating (heated in winter) and a crepe station. The espresso and chocolat caldo (hot chocolate) were excellent.

villa-borghese-rome

How to get there:

As noted above, we always entered from Piazza Popolo, but you can also enter above the Spanish Steps (we departed the park here once). There’s a metro station in both locations.

Three days in Florence with kids

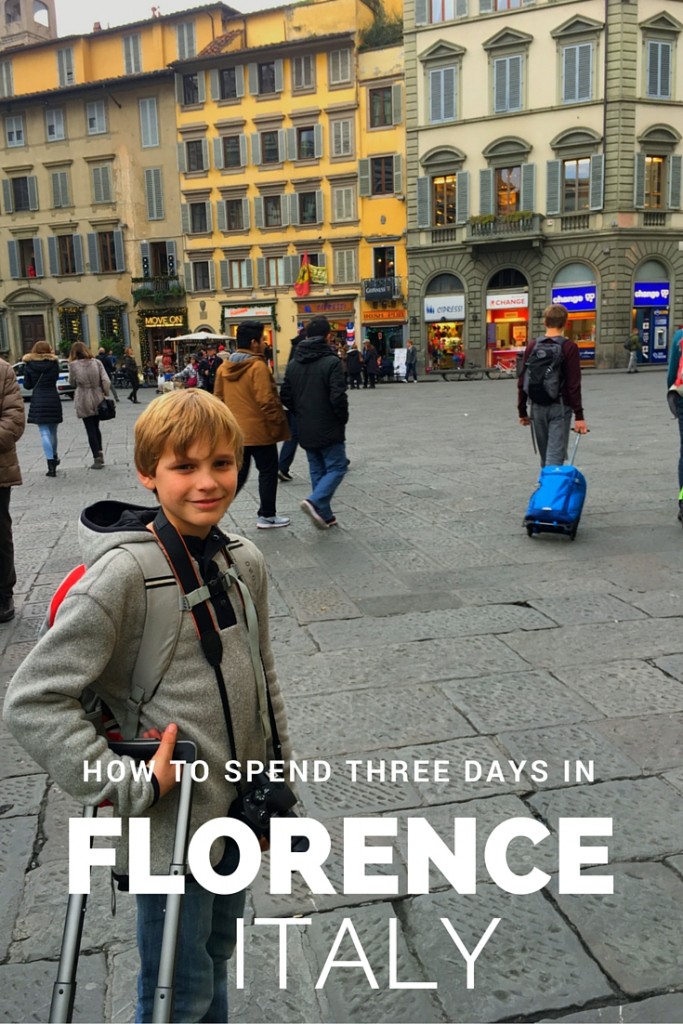
I’ve heard it said that Florence is not an ideal destination for kids, but I couldn’t disagree more. Our three days in Florence were among our best in Europe. Even with only a basic education in Renaissance art, which Florence is known for, we found plenty to do in this charming and picturesque Tuscan city. For us, the key to enjoying Florence with kids was to temper museum visits with lots of eating and shopping through the many street markets and artisan shops.

florence-italy-with-kids

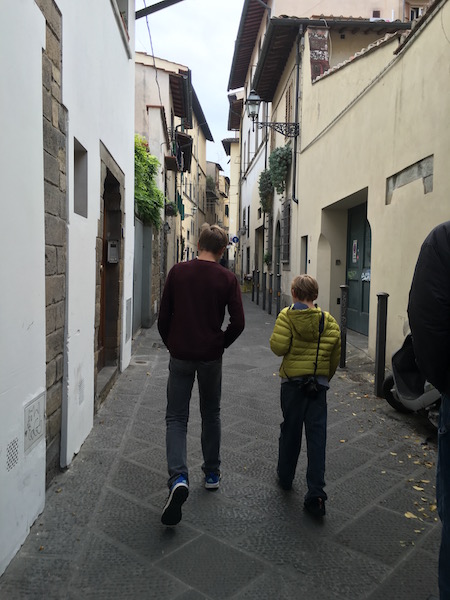
Florence is a very walkable town. Even from the main train station, Santa Maria Novella, families can easily walk into the city center in ten minutes. During our entire stay, we never needed any sort of transportation. After a fun but busy week in Paris, this fact alone set the relaxed tone for our stay. Right away, we noted that wherever we walked, we found beautiful alleys, shops, and art to peruse.

Florence is filled with historical sites and museums, most of which can be accessed on walking tours of the city with outdoor sculptures, exterior architecture, and free-entry churches. In fact, we only went in to three museums during our stay. Here’s how we spent three days in Florence with kids:

Day 1: David and Duomo

florence-with-kids

Florence is home to two major museums for Renaissance art: the Uffizi Gallery and the Accedemia. Most people would consider the Uffizi a must-do, and I don’t disagree…but with three kids who have not studied Renaissance art, we did the unthinkable: we skipped it. Instead, we went directly the the Accedemia to see Michelangelo’s David. This is a sculpture we DID study beforehand, and it did wow us. The Accedemia is not so big as to be overwhelming; it was easy to quickly find the David and the few other pieces of art we knew we wanted to see. These included the Prisoners and the hall of musical history, with wonderful instruments from various centuries. We spent only an hour and a half in the Accedemia, which may be considered a crime, but worked well for us.

We bought our tickets online ahead of time, which allowed us to skip the long ling out front. Instead, we only needed to go to the ‘advance ticket’ booth across the street from the entrance, where they printed out our tickets by reservation number. These are timed tickets, and we opted for mid-morning.

view-from-duomo

Note: if you have tall teens, have them bring an ID to guarantee them their free entry. Kids 18 and under are free, but apparently our 16-year-old looks older than he is.

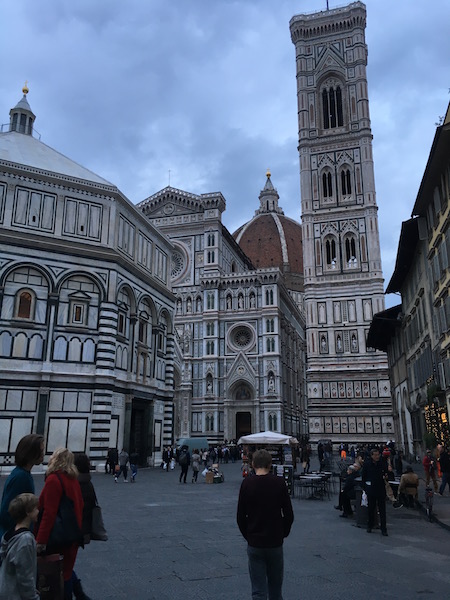
The Accedemia is a short, direct walk to the Duomo, Florence’s crown jewel. This dome is an architectural wonder, and kids love it. On the five minute walk, stop for sandwiches at the take-out window en route. There’s a small grocery store nearby with very affordable water bottles and juice. At the Duomo, the combined ticket gets families into the dome, the museum, and the camponile for about €12 a ticket. Entry to the cathedral is free. Teens pay full price; kids 12 and under are half price. It’s also possible to get a ticket for just the dome, though we recommend seeing it all, especially if you’re doing only a few paid museum visits.

Note: We bought tickets for the Duomo first thing in the morning, on our walk over to the Accedemia. The line for tickets is shorter at this time. You can buy tickets in either the main ticket line or at the campanile. Opt for the latter. When you return, you’ll still wait in a line to go up the campanile and the dome, but others will be waiting in both these lines AND the ticketing line.

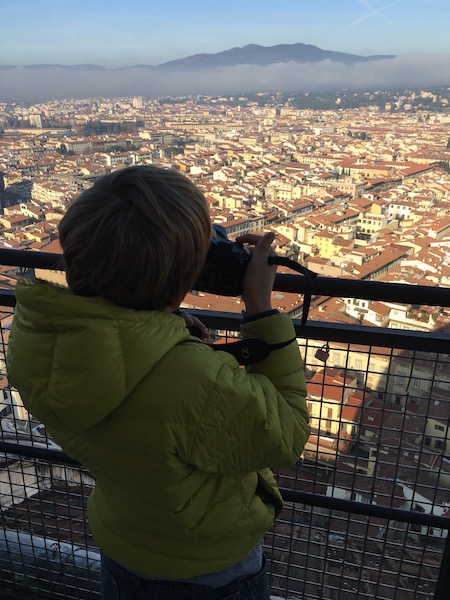
The line to go up into the dome gets long, but it moves fast. It’s a very interesting visit. First you go up a narrow, spiraling staircase, which spits you out on a balcony overlooking the interior of the lower dome. From here, you can look down at the cathedral interior, and up at the frescos on the dome. You’re moved along at a steady pace to another series of staircases to the upper dome area. This time, you’re in the unadorned interior of the outer dome. Imagine two layers of dome, with you sandwiched between. It’s not that claustrophobic, but close. This is a great place to note how the dome’s architect, Filippo Brunelleschi, constructed this masterpiece (he was inspired by Rome’s Pantheon dome). Finally, a final, steep, and narrow staircase takes you to the very top, where you’re deposited outside the tip of the dome for amazing city views.

Expect to feel the crush of humanity on this visit: while in a line, there are several places along the route where the people going up meet with the people going down, with only minimal crowd control by Duomo staff. There are quite a few moments of squeezing past people and letting others pass. If you’re tall, watch your head on the low ceilings. Consider not bringing a backpack, as the extra width will make it hard to navigate the stairs.

florence-italy

On the route back down, you’ll get the chance to stop at the upper interior dome balcony, where you can practically (but not quite) touch the frescos on the ceiling. It’s truly an amazing visit.

Note: There are over 400 steps on the accent, so bear this in mind. However, anyone of reasonable health and fitness can do it: the line of people move steadily but slowly.

After visiting the dome, you’ll probably need a break from stairs before tackling the campanile. Visit the museum, which rarely has a line at all. Here, you’ll see a life-size model of the front of the Duomo from the years before it was ‘re-modeled’ during the Renaissance, plus several levels of fascinating art and artifacts. Kids and teens will be especially interested in the collection of church relics on the ground floor. They include bones from the likes of John the Baptist and several saints. Young kids may be creeped out, as some bones are very recognizable as human, such as jawbones embedded in gold and jewels. We spent about an hour in this museum, but you could easily spend longer.

Day 2: Oltrarno walk and Da Vinci

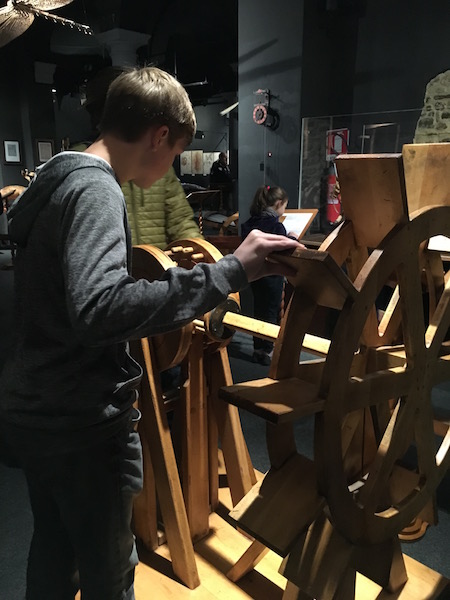
We spread out our museum visits, which meant we saved the fun Da Vinci museum for Day 2. There are actually two ‘campuses’ of this museum in Florence, and according to our guide books, they are quite similar…if you go to one, there’s no need to go to the other. There’s a flat entry rate for families (I believe it was €20), or you can opt to pay a la carte if you have younger kids (kids 12 and under are half price). The Da Vinci Museum is completely self-guided, and consists of a large collection of to-scale models of Da Vinci’s many inventions. The best part: it’s hands on. Kids can pull levers, move wheels, and push and pull things to see how Leonardo’s many contraptions worked. It’s fascinating for adults too: it was amazing to see how far ahead of his time Da Vinci was thinking. We saw his model for an odometer, a tank, a humidity tester, and so many, many more. His flying contraptions were there, as well as his anatomical sketches and replicas of his paintings, so kids could compare his artwork to his inventions and learn how he studied anatomy in an era when it was illegal to study cadavers.

da-vinci-museum

Note: If you have energy for another museum, the Galileo Museum is adjacent to the Uffizi and has Galileo’s actual telescopes (as well as his finger, interestingly enough).

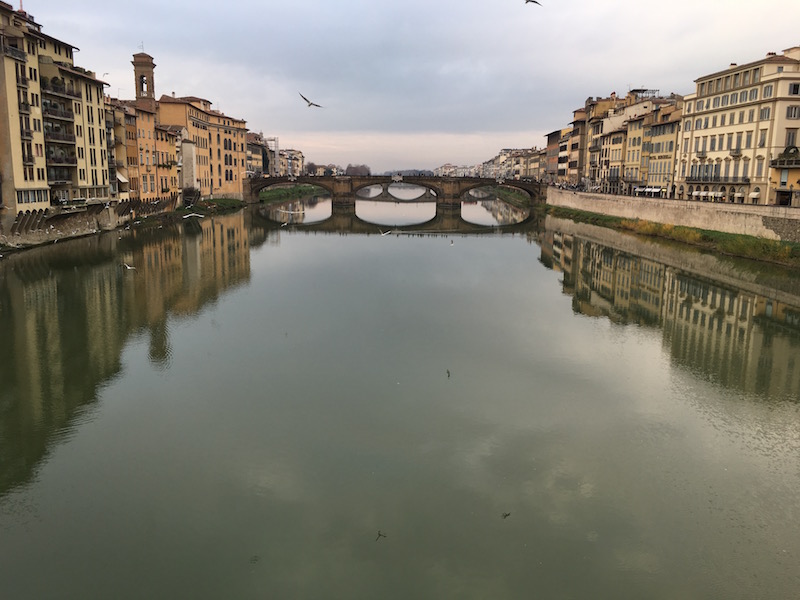
After a morning of museum visits, we had had enough. We opted for a walking tour through the afternoon. From the Galileo, we started outside the Uffizi, where families can see many sculptures outside in the courtyard. Then we crossed the Ponte Vecchio bridge (checking out the jewelry vendors while walking over) to the Oltrarno neighborhood. Oltrarno simply means ‘on the other side of the Arno’, and is much quieter and, in our opinion, less touristy than the Duomo side. This is where the many artisans of Florence have their shops, which you can peek into as you explore the narrow streets here. From the bridge, continue straight to the Pitti Palace. This imposing palace was home to the famous Medici family for generations. You can go inside, but we’re done with art for a bit, right?

florence

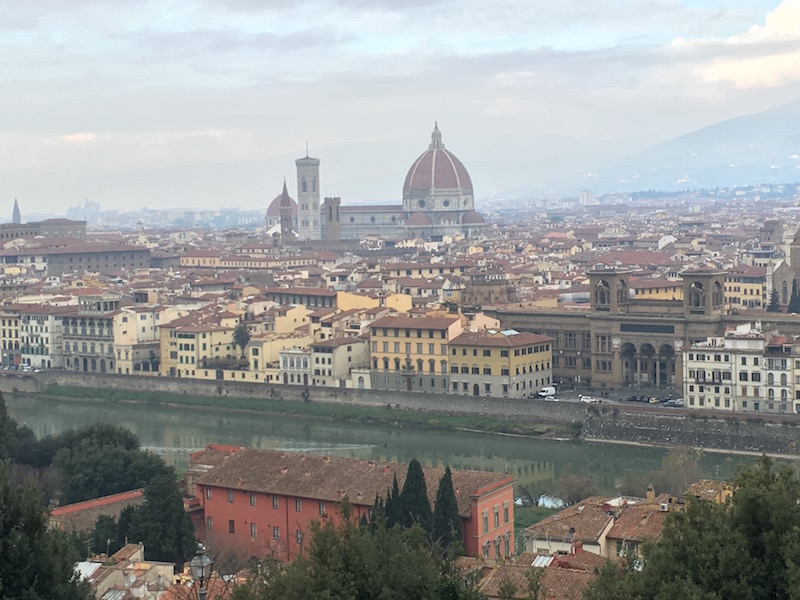
Instead, we continued, turning right down more artisan streets, exploring as we happened upon smaller piazzas and churches. Our favorites were in Santo Spirito. Eventually, we turned right again to find the river. As long as you always know where the Arno is, you can’t really get too lost. Once back near the Ponte Vecchio, head east along the Oltrarno side until you see the city wall and the stairs to climb to Michelangelo piazza, for great city views, vendors, and of course, another church.

florence-italy

After this long walk, we spent the rest of the day letting the kids wander at will, looking around the shops near the Ponte Vecchio. In this area, you’ll find lots of osterias (wine bars), cheese and meat shops (most with generous sampling), and leather shops. There are also many vendors selling trinkets, puppets, wool scarves, and the like.

Day 3: San Lorenzo and Mercado Centrale

North of the Ponte Vecchio and Duomo, the Mercado Centrale is Florence’s foodie market, housed in a big warehouse building full of light and windows. Several stories tall, this market is very fun to peruse; if you have time, pick out picnic supplies for a lunch outside. Next to Mercado Centrale is the San Lorenzo market, which is an open-air market of leather goods. Each stall entices with the smell of leather and the rich, bright colors of Florentine belts, wallets, journals, and more. This is where to spend those euros on souvenirs.

Where to stay in Florence with kids:

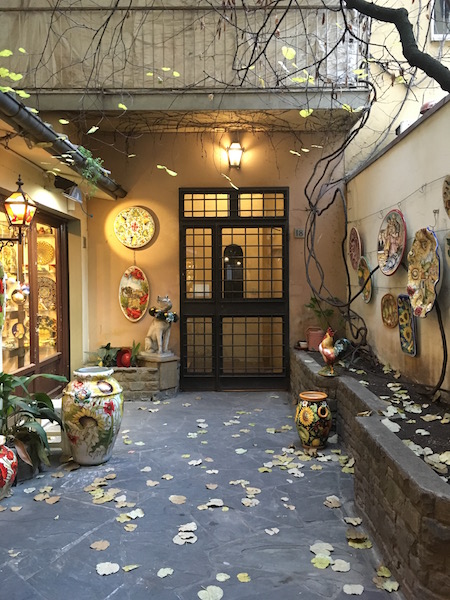
While we were in Florence, I didn’t see a bad place to stay, but we loved our location, just on the Oltrarno side of the Ponte Vecchio. We rented an apartment from AirBnb, and had beds for five, plus a living space and kitchen and large bathroom for less than €100 per night. Our place was located just above a pottery shop, and was very peaceful and quiet while still only steps from the action. For a link to the exact apartment we rented, check out this post on renting AirBnb in Italy.

florence-lodging

Where to eat:

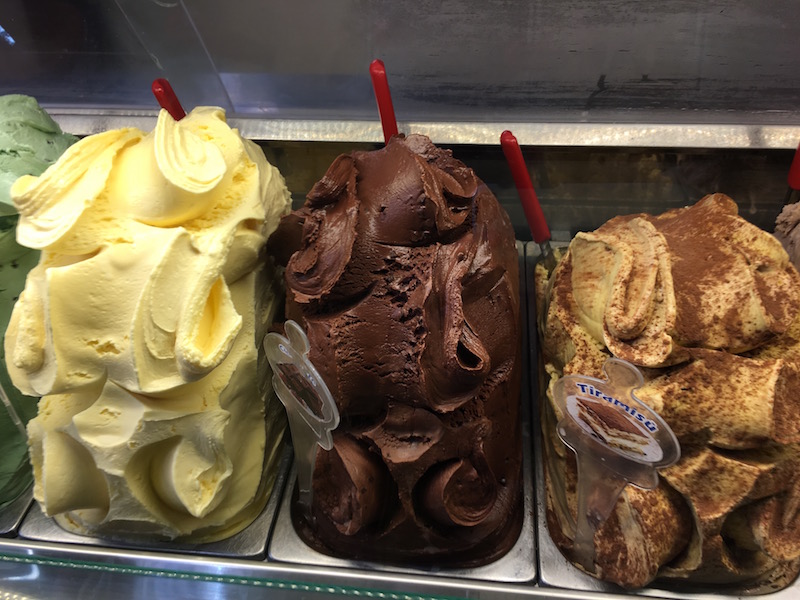
Again, you can’t go wrong. We ate all over the city, but focused our attention on the Oltrarno. By Santo Spirito, we liked Borgo Antico, and right near the bridge, we loved Celestino, where the staff was especially warm and welcoming. By the Duomo, the Black Bar was our go-to place for gelato, and Osteria dei Pazzi was recommended to us for dinner. There’s also a grocery store by the bridge (one street into Oltrarno) with a nice cheese and meat counter and fresh pasta, for those with kitchens.

eating-in-florence

We only had one bad meal in Florence, right across from Pitti Palace at Bellini. Hopefully we just caught this restaurant on an off-night, but I’d skip it.

What’s your go-to activity in Florence?

Fernbank Museum, Atlanta GA

 Whether your travel destinations for summer take you to Atlanta or simply through Atlanta, The Fernbank Museum of Natural History is a wonderful place to stop with kids. With six extensive permanent exhibits and several visiting exhibits (including one on geckos through the summer!), an IMAX theater, a museum store and cafe, you could easily spend a day here. (At very least, you’ll want to plan on an entire afternoon or morning to get your money’s worth!)

fernbank-museum

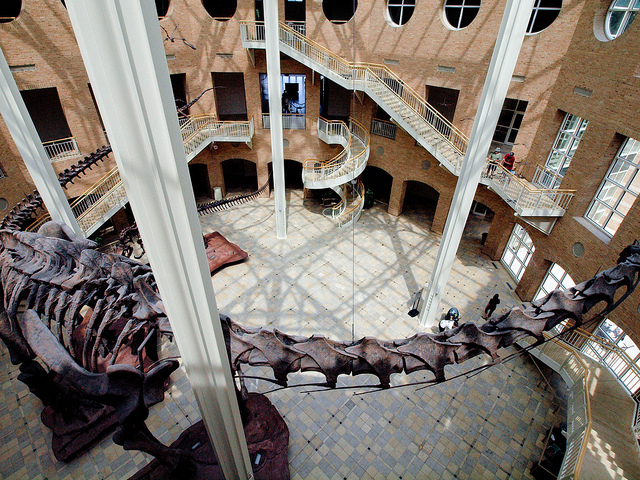
The Fernbank has an entire section geared to young kids: there’s a great hands-on section for kids called NatureQuest. NatureQuest lets kids interactively connect with nature as if they were outside and is great for those younger kids who aren’t too comfortable being outside just yet. For all kids, a permanent exhibit worth noting is called A Walk Through Time in Georgiawhich lets visitors explore the natural history of Georgia and the story of our planet as they journey through lifelike geographic regions and historic re-creations. Highlights include a dinosaur gallery, a giant sloth, a cave, and the sights and sounds of the Okefenokee Swamp.

Seasonal Tip! Fernbank’s holiday-inspired exhibition features trees and other displays decorated by local cultural partners that recognize celebrations including Christmas, Hanukkah and the Festival of Lights, as well as traditions and practices like origami, indigenous art and national symbols.

Coming in 2016! Plan your visit around the opening of Fernbank’s new outdoor space, coming soon. Check on its status at the exhibits page. This is one element the Fernbank has been missing, so we’re excited to see this expansion take place. Included will be interactive outdoor elements, space for children to play and climb, and gardens to enhance the overall experience for those spending a full day at the museum…after all, fresh air is a must!

Distance off the interstate: Just a few minutes!

Hours: Open 7 days a week, but hours vary between the museum, IMAX, cafe, and museum store. See this comprehensive chart for current hours.

Admission Prices:

Adults: $18
Students and seniors (62+) with ID: $17
Children 3-12: $16
Children 2 and under (ticket required): FREE

IMAX admission is separate, but ‘Value Passes’, which include admission to both for a discounted price, are available.

Food Services: The Fernbank Cafe, located inside the museum, offers sandwiches, salads, pizza, and more!

Bathrooms: Located on-site.

Website: Fernbank Museum

Directions: From I-75/I-85/GA400 head toward downtown Atlanta. Take exit 248C Freedom Parkway (GA 10 East). Go 1.7 miles to Ponce de Leon Avenue and turn right. Go 1.7 miles to Clifton Road and turn left. Go 1/10 mile to the Museum entrance and turn right.
View Larger Map

Photo credit: Peter C Reblog this post [with Zemanta]

Exploring Pompeii with kids

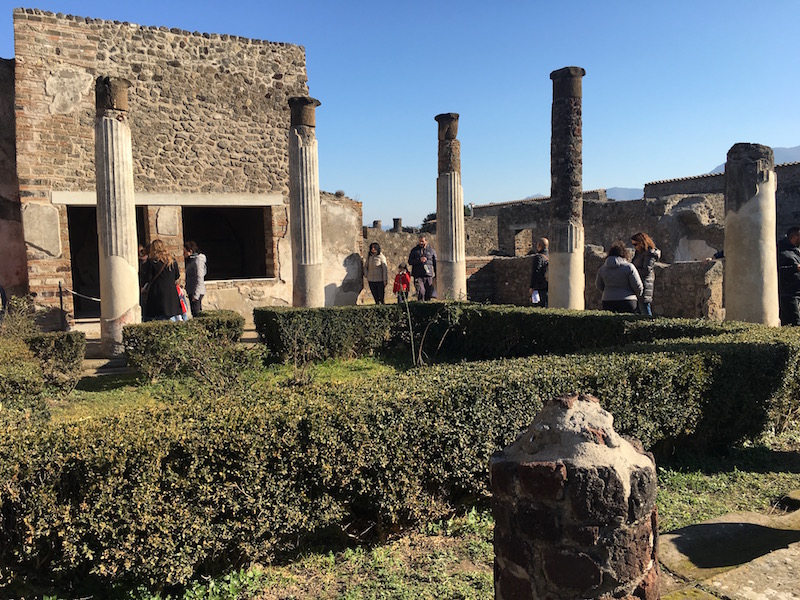
The ancient city of Pompeii, under the looming shadow of (what remains of) Mount Vesuvius, was not precisely as we imagined it. The layout, exhibits, and interpretive materials were not clearly marked, and it took some persistence to find what we were looking for (and even then, we missed things). It’s also most certainly a lengthy and expensive commute from Rome. All this said, we were glad we went. Here’s what to expect if you make the day trip:

pompeii-planning

From Naples, Pompeii is a short and simple metro/train ride away. It won’t, however, be a terribly pleasant one. We found that the local train system that connects the central train terminal in Naples to the outskirts (where you’ll find Pompeii) to be a bit grimy, even as far as metros go. Don’t expect a cushy journey, and do expect a lot of stops. However, it’s a straight line to the Pompeii Scavi stop (the second of two that are listed as Pompeii), and once deposited there, you’re directly in front of the ticket booth and entrance. In the Naples train station, head downstairs for their metro line, and buy tickets at the kiosk. At the time of our visit, metro tickets were €2,50 each (each way).

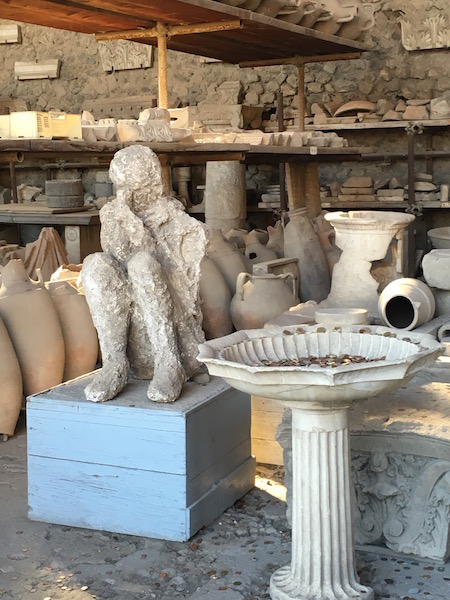
pompeii-casts

If you’re coming from Rome, as we were, you’ll first need to take the fast train from Rome’s Termini station, operated by TrenItalia. We took several journeys on this line, and both were very pleasant. The train is very fast, very comfortable, and yes, a bit expensive. You’ll want to book your tickets for this leg of the trip ahead of time. You can print these tickets at home (you’ll want it to show a bar code) or at the station, using one of the many TrenItalia kiosks. At the time of our visit, tickets for this leg of the flight were approximately €25 each.

Once at the Pompeii stop, you’ll see a line of food stalls, as well as a small cafe and vending machines. Pick up some water if you need some. Tickets for entry to the Pompeii ruins are just a few yards away, at the official ticketing booth. Don’t buy at the train station…this is a scam. There’s another entrance by Pompeii’s amphitheater, for those with tickets bought online. The ticket line is sometimes long, but it moves pretty fast. This is a good time to eat a quick snack.

pompeii-with-kids

There are also audio guides for 5 euros each. We picked these up, and while the audio program has some flaws, we still felt it to be money well-spent. First, the flaws: the locations where you can listen to information are numbered, but they’re pretty haphazard (don’t expect it to go numerically very often). Also, many descriptions instruct the user to ‘step inside’ to see certain artifacts or architecture, or to turn down this or that hallway. In reality, many of the dwellings in Pompeii are gated to the public. You can look in, but not step in (there are exceptions I’ll describe below). All this said, if you go with the flow and listen as you wish (and as you see numbers), you’ll learn a lot. We really liked the actual information presented. It was interesting to kids, too.

Once in the Pompeii ruins, visitors are left to their own devices to wander at will. This is both a blessing and a curse. It’s nice to have the freedom to explore on one’s own, in whatever direction desired, but it can also mean you’ll miss things. There are maps available, but they’re not terribly user-friendly. It’s best to enter and make your own path, listening as you go. Depending on which entrance you come through, you’ll either be near the basilica (meeting space) and forum by the main Porta Marina entrance, or by the amphitheater. Either way, here’s what not to miss:

Pompeii with kids:

In the amphitheater area, Piazza Anfiteatro,look through this entertainment space, then enter the wooden pyramid building that houses the molds of human remains, discovered by archaeologist Giuseppe Fiorelli in 1863. Keep in mind, these plaster ‘people’ are neither replicas or remains…Fiorelli made casts of the empty spaces they’d left behind, capturing their positions at time of death. It’s very sobering, and young kids may not be ready for it.

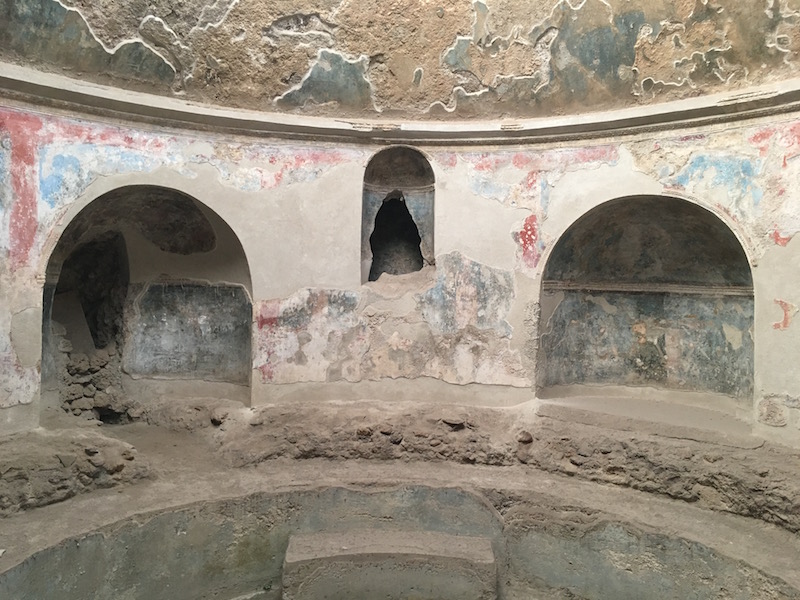
The Palestra Grande is nearby, as well as the domus of Marcus Lucrezius Fonto, both of which help tell the story of the daily lives of those who inhabited them and used them. The main street through Pompeii is probably the via dell’Abbondanza, which will link you with the forum side of the ruins. On this side, you’ll want to see the public bathhouses, the temples (what’s left of them) and basilica, and the simpler buildings that housed ‘cafeteria’ counters, sporting arenas, and more modest homes. In this area, we only had access to the bathhouses for interior entry.

pompeii-ruins

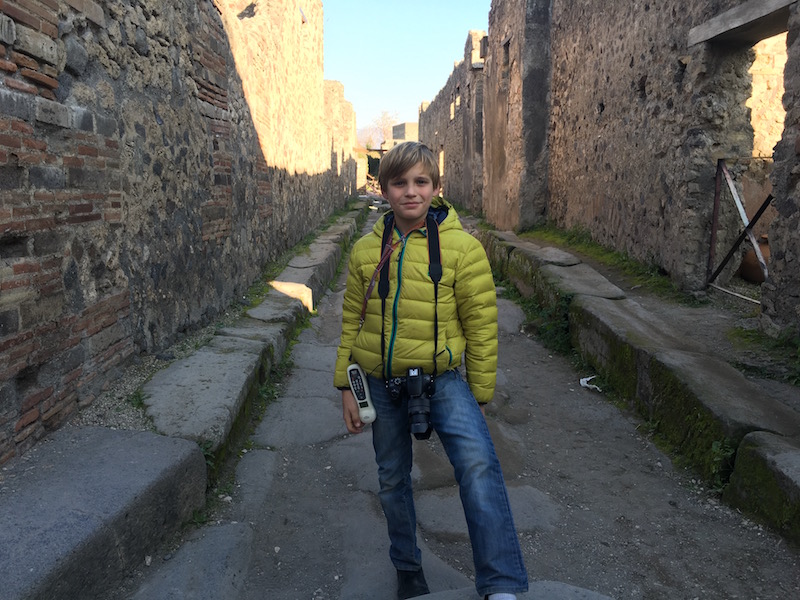
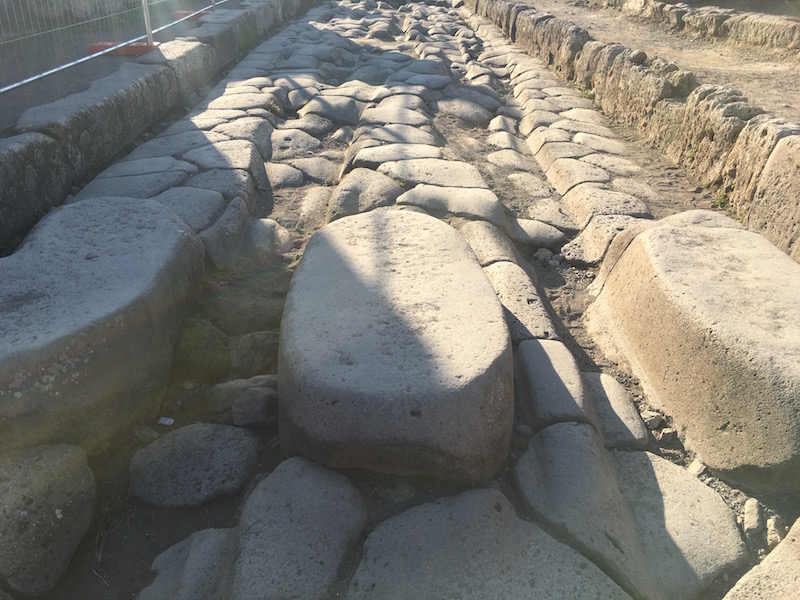
It’s also very interesting to simply walk the streets. You can learn about the city’s water systems, traffic systems, and other public works by listening to the extra materials in the audio guide (you’ll be prompted to these after listening to numbered entries). Don’t skip these…they’re among the most interesting. You’ll see the indentions of chariot wheels in the stone streets, and learn about the ‘crosswalks’ of Pompeii. Certainly, the quality of life was generally high.

If you go:

  • Be sure to allow enough time. We had three hours, and it wasn’t enough. Grab a painfully early train from Rome if you’re making it a day trip, or go in summer when the ruins are open longer per day. While we were happy to do this in one day, we wished we had more time.
  • Pack a lunch if you can. The cafeteria onsite is overpriced and not very good (no huge surprise here), and the lines can get long, cutting into your time in the ruins. It’s permitted to picnic just about anywhere along the roads. There IS a size limit on day packs, but if you have a large bag with lunch, you can keep it at the bag check and retrieve it any time. While mildly inconvenient, I believe going back for it would take less time than we wasted in lunch lines.
  • Validate your metro tickets from Naples to Pompeii. You;ll see the green or yellow validation machines in the station.

pompeii-baths

Hours and pricing:

Tickets are €20 per adults at the time of our visit. Kids 18 and under are free. If you have tall teens like I do, have them bring an ID. We were asked at several locations in Italy to show ID for free admission. The hours are as follows:

1st April – 31st October:    daily from 8.30 am to 7.30 pm (admission closes at 6 pm)
1st November – 31st March: daily from 8.30 am to 5 pm (admission closes at 3.30 pm)

Directions:

For the entrance to Porta Marina and Piazza Esedra:
Circumvesuviana Naples-Sorrento (Pompei Villa dei Misteri Stop)

For the entrance to Piazza Anfiteatro:
Circumvesuviana Naples-Poggiomarino (Pompei Santuario Stop)
FS (Italian railways) Naples – Salerno (Pompei Stop)

Have you been to Pompeii with kids? What was your favorite part?

Exploring Shasta Cascade: Whiskeytown National Recreation Area

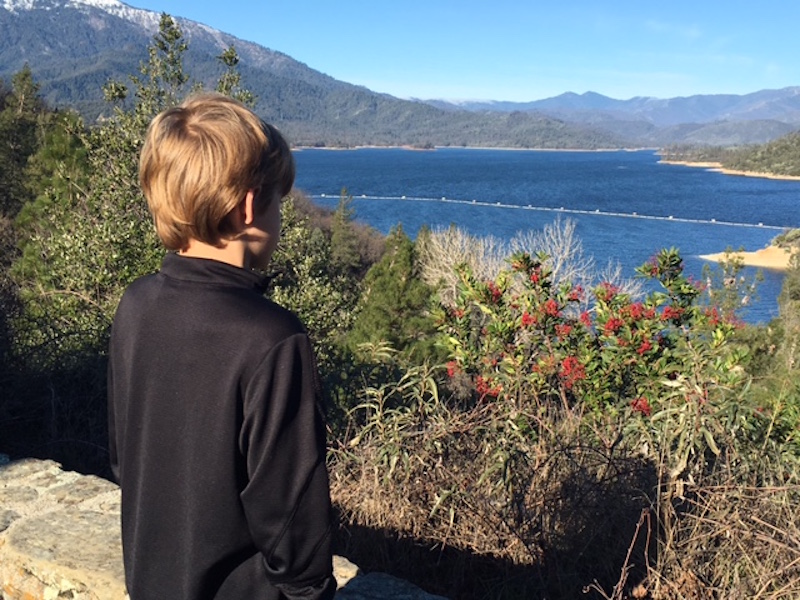
Northern California hosts wonderful outdoor recreational opportunities for families, from Lassen National Park to Mount Shasta hiking trails and ski areas. If you only have a day, and want a taste of the area’s lakes, trails, and mining history, head to Whiskeytown National Recreation Area, just outside Redding, CA.

whiskeytown-lake

Whiskeytown is located just 20 minutes from I-5, and I’m ashamed to say I didn’t realize it was there for years! As residents of Southern Oregon with family in Northern California, we drive this stretch of I-5 regularly. We will now add stops at Whiskeytown more often. Here’s why:

Hiking trails and waterfalls:

We visited Whiskeytown in spring, the ideal time to hike to its many waterfalls. However, summer is still a great time to explore this aspect of the park, as the creeks provide excellent swimming holes. Whiskeytown boasts numerous hiking trails of various lengths. Below are our favorites for families:

whiskeytown

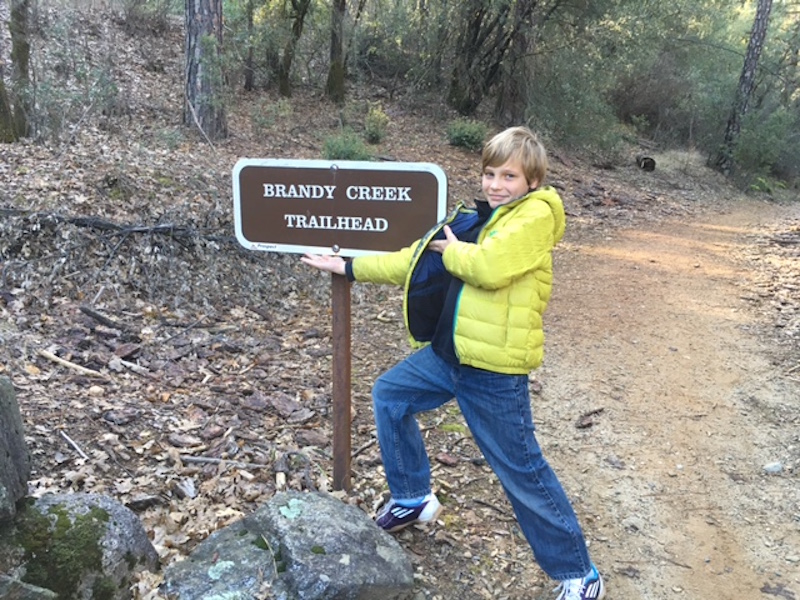
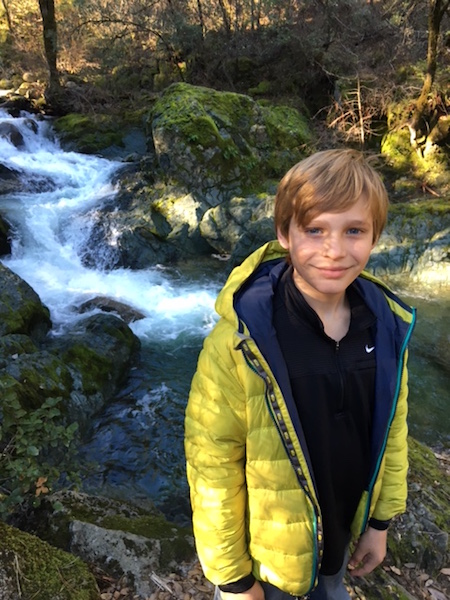
  • Brandy Creek Falls: Brandy Creek is located an easy drive from the Whiskeytown visitor center on South Shore Drive, and is only 1.6 miles. You can go out and back and turn around earlier to make the hike shorter, if needed. The trail follows Brandy Creek, which has a series of smaller but beautiful cascading waterfalls, most of which result in tempting swimming holes. There are picnic spots along the way. In summer, this trail provides lots of shade, and I know it would be a good tucked-away spot to spend the day, provided you get there early enough to snag a spot!
  • Boulder Creek Falls: When Mill Creek Road is open (in the late spring and summer months), the trail to 138 foot Boulder Creek Falls is only one mile. You can also access a trail that ends at the falls via South Shore Drive, but the hike will be 2.75 miles.
  • Mill Creek Trail: This trail is over six miles, but the first mile takes families past a historic stamp mill, mine, and water ditch, which makes the walk very interesting. If you want to shorten it, just take an out-and-back approach, and stop when you’re ready.

Brandy Creek

Note: Watch for poison oak on all trails, during all times of year. It’s very active in this area.

Historic buildings and mining artifacts:

The Tower House Historic District at the top of the park is accessed via Highway 299 and features the homestead and mining claim of pioneering friends Charles Camden and Levi Tower. They made their fortune both in mining and in supporting others who came for mining, opening a hotel on the premises and stamp mill. You can tour through their orchards, Tower’s gravesite, the El Dorado Mine (on the Mill Creek Trail), and the hotel and homestead. The buildings are closed in winter, but open on select days for interior tours in summer.

el-dorado-mine

Stop by the visitor center when you enter Whiskeytown to pick up a family guide to the Tower House Historic District. This single paper has talking points for families. It gives a basic itinerary for viewing the area, with suggested questions for parents to ask kids and suggested activities in the site.

After leaving Whiskeytown, be sure to take 30 minutes or so to stop at the historic town of Shasta. This historic state park on Highway 299 (between Whiskeytown and Redding) has the remains of mining era buildings to explore.

Creek and lake swimming:

If you’re visiting Whiskeytown during Redding’s hot summer months, there are four designated swimming beaches along the lake. Only Brandy Creek beach has lifeguards. We suggest taking one of the hiking trails to find a swimming hole a mile or so inland on foot…the crowds will be much smaller and the shade will be fantastic. There are multiple campgrounds within the park as well.

Admission fee:

There’s a $10 per car fee to enter the park, good for up to seven days. Pay this fee at the visitor center at the entrance. If it’s closed, there’s a self-serve fee station at the parking lot. Note: as a National Recreation Area, kids can get national park stamps at the visitor center, and participate in Junior Ranger programming.

Directions:

From Redding, Whiskeytown is on Highway 299, about 20 minutes from downtown. It’s an easy detour from I-5, but will be at least a half-day pit stop if you’re on a road trip.

Five family friendly activities in Sarasota

While a vacationing family may be perfectly satisfied with spending their entire vacation on the beach in Sarasota, a family that wants to dig deeper (or is considering Sarasota as their new home), will need to have knowledge of some of the more family-oriented activities in Sarasota and the surrounding areas. Even a vacationing family may want to get off of the beach for a while, especially during adverse weather conditions. Fortunately, Sarasota has plenty of family-centered activities to keep everyone busy.

sarasota-florida

Following are five of the top family-friendly activities in and around Sarasota

Mote Marine Laboratory and Aquarium

For families that are enamored by the vast variety of marine life in Florida, the Mote Marine Laboratory and Aquarium offers the entire family the opportunity to come out and get their hands wet while meeting the sea lions. They will also have the opportunity to view some of the most extraordinary specimens of sea life anywhere.

South Lido Nature Park

For the family that is either tired of the water, or still attempting to get their sea legs, visiting the South Lido Nature Park will allow them to enjoy nature absent of the large body of water. They will be able to enjoy hiking along the nature trails. One of the highlights of visiting this park is the ability to view the water and the skyline at a distance, once they reach the end of the boardwalk. Some other attractions at this park are the mangroves and the trees in pairs that grow in this natural habitat.

Sarasota Jungle Garden

Families can visit the Sarasota zoo, where they will be able to pet and pose with a number of the animals. The kids will be able to feed the flamingos, as well as watch the lemurs at play. For the really adventurous kid, they can get up close and personal with a vulture.

Sarasota Opera

When it comes to the refined cultural arts, Sarasota is not lacking. There is always some type of Opera event taking place, such as the Barber of Seville and the Flying Dutchman. So, after a day at the park or the beach, the family can get dressed up and head out to the opera.

Kids Komedy Club at Florida Studio Theatre

The Kids Komedy Club is an event at the Florida Studio Theatre in which kids perform comedic sketches that they write themselves. It is a great opportunity for the entire family to enjoy unending laughter.

While Sarasota boasts some beautiful beaches, there is so much more to the city. For the vacationing family, or for the family that will be making this beautiful city their home, there will not be one dull moment.

Lara Adams recently relocated her family to Florida for her job in real estate. She writes on the subject in her spare time in the hope of helping others.

Photo credit.

Louvre vs d’Orsay museum: why you should visit both with kids

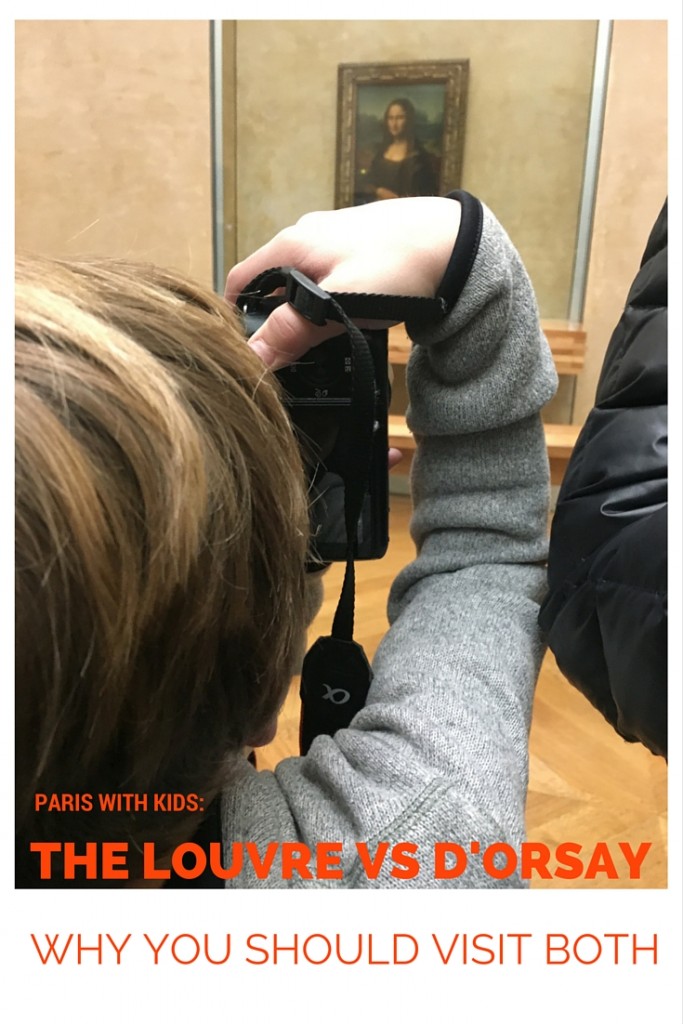
If you’re visiting Paris with kids ten and up, both the Louvre and the Musée d’Orsay are probably on your short list. When I created our Paris itinerary with kids, I initially left the d’Orsay off of it. This was a big mistake! On recommendation by our Fat Tire Tours guide, we ended up spending a morning at this museum and it was our most enjoyable museum visit in Paris. In the battle of the Louvre vs d’Orsay museum, here’s why you need to make time for both.

louvre-vs-d'orsay

What you’ll only find at the Louvre:

Most people are aware that the Louvre is home of Leonardo Da Vinci’s Mona Lisa. Of course, this is a big draw, and like many, many other people, we really wanted to see this work of art while we were in Paris. Is it the only show in town? Of course not, but  I believe that when kids  (and adults) see a work of art they instantly recognize, it increases their enthusiasm for art museums as a whole. There’s a wow factor in seeing the Mona Lisa, and it shouldn’t be underestimated or ignored. In other words, don’t worry about being a cliche; go see it!

Also at the Louvre is the Venus de Milo, as well as a wonderful collection of medieval and Renaissance paintings that serve as a good crash course in the major players of the 14th-18th century. I am not an art historian, so I won’t pretend to know exactly what I’m talking about in regard to particular works, but it’s worth the €5 per person to grab an audio guide when you enter. You can pick and choose which works to learn more about.

Note: the audio guides do not offer commentary on every piece of art. Rather, there are selected works that have an audio symbol adjacent. We found that depending on the room, there might only be 2-3 audio commentary art pieces.

There are three main wings of the Louvre, divided into eight main categories of art. We grabbed a map and headed straight to the biggies we wanted to see, then toured through the Egyptian antiquities and sculptures. The collection of medieval armor and weaponry is of great appeal to kids as well.

louvre-with-kids

What you’ll only find at the d’Orsay:

Compared to the Louvre, the d’Orsay is downright small. It’s very nice to have a manageable space to navigate! This museum is housed in the beautiful train station made during the world fair days, and is light, airy and bright. It’s main focus is Impressionist paintings, and has works primarily from the 18th-20th centuries. You can find Rodin here, Van Gogh, Monet, and Renoir, among many others.

Personally, we prefer this style of art, from the Impressionist era, so we were much more excited for the d’Orsay. With the museum map, it’s easy to find everything, and we found that the kids discovered more pieces that they recognized from text books and popular culture here.

view-from-d'orsay

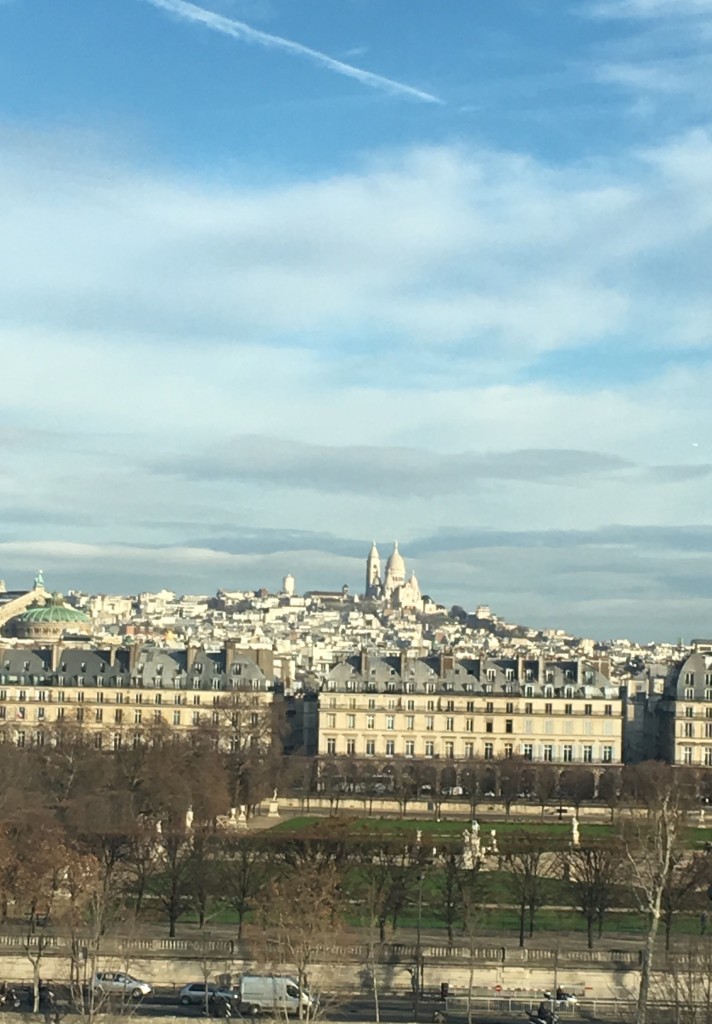
Note: from upstairs on the 5th floor of the d’Orsay, there are wonderful views of Sacre Coeur and a glimpse out the window of the famous train station clock face (on either end).

How to see them both (without burning out):

  • While the d’Orsay is more manageable than the Louvre, don’t even try to see everything in either one. We didn’t even make it to one entire wing of the Louvre. Instead, do some research ahead of time to know what are the must-sees for your group, and get those accomplished first. Then wander at will for a set amount of time, and that’s it. In each museum, we spent about three hours. We saw our highlights in the first hour, our secondary picks in the second, then wandered for the last part.
  • Get the Paris Museum Pass! This pass, which works similarly to CityPass in the US, grants you entry into dozens of attractions and museums in Paris. However, since kids 18 and under and free in most cases, the real value of this pass is in the line-skipping feature. We literally saved hours at each museum by going into the ‘Paris Pass and Reserved Tickets’ line. The museum pass also comes with multi-day metro tickets, which you absolutely need to purchase in Paris anyway.
  • Make time to eat. At the Louvre, the cafe on the second level is not bad at all. Better yet, in summer, go outside to the  Tuileries to eat at one of the little walk-up cafes there. This is even an option in winter, though some of the food stands close.
  • Use the visitor trails. We opted not to do this, but the Louvre has set itineraries you can follow. If you have a theme of interest, this is a great way to make sure not to miss anything. The trails are pre-loaded in the audio guide, or can be followed separately.
  • Be sure to grab a map. We found the maps at both museums to be essential.

Which museum do you prefer in Paris? Why?

Preparing kids for mountain biking adventures

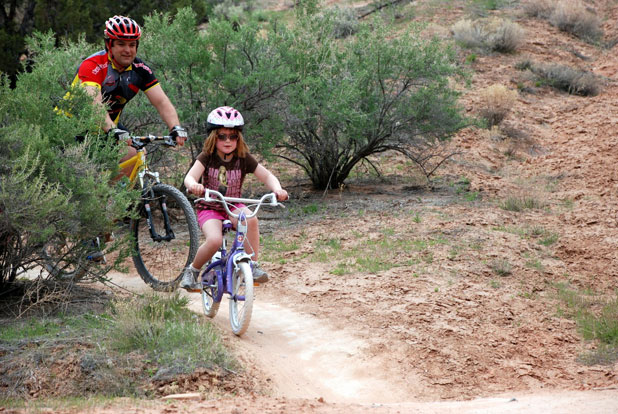
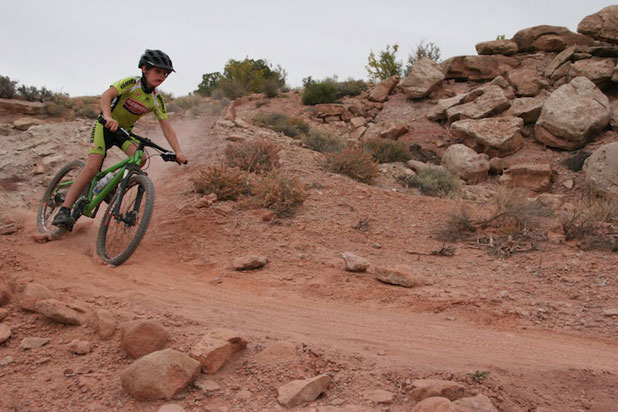
When it comes to mountain biking, kids and younger riders are often left behind. For many, the sport is viewed as dangerous and not fit for kids. However, that couldn’t be further from the truth. Mountain biking is a great sport for kids of all ages. While they may be limited to safer trails in the beginning, kids can enjoy the perks of off-road biking all the same.

mountain-biking

Mountain biking offers a number of benefits that kids can take advantage of. Not only is it enjoyable, but it’s a great opportunity for kids to explore the world around them while getting some exercise. Families that ride together also have the chance to bond as they make their way through a trail.

Before you venture off, you should prepare your child for what’s to come. Mountain biking is very different from a casual ride through the park. Whether the child is apprehensive about their first foray off-road or excited to explore some trails, you should prepare them to make the trip safe and fun.

Get in Physical and Mental Shape for Mountain Biking Adventures

Depending on your child, you may have to do a bit of ongoing physical and mental preparation prior to your first ride. As with adults, being in great shape is a necessity. Even on smoother trails designed for beginners, obstacles will demand a lot from riders. It’s a good idea to do a bit of physical conditioning.

This can include fun and enjoyable workouts that appeal to kids. Instead of a staunch exercise regime, you can play physically demanding games that push the child’s body. The better shape the kid is in, the better they will be at biking safely.

In addition to physical preparation, you should speak to them about what they can expect. They should understand the types of obstacles they’ll face and how to get over them. If the child is a bit nervous, mental preparation will ensure that they face their fears safely. The same goes for a kid that’s overconfident in their skills.

Gather the Right Equipment

It’s crucial to choose the right bike for going through a trail. Kid bikes can be a bit tougher to fit than adult bikes. It’s a good idea to let the child be a part of the decision process. Not only will they enjoy choosing something they like, but you’ll be able to teach them how to properly fit the bike and what types of things they should look for.

A solid frame and large wheels are always a good thing to look for. This will make the bike easier and more comfortable to ride. Obviously, higher end components like brakes and shifters are a good idea. However, if you’re on a budget, a solid frame with basic components is a good place to start. You can always upgrade components as the child grows and improves.

The bike should fit the child perfectly. A bike that’s too small or too large can lead to falls and injuries. Make sure that the child sits on the bike and takes a ride on flat ground prior to making a purchase.

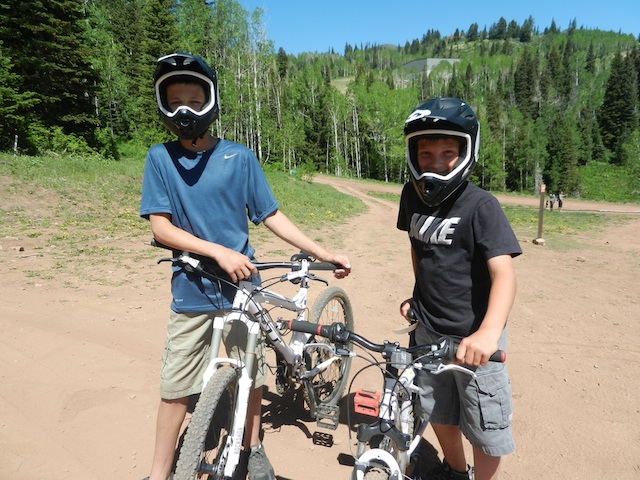
In addition to the bike, safety equipment is a must. The kid will need a high-quality helmet to protect them from bumps and falls. Protective clothing and guards will also help keep them safe throughout the ride.

mountain-biking

Pre-ride Training

The feeling of riding off-road is something that requires a bit of getting used to. It’s never a good idea to just hit the trail and hope for the best. Children need to know what to expect in terms of terrain. Starting off on some grass will give them an idea of what to expect.

A park with numerous hills will expose them to the feeling of riding down a slope. Even something as simple as riding off of a small curb is beneficial. This will allow them to learn how to maneuver different obstacles and terrain as well as how to ride in different positions. For even more training, parents can set up a small course in the backyard that teaches them how to get through basic hazards.

Start Off Easy

Make the first trail ride the child takes an easy one. Simple trails with minimal obstacles will allow the kid to ease into the sport. Dirt roads or jeep trails are perfect for kids just starting out. These trails provide the feeling of off-road biking while allowing the kid to build their strength and comfort level.

Parents and experienced riders should hang back. Never stray too far from the child, just in case they need your help. By letting them take the lead, you can follow along at a comfortable pace and make judgment calls on when to rest. The child should be able to ride as please without feeling pressured to attempt something harder. Without being pushed, kids will naturally improve and move on to more difficult trails at their own pace.

canyons bike park

Learning Techniques Safely

As the child improves, it’s important that you teach them how to ride technically. You can do this by introducing simple moves and techniques throughout the ride. Of course, you should never pressure them to try something they’re not comfortable with. While it may seem easy to you, a young child may find it terrifying.

Constant affirmation and praise will help them learn with time. Technical riding is crucial, and it’s good to start teaching children as soon as possible so that they adopt good riding habits in the future. Things like steering, riding positions, and obstacle maneuvers are all good things to learn.

As the child learns, it’s important to monitor them at all times. Kids are notorious for being overconfident. In the sport of mountain biking, overconfidence can be dangerous. They should learn new techniques while also being aware that of what can go wrong.

All in all, taking your kid out to the trail with you doesn’t have to be difficult. It can be incredibly fun and rewarding to ride a mountain trail with a kid. All it takes is proper preparation and patience to teach kids how to ride safely. Before long, the child will be your go-to riding buddy for all of your mountain biking adventures.

Getting from Pisa to Florence with a side trip to the Leaning Tower of Pisa

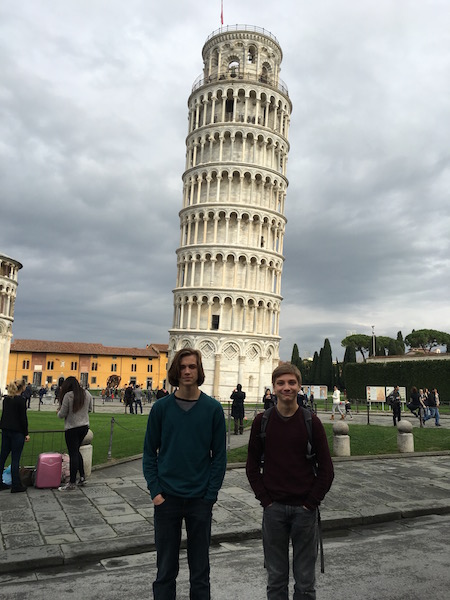
If you’re flying into Pisa’s airport and then getting from Pisa to Florence Italy, you have several options, all of which are pretty cheap and pretty fast. However, if you want to take advantage of your time in the town to see the Leaning Tower of Pisa, there’s really only one way to do it. Here’s how (and why it’s worth the time):

leaning-tower

From Pisa International Airport (PSA), also called Galileo Galilei Airport, you’ll need to go to the bus ticket window/newsstand directly past the baggage claim, in the arrivals area. This booth can sell you bus fare for the Rossa (red) line, that goes from the airport to Pisa Centrale railway station, the city’s biggest train depot. It’s a five minute ride, and costs just a few euros, but from the rail station, the Rossa line continues through town, to the Leaning Tower.

Note: bus rides are FREE all morning in Pisa, with fare only needed after noon. During our visit, we started our bus ride in the morning, but returned in the afternoon, so we bought one-way fare. If your trip will be all in the afternoon, buy return bus fare from this booth as well.

Step outside with your tickets, and you’ll see the bus stop directly across the small parking lot (this is a small airport). Look for a red circle on the front of the bus. They are being literal when they say it’s the Rossa line.

Once on the bus, note the stop at Pisa Centrale, because you’ll want to get off here on your return from the tower, in order to get to Florence. But for now, stay on the bus. Unfortunately, we were given incorrect information on another website, and thought we needed to get off the Rossa line here and access the tower via the trains. Not so.

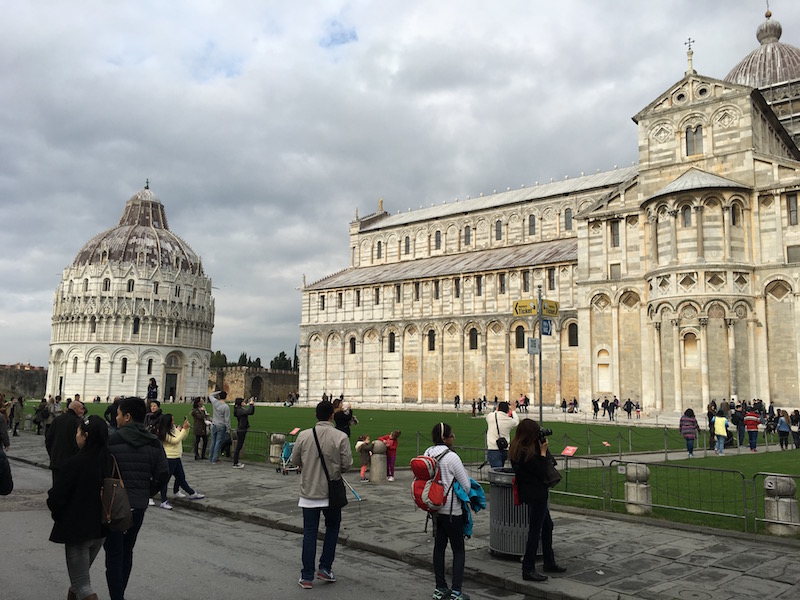
Stay on the bus another few stops, until you get to the Torre stop. There’s usually an outdoor market directly in front of the tower complex, called Piazza del Duomo, partially obscuring your view. We didn’t even see the tower the first time we got to this stop, and thought it was the wrong one! (We had all sorts of navigational issues this day!)

leaning-tower

At Torre, get off the bus and walk through the marketplace to the gate to the tower and cathedral. You’ll clearly see it at this point. It’s free to walk around the base of the Leaning Tower and into the cathedral. A funny note: the tower began leaning during construction, but they kept on anyway!

You can buy tickets online to go inside the tower…you can even climb to the top and see the view from outside. We didn’t have time for this, as we were due in Florence at a certain hour, but if you budget a few hours at the piazza, I recommend going up the tower and into the cathedral. There’s a baptistry as well. Of course, you’ll also see plenty of vendors with booths of touristy souvenirs.

Once you’re ready to depart, take the same Rossa bus line back to Centrale. This bus line goes in a loop, so you can’t go wrong. Once at Centrale, go to the ticket sales window and ask for the first train to Florence. They typically run every hour or so, so we didn’t find any reason to book ahead of time. At the time of our visit, tickets were approximately €18 for adults and half that for kids. You’ll need to be at the correct platform for your train 10 minutes before departure.

Note: Be sure to validate your train ticket once you’re on the platform. You’ll see green validation machines. There’s a steep fine if you’re caught with an unvalidated ticket, though we never saw anyone checked during our trip.

The ride on TrenItalia to Florence took under an hour, and we were able to charge devices and access WiFi onboard. We took TrenItalia many times in Italy, and found it comfortable and convenient every time. We ate lunch on the train, finding several food options at a food court at the Centrale station.

trenitalia

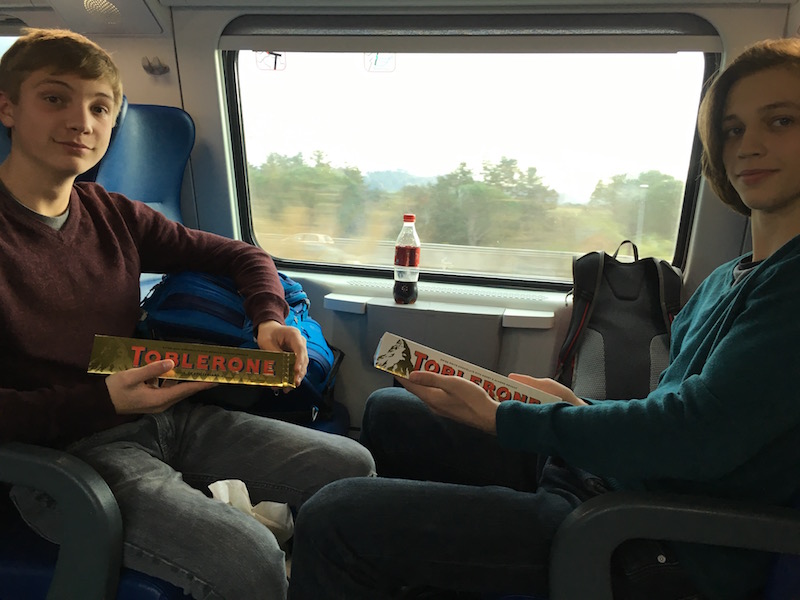
The kids couldn’t help showing off their favorite train snacks!

Once in Florence, get off at the main station, Santa Maria Novella. Almost every point in the city center is walkable from this station, which is lovely! Enjoy Florence!

Worth noting: if you do NOT want to stop in Pisa to see the Leaning Tower, you can take either TrenItalia to Florence exactly as we did from Centrale, or you can buy cheaper bus tickets for buses that depart directly from the airport. We were even given the option of buying these tickets onboard our plane. They are approximately five euros each (one euro more if bought once you land), and by far the cheapest route to Florence. However, the bus takes longer and you miss out on Pisa.