Road Trip Through Spain: Madrid to Barcelona

Ask GoogleMaps how to get from Madrid to Barcelona, and you’ll be taken in a direct shot along the E-90. But take the road less traveled on a road trip from Madrid to Barcelona, and you’ll be rewarded with fewer tourists and a more authentic local scene. Starting in Madrid, take the E-901 from Madrid through Cuenca and Aragon before meeting up again with the E-90 or A-2 into the seaside city of Barcelona.

madrid-spain

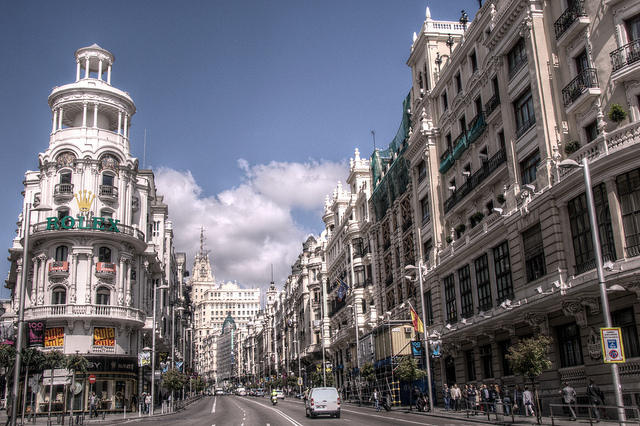
Rent a car in Madrid, then set out from the city by mid-morning. You’ll want to budget at least an overnight for this road trip, but you could certainly stretch it to two nights if you really want to linger.

Cuenca:

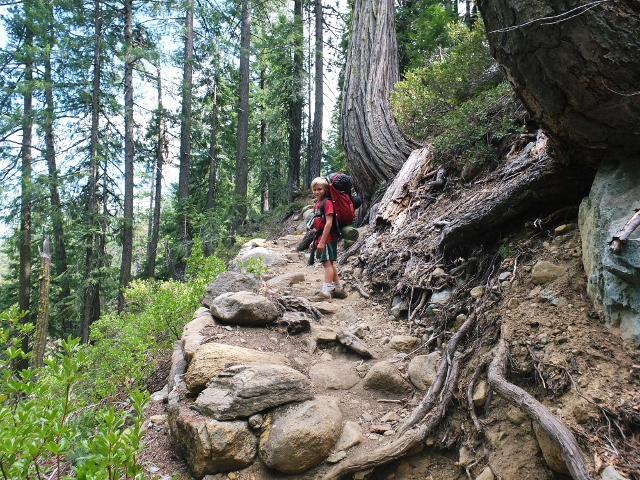
The medieval town of Cuenca is less than two hours from Madrid, on E-901. Cuenca’s famous ‘hanging houses’ are located here; the walled town is on the UNESCO World Heritage List. Built by the Moors, Cuenca has Spain’s first Gothic cathedral, thanks to the Castilians who conquered the city in the 12th century. With kids, stop at the Parque Natural de la Serrania de Cuenca, where everyone can get out of the car for some hiking in this beautiful and visually interesting countryside. The narrow roads are steep in some parts of the park, but this just adds to the thrill for kids.

hanging-houses

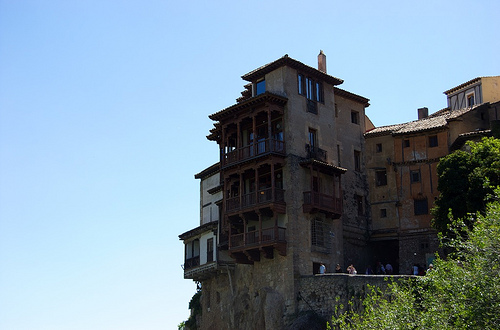
Before driving on, see the Casas Colgadas for a lesson in unique architecture; these houses seem to hover over the cliffs, with layers of balconies and gables. You can see them best from the old town, past the Puente de San Paulo footbridge.

Teruel:

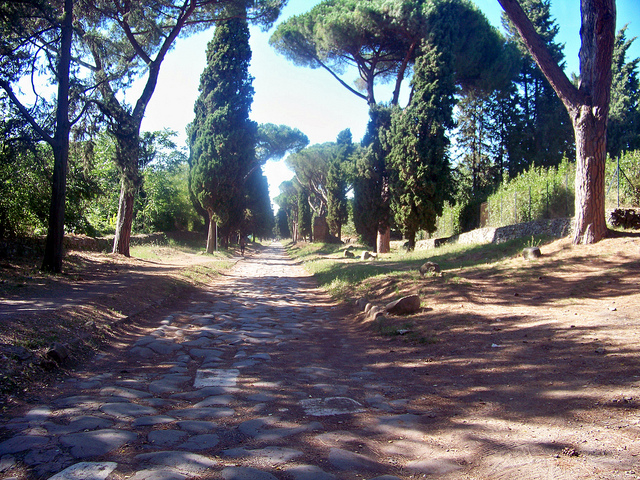
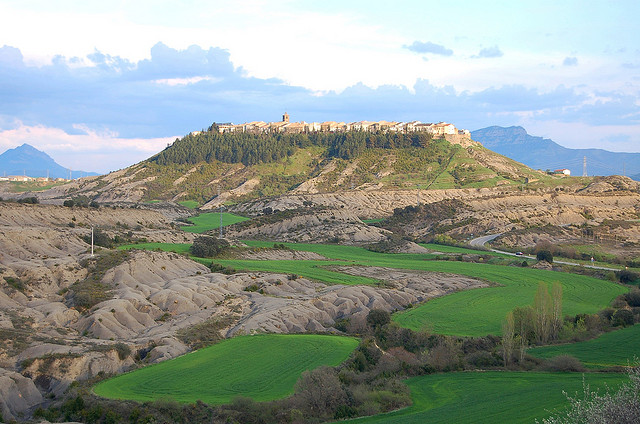
Continuing on from Cuenca, head toward Teruel on the N-320 (connecting to the N-420). This section of the drive is about two hours and 45 minutes, but I recommend continuing on to Aragon for an overnight stop. Stop in Teruel for a break, however, taking in the gorges rising up from the Rio Turia in this industrial city. During this part of the drive, you’ll enter the mountain valleys and vineyards of the Aragon region. The villages tucked away between earth-colored hills are ancient, and look sunk into their surroundings. When I went through, I had to remind myself I was still in modern-day Spain.

Aragon:

Approximately six hours’ drive time from Madrid (but more like eight hours after a few stops en route), you’ll arrive in Aragon. Stay the night, then get up with the sun so you have time to explore this city before getting back on the road. Start with the Basilica de Nuestra Señora del Pilar, the baroque cathedral where Catholic believers say Santiago saw the Virgin Mary. It opens at 7 am, so this makes for a nice pre-breakfast sight if you have early risers.

aragon-spain

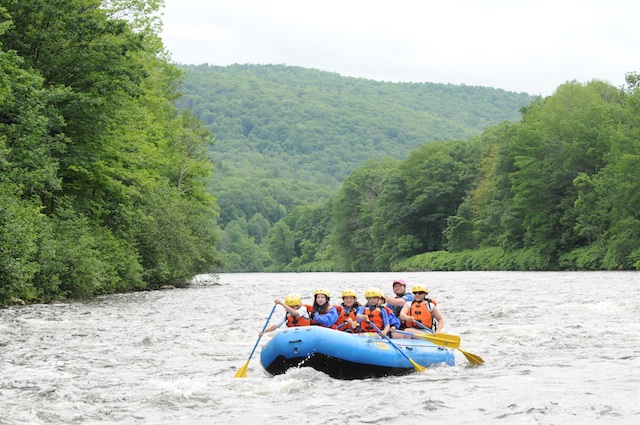
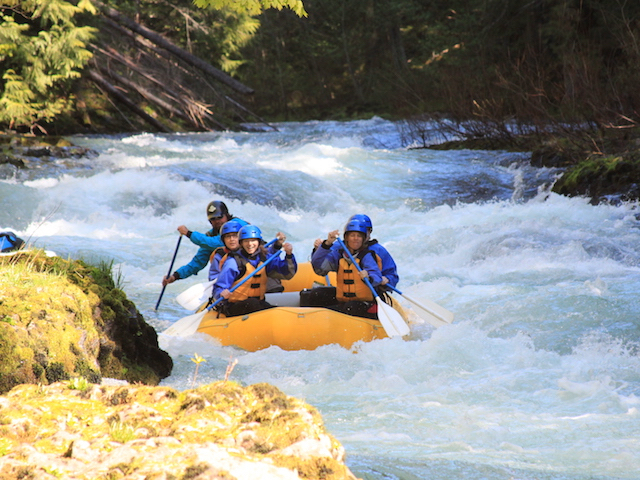
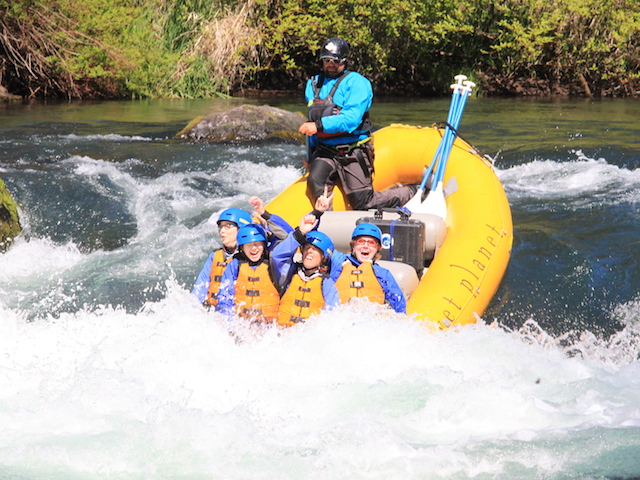
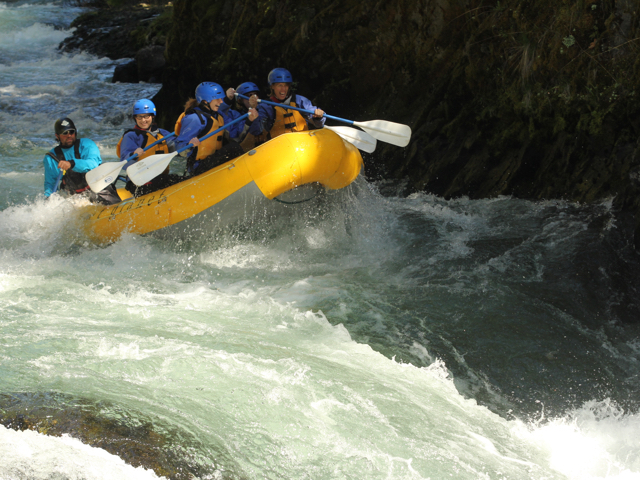
About 30 minutes drive away, in Zaragoza, is the Museo Pablo Gargallo, as well as rafting trips and float trips down the Ebro River. Spending most the day in the area to combine a bit of culture with some outdoor adventure is a great way to go; head out toward Barcelona in the mid-afternoon.

The remaining drive is just over three hours. Arrive in Barcelona as the sun is setting!

This post was written in partnership with Enterprise rental cars. Itinerary is my own.

Photo credit: Felipe GabaldónAndrew GouldJorge Correa

Wet Planet Whitewater adventure rafting near Columbia River Gorge

Julie Henning runs Road Trips for Families, a resource for families love to get out on the open road and let their adventures unfold. 

Fed by underground aquifers and the glacial melt of nearby Mount Adams, the second-tallest mountain in Washington State, the White Salmon River never runs dry. A brisk 40 degrees, anyone venturing out on the river encouraged to wear a wetsuit, booties, fleece, a splash jacket and anything but cotton.

white-salmon

Running fast and high in the spring melt, the river was generating between Class I and Class IV rapids when I embarked on a half-day rafting adventure with Wet Planet Whitewater in mid-April. Wet Planet Whitewater is a rafting and kayaking outfitter located in Husum, Washington just off the Columbia Gorge Natural Scenic Area near Hood River, Oregon.

After receiving safety instruction and practicing paddling techniques on terra firma, our group of four women and one guide dropped into the middle of the rapids six miles upstream at the BZ Corner launch site. Thrilling as much as invigorating, we passed under majestic pines and along waterfalls tumbling into the river canyon that was once a lava tube (in fact, we made a brief stop into a shallow basalt cave formed by lava as it cooled millions of years ago).

wet-planet-whitewater

Depending on the time of year the White Salmon River runs faster or slower (but never dry). In the summer months, groups may have the opportunity to make a 10-food drop down Husum Falls. Too dangerous during our visit, we gladly made a small portage around the falls as the rafts were roped downriver—a group of kayakers received our collective cheers as we watched them plummet through this rocky passage.

At this point in the trip, true thrill seekers may opt to jump into calmer waters from atop the Husum Street Bridge. If you decide to mark this off your bucket list, keep in mind the water temperature and know you might be chilly until the sun dries your clothes.

river-rafting-oregon

Immediately following Husum Falls and the bridge jumping is “the rattlesnake,” a series of rapids where Rattlesnake Creek runs into the White Salmon River. It’s here where rafters have the opportunity to “ride the bull,” a maneuver where everyone moves to the front edge of the raft and plunges feet-first into a concave wave of whitewater. Our guide described this experience as nature’s nasal cleanse and I ended up swallowing and then spitting out a giant gulp of the river.

Wet Planet Whitewater photographers meet up with the rafts at different points along the river and capture groups mid-adventure. The sequence of before/during/after shots of our group “riding the bull” were my favorite (for a laugh, click through some of the shots posted on the Wet Planet Whitewater flickr stream).

The remaining two miles of the eight-mile run remained scenic, but a bit calmer (more waterfalls, majestic pines, red tail hawks circling from above). Our guide explained how the area was impacted by recent flooding and talked about the history and controversy around the removal of a dam that transformed Northwestern Lake into Northwestern Park (and, consequently, led to a resurgence of salmon and steelhead populations in the White Salmon River).

Traveling back to Wet Planet Whitewater by van, we changed into dry clothes and reviewed the photos of our trip. Visitors in the summer months are encouraged to linger over a burger and a beverage on the shaded deck of the Wet Planted Whitewater café. Day-trips include a riverside lunch, but it’s still fun to linger and recount the day’s adventure.

Worth noting is the minimum age requirement for the half-day trip (rafters must be ten and older, and sometimes sixteen or eighteen depending on the trip). That said, Wet Planet Whitewater offers outdoor programs, adventure camps, and youth kayak camps specifically designed with kids in mind.

Please enjoy this video, embedded with photos and sound from our adventure on the White Salmon River. Special thanks to our Instructor and Trip Leader Giani Benevento for his interview and insight.


Date last visited: April 2015


Distance from the interstate: 15 minutes from Highway 84/downtown Hood River, Oregon. Note: You will need $1 to cross the Hood River Bridge between Oregon and Washington.


Pricing: Pricing varies based on the length and duration of the trip (note the minimum age requirements). I participated on the $65/person Half Day trip on the White Salmon River. Food is available seasonally at the Wet Planet Café.


Accommodations: Lodging is available in Hood River. For families, the best bet is the Hood River Inn or a vacation home available through the Oak Street Hotel.


Directions: Wet Planet Whitewater is located at 860 Highway 141 in Husum, Washington. From Oregon Highway 84 take the Button Bridge Road exit and cross over the Columbia River on the Hood River Bridge. In Washington State, take the first left onto State Highway 14 (Lewis and Clark Highway) and then turn right onto State Highway 141. Continue 6 miles on 141. Wet Planet Whitewater is located on the right-hand side of the road.


I received a complimentary half-day rafting trip on the White Salmon River from Wet Planet Whitewater for the purposes of this review. All opinions are my own.


Where to eat with kids on Kauai North Shore

Eating out is one of the most expensive aspects of any family vacation, right after airfare and lodging. When your vacation is in the Hawaiian islands, the cost can be even higher.

north-shore-dining

Wondering where to eat with kids that won’t break the bank? We have plenty of picks for Kauai, particularly on the North Shore. If you’re staying in a vacation rental, all the better…you can make meals at home, and supplement with these fun eats:

Best lunch to-go or dinner pick-up:

North Shore Country Store: 

Grab a great plate lunch here, or pick up a pizza to go to eat at home after a fun beach day. This store is right by the gas station at the entrance of the Princeville resort community, near the Foodland store and other convenience stops.

Kilauea Fish Market:

kauai-fish-market

This cute hole-in-the-wall near the Kilauea Lighthouse is located in a small shopping center (go around back). They have a limited menu with only what’s most fresh and available, and offer plate lunches with fresh fish, rice, and potato-mac salad. There’s also fish tacos, and people rave about the mahi mahi wraps…we tried the plate lunches only, and loved them. Order ahead and pick up to take back to your vacation rental or to the beach, or eat at outside picnic tables.

Puka Dog:

Located in Hanalei, Puka Dog has to-die-for hot dogs topped with relishes like pineapple relish, banana relish, or mango relish, plus mild to hot garlic sauce and Hawaiian spicy-sweet mustard. Veggie dogs are also available. Grab dogs to go for the beach, and be sure to try the homemade lemonade, too!

Sunshine Markets:

Look for these open-air farmer’s markets across the island, on designated days and times. We found the Hanalei one on Saturday morning, with acai smoothies, lots of fresh produce, juice bars, and handcrafted items. Pick up produce for dinner and treats for your morning.

Moloaa Sunrise Fruit Stand:

Hanalei

This small dining space along the highway between Princeville and Kapa’a is so much more than a fruit stand, but still looks just like one, which is part of its charm. When you pull up into the dirt parking lot, the first thing you see is fresh fruit lining the front counter in baskets, with a list of prices by the pound. At the counter, grab a menu and pick out a fresh fruit smoothie or freeze, or opt for a full meal. They serve amazing breakfasts and sandwiches here. Try the Ahi sandwich or the breakfast burrito. Eat at the open-air counter or take it to go.

Note: many readers also seem to love Bubba’s, in Hanalei, for their great burgers. We didn’t get a chance to try this counter-service establishment ourselves, however.

Best nice dinner out:

Dolphin Restaurant:

Located in downtown Hanalei, the Dolphin features an open-air dining room, outdoor ‘garden’ seating, and a fish market. Come at night to eat in the glow of tiki torches, and be sure to try the sushi. We had a nice meal out with the adults only during our trip, but we saw plenty of kids, too. Dolphin manages to be casual but also upscale, a rare but beautiful quality in a restaurant. They have a nice wine list and lots of fun cocktails. I loved the Skinny Chi Chi with coconut vodka. Plan to spend about $25-$35 per entree for adults…a bit overpriced, in my opinion, but off-set by the friendly service and nice ambiance.

Postcards Cafe:

We didn’t get a chance to eat here, but my sister and brother-in-law did, and reported that the food was as tasty as at Dolphin, in a more intimate, cozy setting. You’ll get excellent service at Postcards, and enjoy your meal in a quaint Hawaiian plantation house. The restaurant is located right across the street from Dolphin in Hanalei, and does require reservations on most evenings.

shave ice

Best Shave Ice:

Let’s get serious: the most important meal of the day is your daily shave ice on Kauai, right? We enjoyed several shave ice stands in Hanalei, but the lines get very long in this resort area. Instead, head up the road toward Princeville to the shopping center. Directly across from the North Shore General Store, you’ll see Kauai Shave Ice. This hole-in-the-wall stand uses natural syrups, without any corn syrup and non-GMO. Hang onto your cone though, because the cups used can topple over.

We found the shave ice with the best price in Kapa’a, at Ono Ono Shave Ice. It’s in a parking lot, so we took our shave ice here to go, but prices start at just $3.50 instead of the usual $4 for four flavors. Add a scoop of ice cream to the bottom for just a $1 or $1.50 more.

Note: for a healthier option, try an acai bowl. This smoothie-type treat comes with fresh cut fruit and granola on top.

Best Luau:

Smith’s Tropical Island Paradise:

An evening at Smith’s is a full schedule of food and entertainment. Get there right when it opens (at 5 pm in the spring and summer) to walk the grounds before the excitement begins. When you arrive, you’ll be handed shell leis and a map of the gardens; either take the tram on a loop tour, or explore on your own. We took the tram, then wandered back to our favorite spots. Be sure to buy bird feed for the kids to throw to the many peacocks, chickens, and ducks!

smiths-luau

Dinner is served following a ceremonial uncovering of the roasted pig (which is optional to watch), and is served buffet-style. There was plenty to eat and drink, and the kids had fun trying Hawaiian dishes such as poi and shredded pork. There’s an open bar for the adults, with Mai Tais, wine, and beer, but we found out the bartenders will make you whatever you want. During dinner, you’ll be entertained by dancers and a band.

Check out the kids, or ‘keikis’ learning the hula:

After dinner, head to the amphitheater for the luau show. It lasts about an hour and fifteen minutes, and everyone in our group, from the four-year-old to the grandparents, enjoyed it. It was very professionally done, though the length was a tad long after a full day (we wouldn’t have minded a one hour show). The whole evening was well organized and relaxing, and we recommend it as a first luau for newcomers to the islands. Smith’s is affordable for families with kids (they’re only $19 each) but you’ll pay over $78 for each adult. Consider it a full scale evening out…dinner and a show.

Where do you like to eat on Kauai?

Hiking the Kalalau Trail on Kauai’s Na Pali Coast (with teens to toddlers)

You don’t have to be a through-hiker with a backcountry permit and backpacking equipment to experience Kauai’s Na Pali Coast.Yes, the further you hike, the more you’ll see, but it’s entirely possible to hike just half a day and see enough to be wowed.

na pali coast

The Kalalau Trail runs 11 miles one-way along the stunning and steep Na Pali Coast, and provides the only means of traveling this section of Kauai coastline…on foot. Through-hikers either traverse the entire 11 miles in one day, camp at the end near the south shore, then hike back, or break up the adventure further, camping en route at about mile six, mile 11, and mile 18. It’s a route that requires the right gear, plenty of fresh water, and nerves of steel on some sections, where the trail hugs the mountains with steep drop-offs to the ocean.

Experiencing the Kalalau Trail with kids:

Most likely, you’re not prepared to make a multi-day adventure out of the Kalalau with kids in tow, but parents can certainly carve out a day of a Kauai beach vacation to see some of the trail. Start at Ke’e Beach on the North Shore, literally at the end of the road (you can go no further on Highway 56). The trailhead is well-marked, and you’ll likely see plenty of other hikers. Get to the trailhead early (before 9 am is best), as the parking lot fills up fast.

ke'e-beach

From the start of the trail at Ke’e Beach, families have multiple options on the length of their hike. We suggest:

  • hiking 1/2 mile in to the lookout point, then heading back for a 1 mile hike with preschoolers and young kids
  • hiking 2 miles in to Hanakapai’ai Beach, returning for a 4 mile hike with kids or teens
  • hiking 2 miles to Hanakapai’ai Beach, then an additional 2 miles up a side trail to Hanakapai’ai Falls and back, for a total of 8 miles with strong hikers

na-pali-coast

No matter which option you decide is best for you, note that the way will be steep. The Kalalau Trail rises and falls in elevation with every quarter mile (sometimes with every step!), with rocks, water runoff, and mud throughout. In many places, there are significant drops on the side of the trail to the ocean. There are not guardrails or other safety measures in place, so it’s crucial that young children are secured or holding a parent’s hand and older children follow directions and refrain from running along the trail.

hiking-in-kauai

Our extended family of 11 set out on the trail on a March morning, with the plan to hike the four mile out-and-back with the option of some family members continuing on for the eight mile option. We made a family rule: all kids, even the teens, would be sandwiched between adults as we hiked. This prevented my teens from running ahead, and the preschooler and kindergartener from feeling left behind or getting too close to the edge. No where in the first two miles of the trail did we feel the trail was too dangerous, and I never felt too close to the edge, but a child running, jumping, or playing along the trail would not work.

hike-to-falls

We hiked the first two miles slower than our usual pace, due to the steep trail but also due to the many photo opps along the way. At the 1/4 mile marker, families get their first glimpse of beautiful Ke’e Beach from above, but the even better views are yet to come at the 1/2 mile. The trail is mostly uphill for the first mile, then downhill for the second, as the trail drops down into Hanakapai’ai Valley and they rugged beach there.

There’s a pretty major creek crossing right before arriving at the beach, which can be either an exciting reward for reaching the destination or a final obstacle, however you want to think about it. We had to help the young kids across, but the teens managed just fine. On the other side, there’s room for a picnic lunch and some ocean watching, but no swimming…the beach here is unsafe for swimming. Check out the lovely cairns other hikers have made from the smooth rocks lining the shore, instead.

If you’re going on to Hanakapai’ai Falls, be sure to have plenty of water and adequate supplies, such as an extra layer of clothing, a small first aid kit, and snacks. The additional two miles to the falls is among the most strenuous I’ve encountered anywhere. There were at least six creek crossings, lots of muddy trail, slick rocks, and some actual bouldering to get up to the falls. The reward: one of the most beautiful falls I’ve ever seen, with space to take a dip in it’s pool. (Though if you opt not to get in the chilly water, you’ll get wet from the spray coming off the falls anyway!)

Retrace your steps to return to the beach, then retrace again to return all the way back to Ke’e Beach where you’ll end your eight mile day. We found the experience amazing, and would recommend the falls to anyone in good shape and used to hiking. The youngest hiker in our group for the extended hike to the falls was age 13. However, all kids, from age 4 and up, made it to and from the beach for a total of four miles.

What to wear:

Don’t wear your swimsuit, unless it’s comfortable to hike in. The only swimming is at the falls, and even that’s primarily a quick dunk. Be sure to have hiking shoes or very sturdy, rugged sandals, such as Keens or Tevas. Running shoes are a good bet, if you prefer them to hiking boots. (Browse more good stuff at Runnerclick.) I wouldn’t recommend anything without a closed toe. Wear sunscreen and sun protective clothing, and consider a bug repellent. We didn’t encounter many insects, but the area is known for them in certain times of year.

Additional activities and excursions to try on Kauai:

Cost of trail:

Free

Hours of operation:

Daylight hours. Note that the trailhead is often closed, depending on weather. The trail closes in severe rain, due to slippery mud and heavy flow of the creeks along the route (hikers have been swept all the way out to sea via flooded creeks along the trail). If the trail is closed when you arrive, wait a while. It usually opens. This was the case on our visit: at 9 am it was closed following a rainfall. We snorkeled at Ke’e Beach for a while, then the trail opened at about 10:30. This gave us a later start than we’d like, so please note possible trail closures when planning your trip.

Directions:

From Hanalei, continue along 57 to the end of the road, at Ke’e Beach.

Tubing on Kauai: Kauai Backcountry Adventures

One of the most unique excursions families can take on Kauai is a tubing adventure through a sugar cane plantation. This adventure is very hard to describe until you’ve tried it: essentially, families are guided through the flumes and tunnels of unused irrigation channels on a  now-defunct plantation for a fun, beautiful, and pretty thrilling ride through Kauai’s jungle-like east side.

kauai-backcountry-adventures

Start at the headquarters for Kauai Backcountry Adventures, located in Wailea. This big warehouse is the place to check in, get fitted for helmets and headlamps, and wet suit tops if you need them. Next, you’ll be placed into groups of about 12 and paired with a guide and driver, who will take you via van to the put-in site. This site is on the sugar cane plantation, about 20 minutes from the warehouse. You drive along roads for about 10 minutes, then dirt roads for another ten, arriving into the plantation where your guide tells you about the history of the area.

After a short stop at an overlook, which is a great opportunity to see some of the inland valleys of Kauai, you become acquainted with your inner tubes and the irrigation canals. You’re met with another, ‘back’ guide, who pairs with your head guide to help everyone navigate the flumes and tunnels.

tubing-on-kauai

We weren’t prepared for the cold temperature of the water, but found it refreshing. (The guides make a joke of this, banning the word ‘cold’ from everyone’s vocabulary, but we actually did find it perfectly pleasant, once used to it.) The flumes are fast-moving at times, slow and restful at others, but always active and fun as you bump into others as you float down the narrow canals. Everyone, from the grandparents in our group to the five-year-old, had a good time, though the youngest kids were unsure at first. There are five tunnels to go through, which are beautiful and just scary enough if you turn off your lights to keep the older kids entertained. Throughout the float, the Kauai forests and unused plantation lands surround you, with bird song at all times.

tubing-kauai

The actual float takes about an hour and a half, and ends at a nice picnic spot for a deli lunch that’s set out. It’s nothing fancy, but perfectly good and satisfying. After the return drive, the whole experience takes about three hours.  We definitely recommend it, as it’s unique to Kauai and a fun way to see countryside you may otherwise not be introduced to.

Curious what the dark tunnels look and feel like? Here’s a short video clip!

What to bring:

You can take a day bag with you, which will be transported for you from the put-in spot to the picnic spot. We were glad to have dry shirts and light sweatshirts at that point. Also be sure to wear sturdy sandals, such as Keens or Chacos, because you’ll be pushing off from the concrete walls of the canals and walking on dirt roads a bit. Wear swim suits for the excursion. You’l also want towels.

Cost:

$106 per person, no matter what age. Budget for a tip for your guides as well (they will split it amongst themselves). Tours depart on the hour from 8 am to 2 pm, rain or shine. Our day was rainy, but it didn’t matter much!

Directions:

Find Kauai Backcountry Adventures at 3-4131 Kuhio Highway.

As we disclose whenever applicable, we tried out Kauai Backcountry Adventures at a media rate, for the purpose of review.

How to See a Family-Friendly Italy on a Budget

First off, I want to thank Amy and Kate for hosting me on this blog. There’s a ton of great information on here for everything from summer trips to ski vacations, and I love that. Hopefully this post is a good complement to Amy’s post on day trips around Rome—Rome has some neat history for sure, but so do so many of the nearby towns!

iitaly-with-kidsTravelling with your family has its challenges, but it’s a great bonding experience and a great way to instill a love of travel in your children. Italy is a special country chock-full of history, food, and fun—but as you probably know, a visit to Italy typically comes with a pretty hefty price-tag. Footing the cost as even a single traveler can be rough, so how can you do it with a family? Don’t worry—it’s entirely possible! Here are some tips:

Getting There

Flights and accommodation will typically be the most expensive parts of your travel. Start cutting costs before you even arrive in Italy by shopping around for the best deal. Try to pack light so you don’t have to pay as much in baggage fees. Also remember that your cheapest option may not always be to fly directly to Italy—even though Rome is a huge city, you might find that it costs less to fly first into another city in Europe, like London or Paris, and then take a separate budget flight to Italy from there.

Of course, if you have a layover to kill, you’re going to have to keep the kids occupied. The thing is, an airport is just another world for your kids to explore; take a walk and look out the windows. When they get bored of that, sit them down with your smartphone or tablet and get them watching movies using the airport Wi-Fi. If it’s a foreign airport, you may have to use a VPN to circumvent Netflix’s geo-restrictions, but with a VPN hiding your true location, you’ll be good to go!

day-trip-from-rome

Figuring Out Where to Go

In general, the further south you head in Italy, the cheaper the prices are. And although many of the northern cities of Italy are beautiful, there’s no lack of charm in the southern parts of the country either. You’ll find plenty of fascinating ruins, sweeping landscapes, and wonderful glimpses into the culture of the country—and by sticking to one region of the country, you’ll also minimize your transportation costs. It is entirely possible to do a grand tour of Italy on a budget, but you won’t lose anything by staying south.

If you do decide to travel around, you may want to look into taking the slower trains rather than the faster (and more expensive) Eurostar trains. If you’re a bit flexible on the days, you may even find that budget airlines like EasyJet and Ryanair offer flights that are cheap enough for your budget.

Sightseeing

Many cities in Italy offer free walking tours, which can be a great way to get oriented and learn something about the history of the cities. However, children will often get bored during these tours, especially during tours with longer stops and more detail. Instead, it may be worth grabbing a guidebook or getting a map and printing off information from online. Have your kids take turns navigating to the next stop and being the tour guide (reading out the information from the sheet).

Once you’ve chosen your cities, do a web-search for something like “free things [CITY]” and you’re sure to come up with a list of activities that you could do on a budget. Seeing museums will add up, so if you plan to see a lot of them, you may want to look into getting a museum pass. Be realistic about how many museums you’ll see, though: if your kids get bored with the museums, you’re not going to learn much about the history anyway as you’re trying to keep them from going bonkers.

One way to keep kids occupied is to play a scavenger hunt game throughout the trip. Make a board with things they’re likely to find and see and do along the trip (eg. “Eat a slice of pizza”, “Hear an Italian man singing”). Have a competition to see who can collect the most “Italian experiences” throughout the course of the trip.

Eating

Eating out for every meal can get expensive, but there are a couple tricks you can employ. First of all, look for accommodation that offers a complimentary continental breakfast—even if you’re stuck eating boring cereal or toast for the whole trip, at least it’s one meal a day that you don’t have to worry about. You can also look for cheap bakeries that offer breakfast goods to cover you on that front. As for lunches, many Italians frown on tourists eating wherever they like in the cities, but find a park or a spot in the countryside and you can have a nice family picnic. You might also want to pick up some snacks and drinks from the local supermarket to keep you going throughout the day.

OARS-food

When eating at restaurants, you’ll want to head a little bit outside the touristy areas of the city and keep your eye out for cafés serving cheap Paninis and pastries—these are numerous all around Italy. And hey, your kids will never complain about another slice of delicious Italian pizza!

Despite its often-hefty price-tag, Italy is a bucketlist country for any traveler—and the younger you can expose the kids to some of the magic of this country, the better! You may not be able to see everything with them on the first visit, especially not if you’re trying to keep costs down and only visiting some of the museums and attractions, but hey, that just means you’ll need to go back again soon!

Hi, my name is Jess Signet. My parents were travelers since before I was born. Even in the womb, I was able to travel all over the place! Boy, did things NOT change as I grew older! Knowing there’s more to the world than the bubble I live in made me want to travel even further. Traveling is my drug and I’m addicted. (Please, no intervention!)


How to see the Na Pali Coast Kauai: Holo Holo Charters

Wondering how to see the Na Pali Coast Kauai? There are four ways to see the famous (and roadless) Na Pali Coast along Kauai’s west shore. Families can take a helicopter tour, kayak tour, hike the Kalalau Trail, or take a chartered sailing tour.

holo-holo-charters

We opted for two of the four: we hiked several miles of the trail (the entire 11 miles requires a permit), and saw more of the coastline via catamaran with Holo Holo Charters.  ‘Holo’ means adventure in Hawaiian; if someone says they’re going to ‘go holo’, they’re going adventuring. ‘Holo holo’ means a big adventure. Our excursion with Holo Holo Charters was just that: an exciting adventure.

We took their Napali Snorkel Sail, which took us from Port Allen to the Na Pali Coast on the Leila, a 50’ sailing catamaran that sailed at up to 18 knots. Our sailing was in March, and we experienced a mixed bag of winter and summer sailing conditions: the water was choppy and waves were quite large (in the opinion of this non-sailor).

holo-holo-charters

Our tour began at 8 am (which required an early wake up for us on the North Shore, in order to complete the 1.5 hour commute to the South Shore in time to depart). After a brief safety talk, we were off to find an ideal snorkel spot along the South coast, where we were issued snorkel gear and spent about an hour in the water. While we had snorkeled off the shore several times already in Kauai, we saw more varieties of fish here than anywhere else, even in slightly murky water (due to waves). If you plan to focus on finding the best snorkeling beaches on Kauai, you may not ‘need’ this snorkel cruise, but if you want to be sure to find at least one good spot, this is your best bet.

spinner-dolphins

Next, we set sail (literally) for the Na Pali, while the crew set out a continental breakfast. During the entire day, the coolers were self-serve for juice, water, and soda, and crew members were on-hand to assist with the open bar of wine and beer. Our captain even opened a bottle of champagne to make ‘Hawaiian mimosas’ with guava juice. We past empty beaches near the western end of the Na Pali (also where the Kalalau Trail ends), and saw its famed rugged cliffs and sea caves. It was fun for us to see this side of the Na Pali, since we’d hiked a bit on the eastern end. Now we’d seen both ends of the trail and coastline.

holo-holo-charters

While our kids enjoyed the snorkeling, the most memorable part of the trip for them was laying flat on the mesh fabric at the front of the catamaran, allowing waves to rock them and soak them with spray as we sailed. If your kids like this sort of thing, they’ll have a blast!

On the return journey, we ate a nice deli lunch of sandwich fixings, pasta salad, and cookies, and along the way, we stopped to see humpback whales and spinner dolphins. Tours such as this one can never guarantee to see such wildlife, of course, so this was a very special treat: for the first time, our family saw whales fully breach, and we were close enough to note the calf—baby whale—jumping and playing while his/her mother swam beside. The dolphins surrounded our boat, playing in the waves and talking amongst themselves…a beautiful sight. We were indeed lucky.

spinner-dolphin

A note about seasickness:

I get seasick easily, so I was concerned about this trip. I was right to be: several people did succumb to seasickness. I believe the only reason I did not was the Bonine I took beforehand. The crew also had ginger candies to suck on, and ginger ale. We may have sailed at a particularly choppy time, but the crew said they’d seen worse…and our boat was really rocking over the waves. While you can see shoreline at all times, you are on open ocean. It helps to sit at the back of the boat where there’s less movement, and it’s easy to be outside in the fresh air, but once sick, there’s little you can do. Take something for seasickness if you think it will be a problem. The crew was very helpful to those who did get sick.

What you’ll need to bring:

  • waterproof camera
  • sunscreen
  • sunglasses
  • sun-protective clothing
  • an extra long-sleeved shirt or sweatshirt for everyone (it does get chilly in the wind)
  • towels (at least 2-3)
  • wear any shoes…you’ll take them off before boarding

Safety onboard:

We had a crew of four for our tour (with approximately 20 people), and we felt safety was a priority. There are rules onboard the catamaran, such as how to hold on and walk on the decks, and crew members let people know when it’s best to stay seated. However, it’s a catamaran, so there are no railings along the edges of the boat. Children absolutely must be able (and willing) to listen to instructions and follow rules.

Cost:

The snorkel sail costs $134 for adults and $94 for kids (up to age 12), if you pre-order online. You pay when you arrive. Once you make your reservation, you cannot cancel for a full refund (only a half-refund). The only exception: if the tour is cancelled due to weather, you get a full refund. Please plan on tipping your guides.

Directions:

Holo Holo is located in the marina shopping center in Port Allen, at 4353 Waialo Road. After passing Lihue from the North Shore, take 50 until you reach 541, then turn at the McDonalds at Waialo Road.

Want a preview of additional excursions and activities to try on Kauai? Check out our video:

As we disclose whenever applicable, we toured with Holo Holo at a media rate, for the purpose of review. 

Learn to surf in Hawaii: Hawaiian Surfing Adventures

If you want to learn to surf in Hawaii, you need to learn from the locals. The minute we checked in at Hawaiian Surfing Adventures in Hanalei Bay, Kauai, we knew we were with o’hana, or family. We met many members of the Alapa family, who have owned this business for years. We were met by an uncle, driven to the beach by the father, and taught by a son and cousin.

hawaiian-surf-adventures

Everyone took pride in the business, and best of all, seemed to have fun doing what they do. Their motto at Hawaiian Surfing Adventures is that surfing (and anything you do on Hawaii, actually) should be ‘easy’. They made that happen as we successfully surfed and had a blast doing it.

What to expect:

We found the business location easily enough along the main road of Hanalei, just last the liquor store if coming in from Princeville. We were asked to be there 30 minutes before our lesson time, and we filled out the usual waivers and got fitted for our rash guards. We then locked any valuables in our car and left the keys with the office crew, and hopped on board a surf jeep that took us on the short drive to Hanalei Bay Beach.

surf-lesson

You’ll want sunglasses, sunscreen, and perhaps a camera with you at this point; we were advised we could bring towels too, but we actually never needed them. At the beach, we placed our belongings in a plastic bin (everything valuable should be at your car) and spend about 20 minutes learning how to paddle, stand up, and get back down on our boards while on land. We got useful tips on balance and stance—plus practical tips on getting out into the surf—from our teachers, Evan and Mitchell, before being let loose on the waves.

hawaii-surfing

We entered the water, and here’s the good news: it was easier than I’d anticipated to paddle the board through the surf to the area where we’d be catching waves. Mitchell and Evan helped us know which waves to try for, and when to start paddling to catch them. The bad news: the hardest part for most of us was timing the waves to actually catch them. Luckily for us, the Alapa family motto of ‘make it easy’ ensured a nice push from the team to get us in front of good waves. Once we’d caught them, we were all successful in standing up and riding them. And yes, it was as fun as it seems.

surfing-school

Everyone in our group, from age 10 to 40, had a blast. Evan and Mitchell took care to ensure the kids were always helped and accounted for (which isn’t easy with our adventurous kids) and made them all feel great about their attempts. We enjoyed our hour on the water so much, we decided to return to Hawaiian Surfing Adventures later in the week to rent surf boards to keep practicing on our own. Rentals are only $15 for half a day, and they’ll deliver them to the beach for you. Again…they make it easy!

Pricing:

You can opt for private or semi-private lessons, but we found the ratio in group lessons to be excellent. Group lessons are $65 per person. Plan to tip your instructors!

Directions:

Find Hawaiian Surfing Adventures at 5-5134 Kuhio Highway 96714. Look for the yellow surfboard outside!

As we disclose whenever applicable, we experienced our surfing lesson at a media rate, for the purpose of review. We wanted to be able to tell readers what surfing in Hanalei is really like!

Earth Day every day: outdoor adventures that teach kids to love nature

In our part of the world, Earth Day usually dawns chilly and soggy. For many years, I dutifully took my kids out to the local celebration (always held outdoors, of course) so we could freeze for a few hours while batting around an oversized globe-patterned beach ball, learn about sustainable housing and bio-diesel, and eat local produce. Don’t get me wrong: there’s nothing wrong with any of that. But in the past few years, we’ve found a better way to celebrate. We now strive to honor Earth Day every day.

majestic ocean kayaking in Ucluelet

How? By teaching our kids to appreciate nature and the outdoor world that surrounds us. When kids have seen, felt, and interacted with nature firsthand, they’re much more likely to relate to it and strive to protect it as they get older. It’s true that as an outdoor columnist for OutdoorsNW, I have ample opportunity to expose my kids to the wilderness in our region, but the great thing about the outdoors is how accessible it is. Outdoor adventures are usually low-cost (or free), within easy driving distance, and great exercise. The following are our favorite ways to get outside with kids:

1. Go camping.

Camping is cheap, it’s available no matter where you live, and while it takes some effort, it’s a major kid-pleaser. Check out our favorite campgrounds along the Pacific coast, or check your own state park listings for a one-tank-of-gas-or-less getaway. If you’re ambitious, plan a multi-night backpacking adventure.

2. Kayak or river raft.

Kayaking and rafting are great ways to introduce kids to water sports. Families can start on still lakes and rivers, and most locations include a guide who can help you get started. You can opt to be on the water for only a few hours if desired, and can return to comfortable lodging afterward. Kids dig kayaking and river rafting because it’s more exciting than hiking, with the same explorative benefits. Our top favorite kayaking and river rafting adventures have included a family float along the Deerfield River in Massachusetts with Zoar Outdoor, an autumn kayaking trip in Oregon’s Cascade Lakes with Wanderlust Tours, and kayaking Vancouver Island Canada’s Ucluelet harbor with Majestic Ocean Kayaking.

zoar-outdoor-deerfield-river

3. Hike!

It doesn’t get more basic than this. Take the kids, give them a backpack and walking stick (both optional), and drive to the nearest trail head. Don’t know where to find one? Start at your local outdoor store and pick up a local hiking guide or simply ask the salesperson. Bring sunscreen, water bottles, and a picnic, and you’re all set. To keep kids motivated and entertained en route, allow them to set the pace and stop to explore, even if it means climbing every third tree or stopping to build (and dismantle) a dam along a creek. If you want to make a vacation of it, start with our top five Western mountain lodges, and spend your days on the trail and your nights in comfort.

Brasada trail rides

4. Horseback ride.

Many rustic or outdoor resorts now offer horseback riding. For roughly the cost of any outdoor excursion (or round of golf or spa treatment) you can introduce your kids to the cowboy (or girl) lifestyle…for a few hours. We love horseback riding while on vacation because it accomplishes two important goals: fun for the kids and the chance to see more of the outdoors up-close. Even kids as young as five can often ride solo. Our favorite horseback riding operations have included those at Brasada Ranch and Colter Bay in Grand Tetons National Park.

5. Mountain bike.

Mountain biking is an expensive way to enjoy the outdoors if you own your own bikes and equipment, but surprisingly affordable to rent for the day at most local bike shops (whether you’re on vacation or at home). Because you can’t always mountain bike on pedestrian trails (but sometimes can), it’s important to pick up a cycling trail map where you rent your bikes. If you want to go extreme, try gravity-based mountain biking at a ski resort in summer. It’s one of the activities my kids (and I) have enjoyed most in the past few years! Learn more by checking out our biking experience at Northstar California.

How to plan a multi-night PCT hike with kids

If you backpack with kids, your family will eventually become interested in tackling an iconic backpacking route such as the Pacific Crest Trail. Unless you have a lot of time and stamina, you probably aren’t ready to through-hike the PCT, but a shorter PCT hike with kids is absolutely possible.

backpacking-trail

Planning a PCT backpacking trip is complicated, so we turned to the experts before planning ours. The folks at pcta.org put us in touch with trail expert Dana Hendricks, who has led volunteer crews for AmeriCorps, the Appalachian Trail Conservancy, and the American Hiking Society. She has through-hiked much of the PCT herself. We asked Dana the following questions as we set to work planning our hike.

Who should go?

Dana recommended anyone planning to hike a section of the PCT ‘warm up’ with day hikes or shorter overnight backpacking trips. Our family backpacks regularly, but never more than four days at a time. Because this trip would be at least one week on the trail, we decided two adults and the teens would backpack the entire trip, and another adult and the youngest (10 years old) would meet us for three days of the trip.

Where should we go?

The PCT is three states long, and not all sections are created equal. Our first question for Dana focused on where we should spend the seven days we decided to devote to the PCT. The good news: many people opt for day or section hikes on the PCT, so there’s a lot of research out there. Dana suggested we pick up PCT books at pcta.org to find the best section for our needs. The Day and Section Hikes series are excellent: we found detailed information on starting and ending points, and trail conditions and elevations.

Dana told us the PCT was designed as a stock trail, so the grade is 10% or less. This means most sections are suitable for kids who are used to hiking. There were no sections she felt were ‘off limits’ due to terrain. There are, however, dry sections which require carrying more water, and sections where snow may be a factor. For the sake of simplicity, we decided to eliminate these areas (the CA desert, Crater Lake, and the high Sierras). We also eliminated any areas without many landmarks to make the hike interesting, or areas that may be crowded with day hikers.

stuffing backpacking bags

After studying day and section hike books, and looking at our own needs for bodies of water (lakes or streams) and forest, we decided on a section in Central Oregon. Our route, which we’ll tackle in July, spans approximately 90 miles from Elk Lake Resort, through Sisters, to Olallie Lake. Here’s a screen shot of our route:

PCT-section-hike

How long to stay out?

How long our 90 mile route would take us depended entirely on our hiking speed, of course. While many PCT hikers crush the trail, hiking up to 20 miles a day or more, we wanted a more leisurely pace. We used PCT Planner (above) to gauge our distance and time on the trail. It was easy: we just input our starting and ending points, then added our planned hiking time per day. At the pace we felt comfortable with, we’d spend seven days on the trail. This would be longer than our longest backpacking trip so far, which led us to our next question…

How to plan food drops?

backpacking with kids bear canisters

Dana explained that most PCT hikers arrange to have food drops well before their trip. Hikers can mail food to themselves to post offices along the trail, but the idea of leaving the trail and restarting during such a short trip didn’t appeal to us. Instead, we’ve decided to have friends and family meet us on the trail with a resupply of food. We have this luxury because the PCT section we’ve decided to hike is within a few hours’ drive of our home. We know we can comfortably carry four days’ worth of food from previous trips. We will be met on the trail by family members at the end of Day 3, which will coincide with our path through Sisters.  We couldn’t arbitrarily decide when they’d meet us, however: there are set places where it’s easy to access the PCT, and we needed to plan our reunion accordingly. Another way to tackle food drops is to have a non-hiking friend or family member meet you with food at a designated trailhead en route. All re-entry points along the trail are listed on PCT Planner.

How light should we pack?

While we backpack regularly, we’re not what you’d call ultra-light backpackers. We like our luxuries, like hammocks and coffee presses. While Dana agreed with me that some of these items will need to be left at home to leave room for more food, she did remind me not to compromise on any items that keep us warm and dry. A full list of tips for backpacking with kids can be found here. In short, we needed layers, waterproof clothing, shelter in the form of a lightweight tent, food and cooking supplies. We will bring books and a deck of cards, but no other major luxuries. By keeping our packs light, we’ll adjust more quickly to seven days of hiking. Tip: For basics in backpacking gear for kids, check our Backpacking Gear page and How to Plan a Multi-Day Backpacking Trip.

How best to follow Leave No Trace principles on the trail?

We always practice Leave No Trace while in the wilderness, and we wondered whether it would be harder than usual to find established camp sites en route on the PCT. Dana says no: we’ll be able to find established sites virtually everywhere on the trail. She reminded me to camp 100 feet from water sources, and to leave recovering sites alone if possible.

Additional PCT hikes suggested by Dana and PCTA:

There are many other route options for families looking to hike a section of the PCT, of course. Dana also suggests Mt Hood National Forest from Lost Lake to Wahtum Lake to Eagle Creek (a PCT alternate) into the Columbia Gorge or Rock and Snag Creeks, near Bridge of the Gods in Washington.  Dana describes the latter as kid-friendly, as either a short out and back day trip or a 22 mile section hike. Find additional staff recommendations here.