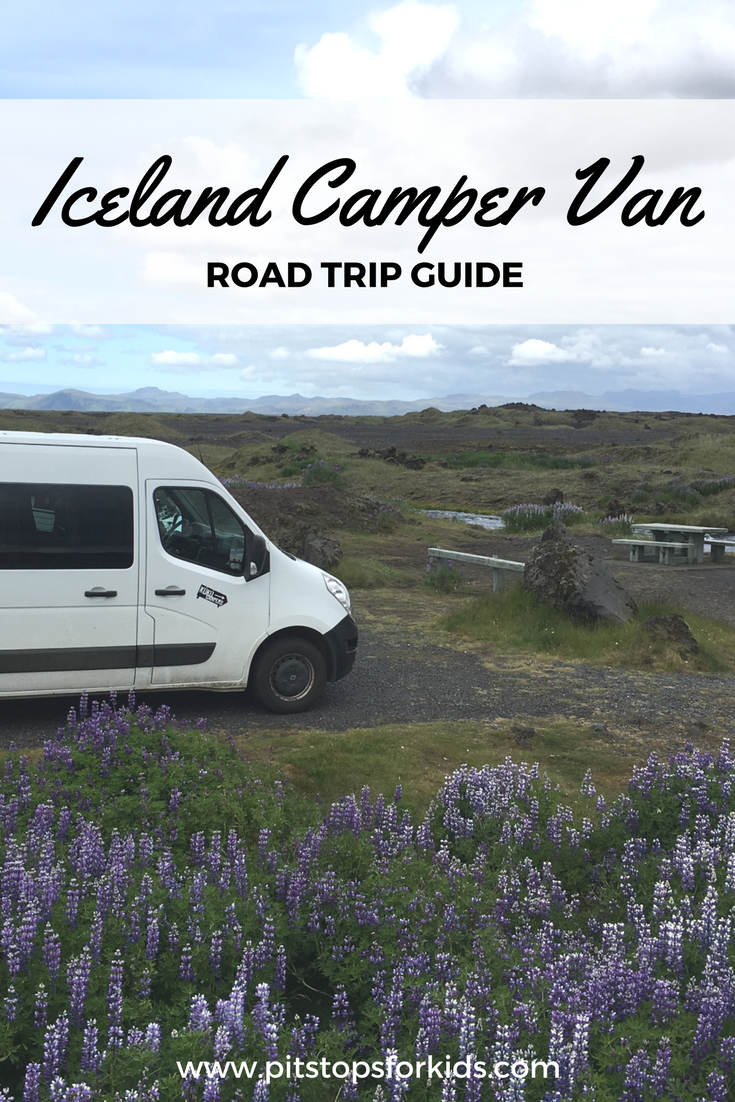
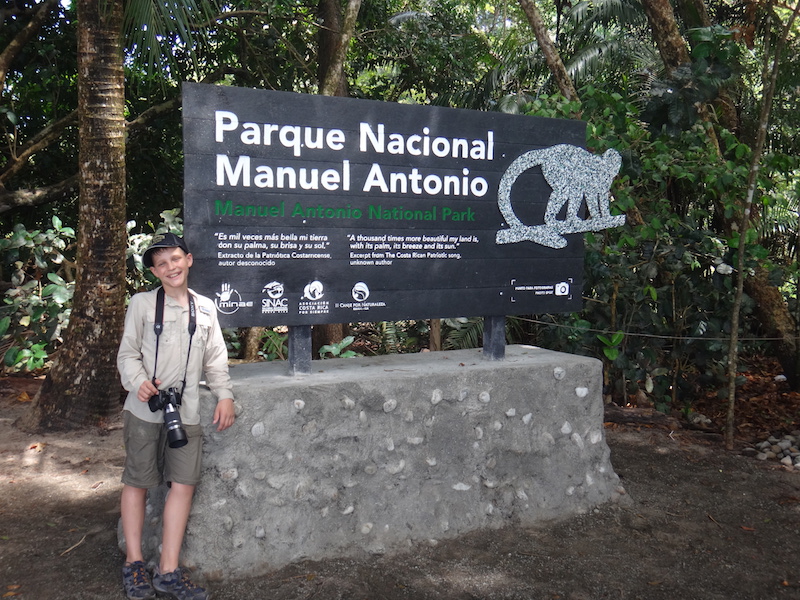
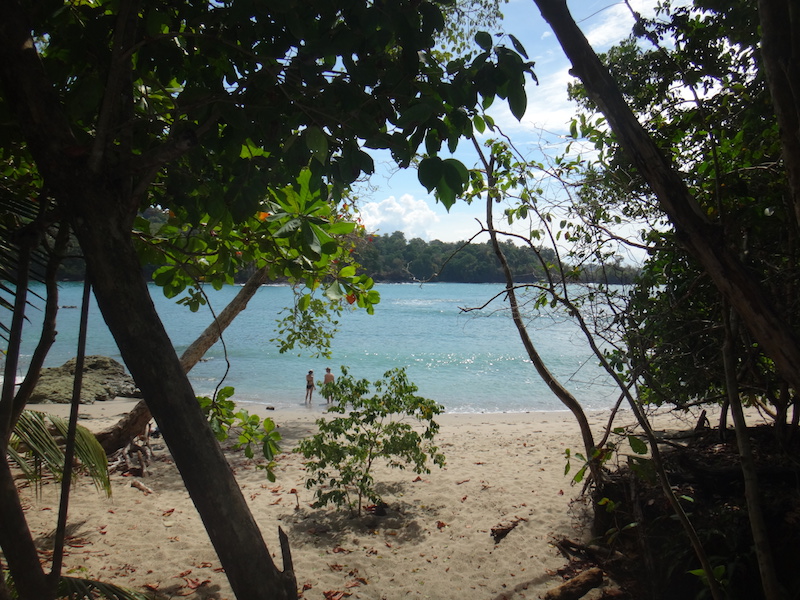
Iceland camper van road trip tips

Iceland has become a popular family vacation destination for many reasons: it is every bit as breathtakingly beautiful as it looks in photographs, there’s essentially no language barrier, it’s extremely family-friendly, and the outdoor recreation and sightseeing is almost endless.

What Iceland is not: cheap. Standard hotels can cost families as much as $400 per night on top of expensive rental car fees (especially if you need a 4×4 car for rough roads). Dining in Iceland is very expensive as well; fast food meals at a basic grill during the time of our 2017 trip were about $15 U.S. per person, and standard sit-down restaurant meals were closer to $45-50 per person. The solution: take an Iceland camper van road trip and combine your lodging and car rental cost and eliminate your restaurant dining out cost. Ready for Iceland camper van road trip tips? Let’s get started!

iceland camper van road trip tips

Start with your camper van rental:

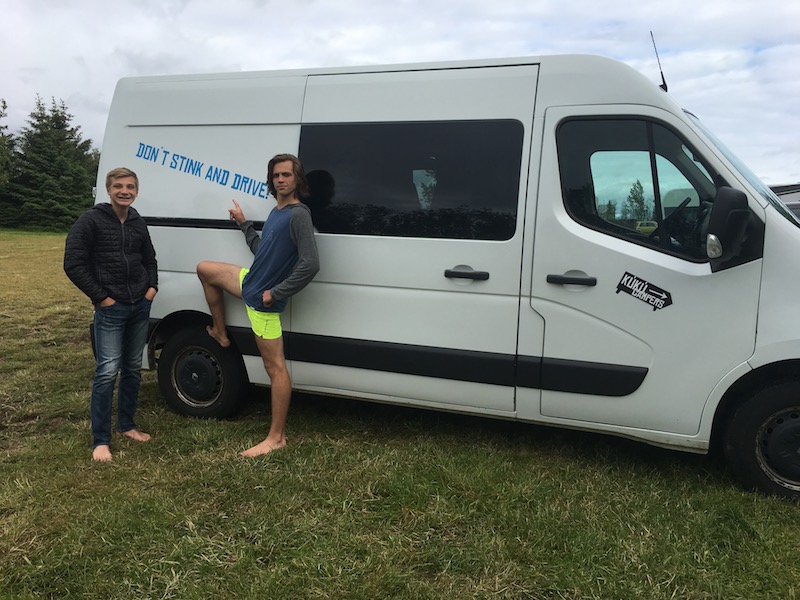
The first stage of planning your Iceland road trip is booking your camper van rental. We used Kuku Campers, one of the largest camper van rental companies in Iceland. Kuku Campers offers just about every size and type of camper van, ranging from small vans that sleep 2-3 people to the larger style we rented, which sleeps five (both are Class C, which don’t require any additional training or know-how to drive). You can also opt between 2×2 or 4×4.
kuku camper

Kuku 2×2 category C camper

We picked this 2×2 van for five people (click on the link to see detailed interior photos) which cost approximately $1800 for nine days ($200 per night). This cost was significantly less than we’d spend on hotels and a rental car. Kuku Campers offers this van in standard (stick shift) or automatic. We opted for standard, as it was cheaper, and  I am comfortable driving a stick shift.

Note: Do you need a 4×4 vehicle? If you’re a regular reader of Pit Stops for Kids, you know we’re a pretty adventurous family. We rented a 2×2 van, and were able to access everything we wanted, and more. You need a 4×4 vehicle only if you plan to drive F roads (Iceland’s most rugged dirt roads), which is needed if you plan to backpack or hike deep in the interior.

The features and configuration of our camper van:

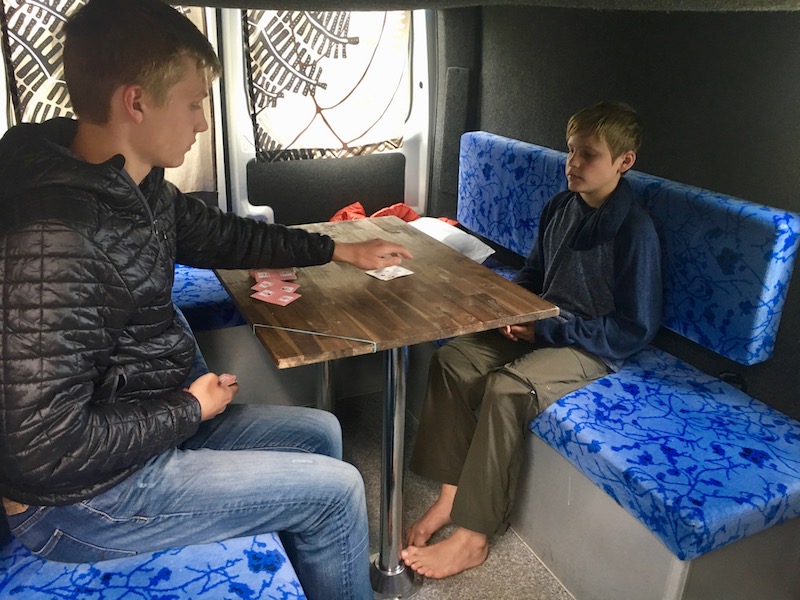
In the front were two bucket seats (the driver’s seat and the front passenger seat). Behind those seats was the kitchen area: a countertop/food prep surface with sink and faucet, storage area for a portable stove/cook top, electric refrigerator (which runs when the car is running), dishes and kitchen utensils and silverware, a large water storage container, and a pantry area for food. Behind the kitchen was the main compartment of the van, which had a padded bench seat in a U shape, surrounded by a roomy kitchen table. Above this was a sleeping bunk. At night, the table and bench seat easily folded down to become a second sleeping area. The bottom slept three, and the top slept two. During the day, passengers could sit on the bench seat with seatbelt while the van was on the road.
kuku-camper

Lots of space: to the front of this photo would be the kitchen area.

In addition to the running water, which ran from a hose from the water container to the kitchen sink, the van had two overhead lights and a nighttime heater (which could be run when the van was turned off). There is no bathroom in the van, but this isn’t a problem (we’ll get to that soon). We found sufficient storage in the van for our bags under the bench seats and at the very back of the van, in addition to smaller storage areas above the front seats and above the kitchen. Lastly, there were useful hooks to hold jackets and rain pants, as well as curtains to pull around the windows at night. These hung on elastic cords, which we used to hang additional items like wet towels and swimsuits.

But was the van hard to drive? 

At first, a little bit, yes. I don’t ever drive anything larger than a minivan at home, so for me, it took a day to get comfortable driving something taller and wider. Icelandic roads are narrower than US roads, so there is definitely a learning curve. I also needed time to get used to backing up the van (though it was far easier than trying to back up a van with a trailer). By Day 2, I was quite comfortable. Overall, driving the van was no big deal, even on dirt and gravel roads, though the van certainly got dirty!
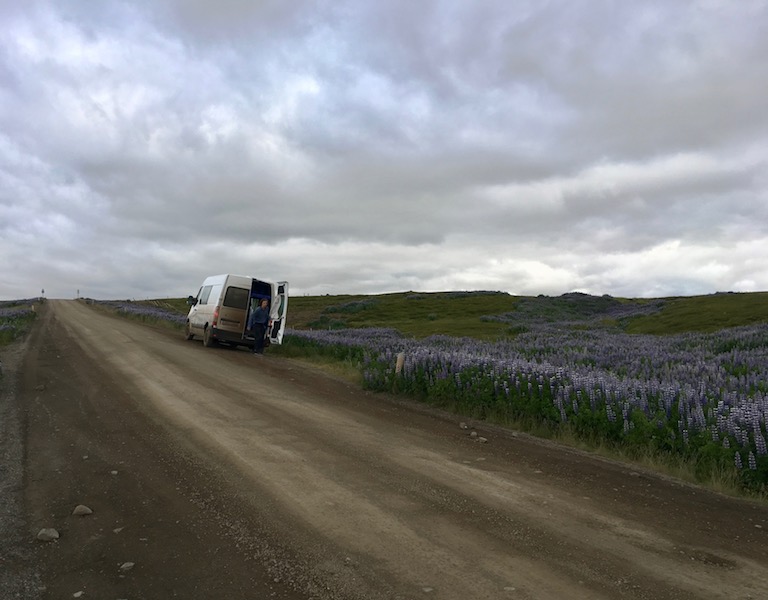
iceland road trip

Stopping to make a snack and take photos on a gravel road. There are plenty of turn-outs to use!

The van took diesel fuel, which seemed to be easily available at every gas station, and it cost me about $160 to fill the tank. We drove for eight days, I filled up twice and topped off once, and I spent a total of $360 on gas. At all campgrounds and parking lots for trails, scenic overlooks, and historic sites, there was ample room to park the van. The only place I had trouble navigating parking was in downtown Reykjavik, and even there, I managed (but it was stressful).

Next plan your trip! Here’s what to expect:

I’m going to say something now that I never say on this site: don’t over-plan. If you allow your itinerary to stay flexible, you’ll be able to advantage of all the many moments of spontaneity possible in Iceland. There are natural wonders and historic sites every few kilometers at times; you can’t do it all, but you can decide what to do in the moment. We planned a general route which included the south, west, and east. We purposely didn’t travel the entire Ring Road because with only eight full days on the road, we wanted to spend more time on side roads than Route 1.
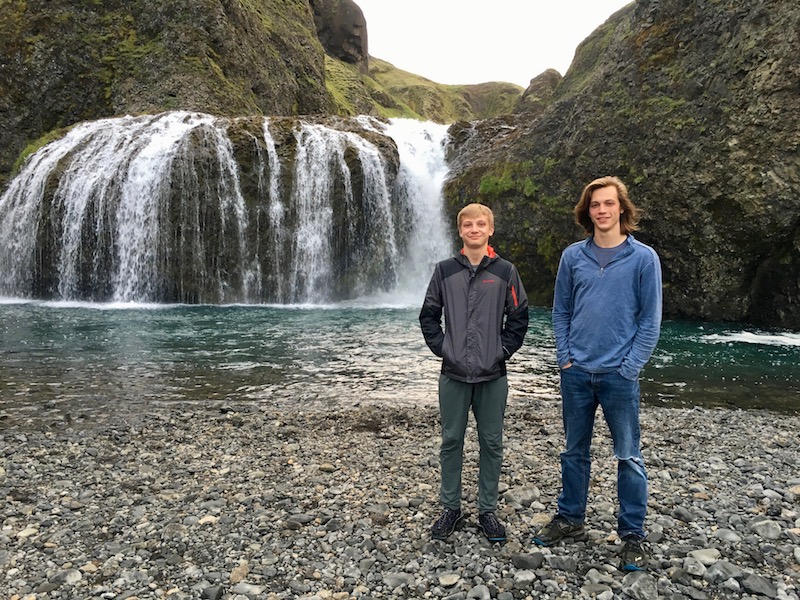
iceland camper van

Waterfall at the base of one of our campsites.

I absolutely loved having our Kuku Camper, because of the freedom it offered. Every day, we traveled WITH our lodging and dining, so we never had to worry about getting to an exact place to eat or sleep each night. In Iceland, especially in the rural areas (which is most areas), we found that restaurants and shops closed relatively early in the day, even in the peak of summer. We were hard pressed to find dining options open after 6 pm, so we loved the ability to picnic our meals anytime, anyplace. We got into a routine of making breakfast in our camper at the campground in the morning, making a picnic or packed lunch to enjoy out and about, and then stopping at one of Iceland’s many, many scenic overlooks to BBQ or cook our dinner on the road. We arrived at each campground at night well-fed and ready to make camp. While we were driving, if someone was hungry, they could simply make a sandwich on the road, and if we decided at the last minute to detour to see or do something, we never had to care about missing reservations.
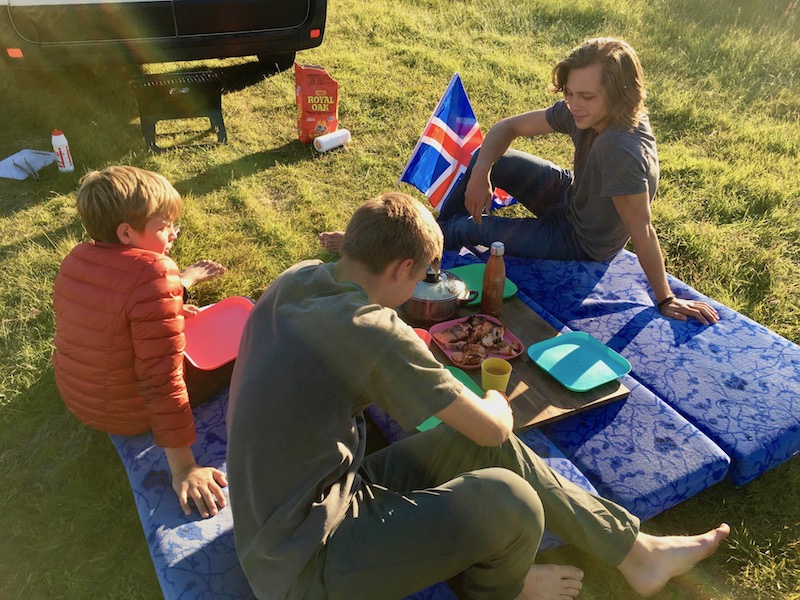
iceland picnic

Iceland outdoor picnic!

The most unnatural thing to me, as a natural planner, was the fact that you do not need to make campground reservations. If you’ve tried to camp in popular campgrounds in the US in summer, you know this simply isn’t true at home. But in Iceland, they really do mean it when they say their campgrounds do not fill up. They really don’t. Not anywhere. Not ever.

uncruise-review

Pages: 1 2 3

Georgia road trip: Five pit stops from the mountains to the coast

The following is a guest post by Sue Rodman, managing editor of 365 Atlanta Family.

Why rush to get to your destination when there is so much to see and do along the way? For those who like to enjoy the journey, we’ve put together a Georgia road trip that will take you on winding mountain roads, zipping along the highways, and cruising toward the sunshine coast. Yes, Georgia does have a coast, and we promise you’re going to love it.

Georgia road trip

North Georgia Route 76

Our journey begins in the North Georgia Mountains along the east-west Route 76, which is easy to get to from the north-south I-75 or I-85. This winding trail takes you through the friendly mountain towns of Ellijay, Blue Ridge, Blairsville, Hiawassee and Clayton. Here are some places you’ll want to get out and stretch your legs along this mountain highway.

Ellijay, Ga. This is the apple capital of the state. In fall, pull over at Red Barn Apple House for a peck and some apple cider. Note, Georgia’s apple season begins in late August and runs through the beginning of October.

Blue Ridge, Ga. About 15 minutes off Route 76 down Rock Creek Road is the Fall Branch Falls. This is a great family-friendly hike, and even young kids can make it to the lower falls section. The seclusion here is a nice break from the road.

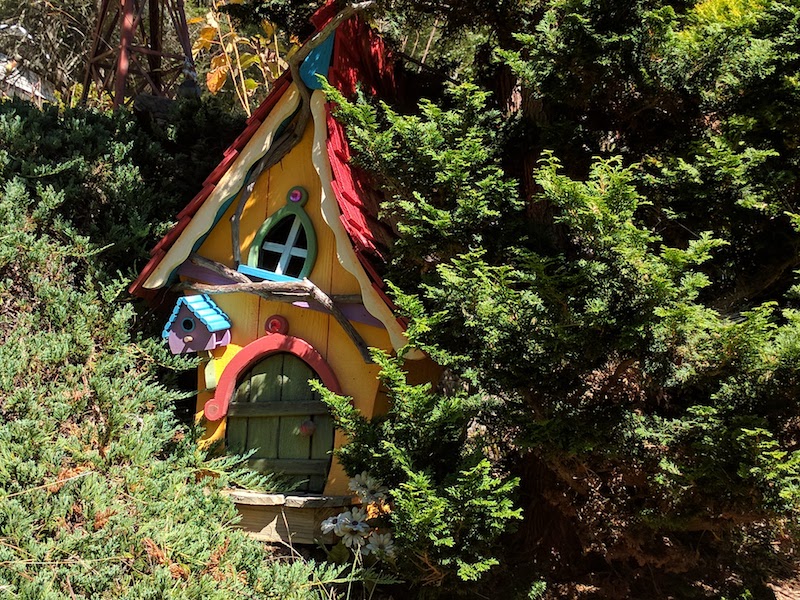
Blairsville, Ga. Along Route 76 (also called Young Harris Hwy or Route 515) is a quick stop at Sleepy Hollow Enterprises. Explore the whimsical “fairy houses” made by this former Disney Imagineer, and then tour the store. The colorful creations will delight your soul.

Hiawassee, Ga. Along Route 76 in Hiawassee is the Georgia Mountain Fairgrounds. The Georgia Mountain Fairgrounds is open for year round camping along Lake Chatuge, but what it’s best known for are the big events it hosts every year, including the Georgia Mountain Fair, the Superstar Concert Series in the Anderson Music Hall, the Georgia Mountain Fall Festival and Georgia’s State Fiddler’s Convention. If you aren’t visiting during any of these events, check the website, they offer lots of smaller events too.

Clayton, Ga. As you make the turn to get on Route 23 toward I-85, take a break at the Clayton Pharmacy. Tucked inside this pharmacy is an old-fashioned soda shop with milkshakes, hot dogs, and more. I also read their egg salad sandwiches are awesome for packing on a hike.

georgia road trip

Atlanta Georgia I-75/I-85

Whether you take I-75 or I-85 south, they’ll merge together for a bit between Midtown and Downtown Atlanta. If you hit things during rush hour (could be anytime, depending on what’s going on in the city that day), grab a bite from the car hops at the Varsity. You’ll see the sign from the highway on the North Avenue exit. And if you want to spend more time in the city, choose from these 140+ Things to do in Atlanta.

In Atlanta you have two choices, stay on the highway or continue to follow the road less traveled and head east on I-20 toward Augusta where you’ll take Route 25 to Savannah. Along this route you’ll pass the antebellum towns of Social Circle, Madison and Rutledge. Stretch your legs with some shopping at Rutledge Hardware. My favorite things, like a 1940’s ledger, peanut warmer and letter from the 1800’s aren’t for sale, but you can get any number of other essentials. Do yourself a favor and go next door for a piece of buttermilk pie from Yesterdays before hitting the road again.

Middle Georgia I-16

If you’d rather take the shortest route possible to the beach, stay on I-75, but plan to make a pit stop in Macon to learn a bit about the city’s musical roots on a Rock Candy Walking Tour. Macon was once home to Little Richard, James Brown, and Otis Redding — and let’s not forget the Allman Brothers Band! — so there is plenty to see and learn from these local tour guides.

In Macon, you’ll veer off I-75 onto I-16 toward Savannah where you’ll pick up I-95 South. It’s worth a slight detour to Savannah to walk among the live oaks dripping with Spanish moss in the city’s many squares. If you only have a little time, combine a ghost tour with a history lesson and a meal at the Pirates House. Some say it’s a bit touristy, but we love the stories of drunken locals carried off to sea, and they have delicious fried chicken, plus pirate hats for the kids.

Georgia Coast Route 17

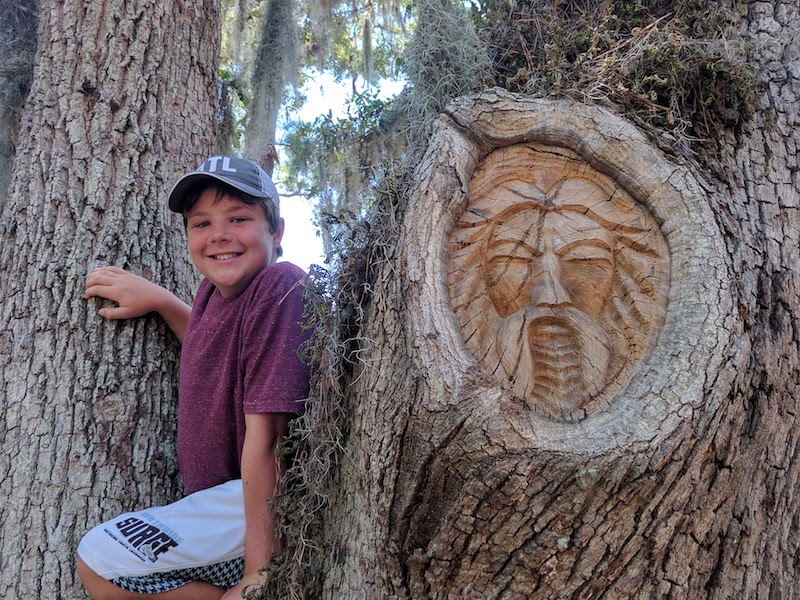
From Savannah you can take Route 17 for a back road path through the towns of Richmond Hill, Milton and Darien, or go straight down I-95 to the coast. Follow the signs to St. Simons or Jekyll Islands. On St. Simons look for tree spirits on a very unusual scavenger hunt. These spirits are carved into the live oaks around the island. Be sure to look for the lovely full-sized mermaid!

For a more structured outing, we love the Tidelands Nature Center on Jekyll Island. It’s a bit less flashy than it’s better known cousin the Georgia Sea Turtle Center (which is also excellent). Be sure to check out the special programs like guided kayak tours and dock studies.

Photo credit: Sue Rodman

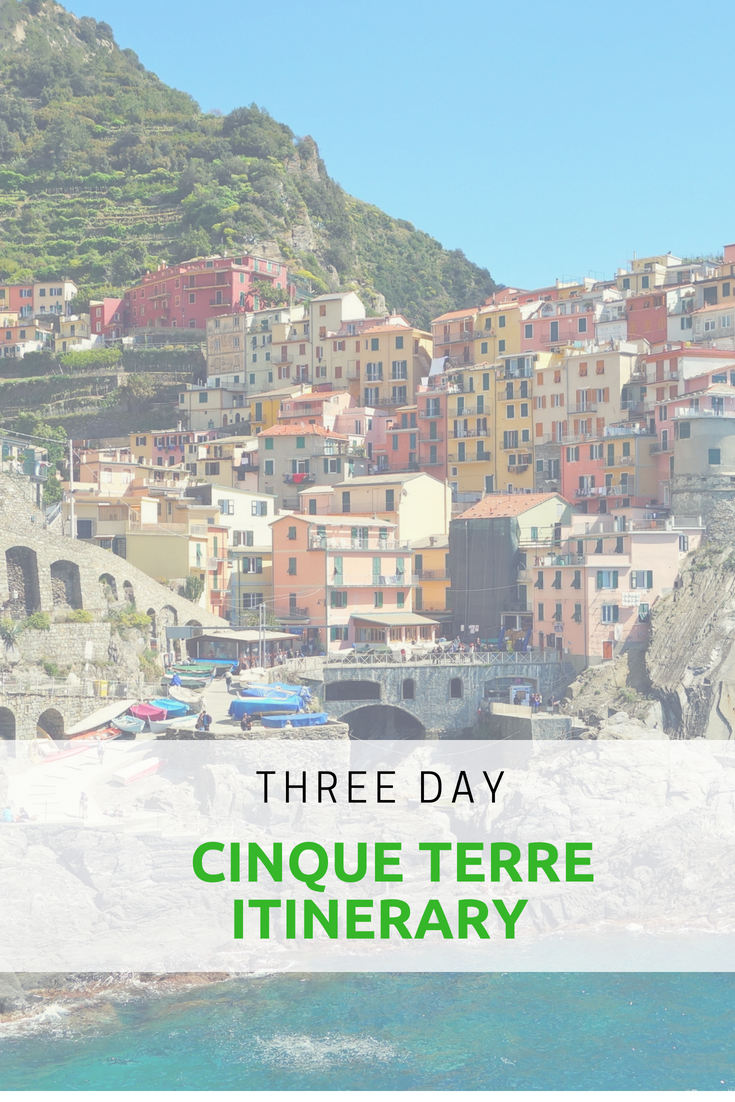
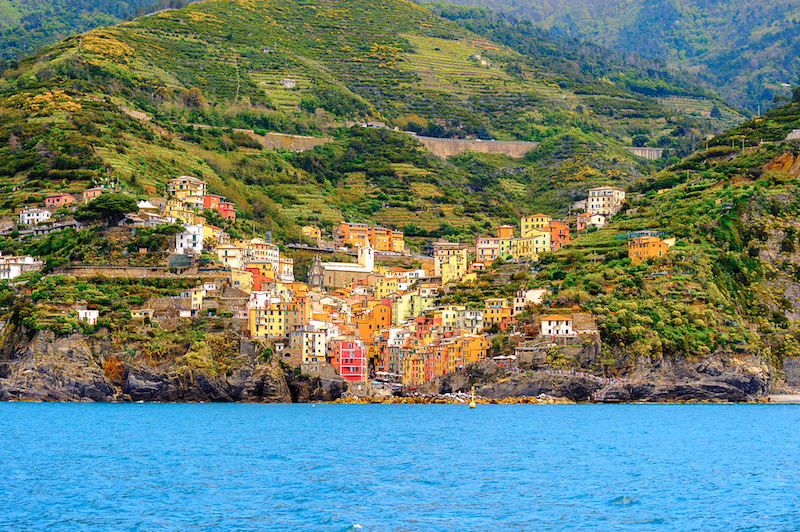
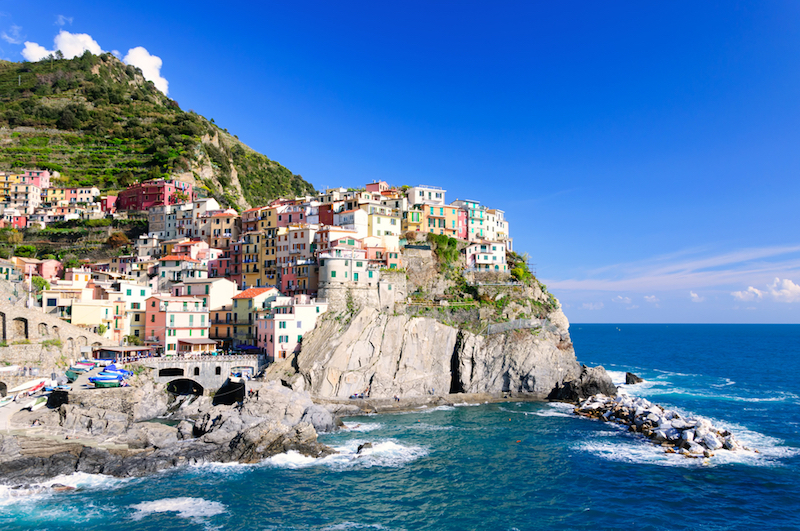
Italy with kids: Cinque Terre itinerary for families

On a trip to Italy with kids, you’re likely to devote a good deal of time to art and history in Florence and archeological ruins in Rome. Afterward, escape the intensity of the city with this three-day Cinque Terre itinerary for families.


Day One: Florence to Cinque Terre

We took a morning train from Florence to Lucca and spent several hours walking around this lovely walled city. It’s definitely worth the side trip. There is a baggage check place right across from the station where we left our bags. From there you can just walk into the town or rent a bike from the same place. 

Then we took a train from Lucca to La Spezia (you can get one ticket that is Florence to La Spezia and just get off and on again) where you change trains for the towns of Cinque Terre. Be sure to get off at La Spezia Centrale station, not La Spezia Milgliarina.

In La Spezia, make sure you take a local train that stops in Riomaggiore (Genoa-La Spezia line). Check the train schedules because they don’t all stop at the little Cinque Terre towns.

We stayed 2 nights at Affittacamere Le Giare which I found through Trip Advisor and booked through Booking.com. Being off-season many places were closed. But this was a wonderful little apartment where our host was waiting for us and made dinner recommendations. We had time for a walk around the town using Rick Steves’ guide.

Note: you can also go from Milan to Cinque Terre.

Day Two: Village to village hiking

We awoke to rain but it cleared up by 9:00 and we found a café in town for breakfast. All the Cinque Terre villages cater to American tourists who come in droves in the summer so there are many cafes trying to serve American or English breakfasts.

You can go from village to village three different ways: by train, hike or by boat. Boats only run in season (and we visited in winter) and most of the train trip is through tunnels, obscuring views between village stops, so we opted to hike. The entire hike is approximately eight miles one-way, which is do-able with older kids and teens, when broken up into a leisurely day.

The first two sections of the hiking trail were closed: Riomaggiore to Manarola is only a 20-minute walk and has been closed for years; the second section, Manarola to Corniglia takes a little longer but is less scenic.

We took the train from Riomaggiore to Corniglia and started our hike from there. Finding the correct trail out of Corniglia toward Vernazza proved to be a bit of a challenge but after climbing a long set of switchback steps up to the town center, we found the red and white stripes on the stonewalls that serve as trail markers.

Tip: It’s a beautiful hike up out of Corniglia and you are able to look back at the village perched on the cliffs. Stunning!

The hike from Corniglia to Vernazza takes about an hour and a half but it is rocky, with some stone steps and somewhat hilly. You hike through vineyards and ravines. No one was on the trail when we were there, which made it pretty magical. In summer the crowds must really take away from the remote beauty, which is why we enjoyed an off-season visit. In another hour we came to Vernazza where we stopped for a delicious pizza lunch at a busy café right by the harbor.

Finding the continuing trail from Vernazza to Monterosso was easy. But the hike to Monterosso was the most difficult of all. It took us about an hour and a half with lots of ups and downs and muddy areas. But most of it is along cliffs with amazing views.

Monterosso is more of a resort town than the others. It is built on flat land and divided into two parts—the old and new. There are long stretches of beach and umbrella rentals, etc. It is also the only Cinque Terre village that is on a main train route. It was our least favorite.

To return to Riomaggiore, we took the train (they come about every hour, more often in summer) and rode it straight through from Monterosso to Riomaggiore. We were back in time to shower and rest up before a nice dinner by the harbor.

Day Three: Manarola back to Rome

We were headed back to Rome today for our morning flight out the next day, but before we left Riomaggiore we took the train to the second village that we could not hike to due to trail closures, Manarola. What a perfect morning outing! We found a little café for some pastries, but not much else was open. It was very quiet. Rick Steves’ walking guide took us up through the town and into the vineyards and graveyards with stone terraces. 

We took the train back to Riomaggiore, got our bags and then took another train to La Spezia where we changed trains to get back to the Rome Termini.

In summary:

  • Visit Lucca coming or going to Cinque Terre
  • Walk as much of the trail as you can and what you can’t, go back to by train and visit the villages that way.
  • Don’t think you’ll have views on the train because you don’t.
  • Pick one village as a base because they are all so close together.
  • Go off-season. We were told April was the best.

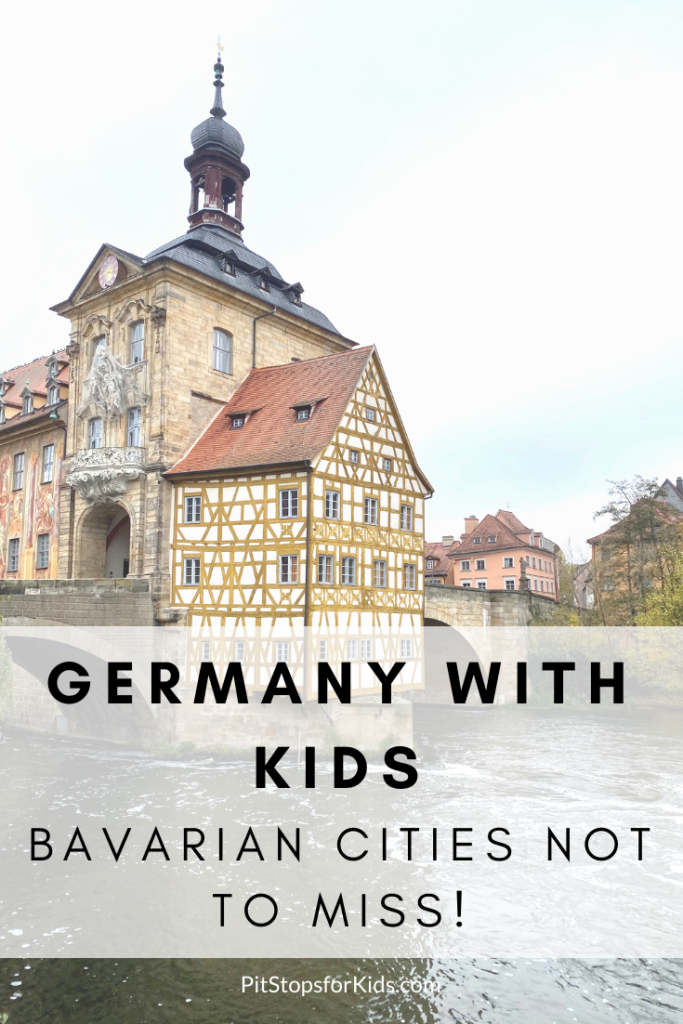
Germany with kids: Five Bavarian cities not to miss

If the Germany of your imagination is storybook towns, medieval villages, vineyards and church steeples, you need to include the region of Bavaria (and its subsection of Franconia) in your European trip plans.

Germany with kids: 5 Bavarian cities not to miss!

After touring Germany with Vantagetravel.com, I compiled a collection of not-to-miss destinations throughout Bavaria that will satisfy kids’ need for fun and exploration and parents’ desire for history; good food, wine and beer; and shopping. Here’s where to go:

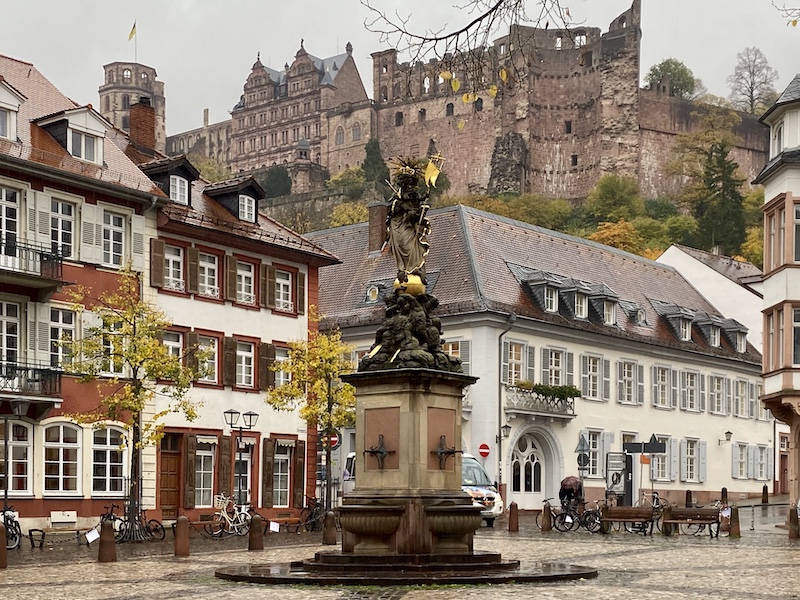
Heidelberg:

This university city is bustling with students and industry, but a compact yet vibrant old town (Altstadt) can be found at its center. This oldest part of the city is filled with historic buildings, market squares, and views of the Schloss Heidelberg (Heidelberg Castle).

In the center of the marketplace is the Heiliggeistkirche, or Church of the Holy Ghost. Nearby, the Alte Brücke (Old Bridge) spans the Neckar River, joining the two sides of historic Heidelberg. A visit to the Heidelberg Castle is a must, and getting there is half the fun: a funicular delivers travelers to the castle walls (ticket sales for both the castle and the ride up are at the base).

Heidelberg Germany

If there’s time, families can also see the Philosopher’s Walk, named by poets in the age of Romanticism in literature in the early 1800s. Also be on the lookout in the shop windows for the Studentenkuss, or Student’s Kiss, a popular chocolate candy.

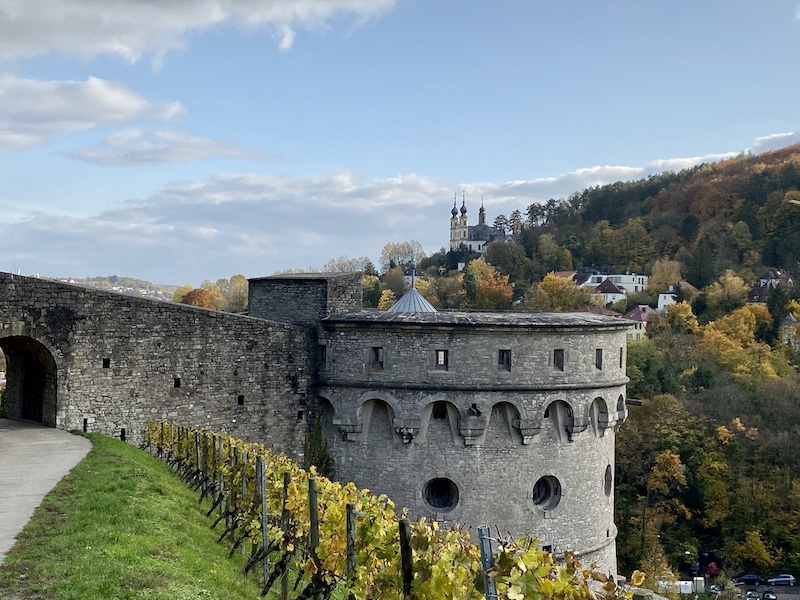
Würzburg:

Located on the Main River in the heart of the Franconian wine region, Würzburg wows with the Würzburg Residence, a UNESCO World Heritage Site and palace of a prince bishop. Comparable to Europe’s other great Baroque palaces, the residence was constructed in 1720 and tours are available indoors and outside (don’t miss the gardens).

Wurzburg Germany

After touring the residence, head to the Marienkapelle, the chapel that is the gateway to the city’s pedestrian-friendly downtown. On Saturdays, a farmer’s market offers food stands and samples, and year-round, shopping is abundant.

Parents won’t want to miss the Alte Mainbrücke, or pedestrian bridge across the Main. Look for the walk-up wine bars, where you can grab a glass of Franconian wine to take to-go. (You’ll be given a token with your glass of wine, which you can use to get a refund on the cost of your wine glass if you opt not to keep it.)

Above the bridge, a pedestrian walkway winds up the hill through vineyards to the fortress of the bishop, which affords fantastic views of the city, plus ice cream and refreshments in the summer months.

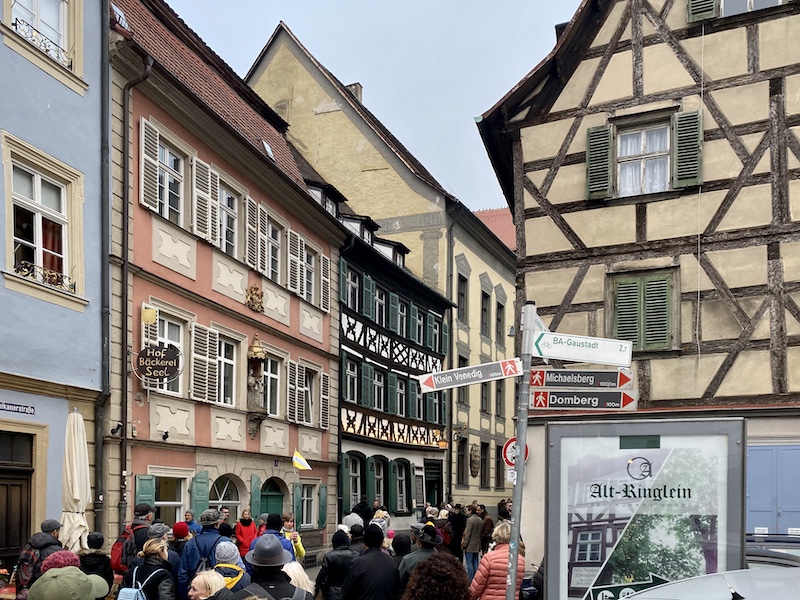
Bamberg:

The fairytale charm of Bamberg is hard not to fall for, as its entire town center is a UNESCO site. The Bamberger Dom is the central cathedral, open to the public, near the Neue Residenz, or palace of this town’s prince bishop.

Bamberg Germany

Families can stroll through town enjoying the quaint shops and arched bridges leading through clocktowers (yes, it looks like a Disney set), but you definitely must stop for a smoked beer at Schlenkerla Smoked Beer Brewery, dating back to 1405. The hops are smoked over a beechwood fire, and the beer is still tapped directly from wooden barrels. Pub food is available too, if you can get a table.

Regensburg:

The charm of Regensburg, which lies on the Danube, is in its abundant shopping amid medieval streets. St. Peter’s Cathedral dominates, but is sometimes outshone by the Old Stone Bridge crossing over the Danube. Visit the town hall, which once served as the seat of parliament with an original torture chamber during the middle ages.

Regensburg Germany

It’s easy to lose track of time window shopping or dipping in and out of small stores while exploring the narrow streets and alleyways of Historic Old Town, but you’ll need sustenance. The Sausage Kitchen by the old stone bridge boasts the best sausages in town, but we recommend the German tapas at Gravenreuther.

Nürnberg:

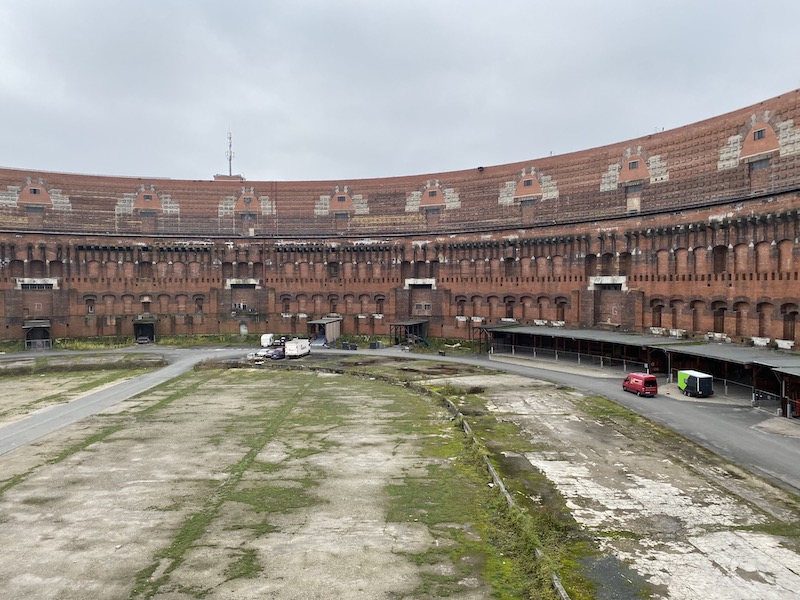
While Nürnberg has its own medieval castle and a charming old town with centuries-old city walls, it’s best known for it’s WWII history. This is the place to teach kids more about the Nazi Party and the damage it inflicted worldwide, starting at the Documentation Center and Nazi Party Rallying Grounds, which can be viewed with ticketed entry. There’s a great museum on-site, and while all exhibits are displayed in German, audio guides are available. The subject matter can be difficult at times for sensitive or young children, and I encourage parents to prep kids ahead of time for images and content involving the Holocaust.

Documentation Center, Germany

You can also see Courtroom 600, where the Nuremberg Trials took place after the war. It’s located in the Palace of Justice in a neighboring city (only about 15 minutes away from the Documentation Center), because Nürnberg was so severely bombed during the war.

When you’re ready for some brevity, head to old town Nürnberg, where you can visit the Toy Museum and Lebkuchen Schmidt, one of the cities best bakeries selling their specialty, gingerbread (in season). And be sure to try a late lunch at Wirtshaus Hütt’n, just off the main square, for an authentic Bavarian meal!

Have you been to Bavaria? What cities are your favorite and why?

Gift-free holiday: Why we opted for no presents at Christmas

When we decided the best time for our family’s bucket list trip to Europe was Christmas break, we, as parents, realized how unrealistic it would be to buy Christmas presents on top of the cost of the trip. While we would be budget traveling through Europe, we would still spend far more than the average amount we set aside for holiday spending. In addition, it simply wouldn’t be practical to try to haul Christmas gifts across the Atlantic to open Christmas Day, only to haul them back.

gift-free-holiday

The idea of a gift-free holiday focusing on the wonderful gift of travel and experiences appealed to us greatly.

We went to the kids (ages 16, 14, and 11), and asked them what they thought of having our European trip be their Christmas gift. And their only Christmas gift. Their answer (in September), was a resounding YES. Whatever it took to get us all to Europe, they were onboard.

I was proud of them; I’ve never considered us to be a particularly materialistic or consumer-driven family, but let’s be real: my kids like presents. And like most families in middle class America, a big part of the Christmas holiday is centered around gifts, for better or for worse. None of my children still believed in Santa Claus, but they definitely still believed in making a list.

With the kids on board, we continued with our plans for Europe, spending all our Christmas gift fund on our travels. I knew we’d be celebrating Christmas Eve and Christmas Day in Florence, Italy, and started making plans for that time period in particular. I knew I wanted to make it special, despite the lack of gifts.

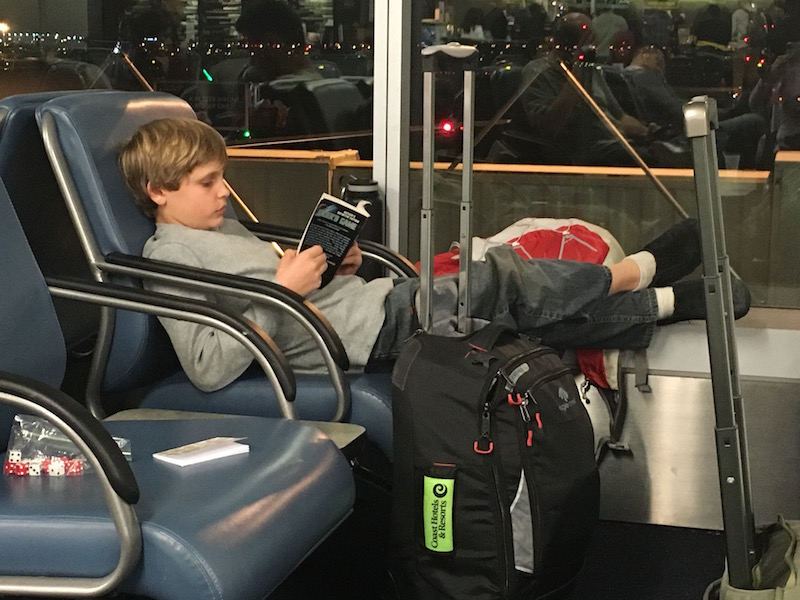
airport waiting

Because many parts of Italy celebrates the Epiphany more intensely than Christmas Day, I found that many local celebrations would have ended before our arrival in Florence. This disheartened me a little, but I forged ahead, asking our AirBnB host for restaurant recommendations that would be open and checking museum hours. By the time I was done planning, we had a lovely Christmas Eve meal reserved at a cafe recommended by a local, a Christmas morning self-guided walking tour, and plans to shop for and cook a Christmas Day dinner in our rented apartment.

I also enlisted the family’s help making a single family gift, which we would open together on Christmas morning. I ordered an AwesomeBox. This innovative gift allows families to add custom photos, stories, and messages to special cards for a lucky recipient. In our case, the recipient was us! Everyone filled out simple information online, such as ‘favorite family memory’ or ‘what I like most about this person is…’. AwesomeBox prints the cards, and ships them in a memory box. I had the box shipped to our house before we left, then brought the cards, unread, with us. They took up no more room than a deck of playing cards, and when we opened them on Christmas morning, it would be both a gift and a family event.

souvenir-shopping

Lastly, we decided to do a family Secret Santa during our trip. We always budget a small amount of money for souvenirs, and for this holiday trip, we opted to purchase souvenirs for each other instead of for ourselves. Each family member drew a name, with the plan to buy three souvenirs for that person before Christmas Day. Souvenirs were to be $5 or less each. This way, we’d still be ‘buying things’ and everyone would still have something to ‘open’.

Here’s how it turned out (the good and the bad):

The first problem we had with our excellent gift-free holiday plan was with me. A few days before our departure, I started to panic. Maybe it was classic mom-guilt, but it just suddenly seemed terrible that I didn’t have gifts purchased for my kids. I even tried to talk my husband back out of our plan, and wanted to spend any amount, to purchase anything, for the boys. Needless to say, this was ridiculous, and I was talked down from the ledge.

eating in italy

The second problem we had was with our youngest. Despite agreeing to our plan, he apparently thought we didn’t really mean it, because in the days leading up to our trip, and even once on the trip, he referenced Christmas presents several times. Each time he said something about his anticipation of gifts, we reminded him gently that we’d decided our trip was our gift. And each time, he agreed, but seemed to continually ‘forget’.  Needless to say, this did not help my guilt. What saved us was our Secret Santa plan. Our youngest loves buying things for others, and doing so brought him so much joy (and distraction) that he stopped wondering about ‘big’ gifts. It also helped that he knew someone was buying small items for him, too.

As it turns out, kids simply love the process of buying things for others and opening gifts, no matter how small.

At times, the souvenir shopping got to be a chore or a point of stress (as in, “I still need one more thing for so-and-so, and I can’t find anything!”), but for the most part, it was very satisfying. And our AwesomeBox was, well, awesome.

What our Christmas Day ended up looking like:

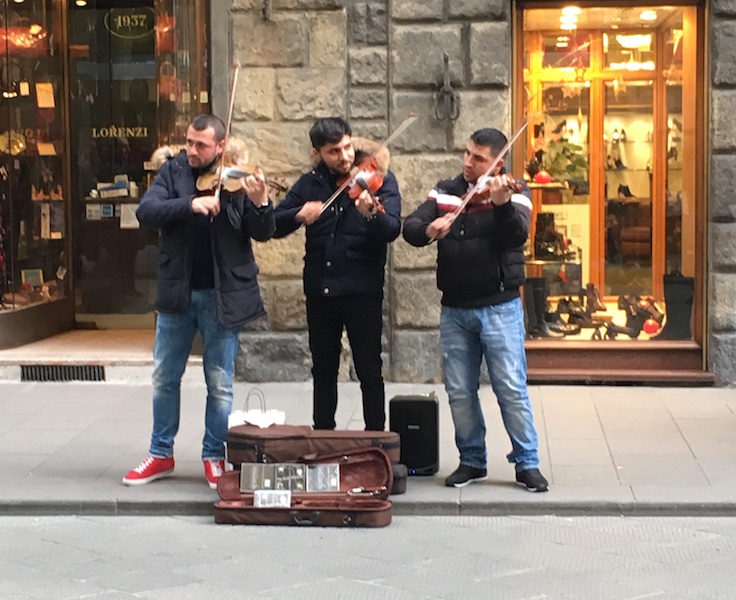
We arrived in Florence via train on Christmas Eve, and walking through the historic city center to our apartment was nothing short of magical. If the kids had ‘forgotten’ it was Christmas, they quickly remembered. On every corner, violinists played, and every street was adorned with holiday lights and decorations. Every church had an intricate cache out front. The bells chimed the hour, and we were entranced.

florence-italy

After settling into our apartment, we ventured out to the grocery store, where we purchased the makings of our Christmas morning meal. We bought a traditional Italian panettone (like a coffee cake), my kids’ favorite peach juice that’s abundant in Italy, and coffee. Then we walked to the small restaurant where we had a reservation, and had our first Tuscan meal. We ordered sparkling water and a bottle of wine, and toasted to our European Christmas.

That night, I reminded the kids yet again that ‘Santa’ had already gifted them with this trip (“Yeah, we know Mom!”…by this time, they’d heard it many times) but that we’d exchange our Secret Santa souvenirs and open our AwesomeBox with breakfast. For the first time ever, everyone slept in Christmas morning. We awoke to more church bells and a fun, special breakfast complete with a lace tablecloth I found in the apartment kitchen. We ate the panettone and exchanged our $5 gifts. Some were silly and some were thoughtful, and all made us feel loved.

christmas-in-italy

We opened the AwesomeBox and took turns reading cards that expressed our gratitude for each other and our funniest/silliest/most important family memories. We took our time with this, and I think it was very special. The kids still keep their cards tucked away in their rooms.

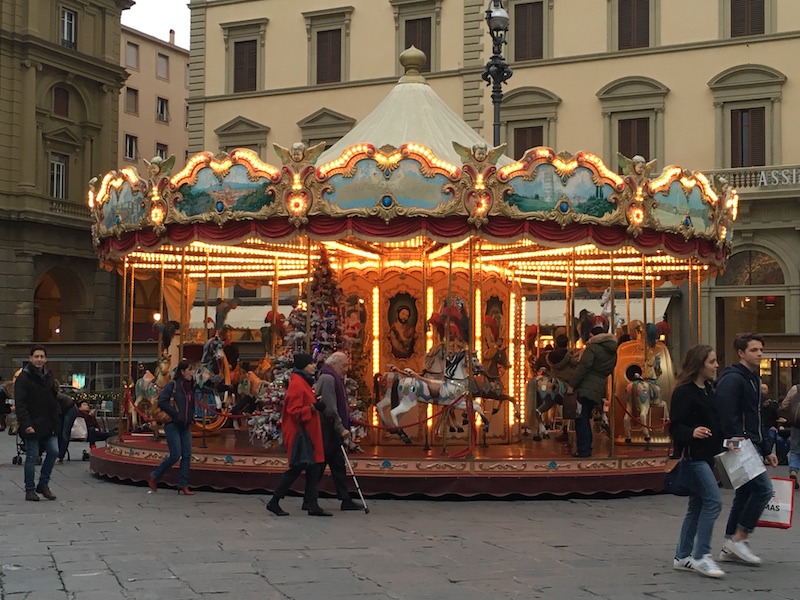
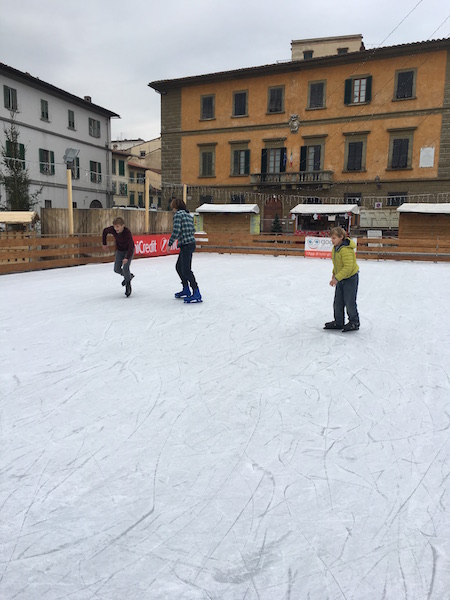
We went out around noon, taking our historic walk of the city to learn more about Florence. The kids tolerated this with only some enthusiasm. I even heard things like, “It doesn’t feel like Christmas anymore.” Then, we turned a corner to find a tiny Christmas carnival in a small square. There was an ice skating rink, kiddie carnival rides, and a hot chocolate (cioccolata calda) stand. We stayed for the better part of an hour. Then we hiked to the best city views at Piazzale Michelangelo, where a large Christmas tree stood sentinel. It felt like Christmas again!

ice-skating-florence

We ended up at a sidewalk cafe serving pizza for a late lunch, and never ended up making dinner! We ended our day with a nighttime stroll amid the city lights and an early bedtime in anticipation of museum hopping in the morning.

Today, the kids say they have no regrets about missing out on presents. After all, they’d be hard-pressed to remember what they’d gotten for Christmas, but still remember this trip like it was yesterday.

Tips for planning your own gift-free holiday:

christmas-nativity

  • Prepare kids well ahead of time. This goes without saying, but remember that kids may need frequent reminders as well. Weave your gift-free holiday plans into the fabric of your itinerary, if you will. We said things like, “Because we’re not doing gifts, we’ll be able to rent Segways in Rome,” or, “With the money we’re saving on presents, we’ll be able to go out to that expensive restaurant as a family.”
  • Have a Christmas Day plan. (Or whatever day is most important for your family, whether that’s Christmas, Christmas Eve, Three Kings Day, Boxing Day, or a day of Hanukkah.) Book a special restaurant reservation, plan a tour, or schedule a special family event. In other words, still mark the day. Don’t pretend it’s just like any other. Remember that many things may be closed on Christmas; ask ahead.
  • Encourage kids to think of the entire trip as ‘Christmas day’. Maybe that one special day won’t be chock full of events and celebrations, but remind kids that every day of your trip, you’re doing special things, eating fun foods, and seeing amazing sights. Organize a family ‘white elephant’ gift giving, or have ‘secret Santas’ to facilitate smaller-scale gift giving and thoughtfulness.
  • Bear in mind the ages of your kids. Honestly, I would not consider a gift-free holiday with kids who still believed in Santa. During family trips with kids this age, we’ve certainly scaled back presents for the sake of travel-ease, but we’ve always ‘delivered’ on the Santa promise.
  • Start small. If you’re not ready to commit to a completely gift-free holiday, consider buying your kids experiences instead of physical gifts for some birthdays or holidays. Buy them memberships, tickets to that special show, or lessons. Make the gift of experiences a regular thing in your family.

The Wizarding World at Universal Studios Hollywood: What to know before you go

If you have kids who live and breathe all things Harry Potter, and you can’t take them on a trip to the motherland, the Wizarding World of Harry Potter at Universal Studios is the next best thing. With the Wizarding World is now open on both coasts, we opted to check out Hogwarts and Hogsmeade in Hollywood. Read on for our best planning tips:

wizarding-world

Don’t forget to budget time for one of the best things to do in Hollywood, the Museum of Illusions, plus additional fun in the greater Los Angeles area!

Rides at Wizarding World of Harry Potter: 

There are two rides at the Wizarding World of Harry Potter, both of which are pretty tame by theme park standards. However, here’s what you should know about each:

  • The Flight of the Hippogriff is Universal Studios Hollywood’s first outdoor roller coaster. It is family friendly and appropriate for younger muggles over 36 inches tall.
  • Harry Potter and the Forbidden Journey at Universal Studios Hollywood takes place inside Hogwart’s Castle. This 3-D adventure is perfect for diehard Harry Potter fans who can brave the Quidditch pitch, Whomping Willows, dragons and dementors. We loved it, but there’s a lot of twisting and turning, and some of us felt a bit queasy afterward. If you get motion sickness, know this in advance!

Shopping inside Wizarding World:

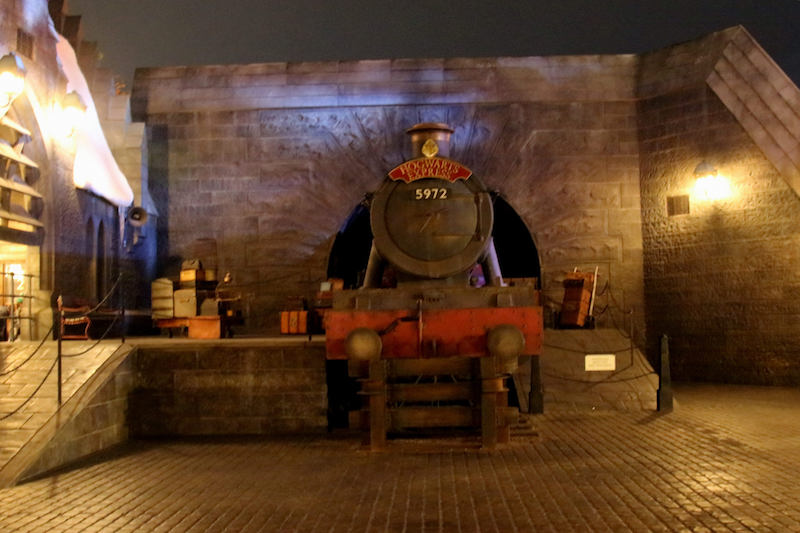
Normally, souvenir shopping wouldn’t get more than a cursory mention in one of my posts…after all, no one comes for the shopping. Not so at Wizarding World! Shopping for Harry Potter souvenirs is truly part of the fun at Wizarding World, and you’ll want to take time to do some browsing. Be sure to go into the various shops, such as Honeydukes candy shop for some chocolate frogs, Bertie Bott’s Every Flavor Beans, chocolate cauldrons and more. Inside the castle and as you exit the Forbidden Journey are where you will find Filch’s Emporium of Confiscated Goods. I could have spent hours in there! You can purchase clothing, house crest banners, toys, games and replicas of the movie props.

If your kid (or you!) want to buy a wand, do it early. Why? You can use interactive wands (the ones with the specially marked sticker on the box) throughout the Wizarding World. It’s really fun to perform spells at any location with an emblem on the ground. There’s always a Universal employee stationed nearby to give you tips.

To get a wand, you can either go through a wand ceremony (where you wait in line to watch the ceremony where one person is picked to be the recipient, then buy your own if you weren’t picked), or you can go directly to the wand shop. If you want to watch the ceremony, we suggest making this your first stop.

The wand shop is usually crazy crowded, but it’s also jaw-dropping to see the wand boxes literally stacked floor to ceiling. Wands will set you back $50 each (yes, really!) but it’s one of those things you should probably just budget for, because once in the Wizarding World, they’re hard to resist!

This video was created with ProEditors…learn more about creating your own!

Food & drink of wizards: 

Like shopping, eating is a big deal at Wizarding World. There are all kinds of edible treats from the candy in Honeydukes to the restaurant and pub, as well as Butterbeer. In the Three Broomsticks restaurant, you’ll find the Hog’s Head (bar), but also English fare for the whole family. You can snuggle up with a drink in a cozy booth or spot in front of the fireplace. We found it expensive but fun to eat a meal in the Three Broomsticks.

Wizarding entertainment:

On the Hogsmeade stage you will find some entertainment throughout your visit. Some of the Hogwarts choir students (one from each house) perform with their large croaking frogs. You can also cheer on the Beauxbatons and Durmstrang students as they get the crowd excited for the Triwizard Tournament. After each performance, you can take photos with the singers and dancers.

Dealing with crowds:

Universal’s Front of Line pass will be worth your while if you’re visiting during peak season (summer) or just about any time in the first months of the park’s opening, even though there are only two rides in the park. The pass is good for both rides, and lines are definitely long. It also includes front access to shows, saving you time (as you won’t have to hold seats). These passes start at $199. There is a single rider line available for The Forbidden Journey. There’s a VIP pass as well, which gets you all the perks of the Front of Line pass, plus a guided tour, breakfast, and lunch, but at over $300 a ticket, we don’t see the value.

Buying tickets:

As with most theme parks, Universal Studios gives you an array of options for ticket purchase (in addition to the aforementioned Front of the Line pass). Always buy tickets online ahead of time if buying directly through Universal to save some cash, but if you plan to do anything else in the greater Los Angeles area, do as we did and use a Go Los Angeles card attraction pass. A 3-day card gives you a day at Universal Studios, which you can upgrade to a Front of the Line pass should you desire. We loved that we didn’t have to wait in the ticket line at all: cards are fully integrated with the Universal Studios Hollywood ticket turnstiles.

Where to stay: If budget allows, consider staying in LA style with luxury villa rentals Los Angeles. Or, staying at a Preferred Hotel gets you early admission privileges, and may even get you shuttle service to the park (in some cases). What we like: there’s a large selection to choose from, making it possible for families on all budgets to book a Preferred Hotel. Be sure to use hotel loyalty programs when you book to ensure you come away with points as well as a great vacation!

Read also: our tips for Universal Studios Hollywood!

Pin for later!

wizarding-world

Photo credit: Prayitno

How to go wine tasting with kids: tips on visiting wineries as a family

With vineyards springing up all over the U.S., wine tasting has become more popular than ever. Visiting wineries is a great way to assist a local economy, taste local pairings, and learn about an area’s agriculture. In fact, vineyards are now a big part of agricultural tourism. But what if you have the kids along? Can you go wine tasting with kids? We believe the answer is yes. Follow the tips below to have a fun, successful, and positive experience at a winery with kids.
Cliff Creek Cellars

Pair vineyards with outdoor activities:

Instead of telling the kids that they’ll be touring tasting rooms all day (get ready for a negative reaction on that one), pick one winery you’d really enjoy visiting and pair it with a family outdoor activity. Many wineries and tasting rooms are ideally located in the countryside surrounding tourist destinations and cities: think of your wine tasting day as an opportunity to explore a rural area. Outside of Portland, Oregon, for instance, lies the Willamette Valley brimming with wineries…and family fun. Before heading the casual and cozy Alloro Winery, we opt for a bike ride or a side trip to nearby Evergreen Aviation and Space Museum for hands-on, kid-centric entertainment.

No matter what region you’re visiting, before your wine tasting, parents can take the kids on a hike in the area, rent bikes and go for a bike ride, or tour a local museum or amusement park. Consider your wine tasting to be a complement to this family day outside, not the sole reason for it.

lawn games at wineries

Select no more than one winery per visit:

Multi-vineyard wine trails are a lot of fun…for adults. Most kids, however, are pretty much of the opinion that if you’ve seen one vineyard, you’ve seen them all. Most tourists spend an average of one to two hours at a winery: plan for one and done to avoid tired, bored kids. Which winery to pick? Ask your hotel concierge or another local for the scoop on the most family-friendly winery in the region, or pick one closest to other area attractions.

Opt for a family-friendly tasting experience:

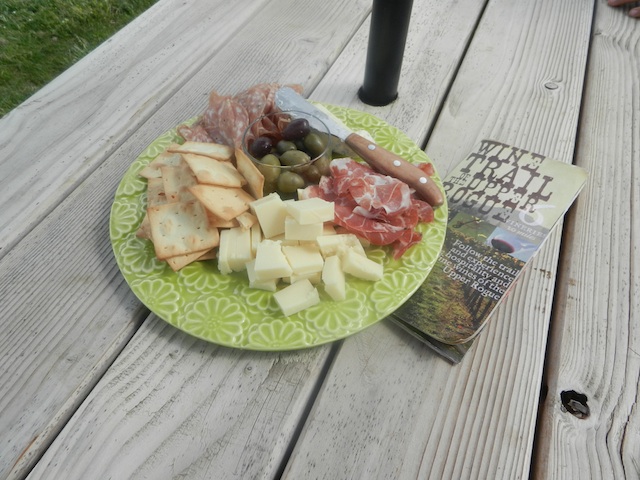
Yes, they do exist! The emphasis of a successful family day at a winery is not on the wine itself, but rather on the ambiance and togetherness. That said, my kids will tell you it’s not much fun if everyone has something good to drink except for them. We pick wineries that serve sparkling cider or root beer to the kids while adults enjoy tasting flights, and those that will put together a kid-friendly snack, such as a cheese plate.

Cliff Creek charcuterie plate

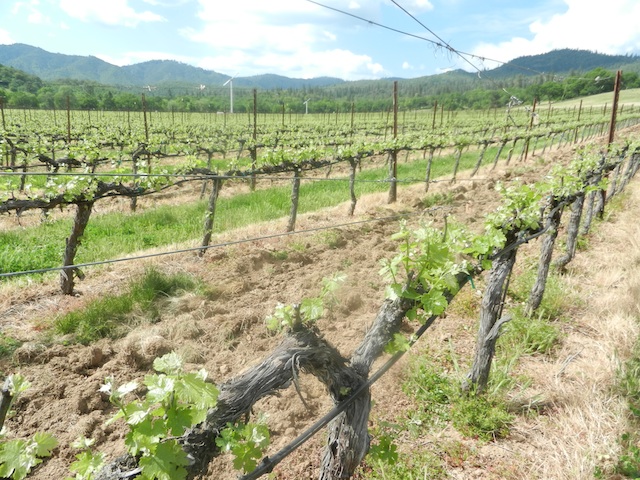
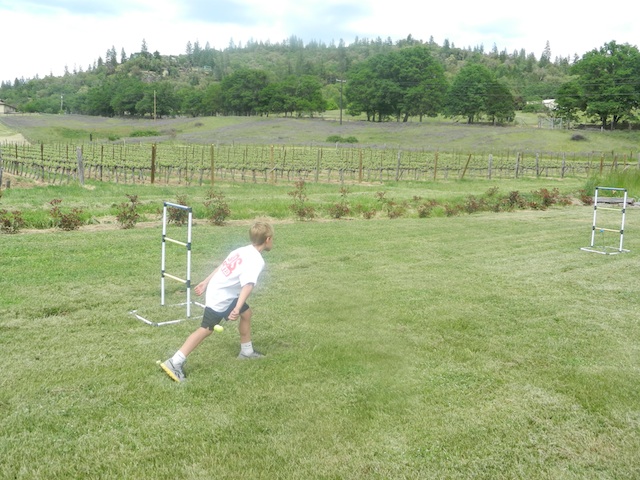
Many wineries now allow picnics and other food items to be brought in by guests. Check ahead of time to make sure the one you want to visit has this policy, and if so, bring a spread! Look for wineries with plenty of outdoor space, and a staff who will welcome your kids. During a recent visit to Cliff Creek Cellars on the Upper Rogue Wine Trail of Southern Oregon, our kids were greeted by the vineyard dog and offered their pick of bocce ball or other lawn games by the winery staff.

Get on winery mailing lists to learn about events and festivals:

Many wineries host summer concert series, holiday events, and other family-friendly happenings. One of our favorite Easter Sundays was spent at Troon Vineyard, where the kids enjoyed an elaborate Easter egg hunt while adults enjoyed tastings and brunch. Other wineries in our region host bluegrass bands (perfect for dancing to, if you ask any toddler), art festivals, and local charity events. During the summer months, kids can spot hang-gliders coming in for landing at many Applegate Valley Wine Trail vineyards.

Above all, be responsible:

Of course, you want to be safe and set a good example to your children whenever you consume alcoholic beverages. If you think you’ll need it, hire a wine tour service to drive you to the tasting room and back again, or set out on a short walk with the family post-tasting before you get behind the wheel of your car. Most wineries don’t mind a bit if you linger: bring extra outdoor toys for the kids or even a pack of cards and play a family game before heading home.

Things to do on Channel Islands with kids

Channel Islands National Park is located right off the coast of Ventura, CA, but feels a million miles away from the rest of Southern California. The park has a different vibe than most: the main visitor’s center is located not in the park, but in the Ventura Harbor, where visitors depart for the islands, and the islands themselves remain remote, isolated, and almost completely undeveloped.

channel islands

Don’t let the Channel Islands, and the logistics of exploring them, deter you: this national park is perfect for kids. Families simply need to know the best things to do on Channel Islands, how to get to Channel Islands National Park, and where to stay prior.

Channel Islands

Which island?

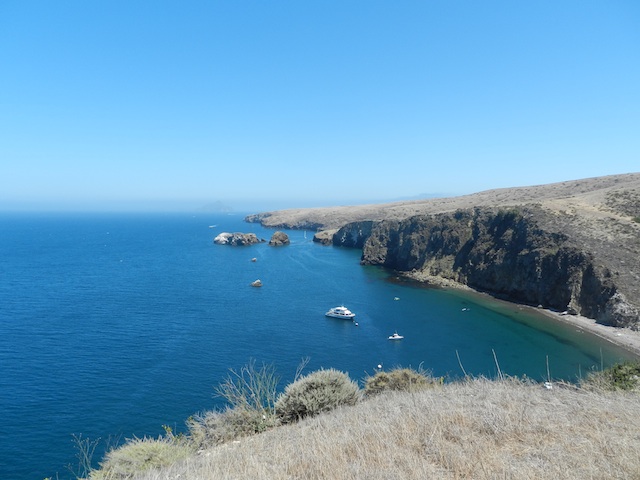
All the Channel Islands are accessible, but the most easily accessed (and with the most to do for families) is Santa Cruz Island, the largest of the five. Protected coves allow for great snorkeling here, and the camping is easiest (on other islands, backpacking may be necessary). Santa Cruz Island is also the most affordable to travel to, making it ideal for larger family groups.

Camping or day trip?

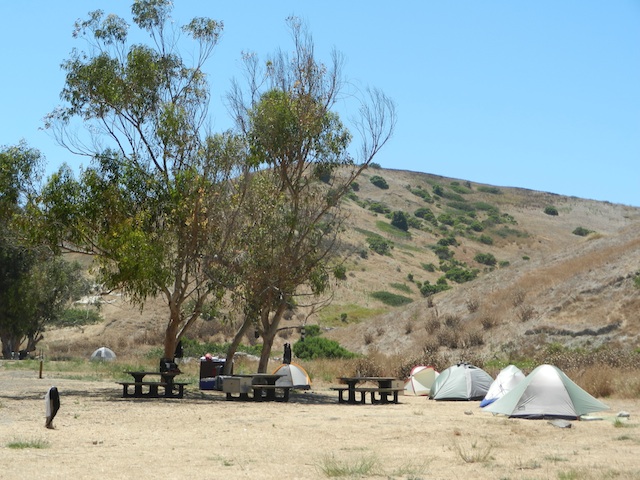
The next thing families need to decide is whether to make their Channel Islands adventure a day trip or an overnight. Camping at Channel Islands is reserved by ReserveAmerica, and the most popular camping experience for families is located at Scorpion’s Cove on Santa Cruz. This campground is walk-in (meaning backpacking is not necessary) and the lower campground is only .2 mile from the beach. Running water and pit toilets are available, and each site has a picnic table and food storage box.

channel islands camping

For families deciding not to camp, a day trip to Santa Cruz Island can be more than enough to experience the National Park. Santa Cruz (the most easily accessible island) is undeveloped; in addition to the campground, there are only a few ranger cabins (rangers are on-site), evidence of the island’s ranching history, and hiking trails. A dock exists at Scorpion’s Cove, where passengers disembark. For a day trip, we recommend taking an early boat (9 am) out to Scorpion’s Cove, and returning at 4 pm or 5 pm. This gives visitors enough time to experience the island’s snorkeling, kayaking, and hiking.

snorkeling on Channel Islands

How to get there:

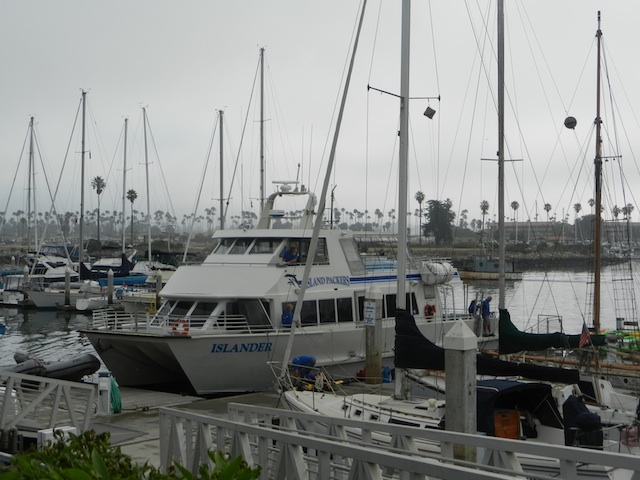
Island Packers is the official transportation to the islands. They’re located in the Ventura Harbor adjacent to the Channel Islands visitor center (follow the brown National Park signs to the end of the drive along the pier) and reservations should be made in advance. The boat ride over takes approximately 1 hour and 15 minutes, and is certainly part of the fun. We spotted dolphins during our passage, and when the water is choppy, as it was on our visit, the ride is downright exhilarating. Kids can stand at the deck and feel the spray of the ocean, or interior seats are also available. The Island Packers crew and staff are all friendly, laid-back, and fun. The cost of an Island Packers passage varies by island and whether your passage is a day trip or camping trip. At the time of my visit, day trip passage was $56 round trip for adults and $39 round trip for children (up to age 12). Overnight passage was $75 for adults and $54 for children.

island packers

Snorkeling, kayaking, and hiking on the islands:

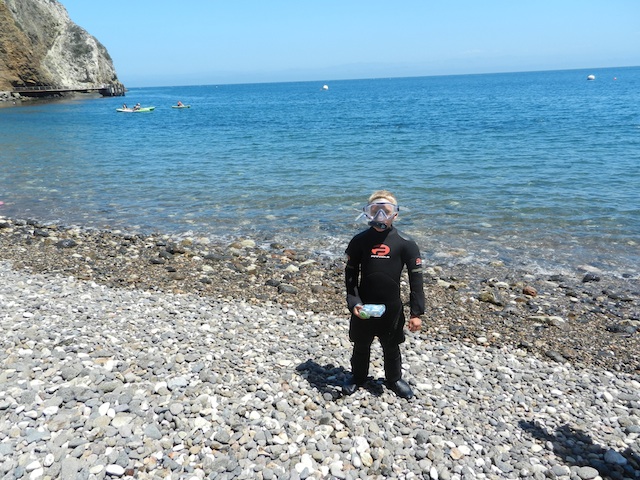
Snorkeling at Scorpion’s Cove, we swam with harbor seals, and spotted multiple fish species, sea urchins, sea stars, and kelp forests. Snorkeling gear can be rented by the day at Ventura Sports, located in the Ventura Harbor, but be advised: they don’t have adequate sizes for kids under age 10. While their staff was friendly, they rented us a wetsuit that was far too large for our seven-year-old, with no warning that it wouldn’t work for him. (Wet suits are usually necessary in all seasons on Channel Islands.) In addition to snorkeling, kayaks can be rented in the harbor and transported for the day or the duration of your camping trip by Island Packers, or guided kayak tours are available on the island (reserve ahead of time). When not on or in the water, numerous hiking trails (of about 2 miles in length at most) are available on Santa Cruz Island, and offer beautiful vistas of the island and sea.

Holiday inn express Ventura harbor

Where to stay in Ventura:

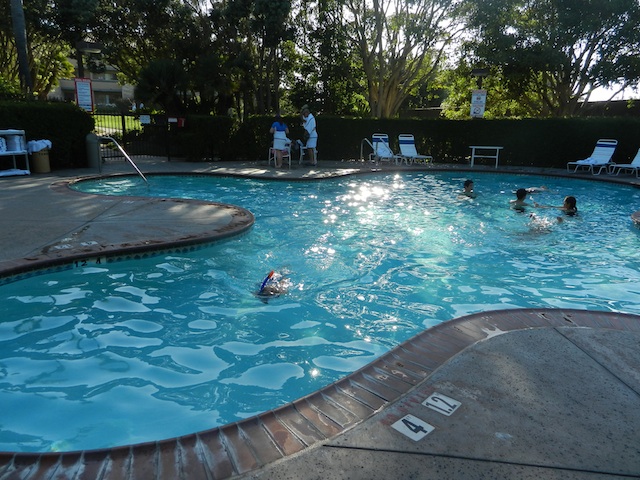
If you’re coming any distance to visit the islands, you’ll need to stay overnight in Ventura the evening prior. We recommend the Holiday Inn Express Ventura Harbor, which overlooks the Ventura Harbor and is less than a quarter mile from Island Packers. I call this Holiday Inn Express an ‘express plus’, because it’s directly tied to the Four Points Sheraton next door, and guests have access to their very nice outdoor heated pool and hot tub (hot tub for adults only). A pedestrian bridge connects the two hotels, and the Holiday Inn Express includes one of the best complimentary breakfasts we’ve ever experienced. Bottom line: the Holiday Inn Express Ventura is a great value for families, and you’ll be close enough to enjoy the Ventura Harbor prior to your Channel Islands trip.

One day in Badlands National Park itinerary with kids

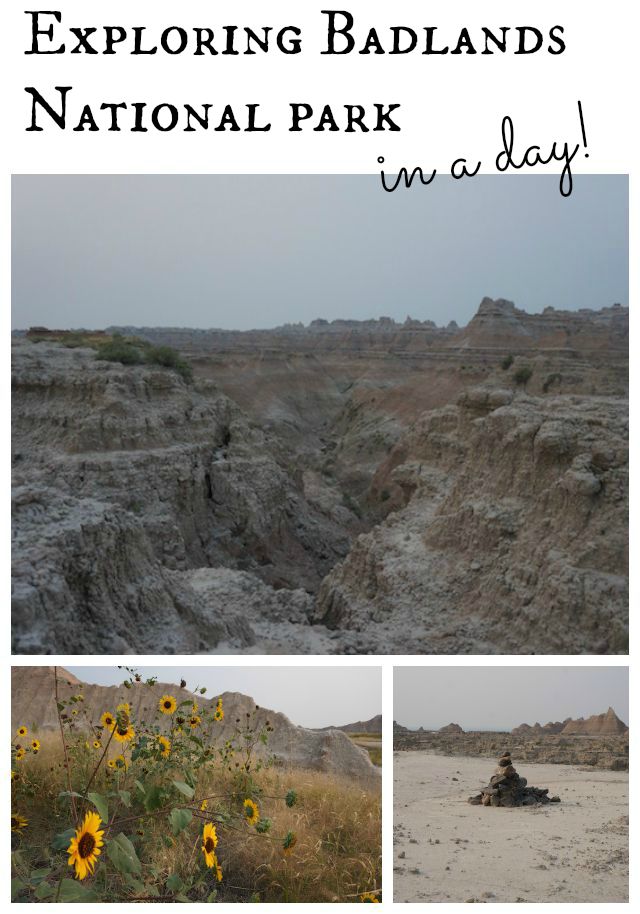
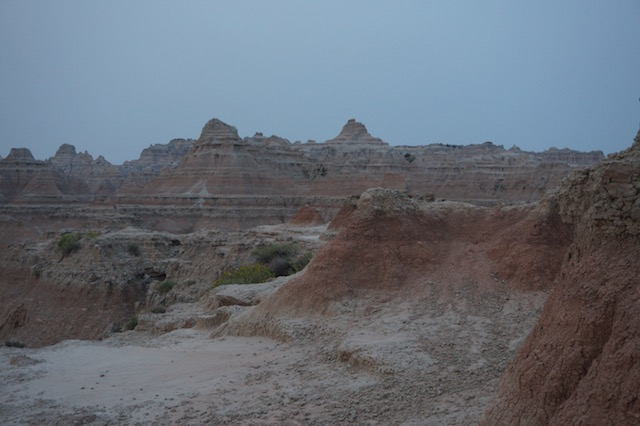
We were blown away by the beauty and peacefulness of Badlands National Park! During our one day visit, we found ourselves comparing this dry, rugged, and dramatic park to other favorites: it has much of the same feel as Death Valley National Park and Joshua Tree National Park. However, Badlands adds another element: high prairie wildlife and terrain that will impress in a subtile, almost delicate manner. Here’s what to do with one day in Badlands National Park:
badlands-national-park

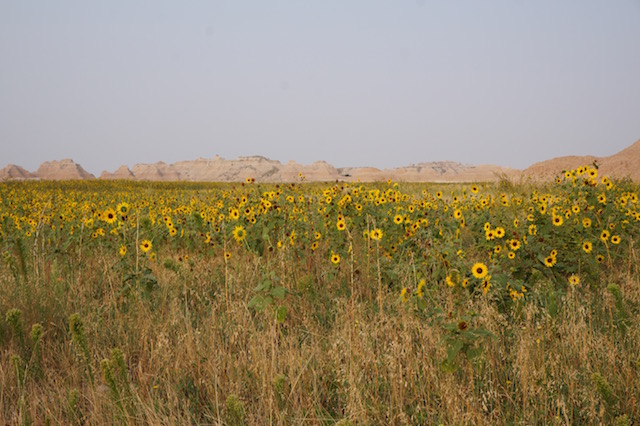
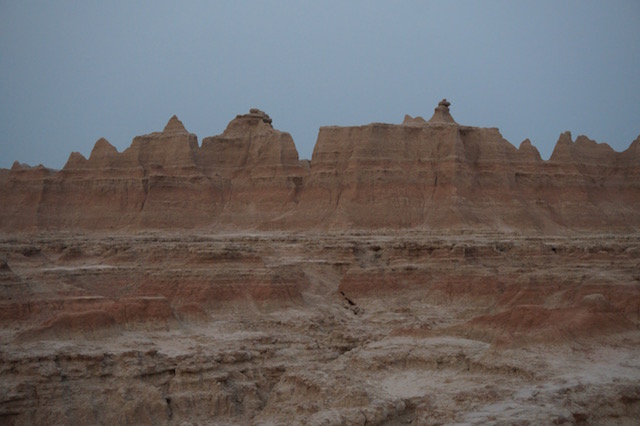
Allow me to explain: while the first thing visitors are likely to notice about the park is its dramatic rock formations and chasms (think of Grand Canyon in miniature, or as one fellow traveler put it, of being a giant hiking in the Grand Canyon), it’s quickly evident that beyond, and in some cases, above, these rock formations, lie plateaus, gulches, and lowlands blooming with sunflowers and wildflowers, harboring prairie dogs and rabbits, and opening up onto prairie grasses. The juxtaposition of dry, cracking rock and flowering plants is stunning.

badlands-sunflowers

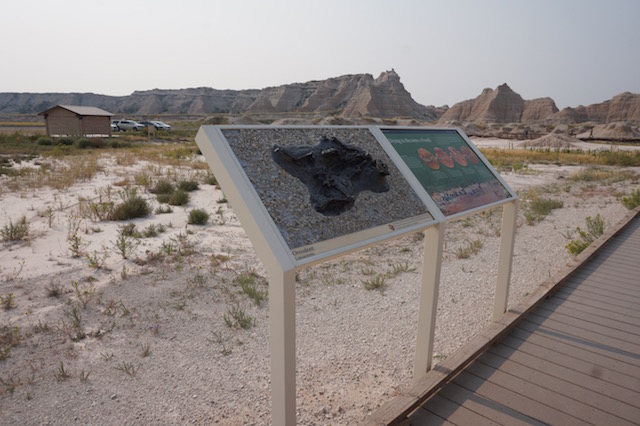
The park is well-known for fossil finds dating to prehistoric eras, though we learned that dinosaur fossils are not found here. The region was underwater during that time period. Instead, early mammal fossils are found quite regularly, and dig sites can still be active.

How to spend a day at Badlands National Park:

Ready for your Badlands National Park itinerary with kids? Though the park area is quite large, most of the sites and hiking options are in a concentrated area, making this park do-able in a day, if needed. As we always suggest, start at the Badlands visitor center to get your bearings. Here, kids can see a well-made 20-minute video, then tour several rooms of exhibits on the park’s geological history, wildlife, and native history (this is Lakota territory). Stop at the desk and ask for a form on which to document any fossil finds. They can still be spotted in the rock throughout the park, and park scientists depend on visitor documentation to help their research. Cool, right?

badlands-fossils

After touring the visitor center, take the Badlands Loop Road. Backtrack to the Window Trail and Door Trail parking lot.

Tip: to do this itinerary as described, enter the park via I-90 Exit 131 instead of via Exit 110 near Wall. We suggest this direction because it places families at the visitor center early on.

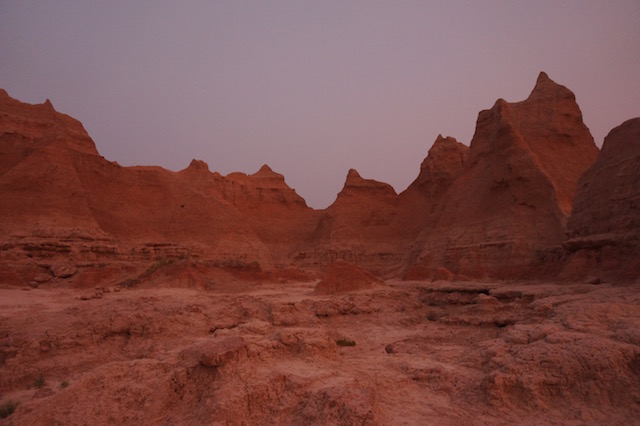
The Door Trail offers an amazing vista of the canyons of the park, with half a mile of ‘trail’, which is actually rock hopping and free-form hiking from marked post to post (the rock bottom here doesn’t allow for a proper trail). The way is easy enough, but kids can make it more fun by climbing a few short rock formations along the path. The nearby Window Trail consists just of a boardwalk ending in a vista to see a very deep chasm in the canyon. Definitely do both. Note: we hit this trail at sunrise, which rewarded us with beautiful light against the stone.

sunrise-at-badlands

Accessed from the same parking lot, the short Notch Trail is great for kids who want more climbing, as this 1.5 mile loop descends through the canyon then up a wooden ladder to follow a ledge to a great view of the White River valley. Only proceed on this trail if you’re comfortable with heights.

badlands-hiking

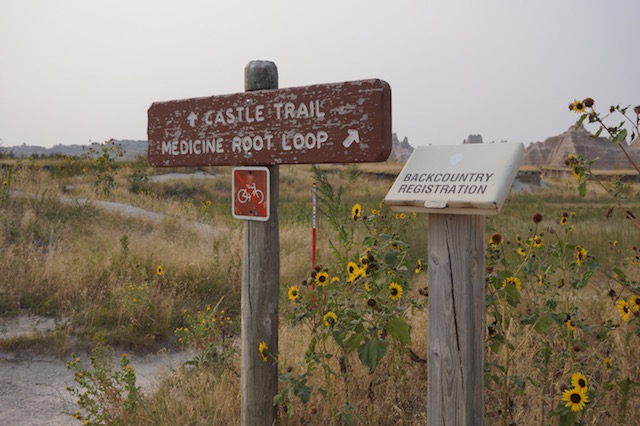
For those wanting a longer hike, The Castle Trailhead is located just across the street from the Door and Window trails. This trail is 10 miles long, and travels west all the way to the opposite end of the Badlands Loop Road at the Fossil Exhibit. Those wanting to hike 10 miles will need a car to pick them up on the other end. However, thanks to a very user-friendly trail system in the park, it’s possible to hike only a portion of the Castle Trail. Starting at the trailhead at Door, hike a short distance on flat terrain to the junction of the Castle and Medicine Root trails. At this point, families have access to a loop of 4 miles, making the hike around 5.5 miles total, or can opt for an out-and-back for less mileage, turning around at the junction.

badlands-castle-trail

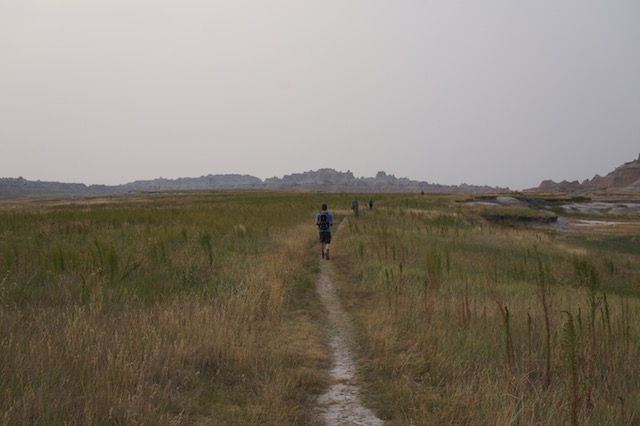
Or, do what we did: after seeing Door and Windows, head back on the Badlands Loop Road in your car and stop at the Saddle Pass trailhead. This quarter mile trail connects you to the Medicine Root/Castle Trail loop for a hike of 4.2 miles. The short Saddle Pass section is severely steep as you climb from the valley floor to the top of the ‘wall’, but once there, the terrain is quite flat. Up on this wall while hiking the Medicine Root Loop, you’ll see prairie grasses, sunflowers, wildflowers, and, possibly, snakes and other small animals. There is no shade up here, so plan to accomplish this part of your day in the morning.

Medicine-Loop-Trail

Further along the Badlands Loop Road, families will come to the Fossil Exhibit Trail. This boardwalk loop of about half a mile features well-done displays en route, which describe the various fossils found here, and whether these prehistoric animals ended up adapting, moving to a new region, or becoming extinct.

badlands

If you depart the park via the Badlands Loop Road toward Wall, you’ll come across many more roadside pull-outs with vistas of this area of the park. It seems to go on and on!

Where to eat:

During your day, definitely stop to eat at the Cedar Pass Lodge. This lodge is modern-looking and new, which didn’t quite seem to fit in with the setting of the national park, but inside, it has a very nice gift shop filled with handmade items and Lakota souvenirs, and a casual cafe that serves wonderful fry bread tacos. These native treats can be ordered with buffalo meat or black beans, and they are huge…two people can definitely share one. And yes, they are very fattening. Enjoy!

Where to stay:

The park does have lodging at Cedar Pass, in the form of very nice cabins overlooking the terrain (and the highway, but it’s no big deal). I did not stay the night on this trip, as the park can definitely be done in one day, but certainly this would be a good option as well.

The park is located along I-90 in South Dakota, near Wall. Make a stop at Wall Drug before or after!

Visiting Manuel Antonio National Park Costa Rica

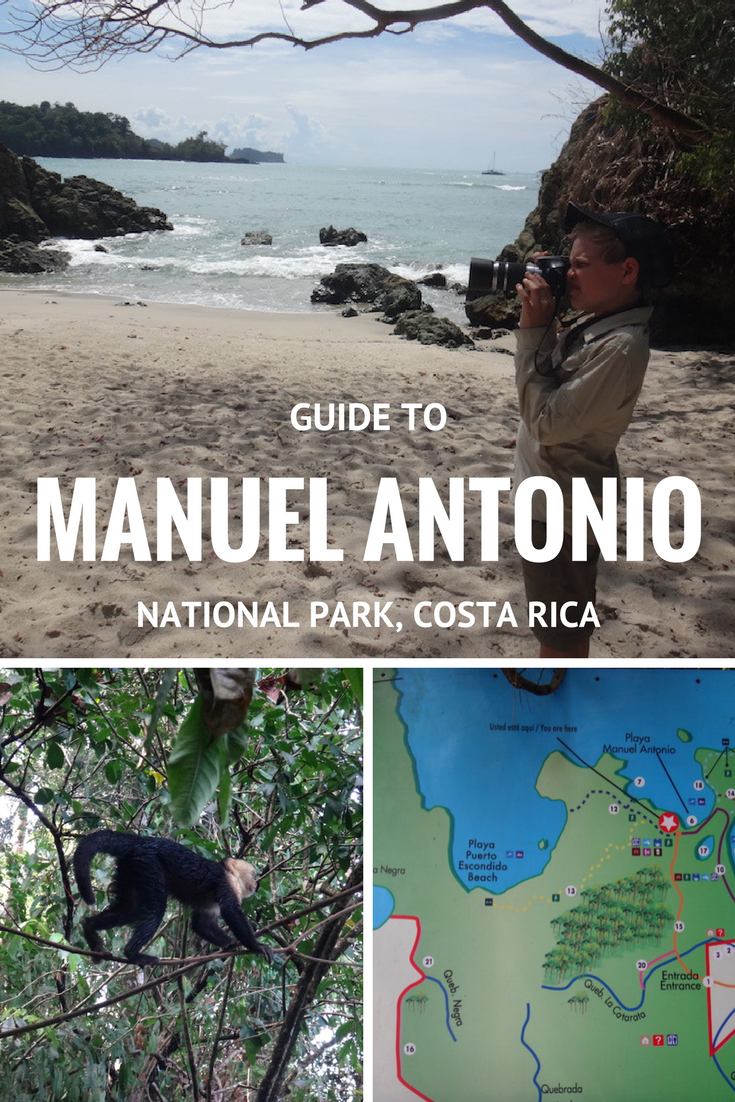
Manuel Antonio National Park (or Parque Nacional Manuel Antonio), is about a three hour drive from San Jose, Costa Rica, an hour from Playa Jaco, and only a short distance from a number of the coastal towns that serve it. We arrived via the Pacific Ocean, on our Uncruise ship, the Safari Voyager, but once in the park, the same tips apply to cruise passengers and other visitors.

guide to manuel antonio

Manuel Antonio has a well-earned reputation for animal spotting, and during our day there, we were rewarded with sightings of capuchin monkeys, howler monkeys, squirrel monkeys, sloths, white-tailed deer, raccoons, quatis, and more types of birds (including macaws) than we could keep track of. It’s small in size at only about 1,700 acres, but it packs a big punch, with expanses of white-sand beaches, jungle hikes, and wildlife viewing platforms. Because this national park is so popular, it has a daily cap of visitors, which helps with the flow of pedestrian traffic.

You can definitely spend a whole day here, alternating between the hiking trails and the beach; we recommend setting up a beach base camp after your morning hike so people can come and go to explore. Just remember to keep someone ‘manning the fort’ as it were, or monkeys will steal all your possessions!

manuel-antonio

Visiting Manuel Antonio National Park: Top trails for animal viewing:

We absolutely loved the Punta Cathedral Point Trail, which winds from one beach to the next, elevating through the jungle via many series of rustic stairs to prime viewing areas. We saw monkeys here, but the prime sloth viewing is on the aptly named Sloth Trail, which is shorter in length and flatter. Ironically, we ended up seeing a sloth in a tree near the beach. Playa Espadilla Sur Beach and Playa Manuel Antonio appear on the map to be on opposite ends of the park, but are in fact only separated by a matter of yards, making it easy to explore both sides.
manuel-antonio

Tips for visiting Manuel Antonio National Park:

  • First off, start early! The park opens at 7 am, and since it fills up fast (and many animals are most active in the morning and evening), we recommend getting there when it opens. Start with a morning hike while it’s still relatively cool (ha!) then head to one of the beaches for a post-hike dip. In our experience, most visitors tend to settle in at the beaches of Manuel Antonio, and it’s hard to blame them; this park has been voted one of the most beautiful in the world many times for a reason. However, getting off of the sand and into the jungle will reward you with animal sightings.
  • Take precautions around the capuchin monkeys (white-faced monkeys) and the raccoons, as they have become so accustomed to humans, they have no fear and will blatantly try to steal your food, backpacks, hats, and just about anything else. Staying on the trail helps somewhat.
  • Consider hiring a guide. We had naturalist guides included in our Uncruise visit, but anyone can hire a guide for the day, who will walk you through the park. At the time of our visit, they were about $40 US for three hours, and from what I could see from observing them with many families, well worth it. (Note: you can bargain.)
  • Bring a picnic or sack lunch and lots of water. While some vendors are outside the park, no food vendors are inside the park boundaries. We also recommend bringing a few beach towels in a backpack.
  • Wear swimsuits over sun and insect-protectant clothing, such as trekking pants and long-sleeve sun shirts. You WILL want to swim, and you WILL sweat a lot!
  • The entrance fee is $16/pp US for foreign visitors, so plan accordingly.
  • Beware the Beach Apple trees. These highly poisonous trees are (mostly) marked, but even sitting under them and touching their leaves can be dangerous. Eating beach apples is highly dangerous, and usually results in a hospital stay. Take the warnings seriously.

If you need lodging and food recommendations outside the park, check out this post.