A Pit Stop a Day (Day 14): Grand Teton Horseback Ride

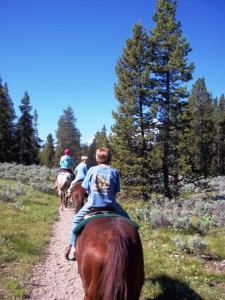
Setting off on our 1 hour trail ride through the Tetons.

On Day 14, we treated Nate and Calvin to a horseback ride through the Tetons (something they’d been wanting to try since Glacier National Park). Luckily, Colter Bay Village has stables on-site, making it easy!

We made reservations at the Activities Center near the Colter Bay Village store (be sure to sign up ASAP: we signed up the night we arrived and got the last three slots for the entire weekend). For our 9 am ride, we were told to be at the stable at 8:45. Our ‘wranglers’ were very friendly and experienced horsemen and women, and took us through the ropes. We were each told which horse we’d be riding (they decide based on temperment, experience of the rider, age, etc) and mounted one by one.

It took about 20 minutes to get everyone on their horse and lined up, then we set off down a narrow trail for our 1 hour ride. The horses were well trained, and everyone (even my kids…first time riders) easily managed their horse. We followed our wrangler single-file (another wrangler made up the rear) and they told us information about the surrounding area and the horses as we rode.
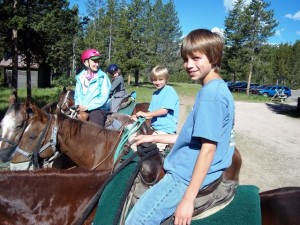
The wranglers made sure to keep family groups together.

The ride took us past a great view of the Tetons, a small pond where you can often spot moose (we didn’t) and the side of Jackson Lake (where we saw Toby canoeing with Grandma). The kids enjoyed the experience of controlling their own stead, and had fun bonding with their horses (named Quarter and Chuck Norris…mine was Claire).

The one hour ride was just about enough for us. Much longer, and we’d get sore and the kids might have gotten bored. The scenery was beautiful, and being horseback afforded a different view (not to mention new trails). We’d definitely do it again!

Note: Kids have to be eight years old to ride. Younger kids can ride a pony in the stable area (with an adult present). Backpacks are not permitted, and you’ll want to move things from back pockets (or the saddle will do it for you en route).

Extra Tip: Bring water. We made the mistake of thinking we’d have no place to put it, but the wranglers issue saddle bags and/or water bottle holders for those who ask for them. The trail meanders through some exposed sections of valley, and the morning was warmer than we anticipated!

Date last visited: July 2010.

Distance off the interstate: About 30 minutes from Hwy 89.

Bathrooms: Pit toilets located at the stables. Be sure to go before trail riding!

Costs: One hour rides cost $35 per person. (Canoe rentals, which Toby did instead with his grandparents, are $18/hour.)

Food Services: None. Two restaurants (one cafeteria-style) are located nearby in Colter Bay Village.

Directions: The stables are just past the tent village at Colter Bay Village Resort. From anywhere in the park, take Teton Park Road to Colter Bay, and follow the signs.

Up Next: We drive from Grand Teton National Park to Utah and enjoy a stay at Westgate Park City.

A Pit Stop a Day (Day 10): Big Sky High Ropes Course

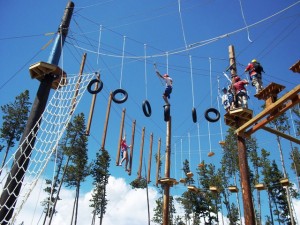
The High Ropes Course is like a kids\’ play structure on steriods!

Before we started our session on the High Ropes Course at Big Sky Resort, I wasn’t sure whether it would be too challenging for my kids (ages 11 and 8)…and myself! The apparatus–a maze of ropes, logs, planks, and even tires suspended in the high alpine air–was certainly intimidating! But from the moment I saw Calvin and Nate shimmy up the rope ladder to enter the array of elevated challenges, I knew it would be a blast!

Just like with the zipline, we started our adventure at BaseCamp, geared up (today our guides were Tanner and Trey), and hiked up the slope to the high ropes course. Once there, we all went through a hands-on safety lesson before we could begin. Our group of approximately a dozen participants included all adults with the exception of two teens, a 10-year-old, and Nate (11) and Calvin (8). Kids who want to try the ropes course have to be tall enough to reach the cables above them (to move their safety clips from one section of the apparatus to another) and must have the presence of mind to follow instructions and remember safety rules.

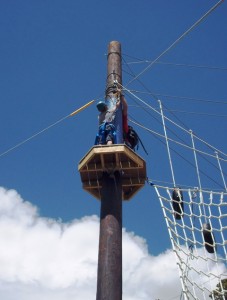
Calvin reaches the first platform after climbing the cargo net.

The way the course works is this: each participant has a safety harness on which two safety clips are attached. When you wish to move from element to element on the apparatus (in any order or repetition…there’s no ‘right’ way), you need to unfasten your clips from one cable to another one at a time (so that you’re never unattached from your harness at any time). It takes some dexterity and maturity to do this.

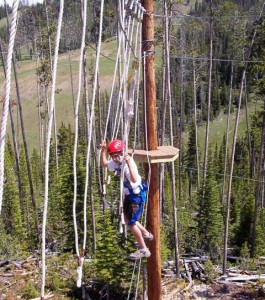
Nate makes his way across the \’monkey tails\’ feature.

Once up on the structure, the kids were cautious for only a matter of seconds before getting the hang of things (literally!) and scampering around like monkeys. I will admit I was less graceful, but had just as much fun. The most challenging part for me was getting up there…once I was standing on the platforms and had mastered moving my clips (intimidating at first), I, too, was stepping, jumping, and swinging from one section of the course to another.

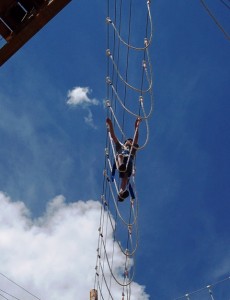
Nate on the rope bridge…by far my favorite feature!

Afterward, the kids ranked the high ropes course even above ziplining, declaring it ‘the most fun thing they’ve ever done’. I have to agree. It’s an experience unlike any other, and well worth a try at Big Sky! I was smiling for hours afterward. If you want to take a moment to get out of your element and have a blast with your family, I cannot recommend this enough.

Note: Big Sky Resort is currently only offering one high ropes session per day (at 1 pm), and space is limited. Reservations in advance are almost always needed. Call 406-995-5769.

Extra Tip: Allow plenty of time for the high ropes course (at least the 2 hours listed). It takes time to brief everyone and get all the participants up on the structure. Expect to be patient, but as a big plus, the guides let all the kids in the group get up there first!

Costs: $59 per person

Date last visited: July 2010.

Distance off the interstate: Big Sky Resort is ten minutes off Hwy 191. It’s easy to access from anywhere in the Big Sky/Yellowstone area.

Website: Big Sky Resort

Directions: From Hwy 191 (near Bozeman), drive 39 miles to Hwy 64. Turn right (west) and drive nine miles to the Mountain Village.

If the High Ropes Course isn’t for you (or isn’t in your budget): The Big Sky area has many wonderful hiking trails. We had the pleasure of walking to see Ousel Falls in the Meadows section of Big Sky (from Big Sky Resort, follow Lone Mountain Trail Road to the Meadows community, then turn right onto Ousel Falls Road). The hike was under two miles on a well-maintained trail with many picnic areas en route, and the falls were stunning!

As I disclose with all compensated reviews, our family experienced the Big Sky High Ropes Course at no cost. This compensation came with no expectation of a positive review.

Up Next: We drive into Yellowstone National Park!

A Pit Stop a Day (Day 9): Zipline and Bungee Trampoline!

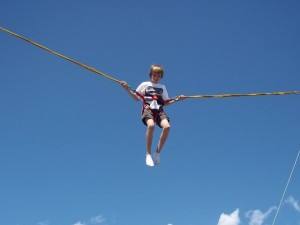
Nate gets some serious air!

We were all excited to wake up at the Big Sky Resort’s Summit Hotel and get going with an activity-packed day…without getting in our car for a change! We grabbed a quick bite to eat in the Mountain Mall, then arrived at BaseCamp (located right next door on the plaza) for our first two activities of the day.

If you’re a guest at Big Sky Resort (or a day guest), you’re going to want to spend some time getting acquainted with BaseCamp…your information and reservation center for all kinds of outdoor fun.

First up for us? A 9 am reservation for the Big Sky Zipline and Bungee Trampoline.

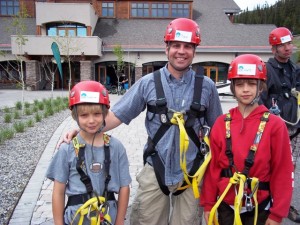
Calvin (left) and Nate (right) with our Big Sky host Dax Schieffer, all geared up and ready to go!

Having never tried a zipline before, we really had no idea what to expect, but our three guides quickly put the group (of approximately 12 guests) at ease with their friendliness and professionalism. While still at BaseCamp, they assisted us in putting on our harnesses and helmets (on which they attached name tags so everyone got to know each other that much faster), then we set off on a short (but fairly strenuous) hike up into the forest to the first line.

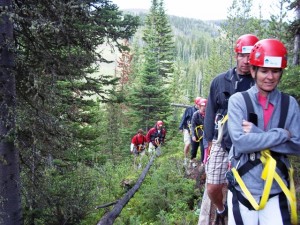
Hiking through the trees to our first zipline.

After a safety talk and demonstration by one of the guides, we lined up for our first ‘zip’ over the lodge pole pines. Calvin was determined to go first (and didn’t chicken out!). After his 12-point safety check (which the guides performed for every guest at every line), he took off 60 feet over the ground!

I was too rattled to get a good video, but by Nate’s turn, I did my best to capture his ‘take off’ on our Pit Stops for Kids Cam, along with the 12-point safety check for any anxious parents!

When my turn came, I will admit to a few nerves, but it was the most fun I’ve had in a long time! The sensation of flying over the trees was spectacular! Of course, the boys quickly wanted to get fancy; the guides were more than happy to teach them how to fly with no hands and even upside-down!

The session includes three separate zip lines (the second two in close walking distance to the first). In all, you sail over 1250 feet over streams and forest!

Calvin takes about his experience on the cam:

Plan on the entire event taking 1.5 hours. Kids have to be at least 45 lbs to participate. If you, like me, have a little one who is not big enough (but definitely brave enough), he or she can try the bungee trampoline (one ride for $10) located directly at BaseCamp while the others zipline. (But word of warning, when they get back, they’ll want to try this out, too!)

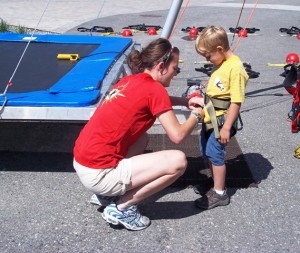
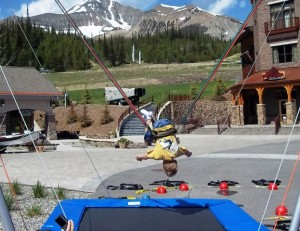
Toby gets in gear for his bungee trampoline session.

And promptly manages a flip!

Note: Reservations in advance are almost always needed. Call 406-995-5769.

Extra Tip: If you have a parent or other adult who would like to watch but not participate, the guides are happy to have you along. You can’t hike all the way to the lines, but they guide you to a great location lower down the mountain to catch all the action.

Costs: $59 per person

Other on-site activities offered at BaseCamp:

High Ropes Course (review to come!)
Bungee Trampoline
Climbing Wall
Paintball (11 years and older)
Scenic Lift Ride
Mountain Bike and Equipment Rentals (separate building)

If you think you’ll want to do more than one, BaseCamp offers ‘Adventure Paks’ (bundled deals) on the above activities. Choose any two activities for $109/person or any three for $149/person. Another great deal for families staying outside the resort is the ‘Family Fun Pool and Lift‘ Package, which combines a scenic lift ride with use of the Huntley Lodge outdoor pools, starting at only $5 for ages 10 and under to only $20 for adults.

Date last visited: July 2010.

Distance off the interstate: Big Sky Resort is ten minutes off Hwy 191. It’s easy to access from anywhere in the Big Sky/Yellowstone area.

Website: Big Sky Resort

Directions: From Hwy 191 (near Bozeman), drive 39 miles to Hwy 64. Turn right (west) and drive nine miles to the Mountain Village.

As I disclose with all compensated reviews, our family experienced the Big Sky Zipline at no cost. This compensation came with no expectation of a positive review.

Up Next: We tackle the High Ropes Course!

Family Vacation
Big Sky

A Pit Stop a Day (Day 5): Swiftcurrent Lake Cruise

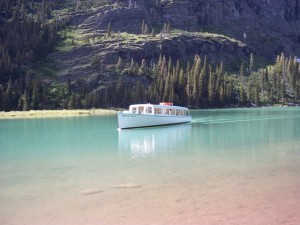
The Morning Eagle: a wonderful way to see the park interior.

Day 5 found us lucky enough to wake up once again at the Many Glacier Hotel in Glacier National Park. We spent the morning hiking nearby trails, then boarded Chief Two Guns for a Swiftcurrent Lake Cruise offered by the Glacier Park Boat Company.

What a great way to combine sightseeing, a guided tour, hiking, and boating! We departed from the dock of the Many Glacier Hotel on Swiftcurrent Lake and cruised to the opposite side (approximately 15 minutes). Passengers then walked .2 mile over a hill to nearby Josephine Lake, where we boarded the Morning Eagle, another cruise boat. From there, we crossed Josephine Lake and passengers were offered the choice of returning to Many Glacier or hiking 2.3 miles (round trip) to Lake Grinnell.

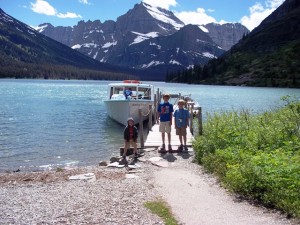
Boarding the boat after a .2 mile walk from Swiftwater Lake to Josephine Lake.

We opted for the latter (as did most passengers¦we had a group of about 30). The guided hike was simply stunning. Before we had walked ten yards, our naturalist (guide) was pointing out a moose and her calf in the reeds by the lake. Later on, we encountered moose and elk prints, many waterfalls on the mountainsides, a swinging and swaying wooden bridge, and Lake Grinnell itself. Our guide was knowledgeable, and while I usually prefer hiking without a large group, it was nice to gain the information. Besides, we were in bear country, so I didn’t mind the extra people (safety in numbers, right?).

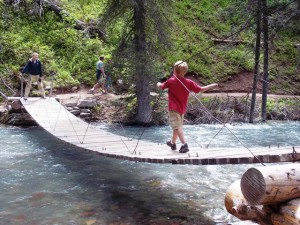
The hike to Grinnell Lake includes a wooden cable bridge over icy glacial waters!

The kids had fun on the boats (and Toby once again got to take a turn at the helm). Despite the substantial cost, we give this tour a thumbs up: we’d do it again!

Toby at the helm of Chief Two Guns.

Note: You can access Lake Grinnell and the surrounding area without taking a boat cruise. From the Swiftcurrent Lake loop trail (which begins at the Many Glacier Hotel), it’s only approximately 1.3 miles (one way). In fact, Calvin, Nate, and my dad opted to walk back from the Lake boat dock instead of waiting for the return boat: it took them 45 minutes.

Date last visited: June 2010.

Distance off the interstate: 21 miles from St. Mary, 12 miles from Hwy 89.

Admission Prices: $22 per adult, $11 per child (under 12)

Hours: Cruises across Swiftcurrent Lake and adjacent Lake run multiple times daily. Cruises with guided hike to Lake Grinnell depart at 9 am and 2 pm daily.

Food Services: None. Bring your own snacks and water, as you’re out for 3.5 hours.

Bathrooms: Pit toilets are located at two locations along the trail. They were as clean as pit toilets reasonably can be!

Website: Glacier National Park lake cruises

Directions: See directions to the Many Glacier Hotel.

Up Next: It’s winter in the end of June as we hike on a glacier!

A Pit Stop a Day (Day 1): Portland Spirit River Cruise

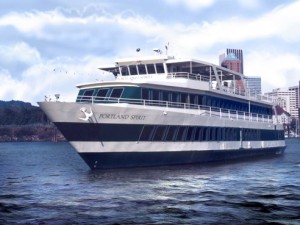
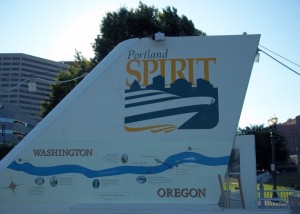
The Portland Spirit leaving downtown Portland.

Tom McCall Waterfront Park
Portland, OR

Our Day 1 route (see map) took us from our home in Southern Oregon four hours north on I-5 to beautiful Portland, where we were fortunate to embark upon the Portland Spirit for a cruise down the Willamette River.

The Portland Spirit is a 150′ yacht with three public decks, two of which are enclosed and climate controlled. We were met at the dock by the skipper (and a photographer), and shown aboard. The kids immediately made their way up the stairs to the top (outdoor) deck to take in the views (and try to climb the rails…we had to implement a safety talk at this point).

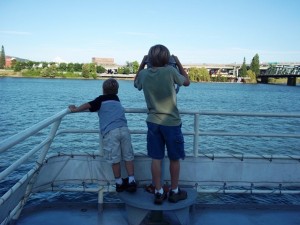
Toby and Calvin scope out downtown Portland.

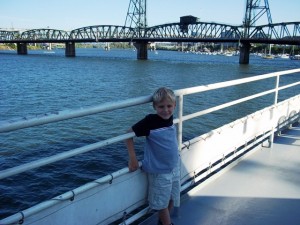
Toby was fascinated by the many steel bridges along the Willamette.

There are several maps of the Spirit’s routes on-board.

The Spirit embarked at 7 pm and cruised south down the Willamette River to Lake Oswego (there are also cruises which will take you down the Columbia Gorge and a jet boat which takes you toward the coast by Astoria). You can eat a gourmet meal aboard the Spirit, or can buy a sightseeing-only ticket; we opted for the latter, and spent the bulk of our time taking in the views on the top deck (although you’re free to explore the entire yacht).

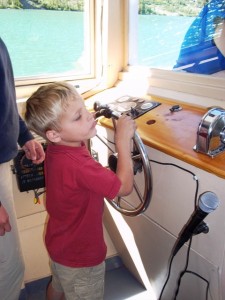
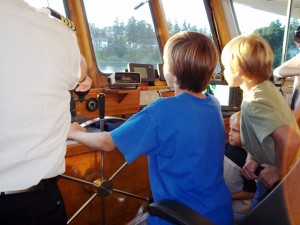
I cannot say enough about the views afforded on this cruise. The scenery was beautiful, and we had fun checking out all the mansions along the banks of the river by Lake Oswego. The many rowing and sailing clubs out on the water kept the kids’ attention, as did the many bridges we cruised under. The entire crew on-board was very friendly and helpful. On the top deck, the First Mate and Skipper were on-hand to let the kids know when the bridges would open up to let us pass and even gave them a turn at the wheel in the bridge.

Uh oh…it’s the Pit Stops crew at the helm!

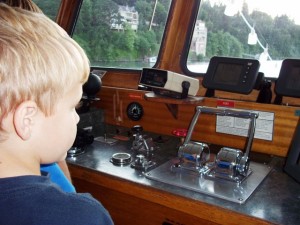
Hmm…which delicate instrument should I touch first?

A few practical notes for parents: the cruise takes over 2.5 hours. Very young children might get squirmy (although there’s plenty of room to let them walk around and play). If you want to buy additional snacks or drinks aboard, plan accordingly. We spent an extra $20 on drinks for a family of five (a cocktail each for the adults, lemonade for the kids) and $10 for a souvenir photo. There is also a small gift shop on-board.

Extra Tip! Bring sweatshirts (even in summer) if you plan (or your kids plan) to stay outside on the deck. It gets windy, and weather in the Northwest is always unpredictable.

Date last visited: June 2010.

Distance off the interstate: Approximately 10 minutes from I-5. (Be aware of possible rush hour traffic from 5-6 pm!)

Hours: The evening (dinner and/or sightseeing) cruise boards at 6:30 pm and departs at 7 pm, returning to the dock at 9:30 pm.

Admission Prices:

$68 Adults
$63 Seniors and Children
Sightseeing only (no dinner): $28 per person

Food Services: If you’re interested in eating aboard the cruise, you’ll be booking the dinner cruise. If you opt for sightseeing only, the bar is still open to you. You can buy drinks (alcoholic and non-alcoholic) and snacks at any time.

Bathrooms: Located on-board.

Website: Portland Spirit

Directions: The cruise departs from the Salmon Street Springs Fountain in Tom McCall Waterfront Park. From I-5, take exit 299B on the left for I-405 W toward US-26 W/City Center/Beaverton, then take exit 1A on the left toward Naito Pkwy/Japanese-American Plaza. Merge onto SW Harbor Dr. Turn right at SW Naito Pkwy. The park is on the right-hand (river) side of the street, and you want to look for the cross-street of Salmon St. We found a parking garage for only $3 for the night (on a Thursday after 6 pm) in the World Trade Center building directly across from the Salmon Street fountain.

More parking in the area:

Smart Park Garage at SW First/SW Jefferson
Pay lot underneath the Hawthone Bridge, accessible to northbound traffic on Naito Parkway
Pay lot north of the Hawthone Bridge, accessible to southbound traffic on Naito Parkway

As I disclose whenever compensated while reviewing an activity or location, my family and I were hosted on the Portland Spirit at no cost. This compensation came with no expectations or agreements for a positive review.

Up next! We spend the night at Portland’s Hyatt Place!

Whale Watching in Crescent City, CA

Photo courtesy of Aquarium of Pacific

1001 Front Street
Crescent City, CA

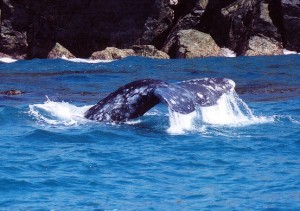
Crescent City, CA has long been a favorite location for whale watching year-round, but the best time to get a glimpse of a gentle giant or two is in May! If you find yourself traveling along scenic Highway 101 this spring, it’s well worth a pit stop on your family vacation!

Check in at the Cultural Center (1001 Front Street) first in order to see if any programs or events are being offered at the time of your visit. On May 23rd, from 11:30 am to 3 pm, a whale event is planned, organized by Coastal Commissioner Sara Wan and hosted by volunteers. (Thank you to Pit Stops for Kids reader Paul for this info!). If you don’t visit at the time of a planned event, the best locations to spot gray whales on your own are:

Crescent Beach Overlook
Enderts Beach
Battery Point Lighthouse
Point St. George

Klamath Overlook (located approximately 15 miles south of Crescent City off Highway 101 past the end of Requa Road), also offers Redwoods National Park ranger talks on gray whales every Wednesday from 2-4 pm and every Saturday from 10 am-2 pm. Bring binoculars!

Photo courtesy of Friends of Battery Point Lighthouse

Gray whales are best seen from an elevated spot close to the shore, so the locations with overlooks are your best bet! If you’d rather watch for whales from the deck of a boat, Tidewind Sportfishing in Brookings (800-799-0337) offers the chance for an up-close encounter! But if it’s not your lucky day, stop by the Marine Mammal Rescue Center instead (at the end of the park by the Cultural Center). If the sun is out, Beach Front Park also features a great playground! (Read about more family attractions in Crescent City.)

Date last visited: May 2010.

Distance off the interstate: Crescent City is directly on Highway 101 just past the California border.

Hours and Admission Prices: Most overlooks and beaches are free; some have car fees on state park land. Hours are generally sunrise to sunset.

Bathrooms: Located in Cultural Center when open.

Food Services: Picnics in the park or on beaches are your best bet! The town of Crescent City has plenty of grocery or fast food options, as well as seafood fare.

Phone: (707)464-7483

Directions: From Hwy 101 (Redwood Highway), take Front Street to Beach Front Park.

View Larger Map