Ruby Falls, Tennessee

If you’ve ever been within a hundred miles of Chattanooga, Tenn., chances are you’ve seen billboards for Ruby Falls. The signs are big and obvious and might lead you to think it’s a tourist trap, but you’d be wrong. Although it is definitely a commercial operation, Ruby Falls is well worth a visit. It is a tightly-run facility that makes good on its claims of spectacular rock formations and a breathtaking waterfall.

ruby-falls

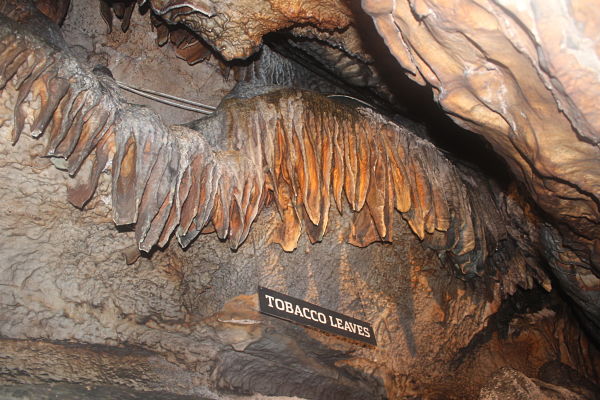
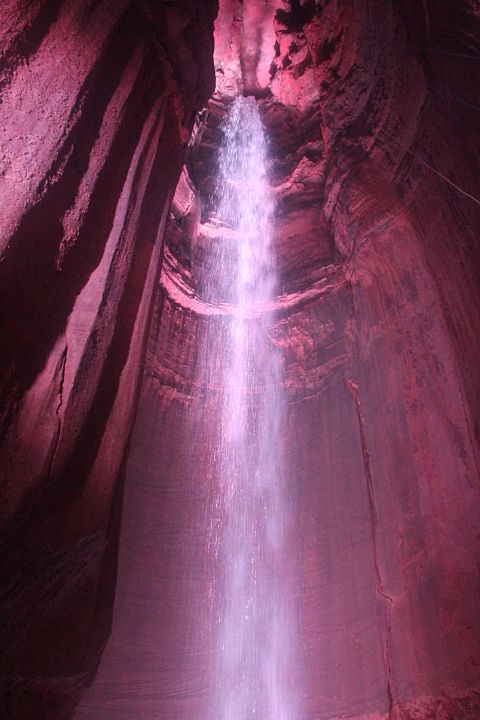
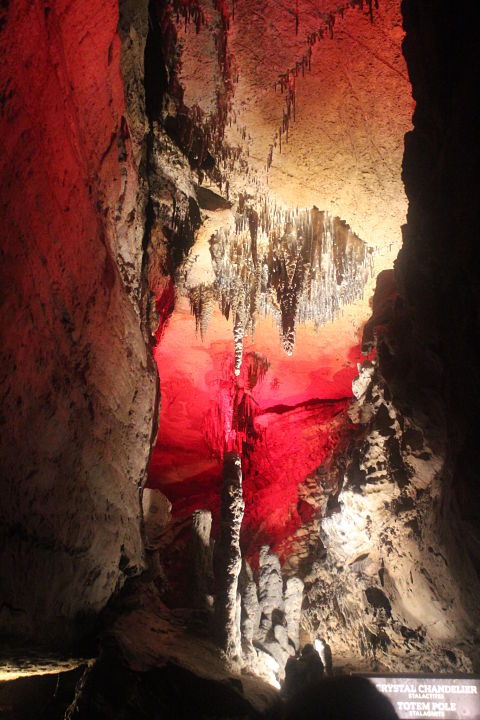
Until the early 1900s, local children played in a cave beneath Lookout Mountain. Eventually it was sealed off during construction of a railroad tunnel. A man named Leo Lambert set out to dig an elevator shaft and reopen it to the public, but in the process he stumbled upon a previously unknown cave, which ended up stealing the show. These limestone passageways contain countless beautiful rock formations. The owners have installed solar-powered electricity and colored lights that highlight the artistry of nature. And all that is before you reach Ruby Falls itself—a 145-foot cascade of water emerging from a crevasse at the top of a cylindrical cavern, a thousand feet below the surface of the mountain. It’s hard to describe the place itself except to say this: it’s worth the wait.

Wait Times at Ruby Falls:

Ruby Falls lives up to its hype, but this means there’s always a crowd. Our tour guide told us that most days, lines form by 8:15 a.m. At any given time there will be multiple tour groups navigating the relatively narrow passageways. The staff does a good job of keeping thing moving, but the sheer number of people trying to coexist in an enclosed space means that inbound tour groups have to hug the wall and wait for outbound groups to pass.

One piece of advice: Because the tour groups are large and get spread out, it’s natural to feel pressured to hurry through the cave. Don’t. There is a lot to see between one tour stop and the next. Give yourself permission to go slow, take pictures, and appreciate the natural beauty of the rock formations. Yes, you are going to hold up the line. But you’re likely to end up waiting anyway. Don’t cheat yourself of the experience.

ruby-falls

Location/Accessibility:

Ruby Falls is accessible by car from TN 148, very close to I-24 in Chattanooga, TN. Parking lots, both paved and gravel, stretch around the mountain. The day we visited, three people were coordinating traffic via walkie talkie.

Access to the cave is by elevator, but the cave is not wheelchair/stroller accessible. Although the path is paved, it’s not wide enough, and just before the waterfall there are a handful of low steps to navigate.

Most of the cave is dry, but with a running stream inside it, the floor does sometimes get wet. Passages are high enough to walk in, but tall individuals will occasionally have to duck down, and there is not a lot of ventilation, so it can feel stuffy in the passageways. The waterfall room, however, is cool, breezy and expansive.

Food/Shopping:

Ruby Falls has a sandwich/snack counter inside the building. The day we visited was cold, and they were doing a steady business in candied nuts, which were delicious. Visitors can also bring their own food and drink. There are two gift shops on site as well.

ruby-falls

Admission/Hours:

The cave tour generally takes a little over an hour, but plan to spend three hours at Ruby Falls; the line moves fairly quickly, but it’s a long line. According to our tour guide, the best way to avoid the crowds is to come between January and March. Otherwise, there will be wait times both before entry and in the cave to allow outbound tours to pass.

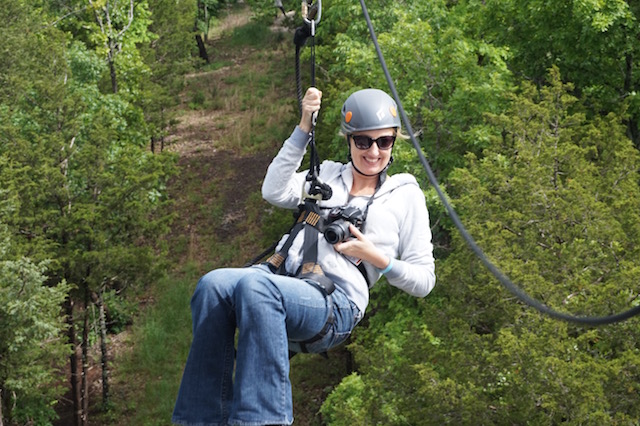
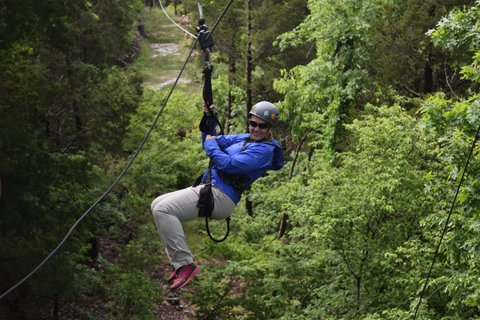
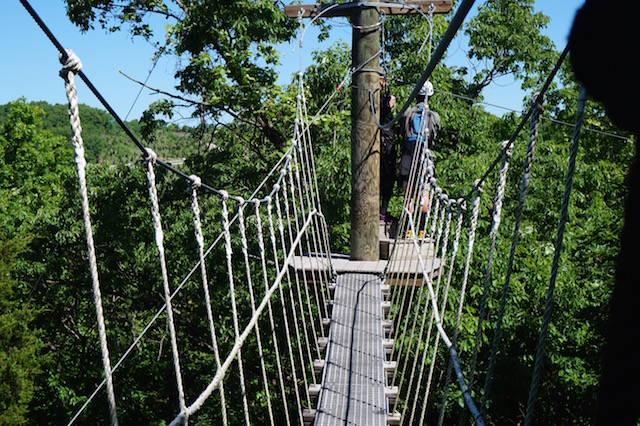
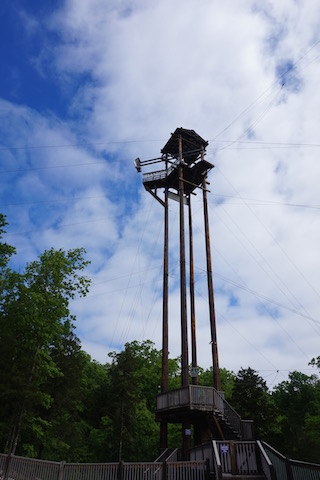
After your tour, you’ll also want to give yourself time to climb the lookout tower and let the kids explore the playground outside the upper gift shop. In the summertime, you can pan for jewels here, too. There’s also a zipline adventure course on-site, and package deals are available to combine a cave tour with the zipline and/or the nearby Incline Railway and Rock City attractions.

Ruby Falls is open 8 a.m. to 8 p.m. daily except for Christmas Day, or when heavy rains cause flooding in the cave. Admission costs $18.95 for adults and $10.95 for children ages 3-12.

As I disclose whenever applicable, our visit to Ruby Falls was complimentary, for the purpose of review. All opinions remain my own.

Touring Paris with Fat Tire Tours

While planning our itinerary for Paris with kids, I kept hearing about an English-language, Paris-based tour company that goes around on bikes. My family loves exploring cities by bike (you may remember how we gushed about Bike ‘n Roll in the States), so we contacted Fat Tire Tours and set up a morning with them.

fat-tire-tour

We chose to try their Paris Day Bike Tour, which has been a staple at the company since 1999. The tour is 3.5 hours, and covers a lot of ground. After several days of hoofing it around Paris, it was a welcome relief to be on two wheels. The Paris Day Bike Tour is designed to give visitors an overview of the area around the Eiffel Tower, Concorde, and Invalides. We took the tour on Day 3, and but while we’d seen the Eiffel Tower from afar and walked around the Louvre area, most of the stops were brand new to us.

The tour started at 9 am. After booking online, we were sent an email confirmation with instructions on where to meet the group. It was easy to find the Metro station indicated, but we almost ended up being late when we stood in the wrong place and somehow didn’t notice the group gathering. Doh! Once we were on the right track, one guide led the large group of about 25 people to Fat Tire’s office, where we could stash backpacks if needed, buy water, use the restroom, and get fitted for bikes. I worried at this point that our group would be too large to be manageable, but I shouldn’t have feared. Once we were all on bikes, the group was broken down to about 8 people per guide.

We set out within about 25 minutes, and rode primarily on streets, following our guide, with breaks from traffic on some bike paths and while on car-free paths along the Seine. While we did need to pay close attention to our guide while navigating the streets, it was easy to follow instructions and I never felt unsafe. Our kids were old enough to ride solo and follow instructions, but young kids are also welcome, as Fat Tire Tours has bikes with child seats available. I’d venture to say kids under age 5 would have a hard time in the traffic, and should be in bike seats.

fat-tire-tour

Our guide Nick was British, living in Paris, and he was a wealth of information with a fun and lively personality. The kids were always interested in his commentary as he described Paris history through the various stops at historical buildings, churches, and bridges. I appreciated that Nick didn’t ‘dumb down’ the information for children. Even when the commentary was geared more to adults, there was always the novelty of riding the bikes through the city to keep kids entertained.

I learned a great deal about some buildings I otherwise would have passed by in Paris, and Nick was able to provide advice on where else to go in the city with the kids. In fact, we would have skipped seeing the d’Orsay Museum if not for his tip to go the following morning. It turned out to be our favorite museum.

We made about 10 stops through the city, with a longer break off the bikes at a cafe in the Tuileries by the Louvre. Even though we went in winter, this garden area was beautiful, and the little cafe was perfect for an easy lunch with kids. The boys got savory crepes and soup, and the adults had sandwiches on baguette. The wine and hot chocolate were both nice, too. At the end of our tour, we got a great photo op at the tower, too.

Note: Lunch is not included in the price, but is not expensive. I believe we spent about €7 per person. We brought our own water bottles in a small backpack.

Overall, we found everyone at Fat Tire Tours to be friendly, welcoming, and energetic, from Nick to the office staff to the attendants putting us on bikes. It was a very friendly place to spend a morning in Paris, which can be an intimidating city. After our tour, the office staff gave us further advice on how to spend our afternoon. We had tickets to go up the Eiffel Tower, so we walked over from the office and spent a few hours enjoying the winter sunshine and checking out the Christmas market.

fat-tire-tours

Cost:

This half-day tour is $32 each, which I think is a steal. It was absolutely worth this and more.

Directions:

The office is located by the Eiffel Tower, and full instructions for meeting your group will be given upon booking.

As I disclose whenever applicable, our tour was comped by Fat Tire Tours, for the purpose of review. All opinions remain our own.


5 touristy things you must do on Grand Cayman with kids

Sometimes, attractions are touristy for a reason. On Grand Cayman, kitchy fun is alive and well, and well worth a place on your itinerary. The key is to augment these activities with downtime the local way…chilling on a beach house porch, taking a walk through town, or going for a sunset swim. Here’s what to do on Grand Cayman with kids (and where to stay to escape the tourist traps).

grand-cayman

Seven Mile Beach

Obviously, the top activity you’ll want to do on Grand Cayman is enjoy some beach days. Popular Seven Mile Beach lands on ‘best beach’ lists every year, and it’s easy to see why. The epitome of a tropical paradise, it stretches along the western side of the island with seemingly endless white sand and caribbean-blue sea. It’s a public beach, and does get crowded, but the calm water with very few waves makes it great for families with young kids, and the abundance of casual beach-side dining and beach bars makes it easy to grab lunch during your beach day.

seven-mile-beach-grand-cayman

‘Hell’

You may roll your eyes at the pointlessness of it, but kids will want to send a postcard from ‘hell’, the natural limestone wasteland on the island. This tourist attraction will take you a few hours max (probably less), but it’s a must-do, because you won’t be able to avoid seeing the cheesy advertising for it everywhere. There are two viewing platforms–you can’t walk out onto the limestone, so this will not take long–but the prime reason for going is to head to the post office adjacent to get your mail stamped from ‘hell’. Other than the cost of mailing your postcard, ‘hell’ is free. To get there, head to West Bay, at the far end of the island.

Mastic Trail

The gorgeous Mastic Trail earns ‘tourist attraction’ status only because of the large numbers of guided tours walking along it. You can do it by yourself for free, however. The trail is 200 years old, and winds through native vegetation, including a mangrove swamp and two million-year-old woodlands. Kids have visions of prehistoric periods swimming in their heads as they walk, adding to the mystique and adventure of the attraction. The path is gravel, and mostly flat, and good for all ages. To get there, drive 15 miles east of George Town in central Grand Cayman.

Stingray City

Any and every dive shop on the island will take you to Stingray City, as well as every cruise ship shore excursion, making it the king of tourist attractions on the island. Should you still go? We say yes…like ‘hell’, it’s so heavily promoted, your kids won’t let you skip it. And it’s fun…very fun. The snorkeling offers amazing interaction with stingrays, but also time viewing underwater corals. Stingray City is located on a sand bar only three to five feet deep, making it very do-able for families with younger kids. Plan to spend at least a half day on this activity, and to drop some cash. Adult pricing starts at $39 each, and kids $30 each.

stingray-city

Cayman Turtle Farm

Once you’ve gotten your fill of stingrays, head to the Cayman Turtle Farm for some turtle love. This attraction has more of an ‘animal theme park’ vibe than conservation center, but they do have a lot of educational programming and opportunities to interact with animals. There’s also dining on site, snorkeling, a waterslide, and the island’s largest pool.

Vacation tip: Unless staying at a major hotel along Seven Mile Beach and booking excursions exclusively through a tour company, you’ll need to rent a car on Grand Cayman.

Where to stay:

You’ve got your tourist attractions lined up, and now you need a place to stay that will take you away from the bustle of the island and all the other visitors. Luxury boutique hotel Cotton Tree is amazing, with a very private, very quiet handful of bungalows nestled in a lush, garden setting. Once on Cotton Tree’s property, the rest of the island falls away; families can feel island life in a more organic, local way with full kitchens and homemade baked goods, front porches, walking paths, and a semi-private pool area. Cotton Tree is located at 375 Conch Point Road, Grand Cayman.

grand-cayman

This post was written in partnership with Alamo Rent A Car. All opinions are our own.

Touring breweries and wineries (and how to take home souvenirs)

Indulging in a libation or two while on vacation has always been popular, but with the number of microbreweries and wineries popping up all across the country, it’s now a  legitimate way to experience a new destination. Here’s how to drink in the local culture, touring breweries and wineries on vacation, even with the kids in tow.

family-friendly winery

How to find the best local beer and wine:

You’ve arrived at your destination, and would love to get to know the wine or beer scene. The best way to go about this is with some pre-trip research, on-site polling, and dining. Ask the folks at your local hotel for recommendations, or talk to waiters or tour guides. They’re locals, and will know if there’s a craft brew or wine that’s the pride of the town. Pop into the visitor’s center or welcome center and ask about wine or beer trails. If you’re in a city or agricultural region, the answer is overwhelmingly, yes!

How to enjoy local beer and wine with kids in tow:

It can be tricky…as parents you want to unwind and enjoy a local craft brew or spend a few hours at a winery, but you also want to enjoy a family-friendly vacation. Here’s how to do both!

miners-brewery

Make it about the process or the place, not about the booze. If an afternoon’s activity is all about tasting beer, and you’re 10, you’re not going to have fun. But if it’s all about the cool fermentation process during a factory tour, kids may dig it. Find a brewery that offers behind-the-scene tours of their floor, or look for a winery with an activity, such as a grape stomp or even rows of vines to stroll through.

Designate it as a picnic spot. Many wineries allow outside food to be brought in. We try to pair a winery visit with a local hike or biking trip, visiting at the end of our outdoor activity. This way, the winery is the destination for everybody, and the kids have the payoff of fun food while Mom and Dad taste.

lawn games at wineries

Find wineries with outdoor space. Related to the tip above, a winery with outdoor space allows kids to play and explore, crucial to the experience. Many wineries have lawn games for families to play, or resident pets, like friendly dogs or bunnies. More and more wineries even offer planned kid activities.

Southern-oregon

Head to brewpubs instead of tasting rooms. A tasting room is going to be boring for kids, if they’re permitted inside at all (not likely). The good news: most microbrews are attached to restaurants, and almost all of them are highly kid-friendly, thanks to yummy pub food. Ideally, head to a pub that makes its own brew on-site, but lacking this, find a pub with local beers on tap. Parents will still taste the local culture and kids will get a great burger.

Enjoy local beer and wine in your vacation rental or room. Can’t find a kid-friendly venue to taste wine and beer? Head to a local grocery store, armed with knowledge about local brews and bottles. Look for cans of locally brewed beer and bottles of local wine, and enjoy after the kids settle in for the night.

Lodge at Suttle Lake

Look for a local craft brew or wine at sporting events. Local pride is strong at sporting events and ski resorts. Take a careful look at the menu before ordering standard domestic beer…it’s very likely they’re serving the local brew alongside the usual suspects.

Attend a festival: One of the most fun ways to experience the local beer scene, brewfests or events like Bluegrass and Beer are almost always family affairs (just do your research to ensure there will be kid-friendly activities). Most brewfests we’ve attended included games for kids, music and dancing, and even activities like bungee jumping and ropes courses for kids to enjoy while parents sample brews.

How to take it home with you:

growler
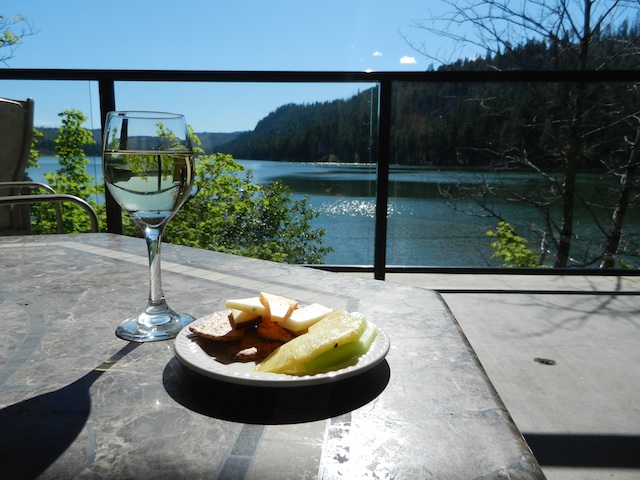
Beer and wine make for great souvenirs, albeit tricky ones to transport. When visiting breweries, bring your own growler to take some suds home with you or to enjoy in the days following your visit. At wineries, cases can be shipped home for you, but if you want only a few bottles, consider investing in a wine transportation sleeve. Our picks:

Hydroflask growler: I’m an Oregonian, so local Hydroflask is the only growler option for me! This 64 ounce flask keeps beer cold up to 24 hours, which means you can enjoy a pint or two the night of a brewpub visit, but also enjoy another round the next night…even if you’ve moved on. The walls are insulated, and totally temperature controlled. Pour your beer from the growler into the Hydroflask True Pint glass (which are also great for keeping kids’ water cool by their bedsides at night). Pick up the growler for under $45 on Amazon.

Wine skin: Pick up a padded or inflatable wine skin to transport wine bottles home without damage. You’ll need to check your luggage if flying, but if you’ve left room in your bag for a few bottles, this is still more economical than shipping wine home. We like this reusable wine skin that comes in a two-pack.


End of summer hurrah: Boat rental from Cruzin

Happy Labor Day! We hope you’re having a fun, sun-filled, and relaxed day off, this unofficial last day of summer. We’re spending our Labor Day in boating on a local lake. Do we own a boat? Nope! But as it turns out, it’s easy to rent a boat for a day.

Shasta-boat-rental

Families can rent fishing boats, ski boats, sailboats, speedboats, and even houseboats from Cruzin, a boat rental website for boat owners and vacation-goers. Think of Cruzin as a HomeAway or Airbnb for boats. We rented this vessel, a party boat holding 25 people.

Yes, we decided to host an end-of-summer, informal party on Northern California’s Lake Shasta for family and friends. And dogs…they’re welcome, too!

What exactly is a party boat?

lake-party-boat

As non-boaters, this was our first question. We were familiar with houseboats, of course, but not party boats. Basically, they’re very similar in style and structure, but instead of interior rooms, our party boat was all open air. We had two large decks (one lower and one upper), plus a head (toilet and shower) and BBQ and wet bar. Best of all, we had a slide!

How Cruzin works:

It was pretty easy to find a party boat that fit our needs on Cruzin. Starting on the website, we perused boat rentals by selecting the lake we wanted to cruise on (sorry, couldn’t resist) and the type of boat we were looking for. Once paired with a boat, Cruzin acted as a middle man of sorts with the partner company or owner (just like when you rent an apartment or home while on vacation). In our case, our partner company was through houseboats.com, located at Jones Valley Resort on the lake.

lake-boat-rental

Once we booked on Cruzin, we were sent a confirmation from the partner company, which listed all FAQs and rules. Generally speaking, Cruzin boat rentals are single day use only, but some partner companies have their own additional rules that override this. For instance, our party boat rental needed to be returned by 8 am the next morning, which meant that should we have wanted to, we could have spent the night. I’m told this is rare, so be sure to ask if you have questions. We found responses to be quick from both Cruzin and the second-party partner.

We were given clear directions to the marina, and the crew at Jones Valley Resort were so friendly, it put us at ease even though we were new to boating. They helped us haul our gear, including coolers and groceries, to the boat and back off when it was time to leave, and their marina has lots of fun outdoor games to keep the kids occupied while we got settled, like ping-pong and basketball. With a brief orientation about the boat, it was less intimidating than we thought to captain it. Did I not mention this? Our very own Pit Stops for Kids’ Dad was at the helm of our party boat, which was tons of fun. We were able to cruise around the lake, play in the water, dock on several beaches, and pick up some additional friends at the marina when needed. Since the boat holds 25 people, all our kids could invite several buddies.

cruzin-boat-rental

Boat rentals don’t end when summer ends, so keep this travel idea in mind next time you’re ready to spend some family time outside. For our crew, it was a fun detour from our usual camping trips!

As I disclose whenever applicable, our family tried out Cruzin at no expense, for the purpose of review. Without review opportunities, lowly writers like me would not be able to update readers on ways to explore the world with their families.

Del Mar Racetrack: Fun for the whole family

The following guest post is written by family travel blogger Amber Mamian of www.GlobalMunchkins.com.
Gorgeous weather, a nostalgic past, the season’s top race horses, jockeys and trainers plus free kids activities. Yes please! I’m talking about where the “Turf meets the Surf” at the famous Del Mar Thoroughbred Club in sunny California. This past weekend I had the opportunity to check out the racetrack for myself during the Pacific Classic… my family was lucky enough to tag-along.
del-mar-racetrack
Honestly what was not to love?  The grounds were immaculate, there was plenty of food, friendly staff and fun activities to keep the kids occupied all day long. Did I mention that kids receive free admission and there are free kids activities on family weekends. Amazing! It really turned out to be quite the day.  Let’s take a closer look.The drive to Del Mar is pretty easy since it is situated right along the coast and parking was a breeze too.  They even have a cute little tram that drives you to the entrance.
del-mar-racetrack-ride
Once you’ve arrived there are plenty of options to keep you entertained. I am a foodie so I always check out the food situation first. I was not disappointed. There were plenty of great options for dining including nine seated restaurants quite a few that even offered track-side dining. For the fancier restaurants and the Turf Club you must make reservations and abide by the dress code. We left those options to be explored at another time when we were sans kids. Today was all about soaking up the family day fun! So, we headed to the concession stands where they have everything from fresh caesar salad and gyros to hamburgers, corn dogs and cheese on a stick.
del-mar-racetrack
After filling our bellies we had fun walking around checking out the gorgeous paintings of past champion horses in the halls. There were also artists with equine art on display and gorgeous hats for the ladies.  My daughter who happens to be a horse lover could have stayed there for hours. The boys, on the other hand, had seen the inflatable jumpers across the track and they were ready to go play.
So, our next stop was the infield where the family area was located. I was a bit leery about what types of activities would be on the other side of the tunnel and if the free price tag could really be true.To my pleasant surprise there were a ton of fantastic activities and they were all free of charge.  Just a few tip jars should you feel obliged.
My boys wasted no time running over to the giant inflatable slides and competing with each other on the obstacle course. I appreciated that the staff had separate inflatables for the babies. (Our youngest was able to jump with kids her own size in the bounce house.) My daughter made a beeline to the pony rides where the most gentle and well groomed ponies stood waiting for her.
Next up were airbrushed tattoos and caricatures. I mean seriously guys: all free! Crazy! The wonderful caricature artist actually holds the World Record for Caricatures. He said he drew 45,000 caricatures while working at Disney over a five-year period. No amateur artist here. Impressive!
del-mar-racetrack
We peeled the kids away from the activities once the racing started. We watched a few races on the infield where there are several picnic benches and grass areas along the fence. It is actually a great view. Alternatively, there was also a bar area with tables under the shade and a giant tv screen should you want to let the kids run free and hang out to watch the races there.
After watching a few races we decided we wanted to head over towards the crowds in the stands.  The excitement as the horses galloped past and the crowd started cheering was contagious! And, we wanted in on it!The kids found a spot right on the fence directly in front of the finish line. We watched race after race in that spot because the kids loved calling out the winner. We put a little bit of money down so the kids could take in the whole experience. They chose their horses and winners received a snow cone! Okay, everyone received a snow cone but you get the point. We were having fun!

I would highly recommend the Del Mar Racetrack to my own friends and family.  Not only is it a great destination for locals but I think the track is equally as great for families passing through the San Diego area on vacation.  The track was affordable and it made for an entire afternoon of fun.  Plus, the fact that Seabiscuit once took the win there by a nose back in 1939 is pretty cool too!

The Del Mar Racetrack is open mid July- early September.  Races run five days a week Wednesday– Sunday with the first post at 2pm except on Fridays when it begins at 4pm.  Click here for upcoming events or to purchase admission tickets.
Must Pack:
  • Camera
  • Bottled water (bottles at the track are $3+)
  • Sunscreen
  • Snacks
  • Picnic Blanket if you want to sit and watch the races from the family area
  • Comfy shoes (not heels like I wore)
  • Tip money

Directions:

Del Mar Del Mar is located just west of I-5 freeway at the Via de la Valle exit in Del Mar CA at
2260 Jimmy Durante Blvd.


Amber enjoyed tickets to the racetrack as guests of Del Mar for the purpose of review.

PCT section hiking with teens

We’ve been wanting to backpack on the Pacific Crest Trail (PCT) long before it was cool. This summer, my 16-year-old and I finally set out, tackling almost 70 miles of the PCT in Central Oregon. We built up to this trip with years of family backpacking, including several 3-4 night trips, starting when my son was just a toddler. How did we fare? We had one of our best backpacking trips ever!

hiking-PCT

Our PCT section hike spanned over 65 miles from Central Oregon’s Mckenzie Pass by Sisters to Olallie Lake, outside Detroit, Oregon. It took us through the Jefferson National Forest and Jefferson Park, past the three Sisters peaks, Broken Top, Three Fingered Jack, Mount Washington, and Mount Jefferson. Every day brought new scenery, from forests depleted by fire to mountain meadows still filled with wildflowers, to rushing creek crossings, to mountain ridge lines, saddles, and peaks.

Jefferson-peak

My son and I felt a keen sense of accomplishment as we navigated landmarks along the trail with our PCT data book and topographical maps, found our own water resupplies, made and broke down camp every night and morning, carried everything we needed on our backs, and relied entirely upon each other for basic survival. This trip was a chance for my son to shine as a young man, for me to let go a bit as a mom, and for both of us to bond. We met amazing people on the PCT, both fellow section hikers like us and thru-hikers going to Canada. The community spirit was uplifting, the scenery breathtaking, and the uninterrupted time in the wilderness invigorating.

A day in the life of a PCT section hiking with teens:

PCT-hike

Each section hike will look different, depending on where you start and end, of course, but a typical day on the PCT for us looked something like this:

7 am: Wake up. Stumble out of sleeping bags on stiff legs, retrieve the food bag (hung in the night to discourage critters from nibbling), and start boiling water for coffee and oatmeal (assuming we had enough water to spare for a hot meal).

8 am: Change into hiking clothes (our only hiking clothes), doctor any blisters on our feet, and tear down camp. This involves washing any dishes (we quickly learned to have as few as possible), putting away our stove and cooking pot, stuffing our sleeping bags and pads, taking down our little tent, and filling our water bottles for the day.

8:30 am: Hit the trail. Depending on the day, we hiked between 10-15 miles. Some days, we took a break mid-morning at a water source to cook a meal if we hadn’t had enough water to do so earlier, other days we hiked straight until lunch. When is lunch? When we were hungry. Regular rules about meals and routine don’t matter on the PCT: our bodies very quickly adjusted to a natural rhythm of eating when we were hungry and sleeping when we were tired.

Mid-day stop at a vista, lake, stream, or otherwise interesting landmark: Some days, we’d go for a swim in a lake if one crossed our path, other days we washed our clothes in a creek or sat on the saddle of a ridge, taking in the view.

Late-day stop: We’d always stop at least once or twice per day to filter more drinking water as the opportunity arose. We had to keep a steady eye on our drinking supply and the water sources listed in our data book. Every day, we ran into others on the trail, and we always stopped to talk a bit. We met wonderful people, all on the PCT for essentially the same reasons as us: to commune with nature, to challenge themselves, and to live deliberately and peacefully.

lake-on-PCT

5-6 pm: Arrive at the night’s camp. Where was camp? Wherever we could find one. We always had an ‘ending mile’ planned (aka, mile 14 of the day, for instance) that was near some landmark desirable for camping, such as a lake or stream. However, campsites didn’t always appear on cue. We sometimes stopped shy of our goal, but more often hiked further, in order to come to a good campsite.

7 pm: Set up camp, make dinner (usually mashed potatoes or noodles, as we always craved carbs), and filter water, unless at a dry camp. If we had wet clothes we’d washed in a lake or stream, we hung them to dry.

8 pm: Do any dishes (remembering to follow Leave No Trace practices), string up the food bag, make sure all our supplies are tucked away in our bags, get in our sleeping bags. Once in our sleeping bags, we’d study our topographical map to get a preview of the next day’s hike, then read our books until we fell asleep (usually as the sun went down around 9 pm).

campsite-on-PCT

How to plan:

Readers of Pit Stops for Kids may remember we started planning our PCT section hike months ago, using information gleaned from PCTA.org. Click on our post, ‘How to plan a multi-night PCT hike with kids’ for details on how we chose when and where to hike.

Since that post, our section hike plan changed a few times. We lost some participants, making the trip a mother-son endeavor, and gained support via car in the form of a trailhead drop-off on Day 1, a check-in and resupply late Day 2, and a pick-up on Day 6.

Once we knew where we wanted our hike to start and end, and how many days we had to accomplish our goal, it was a simple task to break down the trip in miles per day. We then cross-referenced this information with the possible ‘drops’ along the trail (places we could be met by others who could give us aid), and determined to have just one drop during our 6 days out. To do all this, we used the Pacific Crest Trail Data Book and the topographical map dedicated to Central Oregon’s section of the PCT (available at outdoor stores or online).

three-fingered-jack

The data book will tell you where along the trail water will be available (in the form of a creek, stream, pond, or lake), but does not tell you where to find campsites (though some GPS programs do). In many sections of the PCT, hikers are permitted to camp anywhere they find an established campsite. You can tell an established site because the ground will be packed down and there may be a small spur trail leading to it from the PCT. Often, other hikers will mark good campsites with cairns (piles or rock), handmade signs using sticks for arrows on the dirt, or trail marking tape.

How to pack:

When we backpack for a weekend or up to three days, we like a few luxuries in our packs, such as hammocks, camp chairs, and java presses. I know, I know. But when we section hiked the PCT, we went bare bones, in order to be as lightweight as possible. Here was what was in our packs (and nothing else), for a total of about 25 pounds per pack:

Clothing:

  • 1 set of hiking clothing (quick dry pants, t-shirt)
  • 3 pairs wool hiking socks
  • 2 pairs underwear
  • 1 set of base layers (long underwear, preferably wool)
  • 1 down or down-alternative jacket (lightweight, easily stuff-able)
  • 1 rain jacket
  • 1 pair of lightweight sandals
  • 1 pair hiking boots
  • sunglasses
  • sun hat
  • thin gloves

Equipment (divided between two people):

Food (again, divided between us):

We have a tendency to over-pack food, and we managed to do this again, even though we meticulously planned our meals. We have much smaller appetites than we anticbackpacking-food
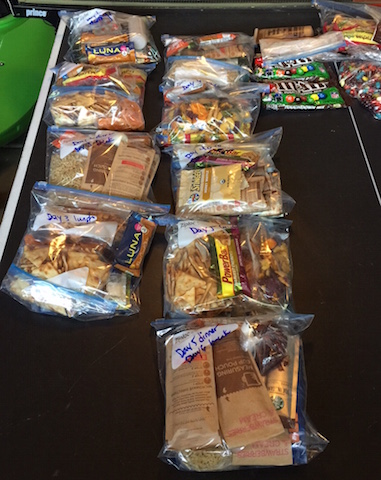
ipated, given how much we worked on the trail. We could barely manage to eat about 300 calories each during the evening meal, and we calculated double this amount. Whoops.

Breakfasts:

  • instant oatmeal packets (mix the hot water right into the paper sleeves if they’re the lined kind)
  • instant coffee (for us, only Starbucks VIA will do)
  • handful of dried fruit

Lunches:

  • protein bar of your choice
  • dried fruit
  • veggie chips or pita chips
  • tube of peanut butter to spread on chips
  • envelope of tuna
  • beef jerky
  • snickers bar or M&Ms to snack on

Dinners (one of the following):

  • instant mashed potatoes (we like Idahoan)
  • Top Ramen
  • dehydrated backpacking meal
  • mac and cheese
  • instant soup
  • envelope of smoked salmon or jerky to add to the carb-heavy meals

We essentially rotated these basic foods over and over. And yes, we got tired of them.

Tips we learned on the trail:

Look for trail signs: while many places along the PCT are not officially marked with mileage and other helpful tidbits, other hikers have often left signs to follow. Look for cairns that will direct you to the correct trail, or hand-scratched ‘pct’ letters in logs or even rocks. During one lucky moment, someone just ahead of us on the trail had made an arrow of sticks to indicate a hidden spur trail to an excellent camping site. When we met her later, we thanked her! Another time, we were almost out of water when we ran across a stick with these words in Magic Marker: “Washington Pond: 1/4 mile, muddy but if desperate?!” We were!

sign-on-PCT

Stop to talk with other hikers. They’re awesome, down to a person.

Let your kids have responsibilities. During our hike, my son was pretty much an equal with me, making important decisions and partnering in all the tasks and work. We both loved this. He’s preparing for bigger and longer hikes in his future, and I will know he’s prepared.

Stop to rest when it feels right. A few times on the trail, we pushed ourselves for no reason other than to ‘make good time’. When the only task of the day is to hike to the day’s destination, don’t be afraid to spend the whole day doing it.

Eat when you’re hungry. Once, we stopped at a creek mid-hike and decided to get out the stove and make a big bowl of chowder at 3 pm. It was supposed to be our dinner, but we wanted it then. We didn’t regret it.

Don’t duplicate equipment. It seems silly now, but we brought two stoves (very small and lightweight) and two pots (not so lightweight). We thought we might want to convenience of boiling two pots of water simultaneously (to have coffee and oatmeal at the same time, for example). We ended up preferring to have patience rather than carry the extra weight.

Issues to be prepared for:

When hiking most of the day, every day (regardless of mileage), certain physical issues may occur. It’s not fun to talk about, but…

rain-PCTChaffing: Skin rubbing against skin for hours at a time can cause major discomfort in sensitive areas. The solution: antibiotic ointment or Vasoline applied before hiking. It can also help to change underwear.

Diarrhea: Lots of water, plus lots of physical exertion, plus exposure to the elements and different food than usual can wreak havoc on the digestive system. Give it a day or two before worrying, making sure you continue to hydrate. Of course, make sure to filter or boil all water.

Bad moments: There will be low moments. Maybe the incline in the trail will seem endless, or a wind and hailstorm will beat down. Maybe you’ll be thirsty or hungry or your feet will be in agony. It’s good for kids (and adults) to remember that pain, discouragement, and suffering can be temporary, and that they can get through these times. Truly.

Blisters: AKA, the bane of my existence on the trail. I always get blisters, no matter what preventative measures I take. Bring lots of moleskin and athletic tape, use skin-tac to make your skin around the blister tacky before applying moleskin or bandages, and make sure your shoes fit properly. If you have tips for avoiding or fixing blisters on the trail, please let me know.

Dehydration: Ask your hiking partner when he or she peed last. Trust me, it’s an acceptable question on the trail.

Was it all worth it? Absolutely. Would we do it again? We definitely will, in-between more 2-3 day backpacking trips with all the kids.

Exploring Holland Michigan with kids

The following post is written by Pit Stops for Kids’ Midwest contributor, Kate Basi.

The town of Holland, Michigan was settled by Dutch immigrants in the mid-19th century, and has made a name for itself as a go-to destination for experiencing Dutch culture. Situated near Lake Michigan, three hours from both Chicago and Detroit and 35 minutes from Grand Rapids, Holland boasts two stand-out attractions for families.

Nelis’ Dutch Village

dutch-village

One part amusement park, one part living history, and one part quaint shopping district, the Dutch Village is a compact, charming replica of 19th-century Dutch culture.

Originally opened as a retail shop for the Nelis family’s tulip growing operation, the village now boasts a carillon, cafe, pub, extensive gift shop, and attractions for kids and adults alike.
 
Start your day by saying hello to the families of ducks paddling in the Village’s decorative canals. Then listen to a performance of the “Gouden Engel” (golden angel), a 1920s street organ. This wooden-piped, ornately carved and painted work of art includes drums and mechanical figures. Periodically through the day, costumed employees converge on the square in front of the organ to demonstrate klompen dancing. Afterward, the crowd is invited down to learn a basic dance.
dutch-village-with-kids

All-you-can-ride carnival-style swings, windmill-themed Ferris Wheel, small zip line and carousel are included in the admission price. For the little ones, there are also “petal pusher cars,” which run on railroad tracks and are powered by the children themselves.

It’s not all carnival rides, though. The Nelis family has set up a mock Dutch village where visitors can see short (5 minutes or less—perfect for little ones) demonstrations from cheese making to wooden clog making. You can even be weight on a scale to prove you’re not a witch. There’s also a petting zoo (hand sanitizer provided!).
Keep your eyes open for gems not included on the map. Behind the zip line stands a trio of old-fashioned water pumps attached to gutters for racing rubber duckies. Beside the school house you’ll find not only a bean bag toss, but a contraption that I can only call a “tandem” snow board.
Nelis’ Dutch Village is ideal for kids in the 3-10 age range. Plan at least four hours for your visit, and don’t be surprised if the kids clamor to stay until closing time.
Whether or not you have time to spend in the park, take time to visit the cafe and souvenir shops, which are accessible from outside the park. The cafe serves kid-friendly fare and Dutch specialties like Kroketten, a fried meat pastry, and Saucijzebroodjes, a sausage pig’n’bun. Kids can also make a “stroopwafel,” a thin waffle cookie spread with a cinnamon-sugar concoction.
The cafe offers the usual souvenir fare–t shirts, shot glasses and the like–but the real gems are found in the collection of Dutch gifts—blue china, cuckoo clocks, and other beautiful artwork.
Nelis’ Dutch Village is located at the corner of US Highway 30 and James Street. Hours vary by season and are posted on the website. (link: http://www.dutchvillage.com/park/hours.html.) Admission is $11 for adults and $9 for children 3-15.

Windmill Island Gardens

Windmill Island Gardens, operated by the city of Holland, Mich., is a beautiful preserve and botanical garden at the edge of the downtown area. 

Entering Windmill Island, you will drive through a marshland grown up in cattails. The scent of flowers greets you upon getting out of the car. A street organ sits at the head of a breathtaking flower garden and lawn, where the mysterious snow-board contraption makes another appearance, along with hoops and sticks. Both of these are unique play opportunities for kids to enjoy while parents listen to frequent organ concerts.
windmill-gardens
The highlight of the grounds is, of course, the picturesque De Zwaan (the swan) windmill. This 250-year-old structure was relocated from the Netherlands, still in working order, and actually grinds grain that can be purchased on site. Costumed guides give klompen dancing demonstrations and offer tours of the first five levels of De Zwaan. Kids can turn a miniature millstone, and you can see World War II bullet holes in some artifacts on display. Although the inner workings of the windmill are fascinating to adults, the highlight for kids is going out on the “gallery,” where you can touch the windmill blades when the windmill is not in operation.
Note: although the rest of the grounds are accessible, the upper floors of the windmill are reached via stairs; strollers will have to be left at ground level.
There are picnic tables, and visitors are encouraged to bring food. The carousel here is smaller than most, so it’s particularly good for little ones. Behind the carousel you’ll find a playground and a small courtyard where children are encouraged to water from a rain barrel and get up close and personal with herbs and edibles.
If you want to get out of the sun, a building adjacent to the gift shop houses a 1930s-era model town (think model railroad, but with boats instead of trains). The gift shop offers snacks and Dutch souvenirs as well as bags of De Zwaan bran, corn meal, wheat flour, and so on.
windmill-island-mi
While you’re on the grounds, you might well see people kayaking in the canal that flows through the property. Kayaks are not rented on site, but can be rented in town.

Windmill Island, located at 1 Lincoln Ave., is open 9:30a.m. to 6p.m. daily from mid-April to the beginning of October. Admission is $8 for adults and $5 for children 5-15, but residents of Holland are admitted free with proof of residency.

As we disclose whenever applicable, Kate and her family experienced Holland Michigan with compensated attraction tickets, for the purpose of review.

Multi-day kayaking in the San Juan Islands

Families will always see more detail of the area they’re traveling by car rather than by plane, and even more by bicycle than by car. In the San Juan Islands, there’s no better way to explore this vast network of islands than by kayak.

overnight-kayaking

On our previous trips to the San Juan Islands, we arrived by ferry, then visited two islands: Orcas and San Juan. This time, we decided we were ready for the bigger adventure of a multi-day kayak trip in the San Juan Islands, camping on remoter islands en route. We embarked with Crystal Seas Kayak, setting out on a perfectly sunny June morning. For two nights and three days, nothing stood between us and the tides, islands, sea, and sky.

What to expect on a Crystal Seas Kayak trip:

After booking our Crystal Seas trip, we were emailed a detailed packing list and FAQs, so we’d know what to bring. In a nutshell, we needed personal items such as clothing, sleeping bags, headlamps, sun protection, and toiletries. Crystal Seas provided everything else, including all food (and meal preparation), tents, sleeping pads, kayaks, and of course, guidance in the form of two guides.

crystal-seas

We met our guides, Brett and Corey, at a designated pick-up location on San Juan Island. This location is usually the ferry dock at Friday Harbor, but Crystal Seas will work with you if a different pick-up location is more convenient. Both Brett and Corey are local to the islands; having grown up in the San Juans, they knew all the ins and outs of the many islands, currents, and tide flows. We were happy to spend three days with both of them.

We shuttled by van to our put-in spot, the San Juan County Park campground and kayak launch on the east side of the island. We transferred our gear to dry bags, and learned how to load our sea kayaks (they’re like clown cars…it’s amazing how much gear fits!). We headed off by mid-morning, paddling to adjacent Henry Island for our first lunch. We then continued across a few miles of open water to reach Stuart Island, our home for the next two nights.

kayaking-san-juans

We paddled approximately 14 miles from our launch site on San Juan Island, but we took most of the day to do it, stopping to look at interesting sites in our kayaks and taking occasional land breaks. As an occasional kayaker (not a total newbie), I didn’t find the distance too strenuous, but we did find it satisfyingly challenging.

Our kids, ages 16, 13, and 10, fared just as well, if not better, than me and my mom, who joined us for this multi-generational trip. The paddling was less challenging for the teens of course, but it was crucial that they listen to instructions by our guides, because while the water looks calm in this part of the Salish Sea most of the time, the currents and tides are to be respected. Without our guides, we absolutely would have made big mistakes, even though we could see land of some sort at all times.

The ‘marine trail’ campsites at Stuart Island’s Reid Harbor are dedicated for human-powered watercraft only, which means kayaks, not motorboats, sailboats, or yachts. The latter can anchor in the bay, and we enjoyed seeing all the watercraft there, but appreciated that the campsites were more isolated, tucked away in the trees just past the beach.

We set up camp before dinner, each group of two finding a spot for their tent and setting it up. We explored the beach and dock, the kids taking a swim (brrr!) and spotting seals, sea stars, and seabirds of all sorts. After appetizers (yes, really!), we sat down to a dinner of salmon, freshly mashed potatoes, and salad with local greens and homemade dressing. Dessert was a pecan pie brought from a local bakery in San Juan (more on food later).

kayaking-crystal-seas


We settled in for the night by 10 pm (when it starts getting dark at this time of year), and while I woke at first light, the kids all slept in. We planned to remain camped in cozy Reid Harbor, taking a day paddle to explore nearby islands and hike. We enjoyed this more leisurely day, but Brett and Corey also offered an alternative itinerary, which would have included packing up and camping at another island, Jones. While Crystal Seas has a general itinerary set for each trip, we found there was a lot of flexibility when possible.

stuart-island

Our Day 2 included a beautiful paddle around Johns Island, where we floated past a colony of seals and looked for orcas in the strait (no luck this time!). We picnicked lunch on a tiny island (I’m sure it has a name, but I don’t know it, and my map shows it only as a speck!), then paddled ‘home’ to Reid Harbor, where we rested (and they kids played on the beach) before our hike up the nearest ridge to view the islands from 800 feet above sea level. This may have been one of my favorite moments on the trip: the view looked like the most perfect 3D map of the islands I could have asked for. In the sunlight under a blue sky, we could see all the way to the Olympics in one direction and Mt. Baker in the other. We spotted all the islands we’d paddled by, and Brett and Corey pointed out Roche Harbor, on the east side of San Juan. It looked surprisingly close, which is a lesson we learned kayaking in this area: distances are very hard to gauge on the water.

san-juans

We enjoyed another amazing meal, then rewarded the kids with a full buffet of s’mores ingredients. Our teens loved making campfires each night, and having the freedom to explore the campsites and nearby trails.

One of the things that makes backcountry trips, of any sort, so special for our family is the together-time. Without electronics, friends, or schedules in the way, the kids play together like they used to when they had less responsibilities and less social life. This trip was no different. Our youngest got his brothers back, and the teens got their childhood back.

They made swords out of sticks, skipped pebbles, spotted schools of fish, jumped off the dock, and wrestled on fallen logs. In other words, they had untethered ‘boy’ time.

reid-harbor-camping

Our last day, we packed up camp early, in order to paddle back to San Juan with the current in our favor. Thank goodness for Brett and Corey, who know these things! We paddled hard the distance back, with few breaks, necessary in this direction, but again, it felt satisfying to accomplish a hard day’s paddle in just a morning! We picnicked lunch back at the put-in spot, then shuttled back to our car. Looking out over the view of the Salish Sea while we ate our last meal together, we weren’t quite ready to leave!

Food on Crystal Seas trips:

In a word, the food is fantastic. We’ve been on several multi-day rafting and kayaking trips, and the food is always good, but Crystal Seas takes it a step further, serving as many local foods as possible. I’d estimate 70% of the foods served were locally sourced or grown. In addition to our salmon meal, we had a wonderful meal of beef and veggie tacos, plus lunches of caprice sandwiches and salmon wraps and breakfasts of bagel sandwiches and yogurt parfaits. There was always fresh fruit, fresh veggies, and snacks like organic chips, top quality trail mix and bars, and spread and dips.

crystal-seas-food

Note: no alternatives to the meal served were offered to children, so if you have a pick eater, let them know ahead of time. They absolutely accommodate all dietary needs, so I’m sure they could accommodate a child who needs a simpler meal. Our teens ate everything in sight, and our 10-year-old like 90% of the meals, but would have been happy with a plain PB&J a few times.

Helpful planning tips:

If you book at multi-day kayak trip with Crystal Seas, here are a few tricks and tips we learned along the way:

  • If you have a car, but you’ve checked out of your accommodations, park at the courthouse parking lot in Friday Harbor. We parked here on recommendation of Crystal Seas, and our car was secure without a parking fee. They picked us up here, too.
  • Organize your gear the night before. While you won’t have your dry bags until you’re at the put-in spot, you don’t want to be organizing your gear from your suitcase or duffle full of clothes at the dock. We set aside all the clothing and personal items we’d need for each person, and packed them in one large packing cube per person. They we only had to transfer the packing cube to the dry bag.
  • You’ll get a separate dry bag for your sleeping bag. The best type to bring is a lightweight down or down alternative bag, which packs down smaller than a camping bag.
  • Don’t forget any medications you might need. We all needed allergy medication during the trip, and luckily we had it with us. The guides will have a medical kit, so we probably could have left ours in the car.
  • Be prepared to get dirty! The campsites are rustic, and there are no showers (though there is a composting toilet at the campground). We brought Wilderness Wipes with us to freshen up a few times.
  • Be prepared for all weather. We lucked out with three perfect days, but we all had rain jackets and down sweaters with us, as well as gloves and beanie knit hats for everyone. On the flip side, we also had sunglasses (a must on the water!) and sun hats.
  • You’ll have a ‘skirt’ on in the kayak, keeping your lower half dry, so don’t worry about being wet and cold while paddling. Arms will get a bit wet from the paddles, but if it makes you cold, wear a rain jacket under your life vest.
  • Don’t forget to tip your guides. Our worked so hard…they definitely deserved it!

Disclosure: we experienced Crystal Seas on a media rate, for the purpose of review. As always, all opinions are our own.

Ozarks with kids: Branson Zip Line

Driving into Branson from Springfield on Highway 65, families won’t be able to pass Branson Zip Line at Wolfe Creek Station without the kids noticing the tall towers and cables stretching over the beautiful Ozarks. Go ahead and stop, because if you plan to include zip-lining in your Branson stay, this is the place to do it.

branson-zip-line

A lot of zip lining operations have popped up in this area, but Branzon Zip Line sets the industry standard in the Branson area. Their guides have training on par with the most extensive operations across the US, and the location at Wolf Creek Station has some history to it, too.

Families will want to make reservations in the summer months, because this place gets popular. However, their check-in area and waiting areas are run smoothly, and there’s plenty to see and do while you wait…including nice outdoor areas. Even the gift shop has some interesting and unique items.

branson-zip-line

Kids need to be at least 70 pounds to take the tours, which is heavier than some zip line companies we’ve tried, so come prepared for this. Families choose form three main packages that range from three zip lines to seven, with sky bridges in-between, or can do a combo tour of all eight zip lines and 10 bridges. Alternatively, it’s possible to do the Blue Streak Fast Line and Free Fall separately or as an add-on. The latter is a zip line and tower free fall from 100 feet up. It’s the main structure visible from the highway, and yes, dare devil kids will beg to do it.

zip-line

Each tour is about 5-10 people, with 2-3 guides, depending on guest number. After a safety briefing and getting outfitted into harnesses and helmets, groups head to the zip lines in a Pinzgauer Swiss Army Troop Carrier. This ride alone is quite fun, as the jeep-like vehicle bumps along the rutted dirt roads up Wolfe Mountain.

branson-zip-line

Throughout the tour, the guides give history on the area and the Wolfe family who owned it. We had excellent guides who were fun, personable, and attentive…definitely among the best we’ve encountered on multiple zip line excursions throughout the US. Branson Zip Line is definitely one of the more ‘hands-off’ zip lines we’ve experienced; there’s very little guests need to be aware of, as guides will click and unclick you from the lines at all times, and it’s not necessary to stop yourself with gloved hands.

We opted for the ‘Ridgeline’ tour, which included three zip lines and several bridges, and took about 1.5 hours. We didn’t opt for the 100 foot free fall add-on, but the Ridgeline does include a smaller 40 foot drop. The free falls are actually a lot less scary than they sound: you’re attached to a mechanism that allows you to fall for a short period, then smoothly and gradually slows you down before you reach the ground. It’s not jarring or particularly frightening to most people, but can be detoured around should you wish.

zip-line-tower

Distance from the interstate:

The zip lines are located directly off Highway 65, seven miles from Branson.

Cost:

Prices vary by tour, of course, but check this price sheet for current info. Zip line prices start at $69 for adults, $59 for kids, with the Blue Streak single zip and free fall add-on for $44.99. The best deal in the place is the family pass, which is $199 for two adults and two kids, or $249 for two adults and three kids. Kids are considered 17 and under, which is really nice.

Hours of operation:

Hours vary by season, and the operation is closed in winter. Check the website for current hours, but at the time of our visit in early season (spring), tours began at 8 or 9 am.

Directions:

Simply head seven miles out of Branson toward Springfield on Highway 65.

As we disclose whenever applicable, Pit Stops for Kids experienced Branson Zip Line as a guest of the operation, for the purpose of review. All opinions are our own.