DeLorme inReach or SPOT Gen3: Which GPS messenger to buy for outdoor adventure

Do your teens hike without you? Do you venture into the backcountry as a family? In winter, do you like to snowshoe, camp, or ski off-piste? If you answered ‘yes’ to any of the above, you’ve probably considered outfitting yourself or your kids with a GPS device for the field. In our opinion, these two devices are the best on the market for hikers, backpackers, and backcountry skiers. Here’s our observations and recommendations for which GPS messenger to buy for outdoor adventure:

The difference between DeLorme inReach SE and SPOT Gen3:
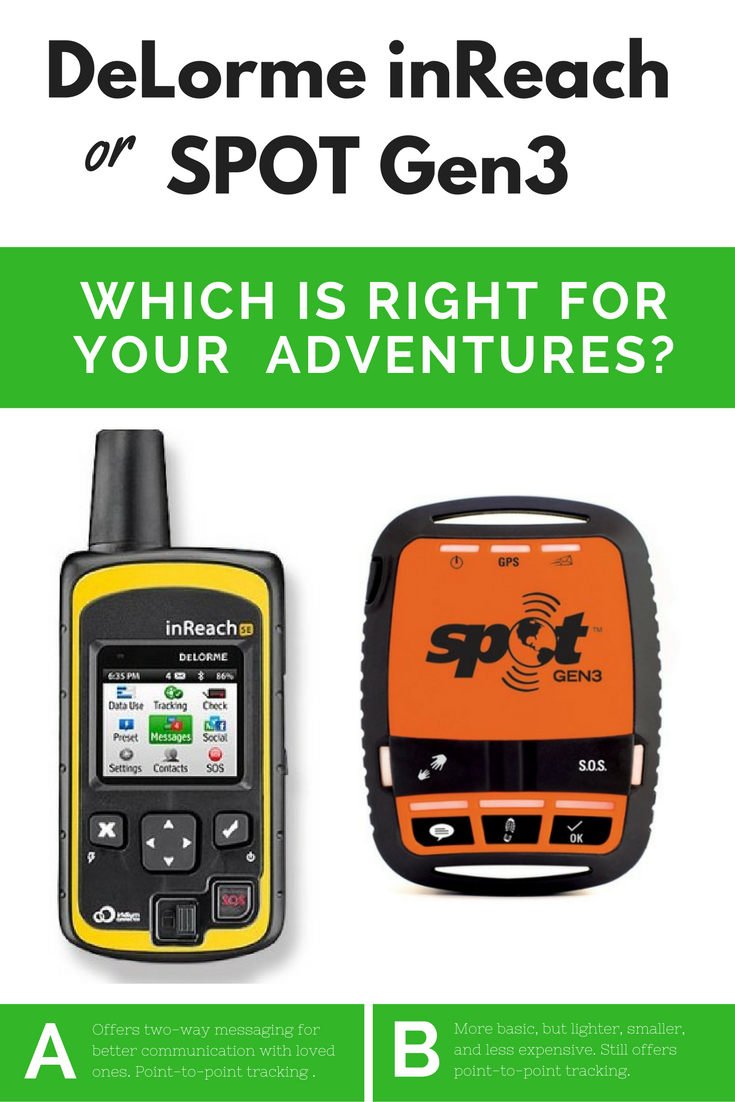
GPS-messenger

DeLorme inReach SE in a nutshell:

Our inReach SE and I are very close, because I clung it its updates as our son was hiking on the PCT. He used it for the entire 457 miles. This was the lifeline we absolutely needed with a kid on the trail. The SE does the following:

  • Emergency service: Your personal locator beacon sends SOS signals with GPS location data to GEOS worldwide emergency response; communicate with GEOS via 2-way text messaging throughout the rescue. We’ve never used it, and in fact, you have to slide a little panel over to activate this button, to prevent accidental activation.
  • Point-by-point tracking: You can set the SE to track progress as often as every 10 minutes. Progress is shown on DeLorme’s website portal, MapShare. You invite people to MapShare, which is where you follow along at home.
  • Two-way messaging: Pay attention, because this is inReach’s best feature. You can send both pre-set messages that you customize yourself to friends or family (things like Everything is ok to I may need help) AND you can message free-form, just as you would via text. This means you can have actual conversations with the inReach. Example: Stopping here for the night. From parent: Did you find water? Answer: Yes, great spring here. You can text via the inReach’s key pad (clunky and slow, but it works) or via your phone, if you’ve opted to pair it. For the person at home, messages come through as either emails or texts (you decide). You text back via the MapShare portal, either on your phone or on a computer screen.
  • Smart phone pairing: Before leaving on your trip, you can pair your inReach with your phone, which allows you to use the included EarthMate app in the field (even when you don’t have cell service). This app gives you a map view, and also lets you text with more ease. Bear in mind: if you do this, you’ll need to worry about keeping two devices charged: your inReach and your phone.

So, does it work?! YES. We loved the inReach, and found it reliable. You can expect delays from five to 20 minutes in some areas (both in tracking and texting), but it literally worked everywhere, with one exception: while hiking through Native American reservation land, it went dark. The MapShare portal was easy to use, too.
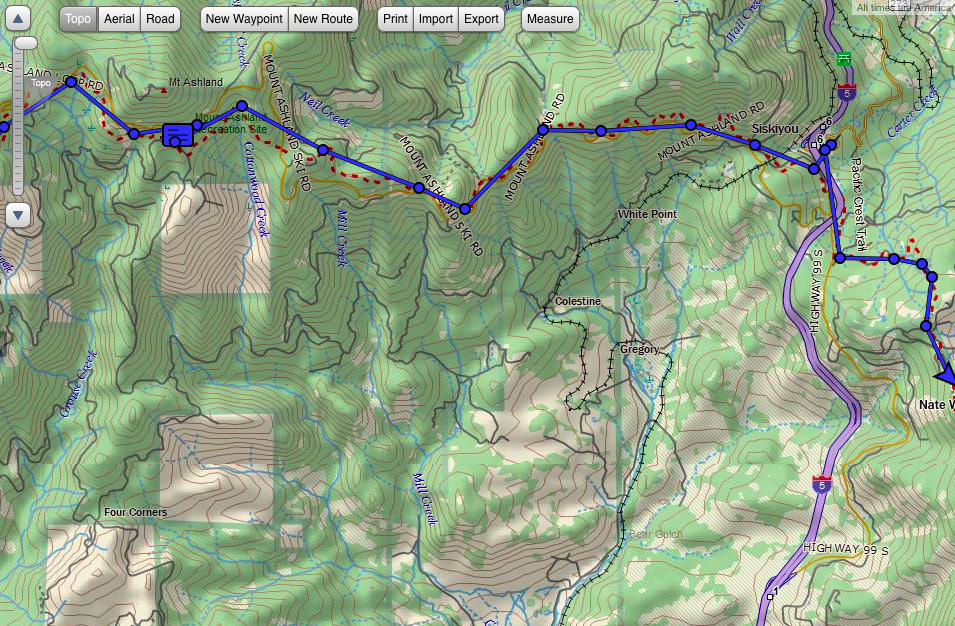
DeLorme-in-Reach

Things to keep in mind with inReach:

Battery life is pretty good; we found that when placed in ‘track every 10 minutes’ mode and turned off at night, the inReach had about three days in it before needing to recharge (via USB cable). We charged with a wall plug when possible, and with a solar panel charger in the field.

The inReach weighs about seven ounces, and attaches to any backpack strap via a clip. We liked that it beeped when there was a new message (helpful when it’s not always in front of you) and beeped to confirm messages were sent. You navigate around the inReach with the keypad and up-down arrows. If you remember your old phones of years bygone the ‘up-arrow, left, left, down-arrow, enter’ drill to command it, it’s like that.

You DO need a subscription plan with the inReach: you can opt to do month-to-month (starting at $14/month) or annual plans (around $150 or starting at $12/month). The plan we picked was about $30/month, which included unlimited texting and tracking. The cost of the actual device is $299. Right now, it’s on sale on Amazon for $263.

Can you upgrade? Yes. If, in addition to all the features above, if you also want to have built-in navigation (in which you plan your route, drop waypoints, and then follow the path with arrows on your screen), you’ll want to upgrade to the DeLorme inReach Explorer for an extra $100 or so. We wished we had this feature a few times when in snowfields, when the trail was not visible. It would also be good for anyone who travels off-trail. This said, it’s possible to pair the inReach with your phone, and download maps there. Then you have two things to carry and charge, though.

SPOT Gen3 in a nutshell:

If your explorer in the field doesn’t need quite as much hand-holding (or you’re better at letting go than I am!), the SPOT Gen3 is simpler, lighter, and more streamlined than the inReach. If you want the TL;DR version of this entire review, here’s the difference between them: the SPOT Gen3 does NOT text back and forth, and therefore does not allow for a two-way conversation. But it has other great features. Here’s what it does:
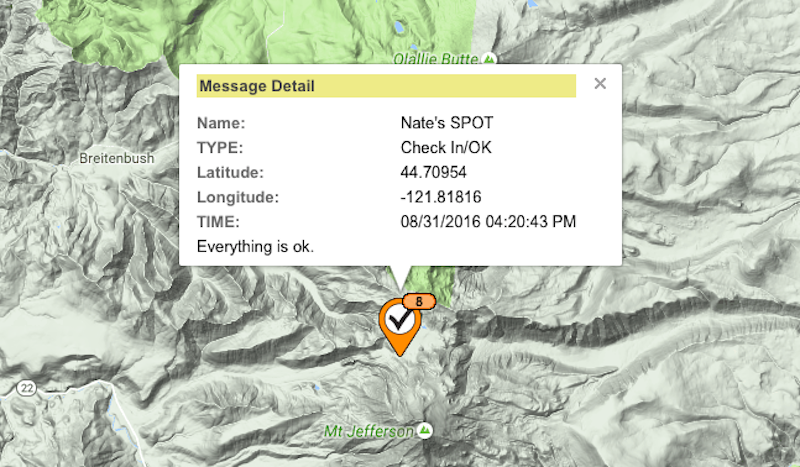
SPOT-Gen3

  • Emergency service: SPOT’s emergency service is the same as inReach; you get immediately connected to GEOS. But there’s a second feature that inReach lacks: there’s also a NON-emergency help button. This button goes out to your pre-set friends and family (NOT to 911), alerting them that you need assistance. It sends your GPS location on a map when it does so. This is a nice feature for if you get a flat tire, run out of food and need a person to bring you some, or hurt yourself but can walk your way out.
  • Point-by-point tracking: Yes, you get this too…same as the inReach, for the most part. SPOT will track your movements as often as every 2.5 minutes, if you opt for an upgraded plan (more on that below), but generally tracks every 10, 30, or 60 minutes. Family at home can see tracking in almost real time via SPOT’s portal, called FindMeSPOT.
  • Custom messages: Like inReach, you can create custom messages you want to use with SPOT, which you set ahead of time on the web portal. Think Found our campsite or Having a great time. There’s also a set button for OK. That’s all it will say (with GPS location via a map), but it’s very convenient if you don’t want to hassle with buttons and key pads.

Does it work? Definitely. The Gen3 does what it says it will do, so as long as you know its limitations, you won’t be disappointed.

Subscribe to our Pit Stops for Kids seasonal newsletter, and get an exclusive travel ‘cheat sheet’, free! Click here!

backpacking-trail

Things to keep in mind with SPOT Gen3:

This is the way to go if you don’t need to download maps (there are lots of other apps for maps, if you want them on your phone separately from your GPS device), don’t need to have back-and-forth conversations with people, and don’t want to mess with navigating through a clunky keypad to do things. We love that one button sends an OK message with a map of location, and that the SPOT is only four ounces and attaches to your pack with a carabiner.

Battery life is longer on SPOT than inReach (they claim 150 hours, but I don’t think it was quite that great). You re-charge it via USB, just like the inReach. I like that both these GPS units have rechargeable batteries; some other devices require you to buy expensive replacements.

The SPOT doesn’t make noises to indicate messages have been sent, but it does light up, which is nice. I just like having some sort of confirmation.

The Gen3 is $150 (half the price of the inReach), so if you don’t want two-way communication, by all means, don’t pay for it. You do still need a service plan, and it will be about the same price as the inReach: $14/month or $150/year. There is NOT an option of a month-to-month plan, which is a bummer.

Can you upgrade? No, but you can downgrade to the $99 SPOT Trace, but it’s pretty bare-bones and designed for car tracking.

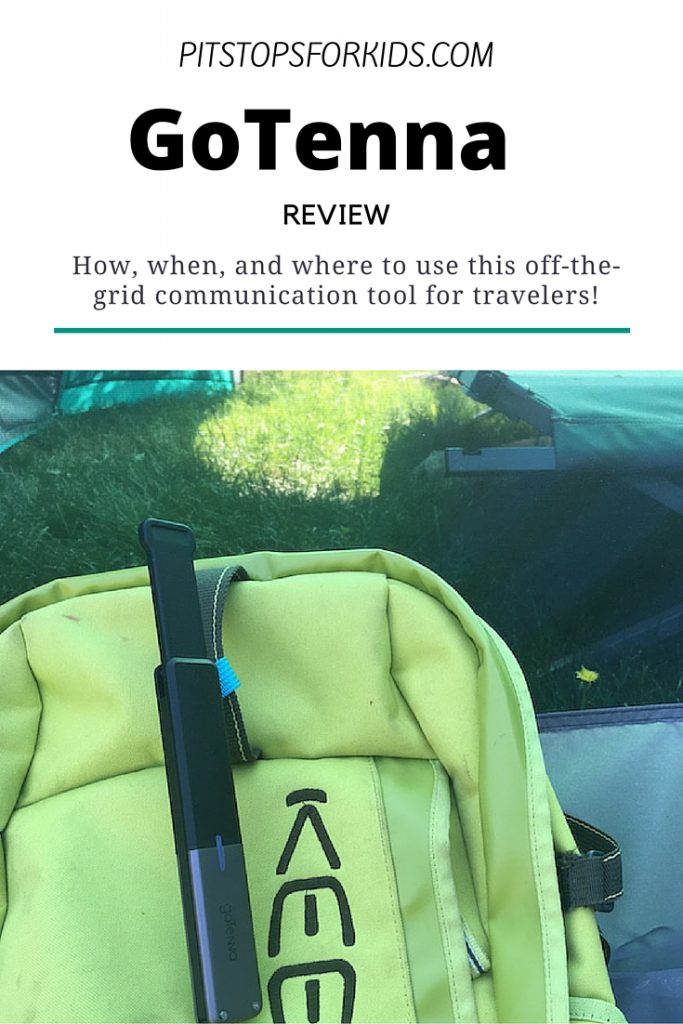
Interested in staying in touch when TWO parties are close by in the wilderness? Consider GoTenna: review here!


Travel Gear We Use: GlocalMe WiFi hotspot for travel

Let’s get real about WiFi usage and fees while traveling internationally as a family. When we travel, we embrace being off-the-grid most of the time, but we absolutely need wifi at various times. Sometimes, this is due to necessity: we need turn-by-turn directions out of a foreign city, or we need to call the credit card company to check our damage (I mean, balance). Other times, someone needs to download an episode of Parks and Rec, or someone else really wants some quality Instagram time.

iceland

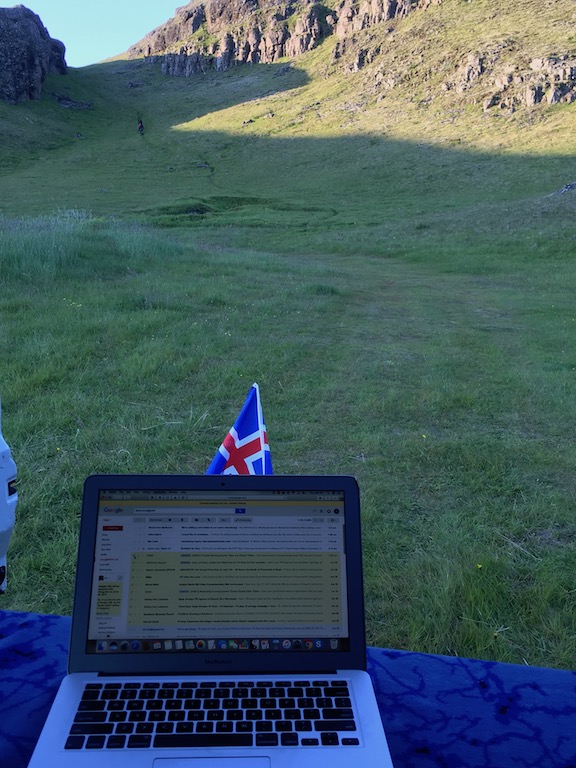
Staying connected in Iceland: using GlocalMe to work from locations like this.

We are a family of five, with older kids and teens who all have phones. Therefore, we have five phones to connect when we travel. Usually, we simply don’t connect them: the parents pay for WiFi, and the kids are basically SOOL. Why? Because our cell service plan charges us $10 per day for an international plan. Now, that’s not terrible, until you multiply it by five. $50 per day seems excessive, even for luxury travelers.

What to do? Invest in a WiFi hotspot for travel.

During our most recent trip, which took us through Iceland for ten days, we tried something new: a GlocalMe WiFi hotspot. For an initial investment of about $150-250, you get the hotspot, which you can then load with varying amounts for different destinations. Or, you can rent the device from Roaming Man.

I spent $20 for 3 GB of data in Iceland, which would ‘turn on’ (for lack of a better word) when I got to the country, and expire after 22 days. The hotspot can connect up to five devices (hey, perfect for us!) and you can add data at any time, either by ‘topping it off’ or buying a second package.

As I noted above, we use WiFi sparingly when we travel, preferring to enjoy the freedom from screen time (for the most part). We turned on our hot spot for about 30 minutes each day to check email, upload photos to Facebook and Instagram, and text, plus a few extra times to navigate when we needed directions, and our package of 3 GB easily lasted us 10 days. So instead of $50 per day for unlimited use we didn’t want, we paid $20 total for all of us to have a little bit of WiFi per day.

This is a perfect solution for us, and we plan to use the GlocalMe hotspot on many more trips.

Note: the hotspot is not intended for streaming video or downloading TV (it will, or at least will try, but it uses tons of data quickly).

How to load the hotspot with data:

Once you have a hot spot, go online to GlocalMe and register. It will ask you for your device’s registration number. Once you’re registered, you can add money by scanning the list of countries (I didn’t see any missing that were within the realm of visiting) and choosing a package or pay-as-you-go option. You can monitor your usage and add money with the free app or with the website. The device itself shows your data usage so you can monitor it there, too. The hot spot recharges with a standard USB cable (included) but during our 10 days, we never ran out of battery life.

How to buy:

The actual GlocalMe device is a one-time purchase of about $130-150, depending on where you buy. We recommend Amazon for the best deal.

Disclosure: We were given a GlocalMe hotspot device for the purpose of review. We paid to use it at our own expense.

SaveSaveSaveSave

SaveSave

SaveSave

CarLock review: Monitor your car while traveling

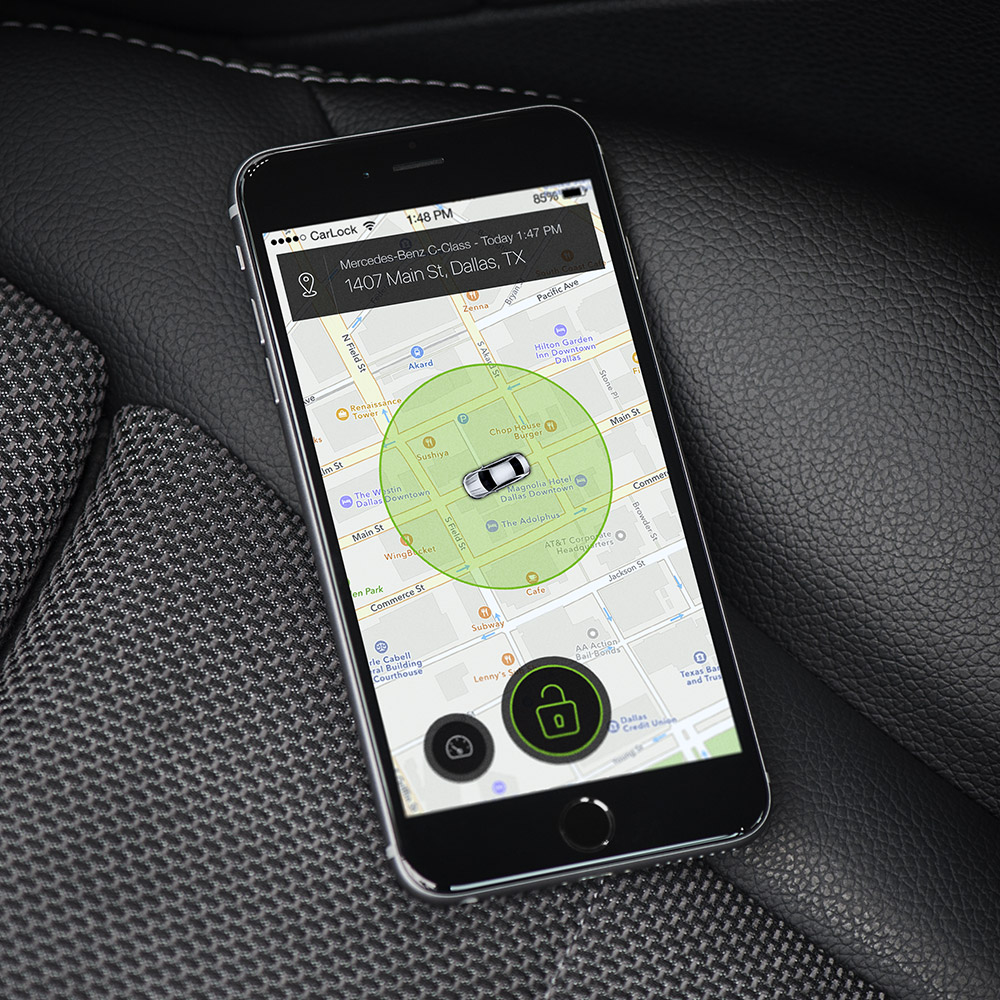
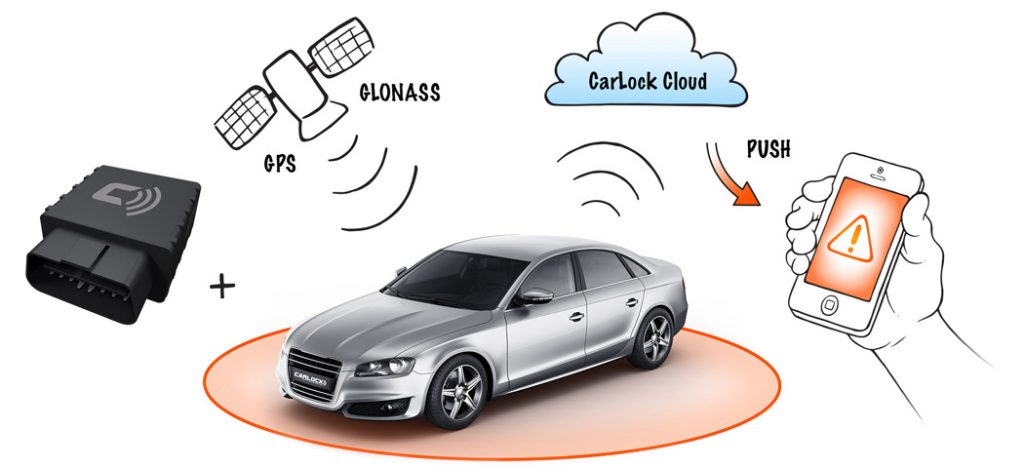
CarLock is a real-time car tracking and alert system. After installing the small device in your car, you can track many actions from your smartphone, including when your car is moved or started, how it’s driven, and if your battery is low. You can also track where it goes via GPS. Read on for our CarLock review:

carlock

What CarLock can do:

Why do you need all this info? Let’s say you’re on a road trip with your family and your car is parked in a questionable parking lot, or outside a restaurant in an unfamiliar city. Using the CarLock app means you’ll get an instant alert in the rare case your car is stolen or someone tampers with it. I like this feature because we park our car at hotel parking lots often, sometimes in park-and-fly situations in which we’re halfway around the world while it sits there. I like the idea that I can keep tabs on it.

It can also help you avoid getting stranded while traveling due to a drained battery, and if someone does take your car, you can see your car’s location via GPS. Issues like this are unlikely, of course, but if you’ve ever parked your car in a big parking lot or on a city street then forgotten where it was, the GPS tracking could come in handy for that, too!

carlock

CarLock can also monitor driving, giving a rating for safety on each drive based on any sudden stops, quick acceleration, etc. Normally, this kind of big brother action would not be something we’d do, but we happen to have two teenage drivers in our family. It’s been useful to track their driving in order to give them feedback when we’re not with them in the car. I’m not personally a fan of tracking the GPS when a family member is driving (so far, we’ve gotten by on old-fashioned trust), but you could certainly track your teen’s GPS location (or at least the car’s) if you wanted to.

How CarLock is installed:

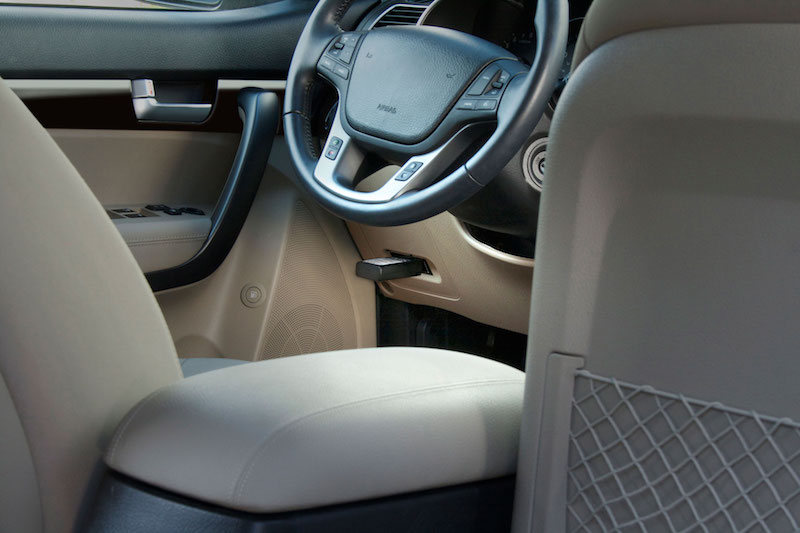
It’s so easy! First, you activate your account with the code that comes with your CarLock. Then you’ll be able to log into your CarLock account from the CarLock app. Next plug your CarLock device into your car. It goes in the same way a car WiFi device does: with a OBD (on-board diagnostics connector) that goes under the dashboard (near the driver’s knees under the steering wheel).

After you’ve installed the device, make sure you’re logged in to your account and take the car on a short drive to test out the GPS tracking. You should see your car’s route on your GPS map on the app. It’s that easy!

Using CarLock on a road trip:

We decided to try CarLock during a short road trip to Portland. I wanted to know how often the app would alert me (hopefully not so much that it became annoying!) and I wanted to see what driving rating I’d be given. I’d happy to say I did pretty well, though it did record a quick stop I had to make when we ran into traffic. I had the CarLock monitoring when we parked the car at night, and so far have never gotten any alerts that it’s been tampered with, as I expected I would not.

Buying your own CarLock:

The CarLock device works with any car made after 1996, and is really easy to set up. So is it worth it? I think so, if you have a need to monitor drivers OR if you take your car on lots of trips where you want to make sure it’s safe while parked. I like it mostly for the latter.

CarLock is usually $99 but on sale for $59 on Amazon. It comes with a 30 day trial subscription to the app, so you can test it for a month and return it if it’s not for you. After that, buying a monthly subscription is just over $9.

Adventure travel for your phone: Tech 21 case review

Gone are the days when leaving your phone on the charging dock, at the ski lodge, in your backpack, or in the car is an option. I’m a big fan of outdoor adventure travel, but also a big fan of having my phone with me when I’m on vacation. It’s often my camera, my communication device, my note taker, and my navigator. But I hate it when I feel limited because I’m worried about my phone.

tech 21

My phone ‘wears’ different cases for different activities, which protects it nicely from drops, spills, and any other silliness I may put it through. But when I travel outdoors, my phone brings along a second ‘outfit’. It’s essential that my phone owns a second skin that’s waterproof, dustproof, and generally adventure travel-proof.

Tech 21 Evo Aqua case review:

Enter the Tech21 Evo Aqua. Currently, we’re trying out the Aqua on my teen son’s iPhone 7+, but it also comes in the iPhone 7. Why test the Aqua on my son’s phone? Frankly, because it’s the phone that goes through the most ‘adventure’. Our first test came on a winter weekend at Mt. Bachelor, Oregon, a ski resort known for creating its own weather system due it its large, volcanic peak. When we stepped out of the car, the temperature was 14 degrees F, with the wind blowing.

My son’s phone likes to ‘die’ nearly immediately in very cold weather (it must have been fated for a life in Hawaii, not the Pacific Northwest), but right away, we noticed that the Aqua case protected the ports and speaker from the bracing cold, which I believe aided to a long day of battery life. (This is not a proven fact; just something we noticed.)

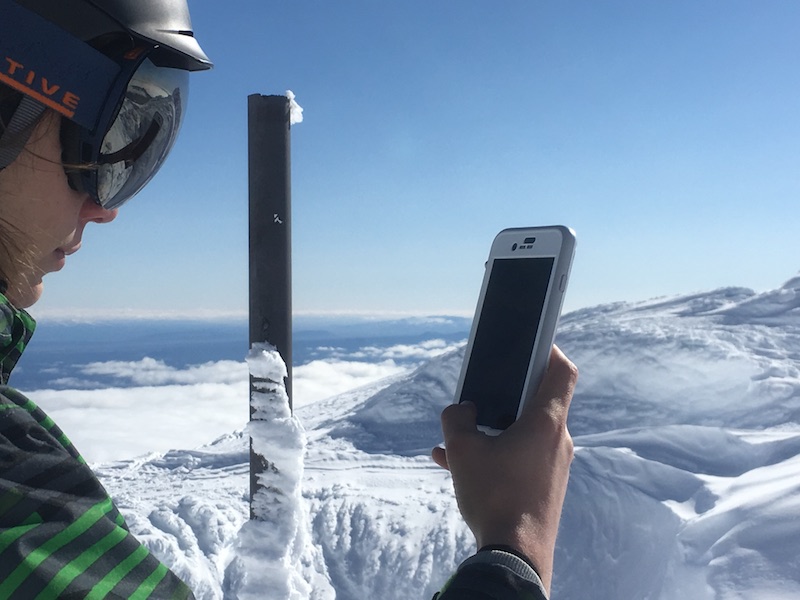
We then tested the Aqua in the snow, retrieving it from the protection of a ski jacket pocket often to take photos, take video while skiing, and take a few tumbles. We even dropped it from the ski chair, though I’ll admit that was an accident.

What’s comparable to other waterproof cases:

The Tech21 Aqua is waterproof to over 6.5 feet submersion, which, in my experience, is similar to a few other waterproof cases. It has FlexShock drop protection, comparable with others, and it retails for $89, which is a bit less, but fairly similar, to other waterproof cases I’ve tried. The Aqua also allows for full access to all your ports and buttons, which I’ve found to be true of other cases. It’s a bit harder to hear from the speaker, because it’s more securely closed off, but on the flip side, it’s easily to access my charging port on the Aqua than on other cases. All in all, it’s a pretty compatible experience.

Tech 21 Evo Aqua

What’s unique about Tech 21 Aqua:

When I first enclosed my iPhone in the Tech 21 Aqua, I did a double take. Why? The front of my phone was still unprotected! Then I looked more closely: while the front glass face of my phone was indeed ‘naked’, the waterproofing seal wrapped all the way around it. This is such a great benefit to the Aqua, because unlike other waterproof cases, this one doesn’t require me to practically beat my phone with my fists to get it to respond to touch. There’s no bulky plastic casing over my screen. Yes, it’s hard to trust this design at first, but once you do, you’ll love it.

The textured finish on the Aqua makes the case a little bit ‘grippy’, which is nice when your phone is wet. Combined with the open front face, I never felt like my phone was a slippery, plastic torpedo about to leave my grasp. We also tested the Aqua in the Narrows of Zion National Park, and I was grateful for its ‘grippiness’ there, too. Yes, it’s waterproof, but no, I don’t want to test that thoroughly (more on this below).

What to watch out for:

For this review, we didn’t submerge the Aqua all the way in water, but the phone certainly got wet, icy, and clammy, with no issues. We DID test it in water as instructed in the Tech21 instruction manual, which gets me to an important point: definitely, absolutely, no-joke, FOLLOW THE INSTRUCTIONS when putting the Aqua case on your phone, especially for the first time. It seems self-explanatory, but it’s imperative that you know how to put the case on correctly the first time, so you can see how it feels and looks to be on the right way.

Basically, you place your phone in the front of the case and then attach the backing of the case by making sure each section securely snaps and seals, working your way around the phone as you go, but if it’s not securely sealed, water WILL get in. The instruction book recommends installing a plastic ‘dummy’ phone (provided) into the case first, then submerging it underwater for 30 minutes to make sure you put it on properly. I highly recommend this as well. This process really made us confident when we put the Aqua on the real phone.

Note: I personally do not submerge my phone completely in water in ANY case. I’ve just seen things go sideways too many times. Instead, I use an underwater or waterproof point-and-shoot camera for underwater photos.

 Tech 21 cases for ‘low impact’ travel:

As noted above, you’re not going to use the Aqua for everything, or every day travel. On travel days, I use my earbud port and speaker more than usual, and I certainly don’t want to mess with a clunky case when my phone needs to be tucked away in my carry-on. I also use up a lot of battery on travel days, since I store my boarding passes and hotel reservations on my phone. For travel days, I tried the Tech 21 Endurance, which is a battery case that’s still streamlined and sleek. Not only is the Endurance a battery case, but it still provides protection from drops and spills. And unlike any other battery case I’ve tried, there’s no heat emission. That’s huge to me.

tech 21 gem

Don’t need extra battery power? For ‘low impact’ travel days (i.e., days I’m not hiking through rivers, skiing, or facing a thunderstorm or sand storm), I like the Tech 21 Evo Gem. It’s ultra-thin and lightweight, but still provides cushioning for drop protection. It’s the perfect level of case when you don’t need mega protection.

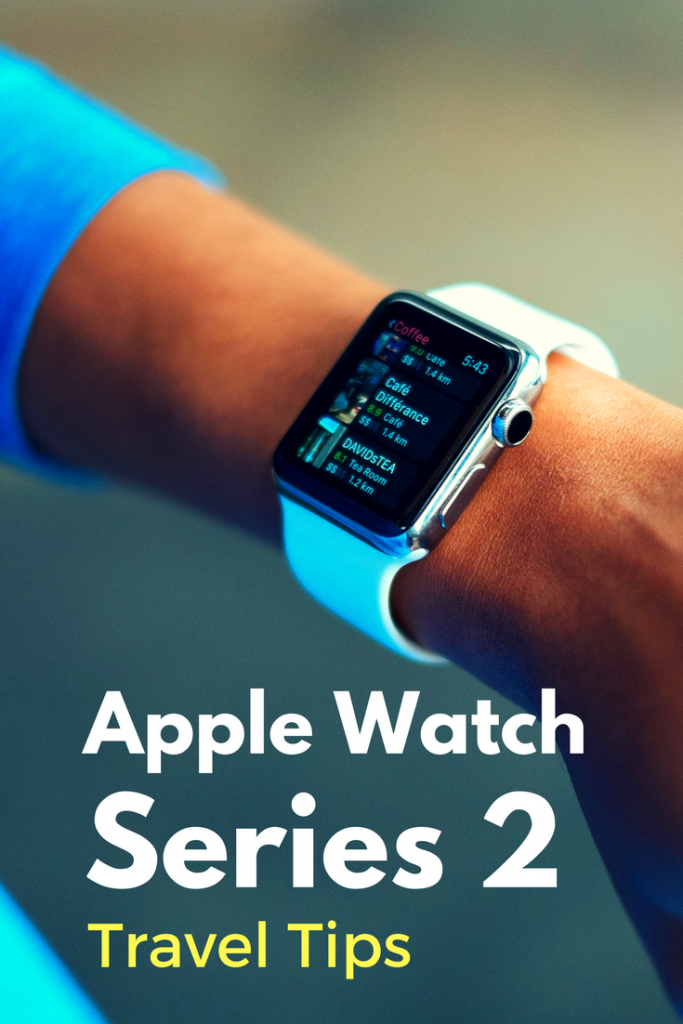
Apple Watch travel tips

I bought my Apple Watch for heath and GPS exercise tracking. I regarded its travel uses with skepticism. After all, I have a phone, which already accompanies me on trips, and saw no need to carry two devices for the same purpose. However, after using the Apple Watch for a few months, I’ve found it to be an extremely useful travel tool. It’s not great for everything, but it’s helpful enough that I no longer travel without it. Ready for some Apple Watch travel tips?

How, when, and why to use your Apple Watch while traveling

Apple Watch travel tips:

For me, the prime benefit of traveling with my Apple Watch Series 2 is the ability to keep my hands free and my phone stashed away. Using the apps on my watch means I can keep my backpack or tote bag closed, my eyes up, and my distractions to a minimum. Here are the uses I’ve found for my watch on travel days:

Boarding passes in Passbook:

When I check into my flight online, I use the appropriate airline app on my phone. Then I save my mobile boarding pass to Passbook. When I open Passbook on my watch, my boarding pass is right there. I can scan it at the gate and at security and never have to dig my phone out of my bag. I also keep the airline apps I use on my watch, because they will alert me of any changes to my flight right on my wrist.

Note: the TripIt app is now available for Apple Watch too, and I find it very helpful to get their alerts.

Directions on my wrist:

I have no sense of direction, so when I travel, I rely heavily on my Maps app. When I use Maps with my phone, I’m distracted, looking down at my screen while I walk unfamiliar streets, or worse, glancing too often at my phone while driving in unfamiliar cities. When I set up mapping directions on my phone before I depart, they sync to my watch, which gives me point-by-point directions as I go. I wasn’t sure if I’d like haptic touch (where the watch buzzes and vibrates to indicate which way to go), but I find I love it. I can drive and be confident about when to turn without taking my eyes off the road.

News bites in real time:

I have the CNN and New York Times apps on my watch, and appreciate how I can stay up-to-date on news as I travel. Yes, I could see updates on my phone, but how often, on a busy day, do I actually take the time to open a news app and read? With CNN and NYT on my wrist, short, one-line news bites are delivered to me, helping me be more aware as I travel.

Note: there are many other great news sources; for my watch, I chose CNN and NYT because their app headlines are particularly succinct and digestible…good for the small screen of my watch.

Apple pay on the go:

I can’t tell you how many times I’ve approached the register at an airport newsstand store or dining venue and had to dig around in my bag for my wallet or phone to pay. It’s time consuming, and can be unsafe to open everything up…important things could easily fall out of my bag. I use Apple Pay on my watch, and I’d say it works easily 70% of the time. The other 30%, it’s a big pain in the butt because it doesn’t work for some reason and I have to dig my wallet out after all. So there are negatives to using Apple Pay, but still worth trying.

GPS tracking for safety:

Some people don’t like to track their GPS, and I get that, but when I’m in a new city, I still like to run outdoors when it’s possible. I appreciate the fact that with just my watch, I can track my route, so I can easily find my hotel again. Also, in the case of anything going wrong, my route is tracked on my phone (which is back at the hotel room), so my family can more easily find me. It’s just a precaution, but one I appreciate.

A few of my favorite Apple Watch apps (not mentioned above):

  • TripIt: great to plan travel and get live updates on your travel plans
  • Timer: fun to time waits in line (so you can prove to kids that they haven’t been ‘waiting forever!’)
  • Breathe: a nice relaxation tool on travel days
  • Uber: I’ve found it to be pretty seamless as long as your account is up-to-date on your phone
  • 1Password: for when I’ve forgotten a password that I need to enter on my phone and my computer isn’t handy
  • Music: I pair with bluetooth headphones and listen to music on the go

What I never use Apple Watch for:

  • Email: heck no! Way too small a screen
  • Photos/video: though I know people who like the remote camera app
  • Banking/Paypal: no real reason other than the small screen
  • Social media: I like to see Instagram, Facebook and more on a bigger screen

Do you have an Apple Watch? Do you use it for travel?

WiFi hotspot in your car: ZTE Mobley review

AT&T reached out to us to product test their mobile hotspot, the ZTE Mobley. We said we’d give it a whirl on a seven-hour road trip, because I was curious about the pros and cons of having a WiFi hotspot in your car: after trying it out, would we want to keep it? Would we decide we needed it, or not?

Do you need a mobile hotspot in your car?

We opted to set up the ZTE Mobley mobile hotspot in our Toyota van for use during a seven-hour road trip from Southern Oregon to Eastern Washington. I figured it was a good journey for testing: most of the route is on interstate, with plenty of cell towers close enough to be in range, with only occasional loss of coverage during mountain passes. It’s also a mixture of rural, suburban, and urban areas. It’s a typical road trip route for us here in the Northwest.

Note: this review is written for AT&T customers. If you’re not with AT&T, you can skip the set up instructions and scroll down to the part where we describe whether we think the hotspot is worth bringing on road trips.

Setting up the ZTE Mobley:

I tend to dread the ‘set up’ process when it comes to new technology, but as it turned out, setting up the mobile hotspot was easy-peasy. The ZTE Mobley is shaped a lot like an ink cartridge, and inserts directly into the OBD II connector port in your car (yeah, I didn’t know I had one, either). All you need to do is start your car’s engine, then connect your smart phone (or other WiFi-enabled device) to the network. To do this, you go through the usual steps: under WiFi on your phone, search for the WiFi network name and input password. Launch your browser.

ZTE Mobley hotspot

Note: you can always manage your hotspot at http://attwifimanager.com.

On the road:

Once we were up and running, we could connect up to five wireless devices to the mobile hotspot, shared across main and guest networks. Parents: you can block certain devices from logging onto the WiFi, though it would seem to me that if you have activated the hotspot in your car, you’re ok with everyone using it. Just like any other WiFi network, you can change the password as desired.

The ZTE Mobley worked great for us on our road trip, during which we had three devices logged onto the WiFi. My teenaged sons streamed some Netflix TV shows, and I was able to work on my laptop, researching an upcoming travel story, when not in the drivers’ seat. Normally, we have a ‘no streaming’ rule on road trips, because we go through 4G data so fast when we allow it. The kids thought it was a nice treat to entertain themselves with Brooklyn Nine-Nine episodes.

Of course, there were a few places en route where we lost connection due to signal strength, but this was expected. We simply refreshed. I read criticism of the Mobley that sometimes, the signal dropped from LTE to 3G or lower, but we didn’t experience this problem.

So, do you need a WiFi hotspot in your car?

Potentially, a hotspot in your car can allow you or your kids to entertain themselves with gaming in the car, movies, TV shows, and other apps that require WiFi. I really enjoyed the ability to get work done. We were also able to stream audio books we didn’t want to have to download, saving us time and storage before our road trip. That said, in my opinion, a WiFi hotspot in the car is a nice luxury, but certainly not a necessity. We don’t personally allow screens in our car for short trips, but do allow them on long trips, making the hotspot desirable sometimes, but not all the time. With a two-year contract, however, you unfortunately can’t turn your hotspot on and off as desired.

My conclusion: I view car WiFi much like I view GoGo Inflight WiFi: well worth paying for when you need it, but not needed for every trip.

With a two-year contract, you can’t, unfortunately, turn your hotspot on and off as desired.

Cost:

If you decide a mobile hotspot is right for your family, it’s pretty affordable. If you’re an AT&T customer, the Mobley is free with a two-year contract. You can get 1 GB for $20/month or 3 GB for $30/month.

Disclosure: We tried the ZTE Mobley free of charge for six weeks, for the purpose of review.  We are AT&T customers, and unfortunately for us, AT&T does not pay our monthly cellular bill. 

Travel Gear We Use: GoTenna review

When we visited Paris last winter, we spent a wonderful day in the Louvre. At least, it was mostly wonderful, except for the two hours we spent looking for each other. My husband had our two older sons in one section, and I had our youngest in another, and our plans to ‘find each other later’ went woefully sideways. We both had phones, but had put them in airplane mode to save on our international data plan. When I turned my phone on to contact him, he had his turned off, and vice versa.

GoTenna-review

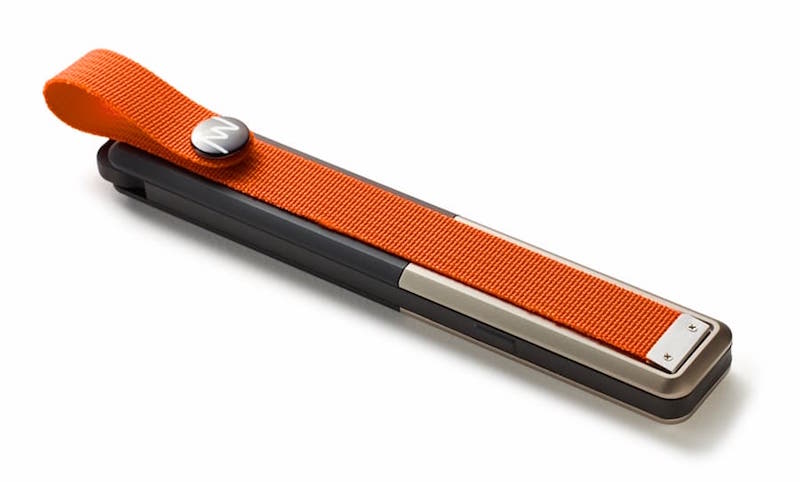
Months later, I was introduced to GoTenna. The minute I saw what it did, I knew we could have used it in Paris. And in Rome. And in Costa Rica. And so on and so forth. GoTenna is a thin, 2-ounce wand that connects to a smartphone app via Bluetooth low energy (LE). It creates a low-frequency radio wave network for its iOS and Android app that reaches about 1 mile in skyscraper-filled urban areas, and, supposedly, up to 9 miles in most open outdoor areas (even longer on mountain tops).

How to use GoTenna:

When you buy GoTenna, it comes in a pack of two (for $199). I had ours set up in about two minutes. You just take the wands out of the package, and pull the little tab on each to extend the stick. When it clicks, you can see whether the GoTenna wand is charged by waiting for the light to blink. If it does, you’re in business. If not, charge the wands first using the included USB cords.

gotenna

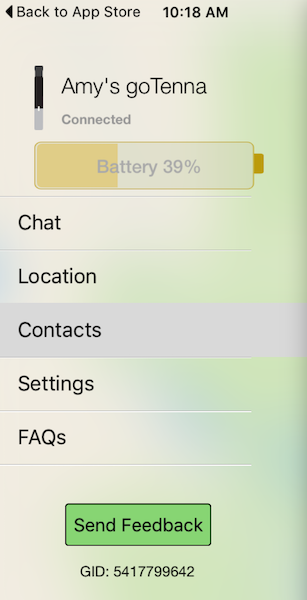
Once they’re ready, turn them off, and download the free GoTenna app. It will walk you through the activation steps, which, again, took me only a minute or so. You turn the GoTenna back on to pair it with your phone via Bluetooth (one wand per phone), add your phone number and name, and you’re in business. You can import your contacts, so it’s easy to find other people when you need to contact them (more on that in a minute) and download maps to use off-line (more on that, too).

Once you and a partner both have the wands paired to your phones, you can use them offline to contact each other. Each GoTenna has a nylon loop so you can attach it to a backpack, jacket, or hat. You don’t hold it; you need it to have a clear path to get a signal. Think of GoTenna like a messaging app: it has the capability to send messages and location, but not much else. You cannot use GoTenna to send photos or video, make phone calls, or scroll through social media. It’s like a walkie-talkie, only much better.

You do everything you want with GoTenna from the app.

GoTenna-app

  • Send one-on-one messages: this is the primary thing we’ve done with it. You can send messages to anyone in your contacts who also has a GoTenna (this is the reason for the pack of two).
  • Send Shout messages to everyone in the area with a GoTenna: A ‘shout’ message is basically a general message that will go out to everyone with a GoTenna within range. Not many people have these, so it’s not much of an issue right now, but in theory, you could use this feature to send out a general invite to meet up at a location at a concert or festival to meet other users, or send an ‘all call’ as an emergency.
  • Send emergency messages: this feature is deceiving, because GoTenna cannot actually connect with emergency services (a con to using it, for sure). It can only connect with other GoTennas (not satellites), so this emergency feature is just a ‘shout’ set in priority mode. If anyone nearby is also using GoTenna, they’ll get a message that someone needs assistance. I guess it’s better than nothing.
  • Use maps: I love this feature. While online, you can download tons of pre-existing maps in GoTenna’s app. (This feature is under ‘location’). Then you can use the maps while offline. We could have used this in Paris, and we will be using it in Central America this fall.

When and why to use GoTenna:

GoTenna is touted as a solution for communicating in the outdoors, when traveling without coverage, and during natural disasters other situations when off the grid. I initially thought I’d like using the wands while backpacking and camping, but in practice, we leave GoTenna at home during outdoor trips. Why? The range isn’t long enough for hikers or campers to communicate with family back at home (reason #1 I’d use it), and to use it hiker to hiker, we’d also have to carry multiple cell phones in the wilderness, which would require bringing solar chargers. While we might do this occasionally (I love the Waka Waka solar charger for this purpose), most often, we’re tech-free in the wilderness.

So what DO we use GoTenna for? International travel. We’re also glad to have it in case of a natural disaster when we may need to communicate off the grid, but primarily, it’s a wonderful tool for travel. When we travel internationally, we pay for limited service plans, so more often than not, we’re in Airplane mode and offline. With GoTenna, we can continue to communicate when we separate during the day, and we can use the maps. The teens and I used GoTenna last month in the Caribbean, when we were doing different service projects a few miles apart, and we’ll use it again in Costa Rica and Panama later this year. The only place we’ve used GoTenna where it’s only worked so-so was on a cruise ship. I think all the metal walls and doors messed with it.

Pick up GoTenna for $199 or look for it at REI. If you travel even a few times per year off the grid (or in Airplane mode), it’s well worth the investment.

Disclosure: We were given a GoTenna to test, for the purpose of review. As always, all opinions are our own.

Subscribe to our Pit Stops for Kids seasonal newsletter, and get exclusive tips, free! Click here!

Travel Gear We Use: Spyder battery case review

I’m very picky about my phone case. My iPhone might just have more ‘outfits’ than me during a week! I need a case for everyday use, that’s protective but still slim and offers easy access (for me, that’s my OtterBox Symmetry), a case for the outdoors (hello, LifeProof), and of course, a case for those days I just KNOW my juice will run low. For those days, the Spyder PowerShadow battery case for iPhone 6 wins.

spyder-powershadow

What sets PowerShadow apart:

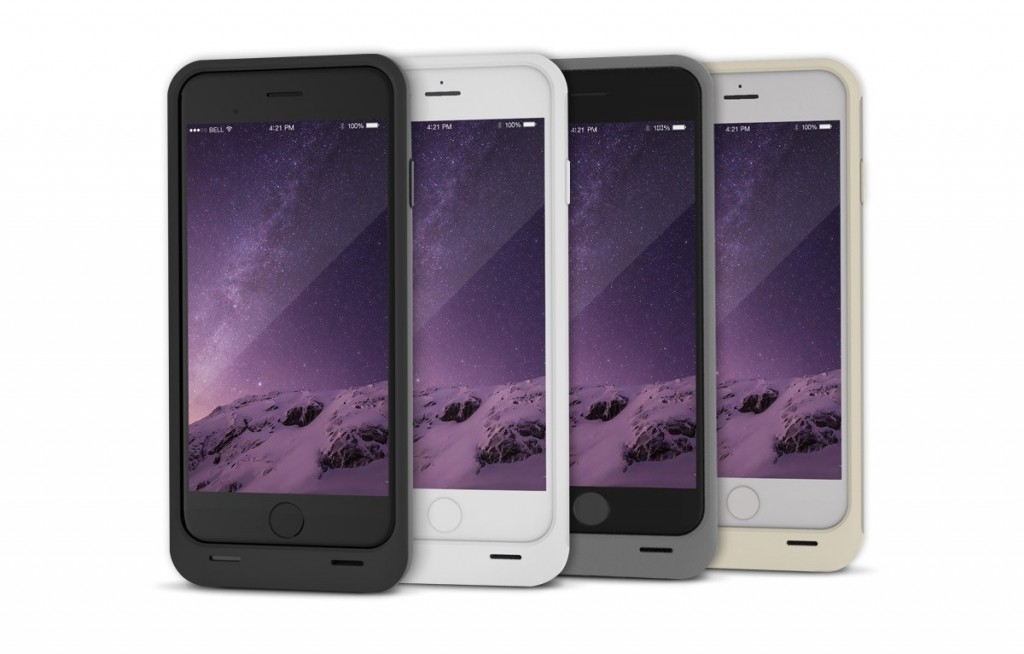
I’ve tried other battery cases, as well as a wide variety of external batteries and chargers, and the PowerShadow keeps returning to the front of the line because it’s the lightest, slimmest, and easiest case to use. Yes, it’s bulkier than my Symmetry, but actually less bulky than larger, tougher OtterBox cases. The PowerShadow wraps around the phone, leaving the screen free from filters or casing, which I like, because I hate having to jab my finger at the screen really hard when there’s ‘protective’ casing around it.

The PowerShadow is shockproof, water resistant, and offers antimicrobial protection, which is awesome. We all know our phones are the dirtiest, most disgusting germ-attractor in our lives, right? Even though the main purpose of using a PowerShadow is the charging capabilities, I cannot have my phone in a non-protective case, even for a minute. I’m just too clumsy for that!

Powering and recharging:

Let’s talk about the charging capabilities of the PowerShadow, because that’s why you buy one. With it on your phone, you get 10 hours extra web browsing, 15 hours extra talk time, 11 hours extra video time, and 50 hours extra music playback. Most power cases seem to offer something similar, but this is where PowerShadow wins out: you can charge and sync the phone right through the case, charging both the case and the phone simultaneously. The last charging case I owned, I had to take the case off the phone and charge it separately. You can even buy a separate docking station and charge through that, if you desire. Honestly, I have so many devices and gadgets in the house, I didn’t want another…I’m fine charging the case and phone with the provided USB cable.

When I use the PowerShadow:

With my job, I have to be connected when I travel. This means lots of moments powering up my phone to take photos, engage in social media, and check in with people. I almost always go through a full charge by mid-afternoon during busy travel days and conferences. At home, I rarely do so, which is why my PowerShadow is my ‘travel day’ phone case. For $99, it’s well worth not having to bring an extra phone charger or look for wall outlets.

Pick up a PowerShadow online for $99 in several colors for iPhone 5 and 6/6+, or look for it at Amazon for a few buck less.

Disclosure: I received a PowerShadow free of charge, for the purpose of review. All opinions remain my own.


Travel Gear We Use: Best cameras for small hands

A good camera or HD video device is essential gear for most families traveling today. We agree, and take it one step further: it’s wonderful to put the camera in the hands of a child. Kids become more engaged with their surroundings when they have some control over documenting the trip, and we find our tweens and teens pay better attention on historic site visits or at natural attractions when occasionally looking through the lens of a camera.

best-cameras

This said, it’s not necessary to buy top-of-the-line camera equipment for kids! (Shouldn’t we parents get the good stuff, first?) Here’s what we deem to be the best cameras for kids:

Olympus Stylus Tough TG-860:

olympus-camera

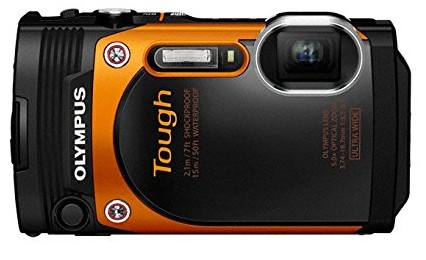
Many cameras designed for young kids look like toys. I dislike this, mostly because kids know what the real deal looks like, and want their photography efforts to be taken just as seriously. This is why I love the Olympus Stylus Tough: it’s a real camera with a design that still appeals to kids. It truly is tough, with a rugged shell and shock-proof features. It’s waterproof up to 15 m, as well as crushproof and freezeproof. There’s easy selfie shooting, if you’re into that (your teens might be) and you get built in Wi-Fi, which makes it easy to transfer photos to a smart phone or the IO Share app. The optical zoom is decent at 5x, and I like the image stabilization. And yes, it shoots movies, too. Pick up the Olympus Stylus Tough on Amazon for $248.

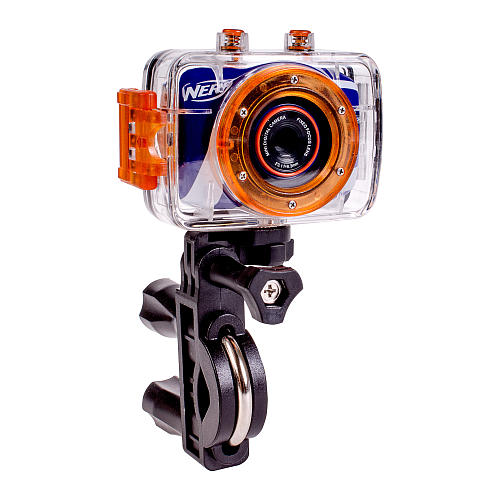
NERF Action Camera:

nerf-action-camera

Yes, NERF! HD action cameras are very expensive, and frankly, I’m not shelling out the big bucks until my kids can do something darn noteworthy on their skis or see something pretty amazing while we’re on the go. In the meantime, we’ve been traveling with the NERF Action Camera, which features many of the same assets of the spendy brands without the terror of kids losing it or breaking it. You get a 5.1 MP digital sports camcorder that produces full HD 720p images and has a 4x zoom, much like mom and dad’s. It mounts on a helmet just like that other brand, and comes with a waterproof case. You also get a full touch preview screen, which makes it easy for kids to use on the fly. Our kids have used it while biking and skiing. Pick up the NERF Action Camera for under $60 on Amazon.

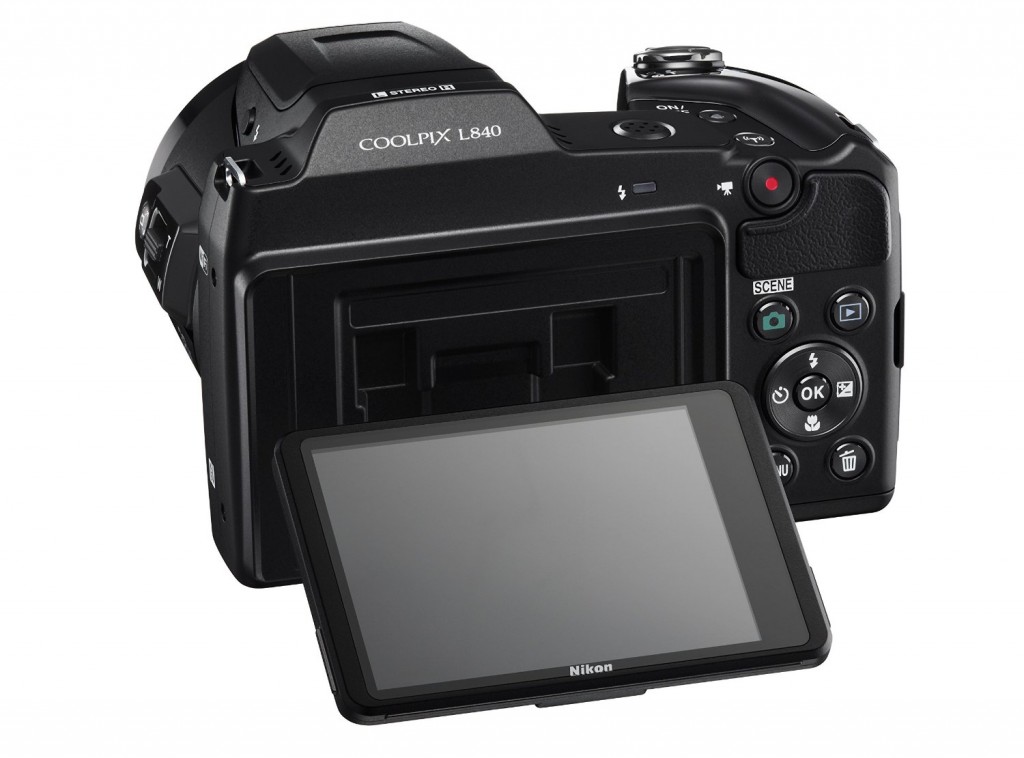
Nikon Coolpix L840:

nikon-coolpix

Our eleven-year-old has shown great interest in photography, so this year, we upgraded him to his first DSLR camera. We still didn’t want to break the bank, and we’ve been very happy with his Nikon Coolpix. He gets to learn about manual settings and lenses, and we don’t have to be too fearful of the cost of replacement. The Nikon Coolpix has 38x optical zoom, a low light image sensor, and a tilt LCD display, which makes it easy for a smaller and shorter person to get the correct angle on a shot. And it still takes HD video, too, of course. Pick up the Nikon Coolpix L840 on Amazon for under $200.

iPhone 5 or 6:

Lastly, don’t overlook the photography features on an iPhone. Even an iPhone 5 features an eight megapixel primary camera and 1.2 megapixel rear camera. Tweens and teens usually know more than their parents about photography apps available to make the most of this, and often a phone is already in a kid’s pocket. When younger, our kids aren’t allowed to have a working phone, but we ‘gift’ them with our old phones when we upgrade. They use them as iPods, for music, games, and photography. Given how often upgrades become available, these used phones make for great travel cameras.

amzn_assoc_placement = “adunit0”;
amzn_assoc_search_bar = “true”;
amzn_assoc_tracking_id = “pitstoforkid-20”;
amzn_assoc_ad_mode = “manual”;
amzn_assoc_ad_type = “smart”;
amzn_assoc_marketplace = “amazon”;
amzn_assoc_region = “US”;
amzn_assoc_title = “My Amazon Picks”;
amzn_assoc_linkid = “5cff3a8b5f0e508e11c71a553e7363cc”;
amzn_assoc_asins = “B01950SVYW,B00UVK2OOO,B00TXH2AZO,B01H1JY95E”;

What camera does your child use? What do you love–or not love–about it?

Travel Gear We Use: Eagle Creek USB Universal Travel Adaptor

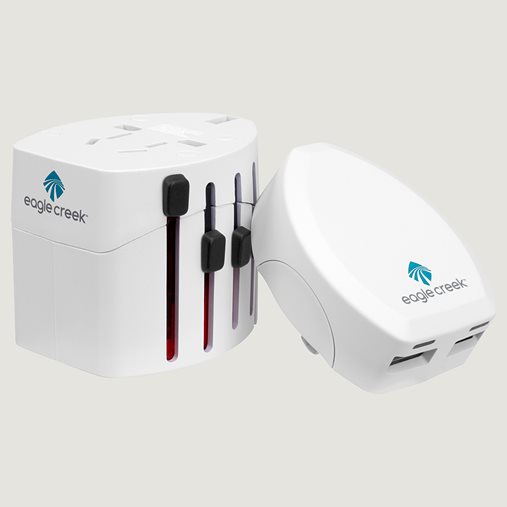
Twenty-five years ago, I went on my first international trip on my own. One of my first purchases for my journey through Europe was a travel adaptor. It came in a big bag with lots of various-sized plug adaptors. A few months ago, I finally upgraded. As it turns out, gone are the clunky, multi-piece travel adaptors. Instead, adaptors now come in one sleek unit, and include USB ports.

eagle-creek-adaptor

I chose to purchase my new travel adaptor from Eagle Creek, because apart from one item*, I’ve always found their travel products to be high quality, practical, and affordable. In fact, we love their wheeled luggage lines so much, we were all carrying Eagle Creek bags through France and Italy.

Eagle Creek offers three travel adaptors, ranging from a bare bones model for $25 to a pro model for $65. I chose the one in the middle, the USB Universal Travel Adaptor for $50. Like it’s ‘pro’ counterpart, this adaptor comes with a detachable USB section with two ports. It’s a two-prong design that works in 150 countries. We appreciated that you simply slide the appropriate prongs in or out as needed. This way, in France we could use one adaptor type and in Italy another, all on the same unit, without needing to remember which types to pack. Because it’s a two-prong design, it accommodates US plug-ins directly. In other words, I can plug my US appliance directly into the adaptor, then plug the adaptor into the wall, using the appropriate prong type.

The whole unit is smaller than my fist, and I had no trouble with its durability, stashing it in various places in my carry on and in my day pack. It comes with surge overload protection, which is good insurance just in case your US devices aren’t approved for use at higher voltage.

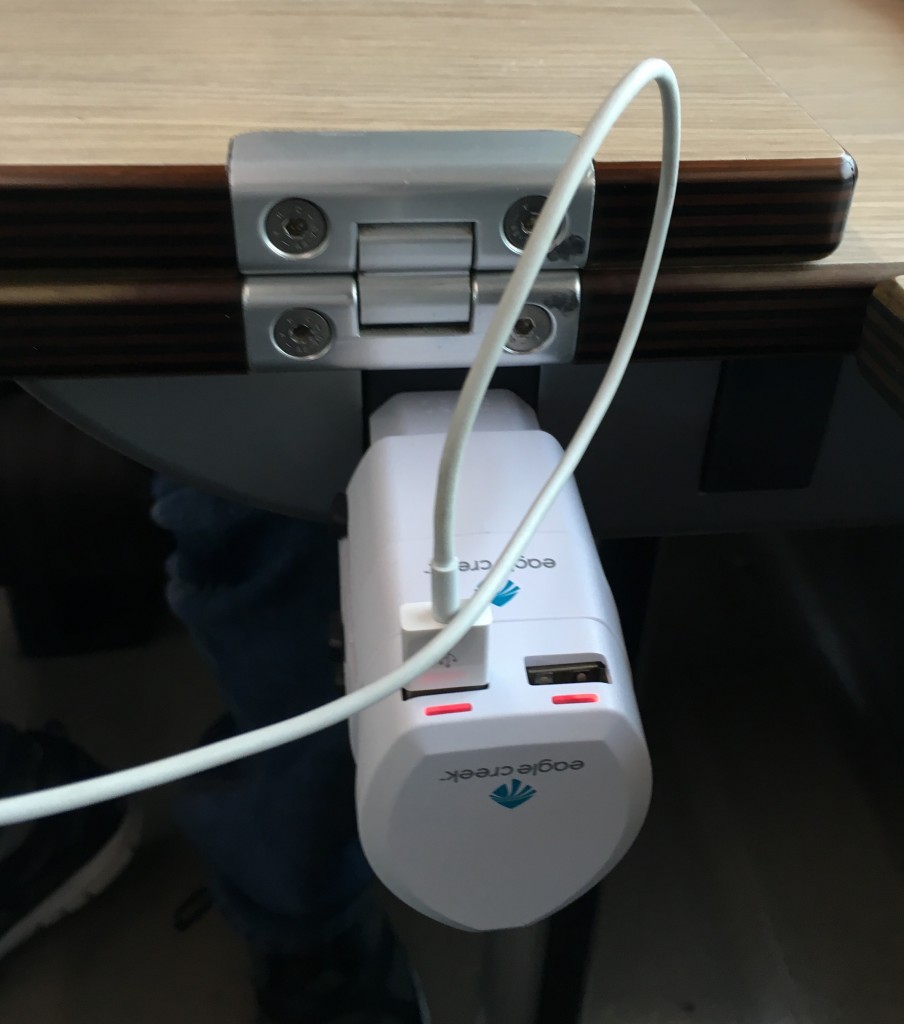
eagle-creek-adaptor

The USB port section slides right into the main unit; you can take it on or off. I found that we used the USB unit at night to recharge our phones, then I’d just slide that section off  (with the USB cables still attached) and use the adaptor solo for items like my hair dryer or my laptop. I debated getting the cheaper model without the USB ports; after all, it’s possible to simply bring a US plug for the USB cables and charge the phones one at a time. However, I’m so glad I splurged. If anything, we could have used more USB ports, not less!

Pick up the USB Universal Travel Adaptor on Eagle Creek, or save a few bucks and buy on Amazon.

*The only Eagle Creek product I’d avoid: their $6 travel sacks (3-1-1 bags) are not durable. We bought five, and four ripped before we’d even left the US.