A rustic cabin stay at Silver Falls State Park, Oregon

A state park stay can be a great way to safely travel with the family during COVID-19. For up-to-date information on park closures and updates in Oregon, check here.

Located approximately 25 miles east of Salem, Oregon off Highway 22, Silver Falls State Park is the largest in Oregon. With each site tucked away under the canopy of the temperate rain forest, however, you’d never know it. Silver Falls is easy to get to off I-5, but feels a million miles away from the adjacent farmland and towns.

silver falls state park

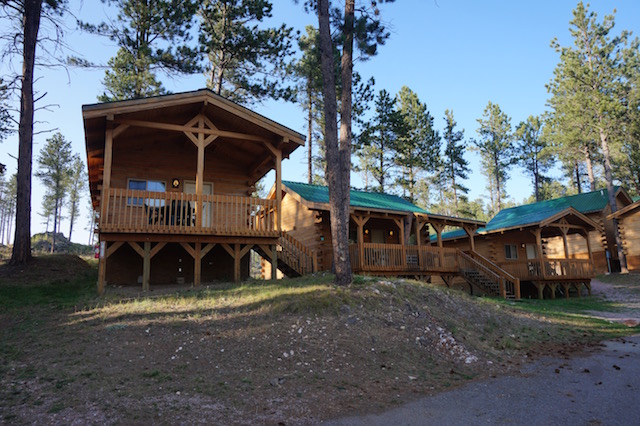
Silver Falls offers traditional tent and RV camping loops, as well as rustic cabins (similar in amenities to Oregon State Parks’ rustic yurts). Group lodging is available in their conference facilities. We stayed in rustic cabin #10, and highly recommend it for optimal seclusion.

silver falls rustic cabin

The rustic cabins:

Each cabin in the cabin loop (separated from the tent/RV loop by a covered pedestrian bridge) has plenty of space, but #8, 9, and 10 especially are set apart from the others. In fact, you are required to park about 20-50 yards away (depending upon cabin) and cart your supplies in by provided wheelbarrow (which the kids thought was half the fun).

Each cabin has two basic rooms: a front room with a table and four chairs and a futon that converts to a double bed, and a back room with a built-in bunk-bed and additional double bed. The cabins have electricity and heaters, but no bathrooms or running water. Bathrooms with hot showers are a short walk away (and exclusive for the cabin loop) and running water is within yards of each cabin at outdoor faucets. Cabins also have porches of varying size (the ones right on the loop have larger ones, whereas #8-10 have smaller ones) and fire pits and picnic tables.

rustic cabin silver falls state park

rustic cabin bunk beds

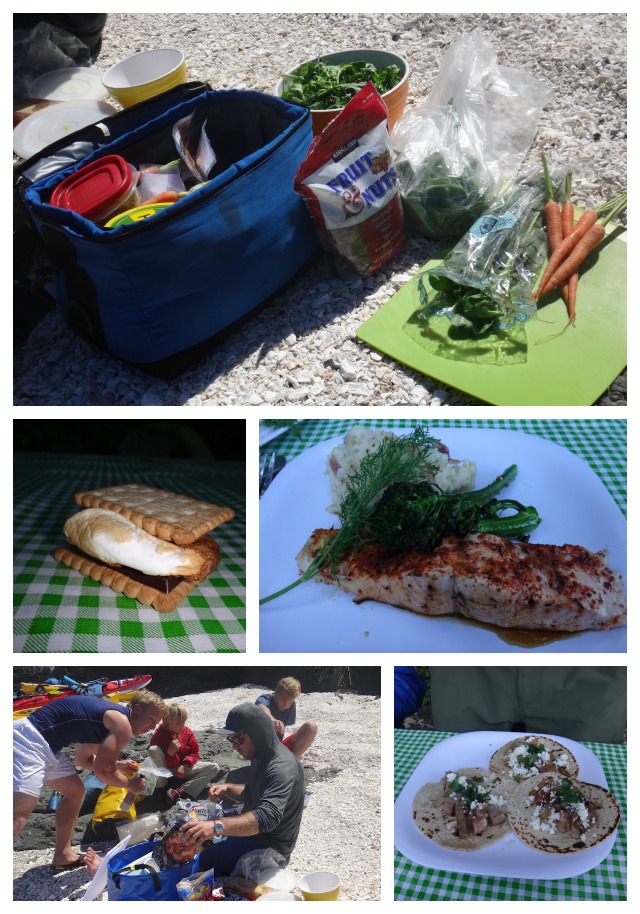
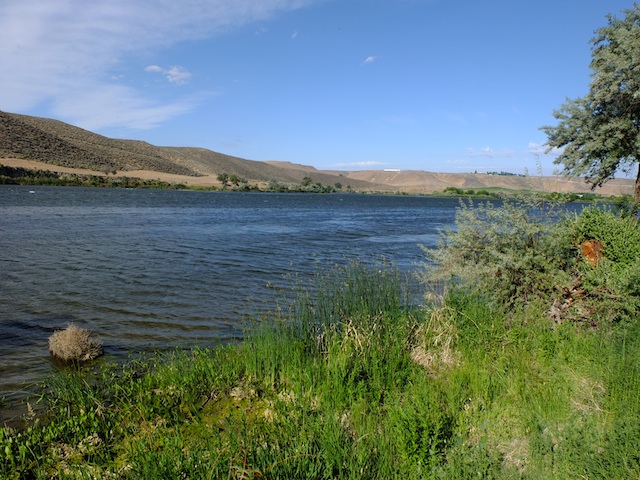
No cooking is allowed in the cabins, but BBQs can be set up outside, and we simply used our camping cookstove at the picnic table. You’ll want a cooler with ice for perishables, as there is no mini-fridge. Right behind Cabin #10 is a short woodland trail leading directly to the banks of Silver Creek, which makes for lots of fun exploring for kids while parents are relaxing (or more likely, unpacking).

Tip: Stay on the trails, because poison oak is abundant! If you have young children, be aware that though hidden behind trees and vegetation, the road leading to South Falls is quite close to the cabins. Adventurous children could wander there.

Things to do in the state park:

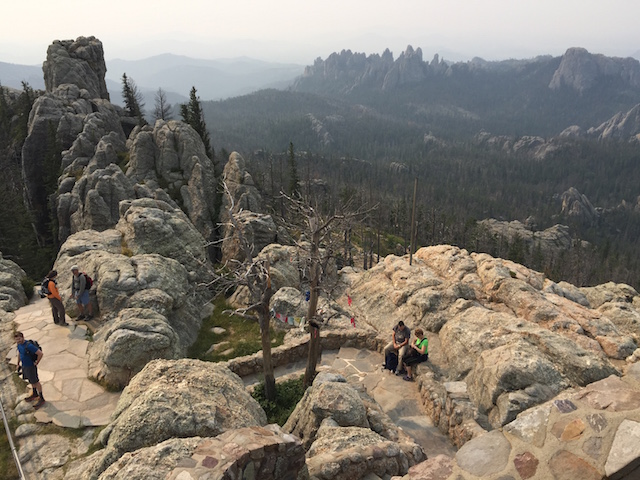
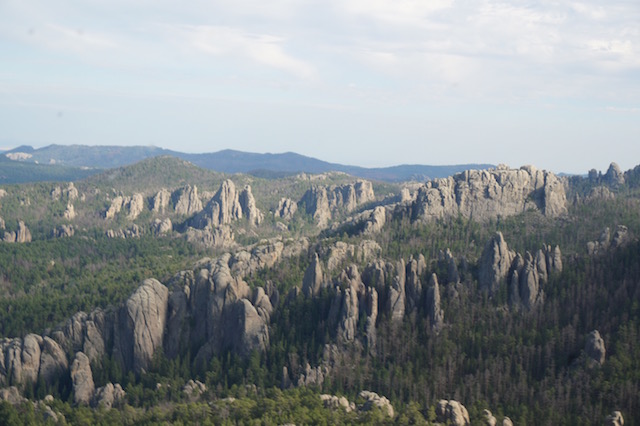
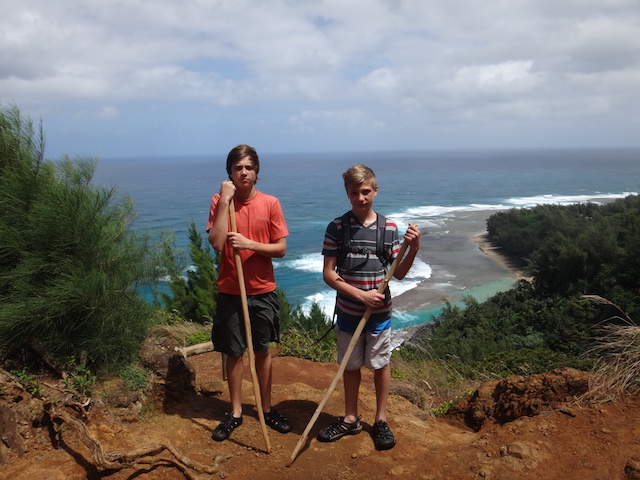
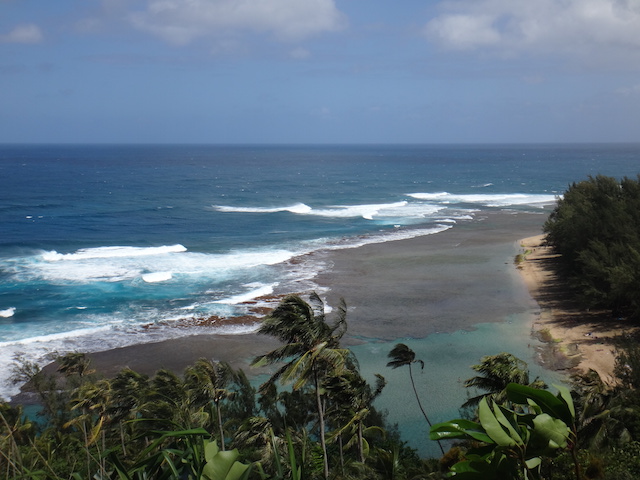
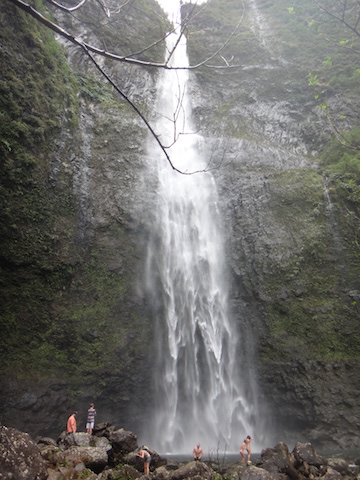
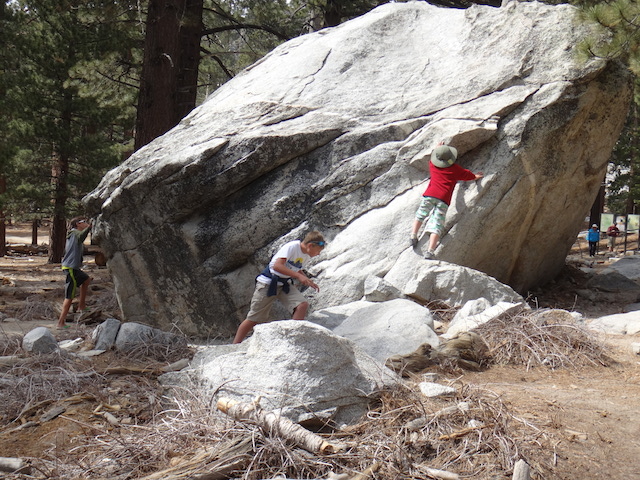
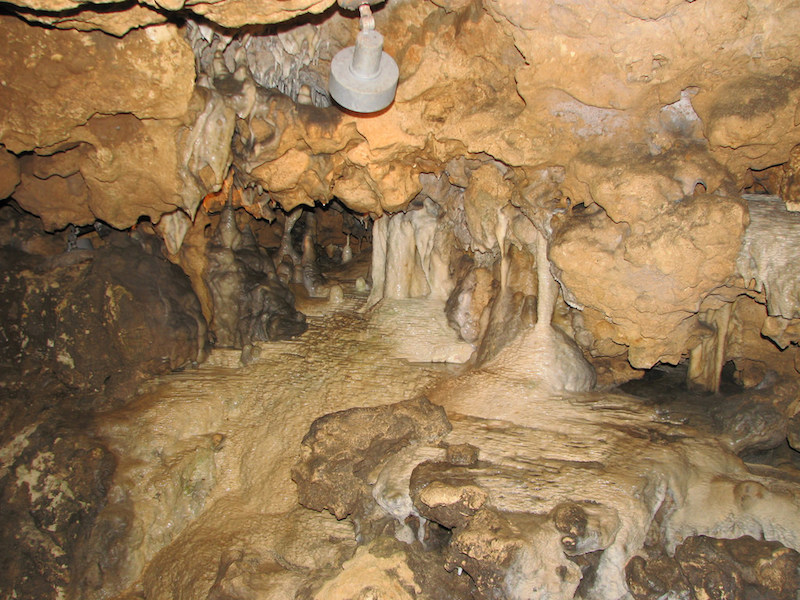
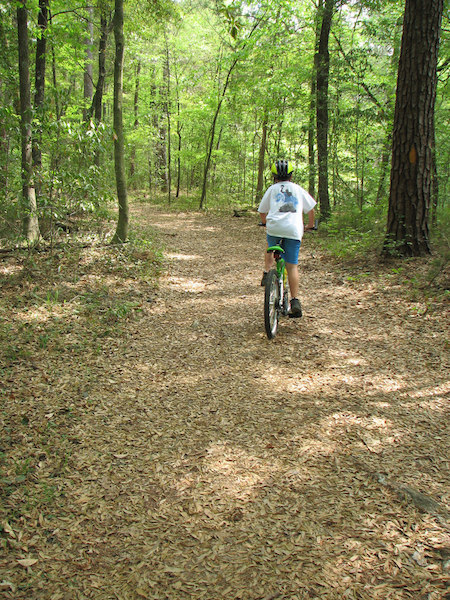
In addition to area road biking and fishing, Silver Falls is a hiking mecca. You’ll want to reserve at least a half day, if not a whole day to exploring the Trail of 10 Falls, the trailhead of which is located past the day lodge in the day use parking area. This is a challenging loop of, you guessed it, 10 waterfalls, and these aren’t just minor rapids, either. Four of the ten are large enough that the trail arcs behind them, for hikers to get a behind-the-scenes view, and all are spectacular.

trail of 10 falls

The entire loop is 8.7 miles, but you don’t have to commit to that length. The first waterfall, South Falls, is within yards of the trail entrance, and on a paved walkway. After peeking behind it, hikers will find the Canyon Trail (Trail of 10 Falls) which will take you another 3/4 of a mile or so along the lush canyon floor beside Silver Creek to Lower South Falls, which is also definitely worth seeing. From there, continue on the Canyon Trail another mile to North Falls (and beyond) or look for the Maple Ridge Trail 1/3 of a mile beyond Lower South Falls for a short-cut back to the trailhead (and parking lot). The Maple Ridge Trail starts out with some tough switchbacks, but evens out on the ridge to make an easy jaunt back. (If you go this route, your entire hike is just over 2 miles, and you see two major falls.)

south falls

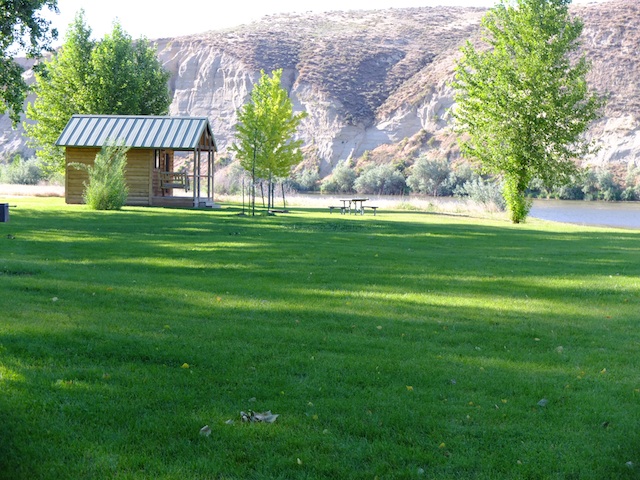
Near the trailhead, there’s ample picnic grounds, as well as a swimming area. The highs were only in the low 70s during our visit, so we didn’t swim, but this section of Silver Creek is deep and still, and there’s a nice grass area surrounding it.

And yes,  the area has some wildlife worth watching too. There are warnings about the bears and mountain lions in the park, so with the kids, consider going nearby and preferably during the day. For a night safari, ensure professionals accompany you.  On the fun side, carry your thermal binoculars along. Thermal imaging has many limitations, so the binocular may not give you the best picture, but cats barely come out in the daylight- don’t miss them.

Distance from the interstate:

25 miles from I-5

Cabin and camping rates:

Cabins are approximately $45/night in peak season. A campsite is as low at $15.

Dining options:

There are a few small towns near Silver Falls, and the lodge at South Falls offers limited cafe hours, but in general, you’ll want to pack your own food in.

Directions:

From I-5, take Highway 22 east from Salem, Oregon. Follow signs to Silver Falls State Park.

Palm Springs Aerial Tramway and Mt. San Jacinto State Park

If you have a few days in Palm Springs, a trip to the Aerial Tramway  is well-worth your time. This ‘world’s largest rotating tram’ takes visitors from the desert floor to over 8,000 feet in elevation to Mt. San Jacinto State Park in just a few minutes. The tram ride itself is fun for everyone (even those who experience ski resort gondolas and trams often), but the real gem is at the top. Mt. San Jacinto Park offers 54 miles of hiking trails in over 14,000 acres of alpine wilderness. Everyone can enjoy the novelty of soaring from a desert environment to an alpine forest within minutes, and once there, they can spend as much time as desired exploring the mountain scenery.

palm-springs-aerial-tramway

Hiking trails are well-marked, the three major trails offering something for everyone: the easy 1.5 Desert View Trail can be done in under an hour, or the Round Valley Trail offers a 4.2 mile loop more suitable to families with older kids. There’s also a 12 mile loop up San Jacinto Peak for experts. Once families depart the tram at the Mountain Station, they follow a paved walkway down to Long Valley, where the wilderness awaits. Since we’d done a lot of hiking in previous days of our trip, we opted to let the kids rock scramble and play at will in the valley area. In winter, an Adventure Center in the valley offers sled and snowshoe rentals plus gear.

san-jacinto-state-park

Tramway tips:

  • The temperature changes dramatically between the desert floor and the Mountain Station, so families will need to bring extra layers. A good rule of thumb: expect the temperature to drop by 20 degrees.
  • Buy tramway tickets online to ensure your departure time. If you buy tickets at the Valley Station, expect a slight to moderate wait. During the time of our visit on a weekend during Spring Break, we waited an hour before boarding.
  • Expect the process of boarding to take awhile, from the time you park and take a tram bus to the entrance of the Valley Station to the time your departure time is called to board.
  • Due to the time and cash investment, plan to spend the better part of the day at the Mountain Station area.

Dining:

There are ample opportunities to purchase food, both at the Valley Station (where there’s a snack area and bar) and the Mountain Station (where families find a quick service type restaurant with pizza, sandwiches, and the like) as well as a sit-down dining experience. Outside food is also allowed, and picnic tables are located at both stations. Bring water bottles and fill them at drinking fountains.

aerial-tramway

Distance from the interstate:

The tramway is located six miles from downtown Palm Springs off I-10.

Admission cost:

Adult tramway tickets are $23 and children’s (12 and under) are $16. Discounted tickets can be had after 4 pm. Hours vary by season.

Directions:

From Palm Springs, take Highway 111 to Tram Way.

Five things to do with kids in Moran State Park, Orcas Island WA

Orcas Island is a great destination for families in the San Juan Island network. Kids will enjoy kayaking or exploring the numerous farmer’s markets and two public beaches, but the highlight for us was Moran State Park. Located on the Doe Bay section of the island, Moran includes two lakes, numerous hikes, beautiful cascade waterfalls, a wonderful nature center, and swimming beaches.

Moran State park

What to do with kids in Moran State Park:

1. Start by orienting yourself with a view from Mount Constitution: Families can opt for a long hike to the top of Mount Constitution, but driving is also available. From the base of the state park, drive up to the summit and park at the educational outreach center (more on that in a minute). From there, it’s only a short walk to the observation tower, which affords visitors with incredible 360 degree views of the San Juan Islands in fair weather. Kids enjoy climbing the many stairs in the tower, and it’s safe at the top for little ones. Along the way up, displays teach about the early history of the island.

Moran State Park

2. Check out the Friends of Moran educations outreach center: At the base of the tower on Mount Constitution, a great little nature and science center teaches kids about local wildlife (including newts) and island history. Best of all, families can ‘check out’ a fully-stocked backpack with binoculars, wildlife and plant life guidebooks, and more. A deposit is taken, and returned upon return of the pack at end of day.

3. Hike the Cascade Falls Trail: This easy quarter mile trail leads families directly to a coastal rain forest waterfall. The hike is easy, and the base of the falls makes for fun exploration (beware of nettles though). If you’re up for a longer hike, the Cascade Creek Trail takes you from the falls down to the Mountain Lake picnic area.

Moran State Park

Moran State Park

4. Swim at Cascade Lake: On nice days, the picnic and swimming area at Cascade Lake is perfect for a long afternoon. Kids can swim in the designated swim area, and a snack shack (open seasonally) offers treats and drinks. There’s a nice playground, and a fishing dock. Small watercraft can also be rented.

5. Take a side trip to Obstruction Pass: This 80-acre park a short drive from the main Moran State Park campus offers Orcas Island’s largest public beach and another interpretive center and more trails.

Moran State Park

Date last visited:

July 2012

Lodging information:

Camping is available at Cascade Lake, nearby Mountain Lake, and Obstruction Pass (the latter is primitive). Sites at the lakes have water and bathrooms, and some have hook-ups. Expect to pay more than typical for standard state park sites, and reserve early for the summer season!

Dining options:

Besides the snack shack, no dining exists in the park. The nearby town of East Sound offers more, and has a large market for supplies to make your own meals at a camp site.

Directions:

From the Orcas Island ferry dock, drive up Orcas Road toward East Sound. From there, take Olga Road into the state park.

Florida Caverns State Park

State parks make some of the very best pit stops, as fans of Florida Caverns State Park well know! One of the few state parks with dry (air-filled) caves, Florida Caverns is the only Florida state park to offer cave tours to the public. Accessible to all ages, the cave has dazzling formations of limestone stalactites, stalagmites, soda straws, flowstones, and draperies. The park is also popular for camping, swimming, fishing, picnicking, canoeing on the Chipola River, boating, hiking, and bicycling.

florida caverns state park

Jen of Two Kids and a Map sung its praises in a recent review of attractions along I-10 on Trekaroo: The kids will love the stalactites and stalagmites and the fact that it is dark and spooky! We were a little disappointed in the amount of trash and graffiti at the entrance of the cavern site. I do not know if it has been cleaned up since. The campsites are set in a beautiful part of the woods. The bathroom facilities and the campsites are clean. Make sure you grab the Florida Passport and get it stamped while you are there! Distance off the interstate: 4 miles

Hours and Admission Prices:

8am until sunset. Cave tours are closed Tuesdays and Wednesdays. $5 admission fee per vehicle. Camping fee is $20 per night. Cave tour fees are as following:

$8.00 per person, plus tax, age 13 and older
$5.00 per child, plus tax, 3 to 12
Under age 2: free

florida cavernsFood Services:

The park’s concession is located below the historic Visitor Center. Refreshments and souvenirs are available. This is also the location where you can purchase your tickets to go on a cave tour. The Gift Shop is closed on Tuesdays and Wednesdays.

  • Website: http://www.floridastateparks.org/floridacaverns/
  • Phone: 850-482-1228. If you plan on a cave tour, it’s recommended that you call ahead to the Ranger Station before departure to ensure they’re not all sold out!

Directions:

Florida Caverns State Park is located 3 miles north of Marianna, off of U.S. 90 on S.R. 166. From Tallahassee: Take I-10 west to exit 142, turn right on Hwy 71 N to Hwy 90, turn left. Follow brown park signs. From Pensacola: Take I-10 East to exit 136, turn left on Hwy 276 N to Hwy 90, turn right. Follow brown park signs.

Bonus Pitstop:

Nearby in Chipley, Florida is Falling Waters State Park (home of Florida’s tallest waterfall and plenty of cool fern and moss-covered sinkholes)!

Photo credit

Exploring Custer State Park with kids

Haven’t been to Custer State ParkGet ready to be impressed! This state park encompasses 71,000 acres, making it larger than some national parks. In fact, some argue that Custer should be a national park, and after visiting, I agree! Plan to stay at least two nights to see the majority of what this park has to offer, or at least one full day to see some highlights. Here’s how to tackle Custer State Park with kids:

custer-state-park

Start with the Needles Highway Scenic Drive:

It’s not often I recommend driving through a park with kids, but Custer’s Needles Highway is breathtaking, and easy to access from the western park entrance at Custer. Plus, it concludes at a great lake and hiking option (more on that later).

needles-highway

After driving past the stockade area and coming into the center of the park, the Needles Highway will head north, winding first through meadows and grassland where you’ll want to keep an eye out for bison. Then, it climbs into the more dramatic, rocky part of the park, taking you through several narrow stone tunnels and opening up on incredible vistas of the Cathedral Spires, Needles Eye, and Little Devil’s Tower. Definitely stop a few times along the way to snap photos (you won’t be able to help yourself), especially after the tunnel that delivers you to Needles Eye. This natural wonder is indeed a rock formation in the shape of a needle’s eye. Hint: mountain goats can often be spotted on the craggy peaks beyond.

needles-eye

Take a hike (or two or three):

Custer State Park is filled with kid-friendly hikes of various mileage and degree of difficulty. We’ll start with what may be the most spectacular:

Harney Peak: Harney Peak has the distinction of being the highest point east of the Rockies (at over 7000 feet elevation). There are several trails that will get you there, marked Trail 9, Trail 4 East, and Trail 4 West. The shortest route to the top of the peak is Trail 9, which is a 3.1 mile (one-way) trail starting at the Sylvan Lake.

harney-peak

The trail is well-maintained, and moderate in difficulty for the first two miles, then gets quite rocky and steep for the final mile. Young kids can absolutely do this hike with the right shoes and the right attitude, and teens will definitely be able to handle it. Most of the way is fairly shaded, but because the final stint is in the open, and because the trail gets very crowded as the day goes on, I highly recommend hitting this trail early in the morning. Pack a picnic lunch to eat at the top, which rewards you with a wonderfully constructed fire tower lookout built by the CCC in the 1930s.

view-from-harney

Cathedral Spires: This trail is also a one-way (out and back) deal, and families will see the trailhead right off the Needles Highway. It’s only 1.5 miles long, but strenuous and mostly open. Another to tackle in the first half of the day, the Spires rewards with amazing views and cool rock formations.

spires-of-Custer-State-Park

Centennial Trail: If you want to try the Centennial Trail, which actually winds 111 miles through the Black Hills from Bear Butte State Park in the north to Wind Cave National Park in the South, 22 miles of it is available within Custer State Park. The French Creek portion is 10 miles one-way, and moderate. It takes hikers through the Narrows, which requires either climbing a 60-foot embankment or wading 100 feet through the creek (way more fun). I recommend doing this trail with kids who are well-adapted to longer hikes and if you have two cars (so you can shuttle). You can do a shorter section of the trail at Badger Hole (approximately 4 miles, but it’s more strenuous).

Badger Clark Historic Trail: For those looking to get out of the car and stretch the legs with an easy loop, this one mile loop offers fun historical background in a pretty setting. The trail is located behind Badger Hole, home of Charles Badger Clark, South Dakota’s first Poet Laureate, and is mostly level, with some short climbs on an even trail.

Go jump in a lake:

Custer State Park is dotted with lovely lakes, all of which offer swimming, canoeing, kayaking, and picnicking.

sylvan-lake


Sylvan Lake: Sylvan is located near the trailhead for Harney Peak, and has a small marina and a trail circling the lake. There’s a general store and lodging, and while it gets crowded in summer, it can be a great place to spend a warm afternoon after hiking. If Sylvan looks familiar, that may be because it was featured (along with Mt. Rushmore) in National Treasure 2.

Legion Lake: Located toward the center of the park, Legion Lake also has swimming, fishing, and picnicking, plus dining at the lodge. If it’s crowded, try Center Lake, to the north up Needles Highway (turn on South Playhouse Road).

See wildlife:

You may see bison just while driving around the park (in fact, it’s very likely), but there’s also the Buffalo Corrals in the south end of the park to visit, and the Prairie Dog Town. Take the Wildlife Loop Road to easily hit both spots, and whenever you stop to get out of your car to snap photos, keep your eye trained on the rocks for mountain goats. We saw several, thanks to some eagle eyes.

Where to stay:

Custer State Park Resort, privately operated within the park, offers five lodges plus specialty cabins within the park. You can check them all out here, but they generally range from stately and elegant (yet still casual) Sylvan Lake to historic State Game Lodge, ranch-like Blue Bell, modern Creekside, and lake house Legion. All have the convenience of services like stores and casual dining.

rock-crest-cabins

If you plan to stay outside the park, I suggest staying in the town of Custer, near the west entrance to the park. I was very comfortable at Rock Crest Lodge. It was located on the highway, but close to town dining and had a nice playground and pool.

Have you been to Custer State Park? What do you recommend?

Multi-day kayaking in the San Juan Islands

Families will always see more detail of the area they’re traveling by car rather than by plane, and even more by bicycle than by car. In the San Juan Islands, there’s no better way to explore this vast network of islands than by kayak.

overnight-kayaking

On our previous trips to the San Juan Islands, we arrived by ferry, then visited two islands: Orcas and San Juan. This time, we decided we were ready for the bigger adventure of a multi-day kayak trip in the San Juan Islands, camping on remoter islands en route. We embarked with Crystal Seas Kayak, setting out on a perfectly sunny June morning. For two nights and three days, nothing stood between us and the tides, islands, sea, and sky.

What to expect on a Crystal Seas Kayak trip:

After booking our Crystal Seas trip, we were emailed a detailed packing list and FAQs, so we’d know what to bring. In a nutshell, we needed personal items such as clothing, sleeping bags, headlamps, sun protection, and toiletries. Crystal Seas provided everything else, including all food (and meal preparation), tents, sleeping pads, kayaks, and of course, guidance in the form of two guides.

crystal-seas

We met our guides, Brett and Corey, at a designated pick-up location on San Juan Island. This location is usually the ferry dock at Friday Harbor, but Crystal Seas will work with you if a different pick-up location is more convenient. Both Brett and Corey are local to the islands; having grown up in the San Juans, they knew all the ins and outs of the many islands, currents, and tide flows. We were happy to spend three days with both of them.

We shuttled by van to our put-in spot, the San Juan County Park campground and kayak launch on the east side of the island. We transferred our gear to dry bags, and learned how to load our sea kayaks (they’re like clown cars…it’s amazing how much gear fits!). We headed off by mid-morning, paddling to adjacent Henry Island for our first lunch. We then continued across a few miles of open water to reach Stuart Island, our home for the next two nights.

kayaking-san-juans

We paddled approximately 14 miles from our launch site on San Juan Island, but we took most of the day to do it, stopping to look at interesting sites in our kayaks and taking occasional land breaks. As an occasional kayaker (not a total newbie), I didn’t find the distance too strenuous, but we did find it satisfyingly challenging.

Our kids, ages 16, 13, and 10, fared just as well, if not better, than me and my mom, who joined us for this multi-generational trip. The paddling was less challenging for the teens of course, but it was crucial that they listen to instructions by our guides, because while the water looks calm in this part of the Salish Sea most of the time, the currents and tides are to be respected. Without our guides, we absolutely would have made big mistakes, even though we could see land of some sort at all times.

The ‘marine trail’ campsites at Stuart Island’s Reid Harbor are dedicated for human-powered watercraft only, which means kayaks, not motorboats, sailboats, or yachts. The latter can anchor in the bay, and we enjoyed seeing all the watercraft there, but appreciated that the campsites were more isolated, tucked away in the trees just past the beach.

We set up camp before dinner, each group of two finding a spot for their tent and setting it up. We explored the beach and dock, the kids taking a swim (brrr!) and spotting seals, sea stars, and seabirds of all sorts. After appetizers (yes, really!), we sat down to a dinner of salmon, freshly mashed potatoes, and salad with local greens and homemade dressing. Dessert was a pecan pie brought from a local bakery in San Juan (more on food later).

kayaking-crystal-seas


We settled in for the night by 10 pm (when it starts getting dark at this time of year), and while I woke at first light, the kids all slept in. We planned to remain camped in cozy Reid Harbor, taking a day paddle to explore nearby islands and hike. We enjoyed this more leisurely day, but Brett and Corey also offered an alternative itinerary, which would have included packing up and camping at another island, Jones. While Crystal Seas has a general itinerary set for each trip, we found there was a lot of flexibility when possible.

stuart-island

Our Day 2 included a beautiful paddle around Johns Island, where we floated past a colony of seals and looked for orcas in the strait (no luck this time!). We picnicked lunch on a tiny island (I’m sure it has a name, but I don’t know it, and my map shows it only as a speck!), then paddled ‘home’ to Reid Harbor, where we rested (and they kids played on the beach) before our hike up the nearest ridge to view the islands from 800 feet above sea level. This may have been one of my favorite moments on the trip: the view looked like the most perfect 3D map of the islands I could have asked for. In the sunlight under a blue sky, we could see all the way to the Olympics in one direction and Mt. Baker in the other. We spotted all the islands we’d paddled by, and Brett and Corey pointed out Roche Harbor, on the east side of San Juan. It looked surprisingly close, which is a lesson we learned kayaking in this area: distances are very hard to gauge on the water.

san-juans

We enjoyed another amazing meal, then rewarded the kids with a full buffet of s’mores ingredients. Our teens loved making campfires each night, and having the freedom to explore the campsites and nearby trails.

One of the things that makes backcountry trips, of any sort, so special for our family is the together-time. Without electronics, friends, or schedules in the way, the kids play together like they used to when they had less responsibilities and less social life. This trip was no different. Our youngest got his brothers back, and the teens got their childhood back.

They made swords out of sticks, skipped pebbles, spotted schools of fish, jumped off the dock, and wrestled on fallen logs. In other words, they had untethered ‘boy’ time.

reid-harbor-camping

Our last day, we packed up camp early, in order to paddle back to San Juan with the current in our favor. Thank goodness for Brett and Corey, who know these things! We paddled hard the distance back, with few breaks, necessary in this direction, but again, it felt satisfying to accomplish a hard day’s paddle in just a morning! We picnicked lunch back at the put-in spot, then shuttled back to our car. Looking out over the view of the Salish Sea while we ate our last meal together, we weren’t quite ready to leave!

Food on Crystal Seas trips:

In a word, the food is fantastic. We’ve been on several multi-day rafting and kayaking trips, and the food is always good, but Crystal Seas takes it a step further, serving as many local foods as possible. I’d estimate 70% of the foods served were locally sourced or grown. In addition to our salmon meal, we had a wonderful meal of beef and veggie tacos, plus lunches of caprice sandwiches and salmon wraps and breakfasts of bagel sandwiches and yogurt parfaits. There was always fresh fruit, fresh veggies, and snacks like organic chips, top quality trail mix and bars, and spread and dips.

crystal-seas-food

Note: no alternatives to the meal served were offered to children, so if you have a pick eater, let them know ahead of time. They absolutely accommodate all dietary needs, so I’m sure they could accommodate a child who needs a simpler meal. Our teens ate everything in sight, and our 10-year-old like 90% of the meals, but would have been happy with a plain PB&J a few times.

Helpful planning tips:

If you book at multi-day kayak trip with Crystal Seas, here are a few tricks and tips we learned along the way:

  • If you have a car, but you’ve checked out of your accommodations, park at the courthouse parking lot in Friday Harbor. We parked here on recommendation of Crystal Seas, and our car was secure without a parking fee. They picked us up here, too.
  • Organize your gear the night before. While you won’t have your dry bags until you’re at the put-in spot, you don’t want to be organizing your gear from your suitcase or duffle full of clothes at the dock. We set aside all the clothing and personal items we’d need for each person, and packed them in one large packing cube per person. They we only had to transfer the packing cube to the dry bag.
  • You’ll get a separate dry bag for your sleeping bag. The best type to bring is a lightweight down or down alternative bag, which packs down smaller than a camping bag.
  • Don’t forget any medications you might need. We all needed allergy medication during the trip, and luckily we had it with us. The guides will have a medical kit, so we probably could have left ours in the car.
  • Be prepared to get dirty! The campsites are rustic, and there are no showers (though there is a composting toilet at the campground). We brought Wilderness Wipes with us to freshen up a few times.
  • Be prepared for all weather. We lucked out with three perfect days, but we all had rain jackets and down sweaters with us, as well as gloves and beanie knit hats for everyone. On the flip side, we also had sunglasses (a must on the water!) and sun hats.
  • You’ll have a ‘skirt’ on in the kayak, keeping your lower half dry, so don’t worry about being wet and cold while paddling. Arms will get a bit wet from the paddles, but if it makes you cold, wear a rain jacket under your life vest.
  • Don’t forget to tip your guides. Our worked so hard…they definitely deserved it!

Disclosure: we experienced Crystal Seas on a media rate, for the purpose of review. As always, all opinions are our own.

Hiking the Kalalau Trail on Kauai’s Na Pali Coast (with teens to toddlers)

You don’t have to be a through-hiker with a backcountry permit and backpacking equipment to experience Kauai’s Na Pali Coast.Yes, the further you hike, the more you’ll see, but it’s entirely possible to hike just half a day and see enough to be wowed.

na pali coast

The Kalalau Trail runs 11 miles one-way along the stunning and steep Na Pali Coast, and provides the only means of traveling this section of Kauai coastline…on foot. Through-hikers either traverse the entire 11 miles in one day, camp at the end near the south shore, then hike back, or break up the adventure further, camping en route at about mile six, mile 11, and mile 18. It’s a route that requires the right gear, plenty of fresh water, and nerves of steel on some sections, where the trail hugs the mountains with steep drop-offs to the ocean.

Experiencing the Kalalau Trail with kids:

Most likely, you’re not prepared to make a multi-day adventure out of the Kalalau with kids in tow, but parents can certainly carve out a day of a Kauai beach vacation to see some of the trail. Start at Ke’e Beach on the North Shore, literally at the end of the road (you can go no further on Highway 56). The trailhead is well-marked, and you’ll likely see plenty of other hikers. Get to the trailhead early (before 9 am is best), as the parking lot fills up fast.

ke'e-beach

From the start of the trail at Ke’e Beach, families have multiple options on the length of their hike. We suggest:

  • hiking 1/2 mile in to the lookout point, then heading back for a 1 mile hike with preschoolers and young kids
  • hiking 2 miles in to Hanakapai’ai Beach, returning for a 4 mile hike with kids or teens
  • hiking 2 miles to Hanakapai’ai Beach, then an additional 2 miles up a side trail to Hanakapai’ai Falls and back, for a total of 8 miles with strong hikers

na-pali-coast

No matter which option you decide is best for you, note that the way will be steep. The Kalalau Trail rises and falls in elevation with every quarter mile (sometimes with every step!), with rocks, water runoff, and mud throughout. In many places, there are significant drops on the side of the trail to the ocean. There are not guardrails or other safety measures in place, so it’s crucial that young children are secured or holding a parent’s hand and older children follow directions and refrain from running along the trail.

hiking-in-kauai

Our extended family of 11 set out on the trail on a March morning, with the plan to hike the four mile out-and-back with the option of some family members continuing on for the eight mile option. We made a family rule: all kids, even the teens, would be sandwiched between adults as we hiked. This prevented my teens from running ahead, and the preschooler and kindergartener from feeling left behind or getting too close to the edge. No where in the first two miles of the trail did we feel the trail was too dangerous, and I never felt too close to the edge, but a child running, jumping, or playing along the trail would not work.

hike-to-falls

We hiked the first two miles slower than our usual pace, due to the steep trail but also due to the many photo opps along the way. At the 1/4 mile marker, families get their first glimpse of beautiful Ke’e Beach from above, but the even better views are yet to come at the 1/2 mile. The trail is mostly uphill for the first mile, then downhill for the second, as the trail drops down into Hanakapai’ai Valley and they rugged beach there.

There’s a pretty major creek crossing right before arriving at the beach, which can be either an exciting reward for reaching the destination or a final obstacle, however you want to think about it. We had to help the young kids across, but the teens managed just fine. On the other side, there’s room for a picnic lunch and some ocean watching, but no swimming…the beach here is unsafe for swimming. Check out the lovely cairns other hikers have made from the smooth rocks lining the shore, instead.

If you’re going on to Hanakapai’ai Falls, be sure to have plenty of water and adequate supplies, such as an extra layer of clothing, a small first aid kit, and snacks. The additional two miles to the falls is among the most strenuous I’ve encountered anywhere. There were at least six creek crossings, lots of muddy trail, slick rocks, and some actual bouldering to get up to the falls. The reward: one of the most beautiful falls I’ve ever seen, with space to take a dip in it’s pool. (Though if you opt not to get in the chilly water, you’ll get wet from the spray coming off the falls anyway!)

Retrace your steps to return to the beach, then retrace again to return all the way back to Ke’e Beach where you’ll end your eight mile day. We found the experience amazing, and would recommend the falls to anyone in good shape and used to hiking. The youngest hiker in our group for the extended hike to the falls was age 13. However, all kids, from age 4 and up, made it to and from the beach for a total of four miles.

What to wear:

Don’t wear your swimsuit, unless it’s comfortable to hike in. The only swimming is at the falls, and even that’s primarily a quick dunk. Be sure to have hiking shoes or very sturdy, rugged sandals, such as Keens or Tevas. Running shoes are a good bet, if you prefer them to hiking boots. (Browse more good stuff at Runnerclick.) I wouldn’t recommend anything without a closed toe. Wear sunscreen and sun protective clothing, and consider a bug repellent. We didn’t encounter many insects, but the area is known for them in certain times of year.

Additional activities and excursions to try on Kauai:

Cost of trail:

Free

Hours of operation:

Daylight hours. Note that the trailhead is often closed, depending on weather. The trail closes in severe rain, due to slippery mud and heavy flow of the creeks along the route (hikers have been swept all the way out to sea via flooded creeks along the trail). If the trail is closed when you arrive, wait a while. It usually opens. This was the case on our visit: at 9 am it was closed following a rainfall. We snorkeled at Ke’e Beach for a while, then the trail opened at about 10:30. This gave us a later start than we’d like, so please note possible trail closures when planning your trip.

Directions:

From Hanalei, continue along 57 to the end of the road, at Ke’e Beach.

Guide to Whidbey Island State Parks

Whidbey Island, Washington is known for its picturesque coastline and pastoral setting. It’s true that Whidbey, located north of Seattle, offers abundant farm stands and a healthy agri-tourism trade, but many families –including mine!– had no idea how many beautiful, exciting state parks fill this small island! We recommend coming to stay at least three days in order to experience most of them.

Fort Casey State Park:

If you arrive via Washington State Ferry at Coupeville, you’ll notice Fort Casey State Park right away. This large park sits on the island’s west coast, and centers on the region’s military history. There are numerous batteries (created for defense but never used) lining the coast line, which contributed to the ‘triangle of defense’ offered by Fort Casey, Fort Worden (across the water in Port Townsend, WA) and Fort Flagler.

admiralty-lighthouse

What to do here: Families will want to check out the batteries and commanders’ station, but should also visit the beach access and Admiralty Head Lighthouse. The light sits at Red Bluffs, and during day time hours in season, visitors can go inside and even climb the spiral stairs to the light. From here (and elsewhere in the park), kids can watch the ferries come and go from the landing.

whidbey-island

Campground: Yes! It’s right next to the ferry landing (which can be a good thing or a bad thing…).

Ebey’s Landing:

Ebey’s Landing National Historic Reserve encompasses the entirety of the town of Coupeville, Ebey’s Prairie, and Fort Ebey State Park. It marks the homestead and founding location of the Ebey family, and protects the historical significance of this entire section of the island. Fort Ebey includes coastline, hiking trails, and more batteries.

batteries

What to do here: At Fort Ebey, play on the beach! This section of protected coastline offers up oversized driftwood perfect for building a beachside hut or fort of one’s own, and the picnic areas are protected from wind and surf. The bluff-side trail is one mile long, and takes families from the beach to the batteries overlooking it. It’s worth getting back in the car to check out Jacob Ebey’s House. The house is open seasonally, but the adjacent cemetery is worthy of a visit in its own right. Families can overlook the prairie, and step inside one of the many ‘blockhouses’ the Ebeys built as protection from Native American conflict.

Campgrounds: Camping is available on the beach (in a protected forested area) at Fort Ebey, and on the prairie at Rhododendron Park (near the Whidbey Island Naval Air Station).

Deception Pass State Park:

deception-pass

On the north tail of the island, Deception Pass State Park may be the most well-known. This breathtakingly beautiful park focuses around the Deception Pass bridge. Hiking trails are abundant, and the park hosts a busy marina with sightseeing vessels doing business.

What to do here: Park at the visitor’s center (stand) on the south side of the bridge, and hike down to North Beach (.2 mile). From here, families will get a great view of the bridge before they cross it. It’s also fun to see the many fishing boats in the current that flows quickly here. Additional hiking trails take you further afield, or you can opt to cross the bridge. Cross either on foot using the pedestrian walkway (an exciting experience!) or drive.  Head to the marina dock on the other side, and take a Deception Pass Tours boat out on the water. This 45 minute tour in a catamaran Island Whaler takes you under the bridge and past the challenging water that churns there to the bay. During our tour, we saw porpoises and harbor seals, and many tour groups see whales. Tours are priced right at $24.95, and don’t last too long for young kids.

deception-pass-tours

Campgrounds: campsites range from forested to open, on or near the water. Like the rest of the park, they’re gorgeous!

South Whidbey Island State Park:

South Whidbey Island State Park is smaller and quieter, and feature shoreline and forested areas. Primarily, it serves as a campground. Families get great views of the Olympic mountains!

whidbey-beaches

What to do here: This state park is popular for clamming, but there’s also about three miles of hiking trails, fishing, and swimming.

Campgrounds: There are 46 tent camping spaces at South Whidbey. Of note: families may hear air traffic from the nearby naval base.

whidbey-island

While enjoying any Washington State park, you’ll need a Discover Pass. Passes are $10 per day, or just $30 for a year!


Exploring Port Townsend with kids

Located at the very tip of Washington State’s Olympic Peninsula, Port Townsend has a lot to offer families. From the quaint waterfront town with its lively history to a storied military presence, exploring Port Townsend with kids includes hiking trails, fort batteries, ice cream shops, and touch tanks! Here’s what’s in store (and where to stay):

port-townsend

Downtown Port Townsend:

It’s easy to see the charm of this small town as soon as you enter, whether via road from elsewhere on the peninsula or by boat (more on that later). The shipyards are open to the public, which means boat-loving kids can see dry-docked vessels up close and personal, and Union Wharf offers great views of the ferry.

Start on Water Street, where kids will want to view the wooden boat outside the NW Maritime Center, then head across the street to City Hall Museum run by the Jefferson County Historical Society. We would have overlooked this museum had I not been taken there by a local: inside the historic courtroom, visitors can get an overview of the town’s history, then go downstairs to see old jail cells (Jack London is rumored to have spent a night inside) and exhibits on the region’s pioneering, Japanese, and native cultures.

port-townsend-history


Right nearby is Dogs-a-Foot, a hot dog stand with every type of hot dog desired. It’s a perfect lunch pit stop, with tables outside. Afterward, continue your stroll down Water Street for a stop at Elevated Ice Cream. This locally-owned and operated ice cream shop offers unique, locally-sourced flavors, and has a chocolate shop and candy store located next door.

Stop into any other shops that interest you; you’ll find a great local bookstore and numerous galleries. Note the historic architecture; Port Townsend has some of the best preserved buildings in the NW. If you have your car with you, don’t forget about ‘uptown’: historic Port Townsend built on both the wharf and in the hills, and families will find the best Victorian architecture overlooking the downtown region. This area features a lot of the town’s B&Bs, but you’ll also find wonderful bakeries, diners, and shops.

elevated-creamery

Note: If you’re in the downtown/shipyard area for breakfast, you’ll want to head to the Blue Moose Cafe on Haines for an authentic home-cooked meal. This local hangout is right in the shipyards, and has been overseen by the current cook (not chef!) for decades.

Fort Worden State Park:

fort-worden

We’re pretty sure Fort Worden State Park is the heart of Port Townsend as far as kids are concerned. This sprawling park is located just outside of downtown on the coast, with beach access, hiking trails, and picnic grounds. The central feature of Fort Worden is the fort, which served as defense against invasion during WWI. The invasion never came, but the many fort batteries remain, with platforms for artillery, ammunition storage rooms, and many more intriguing spaces for kids to explore. The batteries are open to the public, which is a very welcome feature in a world that has increasingly shut doors on historical sites. Kids will love climbing on them, running through their creepy, dark tunnels and hallways, and generally playing soldier. Parental supervision is absolutely needed, of course; small children could fall or get lost. Don’t worry, you’ll want to explore the batteries just as much! Prepare to spend hours here!

marine-science-center

In addition to the batteries, Fort Worden is home to the Marine Science Centerlocated right on Battery Way. It’s open from April through October, with innovative saltwater touch tanks. The center staff bring sea life into the tanks in the spring, and release all the creatures in the fall. Daily, fresh salt water from the ocean adjacent is flushed into the tanks. Kids can touch many marine animals, and see more in additional aquariums. Across the street, the education building houses a whale skeleton and other educational exhibits with a conservation theme.

marine-conservation

There are numerous walking trails through Fort Worden (grab a trail map when you enter) and some take kids to additional batteries (less crowded than the one near the beach). There are several campgrounds, and yes, the beach has swimming access. The Point Wilson lighthouse makes for a great backdrop to your Olympic Peninsula beach day!

Inland from the beach, the campus of Fort Worden remains, though quieter than in its active days. Currently, buildings and rooms can be rented for vacation stays, allowing families to further immerse themselves in the area’s history.

Yes, you can stay the night in Fort Worden!

fort-worden

Rentals include full homes on Officers’ Row, units in the Non-Commissioned Officers’ Row, or dormitory rooms. I checked out an Officer’s Row house, where I stayed the night overlooking the campus and ocean. Officers’ Row houses include 1 and 1/2 bathrooms, four bedrooms, a parlor and a dining room, and a full kitchen. It’s fun to see firsthand how officers and their families lived during WWI. These houses are not newly renovated, but are comfortable and very spacious. Kids can play outside, and everyone can walk to the beach, the light house, and the batteries. There is no wifi, but in the check-in building (which is newer), there is a sitting room and a coffee counter where your java and wifi needs can be met.

fort-worden

Beyond Port Townsend proper, the Olympic Discovery Trail weaves 120 miles between the town and La Push, on the western coast, and of course, the rest of the Olympic Peninsula beckons with Olympic National Park and numerous additional hiking trails and beaches. Read more about Olympic National Park with kids!

How to get here:

puget-sound-express

Port Townsend and Fort Worden are located on Highway 20, which connects with Highway 101. Families can also take Washington State ferries directly to town from Whidbey Island (Coupeville) or take the Puget Sound Express from the San Juan Islands. We recommend booking a whale watching trip with this company, even if you don’t need them for transportation to the peninsula. On our trip with Puget Sound Express, we saw humpback whales, porpoises, and harbor seals.

Port Townsend

Educational Travel: Three Island Crossing State Park, Idaho

Back to school doesn’t have to mean only back to the books! Explore educational travel with pit stops to historic sites! Case in point: when traveling through Idaho on I-84, families may think there’s not much in the way of a pit stop past Boise. About one hour east of the Boise/Nampa area, it’s well worth a stop at Three Island Crossing State Park. Located in the town of Glenns Ferry, Three Island Crossing is the site of the Snake River crossing of the Oregon Trail. Hundreds of wagon trains crossed here where three small islands in the river allowed pioneers to sidestep the swift current (with mixed success).

three island crossing state park


The state park offers RV and tent camping, cabin stays, and an excellent interpretive center. With few motels in the area, we opted to spend a night in a Three Island Crossing cabin, which was a great pick for a casual camping experience. The cabins are located right on the Snake River in the day use area of the park (don’t follow signs to the campground). A handful of cabins dot a long lawn overlooking the river, and come equipped with electricity, heaters/air conditioners, and bunk beds for up to five. Outside, families get a covered patio with porch swing, BBQ, fire pit, and picnic table. Bathrooms are within walking distance (with showers), but these were temporarily closed during our visit. Instead, pot-a-potties were on site. Fresh water from faucets is easy to access.

snake river

The interpretive center is located between the day use and cabin area and the upper campground, and includes interactive exhibits on the Oregon Trail and the Three Island Crossing. Emphasis is placed on the intersection of not only the river and trail, but of the Euro-Americans and Native Americans at the crossing. There are thorough exhibits on the Native population in the area as well. Among our kids’ favorite displays: a packing list for the Oregon Trail, the life-sized covered wagon, and an actual Oregon and California Trail guidebook written by Langford Hastings, guide on the ill-fated Donner Party.

three island crossing state park

Date last visited:

June 2013

Distance from the Interstate:

Right off I-84.

Admission:

Day use fee applies for those visiting the interpretive center (center is free). Cabins were $45/night at time of our visit.

Operating hours:

Park: sunrise to sunset Center: 9 am to 4 pm

Directions:

From I-84, follow signs to 1083 Three Island Park Drive in Glenns Ferry.