Reuben H. Fleet Science Center

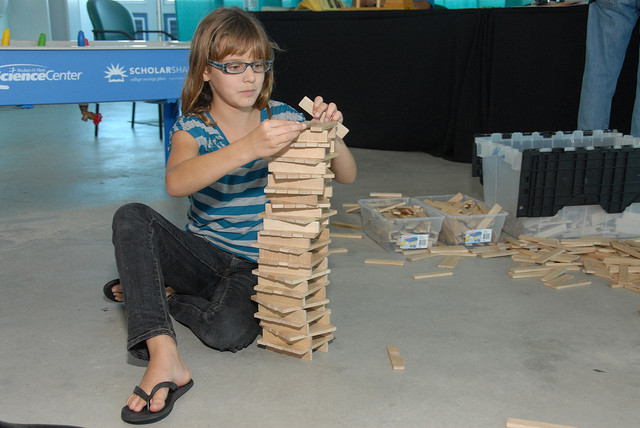
Located in scenic Balboa park San Diego, the Reuben H. Fleet Science Center offers hands-on science fun in a open-layout, easy-to-navigate facility. The museum is actually smaller than it looks on the outside, and for our family, that was just fine by us. With four kids in tow from age 4-14, we were thankful for the manageable size and open layout of the space. There are two floors: downstairs houses exhibits with live demonstrations, such as the popular drone exhibit, hands-on mind games and machine-based science, plus a great exhibit on the human body. There’s a great ‘Tinkering Lab’ where older kids can create projects of their own as well.

reuben-h-fleet-science-center

Upstairs is the ‘Play City’ for kids five and under, which is a full room of imaginative play pieces such as a grocery store, fire truck, and the like. Older kids can enter if playing and interacting with younger siblings or friends (in our experience). The upstairs section also features an interesting exhibit on the history and physics of the guitar, which older kids especially will enjoy. For an admission add-on, there’s an IMAX theater on-site.

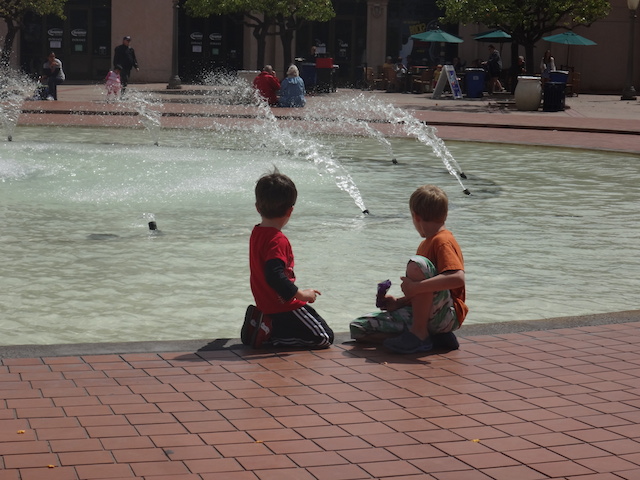
Tip: Combine a visit with a stop at the Natural History Museum, located directly adjacent. Start your day at either museum, and eat a picnic lunch at the fountain between the two as a break. Each museum can be toured in about two hours.

balboa-park

Date last visited:

April 2, 2014

Distance from the interstate:

Balboa Park is an easy drive from I-5 or I-805.

Hours and admission:

The museum is generally open 10 am to 5 pm (but hours alter slightly during school holidays, etc). Admission is only $13 for adults and $11 for children (3-12).

Directions:

The museum is located at 1875 El Prado in Balboa Park, San Diego.

Photo credit: Pit Stops for Kids and Port of San Diego

Luv Surf: Best San Diego vacation home rental

Pay attention, family travelers. I’ve recently discovered a gem of a San Diego vacation home rental option. If you’re not in the San Diego area, you probably haven’t heard of Luv Surf, but this local company should absolutely be on your radar before your next visit to Southern California.

san-diego-vacation-home-rental

Luv Surf is a boutique rental company with half a dozen beach home rentals in the Mission Beach and Mission Bay area of San Diego. Each home is beautiful, in an ideal beach location, and pet and baby friendly. While in a Luv Surf rental, families can enjoy both beach living and city living. Since I hadn’t heard of them before our stay, I admit to being skeptical. As soon as I opened the door to our vacation home rental at 812 San Rafael in Mission Beach, however, I was blown away. Check out our video:

How Luv Surf differs from standard home rental options:

  1. Service and hospitality: Before I’d even arrived at our home rental, I called my rental contact Sheila (as instructed by Luv Surf). I thought I was calling just to get the key code for the front door, but instead, I got so much more: cheerful instruction for how to find the house, where to park, how to make my way to the rooftop deck (more on that later), where to find the SUPs and beach toys (yep!), and what I’d find complimentary in the fridge. In Luv Surf’s words: wine should always be waiting!
  2. Amenities and extras: Many vacation homes are luxurious and beautiful (and 812 San Rafael is both of those things), but rarely do they have everything you need with turn-key readiness. We were advised to poke through our home’s kitchen cupboards before grocery shopping for our stay, which turned out to be great advice: already on-hand were all the small items we thought we’d need to buy, such as ziplock baggies, spices and oils, laundry detergent, soaps and sponges, and even standard over-the-counter medications such as cold medicine. The bathrooms were stocked with shampoos and lotions, and wine and beer were in the fridge.
  3. Recreation items: We were so excited to see two SUPs (paddle boards) waiting for us, as well as boogie boards, a skim board, kids’ life vests, sand toys, beach towels, and cruiser bikes. This is such a savings in recreation rentals! Right away, we were riding bikes along the many bike paths and paddling around Mission Bay!

san-diego-vacation-rental

The 812 San Rafael location:

We stayed at the San Rafael home, which is located just three homes from the water of Mission Bay. On the other side, it’s only one short block from Mission Beach. The location absolutely couldn’t be beat for our family: we were in the area to explore San Diego (all within easy driving or public transit distance) and play on the water. Our school-aged kids could absolutely walk by themselves to the bay or the beach, and we could all ride bikes straight from the front door. There’s ample dining and shopping within walking distance—Mission Beach is a lively, vibrant, and fun community—and the beach is lifeguard-manned. Stop by the Luv Surf retail store just a few blocks away!

mission-beach-san-diego

The home itself is three stories (in addition to a rooftop deck). The first floor houses one bedroom and bathroom plus the garage (with full laundry facilities). The second floor has two bedrooms (one of which is a children’s bedroom with bunk beds) and two bathrooms (one of which has a jacuzzi tub). Each of these bedrooms have their own private deck. On the third floor is the kitchen and living area (with yet another deck), and upstairs from the kitchen is a fabulous rooftop deck with fire pit, outdoor table, and seating.

san-rafael-luv-surf-rental

A few extra ‘extras’ you can expect:

  • BBQ
  • granite counters
  • gourmet kitchen
  • espresso maker
  • flat-screen TVs
  • complimentary WiFi
  • pet amenities such as dog beds and toys
  • high chair and baby-proofing items

Get more tips on what to do in San Diego during your stay!

A word on parking:
The home is located in bustling Mission Beach, which is notorious for having little street parking. The property features two spaces to park: in the single car garage or in the parking space adjacent. The garage and space are located at the back of the house, in a narrow alley. We have a standard-sized minivan, and had a hard time fitting into the garage space (it involves careful navigation). We opted to park in the space instead, which meant that when we had a friend stop by for dinner, she had to find street parking, which was very difficult. This solitary inconvenience would in no way prevent us from renting a Mission Beach home, but it helps to go in aware.

luv-surf-rental

Rates:

All Luv Surf rentals have rates that change seasonally. The San Rafael house ranges from $325-$620 nightly. It is absolutely a luxury home property. Once there, you’ll save on parking, entertainment, dining, and recreation.

Directions:

Mission Beach is only minutes from all points in San Diego. It’s also less than 30 minutes from Legoland and Carlsbad beaches.

As I disclose whenever applicable, we stayed with Luv Surf as guests of the company. Hosted visits make up-to-date reviews on Pit Stops for Kids possible.

An ideal day itinerary using Old Town Trolley Tours

San Diego’s Old Town Trolley Tour is an excellent way to get an overview of the city for first-time or infrequent visitors. The trolley drivers are entertaining and most stops are well-worth your time. However, admission is not cheap, so to make the cost of an Old Town Trolley Tour worth your while, plan to spend the whole day utilizing it.

old-town-trolley

After a day on the trolley as visitors already familiar with San Diego, we designed what we consider the perfect all-day San Diego Old Town Trolley Tour itinerary for families:

The trolley begins running at 9 am (in most seasons) and makes stops every 30 minutes at 11 points of interest (two of which are hotels). The tour takes two hours to complete if you remain on the trolley, but the real beauty of this tour is the hop-on, hop-off feature, so you’ll want to utilize that. However, you certainly don’t need to get off at every stop.

old-town-trolley-tour

Step 1: Unless you’re staying at one of the two hotels on the tour route (Marriott Marquis or Hilton Bayfront), you’ll want to start at Old Town.

Arrive at 9 am at Old Town (the trolley station is located at the edge of Old Town Market on Twiggs). You’ll want to tour Old Town, but wait: the market is much more lively later in the day. Instead, board the trolley and start the tour.

Step 2: Get off at Stop B: San Diego Harbor.

Most families will want to either tour the USS Midway LINK or the Maritime Museum. Either will take about two hours to visit. If you don’t want to spend that much time, it’s still worth hopping off to walk along the harbor front to see the various ships docked: the historic Star of India, the Midway aircraft carrier, an historic submarine, and the odd cruise ship or two.

USS Midway

Step 3: Enjoy the trolley through stops C-H.

Get back on the trolley when you’re done with the harbor, and ride it through the next six stops (this will take approximately 30 minutes). The trolley will take you through the downtown area and give you the history of the founding of the city, plus point out Petco Park, the Gaslamp Quarter, and Horton Plaza. You’ll then head over the Coronado Bridge (with great city views) to Coronado Island.

Step 4: Hop off at Coronado-Orange Avenue.

Don’t get off at the first Coronado stop (on the bay side) but rather wait until the second stop near the ocean side. This is a great place for a causal lunch at any number of sandwich shops, plus a walk on the beach by the famous Hotel Del Coronado. Plan to spend an hour, then re-board the trolley.

old-town-trolley-tour

Step 5: Hop off again at Balboa Park.

The very next stop is Balboa Park, home of San Diego’s many kid-friendly museums and the San Diego Zoo. We recommend saving the zoo for a separate visit (as it deserves a full day) but definitely get off the trolley to walk the grounds of the park. The botanical garden is free, as are several smaller museums. If you want to spend a few hours (which we recommend), our top picks are the Museum of Man, San Diego Natural History Museum, or Reuben H. Fleet Science Museum.

Step 6: Stay on through Little Italy.

Unless you need a meal (the dining in Little Italy is stellar), stay on the trolley through Little Italy after Balboa Park and take it to Old Town. The nice thing about hopping on and off: each driver has different tidbits to share, making the tour entertaining no matter how many drivers you get.

Step 7: Disembark at Old Town.

You’ll want to visit Old Town Marketplace and the Old Town State Historic Park for at least two hours, after which Old Town is a great place to get an authentic Mexican meal for dinner. Our favorite sites in Old Town include the visitor center and historic exhibits in the Old Town State Historic Park square, the marketplace with lively colors and (mostly) cheap souvenirs, and the many snacks and old fashioned candle, soap, and candy shops. Look for the lady making tortillas!

This tour itinerary should take you from 9 am to past 6 pm. Of course, adjust according to your interests, but we found this to be a great use of the trolley (plus you skip the hassle of parking at all these locations).

old-town-san-diego

Trolley tickets:

Trolley tickets are $39 for adults and $18 for kids, making it a serious investment for your day. All the more reason to plan the perfect day’s itinerary to utilize it! Get trolley tickets online or at the Old Town or harbor kiosks.

As I disclose whenever applicable, we experienced the trolley as guests of the company, for the purpose of review. Without hosted activities, we wouldn’t be able to bring reviews to Pit Stops for Kids.

Wet ’n Wild Palm Springs with kids

In our experience Wet ’n Wild operations are largely the same wherever you go, but certainly, Palm Springs is an ideal location for one. Open in spring and summer, Wet ’n Wild Palm Springs includes all you could ask for in an outdoor water park and a sure-fire activity when in Palm Springs with kids: plenty of slides and tube rides, daredevil slides with sharp drops, small slides for the younger set, a large water clubhouse/play area, and most importantly for my kids: a lazy river and wave pool.

wet-n-wild-palm-springs

Note: Coming soon, Wet ’n Wild is adding a Wave Runner surf simulator. We saw construction ongoing during our visit, and wished very much it was already in operation!

Given Palm Springs hot, dry climate, it came as no surprise to me that this Wet ’n Wild location offered more than the usual cabanas with shade and misters (available for an extra rental charge) and ample shaded seating and lounger areas (free of charge). Still, I’d arrive early in the day to snag a good spot. We found the park to be generally clean, and the staff to be friendly and attentive to water safety.

wet-n-wild-palm-springs

Distance from the interstate:

An easy drive from I-10.

Admission and hours of operation:

General admission at the time of our visit was $36.99 for adults and $26.99 for kids 3-11. Hours vary significantly by season and day, so be sure to check the website for update information. Parking is $14 per day.

Dining:

Plenty of snack and quick-dining options abound in the park, including my kids’ favorite: Dippin’ Dots. Outside food is allowed at designated picnic areas just outside the main gate (get your hand stamped before exiting). We brought water bottles and small snacks into the park (our bags were checked and these items permitted).

wet-n-wild-palm-springs

Tip: Bring your own towels and sunglasses, or you’ll pay dearly for these items in the park.

Directions:

From Palm Drive, take Gene Autry Trail. Continue south for approximately 5 miles.
Wet ‘n’ Wild is on left just past Mesquite Ave.
As I disclose whenever applicable, we experienced Wet ’n Wild as guests of the park, for the purpose of review. Without compensated admission, many pit stop reviews would not be possible.

Yosemite lodging pick: Yosemite Lodge at the Falls

If your family vacation will center around the valley floor area of Yosemite National Park, you can’t beat the location and convenience of Yosemite Lodge at the Falls. Located steps from Yosemite Village in the heart of the park, Yosemite Lodge is directly adjacent to Yosemite Falls (yes, you can see them out your door) and a shuttle stop away from everything else on the valley floor. Read Yosemite National Park touring tips and advice.

yosemite-lodge-at-the-falls

Yosemite National Park has plenty of lodging options, obviously, including Curry Village tent cabins, campsites, and upscale accommodations at historic Ahwahnee. Just outside the park, Tenaya Lodge is a good pick. All have their pros and cons, but for location and convenience, Yosemite Lodge can’t be beat. This is no secret, which makes reservations at Yosemite Lodge hard to come by. Here’s what you need to know:

  • the lodge takes reservations a year in advance
  • the 4 family rooms are hardest to come by (try for one of 27 family bunk rooms instead)
  • packages including breakfast or select tours are available seasonally
  • the site availability calendar is kept up-to-date: keep dates flexible to ensure a reservation

yosemite-lodge-building

Yosemite Lodge is run by the park’s main concessionaire, Delaware North, who does a fantastic job offering park programming such as nature walks, ranger-led talks, and naturalist-run activities. I recommend the Night Prowl with a Delaware North naturalist for school-aged kids and teens (which departs directly from the lodge). Yosemite Lodge also offers valley floor tours.

Rooms:

yosemite-lodge-room

Yosemite Lodge’s standard rooms feature two queen beds or one king, a separate bathroom area and private patio or balcony. There’s a small fridge in each room, and complementary wifi, but for coffee and other food preparation, you’ll have to venture out. Family rooms feature bunk beds, living space, and kitchen tables, which helps with space, but I definitely wish they also included kitchenettes for simple meal preparation.

Dining:

yosemite-lodge-food-court

Everything families need in the dining department is right there at Yosemite Lodge: the Food Court is open for all meals, and serves counter-service style items a la carte or by platter or meal. I recommend a B&B package to save some cash on breakfasts. At the time of my visit, a standard adult breakfast cost approximately $10 and up.

In addition to the Food Court, the Mountain Room is open daily for dinner (even in the off-season) and offers upscale dining against a backdrop of mountain scenery thanks to the floor-to-ceiling windows. I recommend budgeting for at least one relaxed dinner in Mountain House (and definitely get the pastry-wrapped salmon entree!).

yosemite-lodge-at-the-falls

Activities on-site:

In addition to ranger and naturalist-led programming held on-site, Yosemite Lodge offers an outdoor swimming pool in summer, bike rentals seasonally as weather permits, and ice-skating at nearby Curry Village. The Tours and Activities desk can help you with anything else you might want to do in the area.

yosemite-village

A five-minute walk takes you to Little Yosemite Falls, and the trail head for Upper Yosemite Falls. A ten-minute walk takes you to Yosemite Village and the visitors center and museum. The park-wide shuttle services stops right at your door.

Rates:

Rates vary widely by season. Check rates here for up-to-date information.

yosemite-falls

As I disclose whenever applicable, my stay at Yosemite Lodge was hosted, for the purpose of review. I hope my knowledge of the property can help other families plan a perfect Yosemite vacation!

Kings Canyon lodging pick: John Muir Lodge review

Kings Canyon National Park’s John Muir Lodge is located in the heart of the park’s Grant Grove Village. Bustling in summer with campgrounds and tent cabin units, the village is nearly empty in the off-season (any time between September and May). The lodge registration is located at the main complex with convenience store, gift shop, and the Grant Grove Restaurant (more on that soon) but the lodge itself is set back about a five-minute walk from the village center.

john-muir-lodge

The John Muir Lodge lobby is comfortable and spacious, with a big roaring fireplace, plenty of couches and tables with chairs, and complimentary wifi. Rooms are along the ground floor and second floor, with nice deck and patio space on the end of each hallway.

Rooms:

You won’t find a lot of frills here (though the lodge interior is scheduled for a facelift). Standard rooms like the one I experienced include two queen beds and room for a rollaway (sleeping a total of five). Deluxe rooms include one king bed and a pull-out couch to sleep a total of four. As stated, the rooms need some sprucing up, but are perfectly comfortable and adequate. I appreciated the iPod docking stations, allowing me to keep my USB cords packed for the night, and the wifi in the lobby proved fast and easy to connect to. Tip: I heard that some first floor rooms adjacent to the lobby have a wifi signal that will save you the trip to the lobby to connect.

john-muir-lodge

Dining:

As mentioned, there is a small convenience store in Grant Grove Village, but this is primarily for the campers in the summer months; guests at John Muir Lodge don’t have fridges or kitchenettes to do much meal preparation. The Grant Grove Restaurant is causal but upscale, and offers nice meals for families. Their breakfast features standards like egg and breakfast meal combos, omelets, and pancakes or French toast, and dinner fare includes a kids’ menu and wonderful local fish and grass-fed beef options. The included bread course at dinner is to die for: the new chef makes his assorted nut and fruit breads from scratch daily, and if you’re not careful, you’ll fill up on them!

Family-friendly package deal: the Junior Ranger Package will be available May 15 through September 1, and includes a one-night stay at Wuksachi or John Muir Lodge and a Junior Ranger vest, tee-shirt, hat, and compass. It encourages checking out the parks’ Junior Ranger programs, which introduce kids to what makes the national parks so special and how to become great environmental stewards. Most programs are free! At the end, each participant will earn a Junior Ranger badge. Rates start at $299 in spring and $365 in summer at Wuksachi and $249 in spring and $339 in summer at John Muir Lodge.

Tip: if you’re looking for a quieter, more upscale lodging experience, we recommend Wuksachi Lodge in adjacent Sequoia National Park.

Directions:

John Muir Lodge is centrally located and within easy driving distance to all points in Kings Canyon or Sequoia national parks. From Fresno, it’s an easy (though windy) drive up Highway 198 to the General’s Highway. Follow signs to Grant Grove Village.

As I disclose whenever applicable, my stay at John Muir Lodge and meals at Grant Grove Restaurant were complimentary, for the purpose of review. All opinions remain my own.

Educational Travel: End of the Oregon Trail Museum

Historic Oregon City marks the official end of the Oregon Trail. It’s also home to the best Oregon history museum you’ve probably overlooked. Only minutes from downtown Portland, Oregon City and its End of the Oregon Trail Museum is easy to access via car or MAX, but often becomes overshadowed by other excellent Portland attractions for kids. The museum includes a wonderful indoor exhibit hall, a country store selling pioneer-era toys, candies, and garb, and gardens in the summer months. Families can also get information on area historic home tours.

end-of-oregon-trail-museum

After checking in at the front desk in the country store, visitors are directed to the three main exhibit halls, where docents take you through the space. This is not a traditional tour, where guides are speaking to you all the time, but rather leading you and helping you along. In the first building, for instance, is a hands-on pioneer-era store, school, and wagon supply area, where kids are encouraged to play for a while. Young kids will like the school and store area, and older kids will love creating their own Oregon Trail supply list, then physically collecting the required items (bags representing flour, bacon, and coffee, medicines, tools, and the like) and fitting them into an actual wagon bed. All supplies must come in under 1000 pounds, so we kept track on our phone calculator.

end-of-oregon-trail

When they’ve played their fill in the first building, visitors are led to a hands-on activity (candle-making during our visit) and then to a 30 minute film depicting life along the Oregon Trail. All our school-aged kids were interested in the film, but very young children may want to opt out. The docents then lead families through to the third building, where the talking portion of the tour includes information on the Oregon City land office (where all Oregon Trail travelers had to ‘check in’ to get their land) and Oregon City history (it was the first capital of Oregon, and boasts additional firsts, such as the first hotel west of the Rockies, etc). The docents do a great job of keeping the talk engaging, with many questions directly to kids and many stories kids are interested in. You can stay here as long as you like (the docents will gamely keep answering questions) or can head outside to run around on the lawns, check out the gardens, and shop in the store. Free hot chocolate and coffee are offered in the store post-visit.

schoolhouse-end-of-oregon-trail-museum

Date last visited:

January 2014

Distance from the interstate:

10 minutes from I-5, right along I-205.

Admission:

$9 for adults, $5 for children 5-17. Kids under 5 are free.

Hours:

Summer: 9:30 am to 5 pm. Winter: 11 am to 4 pm.

Dining:

No food services are on-site. Pack a picnic lunch; picnic tables are available outside.

Directions:

The museum is located at 1726 Washington St., Oregon City. From I-5, take I-205 to Oregon City.

Where to stay in Death Valley: Furnace Creek Ranch California

In stunning and desolate Death Valley, CA, The Furnace Creek Ranch is THE place to stay with kids. This place has everything, from lawn games to a spring-fed outdoor pool and dining options, and is in the best location for exploring this vast park. Read on for a full review of Furnace Creek Ranch.

furnace-creek-ranch

Much more than just your average motel, The Furnace Creek Ranch is a desert oasis centrally located on the eastern side of Death Valley National Park. Recent improvements to Furnace Creek Ranch include an updated pool patio area with new chairs, tables, and gardens, a new sport court for basketball and volleyball, bocce ball and shuffleboard areas, and free sport recreation rentals.

Would you rather camp? We have tips and reviews for Death Valley camping at Furnace Creek!

furnace-creek-ranch-sports

Why it’s worth the drive:

Located 2.5 hours from Las Vegas, Death Valley is a considerable distance from most other sightseeing venues in southern Nevada, but the moment you drive over the mountains to the vast valley floor, you’ll understand why it’s recommended time and again. Even very young children can handle the moderate hikes through stunning canyons and/or ride in an all-terrain jeep through bumpy washes and across cracked desert floors. While this national park can be done in a day trip, it’s a vast area to cover, with lots of driving time. Our family highly recommends at least a two-night stay to see all the valley has to offer.

Why we Recommend Staying at the Ranch:

Death Valley NP offers several accommodations within its borders, ranging from the 5-star Inn at Furnace Creek to campgrounds. We always choose the ranch at Death Valley–Furnace Creek Ranch–for its welcoming atmosphere and accommodation of families with young children. The Ranch consists of an entire complex of motel units (the deluxe rooms, which open out directly onto the green across from the pool are worth the extra $$), restaurants, playgrounds, stables, swimming pool and more. There’s a general store (convenient when we needed Tylenol, ice for the cooler, and after-dinner ice creams) bike-rental booth, and museum. The 80-degree spring fed pool is the highlight. Plus, you can walk to the park service visitor center from the grounds.

Nate and Calvin get sworn in as new rangers at Death Valley National Park.

What to see: Death Valley offers desert hikes, off-road excusions, horseback riding, and tours. Check out our family’s top Death Valley hiking picks.

Accommodations: Options at the Ranch include cabins (one room), standard rooms, deluxe rooms (ideal location), and RV or tent camping (does not include pool pass). Bear in mind that the best rates are on the shoulder seasons, which in the case of Death Valley are early fall and late spring. Our favorite time to visit? Spring break!

Food Services: Several restaurants are available onsite. Our favorite was the family diner, ’49er Cafe, serving general family fare like burgers, pasta, and kid meals. The Wrangler Steakhouse is spendier, but does have an extensive breakfast buffet.

In addition to the restaurants, the Ranch General Store is well-stocked with items to make your own picnics and light breakfasts, like milk, cereal, bread, lunchmeats, etc. Be prepared to pay dearly for this convenience, however! (We stock up on groceries before entering the park.)

Directions: From Las Vegas: take I-15 N, then take exit 42A to merge onto US-95 N toward Reno. Turn left at NV-373 S. Continue onto CA-127 S, entering CA. Turn right at CA-190 W into the park.

Where to backpack with kids in Northern California

Will you be backpacking with kids this coming summer? Most families who love backpacking with kids are familiar with backpacking options in popular regions such as Yosemite National Park, but the following lesser known areas offer backpacking just as scenic and often crowd-free.

where-to-backpack-with-kids

Tahoe and Northeastern Sierra Nevada:

Our favorite section of the Northeastern Sierra Nevada mountain range is located in California’s Plumas County, adjacent to the town of Graeagle. The Lakes Basin Recreation Area, just south of Graeagle up Gold Lake Road, offers 47 trails and over 30 alpine lakes. Some of these trails are available only for day hikers, but link families to backpacking regions. To start out directly on a backpacking route, begin at the Jamison Mine Trailhead en route to historic Johnsville (10 miles from Graeagle) and hike approximately three miles uphill to beautiful Rock Lake. This alpine lake offers idyllic camping, swimming, and rock jumping. Adjacent Jamison Lake offers great trout fishing.

Tip: consider renting a Tahoe vacation home before or after your backpack trip. We like to spend a few days pre-trip in a home, where we can organize backpacking foods, pack our backpacks, and enjoy a few luxurious days before entering the backcountry.

Trinity Alps and Marble Mountains:

Further north near the California/Oregon border, the Trinity Alps Wilderness in Shasta Trinity National Forest consists of chiseled granite peaks and alpine lakes, with elevations from 2,000 feet in creek drainages to 9,000 feet at summits. This wilderness offers many different trails ranging from 1.5 miles to 15 miles at varying levels of difficulty. Spring backpacking is often an option here (in the lower elevations) and mid-week trips are encouraged to beat crowds. Our pick: the five mile hike to Granite Lake on the Swift Creek trailhead. Tip: families will want to arrive early on weekends or during mid-week to secure the prime campsite lakeside.

granite-lake-backpacking

The nearby Marble Mountains are less populated, and easily accessed from I-5. Our favorite backpacking route through the Marble Mountains is to Campbell Lake, located off the Shackleford Creek Trail (three hour hike). Visibly stunning, Campbell Lake offers great swimming. The Trinity Alps and Marble Mountain region offers many loop trails perfect for families wanting to adjust their trip to suit kids’ abilities.

Lassen National Park:

Lassen National Park is one of the least visited in the US, and we have no idea why! However, families can take advantage of the low crowds and find prime backpacking wilderness with relative ease. Grab a wilderness backpacking permit when you enter the park, and then head east, to where the top backpacking loop trails depart. You’ll find alpine lakes, creeks, and lodgepole pine forests in ample supply. The weather tends toward hot and dry, which means families will encounter fewer mosquitos than in damper areas. If you head toward geothermal regions of the park, bear in mind that camps cannot be set within 1/4 mile of geothermal activity (bubbling pots, etc).

backpacking-trail

No matter where you backpack, be sure to get the necessary permits at the ranger station or forest service station nearest your trailhead, and check conditions before arriving. Make sure you have a water filtration system or means of fresh water, and bear canisters where required. For more general backpacking tips, read How to Plan a Multi-Day Backpacking Trip with Kids. For gear suitable for kids while backpacking, check out our Travel Gear We Use series.

The above post is written in partnership with VacationRoost.com.

Stay the night in a fire lookout: a weekend on Pickett Butte, OR

We love camping in all seasons, but we also like to be (reasonably) comfortable. A number of years ago, we discovered Oregon state park yurts, and this year, we’ve added national forest fire lookouts to our off-season camping picks. If you might stay the night in a fire lookout, read on!

stay-the-night-in-a-fire-lookout

Fire lookouts available for civilian stays are located across the US. To find one in your state, start with this US Forest Service list, then click over the Recreation.gov to reserve (you’ll want to plan way ahead, and reserve as early as possible). We stayed at Pickett Butte fire lookout in Southwestern Oregon, located in Umpqua National Forest.  Pickett Butte served well for a winter fire lookout stay because of its relatively low elevation of 3,200 feet; while it sits at the highest rise in the surrounding forest and towers three steep stories into the air, it usually is accessible in all seasons. We loved that the immediate terrain around the tower was open and accessible to play in: we could stage air soft ‘wars’ and games of tag, plus build fun forts. There is also room for a tent and you get a campfire ring and picnic tables.

pickett-butte-fire-lookout

Pickett Butte is accessed via seven miles of winding forest service roads (do not use a car navigation system to find it), and is very isolated. We were the only people within miles, which meant we could enjoy peace and solitude (and also meant our chocolate lab could run freely). The lookout consists of a single 12×12 room at the top of one of the steepest towers we’ve ever experienced: the three flights of stairs are more like ladders. Our dog we spoke of? He couldn’t ascend them, and opted to sleep in the car. The lookout features a nice pulley system to help you haul your stuff up, which was fun for our kids, and you can drive directly to the base of the tower. The single room features gas-powered lanterns, stove, oven, and fridge, plus a heater. There’s a single bed, and plenty of floor space for sleeping bags. The wrap-around observation deck and floor-to-ceiling windows offer incredible views (plus a great flight deck for homemade wooden airplanes we built during our stay).

pickett-butte-stay

Preparation before arriving at any lookout:

Before arriving at your lookout, call the ranger station or forest service office closest and ask about conditions. Depending on your lookout, you may need to ask for a combination lock code or key access as well. We’re very glad we called ahead before our Pickett Butte stay; had we not had the correct combination lock code, we’d have been forced to retrace our steps back to the ranger station for information.

Find out what provisions you’ll need. For instance, at Pickett Butte, gas fuel is in ample supply, so we didn’t need to bring our own. Ditto for pots and pans and some utensils, including a can opener and bottle opener. However, no potable water was available, so we knew we needed to bring our own. Tip: three gallons for two nights was not enough for our family of five. We ended up boiling water from a creek 1.5 miles away for our last breakfast of oatmeal and hot cocoa (be sure to boil water a full five minutes). We also brought more cooking tools than needed, but didn’t want to be caught unprepared.

fire-lookout-stay

At Pickett Butte, it’s understood that each guest will try to leave something to better the experience for the next person; when we arrived, we found a half-bottle of wine awaiting us. We left a set of balsa wood airplanes for the next kids to fly off the top of the tower. In the cupboards, we found canned goods, instant soups, and an assortment of batteries.

Before packing your gear for any lookout, ask whether a campfire is allowed, and make plans for purchasing local firewood. Determine your menus based on what appliances you have at your disposal. We opted to cook over the fire one night, and used the oven and stove top the next. Don’t forget about the details: is there an outhouse? Will you need to bring toilet paper? (We wished we’d brought wet wipes for easy hand washing.)

Pack plenty of dry clothes if camping in the off-season; the small heater in Pickett Butte would not have been up to the challenge of drying all our clothing. We packed rain and snow gear, just to be safe, and plenty of pairs of socks, gloves, and hats.  Bring extra garbage bags in order to haul out all garbage from your stay. Print out directions to your fire lookout before departing home, and don’t rely on your navigation system. Enjoy!

stay-in-a-fire-lookout

Date last visited:

February 2014

Distance from the interstate:

Pickett Butte is located approximately 20 miles from I-5 off the Canyonville exit.

Rate:

Cost of a fire tower lookout stay in Oregon is $40/night.