20 Awesome Camping Hacks to Make Your Next Trip Easier

Camping can be a lot of fun, but it can also bring a lot of hassle. We have been camping for decades, and our experience in the outdoors has helped us learn some pretty great camping hacks along the way to help us spend less time on the hassle and more time enjoying the outdoors.

Glossy magazine covers and campground brochures highlight fun-filled days at the lake or river, restful afternoons lying in a hammock slung between two trees, roasting marshmallows by the fire, and snuggling into cozy sleeping bags at night.
furnace-creek-campground

If this idealized version of camping doesn’t exactly mirror your own family camping experiences, you’re not alone. My first few excursions into the great outdoors with my kids involved more work than play, more chaos than relaxation, and far more dirt (on everything) than I bargained for.

In the years since, I’ve learned some camping hacks that have turned my camping trips into the postcard version.

Want to ensure that your next camping trip is relaxing, stress-free, and focused on the fun, not the chores, in the outdoors? The following camping tips will ensure more time in the hammock and less time over a camp stove.

20 Camping Hacks to Make Your Next Family Vacation Better

1. Use Dryer Lint as a Fire Starter
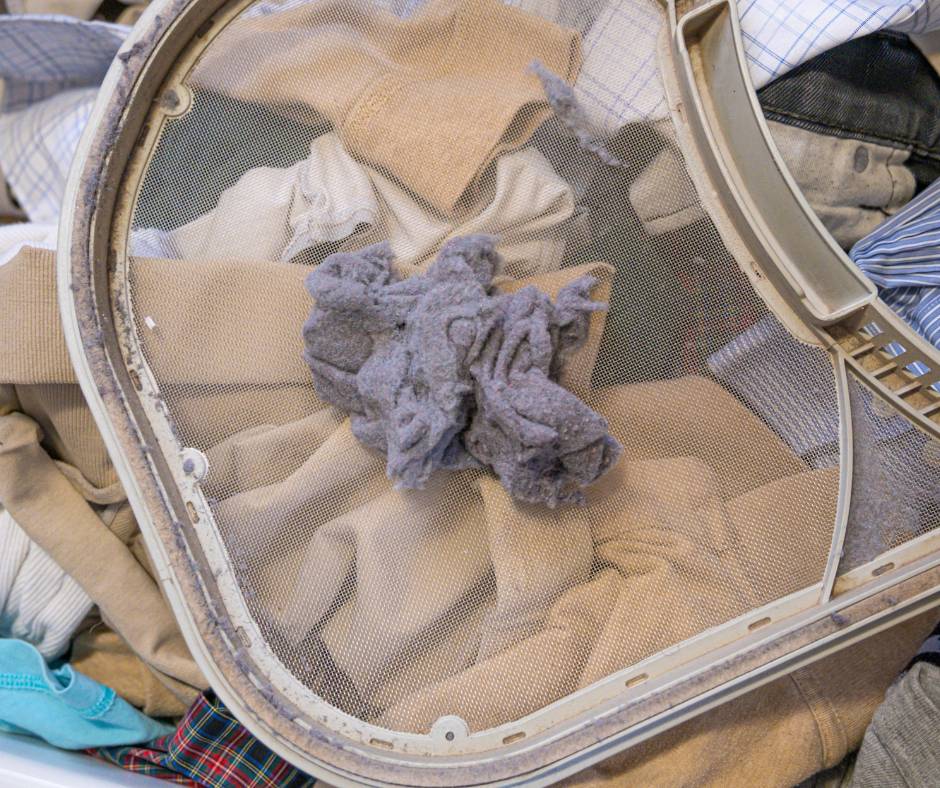
Why buy fire starter or chemical-based gel? Use dryer lint as your fire-starter: simply save lint in cardboard egg carton pockets, pour candle wax over each pod, then bring along to start your fire.

Use can also use cotton pads soaked in melted wax or coated in petroleum jelly as fire starters. They ignite easily and will help you get your campfire going.

Here are some of our favorite RV rental tips.

2. Re-Purpose Your Shower Tote
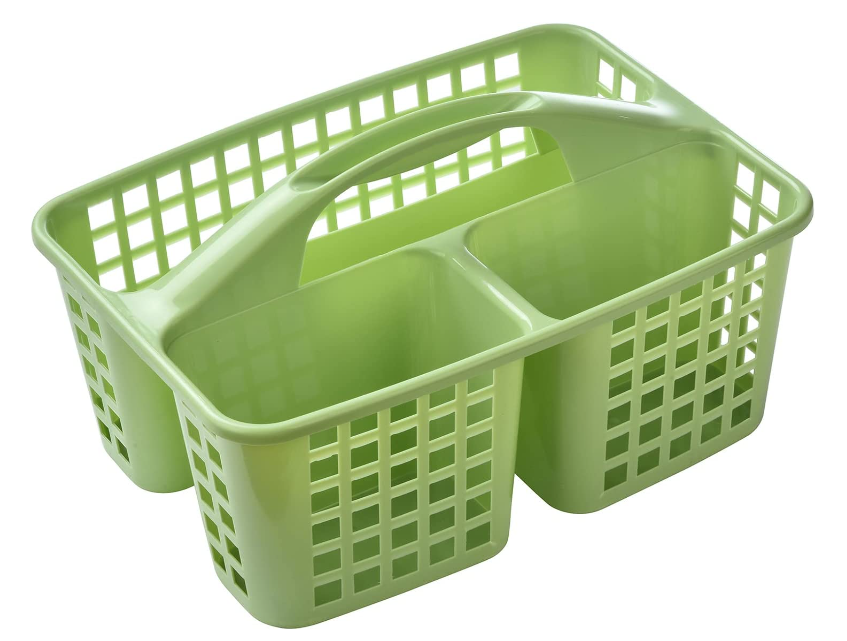
Bring a cheap shower tote with you when you camp. You can use it to tote your toiletries to the bathroom but you can also use it to store camp kitchen supplies, such as spices or grilling tools. You can typically find these handy-dandy items at dollar stores, making them a very cheap investment for a little organization.

3. Keep a Shoe Organizer Hanging with Essentials in Your Tent
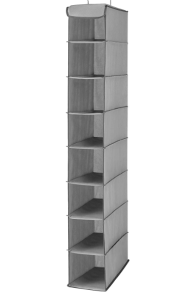
Shoe organizers also act as a great way to organize toiletries or any other small items you want easy access to. You can even hang them inside of your tent! It is like having your own little shelving unit while you camp.

We have found shoe organizer for storage to be good for when we van camp. Plus, they pack flat and take up almost no space when you pack. This one is from Amazon, but Home Goods sometimes has these as well for a bargain.

4. Cleverly Store Your Spices
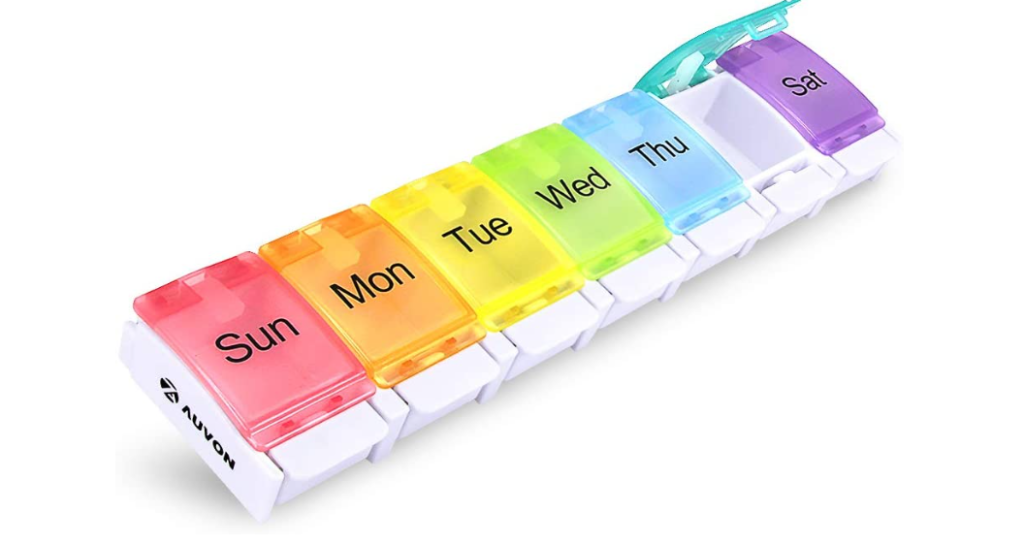
Those days of the week pill organizers that you use to store you meds have more than one use- they are also a great option for spices! Pack all your favorite spices into one convenient carrier and skip the bulk of trying to bring all those bottles from home. You can find these at a dollar store as well.

5. Freeze Water Bottles
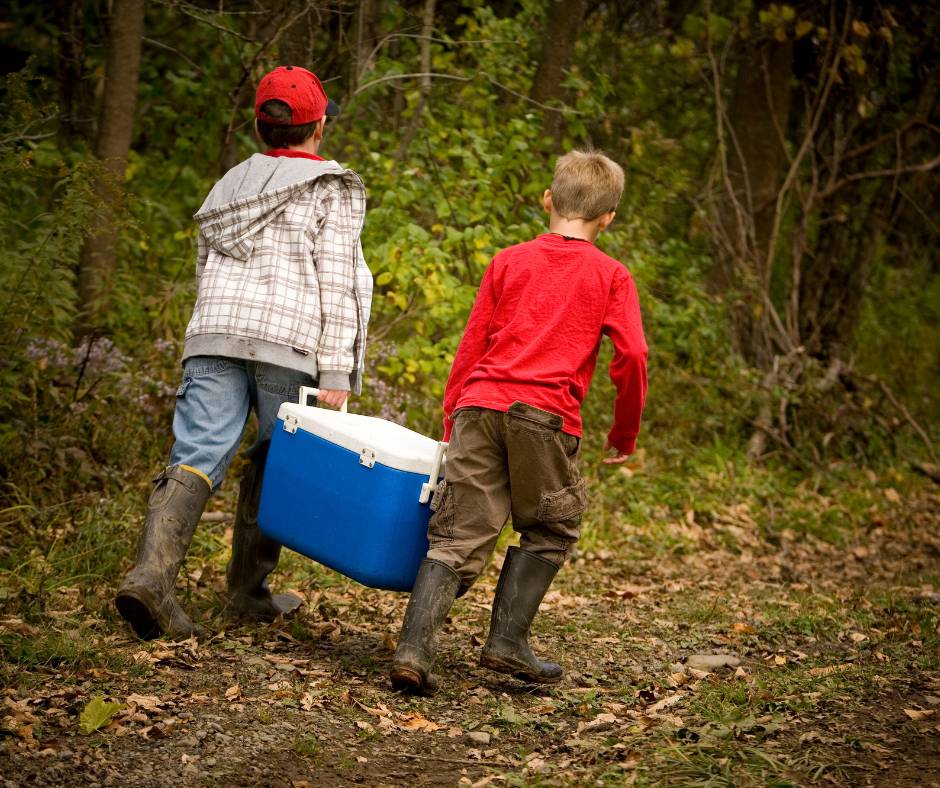
Instead of hauling bags of ice (and dealing with the mess), freeze plastic water bottles and let them slowly melt, first cooling your food, then ensuring hydration.

Simplification is the key to creating a relaxed camping atmosphere. Reduce clutter around the campsite and shorten your packing list by bringing a few ordinary objects that can double as useful camping tools.

If your family prefers to stick to reusable water bottles, buy blocks of ice instead of just cubes. Blocks take longer to melt. Another great option is to buy jugs of water, freeze them for your cooler, and then use that water in your refillable bottles as it melts.

6. Skip the Bulky Lantern
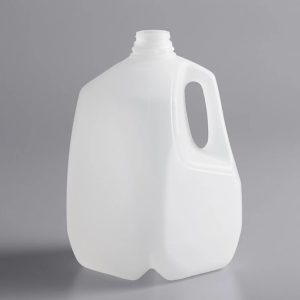
Skip the bulky camping lantern: instead, simply wrap a standard headlamp around a clear plastic water jug. It will light up the entire picnic area for games of cards after dark. You can also use a flashlight that is turned on with a milk or water jug placed on top of it.

7. Let Your Sleeping Pad Play Double Duty
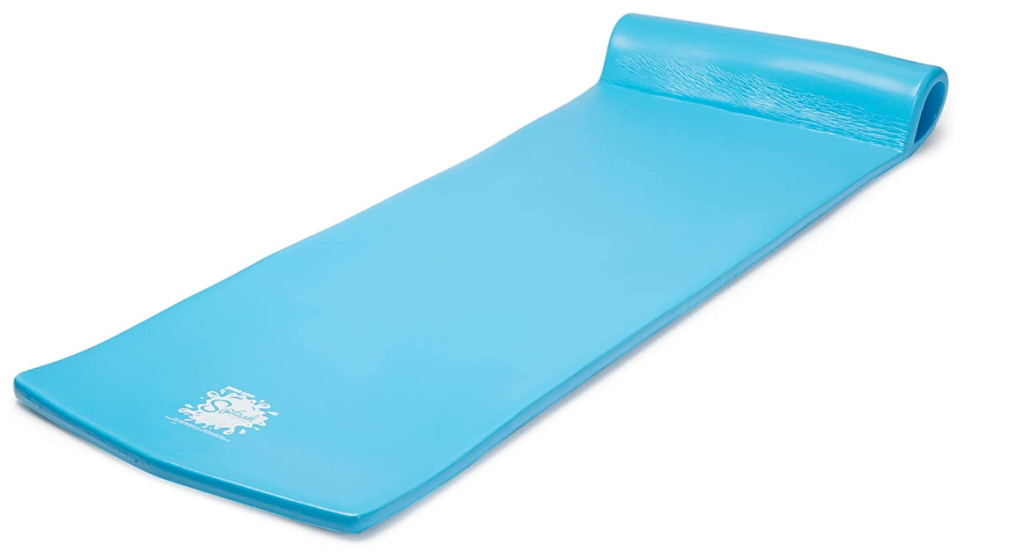
Why bring sleeping pads and water floats? Sleep on plastic blow-up air mattresses or foam pool floats that can go straight from the tent to the lake. Float on them during the day (or take a nap!), then return them to the campsite each night.

8. Make Foil Packet Dinners
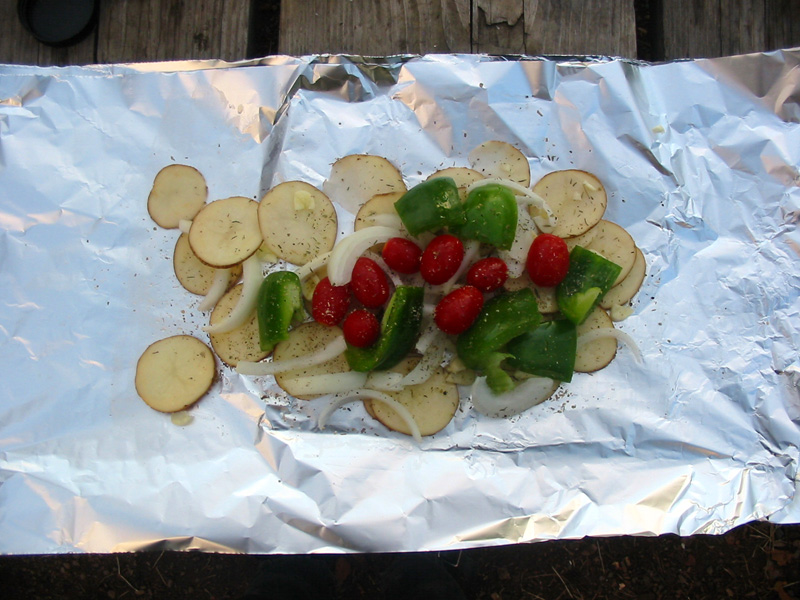
Cooking should be easy and mess free when camping. Create pockets using heavy duty aluminum foil and fill with sliced potatoes, zucchini, onions, bell pepper, pre-cooked sausage, and spices, and then let them cook in the coals.

Each pocket is customizable and fun to eat! When you are finished you can easily can ball them up and toss them.

9. Make My Family’s Favorite Lazy Camp Meal

I learned this trick when on a rafting trip with OARS. Simply grab a couple cans of canned, cooked chicken and mix it into a pre-made bag of Caesar salad that you can pick up at the grocery store.

We find this to be a great option when we have spent all day exploring and don’t want to bother with the camp stove or a fire and best of all, everyone loves it! If you want to get fancy, throw some cherry tomatoes into the mix.

10. Pack Milk Substitutes or Ultra-Pasteurized Milk to Save Cooler Space
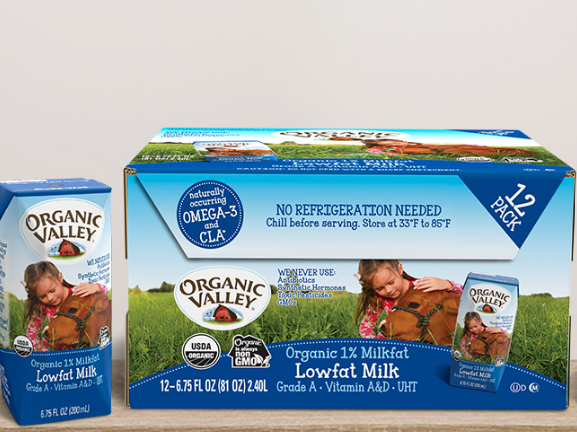
Shelf Stable Milk

Many milk substitutes like soy, almond, and rice milk don’t have to be refrigerated. They also can come in fun flavors which appeal to kids. If your kids are sticklers for moo juice, Organic Valley sells a shelf stable milk that comes in individual servings which are great for travel.

11. Use a Shower Cap to Cover Dirty Shoes
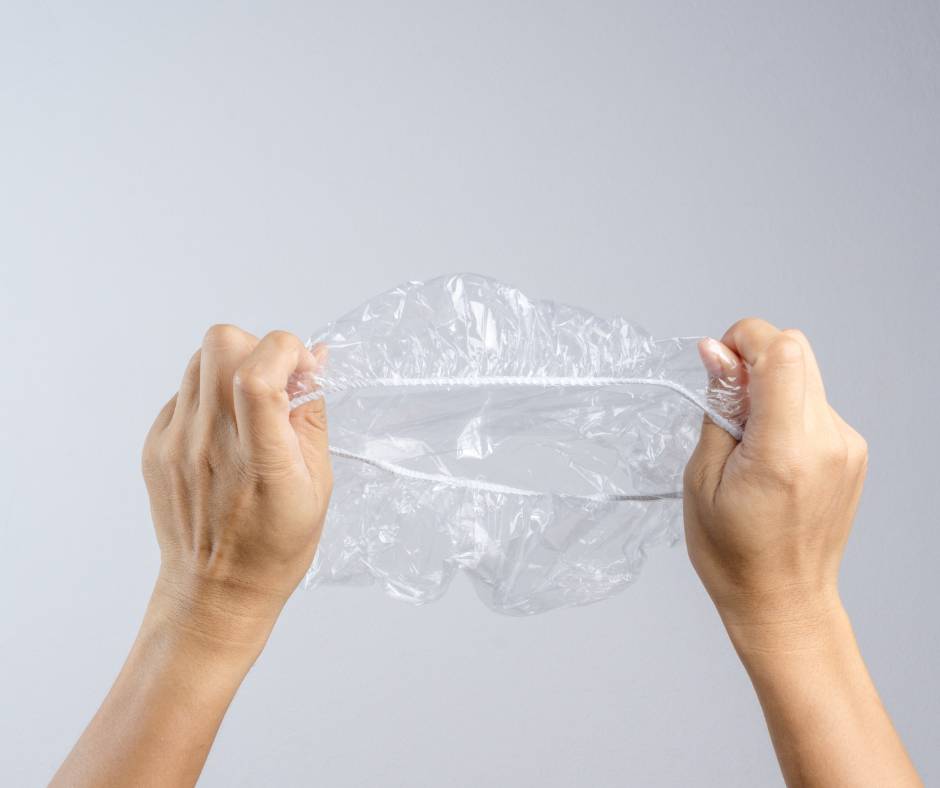
Shower Cap

Dirty shoes can be a big problem while camping. Before packing your shoes, place a shower cap over them. Then, when you get back to camp after a day of exploring, use the shower cap to cover the shoe soles to keep the dirt and mud contained.

This will also keep your clothing from getting covered in dirt when you repack your shoes as well as keep your car cleaner if you come back and change your shoes after a muddy hike.

Shower caps can easily be picked up at a dollar store. We find these to work better than shoe covers because they stretch more and can handle my family’s large shoe sizes.

12. Make a Camp Pillow Using Your Clothes

Pillows take up a lot of room in the car and we have had different members of our family forget theirs on more than one occassion. Fear not! Take the bag your sleeping bag is stored in and fill it with clothes. Instant pillow!

13. Bring a Welcome Mat

Welcome mat

Pack a small rug or welcome mat from the dollar store and keep it outside your tent or van entrance. It helps prevent dirt and debris from being tracked into your sleeping area.

14. Make Single-Use Soap Leaves
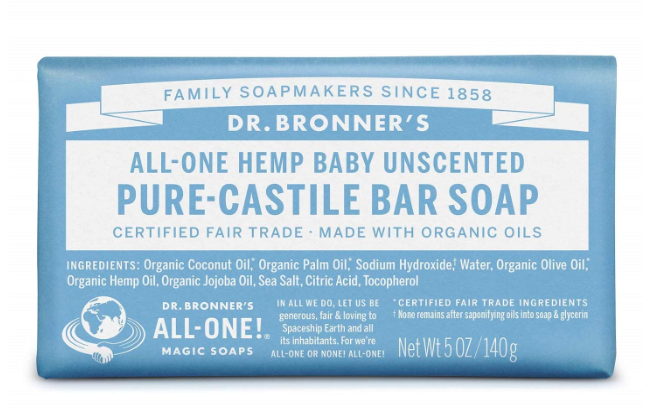
Single use soap leaves are a great camping hack

Use a vegetable peeler to shave small soap flakes off a bar of soap. Collect the flakes in a small container or plastic bag. Then you can use the leaves for handwashing or dishwashing. Dr. Bronner’s makes a soap that is good for dishes and heands and is environmentally friendly.

15. Create a Portable Handwashing Station
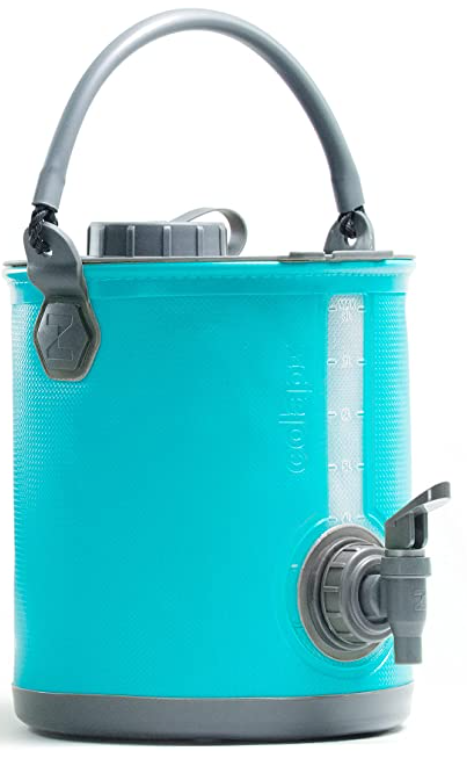
Collapsible water jug

Hang a water jug with a spigot from a tree and tape a bag of soap leave to it. Drape a dish towel over the back of the jug. This allows you to wash your hands right at camp.

If there are no trees nearby, the edge of a picnic table can work. You can also purchase this collapsible, refillable water jug with a spout that is super duper cool.

16. Always Bring Ziploc Bags
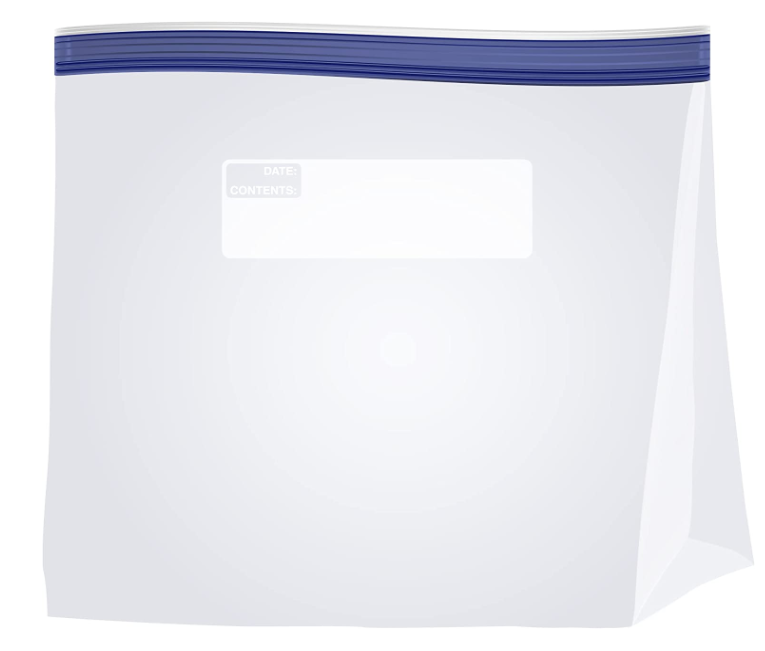
Ziploc Bags

I always fill a gallon-sized bag with more gallon, quart, and sandwich-sized bags when I travel. You never know what you might need them for- snacks to take on a hike, wet clothes, storage for potty accidents you can’t clean right away, leftovers, and so much more. Plus, they pack flat and take up hardly any space.

17. Store Eggs in Ziploc Bags

cracked eggs

Speaking of Ziploc baggies, it is always a good idea to pre-crack your eggs and put the proper amount in a plastic bag for each meal you will be using them for on your trip. Then you will have that egg carton available for your fire starters (see #1)!

18. Use Your RX Bottles to Keep Matches Dry
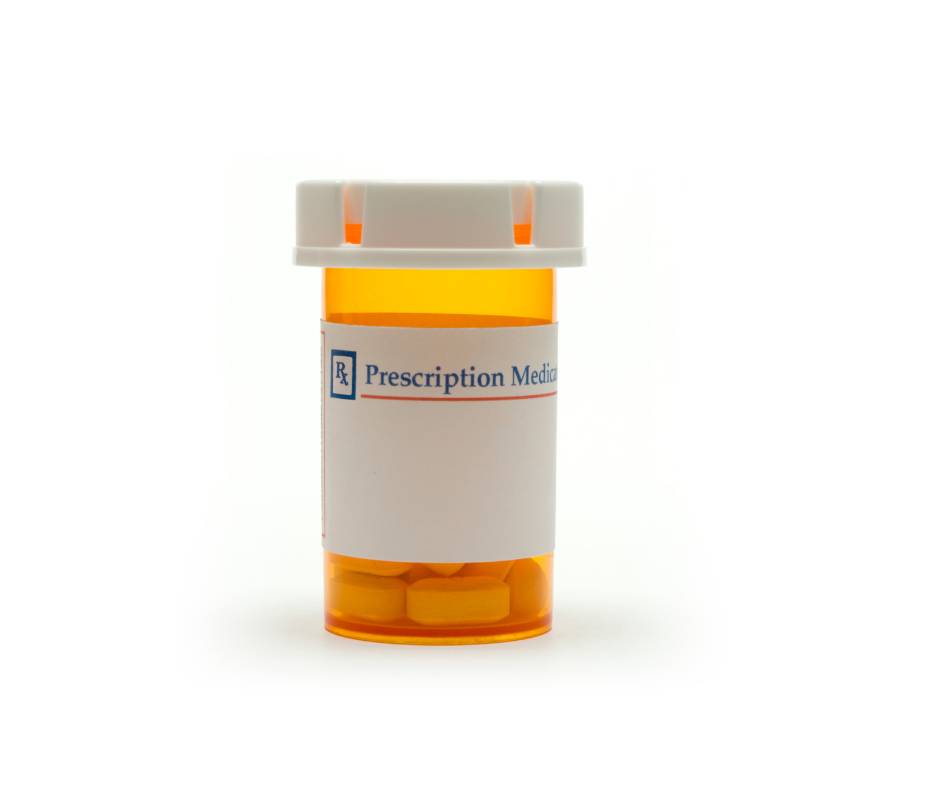
rx bottle

I always love to reduce my trash and repurpose things. Plastic prescription bottles are water tight and the perfect thing to use to store matches.

Wet matches make it really hard to start a campfire and enjoy those S’mores! Be sure to throw a small piece of sandpaper in there to use to strike the matches against and light them.

19. Pack a Collapsible Bucket
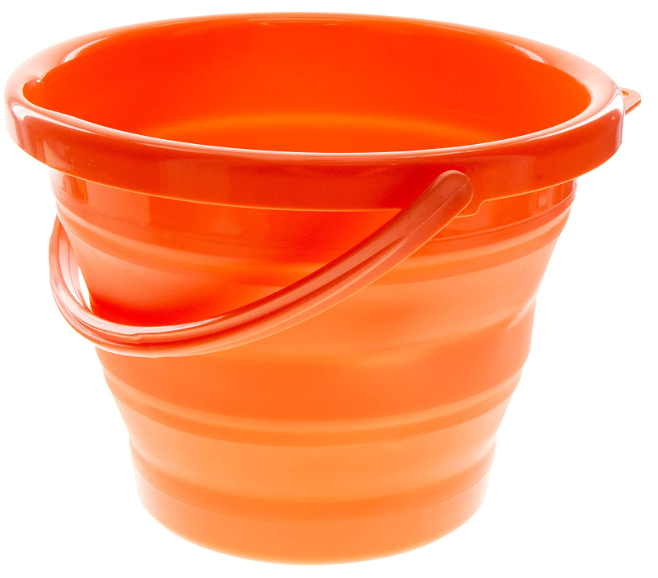
Collapsible Bucket

Why didn’t I think to invent a collapsible bucket? They have tons of uses and are so easy to store! Use it as a wash basin for dishes, ice bucket for drinks, bucket for collecting kindling, or simply for the kiddos to play with at the beach.

20. Take Your Campfire to the Nest Level with Mystical Fire
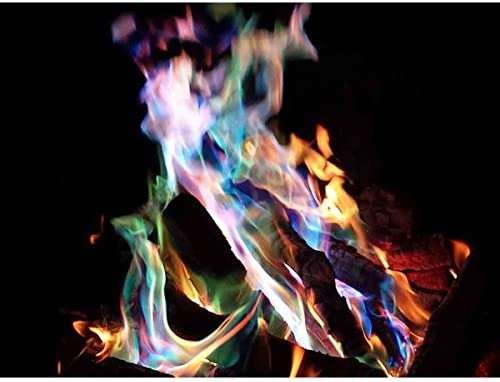
Mystical Fire

I’m not gonna lie, my neighbors and I are kind of obsessed with Mystical Fire. It was a discovery we made during our bi-weekly social distance cul-de-sac fire pits that we still can’t get enough. Just throw a packet or two into your campfire (after you are done cooking) and prepare to be dazzled.

Ready to go camping? Subscribe to our Pit Stops for Kids seasonal newsletter, and get an exclusive camping gear list, free! Click here!


Source: Fix.com

Intrigued? Read more of our camping hacks on fix.com.

Subscribe to our Pit Stops for Kids seasonal newsletter, and get an exclusive travel ‘cheat sheet’, free! Click here!

Must have van life camping gear

We have been camping in a 1984 Westfalia camper van, and it is epic! That said, space is at a premium in a Westy, and older camper vans, while charming and Instagram-worthy, lack some of the creature comforts of bigger RVs. If you are living the van life, tent camping, or camping in a smaller van, pop-up trailer, or camper, the following must-have camping gear is, well, MUST HAVE.

Must have van life camping gear you need for this season!

Must have van life camping gear

Tough duffels for organization:

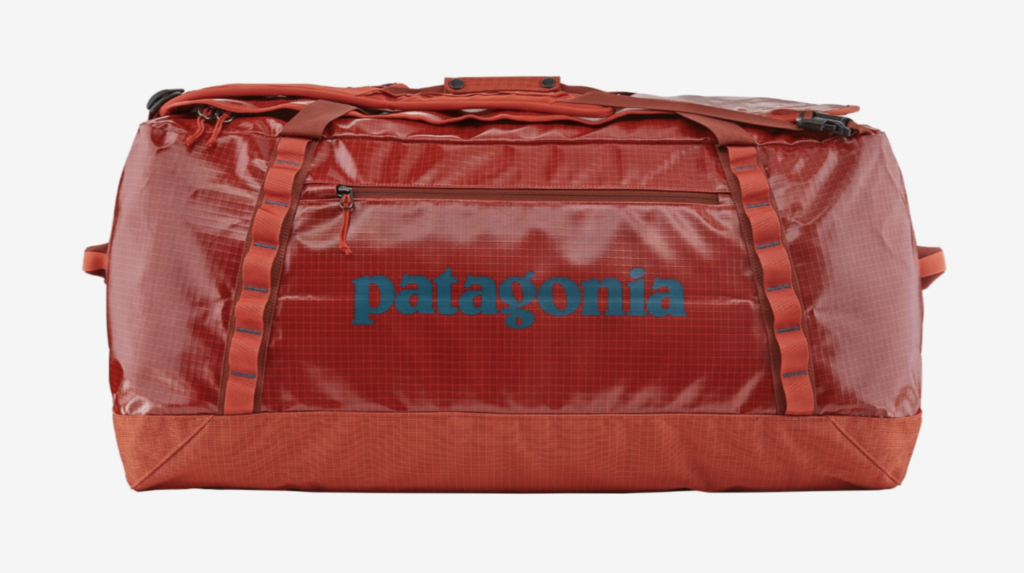
We love our new Patagonia Black Hole duffel, made of water-resistant 100 percent recycled material. They range from 40-100 liters, with or without wheels. For van life, we recommend wheel-less, because these duffels are easy to stack on top of one another, toss around, and set in the dirt. We use one for all our bedding in our van, which keeps us organized and keeps our pillows and blankets clean.

Must have van life camping gear

We also like our Big Agnes Big Joe, which comes in 45-110 liter sizing. This one stores our dog gear, their bedding, and their food.

Pick up the Black Hole for under $230 on Amazon.

Comfy bedding for plenty of zzzz’s:

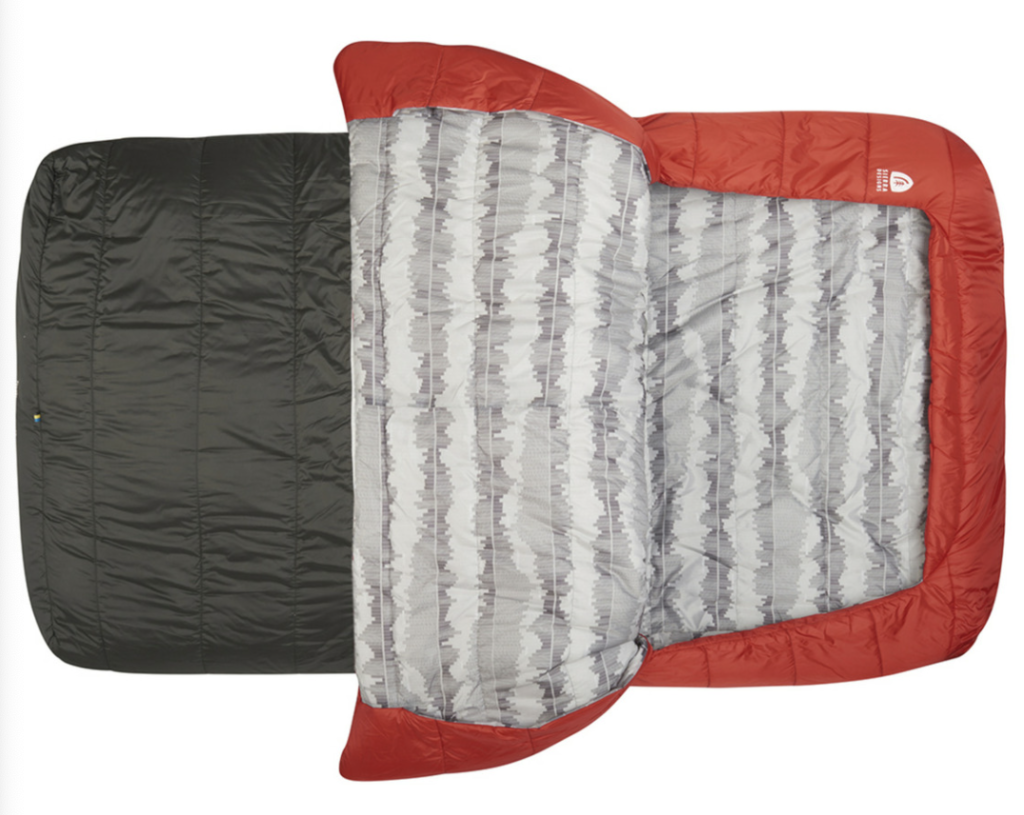
Our Sierra Designs’ Frontcountry Duo bed is amazing. If you’re camping as a couple, this sleeping bag feels more like bedding, with a zipperless design and toe holes so you don’t overheat. It comes in a single option as well, and a backcountry version that’s rated to a lower temperature. We lay our Frontcountry Duo out along our bottom floor bed, which we convert from our passenger bench seat at night.

Pair the Frontcountry Duo with a Thermarest Vela Double Quilt on chilly nights. This zipperless sleeping bag/quilt stuffs down small when you don’t need it, repels dog hair beautifully, and is rated to 32 degrees.

Chairs that invite lingering:

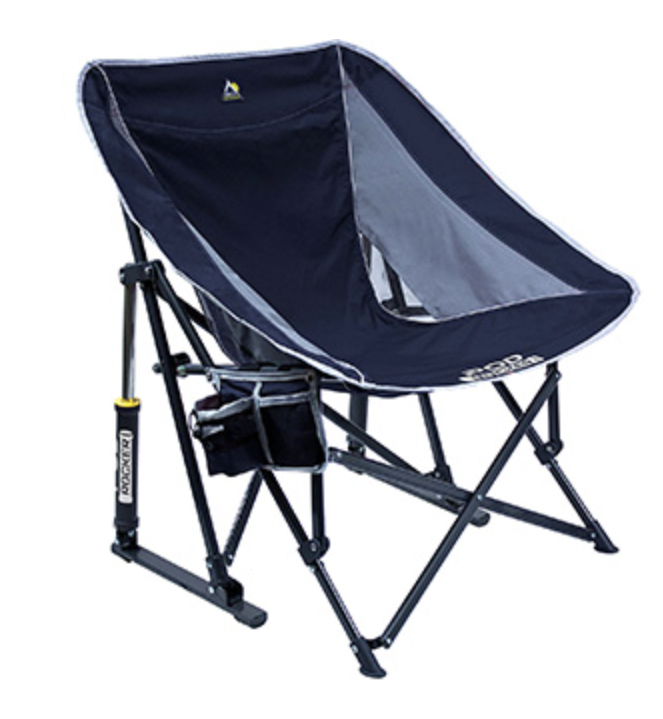
One nice thing about van life is that you can bring along extra weight, since you won’t be carrying it far. We like to relax by the fire in style with our GCI Outdoor Pod Rocker chairs. We’ve set these chairs in creeks, on the edges of lakes in the sand, by the fire pit, on lawns in parks, and everywhere in-between. They’re heavy, but they pack down small, and they are rocking chairs!  

Must have van life camping gear

GCI’s Spring-Action Rocking Technology allows for smooth rocking while you enjoy your time in the outdoors. There’s even a cup holder and a cell phone pocket.

Power that runs on solar:

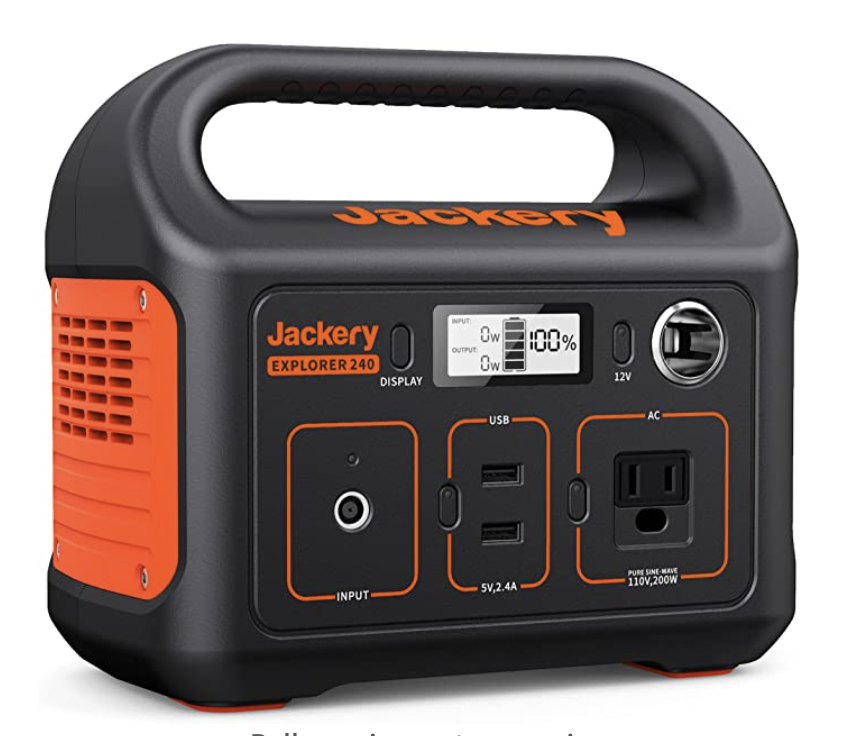
If you plan to spend time off-the-grid with your camper van, you’ll want on-the-go power at your fingertips. We have the Jackery Portable Power Station 240, which we can pair with our Goal Zero solar panel to provide power for our camper lights, our phones, our laptops if we bring them, our InReach, and our music. The price of the Jackery depends on the power level you opt for, but can start as low as $99 and go into the thousands. Pick something that meets your needs in the outdoors with a little bit of wiggle room, just in case.

must have van life camping gear

Bear in mind that you don’t HAVE to power the Jackery with a solar panel. You can charge it using a wall outlet before you leave home, as well. We do both!

A lantern that turns your van into a party (or a romantic evening):

BioLite AlpenGlow 250 is an LED camping lantern with so many light and color modes, it takes a bit of a tutorial to take advantage of them all! But once you know, you know, and you can toggle between a very bright LED light, a dimmed yellow light version, solid color lights, half a light (to save power) and a full-on color dance party. You get a USB cord included (we charge this lantern with our Jackery power bank) and the 250 lumen version is small enough to fit in our glove box (there’s also a 500 lumen version).

BioLite Alpen Glow

More must have van life camping gear:

An extra cargo box to bring all your toys:

We love our Thule Transporter Combi cargo box, which is hitch-mounted. Read our full review! We love the design because we don’t have to worry about loading and unloading a rooftop cargo box on our van, and we don’t have to worry about the extra weight on our pop-top. The Transporter Combi fits our grill, our charcoal, our portable toilet, our recycling, and more, so we don’t have to carry any of this inside the van when we travel.

Pillows that can take a beating:

Our Avocado mini green pillow travels in our van, serving many purposes. It’s great to prop myself up to read or work on my laptop on those travels when work comes along for the ride, and it’s small enough to not take up precious storage space. The size is also perfect for small kids and toddlers!

A high-quality auto tool kit:

We hope we’ll never need to use our car and van tool kit (or at least not often!) but having it brings peace of mind.

Reusable propane:

This is a game-changer. The Ignik Gas Growler allows us to refill with propane in a portable form, which saves tons of those green gas canisters from the landfill. Plus, the convenience and cost savings are significant! We use the gas growler to power our stove, but you can use it for anything you’d need propane for.

A truly long-lasting cooler (or two):

Yes, it’s worth it to buy a Yeti. Or a Pelican. Or any double-walled, highly insulated, hard-sided cooler. Our ice lasts for days, our drinks stay cold, and we aren’t afraid to bring food ingredients like raw meat, fresh veggies, and dairy, even though we don’t have any electric refrigeration. Yes, the hype is worth the money. We have a Yeti Tundra 45.

A hot shower (or cooling spray):

Our Helio Pressure Shower from Nemo Equipment doesn’t just offer the welcome chance of a warm shower (thanks to its solar heating capability). Because it’s pressurized, you get a strong sprayer that’s great for getting sand off your feet, hosing off muddy dogs, and even doing the dishes. It’s not a gravity-based solar shower, so you don’t need to find a tree to hang it from. Any sunny patch in your campsite will do!

Safe, portable water:

A Lifesaver Jerrycan will set you back, but you get peace of mind that extends far beyond camping season. Thanks to built-in filters, a Lifesaver is a portable water purifier capable of filtering 10,000 litres/2,650 US gallons of clean drinking water, removing viruses, bacteria, cysts and parasites. Its great for camping, for off-grid living, and for emergencies. We have ours always filled with water and stored in the garage in case of evacuation or loss of power and water.

Additional resources:

RV vacation tips for the summer of 2021

Pit Stops for Kids is, at its roots, a resource for families who love to hit the road. We’ve evolved over the last decade to include destinations and vacations across the world, but during these uncertain times, we invite you to join us in returning to what we know best! For the summer of 2020, a road trip or camping trip might be the best vacation for your family. And we’re here to help you plan it safely.

rv-road-trip-tips

As states slowly open up again to domestic travel, the challenge remains for families to be able to explore while social distancing. One ideal way to do this is with a camper van or RV vacation. Why? You and your family can social distance using your own:

  • dining area
  • bathrooms
  • sleeping quarters

You only patronize local restaurants and hotels when and where you feel it’s safe to do so. Get our RV camping tips here.

Tips for choosing where to go on a road trip or RV vacation:

Even if you can ensure self-containment within your RV or camper van for meals, bathrooms, and sleeping, you’ll want to vacation, right? This means picking a destination that’s open for tourism. Check national state park closure lists, but in the early planning stage, don’t be afraid to make campground reservations. Recreation.gov will cancel and refund you in the event that the campground is not yet open in time for your trip.

If you don’t want to camp at a designated campground, consider dispersed camping. Any BLM and national forest service land is free to camp on; pick up a local BLM map and call the ranger station for ideas. Remember that you’ll be off-the-grid while dispersed camping, so you’ll need to be self-reliant for power and heat, and will need to follow Leave No Trace principles.

A third option is HipCamp, which pairs RV campers and road trippers with private land available for camping. It’s like AirbnB for camping, and is a great way to socially distance while enjoying a new location. Check out our dispersed camping and HipCamp tips.

Once you have campground reservations or have decided on your dispersed camping option, do some research on your intended destination in general: are locals welcoming tourism to the area? Many are, but some regions are wary. Will local restaurants be open for take-out or delivery? Are local attractions, such as museums or parks, open? If not, think of alternative plans: are hiking trails in the area? Can you access greenways or bike paths?

We have successfully enjoyed a private campground experience, a HipCamp experience, and a Rec.gov campground experience since this spring, all while maintaining distance from others and utilizing our own kitchen areas, sleeping areas, and bathrooms in our camper van.

But what if you don’t own an RV or camper van?

You can rent one! RVshare is the first and largest peer-to-peer RV rental marketplace. Families can rent anything from a travel trailer to a luxury motorhome (and if you own an RV, RVShare is a great way to make some vacation cash while you’re staying at home). RVShare offers:
  • 100,000 listings across the US 
  • a worry-free rental guarantee
  • Rentals available in all 50 states 
  • A safe and secure booking/payment platform 
  • Instant bookable 
  • 24/7 Emergency roadside assistance on every booking            
  • Pet-friendly options                                               
  • Delivery and stationary options                                                            
  • Comprehensive Nationwide Protection: RVshare Rental Insurance covers both domestic  and international renters and provides collision and comprehensive coverage

The average cost is $150/night and anyone with a valid driver’s license can drive. All drivers must be at least 25 years of age. By choosing an RV vacation this summer, you’ll save yourself the heartache of canceled airfare and have more control over your family trip during this time of uncertainty. Enjoy the outdoors!
RV vacation tips

Disclaimer: This post was sponsored by RVShare. All opinions remain my own.

10 tips for camping with kids

Are you thinking of taking your kids camping? Whether it’s your first camping trip or 20th camping adventure with the whole family, these tips for camping may change the way you “rough it” when you go camping with kids in tow. Picking a great kid-friendly campsite for your next family vacation is the first part, but packing the right supplies is just as important to ensuring camping fun!

tips for camping with kids

Tip One – Pack Everything in Clear Tubs

Organizing your items before you go out is key to a successful camping trip, whether or not you bring kids. The goal is to make everything easy to find once you get to your spot, so you want to group like items together. Have one tub for kitchen items, food and snacks, toys, bathroom and bathing, clothes and laundry, sleeping bags and tents, and music and entertainment. This is a huge time saver before, during, and when you get back home and have to unpack everything. Also, it makes it easy to protect your items from the rain.

Tip Two – Bring a Load of Antibacterial and Baby Wipes

Since you’re out in the woods, you won’t have a dedicated area to go and give your kids a bath or shower. These wipes allow you to get a lot of the dirt and grime off your kids as they play. Set a towel or blanket down in front of your tents to give your kids an area to wipe off. This can help keep your tent clean. Also, bring along bug wipes or bug spray for the mosquitos that come out after dusk.

Tip Three – Set up Comfortable Sleeping Arrangements

Baby care is a big factor when looking for tips for camping. If you’re bringing a baby that sleeps in a crib, bring along a pack and play. Tossing an extra sheet across the top can keep bugs out, and they’re easy to move around as you cook. Another option is a portable bassinet. For the bigger kids, consider investing in a double camping cot that looks like a bunk bed. Not only does it save space, but it’s versatile. If you want to sleep directly on the ground, get a thicker foam mat and put it down first for extra cushion. Don’t forget comfortable pillows and sleeping bags.

Tip Four – Bring Along Entertainment Items

Your kids won’t be able to entertain themselves 100% of the time. The biggest thing you can do is bring a tub full of toys that are electronic-free and camping-friendly. Things they might like include bubbles, squirt guns, coloring books, balls, card games, camping bingo kits, bug catcher cases, blocks, or musical items. You want to have a nice variety that the kids can use throughout your trip to stay entertained. Also, plan to take them on short hikes or walks around the campsite.

Tip Five – Set up a Bath Station

Kids get dirty at home. Just imagine how dirty they’ll get when you’re outside for two or three days straight. You want to be able to set up a small bathing station. To do this, you’ll need to bring a plastic bath for babies or an extra plastic tub you can fill with water. Fill the tub in the morning and let the sun warm it up throughout the day. You can also get a solar-heated shower bag if you don’t have any lakes nearby to take a quick dip in.

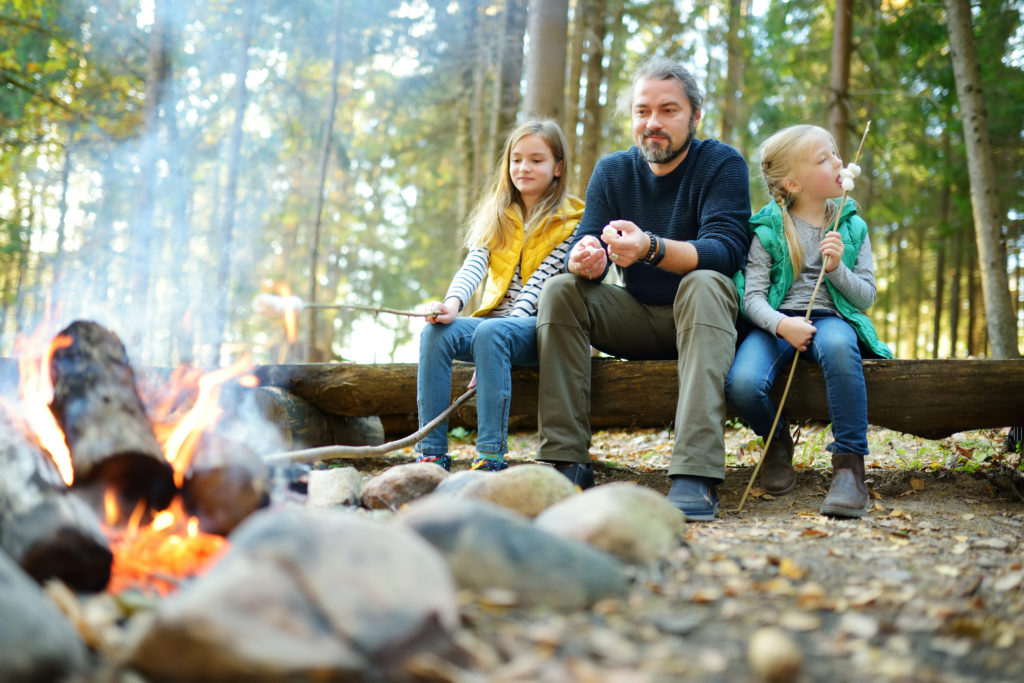
Cute little sisters and their father roasting marshmallows on sticks at bonfire. Children having fun at camp fire. Camping with kids in fall forest. Family leisure with kids at autumn.

Tip Six – Take Nighttime Safety Into Consideration

Glow sticks are very easy to find, and they make it easy to spot your kids after the sun goes down. They can easily string together several for a necklace, and you can set them around your campsite for light. Another option you have is to buy headlamps for everyone to wear. Invest in a few hanging lanterns for the tent. Another option is to make your own lantern by filling a jug of water and putting a headlamp around it with the light facing inward. It’ll create a soft glow.

Tip Seven – Plan Easy Snacks and Meals

Being outside all day is one fast way to work up an appetite. To keep the kids full, pack easy snack ideas like apples, grapes, cheese sticks, bananas, sliced cucumbers, crackers, baby carrots, and raisins. To make it easy on you for mealtimes, precook meat items at home, so all you have to do is warm them up. Bratwurst and chicken are easy, and you can bring along things for sandwiches. Pack a few different cold cuts, cheese, or peanut butter and jelly for quick mealtime options.

Tip Eight – Check for Local Park Programs

If you plan to camp in a national park, check out Junior Ranger programs. Almost every national park has one, and your kids can get involved in a range of activities. The ages range from 5 to 13, and they have a ranger book that allows your kids to earn badges. Local state campgrounds might also offer staff-led activities that your kids can participate in. This can give the parents a short break while the kids learn educational but fun things during the program hours.

Tip Nine – Pack a Smaller Tent for Play Space

Your kids may like to play in the tent, but this can easily end up dirtying up their sleeping space. Instead, you should pack a smaller tent for the kids to give them a space to play. You can even store their toys in here as a bonus. This comes in very handy if the weather takes a turn and it starts to rain. This doesn’t have to be another full-sized tent, but it should be big enough for the kids to enjoy themselves and move around.

Tip Ten – Bring Extra Clothing

Having a warm sleeping bag may be key when you camp, but your kids should also have extra layers. It’s hard for smaller bodies to generate enough heat to stay continually warm. Make sure you pack outfits for each day but don’t be afraid to bring extra clothing. Don’t forget a pair or two of shoes with warm socks. The evening temperatures can drop significantly, and you want to have enough clothing to easily go around. Also, it’s easy for clothing to get wet, so pack a small clothesline that you can string between two branches and hang the clothes out.

Bottom Line

These top 10 tips for camping with kids will help you pull off a memorable and fun trip, no matter how old or young your children are. The parents will be able to relax a little and enjoy the trip too. Start small and work up to a larger trip, involve your kids, and make memories that last a lifetime.

Tips for renting an RV

2021 will be the year of camping and outdoor travel! One of the safest ways to see the country this year is by renting an RV, where families can have their own bathroom, sleeping quarters, and kitchens while easily socially distancing from other travelers.

Tips for renting an RV on your next family vacation. Safely travel and social distance!

Ready to rent an RV?

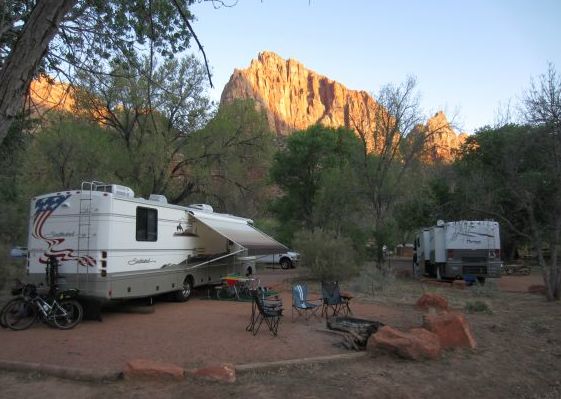
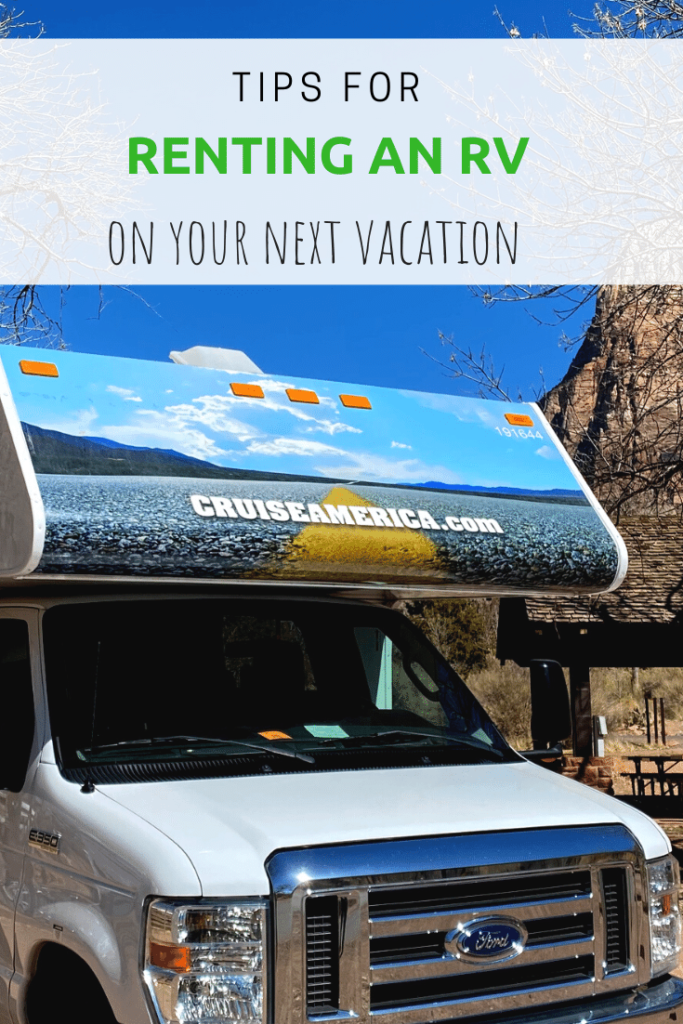
We rented an RV from CruiseAmerica, which has rental locations across the US. Our destination was Zion National Park, so we flew in Las Vegas, renting an RV from the location in Henderson, Nevada. We are RV novices, but we found the experience easy and not intimidating!

Tips for renting an RV this spring or summer:

Plan a route that allows you to return the RV to the same rental center. Just like if you rented a car, you significantly reduce the cost of your RV rental if you’re returning it to the same location from which you picked it up.

Plan your transportation to the RV rental center. Cruise America does not allow for any overnight parking, so if you’re driving to your RV rental center, have a plan for where you’ll park your car while you’re on your RV trip. Take an Uber from the airport, or, if you’re lucky like we were, get local friends to pick you up!

Choose you RV size carefully. The bigger the RV, the more intimidating it is to drive! But you definitely need room for everyone to spread out. A 19-foot RV is perfect for a couple (you can either convert the dining room table to a bed or sleep in the berth above the cab), but for families with kids, you’ll want more sleeping space.

Double check the amenities offered at the campground. Does the campground offer full hook ups (water, electricity, and dumping)? Or, in our case at Watchman Campground in Zion National Park, only electricity? Your RV rental will come with a tank of water to be used for showering, hand washing, dishes, and flushing, but it’s not unlimited if you don’t have water hook ups. Get acquainted with the levels gauge in the RV so you can keep an eye on how much water you have left. If you need to refill your water tank, remember that you’ll also need to dump.

Allow yourself extra driving time. You’ll drive slower in an RV, and you’ll need to plan your stops carefully, avoiding narrow turnarounds and difficult-to-navigate parking lots. Look for rest stops and truck stops!

Bring as much gear from home as possible. You can rent sleep and kitchen kits from Cruise America, but if you have camping gear at home, we recommend packing it. It will be better quality and you’ll already be familiar with your stuff. We managed to fit all our camping gear (including small folding chairs, kitchen gear, sleeping bags, and pillows) into two checked bags.

Remember that you fly to your destination, you won’t have ALL your camping gear. For us, this meant sacrificing some of the outdoor camping gear we like to bring on camping trips, like extra lanterns and lights, bigger camp chairs, and picnic supplies.

If you rent the smaller RV size (19-foot), remember you will not have an oven. You will have a microwave and a stove top only to cook your food. We simply planned our menu around this.

Use campground facilities to save water and dump less. If your campground has clean bathrooms and showers, use these facilities to save water in your RV. After all, you already paid for them!

Plan on much higher gasoline costs. Our RV cost $100 to fill up in Utah and Arizona in spring of 2021.

Renting an RV can cost a fraction of the price of hotel rooms, and allows the family to safely travel during the pandemic. If you rent an RV, have a great time!

Yosemite National Park travel tips: best tours, hikes, and advice

During a time when many vacations are not possible, outdoor activities in road trip-accessible locations offer the ability to safely social distance. Hotels.com asked me to share my favorite activities and tips for exploring the Yosemite area, so start here as you plan a safe and responsible vacation.

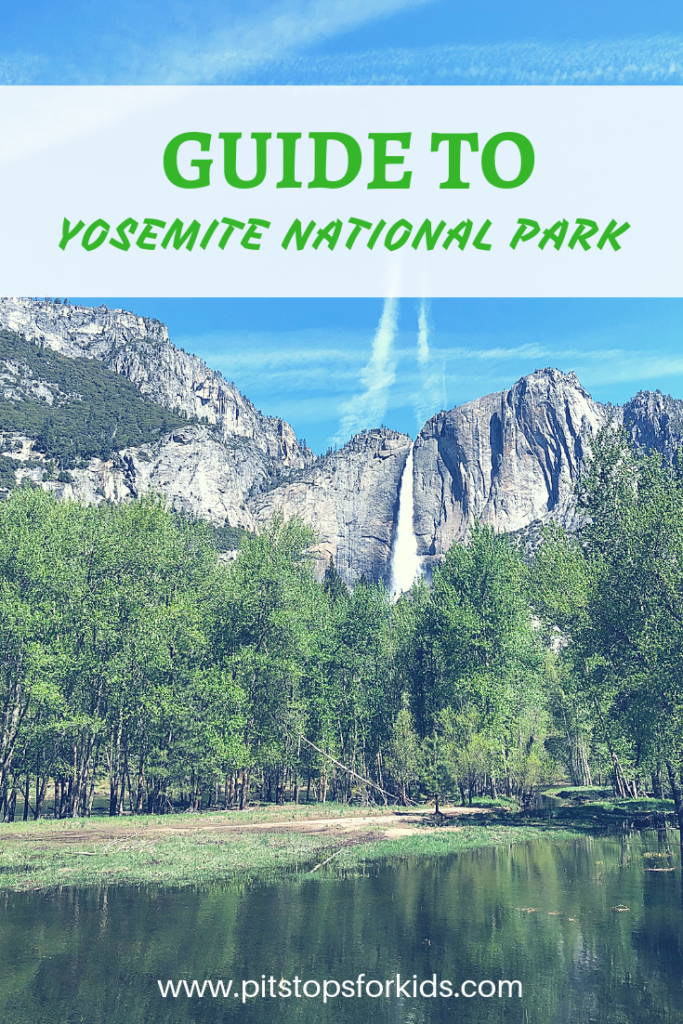
Yosemite National Park is one of the crown jewels of the national park system, and for good reason. Its stunning geological features, wildlife, and rich history make it ideal for an outdoors family vacation. This park has so much to offer, the following Yosemite National Park travel tips and touring advice are meant to supplement further research. Start with the official Yosemite National Park site to plan your trip, make sure activities and sites are open, and plan your lodging options! For touring advice and tips primarily for Yosemite’s Valley Floor region, read on.

Note: if you’re considering the Majestic Mountain Loop of three parks in one trip, start by viewing our Guide to Sequoia and Kings Canyon National Parks.

When to go:

Yosemite is open and active year round! While the vast majority of visitors arrive in the summer (of course), more is open during the off-season than many families realize. During fall and spring, some hikes and roads may be closed, but the majority are still at your disposal. Ditto for visitors centers and museums (just check seasonal hours). Winter is a wonderful time to stay on the valley floor without the crowds; families can easily rent snowshoes or Nordic skis to explore the area. If you must go in summer, don’t worry: the park is still very accessible with crowds. Plan to base your car in one location (ideally your lodging within the park) and take the free inter-park shuttle everywhere you need to go. We tried this out during a busy week in July (the peak of the busy season) and never waited more than five minutes for a shuttle bus. Busses run between campgrounds, lodges, visitors centers and hiking trailheads.

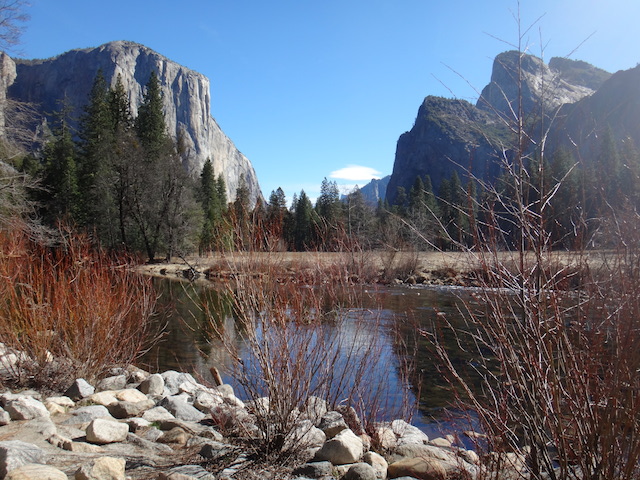
yosemite-national-park-tips

What to do on the valley floor:

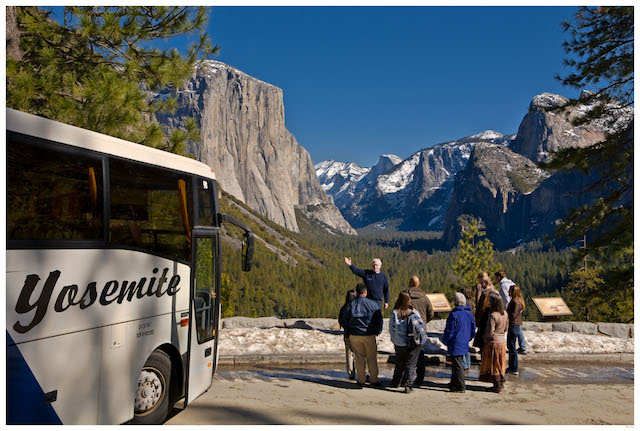
Obviously, there’s too much to do in Yosemite to put into one post! The Tuolumne Meadows and Wawona regions are well-worth visits; however, if your family is new to the park, and you have at least three days, devote one morning to a Valley Floor Tour. This tour–conducted on motor coach in the off-season and open-air tram in the summer–offers a wonderful overview of the valley. If possible, ask for tour guide Bill: his knowledge is unparalleled, and he’s entertaining throughout! I loved that Bill described his tour as a ‘portal’ tour: he considered every major subject he addressed as merely a ‘portal’ to learning more (then gave the resources needed for those who wanted to dig deeper). Our Valley Floor Tour covered Yosemite Falls, Bridal Veil Falls, Tunnel View, Swinging Bridge, and Sentinel Rock, Cathedral rocks, and El Capitan. The bus stopped frequently, with plenty of photo ops. Because tours don’t stop for hiking, swimming, and the like, this is a good opportunity to note the areas you’d like to come back to on your own.

yosemite-valley-floor-tour

Lodging:

Where to stay in Yosemite National Park is as varied as individual family itineraries! For easiest access to the shuttle buses and to be within walking distance to the most sights, I’d opt for Yosemite Lodge or Camp Curry (be sure to reserve both well ahead of time). For families who may wish to divide their attention between Valley Floor activities and backcountry, many lodging options are located just outside the park.

Hiking:

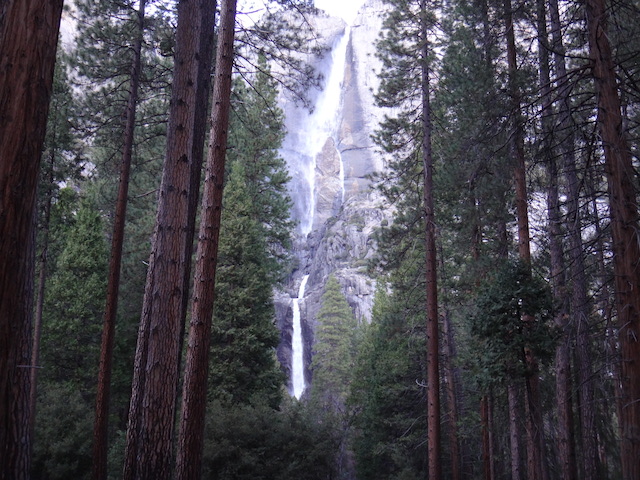
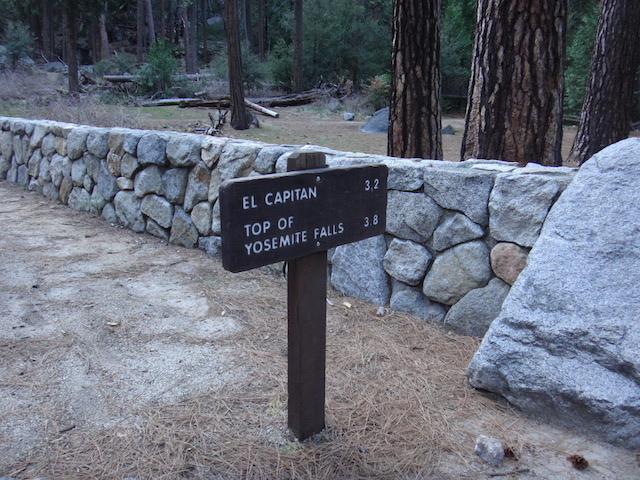
Yosemite Falls: One of the easiest hikes to access from the valley floor, Yosemite Falls offers a very short hike to the lower falls, or a much more strenuous hike (3.8 miles one way) to Upper Yosemite Falls. Plan to spend the better part of the day if you tackle the latter! End your hike with a treat at the Food Court of Yosemite Lodge at the Falls.

yosemite-falls

Mist Trail: If you only do one hike in Yosemite, this should be it. But bear in mind that it will get very crowded in summer. Go early in the morning, or just before evening to beat the crowds (and heat). Enjoy the mist off Nevada and Vernal Falls as you make the short but very steep climb. If you’re up for more, this is the access point to hiking all the way to Half Dome to climb the backside using the cable system.

Note: permits are required for the Half Dome climb. You don’t need to be a rock climber, but you do have to be comfortable with heights and tall enough to hold the cables. If you’re not up for it, but do want a long hike, continue past the falls to Little Yosemite Camp, where you can watch the cable climbers.

yosemite-falls-trail

Glacier Point to Valley Floor: This is another hike for the hearty! Use the free shuttle system so you only have to go one-way! Because you are directly across from Yosemite falls, you get a great perspective since you start above the falls, and see it at every height as you descend to the valley floor. If the kids are up for it, bribe them with a promise of ice cream at Yosemite Village and keep trekking across the valley floor.

Our review of family backcountry hiking and backpacking in Yosemite.

Museums, programs, and visitors centers:

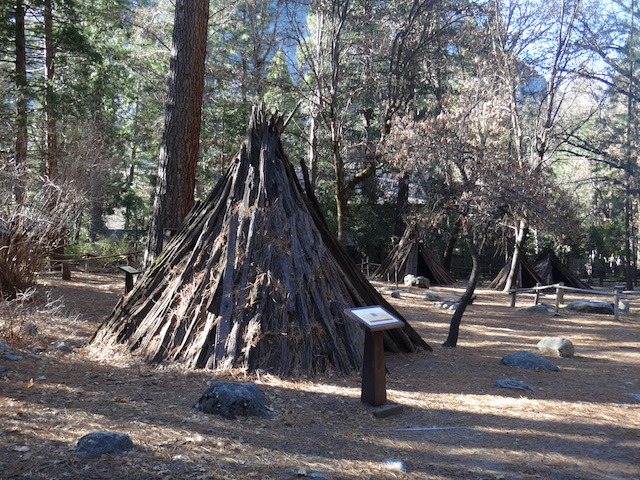
A trip to the Yosemite Village Visitor Center and museum is absolutely worth your time. Kids (and adults) learn about geography and wildlife in the center, then can tour an outdoor Miwok village at the attached museum. We also loved the baskets on display, and during the summer months, Native American artisans are on-hand to show you their techniques. The village center also has stores, restaurants, and the like.

yosemite-village-museum

For winter activities and snow play, start at Yosemite lodging, such as Yosemite Lodge or Camp Curry. Both locations will have sleds to purchase and snowshoes to rent. Camp Curry has an ice-skating rink (tickets can be bought at either lodge). Guided nordic skiing tours to Glacier Point depart regularly in winter. In fall, be sure to ask about the Swinging Bridge Ladybuy Hatch. This amazing event takes place annually on the Swinging Bridge in the valley, when hundreds of thousands of ladybugs hatch. An amazing sight, and one guests can only see in autumn.

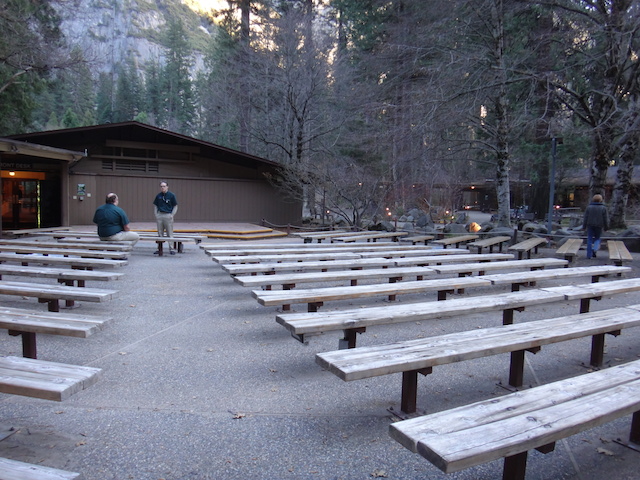
Park programs and nature walks are available year-round at Yosemite! Definitely sign up for one of the park’s watercolor classes, Junior Ranger programs, or, my current favorite: the Night Prowl. Led by a naturalist, the Night Prowl takes visitors on wooded trails by moonlight, which chances to see or hear nocturnal animals. Even if you don’t see animals, guides do a great job of relaying interesting information and conducting fun group exercises to help you adjust to the dark and understand your surroundings. This program is ideal for school-aged kids, and is a deal at only $5.50 per person.

yosemite-programs

Tip: Did you know park rangers are not the only naturalists leading guided tours and programs in Yosemite National Park? The park’s chief concessionaire also employs naturalists to lead excursions, often filling the gap left by budget cuts. These services are available to book from park lodging!

Camping recipe ideas and tips for fall

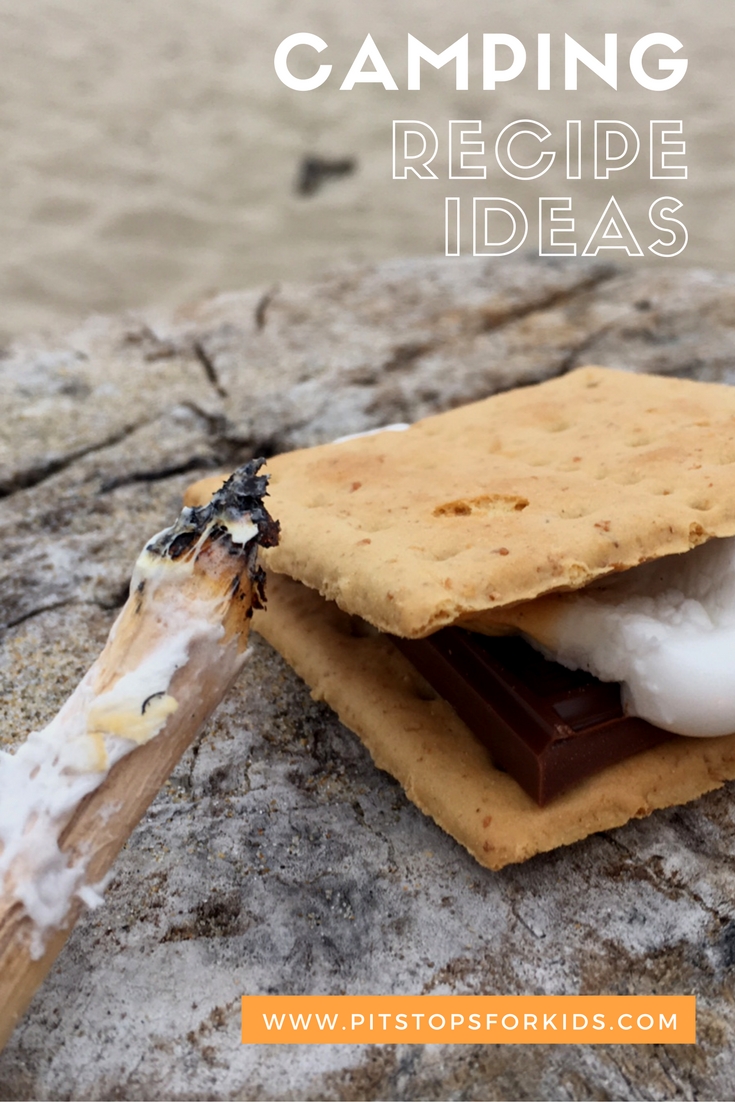
We enjoyed one of our last summer weekends on the Oregon Coast at Eel Creek Campground. It was cool and foggy, which meant fall camping conditions for us! We came to this part of the Oregon dunes to go sand boarding with a big group of tweens and teens, so we needed to really think through our meal lists. For all your year-round camping adventures, here are a few camping recipe ideas and tips from one camping family to another:

camping-recipe-ideas

Camping meal tips:

  • Pack separate coolers: You don’t want your main meal ingredients, like frozen meat, sliced veggies, and staples like milk or eggs to get warm, so place these items in a separate cooler from the one you use for ice and drinks. That way, it’s not opened and closed continuously throughout the day.
  • Freeze plastic milk jugs instead of bringing blocks of ice: This way, as the ice melts, you have potable drinking water to use, instead of a soggy, leaking cooler. Bonus tip: wrap your headlamp around the milk jug (inwardly) in the evenings for a lantern that will glow brightly! 
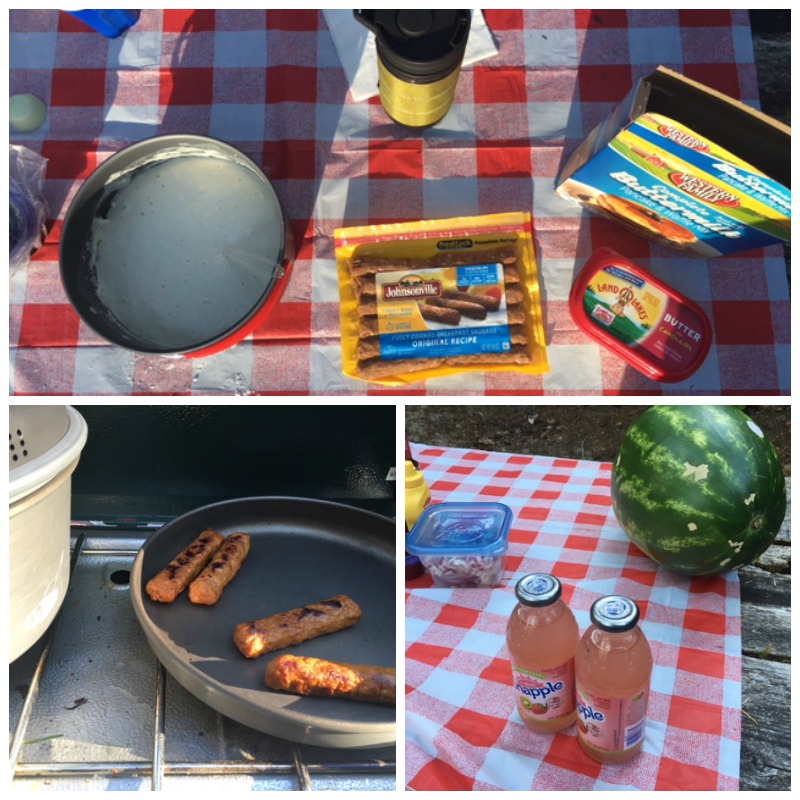
  • Pre-sliced or cut meat into the portions needed for your recipes before you leave home, then freeze them in zip-lock bags. Your meat will gradually thaw, and you’ll save a lot of time and energy once at camp if you don’t have to portion the servings. Choose meats that can pull double duty: for example Johnsonville fully-cooked sausage patties can be used at breakfast, then again in dinner tin foil packets or soups.
  • Bring milk that doesn’t need refrigeration: Consider using powered milk or boxes of milk that don’t require staying cold, like almond milk.
  • Place all your cooking items into one plastic storage bin: mark it as your ‘kitchen’ bin and keep everything together. For organization at camp, use a hanging shoe organizer to stow spices, utensils, and knives you need to keep out of kids’ reach.
  • Be sure to safely store food at camp: Use a bear locker or bin if provided by the campground, or hang food from a tree in a sleeping bag stuff sack if you’re in bear country. If not, store food in a locked car at night to prevent smaller critters from snacking.
  • Have a separate lunch bag that kids can dig into on their own. Keeping lunch and snack items apart from your dinner ingredients ensures foods don’t get eaten up early when they’re supposed to be part of recipes! Consider bulk foods for snacks to cut down on packaging and trash, such as trail mix, dried fruit, and nuts from bulk bins.

Fall camping recipe ideas:

Autumn is a great time to camp…the crowds have left your favorite campgrounds, and the weather stays nice in most areas long after Labor Day. Fall is the time for savory, warm camping meals between traditional BBQing sessions. Here are a few fall camping recipe ideas:

camping-recipes

  • Egg scramble: Start with a layer of hash browns on your griddle (bring frozen hash brown patties for ease), then scramble with eggs, sausage, cheese, and any fresh veggies you’ve brought along. Serve on tortillas for breakfast burritos that reduce the need for plates…and dish duty.
  • Dinner tin foil packets: Anything goes in these fun dinner packets! Start with a square of tin foil for each person. Create a buffet of chopped veggies and sliced meats (pre-cooked is best for fast cook times), plus diced potato and any spices you want to add. Each person creates a customized packet, then places it over the grill (allow coals to get hot first…not over a new fire). Cook until potatoes are soft…this may require some checking by parents.
  • Potato soup or chili: Use the burner on your camp stove to make a big batch of easy-to-make potato soup or chili (or one of each!). We like to use soup starters that come in powder mixes when we camp, then we add cooked meat or veggies to the mix ourselves. Sausage, diced chicken, fresh corn, or red bell pepper work great in the soup, and any meat or beans can be added to chili mixes. When the weather is turning cool, it’s great to have soup on the camp stove! Bring a pan of cornbread from home to serve alongside!
  • Hot dogs over the fire…with extras: Have kids gather sticks and roast hot dogs over the fire, then add some extras. Remember that chili you served the night before? Reserve some for your hot dog night! Add diced onion (get it pre-packaged, or dice at home), avocado, shredded cheese, or roasted veggies to the mix.

Do you have a top fall camping recipe idea? A family favorite? Share in the comments! Note: comments submitted may be displayed on other websites owned by the sponsoring brand.

This is a sponsored conversation written by me on behalf of Johnsonville. The opinions and text are all mine.

var ts=document.getElementById(‘ti-pixel-tracker’); var axel = Math.random() + “”; var num = axel * 1000000000000000000; var ti=document.createElement(“img”); ti.style.display=”none”; ti.src=”https://tracking.tapinfluence.com/trk/Zl0qD/FLIrV/p.png?p=NaKx5″ + String.fromCharCode(38) + “i=xgp6m” + String.fromCharCode(38) + “ord=”+ num + String.fromCharCode(38) + “s=” + encodeURIComponent(document.referrer); ts.parentNode.replaceChild(ti,ts); new TAP.CogFrame(‘/v1/cogs/7e0c5b04-4507-11e6-89bd-22000a66c666/comments’).drop({“program_id”:”7e08c890-4507-11e6-89bd-22000a66c666″,”post_id”:”5acddd30-6577-11e6-b161-22000a7d00a4″,”host”:”api.tapinfluence.com”,”apiHost”:”api.tapinfluence.com”,”sort_order”:”desc”,”limit”:”20″,”offset”:”0″,”sort_by”:”created_at”,”protocol”:”https://”});

How to pack for a camping trip and organize your campsite

Camping with the family is supposed to be relaxing, but it can feel stressful if you don’t know how to pack for a camping trip, and set up your campsite efficiently. After all, no one wants to spend all their time unpacking gear, looking for things, and hauling stuff around their campsite! Read on to learn how to efficiently pack and set up all your gear!

OARS

How to Pack for a Camping Trip: Easy Set Up at the Campground

Start your packing process with stackable rubber storage totes. You’ll need at least three (one for each camping “section” of your campsite, including the kitchen, sleeping, and living areas). Larger families or those with extensive gear will probably need more than one tote for each section. Once you arrive at your campsite, simply set each tote in the designated area you’ll need it in, such as the area around your picnic table for the kitchen tote, your tent area for your sleeping tote, and near your campfire pit for your living area tote. Color code your totes to remember where each one belongs.

Try this kitchen packing hack: Store your kitchen tools and utensils in a toiletry bag or other small bag to keep them organized and clean between uses at a dusty campground. You can hang them from a tree branch for easy access when you’re at your site.

In addition to your three “main section” totes, assign a smaller tote to each family member. This tote will hold that person’s clothing and personal items. Using totes for this purpose, instead of duffel bags or suitcases, saves space in your car, trailer, or RV. This especially helps save up room in an RV for important items like an extra RV battery. You can read about which RV battery to buy here https://www.stayontrails.com/best-rv-battery.

Place items you’ll need at the ready in a mesh laundry sack (which can be re-purposed later for dirty clothes). These items may include swimsuits and towels you’ll want as soon as you arrive at the campground or jackets and boots if you’re camping in damp areas or in the off-season.

How to Find a Good Campsite and Set Up Efficiently

If you can reserve your campsite ahead of time, do so online as early as possible. Look at the campground map and note campsites that back up to the wilderness instead of other sites. In addition, look at the bathroom and shower locations (you may want to be close to one or you may want to be farther away from foot traffic). If you are camping at a campground that does not take reservations, arrive at the campground as early in the day as possible. When you arrive, look for a campsite that backs up to the forest or scenery to minimize noise from any neighbors.

Find a campsite with equal parts shade and sun to maximize your exposure and enjoy warmth in the mornings and cooler temperatures in the afternoon. Once you’ve selected a site, set up your sleeping area in the shade (so your tents don’t heat up during the day) on flat ground away from the fire ring and kitchen area.

Set up your kitchen adjacent to the fire ring and picnic table. You may want to consider setting up a screen dome or shade shelter over the table to reduce unwanted quality time with insects and mosquitos. Make sure you place your cooler in the shade.

camping-recipes

How to Have a Safe Campfire

First, always make sure the campground permits campfires. Campfire policies can change seasonally, and they may be prohibited during peak forest fire danger periods. If campfires are permitted, make sure to gather sticks and wood from the ground around your site, taking care not to break branches off living trees. Dead wood is drier and better for burning.

If you need to buy firewood, buy it at your campground or at a local store. This practice saves space in your vehicle for your other gear, and it is far better for the environment. When you bring wood from home, you can unknowingly bring unwanted, non-native insects or parasites along with it.

Start your campfire with kindling or small sticks from around the campsite, combined with some newspaper or store-bought fire starter.

Always let your campfire start to die out one hour before bedtime. This is a great time to light a camping lantern and play a few rounds of cards or a board game. Of course, you should always put your fire completely out before leaving your campsite (for the day or at the end of the trip). To extinguish your fire quickly, separate the burned coals with a stick. Once they’re not touching, they will become cool to the touch within 15-20 minutes on average. After spreading the coals, ensure that the fire is fully out by throwing buckets of water or sand or them.

Pin it for later!


Source: eReplacementParts.com

Road Trip Travel Hack: Stay nights at KOA Kampgrounds!

We love to review destination hotels and resorts, but let’s face it: roadside motels booked solely for the purpose of an overnight pit stop en route on a road trip are usually nothing to write home about. Plus, an average motel stay is now over $100 per night. In the last year or so, we’ve been thinking outside the box (or motel room) and booking cabin, yurt, or campground stays instead.

koa jackson hole

I know what you’re thinking: you don’t want to pack everything needed for a camping overnight during your road trip, right? And you’re not keen on the dirt and work involved, just for one night. But wait, we have a solution: campgrounds with cabins.

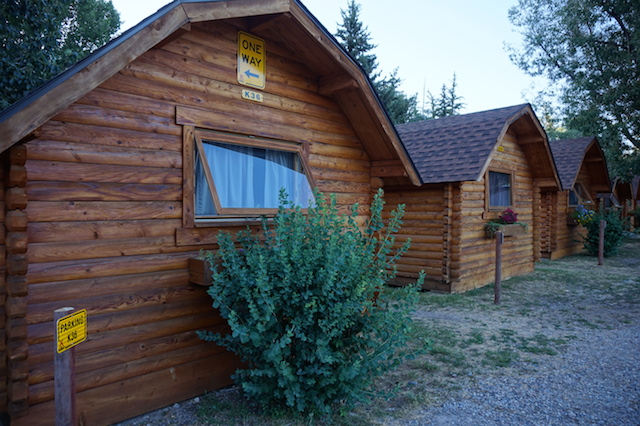
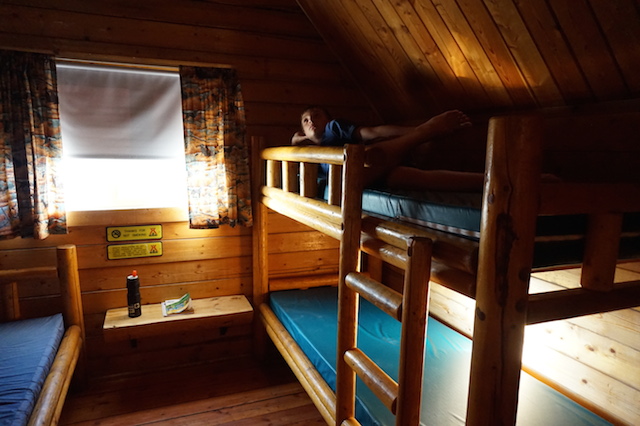
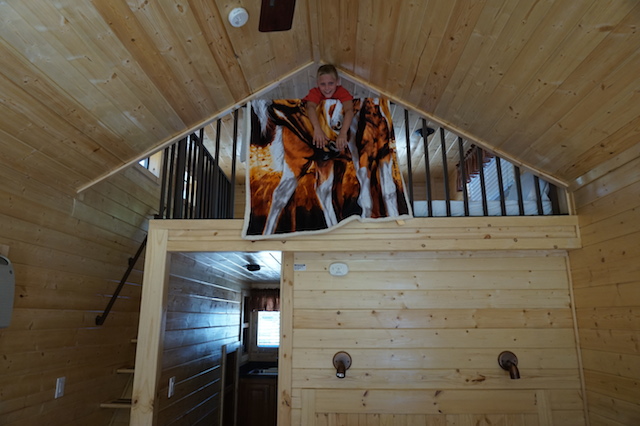
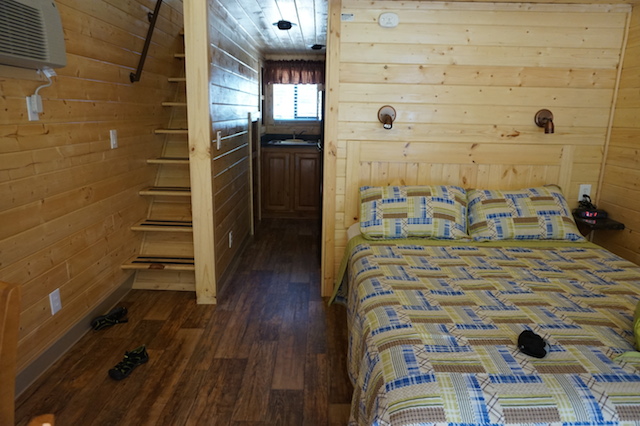
Many state parks and wildlife reserves have wonderful cabin or yurt options (check out this one right outside Yellowstone National Park), and most well-traveled interstates and highways now have KOA Kampgrounds en route. A number of years ago, I would not have considered staying at a KOA. But times truly have changed. We stayed at our first KOA in a decade two years ago, while traveling through Oregon to Mt. Hood in winter. We needed a low-cost, fun, and friendly place to stay the night, and a KOA cabin in Redmond fit the bill. Last week, we repeated the process, staying at a KOA cabin in Mountain Home, Idaho en route to Wyoming. Both of these cabins were listed as one of their standard options, which include electricity, heat, and beds for 4-6 people. They are not deluxe, and meals need to be cooked outside the cabin. Bathrooms are located in a different building close by.

koa-interior

For us, standard cabins work just fine. We usually have our own sleeping bags with us, and when we’re road tripping, we like to grab dinner out and eat a simple breakfast in our cabin that doesn’t require a kitchen. The Mountain Home and Redmond KOAs offered room to run around for the kids, a friendly community atmosphere, and the basic supplies we needed, like groceries, sunscreen, and bug spray in their stores. Some KOA locations aren’t anything special, but I’ve never experienced one that did not include a friendly, welcoming staff and clean amenities.  The rate is about half that of a motel room.

But what if you don’t want to rough it?

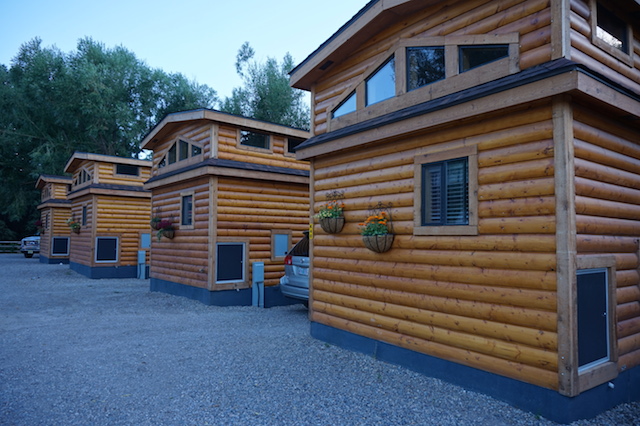
Try a KOA Deluxe Kabin! On our same Wyoming road trip, we stayed at the Jackson Hole/Snake River KOA in Jackson, and upgraded to a cabin with two rooms, a bathroom, and a full kitchen. Our cabin was located right on the Snake River, and when we arrived, the kids could immediately go play while we unloaded. We could cook our own dinner (the kitchen includes everything but an oven, and there’s a great BBQ, too) and sit outside at night, watching the stars come out instead of being stuck in a small motel room.

koa deluxe cabins

At KOA Jackson Hole/Snake River, there’s guided river rafting on-site, and in late summer, when the Snake River is running less rapidly, families can rent inner tubes to float down the river right next to the campground. The tent sites are located right on the banks (try to get site #1 for the best creekside playing) and the deluxe cabins overlook the river on higher ground. You can also opt for a standard cabin at this location, of course. We loved the friendly staff, and the fun activities on-site for kids. For instance: if kids find one of the painted rocks on property, they can turn it in for free ice cream!

deluxe-cabin

Deluxe cabins are as nice as you’d expect from an upscale rental home booking. Who knew? But be aware: these cabins can cost as much as, or more than, a motel room. It’s important to decide what your vacation goals are. If you’re booking primarily for budget reasons, opt for a standard cabin, and if you’re booking primarily for the outdoor experience instead of a motel experience, upgrade to a deluxe. Not all KOAs offer both, but you can get a good indication of the range of options by checking out the Jackson Hole camping cabin page.

koa-bedroom

What KOAs have you stayed in? Have your tried a cabin? We’d love your recommendations!

Iceland camper van road trip tips

Iceland has become a popular family vacation destination for many reasons: it is every bit as breathtakingly beautiful as it looks in photographs, there’s essentially no language barrier, it’s extremely family-friendly, and the outdoor recreation and sightseeing is almost endless.

What Iceland is not: cheap. Standard hotels can cost families as much as $400 per night on top of expensive rental car fees (especially if you need a 4×4 car for rough roads). Dining in Iceland is very expensive as well; fast food meals at a basic grill during the time of our 2017 trip were about $15 U.S. per person, and standard sit-down restaurant meals were closer to $45-50 per person. The solution: take an Iceland camper van road trip and combine your lodging and car rental cost and eliminate your restaurant dining out cost. Ready for Iceland camper van road trip tips? Let’s get started!

iceland camper van road trip tips

Start with your camper van rental:

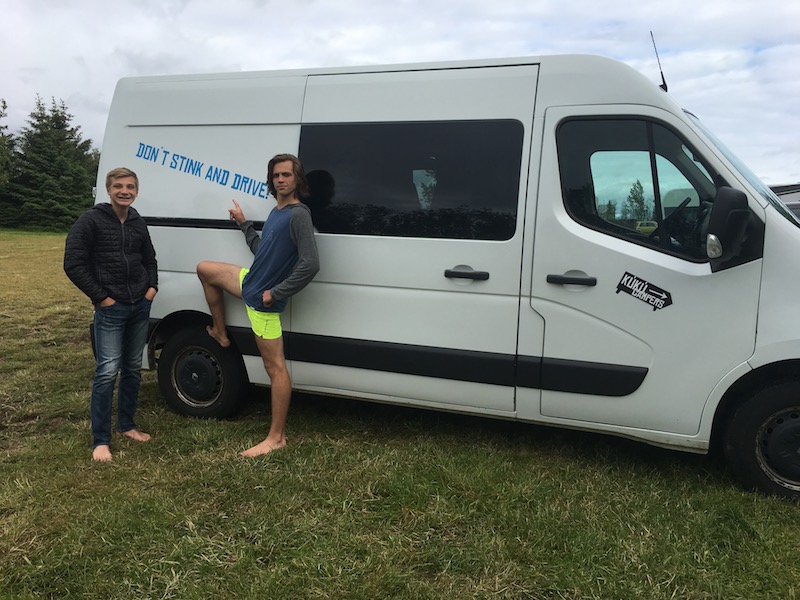
The first stage of planning your Iceland road trip is booking your camper van rental. We used Kuku Campers, one of the largest camper van rental companies in Iceland. Kuku Campers offers just about every size and type of camper van, ranging from small vans that sleep 2-3 people to the larger style we rented, which sleeps five (both are Class C, which don’t require any additional training or know-how to drive). You can also opt between 2×2 or 4×4.

kuku camper

Kuku 2×2 category C camper

We picked this 2×2 van for five people (click on the link to see detailed interior photos) which cost approximately $1800 for nine days ($200 per night). This cost was significantly less than we’d spend on hotels and a rental car. Kuku Campers offers this van in standard (stick shift) or automatic. We opted for standard, as it was cheaper, and  I am comfortable driving a stick shift.

Note: Do you need a 4×4 vehicle? If you’re a regular reader of Pit Stops for Kids, you know we’re a pretty adventurous family. We rented a 2×2 van, and were able to access everything we wanted, and more. You need a 4×4 vehicle only if you plan to drive F roads (Iceland’s most rugged dirt roads), which is needed if you plan to backpack or hike deep in the interior.

The features and configuration of our camper van:

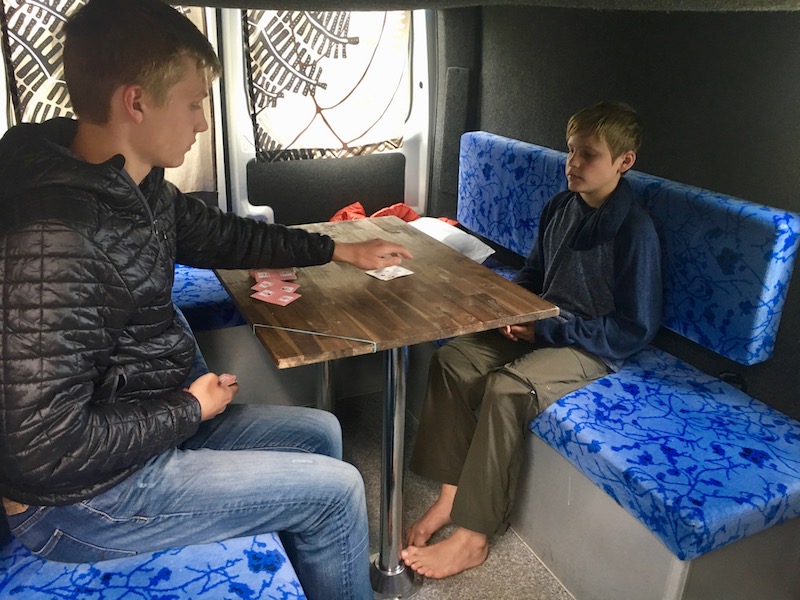
In the front were two bucket seats (the driver’s seat and the front passenger seat). Behind those seats was the kitchen area: a countertop/food prep surface with sink and faucet, storage area for a portable stove/cook top, electric refrigerator (which runs when the car is running), dishes and kitchen utensils and silverware, a large water storage container, and a pantry area for food. Behind the kitchen was the main compartment of the van, which had a padded bench seat in a U shape, surrounded by a roomy kitchen table. Above this was a sleeping bunk. At night, the table and bench seat easily folded down to become a second sleeping area. The bottom slept three, and the top slept two. During the day, passengers could sit on the bench seat with seatbelt while the van was on the road.

kuku-camper

Lots of space: to the front of this photo would be the kitchen area.

In addition to the running water, which ran from a hose from the water container to the kitchen sink, the van had two overhead lights and a nighttime heater (which could be run when the van was turned off). There is no bathroom in the van, but this isn’t a problem (we’ll get to that soon). We found sufficient storage in the van for our bags under the bench seats and at the very back of the van, in addition to smaller storage areas above the front seats and above the kitchen. Lastly, there were useful hooks to hold jackets and rain pants, as well as curtains to pull around the windows at night. These hung on elastic cords, which we used to hang additional items like wet towels and swimsuits.

But was the van hard to drive? 

At first, a little bit, yes. I don’t ever drive anything larger than a minivan at home, so for me, it took a day to get comfortable driving something taller and wider. Icelandic roads are narrower than US roads, so there is definitely a learning curve. I also needed time to get used to backing up the van (though it was far easier than trying to back up a van with a trailer). By Day 2, I was quite comfortable. Overall, driving the van was no big deal, even on dirt and gravel roads, though the van certainly got dirty!

iceland road trip

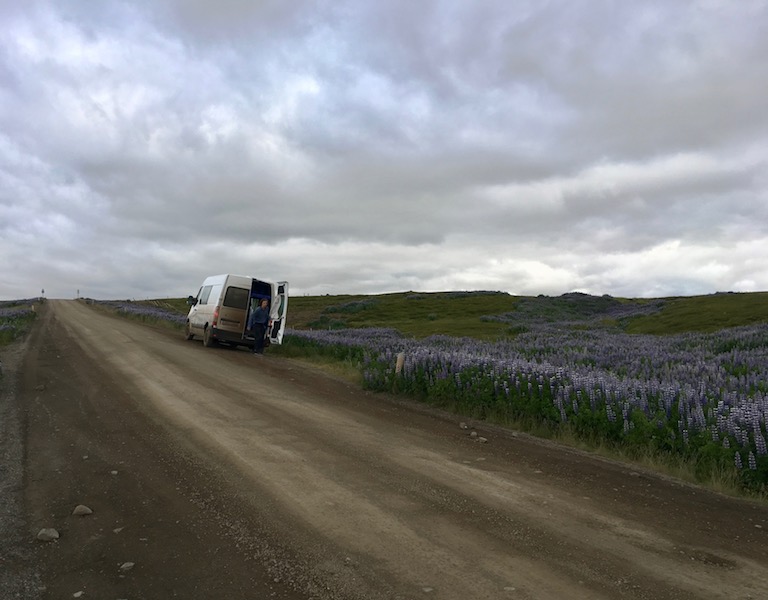
Stopping to make a snack and take photos on a gravel road. There are plenty of turn-outs to use!

The van took diesel fuel, which seemed to be easily available at every gas station, and it cost me about $160 to fill the tank. We drove for eight days, I filled up twice and topped off once, and I spent a total of $360 on gas. At all campgrounds and parking lots for trails, scenic overlooks, and historic sites, there was ample room to park the van. The only place I had trouble navigating parking was in downtown Reykjavik, and even there, I managed (but it was stressful).

Next plan your trip! Here’s what to expect:

I’m going to say something now that I never say on this site: don’t over-plan. If you allow your itinerary to stay flexible, you’ll be able to advantage of all the many moments of spontaneity possible in Iceland. There are natural wonders and historic sites every few kilometers at times; you can’t do it all, but you can decide what to do in the moment. We planned a general route which included the south, west, and east. We purposely didn’t travel the entire Ring Road because with only eight full days on the road, we wanted to spend more time on side roads than Route 1.

iceland camper van

Waterfall at the base of one of our campsites.

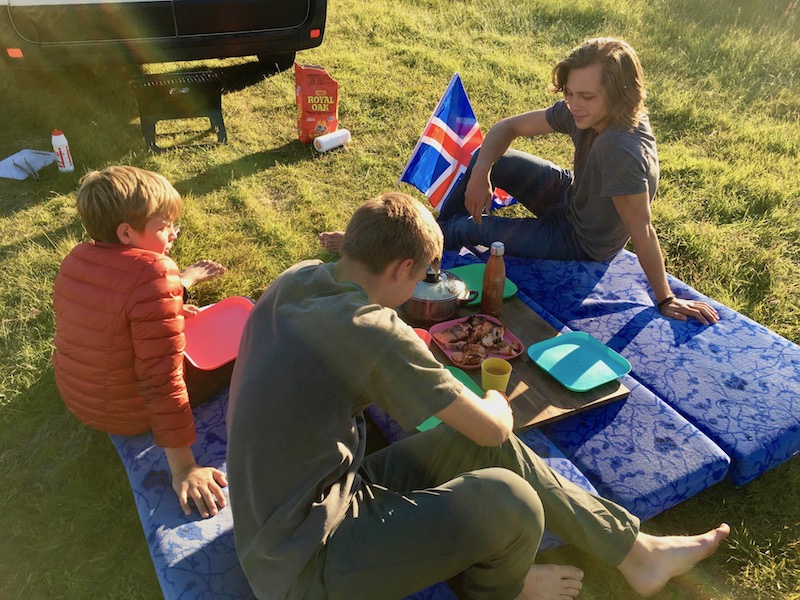
I absolutely loved having our Kuku Camper, because of the freedom it offered. Every day, we traveled WITH our lodging and dining, so we never had to worry about getting to an exact place to eat or sleep each night. In Iceland, especially in the rural areas (which is most areas), we found that restaurants and shops closed relatively early in the day, even in the peak of summer. We were hard pressed to find dining options open after 6 pm, so we loved the ability to picnic our meals anytime, anyplace. We got into a routine of making breakfast in our camper at the campground in the morning, making a picnic or packed lunch to enjoy out and about, and then stopping at one of Iceland’s many, many scenic overlooks to BBQ or cook our dinner on the road. We arrived at each campground at night well-fed and ready to make camp. While we were driving, if someone was hungry, they could simply make a sandwich on the road, and if we decided at the last minute to detour to see or do something, we never had to care about missing reservations.

iceland picnic

Iceland outdoor picnic!

The most unnatural thing to me, as a natural planner, was the fact that you do not need to make campground reservations. If you’ve tried to camp in popular campgrounds in the US in summer, you know this simply isn’t true at home. But in Iceland, they really do mean it when they say their campgrounds do not fill up. They really don’t. Not anywhere. Not ever.

uncruise-review

Pages: 1 2 3