Outdoor adventure road trip: 30 days on an outdoor adventure itinerary

Our absolute favorite type of travel involves an outdoor adventure itinerary, the longer the better! However, even we don’t cherish the idea of roughing it continuously for weeks on-end. While we will be spending a full week (or more) on the PCT with kids soon, we opted to plan the rest of our summer outdoor adventures with a little more comfort in mind. Here’s how we’ll be spending 30 days on an outdoor adventure itinerary in the Northwest US this summer, without channeling our inner Bear Grylls.
OARS

Day 1-5: Out on the water at the edge of Washington State

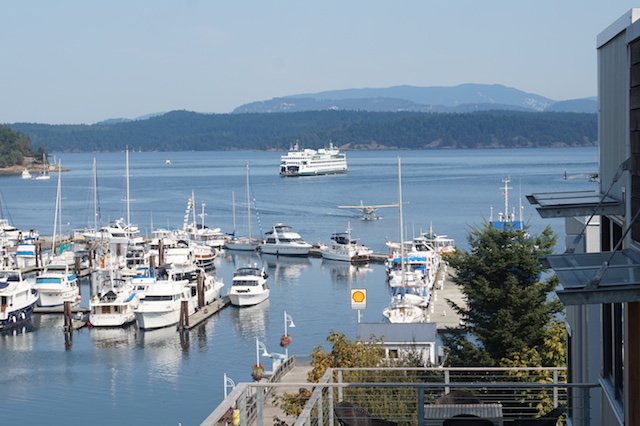
We’ll be starting our month of outdoor adventure on scenic San Juan Island, Washington. The San Juan islands are one of our favorite outdoor playgrounds for families, because they offer unparalleled beauty and nature as well as comfort and relaxation, should you want it. It’s easy to get around the island, exploring beaches, forts, and harbors. We’ll spend a night enjoying in San Juan Island hospitality, then set out for two days and two nights with Crystal Seas, kayaking around the side of the island and in the sound. I won’t lie: on this kayaking camping trip, I am very much hoping to see orcas…wildlife that has eluded me so far during multiple trips in the Pacific Northwest. Fingers crossed!
friday-harbor

Day 6-8: Mt. Rainer National Park

After one more night of R&R after our outdoor kayaking days at Snug Harbor Resort, we’ll say goodbye to the San Juans and drive back onto the mainland for a few days in Mt. Rainer National Park. Since we just camped out a few days on the island, we’ve reserved a cozy cabin outside the park instead (we got ours through HomeAway). While in the park, we have long day hikes planned; while it will be too early in the season for us to tackle the famous Wonderland Trail (we won’t have time, anyway), we’ll be trying a few of these day hikes. The teens and I will be wearing our Oboz hiking shoes, of course. (Curious about this? Check out why I’m an Oboz ambassador.) As the last Pacific Northwest national park we have yet to visit, I can’t wait to explore Rainer!

Day 9-11: Playtime at Suncadia

Our next set of stops on the itinerary will take us east across Washington, then up to British Columbia, but we don’t want to be in a rush, so we’re planning a relaxing stop at Suncadia. Located in Cle Elum, Washington, Suncadia is one of those one-stop outdoor resorts the Pacific NW is so good at creating. We’ll be able to spread out for a few days in a vacation rental, swim in the pools, ride rental bikes along the Suncadia paths (and perhaps embark on a little mountain biking). While at Suncadia, I’m looking forward to a well-deserved bottle of wine, some nice meals, and maybe even a round of golf.

Day 12-13: Rest(ful) stop in Spokane
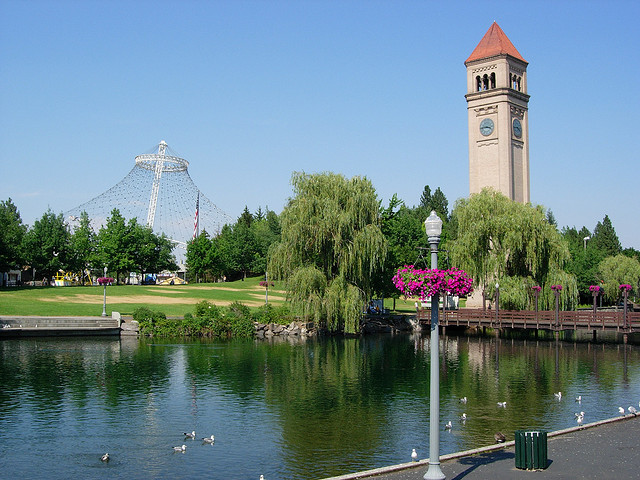
spokane-riverfront-park

After leaving Suncadia, we’ll have a long drive ahead of us as we travel to Cranbrook, BC. Spokane Washington is a natural stopping point, with a lively and revitalized downtown and plenty of outdoor pursuits. We lived in Spokane for many years (in fact, two of the Pit Stops kids were born here), and I can’t wait to show them beautiful Riverfront Park and the Spokane River. We’ll be staying the night at the Red Lion Hotel at Riverfront Park, where the kids will get an evening of waterslides and pool fun. We’ll actually be returning to this hotel later, to watch Spokane’s well-known Hoopfest basketball tournament.

Day 14-20: Cowboy (and girl) living at Three Bars Ranch

After leaving Spokane, we’ll arrive in Cranbrook, BC, in the heart of the Canadian Rockies. Located between two of our favorite outdoor playgrounds–Glacier National Park and Banff, Alberta–the Three Bars Ranch is an all-inclusive dude ranch perfect for families. After trying our first dude ranch last year at Triangle X Ranch, Wyoming, we’re really excited to repeat a week on horseback. Every dude ranch is different, and we’re looking forward to reporting on how Three Bars differs from our Triangle X experience. Already, I know the boys are looking forward to using the tennis courts and pool at Three Bars! While I know our days will be filled with outdoor adventure, we’ll be sleeping in comfortable lodging every night, and able to soak sore muscles in the hot tub.

Day 21-27: Tackling the Main Salmon with O.A.R.S. Rafting
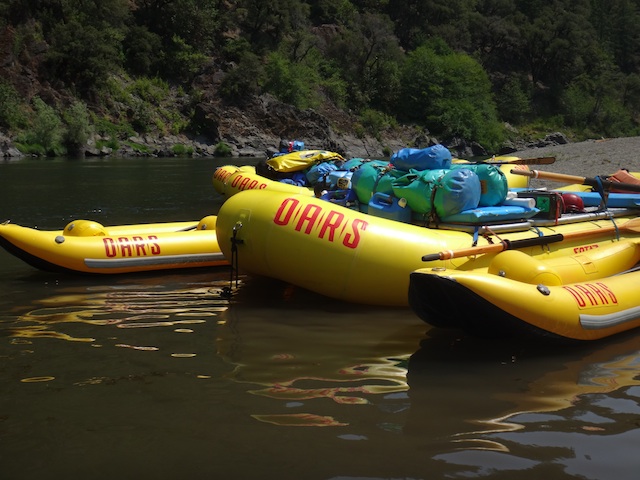
OARS river rafting

It’s no secret that we absolutely love O.A.R.S., so we’re very excited to announce we’ll be back on the river with this amazing company, this time on the Main Salmon in Idaho. After leaving Three Bars Ranch, we’ll return to Spokane, then head east to lovely McCall, Idaho. After our pre-rafting trip team meeting, we’ll be flying to our put-in spot on the Main Salmon, in the heart of the Frank Church ‘River of No Return’ Wilderness. For six days, we’ll be out in the elements, sleeping in tents and paddling the river, but with the O.A.R.S. team, families still feel pampered, even when on multi-day trips. I know there will be good food, comfy tents, and lots of fun and games.

If you’d love to spend the majority of your summer out-of-doors, but the thought of roughing it for days on end have you hesitating, consider one of the trips listed above…or be crazy like us and do them all! Look for detailed reviews of our experiences with Crystal Seas, Three Bars Ranch, Suncadia, and O.A.R.S. in the months to come!

Camping packing lists and tips

Family camping trips are an excellent way to spend time together in the outdoors and enjoy a vacation on a budget, provided you have some camping tips and hacks up your sleeve. Otherwise, it can take as long to prepare and pack for a camping trip as the trip itself! To ensure that you’re ready for that next weekend trip to the woods, use the following camping packing lists and tips.

Coleman-tent

The Camp Kitchen

Organizing and packing your camp kitchen is often the most complicated part of preparing for a camping trip. The workaround is having dedicated camping pots and pans, utensils, and kitchen gadgets stored apart from your home kitchen, which will save you time and effort in packing and unpacking daily supplies. Here’s what you need:

Kitchen Packing List:

  • Camp stove: Opt for a lightweight backpacking stove or traditional car camping stove.
  • Fuel: Make sure you have the correct propane fuel for your stove.
  • Plates, cups, and eating utensils (1 per family member): Use paper products or opt for reusable mess kits, which are available in outdoor stores.
  • Tablecloth: Buy a cheap one at a dollar store.
  • Dishwashing tub: Opt for a plastic tub or nylon, sealed, collapsible tub.
  • Dishwashing supplies: Paper or cloth towels or dishrags; dish soap; and sponge.
  • Matches
  • Fire starter
  • Ice
  • Cooler
  • Tarp
  • Grill (optional): Most campsites provide a grill over the fire pit.
  • Camp table (optional): Helpful for organization, but not necessary.
  • Kitchen tools/utensils: Spatula, all-purpose knife, potholders, serving ladle, butter knife, tongs, long skewers for s’mores or meat-on-a-stick, and tin foil.

Try this kitchen packing hack: Store your kitchen tools and utensils in a toiletry bag or other small bag to keep them organized and clean between uses at a dusty campground. It will be easy to hang them from a tree branch for easy use when you’re at your site.

The Camp Sleeping Quarters

Everyone wants to be warm and cozy at night! Whether you’re camping in warm or colder climates, everyone in your family will need the essentials to ensure that they’re safe at night. Store tents and sleeping pads in a second large tote, making it easy to pack up the car and head to the campsite at any time.

camping-tips

Sleeping Packing List:

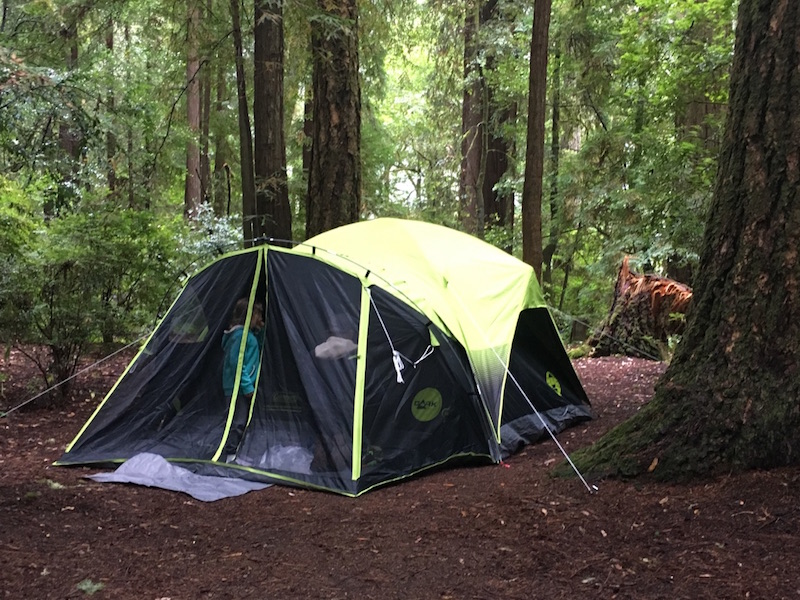
  • Tent(s): Opt for one large family tent or 2–3 smaller tents. Larger tents have the advantage of space, but small tents fit in cozier campsites.
  • Sleeping bags: Buy sleeping bags rated at 20 degrees F, unless you know you’ll be camping in colder climates. A 20–40 degrees F bag works for most camping experiences. Down or down-alternative bags pack down smaller and are lighter and warmer than cotton or nylon/polyester bags.
  • Sleeping pads: Opt for thick blow-up mattresses for car camping, or save space with backpacking pads that inflate with just a few breaths of air.
  • Ground tarp: Don’t skip the ground tarps. They protect your tent floor and keep the dew and cold at bay.
  • Towels and personal hygiene items: One per family member!
  • Flashlights or headlamps: One per family member. Everyone should have their own light source for safety and convenience.
  • Lantern: One per family will do. Ideally, your lantern can transition from kitchen area to tent and back.

Try this sleeping quarters hack: Buy a ground tarp one size larger than your tent, and use the overhanging space as a place to take off shoes and wipe off feet before entering the tent.

The Campfire Area

Camping just isn’t camping without a comforting campfire, right? The campfire area is important, but there’s good news: it’s easy to pack for!

Campfire area packing list:

  • Firewood: Buy on-site, or save money by buying it at a local grocery store.
  • Matches and fire starter: You’ll already have these in your camp kitchen supplies. The type of fire starter you use is up to you; we like fire disks or fire cubes.
  • Axe or hatchet: Useful for breaking down firewood. Store away from children.
  • Camp chairs: Some campsites include a bench around the fire ring, but for most, you’ll want collapsible camp chairs. To save space in the car, opt for the smaller, lighter versions sold in backpacking stores.
  • S’mores: Be sure to bring the ingredients for this tasty campfire treat!
  • Deck of cards or board game: Everyone enjoys playing a game around the fire.
  • Lantern: This item is already with your sleeping supplies!

Try this campfire area hack: Never bring firewood all the way from home. It takes up lots of room in your car or truck, which could otherwise be used for other items, and it could be banned from your campground if you’re driving any distance. Campgrounds often require local wood to be burned in an effort to reduce foreign insect species from invading new areas.

Miscellaneous Items Campers Love

Think you have everything you need? Probably not! Read the list of extras below and decide what you can’t live without!

  • Insect repellent or wristbands
  • Sunscreen
  • Toilet paper and shovel (if you don’t have a campground restroom)
  • Inflatable wading pool for small children to play in
  • Playpen for babies to stay off the dirt (sometimes)
  • Clothespins and a clothesline to hang wet clothing
  • Extra sheet or towel to hang in the tent to create “rooms”
  • Hammock
  • Baby wipes to clean hands and faces
  • Camera
  • Water/wading shoes
  • Small net and bucket to use in streams
  • Small toys for kids to use in camp
  • Bikes or scooters for larger campgrounds


Source: Fix.com Blog

Dealing with camping mishaps: Camping tips for families!

It’s almost camping season! If you’ve been reluctant to enter the wilderness with your family because of worries or fears, read on! Our camping tips address the most common camping mishaps, and how to deal!

Those who camp regularly know it’s not all sunshine and rainbows. Here’s what to expect from the unexpected and what to do when you encounter camping mishaps. Read on for camping hacks!

Coleman-tent

When The Weather Turns Against You

Bad weather is the most common mishap encountered by campers…even when car camping. Usually nothing more than an inconvenience or temporary delay of outdoor fun, weather can sometimes become dangerous. Here’s how to protect yourself from serious weather issues from mother nature.

Rain: It’s good to be prepared for rain when camping. Be sure to bring a reliable rain fly for your tent, rain jackets for everyone in the family and, if rain is predicted, an extra shelter or canvas tarp to put over eating and cooking areas. It can also help to bring an extra beach towel to use as an entry mat to your tent to wipe off dirty feet when campsites get muddy.

Wind: High winds can cause major problems for campers. If you are in a camper or RV, fold down all awnings and external structures in the case of high wind and, in tents, secure your shelter with guy lines and stakes. Beware of “widow makers” when pitching tents or parking RVs: these dead-yet-standing trees can fall over easily in high winds.

Heat: Always plan your tent site with shade in mind and look for campsites with trees, rocks, or vegetation that will provide some relief. Freeze jugs of water before departing home so you can have access to icy water along with homemade ice packs. Wet bandanas or other clothing to cool skin and camp near bodies of water for easy access.

Wildfires/lightning: A regular occurrence most summers in the western United States, wildfires can certainly ruin a camping trip. The good news: families in campgrounds will have advance warning of any needed evacuations. Check your state’s US Forest Service website for possible fires in the area of your campground and have a back-up plan in case of road closures or campground closures. To avoid lightning strikes, ensure your campsite is not the highest point in an open environment, and do not hike to vistas and peaks if lightning is possible. Cars and RVs (except canvas-topped or fiberglass), bathrooms wired with plumbing and electricity, and other wired buildings are safe places in a lightning storm. Tents are not.

Tip: For all weather-related issues, know the campground’s evacuation procedures before your arrival. You can find this information at a ranger station or check-in booth.

When Someone Becomes Injured or Sick

Minor illnesses and injuries are common while camping, and most can be addressed with a simple bandage or extra s’more for dessert. Prevent blisters before they start by wearing well-worn shoes and sandals while camping. If you’re prone to blisters, use moleskin or bandages specifically for blisters before you hike.

silver-falls-hike

Because you’re in the outdoors with less access to sterile environments, cuts and scrapes should be treated immediately to prevent infection. Always carry a standard first aid kit with antibiotic ointment packets and antiseptic wipes in addition to various-sized bandages.

If your campsite does not offer running water, such as a hike-in or backcountry site, beware of Giardiasis. Also known as Beaver Fever, Giardiasis is an intestinal illness caused by microscopic parasites. It’s caused by drinking untreated water and can result in diarrhea and dehydration. Campers at a campsite with running water (in developed countries) will not need to worry, but those camping where water is sourced from lakes or streams (or in undeveloped countries) will need to treat water before drinking. Be sure your camping gear includes a filter or pump system for your water bottle.

Finally, deal with those annoying buzzing creatures in the outdoors with topical anti-itch cream or hydrocortisone for minor bites and stings. Always carry Benadryl (oral) in case of swelling or discomfort, even if you don’t think you’re allergic to any type of insect.

Tip: For all health-related issues, know where the closest hospital is located and have local emergency numbers on hand.

Addressing Common Camping Nuisances

There are always a few things we’d rather not deal with while camping but that are hard to avoid. Here’s what to do about the worst offenders.

Difficult neighbors: When car camping at popular campgrounds, you’ll often have neighbors. Usually these camping buddies are outdoor lovers like you and will be quiet and courteous. But if they turn out to be disruptive neighbors, they can ruin your trip. Here’s what to do when faced with loud, arguing, or partying campers:

  • Speak with them directly, in a friendly manner.
  • Talk to a campground host. Each campground will have one or more of these citizen enforcers; their campsites will be marked as host campsites. The host should speak with the offending campers.
  • Ask to move campsites (if hosts cannot control the situation).
  • Call the local authorities if the situation makes you feel unsafe.
  • Follow up after your trip with the campground owners or government agency (if it’s a national or state park). They can’t take action that will help to prevent this issue in the future if complaints aren’t lodged.

Mosquitoes: Always a pest, and now a danger in some regions for those susceptible to the Zika virus, mosquitoes need to be controlled (as much as possible) within your campsite. Have a secure shelter to use when necessary (such as a tent or screen room), wear insect-repelling clothing, and use natural repelling remedies around camp. At night, make a campfire and let the wood smoke repel mosquitos for you!

Some mishaps are bound to arise while camping, and they can even make for great stories! Anticipating them and following our camping tips and tricks means you will be prepared and won’t allow them to define your whole trip.

Subscribe to our Pit Stops for Kids seasonal newsletter, and get an exclusive travel ‘cheat sheet’, free! Click here!

Pin for later!

Everything you need to know to avoid (or deal with) camping mishaps!
Source: Fix.com Blog

Guide to Sequoia and Kings Canyon National Parks with kids

On a recent tour through several California National Parks, I heard the same thing over and over again from fellow guests and even park employees: “We love Yosemite, but we’ve actually never been to Kings Canyon.” Or, “We come to Yosemite annually, but haven’t experienced Sequoia, yet.” This tells me two things: Yosemite National Park is one of the most popular in the nation (no surprise there), and neighboring Sequoia and Kings Canyon National Parks will be vastly less congested nearly all year long. Are they worth visiting? Absolutely!

Park overview:

Sequoia and Kings Canyon are two distinct national parks with one planning site. They have separate entrances, though the same entry fee will get you into both. They sit side-by-side along the General’s Highway off Highway 198 (accessed from Fresno, California) and sit at impressively high elevation: between 6,000 and 8,000 feet for the most part.  We suggest at least two days in the parks in the off-season, and three in summer, with the majority of your time spent in Sequoia.

What to do:

Giant Forest: 

giant-sequoia-trees

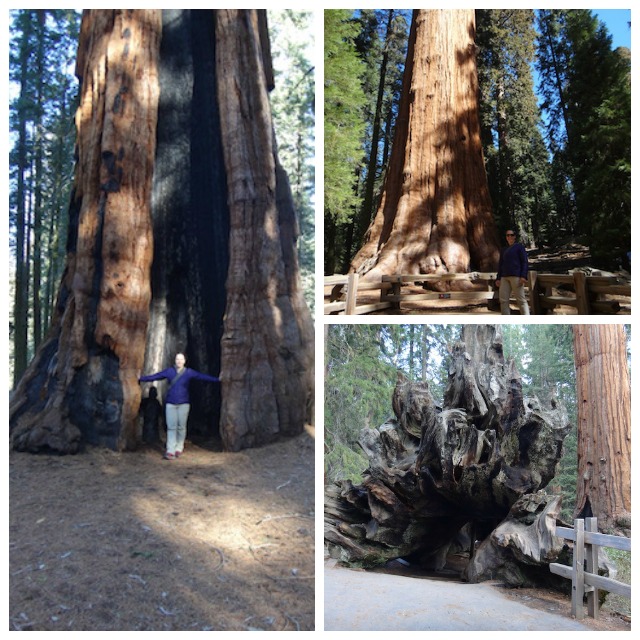
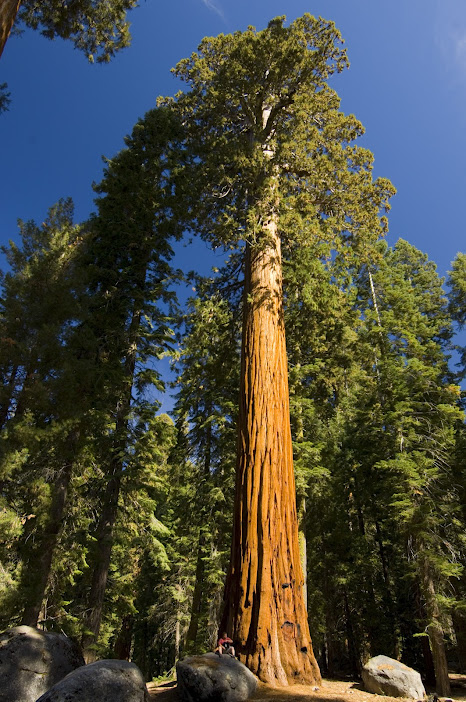
Most of us come to Sequoia for the Giant Sequoia trees. And yes, they’re absolutely worth the trip. These towering giants reside in this region because of the ideal conditions: they cannot grow like this anywhere else in the world. Take the Big Trees Trail to walk amid these giants (you’ll find the hush of the forest soothing…unless you have restless kids with you!). The General Sherman Tree is the largest tree in the world. Bear in mind: the General Sherman is not the tallest tree in the world, but rather the biggest, measured in circumference around its trunk.  The nearby Giant Forest Museum is worth a stop (in the off-season, it opens at 10 am).

Moro Rock:

moro-rock

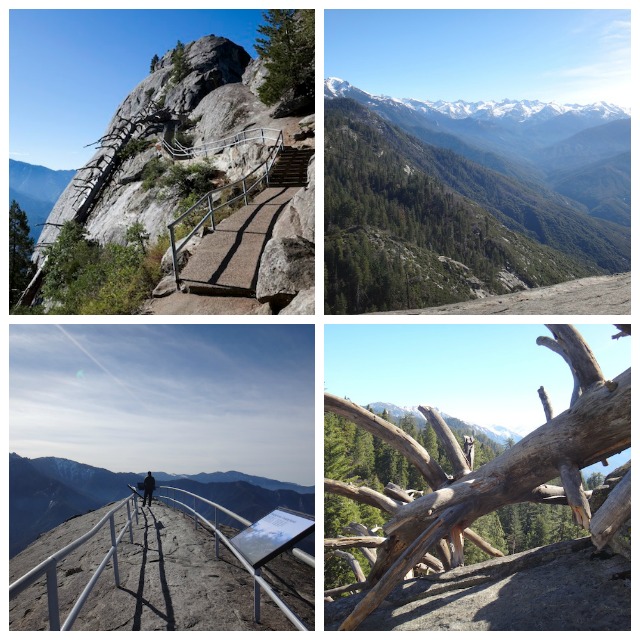
Absolutely plan an hour or so at Moro Rock in the high season. This overlook includes a short but steep hike up the cliff-like rock, which will feel unsettling to anyone with fear of heights. I fall into that category, but had no problem with this short hike, because guard rails are set at key locations. There’s nothing to stop small children from wandering, however, so extreme attention is necessary. From the top of Moro Rock, the views are unparalleled. It’s possible to see the valley floor from one side of the viewing platform, and the peaks of the Sierras from the other. Point out the tops of the Giant Sequoias to kids: they look like bunches of broccoli from this height. Tip: after Moro Rock, continue a very short distance on the same road to drive through Tunnel Log and picnic in Crescent Meadow. Wolverton Snow Park is another nice resting stop in any season.

Crystal Cave:

I had no idea hundreds of caves lay under the surface of Sequoia National Park! The only cave available to tour is Crystal Cave, and it’s only accessible in summer. If you visit during the high season, this should be on your list.

sequoia-sightseeing-tour

Tip: Take a tour with Sequoia Sightseeing Tours with Paul Bischoff! Paul is a long-time resident of the area, and runs the best sightseeing tour I’ve taken from a private concessionaire in a national park. We spent a full morning with Paul, and learned more about the parks in a few hours than we ever could have guessed. Paul knows where the animals are, the best ways to avoid crowds, and can walk guests right to the most interesting trails and natural wonders.

Grant Grove of Giant Sequoias:

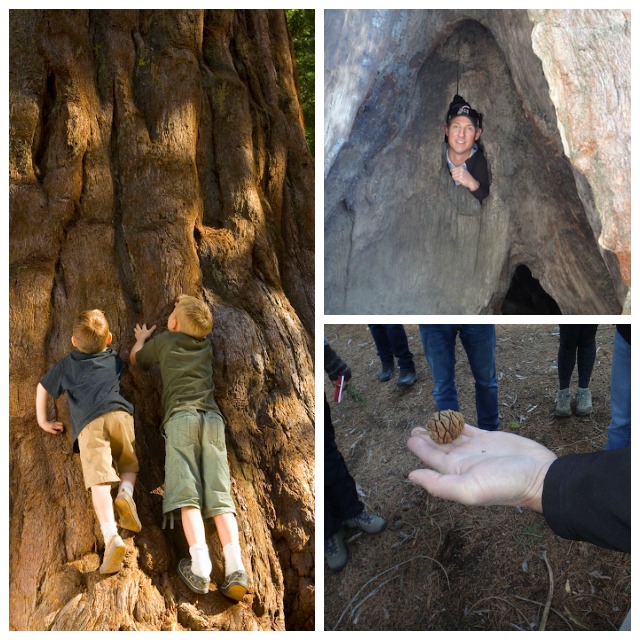
In Kings Canyon, the Grant Grove offers the General Grant Tree, plus a nice, easy hiking loop of additional Sequoias which includes some naturally downed trees. This is a great place for kids to see the root system of these giants, crawl through a fallen Sequoia log, and walk through a Sequoia tunnel! The Grant Grove Visitors Center is nearby as well, but we found it to be pretty limited.

Tip: While staying at Kings Canyon, catch the John Muir impersonation program by talented Frank Helling. Frank performs most Fridays at the Grant Grove evening campfire program during the summer months. I learned more about John Muir from Frank than I have before or since, and it was entertaining for all ages. Check at the Grant Grove Visitor Center to find out exactly when he’ll be performing during your summer visit.

giant-sequoias

Kings Canyon:

In summer, families can drive into the famed canyon, stopping for short hikes along the way. Kings Canyon is home to fabulous backcountry as well: if you plan to backpack in Kings Canyon or Sequoia, apply for a free backcountry permit. The good news: they’re far easier to get than Yosemite permits!

Tip: if you have the opportunity to listen to the storytelling of John Muir impersonator Frank Helling, make time to do this! Frank is absorbing and entertaining, and I learned more about John Muir in the 45 minutes I listened to him than I have before or since! Frank conducts his performances when available; as a park ranger or at the John Muir Lodge about opportunities to hear him speak.

Where to stay:

Kings Canyon offers the busiest ‘village’ of tent cabins, lodging, general stores, and visitors centers at Grant Grove Village. In the off-season, it’s quiet and we recommend the adjacent John Muir Lodge. However, in the height of summer, we’d opt for the less congested Wusachi Village of Sequoia National Park, where you’ll find Wusachi Lodge. This village center houses only the lodge and its restaurant (no adjacent camping and conveniences), which makes it somewhat quieter year-round. Read reviews of John Muir Lodge and Wusachi Lodge.

How to get here:

Access either park from Highway 198 from Fresno California. If you’re doing a loop of Sequoia and Kings Canyon as well as Yosemite National Park (called the Majestic Mountain Loop and highly recommended), you’ll need to depart Kings Canyon and return to the valley floor, then loop around to Yosemite via Highway 41. It’s not possible to drive over the Sierras, which is a good thing for all of us enjoying the parks!

10 tips for avoiding altitude sickness while vacationing


The first time I traveled to high altitude while on vacation, I didn’t take the threat of altitude sickness seriously. After all, I reasoned, I had grown up in the mountains, and knew how to enjoy myself in the thinner air. But I had been living at low altitude for years, and the first time I exited my mountain condo at Keystone Resort Colorado for a morning jog, I suffered. At first, I worried my poor performance meant I was terribly out-of-shape, but the persistent headache and queasy stomach I endured the rest of the day told another story: I was suffering from altitude sickness.

joshua-tree-scrambling

When I returned for a high mountain vacation with my kids, I had renewed passion for avoiding altitude sickness! We guzzled water pre and during our trip, ate and slept well, and had a great time. Before you head to high elevation with your kids, read the following tips from Dr. Josh Brown of Santa Fe’s Internal Medicine Specialists. (Yes, Santa Fe is at high elevation!)

  • Start Exercising Now: If your trip includes strenuous physical activity, start an exercise plan that includes extra cardio activity for the month or so prior to your visit.
  • Stay Hydrated: Begin drinking extra water a day or two before arriving at your destination and continue to stay well hydrated throughout your trip.
  • Limit Caffeine and Alcohol: Try to avoid or limit beverages that contribute to dehydration.
  • Eat Foods High in Potassium: Foods such as broccoli, bananas, avocado, cantaloupe, celery, greens, bran, chocolate, granola, dates, dried fruit, potatoes, and tomatoes will help you replenish electrolytes by balancing salt intake.
  • Take Ibuprofen: Recent studies show that altitude sickness can be effectively prevented with this common and inexpensive over-the-counter medicine.
  • Plan for Trouble Sleeping: It is safe to assume that you will have difficulty sleeping, particularly during the first night in a higher altitude. Take it easy and allow for extra time to rest.
  • Climb High, Sleep Low: This mantra is especially important if you are hiking or camping at elevations above 10,000 feet. If you can, arrange the itinerary so that there are gradual increases in elevation spread throughout your trip.
  • Wear Sunscreen: Remember that higher altitude means less atmosphere to filter the sun so there is a much higher chance of sunburn compared to sea level. Apply sunscreen of at least SPF 30 or more even in the winter. 
  • Know the Symptoms: Altitude sickness can cause loss of appetite; fatigue or weakness; dizziness or light-headedness; pins and needles; shortness of breath upon exertion; persistent rapid pulse; drowsiness; and peripheral edema (swelling of hands, feet, and face). Contact your doctor if your symptoms are severe or don’t clear up after a couple days.
  • Consult With Your Doctor: People who have had serious bouts of altitude sickness in the past should check with their doctor or an online pharmacist, like The Independent Pharmacy, about prescription medications, like Diamox, that can help alleviate symptoms. Those who have significant heart problems should also check with their doctor before traveling as higher altitudes can cause an increase in blood pressure for a few days. Be aware that those who wear oxygen, have lung problems or have difficulty breathing may experience additional complications at high altitude.

Enjoy staying and playing at high altitude destinations with your kids this summer!

Tips courtesy of Dr. Josh Brown, used with permission.


Outdoor gear brands that give back

As a gear reviewer and travel writer, I am familiar with many travel brands and outdoor gear companies. As we head into this year’s ‘giving season’, I’d like to highlight just a few that donate significantly to a charitable cause or program…not just during the holidays but all year long!

Outdoor gear brands that give back:

Icefields parkway hiking

Lifestraw:

Lifestraw makes filtered straws that make contaminated water safe to drink. You can buy them solo, or as part of a full water bottle in the Lifestraw GO. They’re great for travel to countries where the water is not potable, or for backcountry hiking and camping trips.

How Lifestraw gives back: For every LifeStraw sold, one school child in a developing community also receives safe drinking water for an entire school year. So far 1,015,652 students have been given safe water. 1621 schools reached. The LifeStraw Safe Water Fund is also working in Haiti, Kenya and India. More information of the Follow the Liters program can be found here.

Cotopaxi:

Utah-based Cotopaxi makes one of our favorite backpacking packs, the Taboche. I love the bright colors and flare they bring to all their backpacks, totes, and outdoor clothing. This season, their new day pack, the Luzen, is perfect for every type of traveler…and perfect for under the tree.

How Cotopaxi gives back: Cotopaxi and the Utah Refugee Services Office have come together to launch a skills-based volunteer program in Utah called the Refugee Coding Project. Started in partnership with the Bhutanese refugee community, the coding program has been so successful, community leaders and youth from five other key refugee communities in Salt Lake City requested the program and Cotopaxi met that demand.

Aventura Clothing:

Aventura Clothing is a lifestyle and travel brand for women. You can see us review many of Aventura’s organic cotton pieces here.

How Aventura gives back: They give back to Uncommon Threads, a boutique-style clothing program where survivors of domestic violence receive styling services and new clothes. Aventura donates new clothing quarterly, which enables women in need to feel the self confidence and empowerment they need in their daily lives.

Toad & Co:

Toad&Co is a lifestyle brand inspired by a love of the outdoors. I have loved them for years, especially their travel and hiking pants that flex, resist stains, and fit my body in a way that makes me feel good about myself.

How Toad & Co gives back: As of this fall, 98 percent of the line is sustainably-made with at least 80 percent sustainable fibers and/or fabrics that are third-party certified for responsible manufacturing. And as always, a portion of every Toad&Co purchase goes toward supporting people with disabilities.

GoLite:

This brand makes exercise and outdoor clothing that’s breathable and practical for travel, the outdoors and running (including trail running).

How GoLite gives back: GoAid is a program that promotes health support and community empowerment, while sister pillar GoResponsibly commits to ensuring that 80% of the introductory GoLite product line is developed from environmentally preferred and low energy production materials. What does this mean? For example, their ReGreen Windshell is made of 100% recycled green bottles, in partnership with eco-organization Tzu Chi.

Costa:

Long loved for their high-quality sunglasses, we love to travel with Costa during both beach season and ski season. These sunglasses wear well, don’t break easily, and always come with protective bags and cases so we can protect our investments.

How Costa gives back: TheirUntangled Collection is created by recycling fishing nets that are at the end of their lives. These nets go into each pair of the polarizes sunglasses in this line.

Ecoths:

The men’s line of Aventura Clothing, Ecoths makes organic cotton and lifestyle pieces ideal for men who are active and busy…both at home and while traveling. The Pit Stops men in my life love the Xavier Shirt for warm-weather travel destinations, and they now also offer travel-ready pants and hoodies.

How Ecoths gives back: When you purchase clothing from Ecōths, you feed the hungry.  As part of their Good Sam program, Ecōths feeds one person for one day with each garment sold. In just over two years, they have donated over 200,000 meals across the US.

DownTek:

You may have heard or seen the name DownTek in regard to your outdoor gear: this sustainable, water-repellant down company is the supplier of choice for big names in the gear industry, including L.L. Bean, Big Agnes, and more. One of my favorite travel products with DownTek is the Big Agnes Shovelhead Hooded jacket, which is extremely lightweight but warm enough for deep winter adventures.

How DownTek gives back: Sustainable Down Source, creator of DownTek, participates in three programs that give back to children including, Ronald McDonald House Quilts for Kids, Parks4Kids and K.I.D.S. / Fashion Delivers. Down pillows created by SDS have been provided to K.I.D.S. / Fashion Delivers, and SDS has also donated to outdoors programs through Parks4Kids, encouraging exploration, appreciation and understanding of natural environments and resources.

Mountain Khakis:

Mountain Khakis is one of our favorite travel wear brands for outdoorsy men and women. Their khakis are their signature pant, but we find we love their sweaters and pullovers most. This year, MK is debuting a new line of luggage, which will compliment their canvas totes and bags.

How MK gives back: Each year, Mountain Khakis offers a limited-edition design which supports the mission of Protect Our Winters (POW), the leading climate advocacy group for the winter sports community founded by professional athlete/artist/environmentalist, Jeremy Jones. This year’s offering is the Men’s POW XVI Sweater.

Parks Project:

Parks Project is an outdoor lifestyle brand that funds various national park projects through their apparel and accessories. Parks Project is an official partner to the National Park Service, serves as a supporting business partner to the National Parks Foundation and is carried in over 100 retailers around the nation. We especially love their tees that serve as reminders of our trips to favorite national parks.

How Parks Project gives back: As a for-profit business, Parks Project supports 22 individual park groups around the nation. Every product sold carries a story and contributes to habitat restoration, animal conservation, educational initiatives and visitor services across America’s parks, promoting Parks Project’s ethos, Leave It Better Than You Found It.

outdoor-gear

Hiking Safety: How to keep kids safe in the outdoors

A ramble through the woods, a stroll across a mountain meadow, or a strenuous alpine hike with the reward of a breathtaking vista – it all sounds idyllic until something goes wrong. As a former search and rescue volunteer and EMT, hiking safety is very important to me. I’ve participated in too many wilderness searches that could have been avoided with a few precautions, a little know-how, and the right hiking gear.

nature-hikeTrust me – if golf is “a good walk spoiled,” so is a search for a missing hiker! If you’re planning to explore hiking trails in your region this fall and winter, know what is needed to have a fantastic outdoor experience (and make it home in time for dinner).
Safety Precautions

Before setting out on any wilderness hike, download or buy a topographical map of the trail network so you’ll be aware of trail crossings and alternative routes. Consider hiking with a buddy, or, if you must hike alone, always tell a friend or loved one where you’ll be and when you plan to be back. Many trailheads offer “sign-in stations,” where hikers can register their presence.

Lucky hikers will enjoy spotting wildlife en route; with very few exceptions, these animals will respect your presence if you respect theirs. Carrying bear spray is a good precaution against the rare event of an aggressive animal, but a camera will come in handy far more often.

Gear to Take

Most hikers remember to pack weather-appropriate clothing and their best hiking boots, plus to carry a water bottle when setting out, but they are surprised to learn what else should be in their day pack. While compasses and GPS units are useful, they don’t make the list of absolute necessities. Neither do high-tech hiking poles or hydration systems, despite being nice to have. In fact, hikers carrying just the following five items will greatly increase their chances of survival in the wilderness should they spend more time in the elements than planned:

  • Bandana
  • Whistle
  • Glow Stick
  • Plastic Poncho
  • CD or Mirror

All five of the items above can be purchased for under $10 at any outdoor store or dollar store. Keep all five safety tools in your hiking day pack permanently to ensure they’re at the ready on every hike.

Read our full article on fix.com.


Source: Fix.com

Maine with kids: Baxter State Park backcountry itinerary for families

Baxter State Park is Maine’s largest expanse of untamed public wilderness. With almost 210,000 acres to explore, where do you start? Our Baxter State Park backcountry itinerary for families includes days in the frontcountry enjoying Baxter’s car camping options, several days in Baxter’s backcountry, then a rest day to play and explore before departure.

Baxter’s scope and size is on a national park scale, but unlike national parks, almost every lake, pond, waterfall and stream in the park is accessible only by trail. In very few places in Baxter can you drive up to see anything, and even then, you must drive miles upon miles on dirt roads. In other words, you earn you sightseeing! Baxter limits the number of visitors to the park daily, which means you won’t be rubbing elbows with crowds of tourists. It also means you have to be organized about your trip and get the required permits you need early. Here’s how!

The best way to experience Baxter State Park is by camping, though day permits are available as well (if you opt for that, stay in nearby Millinocket). Here’s our suggested itinerary, after doing most things right and a few things wrong during our five days in Baxter.

Day 1: Frontcountry camp at Roaring Brook Campground

In case you’re not sure, when I say ‘frontcountry camp’, I mean ‘car camp’, or camping via car access. Roaring Brook Campground is about eight miles into the park after you check in at the ranger station at the Togue Pond entrance, past Millinocket via dirt road. The campground, like all in Baxter, is remote and basic, with nicely-kept pit toilets, a place to purchase firewood (bring cash), and a staffed ranger station, but no other amenities, such as showers or potable water.

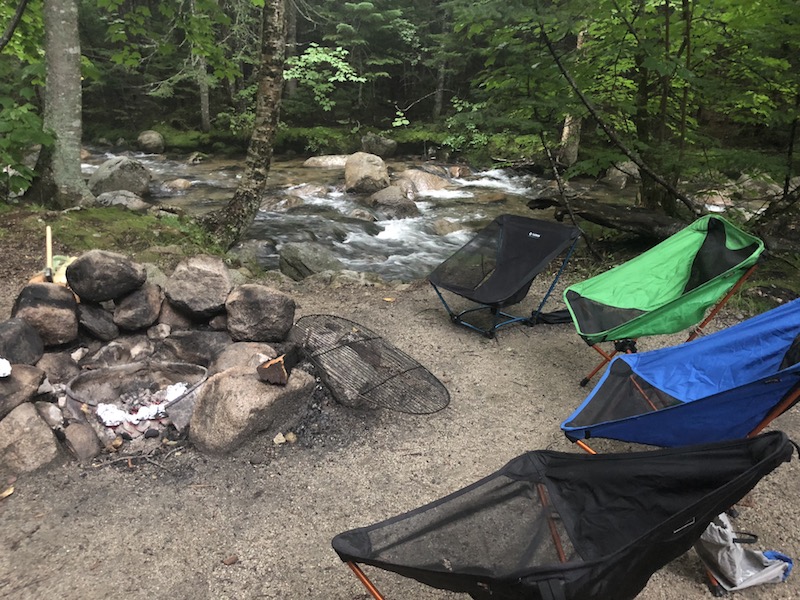
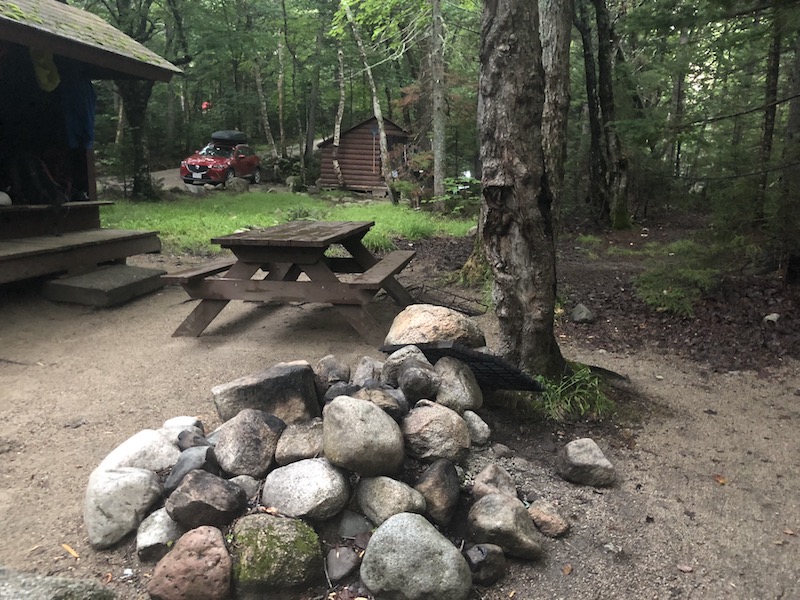
You can pick between tent sites and lean-to sites, and I recommend the latter, because they’re on the brook. You get a basic wooden shelter with a platform for each site, plus a picnic table and fire pit. We loved the shelters (lean-tos) throughout Baxter, as they provided just enough protection from the afternoon rainstorms and gave us a place to roll out our sleeping bags off the dirt. They’re not enclosed, however, and you won’t be safe from mosquitos there, so you can opt to set up a tent inside the shelter (but not outside of it). Roaring Brook is cold and clear, and we loved swimming in it.


Tip: You MUST enter Baxter State Park before 8:30 pm, so time your arrival accordingly. Also, the entirety of Baxter is ‘carry out’ for all your trash, so bring trash bags and plan on storing your trash in your car at night. You must also stow away all your food at night.

Day 2: Hike Mount Katahdin

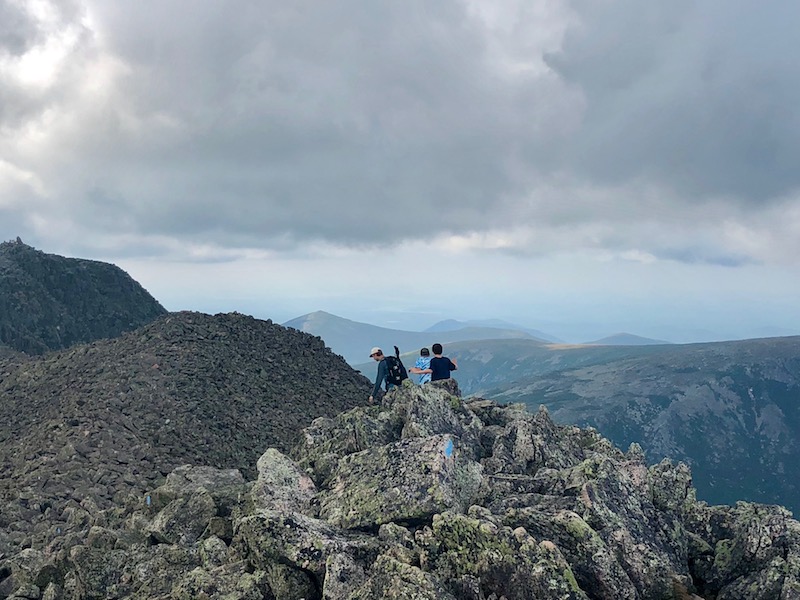
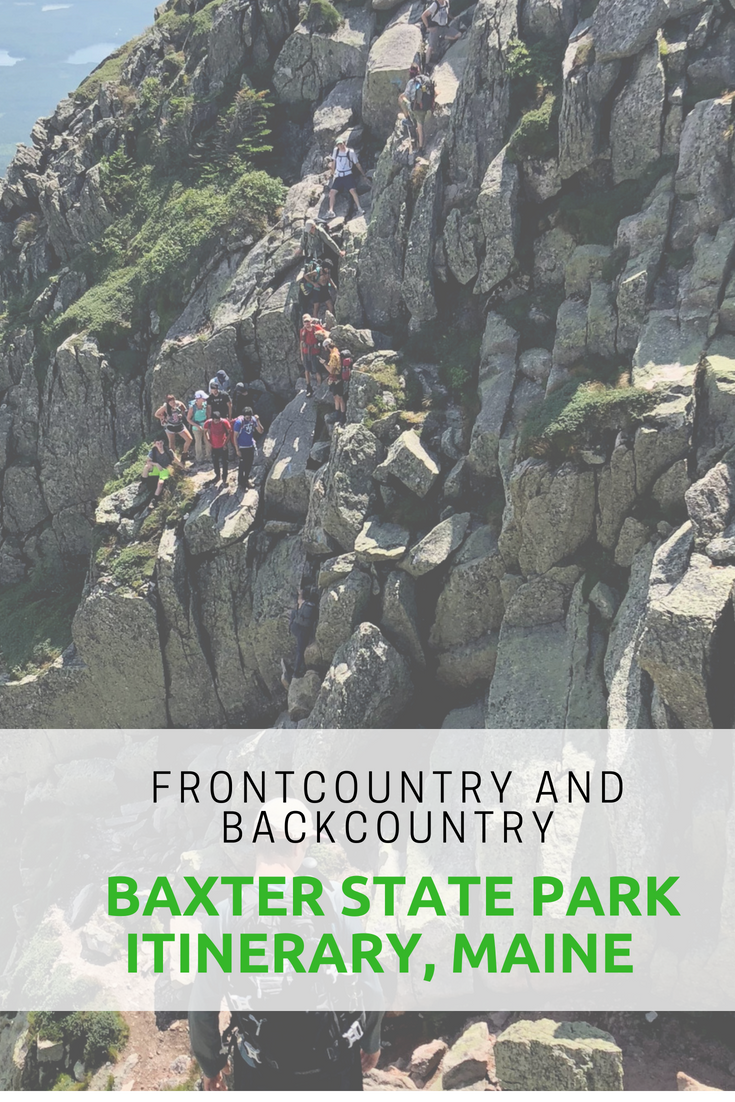
If summiting Mount Katahdin is on your to-do list in the park, do it early in your trip, while you’re still fresh. It’s 5.5 miles (pretty much straight up) from the Roaring Brook Campground, and it took our family (seasoned hikers) 12 hours to complete. The trail is extremely strenuous, and the final mile of the summit hike is along a ‘knife edge’ with some scary-looking drops. If you go: bring tons of water, and a means to filter more on the trail (you’ll need it). Also bring headlamps in case you’re caught hiking after dark. We took the following route: Roaring Brook to the Helon Taylor Trail, to the Knife Edge, to the Saddle Trail, to the Chimney Pond to Roaring Brook trail. It was 11 miles that took us forever to complete.

Note: Kids under age six are NOT ALLOWED above the treeline at Katahdin, though on our visit, we did not see a ranger monitoring this. I’m told there usually are. We took a seven-year-old, my niece, who rocked it, but she’s unusual in her awesomeness.

If you don’t want to tackel Katahdin, I recommend the Chimney Pond trail from Roaring Brook (3.3 fairly strenuous miles) to enjoy a picnic lunch at Chimney Pond, which has fantastic views of Katahdin right at the base of the mountain.

Day 3: Recover from Katahdin

This is where we made a mistake in our itinerary. We didn’t give ourselves a rest day after summiting Katahdin. Stay one more night in Roaring Brook and plan on sticking around camp. Enjoy the swimming and maybe go .2 mile to Sandy Pond, to try to spot the moose who like to hang out there at twilight. No nothing more!

Day 4: Head into the backcountry

If you’re prepared for backpacking in Baxter, depart Roaring Brook today, hitting the Russell/Sandy Stream trail. The destination: either Russell Pond Campground with lean-tos (7.2 miles away), or, if you don’t want to go quite so far, reserve at Wassataquoik Stream, which offers several more lean-tos with great swimming (5 miles away). If you’re ambitious, you could aim for Wassataquoik Lake, 9 miles distant, which doesn’t have a campground but does have several more lean-tos. Russell Lake has a staffed ranger office and lean-tos, a bear line, and pit toilets, and we settled in at two of them, adding a tent site for our group of 10.

Note: Baxter State Park is VERY strict about group size and where you can camp. This is a good thing, as it eliminates big groups in campsites they don’t fit into. If you reserve a lean-to made for four, you can ONLY have four people sleep there. Ditto for six-person lean-tos and tent sites.

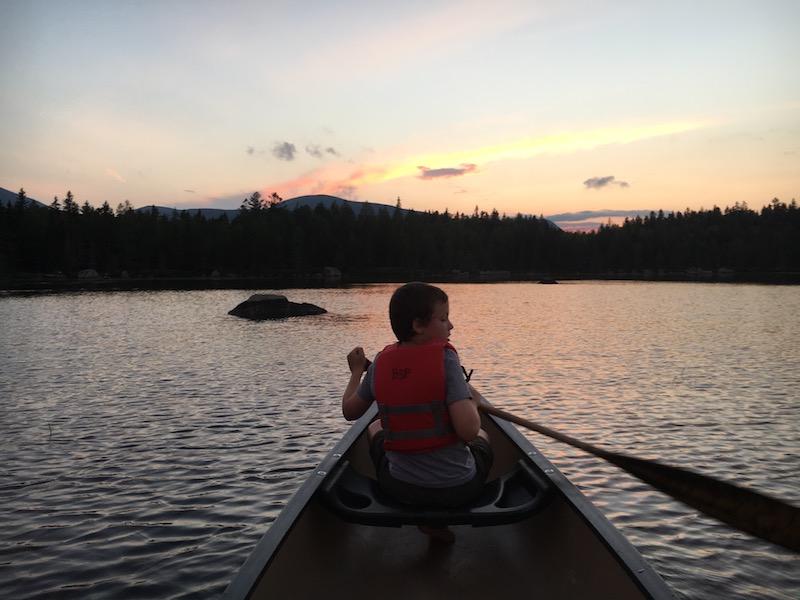
At Russell Pond, you can use the provided canoes at the dock for a small fee (I believe it was $1/hour, on the honor system) and you can swim, though we don’t recommend it (there are many leeches here). It is, however, a good place to spot moose. The Wassataquoik Stream lean-tos are better for swimming, and theWassataquoik Lake lean-tos offer a bigger lake (better for swimming) and more canoes.

Alternatively, you could backcountry camp at Chimney Pond instead of Russell Pond (see description above). It’s a shorter distance, though a rockier trail.

Day 5: Day hike from Russell Pond

We enjoyed hanging around camp and day hiking from Russell Pond to Wassataquoik Lake (2 miles) on this day. We played board games and cards in our lean-tos, picked blueberries in the wild patches nearby, and tried to spot moose.

Day 6: Hike back to the frontcountry

Return to Roaring Brook today, and spend the late afternoon cooling off in the brook. Pack up and depart Baxter the next morning, checking out additional parts of Baxter if time allows. We recommend Blueberry Ridges or Ledge Falls if so, and if not, hit a last swim spot just outside the park boundary at Togue Pond. You can grab a nice sandwich and some souvenirs from the North Woods Trading Post just outside the park toward Millinocket, and if you want a bigger meal, we recommend the friendly and affordable Sawmill Bar and Grill.

How to reserve your campsites:

Baxter State Park is popular, and as mentioned, entry is limited. To ensure you get your campsite, reserve far in advance. Baxter uses four month rolling reservations, so you’ll want to reserve exactly four months before you desired time. You can reserve online or by phone.

More tips:

  • If you’re day hiking Katahdin (staying in Millinocket), you’ll want to reserve your parking space (these are limited as well!). Here’s how. Parking reservations are only held for you until 7 am, then are given away on a first-come, first-served basis. Yes, you really need to start that early. If you’re camping in the park, you don’t need a parking reservation.
  • You’ll need to treat ALL your water in the park. Bring a good filter. We like the Sawyer Squeeze to bring on day hikes and the Platypus GravityWorks for in camp.
  • You cannot bring firewood into the park. You must purchase it in camp.
  • No pets are allowed, even in car camping campgrounds. Plan accordingly.
  • Check in at every ranger station as you hike. Bring a phone and treat it as an emergency device (you won’t get service in the park anyway).
  • Pack out all your trash…make it easier on yourself by reducing packaging on your food before you arrive. Store all food and trash in your car at night in the frontcountry, and on bear lines in the backcountry (use your sleeping bag stuff sacks to store food and hang it from the line provided).
  • Backcountry campgrounds DO include pit toilets with toilet paper. They were all in good condition during our visit.
  • Enjoy the Maine wilderness!


Family camping hack: Dispersed camping tips

Have you ever been on a road trip, paid around $100 a night to stay at a basic motel, and thought to yourself that you’d rather pay less and see more nature along the way? Or have you ever camped in a campground amid loud neighbors and wished you could find a place to pitch your tent away from the masses? If either question has crossed your family’s minds while traveling, dispersed camping might be a good option for you. If dispersed camping sounds intimidating, we have dispersed camping tips ready for you.

What is dispersed camping?

Dispersed camping simply means camping anywhere in the National Forest outside of a designated campground. No services will be available. such as trash removal, and little or no facilities will be at your disposal, such as tables and fire pits, or bathrooms or showers. However, dispersed camping is free, and you can usually count on finding a campsite where you can be alone in the wilderness, via car instead of hike-in.

You’ll be responsible for packing out everything you pack in (follow Leave No Trace principles), and you’ll need to remember to bring basics you might not think about when camping in campgrounds, such as potable water, toilet paper (and a shovel), and portable chargers for phones, lanterns and the like. Store all your food items in your car or in a bear canister at night, as food storage lockers will not be present. Think of dispersed camping as backpacking, but with your car: you need to be completely self-contained.

So how do you find dispersed camping locations?

This is the tricky part. You can use any road map to locate National Forest Service land in the vicinity in which you want to camp, but the best way to find out what areas are open to dispersed camping is to contact the nearest Forest Service office to the area you wish to visit. Many people drive out on forest service roads into the woods and find a clearing or a spot near a stream or with a view of the mountains. Use maps to find water sources near your desired camp area (but remember it will not be potable).

Only drive on existing roads to prevent resource damage. Dispersed camping is allowed in a one-mile perimeter away from campgrounds and 100 feet from any stream. To prevent resource damage please keep your campsite within 150 feet from a roadway.

Sometimes, though, it’s hard to identify exactly what is forest service land and what is private land. When we’re unsure, we’ve found its sometimes worth spending a few dollars to use Hipcamp.

Hipcamp is a website that mimics AirBnb, but for campsites. Private owners (hosts) post their camping options, which families can search for by location and date. Essentially, Hipcamp sites are dispersed camping on private land with permission. We have paid about $20 per Hipcamp site, paid via the website much as you’d do for AirBnb. The host then contacts you with exact directions to the site. Like when using AirBnb, it’s important to read reviews before booking, to make sure the host will be a good communicator and offer solid directions. And just like when disperse camping on forest service land, it’s crucial to pack everything out and leave the site as nice as when you found it (or better).

Hipcamp is popular with young adults looking to camp in groups (think festival-goers) but is a great option for families as well. Look for options with plenty of space in which to find a private area to camp. On a recent road trip through Nevada, we found a completely isolated Hipcamp location, and enjoyed a night to ourselves amid antelope and a perfectly starry sky. We brought a small stove, potable water, headlamps, food and a tent, and were completely cozy and self-contained for $20 instead of the $100 we would have spent on a not-so-great hotel room in a nearby town.

Have you disperse camped or used Hipcamp? Let us know in the comments!

Your Favorite Travel Spot Needs You: How to Protect the Outdoor Places We Love

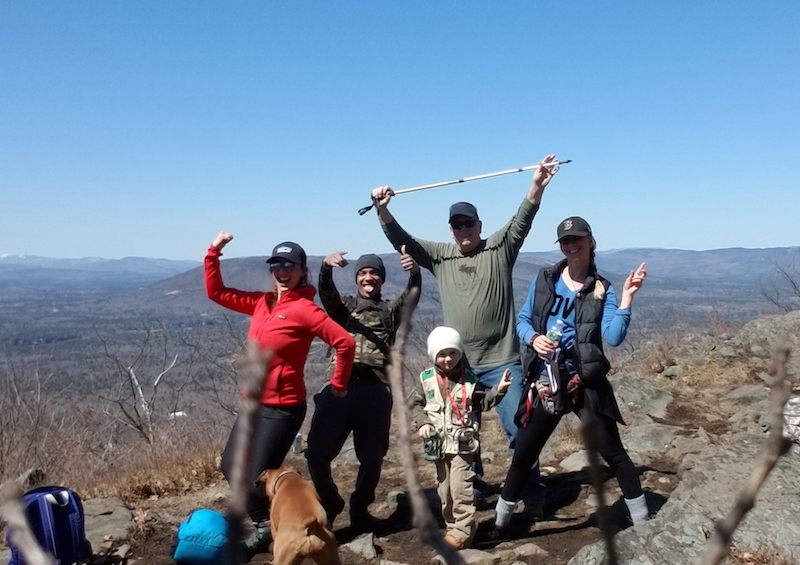
Whether you’re packing up the family for a National Parks tour or getting in a historical monuments road trip, you can give your trips new meaning this summer with Team Sierra.  We love Team Sierra’s fun community of planet-lovers – they’ve come together to raise funds to benefit Sierra Club because protecting the places we live and play is so important and each of us can make a real impact when we all take action together.  Team Sierra is dedicated to protecting our public lands, making the outdoors more accessible for everyone, and helping cities commit to 100% renewable energy, and we highly encourage you to join the team!

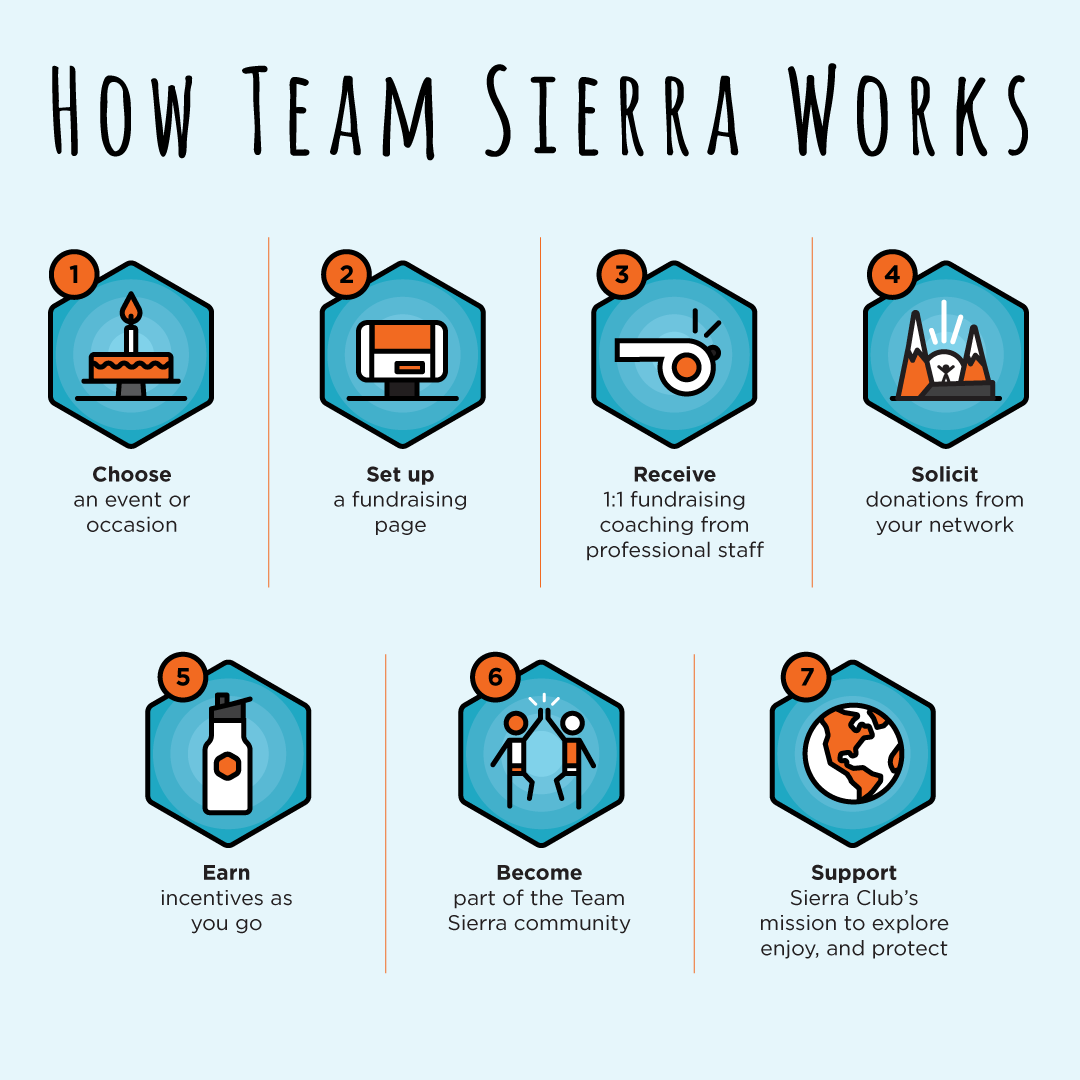
It’s never been more important to protect our planet – more than preserving the places we love to visit, it’s also about leaving the world a better place for our children. With Team Sierra, you and the family can set up your own fundraising webpage with one of their many events or create your own campaign.  Every Team Sierra member gets 1:1 support from a professional staff member, and earns Team Sierra swag as they go! Team Sierra and Sierra Club have also proven that they know how to make an impact. As the largest environmental grassroots non-profit, Sierra Club is known for bringing people together to make real change – which is also what makes Team Sierra’s fundraising program so powerful.

Examples of family-friendly campaigns you can create:

The Outdoor Challenge

Use your family trip to challenge yourselves to explore, enjoy, and protect the beautiful places that you see.  The Outdoor Challenge is happening now and wraps up on August 10th, National S’mores Day.  Complete activities like birdwatching, beach cleanup, or hiking a new spot and raise money to earn exclusive collector’s badges that the kids can show off on their backpacks come September!

My Favorite Species

Whether you’ve got sea turtle fans or want to keep the pollinators around for the beautiful flowers, you can dedicate your fundraising to your most beloved species.*  When you pass the $39 mark, you’ll get a plush animal for the littlest, and a fun educational book about endangered species for that summer reading challenge.

My Finish Line

For many, the idea of running 13 miles is unappealing.  For parents who’ve shared a sedan with their 3 kids for the past week, the thought of stretching one’s legs in solitude for 13 miles is a dream.  Join one of Team Sierra’s race events to get those endorphins going and earn that cold beverage.

Create Your Own

Dedicate your road trip to fundraising for our planet by asking supporters for a dollar for every fun fact the kids share about the most recent pit-stop.  Turn those planet themed drawings into greeting cards and auction them off to the fans! It’ so great that there are so many non-profit fundraising ideas out there to help our planet.

By family fundraising, you’re not only giving back to Sierra Club, you’re spreading their mission to the next generation. Sierra Club Mission Statement: To explore, enjoy and protect the planet. To practice and promote the responsible use of the earth’s ecosystems and resources; to educate and enlist humanity to protect and restore the quality of the natural and human environment; and to use all lawful means to carry out those objectives.

How it works:

Set up your fundraising page today!

Note: Sierra Club policy dictates that fundraising pages must be created and managed by an adult 18 or over, but feel free to create a page on behalf of your family!

*My Favorite Species fundraising goes to the general mission of Sierra Club, not to a particular species.