Tips for getting your RV summer-ready

Summer has arrived, and while you might be ready for a family camping trip, or road trip, can the same be said about your RV? If your Class C camper or trailer is still winterized, it’s time to get it summer-ready. You’ll want to begin your preparations a week or more before your first camping trip of the season, to ensure you have time to replace any necessary parts and pack for your trip.

rv-road-trip-tips

Getting your RV summer-ready:

Begin with a basic spring or summer maintenance check, which will ensure your safety while enjoying your RV. Start by checking your batteries and smoke detectors, and checking for any rips or tears in seams. Next, check for leaks to your water system. Run fresh water through the whole system, checking valves, and if desired, sanitize your water pump system with a bleach-water solution after filling your fresh water holding tank with water. Here’s how: turn the water pump on and run water through all hot and cold faucets until you smell the bleach (1/4 cup for every 15 gallons your tank holds). Close the faucets and let sit for twelve hours. Drain and re-fill the tank with potable water, running the water until you no longer smell any bleach.

Check all fluid levels next, then test your hydraulics (if you have them), kitchen appliances, and oil levels. You don’t want any surprises after you’ve left the comforts of home and the conveniences of retail stores.

The day of your camping trip, it’s time to pack up your RV, taking care to secure all loose items. It can be a good idea to place a pad or cushion on the floor of the RV in case items fall (you’ll probably pack a few to sleep on anyway).

Take a walk around your RV, making sure you’ve secured everything on the outside, too, such as bikes and scooters, lawn chairs, or awnings. Check antennas and satellite dishes, and lock all external doors (closing internal doors, too). Empty your black and gray water tanks, and disconnect any cables or cords connected to your RV.

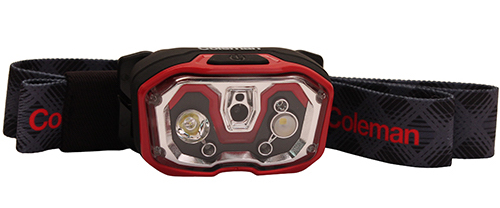
Once you’ve secured everything for travel, it’s time for final safety checks to your headlamps, trailer brakes, tires, and mirrors. It will be hard enough backing into narrow campsites without worrying about your mirror placements!

Lastly, stock your RV with gear you’ll use all summer (the stuff that stays in your RV). These items include travel-friendly magnetic board games, flashlights and lanterns for outdoors (don’t forget batteries), pantry staples like flour, sugar, coffee and spices, and dishware (consider silicone cups, tumblers and wine glasses that won’t crash to the floor while driving…we love silipint’s bright designs.

family RV camping

Upon arrival at the campground:

When you arrive at your campground, it’s a good idea to park near the entry booth (taking care not to block others) and first check out your campsite on foot. This way, you can double check that the needed amenities are ready to use, including any hook-ups or water, and you can make a plan for approaching the site in the RV (backing up or driving through).

Check for any low-hanging branches or rocks in the way, then be sure to stabilize your RV once you’re settled in your spot. At many campgrounds, a campground attendant or camp host is happy to assist with this process if the campground is not busy. Connect your water and power, ensuring they are in working order, then switch your refrigerator from portable power to plugged in power. Set up your campsite with any chairs or awnings, and take a stroll around the campground to meet your neighbors.
The small space afforded by most RVs can make camping challenging, especially if you like to camp in comfort, but it’s possible to save space while still bringing (most of) what you want. Focus on elevated space saving measures: hang items from magnets or hooks, install hanging trash receptacles and organizers, and add dividers or lightweight shelving to your top cabinets.

Dividing storage areas into smaller spaces can help you stay organized and find gear faster; divide bigger cabinets and shelves with office file folder baskets, tension curtain rods, or simple wooden slats.

Keep as much bigger gear outdoors as possible, including your grill, bikes, chairs, and larger kitchen items. Enjoy the great outdoors while keeping your RV neat and organized.


Source: Fix.com Blog

What to expect on an O.A.R.S. river rafting trip

Earlier this month, we enjoyed our fourth multi-night rafting trip with O.A.R.S. If you do something four times, it’s because you love it, and there are very few vacations we’ve loved as much as O.A.R.S. trips. This unique family vacation combines some of our favorite things: outdoor exploration, adventure, isolation and off-the-grid family time, and conservation. And it packages all these elements into a vacation where my husband and I don’t have to worry about directions, dining, or any other major decisions.

oars river rafting

If you’ve read our previous reports from O.A.R.S. trips, which include our two times on the Rogue River, our trip on the Salmon, and our trip in the Tetons, and you still haven’t booked a river rafting trip with your family, maybe it’s because you’re not quite sure what to expect, are not quite convinced such an outdoor trip will be in your family’s comfort zone, or maybe just fear the unknown. I understand. I’m here to help, and I’m going to get really nitty-gritty with you, because knowledge is power, right?

What to expect on an O.A.R.S. river rafting trip:

What to expect from your guides: The night before your trip begins, you’ll meet your trip leader and fellow rafting companions at a nearby hotel or resort. I’ll go into more detail about those fellow rafting companions in a bit, but first: the trip leader. This is an individual, male or female, who has the most authority during your trip. Trip leaders rotate throughout the season, so keep in mind that some of your additional guides on your trip may also have trip leadership experience and be every bit as competent. In my experience, O.A.R.S. trip leaders are ruggedly outdoorsy types between age 30-45, who have often made the outdoor recreation industry their career choice. Your trip leader will go over logistics for the launch the next day, issue your dry bags (more on that soon, too), and tell you any updates on weather, packing, or water conditions.

oars river rafting trip

You’ll meet your additional guides the following day, at the put-in location. Sometimes, the put-in is nearby, just a short van ride away, and sometimes, as is the case on the Salmon River in Idaho, it’s a charter plane flight away. On our trips, which ranged from as few as 10 guests total to 18 guests, we always had 3-4 additional guides. These guides are generally younger (with the exception of any guides who are also trip leaders). Some are college students, but most are in their 20s. We’ve had some great guides and some just ok guides, but never a bad guide.

What to expect from your fellow guests: Well, you can expect just about anything and everything, which is one of the ‘unknown variables’ of commercial river rafting. In a small group, in a fairly intimate setting of camping together, it is frankly a big bummer to get saddled with people you don’t get along with or don’t like for whatever reason. It’s a risk, no way around that. However, while we have been on O.A.R.S. trips with guests who occasionally annoy us, we have never experienced a downright ‘bad’ guest. I believe this is because in general, the individuals and families who book multi-night river rafting trips have something essential in common: we all value the outdoors and the opportunity to explore the scenic river.

rapid-scouting-oars

If you do encounter a guest who is, shall we say, difficult, there are a few things you can do to help the situation. First, trust the guides. If a guest is difficult, they are aware of it, and are the best authority to curb any unwanted behavior. Best to allow the guides to be the ones to tell guests where to place their trash, not to hog the kayaks, or to stop diving headfirst into the water. Second, if both you and the other guests have kids, it can help to set some basic shared rules in place right away. That way, kids don’t feel frustrated when rules are different for others. Most of the time, this happens naturally, because O.A.R.S. sets the rules for rafting, swimming, use of PFDs and helmets, and even how many sodas and snacks are consumed (by kids). There’s very limited ability to be on screens on an O.A.R.S. trip, so likely, you won’t have to contend with varying electronics rules. A few times, we’ve encountered families with vastly different parenting styles from us, but all it took was a brief family meeting to remind our kids that our rules would remain in place for our kids, and that was that.

What to expect from meals and drinks: Aside from group dynamics, people worry most about food on trips, don’t you think? On each of our O.A.R.S. trips, we ate better on the river than we do at home. Every meal was made from scratch with whole food ingredients, and all were cooked and prepared swiftly and efficiently by our guides. Between meals, GORP (trail mix) was available, and before each meal, ‘appetizers’ were set out, even at breakfast and lunch. For example, at breakfast, coffee came out first, along with dry cereal (usually Cheerios and granola), yogurt, and orange juice. When ‘real’ breakfast followed, it might be French toast, eggs Benedict, or pancakes. At lunch, while our guides prepared the meal, snacks were set out such as cut veggies and dip, chips, fruit, and cookies. A typical lunch would include sandwich fixings and/or a hearty salad. Before dinner, a cooler with sodas, beer, and wine was available (with a ration of approximately one soda per day for kids and 2 drinks for adults), along with appetizers such as chips and salsa, bruschetta and toast points, or veggies, followed by salmon and cous cous, steak and potatoes, or enchiladas, always followed by dessert.

OARS-food

If you want to bring additional drinks, families are free to do so, with the general understanding that they’ll be willing to share. Guides store your additional drinks for you, keeping them cooled.

What to expect from the camping experience: On our last O.A.R.S. trip on the Rogue River, we rafted with a family who had never camped outside before, and they rocked it! You get tents from O.A.R.S., which you set up yourself after a demo, at each campsite. You can also rent a sleep kit, which includes a sleeping bag and paco pad (big thick rafting pad) and liner. Or, you can bring your own sleeping bag and pad (though if you do, I still recommend using a paco pad for comfort…you can rent this solo). Most nights on the Rogue and Salmon, we didn’t even bother sleeping in our tent, the weather was so nice. We slept under the stars, setting up a tent only for changing clothes and storing belongings.

OARS

Within each campsite, it’s easy to find a little corner for your family, but you’ll want to remember that you won’t have total isolation or much privacy. Expect to still see the other tents, the guides’ sleep pads, and the camp kitchen area. I promise this is no big deal: you get to know fellow guests very quickly on an O.A.R.S. trip, and you can always set up your tent for some privacy.

What to expect from the bathroom experience: Okay. Let’s get real: this is the issue people are afraid of most. How do you take care of your bathroom needs when you’re in complete wilderness, away from any plumbing whatsoever? Two ways: first, you pee in the river, as mandated by Leave No Trace (dilution is the solution to pollution). This is easy to do during the day…after all, you’re in the river most of the time. It’s harder during the evenings and mornings at camp, especially for women. Men tend to just walk a few paces downriver and stand to pee into the current from the shore…no biggie, no one even notices. Women, here’s what you do…and sorry for going here, but I’m in the outdoors a lot, and very comfortable with this stuff: if you need to pee and you’re out of the water for the day, you go behind one of the rafts, which will be ‘parked’ at the shoreline for the night. Behind their protective wall, you squat by the water, facing the camp. This ensures you moon the river, not the camp. After a few tries, I promise you’ll get good at this and no one will see a thing. When you’re getting used to this technique, it helps to wear a skirt or sarong, so you can eliminate even the mooning part.

For #2, O.A.R.S. sets up what they call the Groover (so named because it used to be a simple bucket or square metal box that would leave grooves on your backside). Now, it has a toilet seat (luxury!). The guides always set up the Groover at camp, in a discreet (but rarely discreet as you’d like) location from the hub of camp activity. You’ll know where the Groover is because there will be a hand wash station (two buckets of water with a foot pump and soap)…and the Groover will be a short walk from this station, hidden as best as possible behind trees, willows, or other natural barriers. It is by no means completely private, with doors that lock, etc, and I know that’s hard to handle at first. But I promise you’ll get used to it. And the thing is, everyone is in the same boat. You’ll know you won’t be interrupted because if you have the TP, others know someone is using the Groover, and when you’re done, you bring the TP back to the hand wash station. The Groover is for solid waste only, as everything in it is packed back out (per Leave No Trace rules), so no peeing in the Groover. However, if you would rather not pee in the river, there is a pee bucket next to the Groover, for that use. I know, this is so gross, but this is the nitty-gritty part, and I bet it helps to know what to expect ahead of time.

salmon-river

What to expect on the river: The actual river is probably what people worry least about, but I’ll cover a few things anyway. Depending on your destination, most O.A.R.S. trips include paddle rafts (where lots of people can paddle together, with a guide), oar rafts (with a guide rowing only), and IKs or duckies (inflatable kayaks), paddled by guests individually. Sometimes, there are also stand-up paddle boards. IKs and paddle boards provide the most adventurous way to experience the river, but all the methods of river transportation are fun. Guides do a good job of making sure popular boats are shared evenly, but you can help by not ‘hogging’ certain things, like IKs. Often, rafters using IKs will need to take a ‘ducky test’ or ‘ducky practice’, where they’re required to purposely flip it over, flip it back upright, and get back in, in water over their head. This is not as hard as it sounds, and most people can do it with some practice and instruction. Kids usually need to be 12 to ‘ducky’ on their own, but tandems to be shared with parents are also available. Most of the time, you paddle the river for a few hours in the morning and a few hours in the afternoon, with the remainder of the time used for lunch, short side trip hikes, and swimming time.

Have additional questions about what to expect on an O.A.R.S. river rafting trip? Ask me in the comments! 

SaveSave

Three northwest backpacking routes for families

Parents with young children: you absolutely can backpack with kids! Our family has found success by choosing backpacking routes that are short on distance but big on rewards, whether that be in the form of a fun lake or river to swim in, dramatic scenery, or both. The following three northwest backpacking routes for families deliver.

Before you read on, check out our tips for backpacking with kids!

northwest backpacking routes

Northern California’s Trinity Alps:

Just south of dramatic Mt. Shasta at the top of Northern California, the Shasta-Trinity National Forest offers some of the best backpacking for families. While word is now getting out, the Trinity Alps used to be very uncrowded, while still offering up vistas on par with the Sierra Nevada.

For families, we recommend the 5.2 mile route from Swift Creek Trailhead to Granite Lake. From the Swift Creek Trailhead of the Trinity Alps, families hike for one mile before crossing Swift Creek at a large bridge and taking the Granite Lake Trail. After that, it’s 4.2 miles of a pretty strenuous uphill hike. Take your time, knowing that you don’t have to hike too far but will be rewarded with one of the most stunning alpine lakes you could ask for.

Make a home base at Granite Lake, and spend an extra day day-hiking up above it (the terrain turns to sub-alpine granite with great views). If you want to make a full loop of it, you can continue to Horseshoe Lake, reconnecting with the original Swift Creek Trail to follow the creek back to the parking lot. We have always been content to simply play at Granite Lake, however.

How to get to the trailhead: Swift Creek Trailhead is at the end of Swift Creek Road, accessed from Highway 3. (From I-5, grab Highway 3 at Yreka.) You’ll pass a national forest ranger station near Fort Jones, where you can grab your backcountry permit.

backpacking-trail

On the Granite Lake Trail

Southern Oregon’s Sky Lakes Wilderness:

The Sky Lakes are beloved to our family. They’re right in our backyard, so we’ve logged a lot of hours on trails here. The great thing about Sky Lakes is the flexibility; there are multiple options for making larger or shorter loops between its many small alpine lakes. The elevation is lower than many backpacking routes, so the nights will remain warmer (but you’ll also experience more mosquitoes, so aim to visit in August or September).

The Sky Lakes are generally split between Lower Sky Lakes Basin and Upper Sky Lakes Basin. You can see it all in a 12 to 14 miles loop, but we recommend staying on the Upper Sky Lakes Basin end to see Trapper Lake and Lake Margurette. You can camp at either, and experience the other in a day hike, should you wish. Start at Cold Springs Trailhead, and when the trail splits, follow the upper toward Natasha and Margurette lakes. The entire hike is only about 3.2 miles, and isn’t too steep. If you’re ambitious, you can also access the Pacific Crest Trail above Trapper, and walk along it for a while.

How to get to the trailhead: Cold Springs Trailhead is located off Highway 140. From Medford (and I-5), take Highway 62 to Highway 140. At mile marker 41, you’ll take gravel road FR 3651 at the Cold Spring Trailhead sign, and follow it 10 miles to the parking lot.

stuffing backpacking bags

Setting up camp

Central Oregon’s Jefferson Park:

Very few wilderness areas are as breathtakingly beautiful as Jefferson Park. And yes, it is indeed a veritable ‘park’ of alpine creeks, lakes, trickling waterfalls, and towering peaks. You have to earn it though: the route in from either side takes some time for families. We recommend the slightly shorter route from Whitewater Trailhead (the other option is Breitenbush Trailhead further north).

You’ll go about four miles before reaching Whitewater Creek, with stunning views of Mt. Jefferson all the while. After the creek, you’ll join the PCT temporarily as you enter the park. Once in, you’ll see many trail options leading a short distance to multiple small lakes. We suggest Russell Lake or Scout Lake. Take fishing poles, and the fish seem to really bite here. You can rejoin the PCT for a long day hike should you wish, or can simply set up camp and enjoy the lake. No matter which lake you pick in the park, the round-trip mileage will be about the same: 11 miles or so.

How to get to the trailhead: Take exit 253 off I-5 in Salem. Drive 60 miles east on North Santiam Highway 22. Between mileposts 60 and 61 (10 miles beyond Detroit), turn left on Whitewater Road 2243. This gravel road forks in about 100 yards, keep right. Follow this road 7.5 miles where it dead-ends at a large parking area.

Jefferson-peak

Jefferson peak

I think it’s time for us to discover some shorter backpacking routes in Washington state next! While we have experience in this region, it’s for longer hikes for more experienced backpackers. If you know of great routes for families in Washington, please leave them in the comments. And always remember to call the local ranger station before your trip for weather and trail closure information, as well as any detailed driving directions you may need.

Travel Gear We Use: Top sleeping bags for backpacking families

It’s time to think family camping! Get your family geared up for the summer camping season by snuggling up in a down or down-alternative sleeping bag! Today on Travel Gear We Use, we’re listing our favorite sleeping bags for backpacking and camping families, with lightweight and kids’ picks.

Best sleeping bag we use for kids:

north-face-for-kids


We love our son’s The North Face Dolomite 20F Youth Sleeping Bag. No, it’s not the most compact bag on the market, but that’s ok with us. Kids’ bags, by definition, are smaller, so it’s possible to get away with a bulkier model and still fit it into smaller sleeping bag compartments in youth-sized backpacks. The Dolomite is rated to 20 degrees, plenty warm enough for us, and ours has lasted through three kids and counting! The price is right, too, at only $119.

Best sleeping bag with a larger toe box:

big-agnes-lulu

If you’re wondering what a ‘toe box’ is, you either haven’t used a ‘mummy’-style sleeping bag, or don’t mind its restricting nature. I fall in the latter category (I actually love the tight space that warms me up faster), but some members of our family hate it. They’ve been looking everywhere for a sleeping bag made for backpacking that offers a roomier toe box, and we finally found it. The Big Agnes Lulu 15 stuffs into a compression sack and is lightweight enough for carrying long distance (it weighs in at just over 3 pounds), but features a wider bottom half that most bags. It’s rated at 15 degrees, with a fill weight of 24 ounces. Pick one up for as low as $139.

Best sleeping bag for ultra-light backpackers:

kelty-trail-logic

Maybe you’re not trying to beat any ultra-light backpacking records, but you’d still like to carry one of the lightest sleeping bags on the market. Or maybe, you’d like your older kids or elderly parents to carry a lighter bag. We love the Kelty TrailLogic Kelty SB20 delivers, with a weight of two pounds. The best benefit of a lighter bag? It fits into a stuff sack roughly half the size of its counterparts, which means more room in your backpack. Hey wait a minute…that means I carry more gear, doesn’t it? The SB20 will set you back $299, but you’ll see why once you pick it up.

Best sleeping bags for those who prefer a quilt:

backcountry-quilt
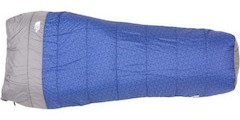
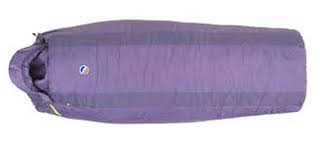
Did you know there was such thing as a sleeping quilt or backcountry quilt? These ‘sleeping bags’ don’t zip all the way around, which prevents that clammy, enclosed feeling some of us just can’t stand. If you’d rather sleep outdoors under a blanket or quilt than in a sleeping bag (but still need the warmth of a bag), Sierra Design’s Backcountry Quilt may be for you. You still get the 2-season warmth of 800-fill synthetic down, plus a hide-away hood and hand pockets to keep extremities warm at night. But the design remains open on the upper half, which allows you to feel like you’re under a blanket, not wrapped like a burrito.

The Backcountry Quilt is sold for as little as $150 for a 1.5 season weight, but you’ll want to spring for the $250 version to ensure you can use it in almost all conditions.

Our other favorite is the new Big Agnes Big Pine bag, which works with any pad size and is a great quilt option for road tripping, couch surfing, hotel stays where perhaps a child is on a rollaway bed, and the like. It can be used as a quilt or can be zipped to be a sleeping bag. It’s also great for summer season camping and backpacking. Our favorite feature is that it’s made with DownTek, which is sustainable down that’s water repellent. You can even zip two together for a double sleeping bag! This is by far the most versatile quilt option we’ve tried.

Best budget sleeping bag:

cosmic-20
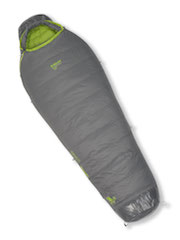
If you need a solid sleeping bag for a family member that is rated to 20 degrees for three-season comfort in the backcountry, you don’t have to break the bank. The Kelty Cosmic 20 gets our pick for the best bag for your buck. It’s only $149, and while a little heavier than most bags, you still get DriDown, Kelty’s down blend that resists moisture (so you don’t get that soggy, damp issue with your down sleeping bag after being dusted with morning dew). You also get a draft collar, a feature that used to be found only on more expensive models. It packs down into a stuff sack, though again, it won’t be as compressible as it’s more expensive cousin, the SB20.
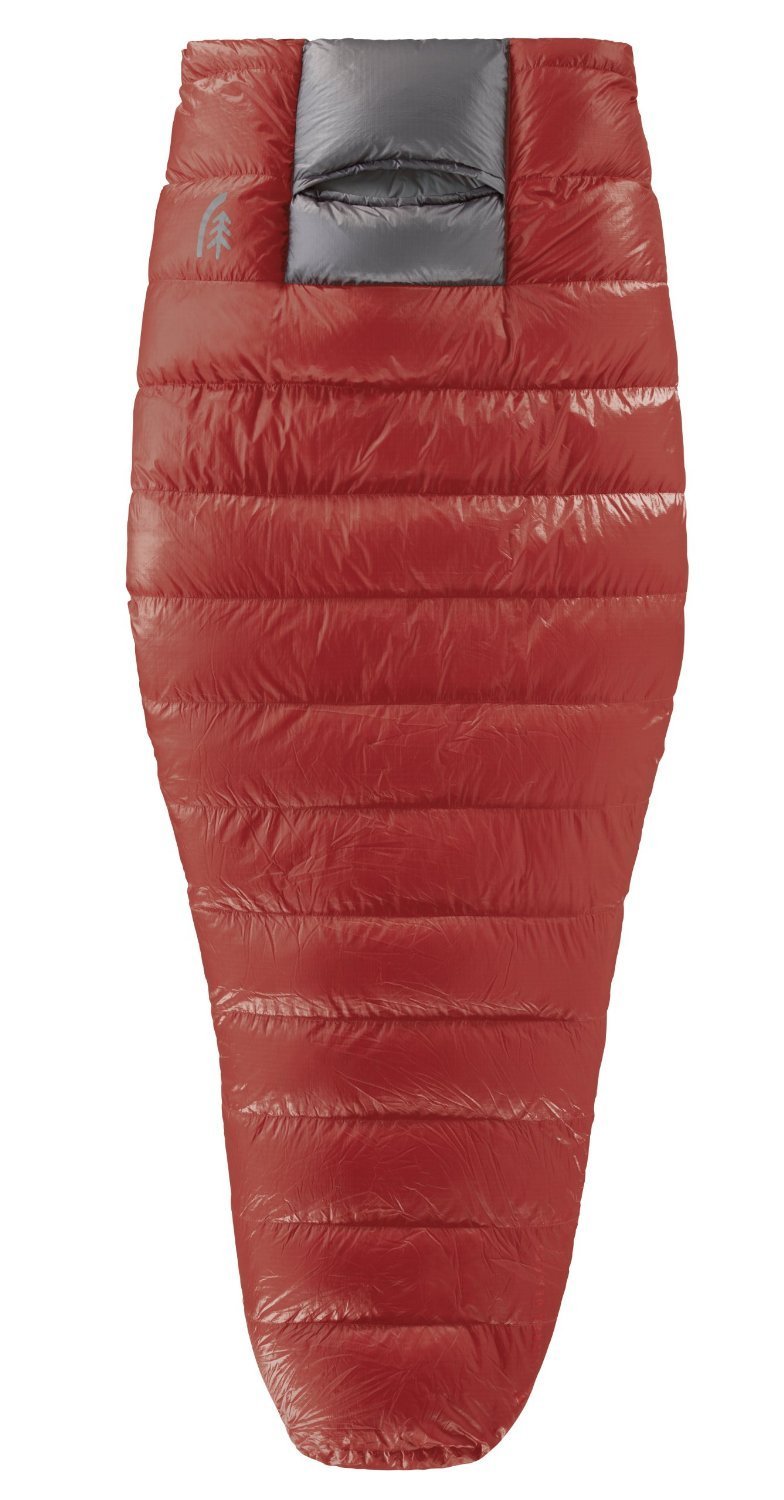
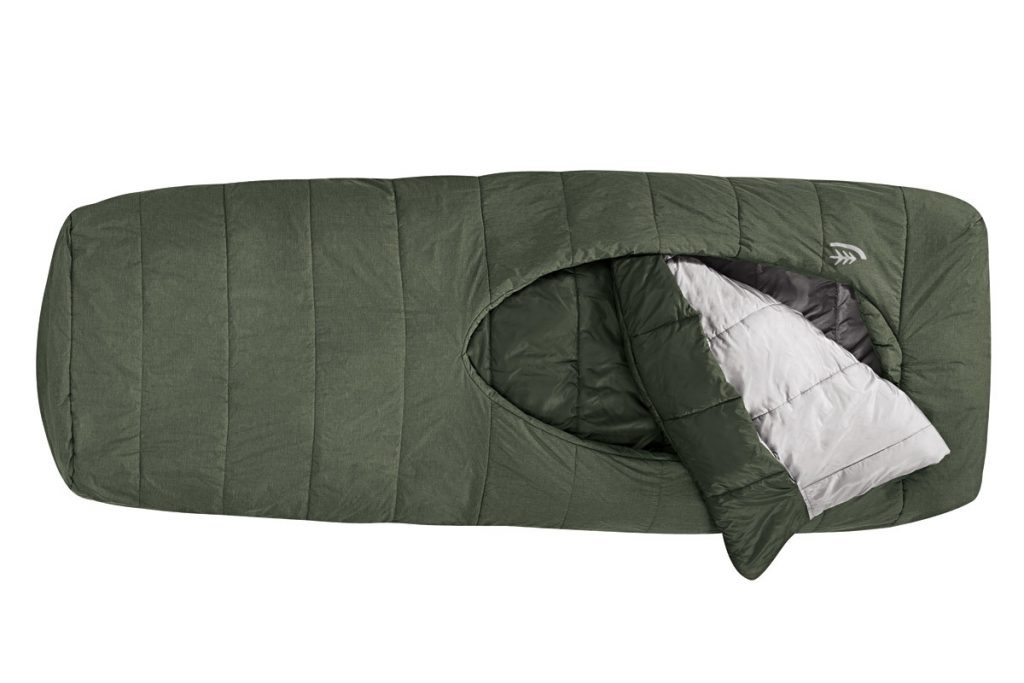
Best luxury car camping sleeping bag:

sierra-designsThe Sierra Design backcountry beds are so comfortable, you’ll think you’re sleeping in a bed…really. They’re not as lightweight as some, so we think they’re best for car camping and road tripping, but they’re ultra-plush and fit nicely on or over think pads and cots. They come in single or duo size, with two basic designs: front country (rectangular for comfort) or backcountry (mummy-style and more packable for backpacking). They all come with an extra blanket flap that makes the sleeping bag feel more like a made bed, as well as hand pockets and slips for your pad. We love them!

How to choose sleeping bags for your family:

Start by deciding whether to go with down or a down alternative. It’s hard to ethically harvest down for sleeping bags, and since the synthetic version is arguably just as good, it’s easy to go without. Not sure which is best for you? We like this down vs synthetic guide from Sierra Trading Post.

Next, access your temperature needs. Will a bag rated at 30 degrees be enough for your use? Will you need a zero degree-rated bag? Determine where you’ll be using it, and in which season.

Finally, make sure a ‘youth’ sized bag will fit your kids (tweens may fit better in adult bags). Go into your local outdoor store to try out bags, and while you’re at it, bring your backpacks so you can be sure the sleeping bag of your choice fits into the sleeping bag compartment (if you care about that).

Once you’ve bought your bags and brought them home, remember to store them in a space where they can remain free of their stuff sacks. This is better for the bags. We hang ours from pegs in our garage, with each bag’s stuff sack set inside.

Find more gear in the Travel Gear We Use series (click below):

How to teach kids the joys of fishing (and plan a fishing trip)

Fishing is an easy and relaxing activity that’s easy for children to learn and gets them outside to enjoy nature. If you’re interested in learning how to teach your children the joys of fishing, discover some helpful tips and advice for making memories and new experiences for you and your children.

how to teach kids the joy of fishing

Foster an Interest in Fish First

Before you take your children out for their first fishing trip, help them learn more about water and fish by taking them to the beach, aquarium, or nature center. Being able to learn about where fish live and how they survive will help foster children’s natural curiosity. When you feel like your children are able to handle a day on the water, you can use what they’ve already learned to make the fishing trip more enjoyable for everyone.

Fish in Well-Stocked Water

Any experienced angler can tell you that fishing has much downtime when you’re simply waiting for the fish to bite. For adults, this time is usually relaxing, but for young children, this time can try their patience. While you can use the experience to teach them about patience, you also want them to enjoy a reward for their efforts. When you start out by fishing in well-stocked ponds or lakes, you lessen the chances of leaving empty-handed.

Need gear? Discover some helpful tips about beginners fishing rods.

Get Equipment Appropriate for Children

Fishing rods made for adults are too big and heavy for children to handle. Instead, you’ll want to buy equipment made specifically with their size in mind. Read more here about choosing the best fishing pole. Even with the right equipment, children won’t be able to cast the line on their own at first. Either cast it for them and then hand them their rods or place sinkers on their lines and let them drop the sinkers directly in the water.

Additionally, consider using a small piece of rope to tie the fishing rod to the boat or dock. If they accidentally drop their rods, the rods won’t end up at the bottom of the water.

Try a Fishing Charter

As your children start to learn the joys of fishing, you can add some extra adventure and make great memories together by booking a fishing charter. Your captain will typically know the waters well and can take you to places where you’ll increase your likelihood of a catch. Additionally, most fishing charters also offer bait, tackle, and fishing licenses; all you and your children have to worry about is having a good time.

Watch the Weather and Time

When you decide on taking a fishing day, make sure the weather is perfect. If the weather for the day will be windy, rainy, cold, or very hot, consider postponing the trip to another day. Additionally, you want to keep your children’s first few fishing trips short. Most young children can handle only one or two hours at a time.

Help your children learn more about the outdoors by teaching them the joys of fishing. With the tips presented above, you and your children will make wonderful memories as you enjoy fishing together.

Image via Flickr by Lake Mead National Recreation Area

Central America packing list and gear picks

Heading to Central America? You’re going to need to pack smart, for both sun protection and insect protection. And of course, you’ll want to be comfortable in humid and tropical weather. We just returned from Panama and Costa Rica, where we stayed relatively cool and safe from the elements by following this Central America packing list.

central america packing list

Central America packing list:

  • 2-3 lightweight, long-sleeved travel shirts
  • 2-3 lightweight t-shirts or tank tops
  • 2 pairs quick-dry, wicking travel pants (convertible a plus)
  • 2 pairs of shorts, skirts, or dresses
  • 4-5 pair quick-dry travel underwear/bras (trust us)
  • 1 swim suit (preferably a ‘sporty’ type for activities)
  • 1 light pullover, sweater, or cardigan
  • 1 breathable rain jacket
  • 1 pair walking or hiking shoes
  • 1 pair water-ready sandals
  • 3-5 pair hiking socks (preferably lightweight wool)
  • 1 wide-brimmed, lightweight hat (think safari style)

Gear picks: the brands and products we recommend:

Look for clothing that’s specifically designed for hot, humid environments with lots of bright sunshine and more than its share of insects. Your clothing needs to be breathable, loose enough to be comfortable while you’re active, and quick-drying for water sports (and humidity and sweat). Here’s what we took to Panama and Costa Rica and loved:

Toad & Co Debug line: Toad & Co’s ‘Debug’ line comes treated with insect shield technology that lasts through years of washes. It’s much safer to wear bug-treated clothing than to spray insect repellent directly onto your skin, and because Toad & Co’s Debug line is designed for tropical environments, most items are also very breathable and lightweight. I wore the Debug Hike Thru shirt both onboard our UnCruise on travel days and in the jungle. Their bandana scarf is also a great item to accessorize with, giving your debug benefits without buying a whole outfit.

Craghoppers Insect shield line: Craghoppers’ Insect Shield line is made for men and women, and offers both long and short-sleeved ‘Panama’ shirts, lightweight jackets with multiple pockets, and hiking pants. Our Pit Stops Dad loved the NatGeo Insect Shield cargo shorts and I liked the NatGeo adventure shirt. Best of all, there’s a nice line of kids’ insect shield clothing, which can be hard to find elsewhere! Our son wore the Insect Shield half-zip.

amzn_assoc_placement = “adunit0”;
amzn_assoc_search_bar = “true”;
amzn_assoc_tracking_id = “pitstoforkid-20”;
amzn_assoc_ad_mode = “manual”;
amzn_assoc_ad_type = “smart”;
amzn_assoc_marketplace = “amazon”;
amzn_assoc_region = “US”;
amzn_assoc_title = “My Amazon Picks”;
amzn_assoc_linkid = “c0e81bd1f53dedc8669ba2ef6c71c93e”;
amzn_assoc_asins = “B00ZE4O4W2,B00ZE6BV6C,B00O3X4UKG,B00SAZW7QW”;

ExOfficio BugsAway line: I’ve always loved ExOfficio for travel wear, and their BugsAway line is fashionable and comfortable. I’ve worn their Damselfly pant in the Dominican Republic, Mexico, and Costa Rica. And ExOfficio is absolutely where to go for quick dry underwear for your trip!

amzn_assoc_placement = “adunit0”;
amzn_assoc_search_bar = “true”;
amzn_assoc_tracking_id = “pitstoforkid-20”;
amzn_assoc_ad_mode = “manual”;
amzn_assoc_ad_type = “smart”;
amzn_assoc_marketplace = “amazon”;
amzn_assoc_region = “US”;
amzn_assoc_title = “My Amazon Picks”;
amzn_assoc_linkid = “c0e81bd1f53dedc8669ba2ef6c71c93e”;
amzn_assoc_asins = “B00DZLVIZM,B00HUVUBGA,B011D4SCZ6,B00LCL9JBM”;

Columbia Sportswear: Columbia doesn’t make insect-treated clothing (that we are aware of), but they do make some of our favorite hiking/travel shirts and pants, and are less expensive than most. They come in kid sizes too, and our son’s favorite is the Bahama long-sleeve. Definitely shop Columbia for zip-off convertible hiking pants, too.

amzn_assoc_placement = “adunit0”;
amzn_assoc_search_bar = “true”;
amzn_assoc_tracking_id = “pitstoforkid-20”;
amzn_assoc_ad_mode = “manual”;
amzn_assoc_ad_type = “smart”;
amzn_assoc_marketplace = “amazon”;
amzn_assoc_region = “US”;
amzn_assoc_title = “My Amazon Picks”;
amzn_assoc_linkid = “c0e81bd1f53dedc8669ba2ef6c71c93e”;
amzn_assoc_asins = “B0089FB5JI,B00DCZJINU,B01GOQ5NP0,B00DCYCK8G”;

Mountain Khakis’ Equatorial shirt and pants: This line isn’t insect-repellant, but it IS SPF-blocking and when we wore Equatorial shirts in the jungles of Panama and Costa Rica, these were the ONLY shirts that stood up to more than one wear. Somehow, the sweat wicked off; we called them our ‘magic’ shirts. MK also makes an Equatorial pant that zips off. Both are recommended.

Aventura Clothing: Again, no bug-proaction line (but maybe if I keep hinting?), but Aventura Clothing makes THE best after-adventure clothing out there. When you get back from your paddle boarding session or jungle trek, put on soft, organic cotton for your evening indoors. This spring, I am loving Aventura’s Hannah cardigan and Pearson tank for layering. The men’s line, Ecoths, makes really stylish and comfortable short-sleeved, button-down shirts perfect for cocktail hour and dinner. Pit Stop Dad’s favorite: Garrick Polo.

See also: our most comfortable travel pants for moms!

Sun hats: The most important thing about sun hats in Central America is…wear one. So pick a wide-brimmed style you like, and bring it along! It helps to pick a style that flattens easily for travel, and has a strap to secure it both when wore and when you want to strap it to your bag or backpack. We love the sun hats for kids at Sunday Afternoons and Columbia, and the adult offerings at Tilley.

amzn_assoc_placement = “adunit0”;
amzn_assoc_search_bar = “true”;
amzn_assoc_tracking_id = “pitstoforkid-20”;
amzn_assoc_ad_mode = “manual”;
amzn_assoc_ad_type = “smart”;
amzn_assoc_marketplace = “amazon”;
amzn_assoc_region = “US”;
amzn_assoc_title = “My Amazon Picks”;
amzn_assoc_linkid = “c0e81bd1f53dedc8669ba2ef6c71c93e”;
amzn_assoc_asins = “B01CZ18II2,B000AMJWCU,B008FIFFY0,B010M3PL6M”;

How to prepare meals in a camper van

When your family hits the road in a camper van, you want your kids to be well nourished throughout your journey. After all, well-fed kids are generally happy kids, which can make your road trip more enjoyable. However, a small campervan kitchen might pose a challenge and leave you scrambling for diverse and delicious meal options that your youngsters can enjoy. Once you’ve devised your road trip and secured your camper van rental, take time to meal plan before you hit the open road.

camper van

Know What You’re Working With

Before your trip, familiarize yourself with the campervan kitchen. Typically, you’ll have a refrigerator, a couple of burners, and a small grill. So, while real estate might be small, you’ll have enough basic tools to throw together a variety of meals for your hungry family.

Focus on One-Pot Meals

You don’t have to rely on hot dogs every night—even if your kids might love that—when you’re road tripping in a campervan. However, you do need to get creative to provide a well-rounded meal that doesn’t require too many pots and pans. One-skillet meals are a smart solution when you’re cooking in a campervan. For breakfast, brown sausage in a skillet, pour eggs over the cooked sausage, and top with cheese. You’ll have a hearty breakfast skillet, which you can serve on its own or wrap in a tortilla to make breakfast burritos. Diced potatoes, veggies, and kielbasa or turkey sausage is another mouthwatering meal that requires just one skillet.

Get Grilling

If your campervan includes a small grill, take advantage of this versatile appliance. Hot dogs and hamburgers are, of course, a simple and kid-friendly option when you’re exploring the open road, but don’t limit yourself to these classics. Tortillas can double as pizza crust—just top them with sauce and your kids’ favorite toppings for a simple and crowd-pleasing dish. Enjoy a Mexican-inspired night with bean and cheese quesadillas cooked on the grill. Grill packets are also convenient when you’re on the road, and they minimize messes. Chopped veggies and potatoes, along with an easy-to-grill meat, wrapped in aluminum foil requires little effort and delivers a hearty meal every time.

Minimize Cooking But Maximize Meals

Don’t spend too much time on your journey in the campervan kitchen. Instead, focus on ways to cook in bulk for your family and use up every last ingredient to create a diverse menu that pleases both kids and adults. For example, chicken breasts have a variety of uses, so cook several pounds of breasts at once. You can boil the chicken and shred it or fire up the campervan grill. Make chicken salad for sandwiches, add shredded chicken to tortillas for tacos or quesadillas, or toss some barbecue sauce on it and add it to a bun. This way, you’ll devise several convenient meals in one cooking session, which leaves you more time to enjoy your adventure.

Tip: Looking to have a camper van adventure outside of the states? Check out RV hire Australia for great options.

Even though the quarters are tight and the resources limited, cooking in a campervan doesn’t have to be frustrating. You can keep your family well fed during your getaway with thoughtful meal planning, simple recipes, and versatile ingredients.

Image BY studio tdes via flickr.com under a Creative Commons License CC BY 2.0

Born Wild: The importance of getting our kids into the outdoors

Happy New Year! I’d like to start 2017 with what I believe is an important subject: the value of getting our kids into the outdoors. Long-time readers of Pit Stops for Kids know that as often as possible, our pit stops, destinations, and adventures are of the outdoor variety. We ski, hike, snowshoe, mountain bike, camp, backpack, kayak, raft, and fish, and while we’d be crazy not to enjoy five-star hotels and luxury resorts, we’ve noticed something over the years:

born-wild

Our kids remember their outdoor adventures most fondly, and the vacations they ask to repeat are ones spent in tents and hammocks, not luxury hotels.

The articles on Pit Stops for Kids that I am most proud of help parents explore nature with their kids: tips for backpacking, advice for road trips that explore national parks, reviews of river rafting expeditions, and the like. We know it can feel intimidating to get outside with kids. We know that for parents without experience in the outdoors themselves, there are real questions and concerns. So I’m excited to introduce a new website with core values that align with ours: the importance of getting our kids in to the outdoors, and the benefits families can find from communing with nature.

born-wild

The Born Wild Project is a brand new site that serves as a hub for the adventure-ready and adventure-curious. It includes tips and tricks, how-to’s, gear reviews, and regular blogging by their growing collective of awesome parents. I hope to contribute there, as I believe wholeheartedly with their mission.

So why is it so important to get kids outdoors?

I believe in getting kids outside, in the dirt, in trees, on the sand, in the water, and on the snow because in the last generation or so, we’ve seen a barrier build between humans and nature. The more kids stay indoors, the less ‘real’ nature feels to them. It’s something scary, something ‘other’. And when that happens, a whole generation loses their love of, and desire to protect, planet Earth. Plus, kids love the outdoors!

I promise, you can spend a fraction of the cost of a Disney trip camping with your family, and your kids will remember it more fondly, if you give it a chance.

Parents who fear the outdoors can embrace it with the help of a community.

I love that the Born Wild Project offers a community of like-minded parents who either want to get outdoors with their kids or already do. We can learn so much from one another! Even those of us who spend a lot of time outdoors have questions and need advice. When we decided to sea kayak on the marine trail through the San Juan Islands, we didn’t have any experience with ocean kayaking. We relied on the help of guides and the packing lists provided to us from fellow parents. Likewise, after we allowed our 17-year-old to hike the Pacific Crest Trail for a month, many parents asked us specific questions so they could plan their own adventures.

born-wild

So if you’re ready to go outdoors on your next trip or at home, get inspired from Born Wild’s documentary series, showcasing families who decided to make outdoor trips part of their lifestyle. And check out our Adventures for Kids section, of course!

Travel Gear We Use: family tents for camping

This week in our Travel Gear We Use series, we’re talking about best family tents for camping. There are a mind-boggling array of family camping tents on the market, in a very wide price range. What’s best for your family will depend on where you’re camping, how often you camp, and the size of your family.

camping-tips

Best family tents for minimalists or backpackers:

All purpose: We love, love, love Kelty’s Trail Ridge tent.The Trail Ridge 4 is affordable yet high quality, making it a great double-duty tent: it can be used backpacking or car camping. It falls in the middle weight range for family backpacking–not the lightest tent you’ll find, but also not the most cumbersome-and it’s beautifully affordable at only $279. It technically sleeps 4, which to us, means it sleeps 3 (we always reduce the sleep number by 1 to be comfortable). Another solid option is the REI Half Dome tent, which is one of the easiest to set up of any we’ve tried.

Ultralight: Want to carry as little tent weight as possible? Camping with just one kid or as a couple? Try the Nemo Meta. The Meta is our go-to tent for these situations. It weights just two pounds, but is roomy for a two-person tent, with respectable height too. The catch: you set up the Meta with trekking poles (it does not come with tent poles at all). Set up takes some getting used to, but once you learn how to do it, it only takes about five minutes. You need to stake the tent every night, in order to keep it upright, and of course, you need to be hiking with trekking poles, which we do.

Only need a single person tent? Sometimes you have one extra person or are planning a solo adventure. Our teen checked out the Big Agnes Fly Creek UL1 during his PCT hike, and loved it so much, he uses it all the time now. Like the Meta, it’s just over 2 pounds, but on the Fly Creek, this includes the tent poles. If you want to get really posh, get the Fly Creek with Big Agnes’ light system, Mtn Glo. This LED light system illuminates the interior of the tent, freeing you up to go without a headlamp or flashlight inside. We’re spoiled now!

Best backpacking and small family tents at a glance:

amzn_assoc_placement = “adunit0”;
amzn_assoc_search_bar = “true”;
amzn_assoc_tracking_id = “pitstoforkid-20”;
amzn_assoc_ad_mode = “manual”;
amzn_assoc_ad_type = “smart”;
amzn_assoc_marketplace = “amazon”;
amzn_assoc_region = “US”;
amzn_assoc_title = “My Amazon Picks”;
amzn_assoc_linkid = “2b3ff3efebcf632ee007032e7c7a5424”;
amzn_assoc_asins = “B012FCHED6,B019UFVLKI,B00GSYH1T0,B012W1NT34”;

Best family tents for car camping or large families:

joshua-tree-camping

Best big tent: As our family grows (in height and age, not number!) we’ve found the need for a larger, less portable tent for family car camping adventures in campgrounds and state or national parks. Enter the Slumberjack Grand Lodge 8-Person Tent. Sounds pretty fancy, doesn’t it? And to our minimalist standards, it feels pretty fancy, too: the Slumberjack has room dividers, multiple entrances and windows, and great ventilation. We can even stand up inside it! The Grand Lodge comes in an 8-person or a mind-boggling 12-person. Even for the 8-person, you’ll want to make sure your tent space is large in your campsite! The downside of such a large tent is the set up time: it takes considerably longer to set up the Slumberjack than the Kelty, and it’s definitely not pack-ready. However, it does get easier with experience, and does pack down into its own (large) duffel for car or garage storage.

Coleman-tent

Six person or less: Don’t need the 8-person capacity of the Slumberjack? Try the Coleman Carlsbad. This six-person tent includes a screen room attached, PLUS has ‘dark room’ technology, which is designed to help kids fall asleep when it’s still light out (does the sun EVER set in summer?). We’ve found our kids, naturally early risers, also sleep in with this tent. It does feel dark when you’re inside, however, so this isn’t the tent to hang out in during the daytime. It also comes in a 4-person size.

All the bells and whistles: Want lots of storage space and technology in your tent? Try the Eureka Jade Canyon. This six-person tent has 10 x 10 feet of space, with lots of built in pockets and sleeves. It even has a media pocket, where you can prop up your iPad in a transparent pocket to view movies or TV. It also features E!Luminate, which is Eureka’s technology that enhances light. You simply place the provided panels on your ceiling of the Jade Canyon, and your headlamp or lantern light will shine brighter. It really does work.

Best large family tents at a glance:

amzn_assoc_placement = “adunit0”;
amzn_assoc_search_bar = “true”;
amzn_assoc_tracking_id = “pitstoforkid-20”;
amzn_assoc_ad_mode = “manual”;
amzn_assoc_ad_type = “smart”;
amzn_assoc_marketplace = “amazon”;
amzn_assoc_region = “US”;
amzn_assoc_title = “My Amazon Picks”;
amzn_assoc_linkid = “2b3ff3efebcf632ee007032e7c7a5424”;
amzn_assoc_asins = “B00SPOA2G0,B0068BGQKS,B019YDV6A6,B001RPIOMI”;

Pin it for later!

best-tents

Want more camping info? Get Pit Stops for Kids’ camping gear list!

Coleman camping gear and #FindYourPark

It’s camping season in most of the US and Canada, and I’m excited to spend time in the outdoors for the next few months. Most of us are now familiar with our National Park system’s #FindYourPark initiative, which is helping more families than ever discover outdoor recreation in state and national parks.
coleman-camping-gear
Most families are also familiar with Coleman, an outdoor gear brand with a long tradition of creating family-friendly camping equipment. We’ve been using Coleman gear since I was a kid. Right now, Coleman is partnering with #FindYourPark. Through 2017, Coleman will host a variety of outdoor experiences that will enable America’s youth and their families to connect with our national parks in unique ways.

Want more camping info? Get Pit Stops for Kids’ camping gear list!

To round out this partnership, Coleman will also offer a limited edition line of products including grills, stoves, lanterns and coolers that commemorate our national parks to ensure Americans are well equipped to head out to the parks. To kick off the camping season, we wanted to share reviews of some of our favorites, and let you know how to get them.

Coleman camping gear we’re using this summer:

Carlsbad Fast-Pitch tent:

carlsbad-tent

The Carlsbad tent sleeps six and includes two living spaces: a 10 x 9 ft. tented space and a 10 x 5 ft. screen room. It’s roomy vertically too, with a ceiling of 5 ft. 8 in. Families can easily spread out, with extra sleeping space in the screen room if the weather is dry, or you can use that space for a few chairs, a game of Uno, or everyone’s shoes and gear.

A few features we love: The Carlsbad features Coleman’s ‘Dark Room Technology’, which means it stays darker inside than the average tent. When you have kids with an earlier bedtime or hope that you’ll all sleep in a bit, this is golden. You also get window awnings, which is more than just a cute feature: they allow you to keep windows zippered down, even in rain, which reduces condensation in the tent. Lastly, the Carlsbad is one of Coleman’s ‘Fast Pitch’ tents, which means that for its size, it’s very easy to set up. Forget the heavy, awkward set up stage: some of the poles are pre-inserted, and it really only takes five minutes to be up and running. Buy on sale for $169 on Amazon, or grab a 4-person model for only $134.

Big N Tall cot:

coleman-cot

 We’ve really fallen in love with cot sleeping when we’re car camping. To be honest, we sleep outside on cots much of the summer. Cots are more comfortable than air mattresses for us, and sleeping off the ground simply feels like a luxury when we’re camping. The Coleman Big N Tall cot is part of their Big N Tall line, which, in our opinion, isn’t just for bigger people. The oversized cot is simply more stable and wider, which is good news for anyone. It’s designed in a military style with an X frame, and is quick to set up.

A few features we love: The design on the Big N Tall cot is a manly yet understated topography map design in sand tones. I realize a cot’s selling feature isn’t its looks, but it’s always nice to have something nice looking in your campsite! It comes in a rolling carrying case, with is really good, since this baby is heavy! Pick up the Big N Tall for $135. You can also find standard-sized Coleman cots for $79 and under.

Mountain View Screen Dome Shelter:

mountain view-screen

Coleman’s 12×12 screen dome shelter went up in our yard in May and won’t come down until August, except to go camping! We use it daily for bug-free outdoor space and outside sleeping space throughout the summer months, and it’s a wonderful addition to car camping sites when you need a bug-free zone. It has an open bottom/floor, which means you can set it up around fixed picnic tables at campsites for mosquito-free eating or card games during the twilight hour. I won’t lie: set up takes longer than for your average tent (it took us about 15 minutes) and the poles are bulky and heavy.

A few features we love: You get 50+ UPF, and the roof is waterproof (we’ve tested it extensively). You get some side-panel ‘walls’ you can drape on one or more sides if you desire, which is helpful for keeping out sun on one side, privacy, or during rain storms. If you don’t need the shelter to be screened to keep out bugs, you can zip away the attached screens to use the shelter as just a sun dome (great for sporting events). The inside height is over 7 feet, so you won’t need to duck. Pick it up for $181 on Amazon.

Conquer 200L LED Headlamp:

coleman-conquer

Sorry, flashlights, but we’ve switched entirely over to headlamps for our illumination needs while camping. We love the hands-free convenience, and the way headlamps easily convert from pathway illumination to reading lights to lanterns (just wrap one around a large plastic bottle of water). The Conquer headlamp is bulkier than we’d like for backpacking, but ideal for car camping and for kids to take to camp. It’s rugged exterior can take a beating, and the headband can be adjusted to fit just about everyone.

A few features we love: The Conquer features BatteryLock, which stops battery drain. Believe it or not, you won’t be changing out the batteries constantly! It has five modes, including high spot, high flood, low spot, low flood, and red, and lumens ranging from 200 (high spot), 150 (high flood), 70 (low spot), and 20 (low flood). You need three AAA batteries, but the LEDs never need replacing. Pick it up for just $25. There are stronger, brighter models available as well, going up to about $45, but honestly, this is all you need.