How to stay healthy while traveling with the family

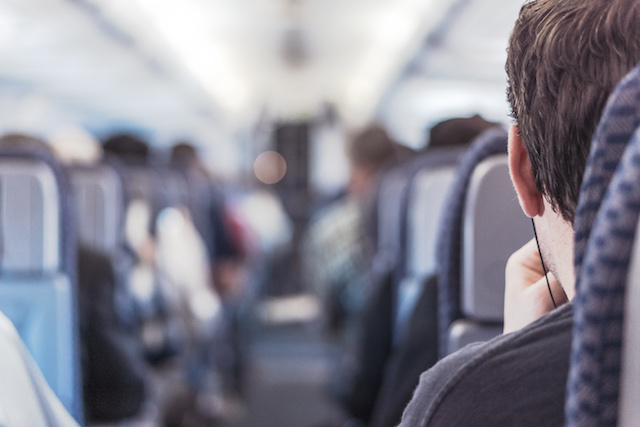
Traveling can be an exciting adventure, especially when you get to share it with family. Flying or driving to a new city, having new experiences, and getting to detach from your regular routine are things most people can look forward to when travel is in their future. If you have stress in your typical day to day life, sometimes travel is the only way to really get away to de-stress.

On the flip side, traveling isn’t always so nice for our routines when it comes to staying healthy. When you leave your house, you might leave your regimented life behind and regret it when you return home. Traveling with family brings its own types of stress that are different from your “normal stress,” and it can be handled. Incorporating these  healthy traveling tips are similar to managing your health with a super busy schedule.

air-travel

Keep Some Routine

It’s easy to let routine items slip to the wayside while you’re traveling, but it’s a good idea to keep some of your routines in place, so you don’t experience “travel shock” when you return home.

For example, if you drink coffee every morning to get you going, that shouldn’t become foreign just because you’re traveling. Most lodging has a coffee maker in the room, or you can find a coffee place nearby to grab a cup of joe. Along with giving you your morning jolt, the caffeine in coffee can help your bowel movements stay regular. If you take pre-workout supplements, stay on your routine.

Visit a Local Grocery Store

While you’re traveling, there is no excuse not to find fresh snacks, especially if that’s what your body is used to on a regular basis. It’s just as simple to find fresh fruits and veggies even at gas stations these days as it is to grab a sodium-packed bag of chips off the shelf.

If you’re staying somewhere for a few days, there is likely a grocery store that sells fresh produce and other snacks that will keep you in good health. If your accommodations have a refrigerator that is accessible to you, grab some produce from the local supermarket for snacking in the room or on-the-go. You can stock up for your entire stay with one trip to the store.

If you’re worried about spending extra money on airport food on a layover or as you road trip, pack some pre-made snacks in your suitcase or cooler. This is great for babies and picky eaters. If you’re flying, check the Transportation Security Administration’s website for what foods are allowed through security. If you’re driving, pretty much anything is allowed, but be cautious of states that don’t allow items like fresh fruits across their borders.

Supplements and Water

Supplements are gaining popularity as easy ways to get your daily dose of certain nutrients you might not get in your regular diet. If you’re one of these people, you should absolutely take enough on your travels to keep your health in check. You can’t always count on restaurants to use fresh ingredients that with no preservatives, so your family’s salt intake may spike while you’re traveling. You may consider adding a probiotic to the mix while you’re traveling to maintain your gut health. For your budget-friendly, yet equally nutrient-rich superfood, learn more here in Amazing Grass Green Superfood review.

Also, ensure your family is staying adequately hydrated. Traveling for long periods of time can disturb the level of hydration you usually experience. Whether you’re flying for 2 hours, 12 hours, or trapped in a car for the day, your body will suffer some dehydration. This doesn’t mean you need to consume crazy amounts of water to cause numerous bathroom breaks.
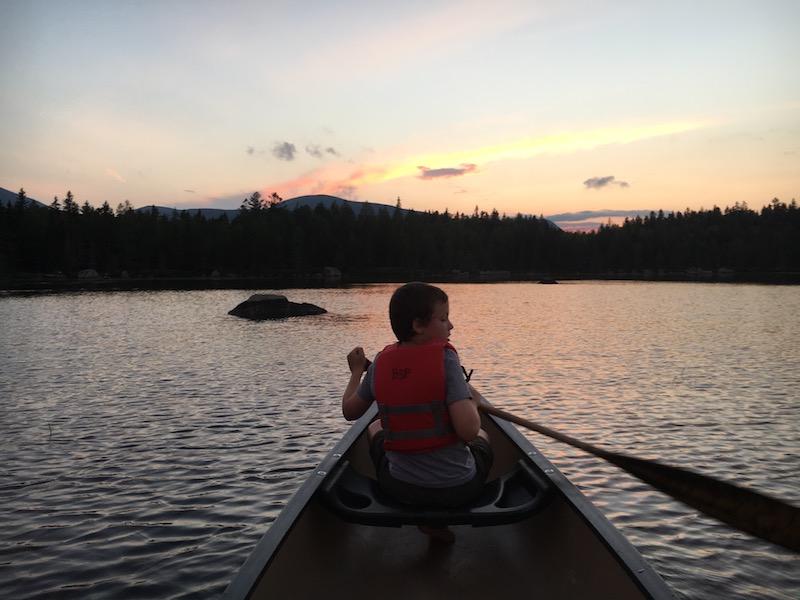
Keep Moving

Unless your travel adventure includes hiking or other activities that keep your family active, consider incorporating a short movement session that includes the whole family. Whether it’s time in the pool swimming laps, maybe disguised as races for kids, or pulling up a yoga video on your iPad, get some movement in each day for at least 30 minutes.

If you’re a member of a national gym, ask if your membership includes admittance to gyms in the area you’ll be visiting or if you can get a guest pass. You can also check out any public fitness groups to get your heart rate up for a bit. Of course, you can always utilize the hotel gym if one is offered. Even if you’re walking a lot each day, you’ll be able to get some weight training in if that’s what you’re used to.
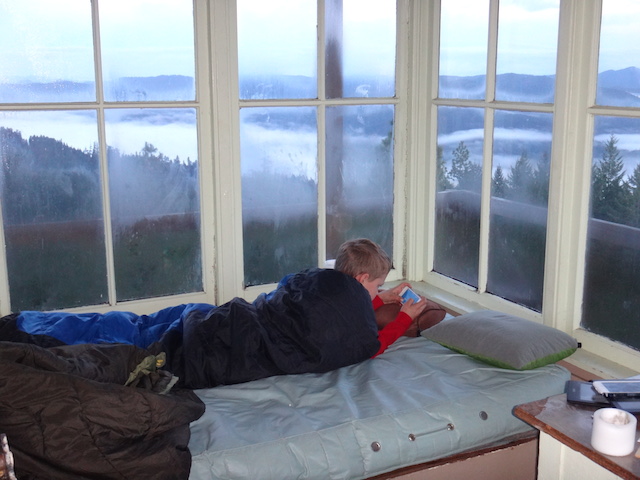
Good Night’s Sleep

Even though traveling is usually a limited time, your sleep is crucial and should not be sacrificed. It’s tempting to pack your day full of activities and sites but consider how it will affect your family’s sleep schedule. Getting quality sleep will keep your mood and mental health in check to ensure each portion of your travels is enjoyed to the fullest.

If you have younger children, you endanger their regular sleep routine by putting them to bed later or waking them up earlier than usual. You might even look at how you can incorporate their usual nap time to give them the rest they’re used to and give you a break.

Hiking Safety: How to keep kids safe in the outdoors

A ramble through the woods, a stroll across a mountain meadow, or a strenuous alpine hike with the reward of a breathtaking vista – it all sounds idyllic until something goes wrong. As a former search and rescue volunteer and EMT, hiking safety is very important to me. I’ve participated in too many wilderness searches that could have been avoided with a few precautions, a little know-how, and the right hiking gear.

nature-hike
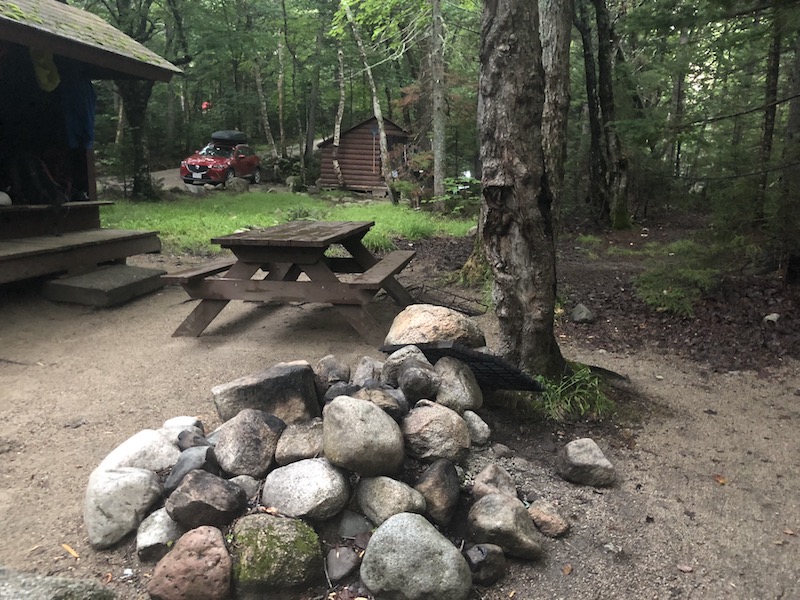
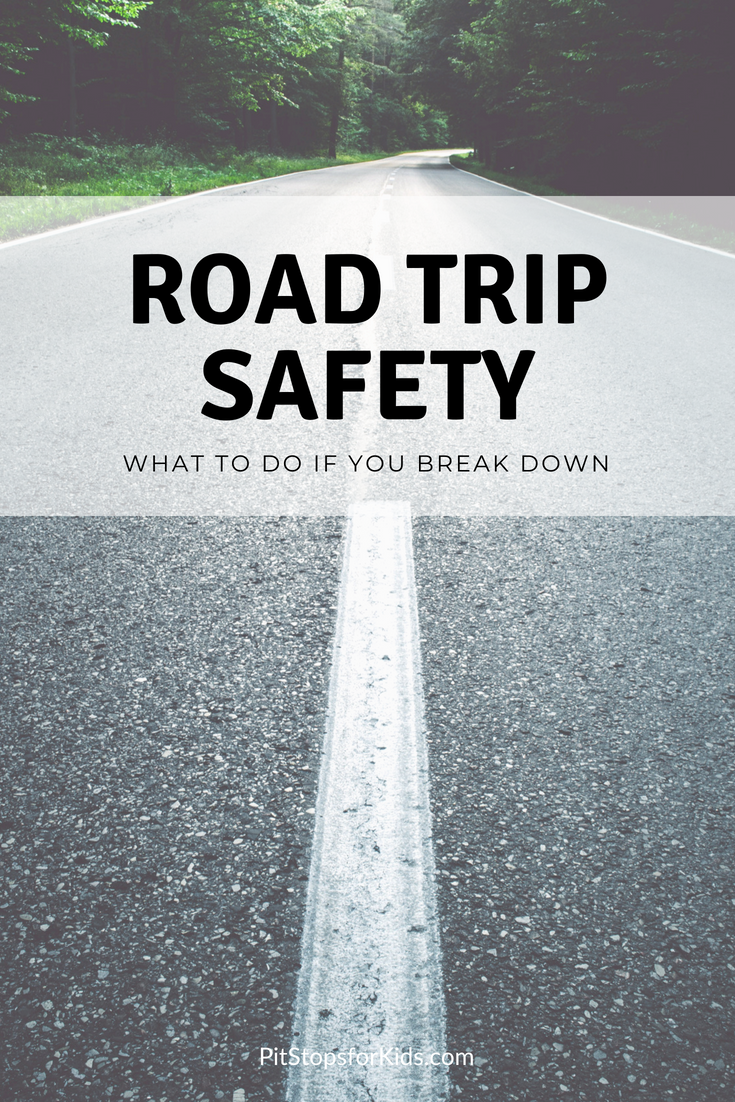
Trust me – if golf is “a good walk spoiled,” so is a search for a missing hiker! If you’re planning to explore hiking trails in your region this fall and winter, know what is needed to have a fantastic outdoor experience (and make it home in time for dinner).

Safety Precautions

Before setting out on any wilderness hike, download or buy a topographical map of the trail network so you’ll be aware of trail crossings and alternative routes. Consider hiking with a buddy, or, if you must hike alone, always tell a friend or loved one where you’ll be and when you plan to be back. Many trailheads offer “sign-in stations,” where hikers can register their presence.

Lucky hikers will enjoy spotting wildlife en route; with very few exceptions, these animals will respect your presence if you respect theirs. Carrying bear spray is a good precaution against the rare event of an aggressive animal, but a camera will come in handy far more often.

Gear to Take

Most hikers remember to pack weather-appropriate clothing and their best hiking boots, plus to carry a water bottle when setting out, but they are surprised to learn what else should be in their day pack. While compasses and GPS units are useful, they don’t make the list of absolute necessities. Neither do high-tech hiking poles or hydration systems, despite being nice to have. In fact, hikers carrying just the following five items will greatly increase their chances of survival in the wilderness should they spend more time in the elements than planned:

  • Bandana
  • Whistle
  • Glow Stick
  • Plastic Poncho
  • CD or Mirror

All five of the items above can be purchased for under $10 at any outdoor store or dollar store. Keep all five safety tools in your hiking day pack permanently to ensure they’re at the ready on every hike.

Read our full article on fix.com.


Source: Fix.com

Five outdoor travel experiences any family can try

Good news parents: Most kids’ favorite vacations involve sleeping bags and campfires instead of five-star luxury and turn-down service. Traditional camping trips are a crowd favorite, but if you’re looking for something a bit further off the beaten path of family travel, check out one of the following outdoor travel experiences any family can enjoy, no prior wilderness knowledge necessary.

outdoor travel experiences

1. Spend a night in a fire tower lookout.

2014-02-18-pickettbuttebed.jpg

Un-used or seasonally manned fire tower lookouts dot US Forest Service lands, especially in the Western states. Many of these lookouts are available for seasonal rental. Our fire lookout stay at Pickett Butte, Oregon included two nights in an isolated three-story high tower, with plenty of room to play, hike, and let our dog roam. We enjoyed downtime, plenty of paperbacks, roaring campfires, and the excitement of sleeping above the treetops while the wind blew. Fire lookouts are available to reserve via Recreation.gov, just like state campground sites.

2. Book an overnight river rafting trip.

2014-02-18-rafts.jpg

Untried on the river? Don’t try to plan an overnight float trip by yourself. We’ve seen the results first-hand (and they usually involve stuck rafts and miserable families). When we wanted to explore Oregon’s backcountry via the Rogue River, we entrusted our vacation to OARS, who took care of everything from experienced rafting guides to three-course meals. Rafting tours are available in most states, with the most popular overnight trips for families in California, Oregon, Utah, and Idaho.

3. Go dog sledding.

2014-02-18-BigWhitedogsledtrip.jpg

A day trip that involves speed, snow, and happy, barking canines? Sign us up! The best dog-sledding tours will include educational opportunities for kids to learn about the history and practice of dog sledding, as well as time to greet the dogs, learn about their care, and see where they eat and sleep. We loved our dog sledding tour in Big White, British Columbia, as well as our summer tour of a dog sledding training facility in Juneau, Alaska.

4. Rent a state park yurt.

2014-02-18-yurtstay.jpg

Want to camp in the Pacific Northwest in the off-season, but don’t have an RV or camper to keep warm? No problem: rent a state park yurt. Reservable via Recreation.gov, state park yurts in Washington and Oregon (as well as other states across the US) provide families with just enough comfort to still be considered a camping trip. Yurts along the Pacific coast provide heat, electricity, and beds… perfect for a weekend of whale watching or winter storm viewing. Reserve early: yurts are very popular!

5. Take a hut-to-hut ski or hike tour.

2014-02-18-amc.jpg

Perhaps you grew up taking overnight backpacking trips, but your children aren’t quite old enough to carry full packs of gear (yet). Or maybe you’d like to get into the sport, but are first-timers. Enter hut-to-hut hiking or skiing, where families can enjoy the backpacking experience combined with the comfort and security of a winterized (and sometimes stocked) hut at the end of each day’s journey. Our favorite hut-to-hut trips are located in the heart of the White Mountains, run by the Appalachian Mountain Club. Families can opt to trek on their own, or base in one of AMC’s family-friendly lodges such as the Highland Center Lodge for a guided day trip. Just in time for summer, AMC has extended their guided family vacations.

Photo credit: Amy Whitley, Flickr Creative Commons

Maine with kids: Baxter State Park backcountry itinerary for families

Baxter State Park is Maine’s largest expanse of untamed public wilderness. With almost 210,000 acres to explore, where do you start? Our Baxter State Park backcountry itinerary for families includes days in the frontcountry enjoying Baxter’s car camping options, several days in Baxter’s backcountry, then a rest day to play and explore before departure.

Baxter’s scope and size is on a national park scale, but unlike national parks, almost every lake, pond, waterfall and stream in the park is accessible only by trail. In very few places in Baxter can you drive up to see anything, and even then, you must drive miles upon miles on dirt roads. In other words, you earn you sightseeing! Baxter limits the number of visitors to the park daily, which means you won’t be rubbing elbows with crowds of tourists. It also means you have to be organized about your trip and get the required permits you need early. Here’s how!

The best way to experience Baxter State Park is by camping, though day permits are available as well (if you opt for that, stay in nearby Millinocket). Here’s our suggested itinerary, after doing most things right and a few things wrong during our five days in Baxter.

Day 1: Frontcountry camp at Roaring Brook Campground

In case you’re not sure, when I say ‘frontcountry camp’, I mean ‘car camp’, or camping via car access. Roaring Brook Campground is about eight miles into the park after you check in at the ranger station at the Togue Pond entrance, past Millinocket via dirt road. The campground, like all in Baxter, is remote and basic, with nicely-kept pit toilets, a place to purchase firewood (bring cash), and a staffed ranger station, but no other amenities, such as showers or potable water.

You can pick between tent sites and lean-to sites, and I recommend the latter, because they’re on the brook. You get a basic wooden shelter with a platform for each site, plus a picnic table and fire pit. We loved the shelters (lean-tos) throughout Baxter, as they provided just enough protection from the afternoon rainstorms and gave us a place to roll out our sleeping bags off the dirt. They’re not enclosed, however, and you won’t be safe from mosquitos there, so you can opt to set up a tent inside the shelter (but not outside of it). Roaring Brook is cold and clear, and we loved swimming in it.


Tip: You MUST enter Baxter State Park before 8:30 pm, so time your arrival accordingly. Also, the entirety of Baxter is ‘carry out’ for all your trash, so bring trash bags and plan on storing your trash in your car at night. You must also stow away all your food at night.

Day 2: Hike Mount Katahdin

If summiting Mount Katahdin is on your to-do list in the park, do it early in your trip, while you’re still fresh. It’s 5.5 miles (pretty much straight up) from the Roaring Brook Campground, and it took our family (seasoned hikers) 12 hours to complete. The trail is extremely strenuous, and the final mile of the summit hike is along a ‘knife edge’ with some scary-looking drops. If you go: bring tons of water, and a means to filter more on the trail (you’ll need it). Also bring headlamps in case you’re caught hiking after dark. We took the following route: Roaring Brook to the Helon Taylor Trail, to the Knife Edge, to the Saddle Trail, to the Chimney Pond to Roaring Brook trail. It was 11 miles that took us forever to complete.

Note: Kids under age six are NOT ALLOWED above the treeline at Katahdin, though on our visit, we did not see a ranger monitoring this. I’m told there usually are. We took a seven-year-old, my niece, who rocked it, but she’s unusual in her awesomeness.

If you don’t want to tackel Katahdin, I recommend the Chimney Pond trail from Roaring Brook (3.3 fairly strenuous miles) to enjoy a picnic lunch at Chimney Pond, which has fantastic views of Katahdin right at the base of the mountain.

Day 3: Recover from Katahdin

This is where we made a mistake in our itinerary. We didn’t give ourselves a rest day after summiting Katahdin. Stay one more night in Roaring Brook and plan on sticking around camp. Enjoy the swimming and maybe go .2 mile to Sandy Pond, to try to spot the moose who like to hang out there at twilight. No nothing more!

Day 4: Head into the backcountry

If you’re prepared for backpacking in Baxter, depart Roaring Brook today, hitting the Russell/Sandy Stream trail. The destination: either Russell Pond Campground with lean-tos (7.2 miles away), or, if you don’t want to go quite so far, reserve at Wassataquoik Stream, which offers several more lean-tos with great swimming (5 miles away). If you’re ambitious, you could aim for Wassataquoik Lake, 9 miles distant, which doesn’t have a campground but does have several more lean-tos. Russell Lake has a staffed ranger office and lean-tos, a bear line, and pit toilets, and we settled in at two of them, adding a tent site for our group of 10.

Note: Baxter State Park is VERY strict about group size and where you can camp. This is a good thing, as it eliminates big groups in campsites they don’t fit into. If you reserve a lean-to made for four, you can ONLY have four people sleep there. Ditto for six-person lean-tos and tent sites.

At Russell Pond, you can use the provided canoes at the dock for a small fee (I believe it was $1/hour, on the honor system) and you can swim, though we don’t recommend it (there are many leeches here). It is, however, a good place to spot moose. The Wassataquoik Stream lean-tos are better for swimming, and theWassataquoik Lake lean-tos offer a bigger lake (better for swimming) and more canoes.

Alternatively, you could backcountry camp at Chimney Pond instead of Russell Pond (see description above). It’s a shorter distance, though a rockier trail.

Day 5: Day hike from Russell Pond

We enjoyed hanging around camp and day hiking from Russell Pond to Wassataquoik Lake (2 miles) on this day. We played board games and cards in our lean-tos, picked blueberries in the wild patches nearby, and tried to spot moose.

Day 6: Hike back to the frontcountry

Return to Roaring Brook today, and spend the late afternoon cooling off in the brook. Pack up and depart Baxter the next morning, checking out additional parts of Baxter if time allows. We recommend Blueberry Ridges or Ledge Falls if so, and if not, hit a last swim spot just outside the park boundary at Togue Pond. You can grab a nice sandwich and some souvenirs from the North Woods Trading Post just outside the park toward Millinocket, and if you want a bigger meal, we recommend the friendly and affordable Sawmill Bar and Grill.

How to reserve your campsites:

Baxter State Park is popular, and as mentioned, entry is limited. To ensure you get your campsite, reserve far in advance. Baxter uses four month rolling reservations, so you’ll want to reserve exactly four months before you desired time. You can reserve online or by phone.

More tips:

  • If you’re day hiking Katahdin (staying in Millinocket), you’ll want to reserve your parking space (these are limited as well!). Here’s how. Parking reservations are only held for you until 7 am, then are given away on a first-come, first-served basis. Yes, you really need to start that early. If you’re camping in the park, you don’t need a parking reservation.
  • You’ll need to treat ALL your water in the park. Bring a good filter. We like the Sawyer Squeeze to bring on day hikes and the Platypus GravityWorks for in camp.
  • You cannot bring firewood into the park. You must purchase it in camp.
  • No pets are allowed, even in car camping campgrounds. Plan accordingly.
  • Check in at every ranger station as you hike. Bring a phone and treat it as an emergency device (you won’t get service in the park anyway).
  • Pack out all your trash…make it easier on yourself by reducing packaging on your food before you arrive. Store all food and trash in your car at night in the frontcountry, and on bear lines in the backcountry (use your sleeping bag stuff sacks to store food and hang it from the line provided).
  • Backcountry campgrounds DO include pit toilets with toilet paper. They were all in good condition during our visit.
  • Enjoy the Maine wilderness!


Best essential oils for travel

Like everyone else (it seems), I’ve recently started using essential oils in my home and for my family. While I don’t deem them lifesaving (gasp!), I do believe essential oils add to our family’s well-being and overall health. Why not take this show on the road? We have a round up of the best essential oils for travel (and when to use them):

Three best essential oils for travel:

essential-oils

Motion sickness:

Several members of our family suffer from motion sickness in cars and on ships. I hate medicating for this, because no matter what we use, we seem to get drowsy. Before motion sickness can hit, I like to use essential oils topically (to the back of the ears, temples, or wrists) to fight nausea. It’s important to apply the essential oils before getting in the car!

Essential oils for motion sickness: ginger, peppermint, or spearmint. Alternatively, get a pre-made blend. We like Motion-Eaze, which is a combination of lavender, peppermint, frankincense, chamomile, myrrh, Ylang Ylang, and birch.

Immune defense:

This is a biggie. We do everything in our power to prevent sickness while on vacation. For immune defense, we diffuse essential oils at home pre-trip. If you have a small diffuser, you can even bring it along on road trips to use in hotel rooms and vacation homes. You can also just bring the oils, and add a few drops to a bowl of boiling water to breathe in.

Essential oils for immune defense: clove, lemon, cinnamon, eucalyptus, rosemary. Or use a blend like Thieves. We are using Best Friend, from Better Essentials. Better Essentials makes blends nearly identical to those made by the big essential oil makers, at a lower cost. Their oils are 100% pure, therapeutic grade, and third-party tested.

Sleep:

Sleep is absolutely essential (no pun intended!) while on vacation. To assist with sleep in hotel rooms and other unfamiliar places, we apply essential oil to our wrists, plus perhaps a dab behind the ears. You can also spray pillows lightly. I just don’t suggest doing this in enclosed spaces like airplanes, as the scent could bother others.

Essential oils for sleep: lavender, or a blend like Breathe. We are using Fresh Air from Better Essentials (their version of Breathe), or we use pure lavender. Hard to beat it!

How to conveniently bring essential oils:

Luckily, essential oils come, by their very nature, in small packages. They are easy to bring along on road trips in any first aid kit or medication kit, and easy to bring for air travel in a 3-1-1 bag. Almost all are under 3 ounces. Several travel-sized diffusers are on the market, but we don’t bother with this: for our use on the road, we apply our essential oils topically. However you decide to use your oils, make sure you buy therapeutic grade, and place all oils in a plastic bag or otherwise airtight container. This will contain the scent (when you don’t want it) and also prevent any leakage.

amzn_assoc_placement = “adunit0”;
amzn_assoc_search_bar = “true”;
amzn_assoc_tracking_id = “pitstoforkid-20”;
amzn_assoc_ad_mode = “manual”;
amzn_assoc_ad_type = “smart”;
amzn_assoc_marketplace = “amazon”;
amzn_assoc_region = “US”;
amzn_assoc_title = “My Amazon Picks”;
amzn_assoc_linkid = “87cfb6f6de58c95d5111725a5c4ebbe0”;
amzn_assoc_asins = “B002D6M94E,B01ETQXMM8,B016PSMSHI,B0183K2AG0”;

Do you use essential oils? What are your favorite blends?

What you need to know about going through international travel customs with kids

To some parents, the thought of navigating immigrations and customs with kids is intimidating. For some, the first experience in customs will be during a trip to Mexico, or Canada. For all of us, it can be tiring, especially after a long travel day (or night). But by knowing what to expect (and having the forms and documents you need) going through travel customs with kids can be a breeze. Here’s what you need to know:

going-through-customs-with-kids

1. Finding customs will be easy.

To frequent travelers, this may be obvious, but I’ve been asked by several parents how they’ll know where customs is. The answer: you can’t miss it. Airport security won’t let you. Once you deplane, the only way to go will be through immigrations and customs (through an international arrivals terminal). On the way, don’t delay, if you can help it. There are usually restrooms just before you enter the customs line, but if everyone’s good to go, it’s best to keep moving to avoid a long line.

2. You’ll go through Passport Control/Immigration first.

Get in the line that applies to you (foreign citizen or American citizen, depending on where you are and who you are). Have your customs declaration form ready (one per family, given to you on the plane), plus everyone’s passports. Keep your cell phone off, and pay attention to when it’s your turn. Keep all carry-on luggage with you (just as you would elsewhere in the airport).

When it’s your turn, hand the immigration agent all the passports and the customs declaration form, and be ready to answer some basic questions, such as why you’re in the country, how long you’ll be there, and where you’re staying. The agent may ask questions of your children, as well. He or she will give you the customs declaration form back.

3. Head next to pick up your bags (if you have any).

Again, you won’t be able to miss this step. On the other side of immigration, the baggage carousels will be waiting. Get your bags before heading to customs. If your bag is delayed (bummer!) be sure to have your baggage claim form handy. You will have to pick up your bags whether or not you’re in your final destination. If you’re connecting to another flight, get the bags, go through customs (explained below), then follow signs to ‘connecting flights’ or ‘luggage drop off’.

4. Go through customs.

Get in the proper line (do have something to declare, do not) and turn in your customs declaration form. Declare everything you might have bought in the country, including duty-free items. Our souvenirs never add up to much, and we’re always waved through without much fanfare.

5. Head out and connect with your next flight or ground transportation!

That wasn’t so bad, was it?

If you’re traveling without your children’s other parent:

Learn from my mistakes, because this is where we’ve hit a snag. If you share custody of your children (either in a custody arrangement or as married parents), but you’re traveling without the other parents, you MUST have a signed letter stating that you have permission to take your children out of the country. If possible, get it notarized. We were delayed and ‘interrogated’ (using that term loosely) when I neglected to have a letter from my spouse on a recent trip to Canada.

If your teen is traveling alone:

In addition to his or her passport and customs declaration form, any teen traveling without a parent or guardian should also have a notarized letter from both parents (if both have custody) explaining his or her purpose in the country. He or she should also have a document with the names, addressees, and phone numbers of whomever he or she is meeting in the country. We also send our son with a photocopy of his passport, carried in a different bag on his person.

Will your child be flying as an unaccompanied minor? Read our tips for kids flying solo.

Photo credit: J Aaron Farr

Family camping hack: Dispersed camping tips

Have you ever been on a road trip, paid around $100 a night to stay at a basic motel, and thought to yourself that you’d rather pay less and see more nature along the way? Or have you ever camped in a campground amid loud neighbors and wished you could find a place to pitch your tent away from the masses? If either question has crossed your family’s minds while traveling, dispersed camping might be a good option for you. If dispersed camping sounds intimidating, we have dispersed camping tips ready for you.

What is dispersed camping?

Dispersed camping simply means camping anywhere in the National Forest outside of a designated campground. No services will be available. such as trash removal, and little or no facilities will be at your disposal, such as tables and fire pits, or bathrooms or showers. However, dispersed camping is free, and you can usually count on finding a campsite where you can be alone in the wilderness, via car instead of hike-in.

You’ll be responsible for packing out everything you pack in (follow Leave No Trace principles), and you’ll need to remember to bring basics you might not think about when camping in campgrounds, such as potable water, toilet paper (and a shovel), and portable chargers for phones, lanterns and the like. Store all your food items in your car or in a bear canister at night, as food storage lockers will not be present. Think of dispersed camping as backpacking, but with your car: you need to be completely self-contained.

So how do you find dispersed camping locations?

This is the tricky part. You can use any road map to locate National Forest Service land in the vicinity in which you want to camp, but the best way to find out what areas are open to dispersed camping is to contact the nearest Forest Service office to the area you wish to visit. Many people drive out on forest service roads into the woods and find a clearing or a spot near a stream or with a view of the mountains. Use maps to find water sources near your desired camp area (but remember it will not be potable).

Only drive on existing roads to prevent resource damage. Dispersed camping is allowed in a one-mile perimeter away from campgrounds and 100 feet from any stream. To prevent resource damage please keep your campsite within 150 feet from a roadway.

Sometimes, though, it’s hard to identify exactly what is forest service land and what is private land. When we’re unsure, we’ve found its sometimes worth spending a few dollars to use Hipcamp.

Hipcamp is a website that mimics AirBnb, but for campsites. Private owners (hosts) post their camping options, which families can search for by location and date. Essentially, Hipcamp sites are dispersed camping on private land with permission. We have paid about $20 per Hipcamp site, paid via the website much as you’d do for AirBnb. The host then contacts you with exact directions to the site. Like when using AirBnb, it’s important to read reviews before booking, to make sure the host will be a good communicator and offer solid directions. And just like when disperse camping on forest service land, it’s crucial to pack everything out and leave the site as nice as when you found it (or better).

Hipcamp is popular with young adults looking to camp in groups (think festival-goers) but is a great option for families as well. Look for options with plenty of space in which to find a private area to camp. On a recent road trip through Nevada, we found a completely isolated Hipcamp location, and enjoyed a night to ourselves amid antelope and a perfectly starry sky. We brought a small stove, potable water, headlamps, food and a tent, and were completely cozy and self-contained for $20 instead of the $100 we would have spent on a not-so-great hotel room in a nearby town.

Have you disperse camped or used Hipcamp? Let us know in the comments!

Road Trip Safety: What to do if your car breaks down

A few years ago, we were ten minutes into a six-hour road trip when we ran over a nail in the road and got a flat tire. Yep, only ten minutes in…and while it was a bummer to be sidelined so quickly, at least we were close to home. Within a few hours, we were back on the road. But what if you were further afield?

Any time your car breaks down, it’s natural for panic to set in—but what if you’re miles and miles into a road trip? What if you’re in unfamiliar territory and have no cell phone signal? As difficult as it is, don’t panic. Here are a few things to do if you have to take that gut-wrenching park on the side of the highway:

1. Move away from the car if you see smoke. It’s very unlikely for modern cars to catch fire, but it does happen. If you see smoke or otherwise suspect staying in or near the car is dangerous, move away. Your safety is the top priority.

2. Put on your hazards and set out flares if you have them. Flares should be part of any roadside emergency kit. However, if you don’t have them, at the bare minimum put on the hazards. This will minimize your risk (and the risk of a car accidentally hitting yours).

3. Call for help if you have a signal. Most insurance companies include roadside assistance with policies. However, the waits can be long. If you do have a roadside assistance program, call them first so you can get help as soon as possible. Next, call someone nearby who may be able to help. If that isn’t an option, call someone you trust to let them know what happened and where you are.

4. Start walking if you have no cell service but know a store is nearby. Maybe you recently passed an interstate gas station or saw signs for a small town within a couple of miles. Only start walking if you’re confident that you can safely and quickly get to a business where you can then call for help. If possible, walk against traffic so you can see cars as they approach.

5. Make a sign for jumper cables and wait by your car if you know your battery is dead. It’s rare that a car will stop working suddenly on the highway because of a dead battery, but it can happen—especially if you recently turned the car off. If you’re certain that’s the issue and have jumper cables, hold them up to passing cars. If you don’t, make a “jumper cables” sign with your hands to let passing cars know what you need. It shouldn’t take long for someone to stop.

The best way to avoid getting stranded is to take precautions. Make sure you’ve ticked off these tasks before taking your next road trip:

1. Get your car serviced. Regular maintenance is the best way to stay safe and spot any troubling signs before they get out of control. Maintenance checks are fast, affordable, and save you money in the long run. Aim for at least one car service per year.

2. Make a roadside kit and always keep it with you. This should include jumper cables, safety items such as pepper spray, solar-powered chargers, a wind-up radio, road flares, and a first-aid kit. Hopefully you’ll never need it, but you’ll be glad to have it if you do.

3. Choose a wireless plan with good coverage. It’s tempting to save money on a bargain carrier, but you’ll regret it if you travel to a more rural area without coverage. The best way to get help is simply to make a phone call. Don’t opt to take that away from yourself.

 In the worst-case scenario, you might have to sell your car if it breaks down. If you must, you can find a company near you. For example, a company like Junk That Car in Temecula will purchase your car and tow it away getting rid of the hassles associated with a broken-down car.

Another way to increase safety on a road trip? Don’t go alone. There’s safety and power in numbers.

Safe travel tip: How to use the Allianz TravelSmart app

If you’ve traveled a fair amount, you know that sometimes, things go sideways. Usually, these things are small things: maybe you need to pick up a prescription from a pharmacy and need directions, or maybe your flight got delayed, leaving you rescheduling your airport transfer. These problems are always pesky–who to call? Where to go? Sometimes, of course, the problems are bigger and more consuming: you need serious medical care or you have to deal with a theft.

Murphy’s Law dictates that you’ll never have to deal with any of the above (yeah right!) if you think ahead and buy travel insurance, which is why we always travel with our travel insurance annual plan. Here’s why, if you’re wondering whether travel insurance is right for you.

As we’ve stated in the past, we use Allianz Travel for our personal family travel and highly recommend them, but, even if you opt to use a different insurer, you can now use Allianz’ TravelSmart app to help you navigate any rocky moments on your next trip. The TravelSmart app is FREE for anyone to download, and helps you organize a lot of necessary emergency information and tools in one place.

Note:

Allianz has recently upgraded their annual policies in light of the recent pandemic. Their newly filed policies now include permanent accommodations for epidemics, not only the current COVID-19 but others that may form in the years ahead. This benefit is now offered beyond single trip products and I am sure it will help many travelers.

Learn more about the Epidemic Endorsement Product (EEP) benefits here:

Here’s what the TravelSmart app can do, in a nutshell:

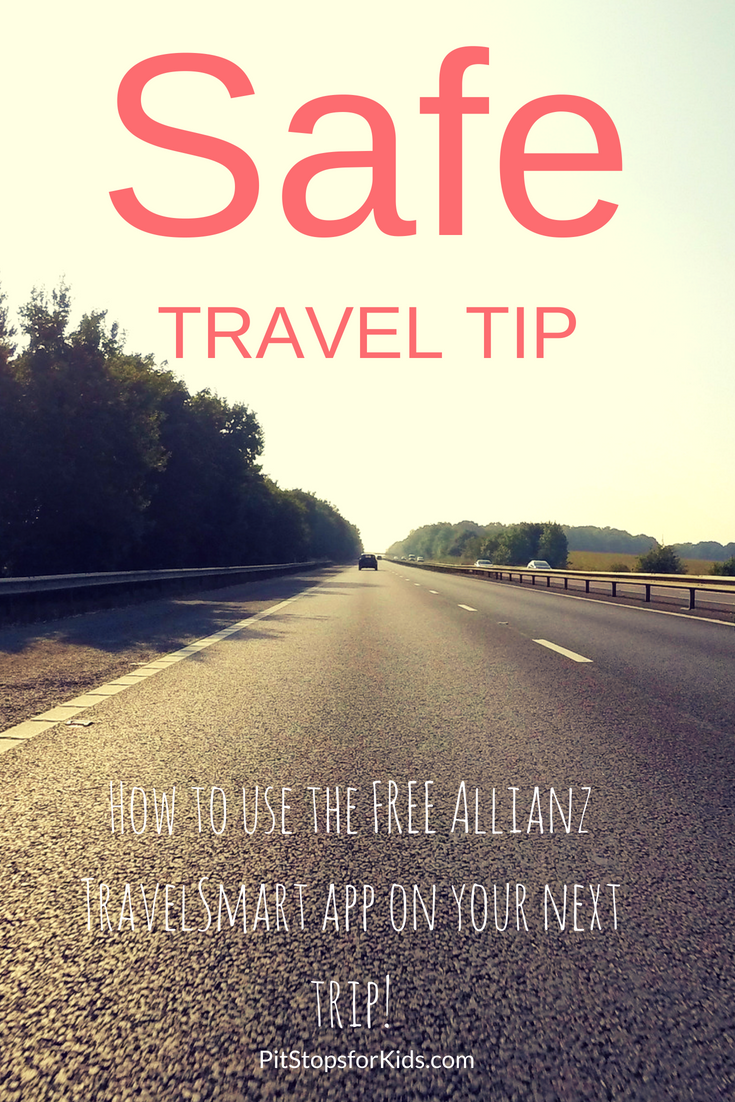
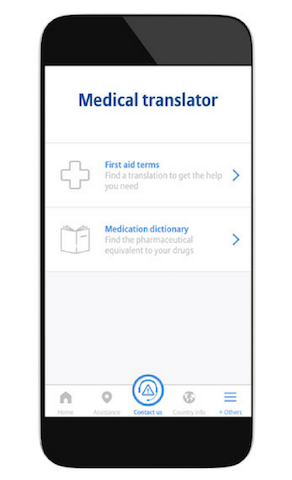
Provide emergency numbers: Once you’ve enabled location services on the app, it can provide access to local emergency numbers for the police, medical care, and fire with one-touch calling. We always recommend storing numbers for the US embassy in your phone for each country you visit, but this app goes a step further, because honestly, how likely are you to write down ALL of these emergency services numbers?

Access a map to emergency services: The TravelSmart app will bring up a map for you of nearby services, like hospitals and pharmacies. Right on your screen, you can find addresses and phone numbers.

Translate: Once, I spent a good five minutes in a Peruvian pharmacy trying to pantomime high altitude sickness. If I’d had the TravelSmart app, I could have turned on the emergency translator and had the right medical jargon at my fingertips. There’s also a medical dictionary, and the ability to convert dosages and measurements in various systems.

Track flights: You can track your flights, any delays, and departure times from the app, once you’ve input your flight information. If you’re an Allianz customer, you’ll want your flight numbers in there anyway, just in case you need to file a claim (fingers crossed you won’t!).

Tip: If you’re already an Allianz Travel customer, you can also track any claims in the app, and pull up your current plan and coverage at any time.

There’s much that families can do to avoid most travel difficulties: map things out ahead of time, get to know the neighborhoods and culture you’ll be experiencing, and keep track of your important documents, phone numbers and WiFi options. A little planning goes a long way! But we all know the unexpected can happen, and when it does, I guarantee you’ll be glad you took a few extra minutes to download this travel app and have it set up to help lend a hand. I’d call this one of the most practical travel apps out there–with a veritable Swiss army knife of features–whether we used Allianz or not.

Download TravelSmart on the Apple AppStore or Google Play Store.

Disclosure: This post was written in partnership with Allianz Travel, in order to make our readers aware of this free service. All opinions remain my own.

Your Favorite Travel Spot Needs You: How to Protect the Outdoor Places We Love

Whether you’re packing up the family for a National Parks tour or getting in a historical monuments road trip, you can give your trips new meaning this summer with Team Sierra.  We love Team Sierra’s fun community of planet-lovers – they’ve come together to raise funds to benefit Sierra Club because protecting the places we live and play is so important and each of us can make a real impact when we all take action together.  Team Sierra is dedicated to protecting our public lands, making the outdoors more accessible for everyone, and helping cities commit to 100% renewable energy, and we highly encourage you to join the team!

It’s never been more important to protect our planet – more than preserving the places we love to visit, it’s also about leaving the world a better place for our children. With Team Sierra, you and the family can set up your own fundraising webpage with one of their many events or create your own campaign.  Every Team Sierra member gets 1:1 support from a professional staff member, and earns Team Sierra swag as they go! Team Sierra and Sierra Club have also proven that they know how to make an impact. As the largest environmental grassroots non-profit, Sierra Club is known for bringing people together to make real change – which is also what makes Team Sierra’s fundraising program so powerful.

Examples of family-friendly campaigns you can create:

The Outdoor Challenge

Use your family trip to challenge yourselves to explore, enjoy, and protect the beautiful places that you see.  The Outdoor Challenge is happening now and wraps up on August 10th, National S’mores Day.  Complete activities like birdwatching, beach cleanup, or hiking a new spot and raise money to earn exclusive collector’s badges that the kids can show off on their backpacks come September!

My Favorite Species

Whether you’ve got sea turtle fans or want to keep the pollinators around for the beautiful flowers, you can dedicate your fundraising to your most beloved species.*  When you pass the $39 mark, you’ll get a plush animal for the littlest, and a fun educational book about endangered species for that summer reading challenge.

My Finish Line

For many, the idea of running 13 miles is unappealing.  For parents who’ve shared a sedan with their 3 kids for the past week, the thought of stretching one’s legs in solitude for 13 miles is a dream.  Join one of Team Sierra’s race events to get those endorphins going and earn that cold beverage.

Create Your Own

Dedicate your road trip to fundraising for our planet by asking supporters for a dollar for every fun fact the kids share about the most recent pit-stop.  Turn those planet themed drawings into greeting cards and auction them off to the fans! It’ so great that there are so many non-profit fundraising ideas out there to help our planet.

By family fundraising, you’re not only giving back to Sierra Club, you’re spreading their mission to the next generation. Sierra Club Mission Statement: To explore, enjoy and protect the planet. To practice and promote the responsible use of the earth’s ecosystems and resources; to educate and enlist humanity to protect and restore the quality of the natural and human environment; and to use all lawful means to carry out those objectives.

How it works:

Set up your fundraising page today!

Note: Sierra Club policy dictates that fundraising pages must be created and managed by an adult 18 or over, but feel free to create a page on behalf of your family!

*My Favorite Species fundraising goes to the general mission of Sierra Club, not to a particular species.