Travel Tip: Is a travel insurance annual plan right for your family?

Two years ago, just before a trip of a lifetime to Paris and Brussels, we learned of the very unfortunate attack on a Paris nightclub, which of course triggered an extended search across country lines…the exact country lines we planned to cross ourselves on our Christmas holiday. We didn’t cancel our European trip, but we did have to reroute one leg, due to airport closures. As I canceled train tickets and lodging in Brussels and rebought in Florence, Italy, where we decided to go instead, I was very glad I’d purchased travel insurance.

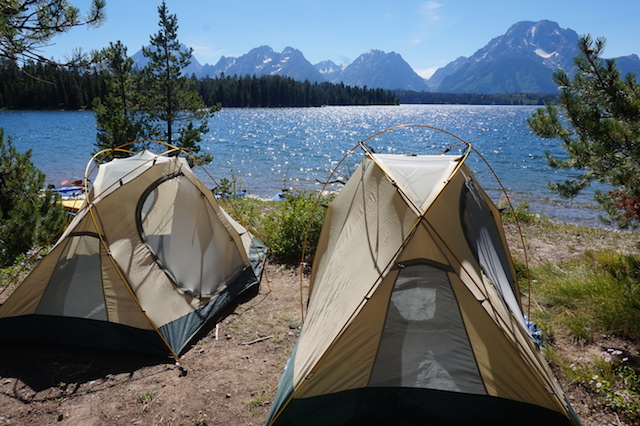
Ditto for the time we booked a cruise to the Caribbean at the edge of hurricane season, when we hiked through Iceland, and again when a snowstorm stranded us in Seattle after a weekend trip to Breckenridge, Colorado. In this case, the cost of a hotel overnight stay wasn’t significant, but I was in a much better mood knowing I’d be recouped for the expense.

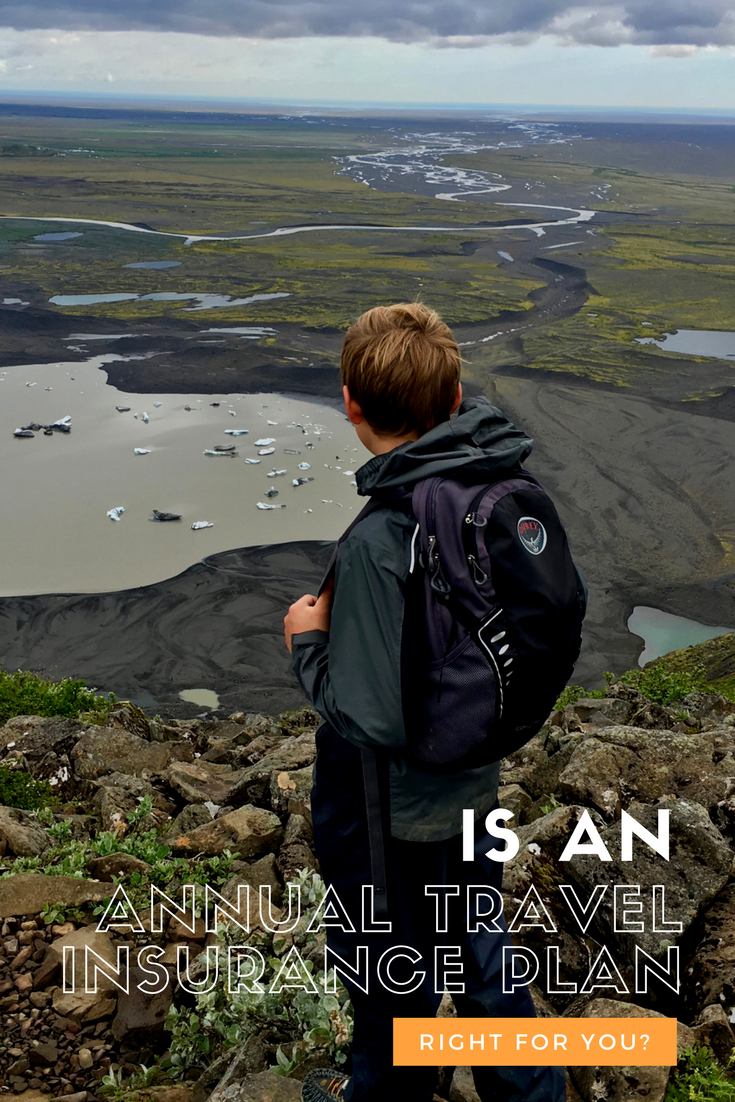
We travel hard and we travel often, usually with an adventurous itinerary. Heck yes, we need travel insurance!

Do you need travel insurance as well? I always recommend asking yourself the following questions to determine if you need travel insurance but I now go a step further: consider whether a travel insurance annual plan is right for your family. Unlike single trip plans, which expire as soon as you’re home, annual plans protect a full year’s worth of vacations, with 365 days of international and domestic coverage.

To cover our European trip, we used Allianz Travel, based on recommendations from other travel experts, and I was happily surprised to learn how little it cost me to have peace of mind (which, it turned out, we needed). Truly, it’s just a fraction of the cost all of us already sink into traveling with our families. After learning about Allianz Travel annual plans, I’ve decided that because we travel at least six times per year, we need to upgrade to this level of protection. I don’t want to hassle with purchasing insurance for every trip. And you know it will be the one trip we decide not to protect that turns into a hot mess, right? That’s just Murphy’s Law.

Allianz Travel annual plan comparison (and who needs what):

If you travel as much as we do, you probably need an annual plan, too, but which one? Here’s how Allianz’ annual plans break down, with our recommendations for each.

Annual Basic Plan: This plan does not include trip cancellation protection, which frankly, I think is essential, so it’s not the plan for me. That said, you might have trip cancellation coverage through a credit card you used to book your airfare or lodging, in which case, the basic plan is all you need. It includes emergency medical protection and emergency medical transportation protection (so important overseas where your personal health insurance may not reach), plus trip delay protection, baggage benefits, rental car damage protection, and a 24/7 assistance hotline to help with travel-related emergencies.

Annual Deluxe Plan: The Annual Deluxe plan adds trip cancellation coverage ($2,000 annual maximum), plus everything you get in the basic plan, like trip interruption, emergency medical, lost, stolen or delayed baggage and even rental car damage protection.

Annual Executive Plan: This one is better for the most frequent travelers who need who need higher trip cancellation and interruption limits (tiered levels up to $10,000 annual maximum). Of course, you still get all the other benefits listed above. If you’re planning that epic, once-in-a-lifetime bucket list-worthy trip, you may want to upgrade to this plan.

Lastly, there’s a Premier Plan, which requires a phone call to learn more about, for the absolute greatest coverage with worldwide protection. If you want or need the most extensive concierge service, call about this one.

Note:

Allianz has recently upgraded their annual policies in light of the recent pandemic. Their newly filed policies now include permanent accommodations for epidemics, not only the current COVID-19 but others that may form in the years ahead. This benefit is now offered beyond single trip products and I am sure it will help many travelers.

Learn more about the Epidemic Endorsement Product (EEP) benefits here:

Do you purchase travel insurance? Would you consider an annual plan? Let us know!

Disclosure: This post is written in partnership with Allianz Travel, for the purpose of educating my readers about available plans. All opinion remains my own.

Ski trip planning hack: Using GetOutfitted to rent ski wear

Ski and snowboard wear is expensive–very expensive, in fact–and for some families, the cost to outfit everyone for one or two ski trips per season is simply not worth it. Our family skis much more often than that, but with the rate my teens are growing, I never know what will still fit them, even from month to month! Enter an interesting solution: GetOutfitted.

What is GetOutfitted?

It’s a new service that rents outer wear, plus ski gear ranging from ski packages to Go Pros. You select the items you need online, picking your jacket and snow pants a la carte based on the styles you like, or selecting a pre-determined package. I’m very familiar with the latest outdoor wear brands, and they’re all here. Once you’ve made your selections, you input your vacation dates and destination, and GetOutfitted will FedEx your ski wear directly to your hotel, condo, or vacation home. If you opt to rent skis and/or snowboards, too, they’ll be delivered to your door via a local ski rental partner. When you’re done with you vacation, you just put the ski wear in their pre-paid, included package and drop it off at any USPS mail center. You get free shipping both ways.

What can I get?

rent-ski-wear

Premium outerwear packages for women or men include a top-brand jacket, pants, gloves, and googles and rent for approximately $45/day. Standard packages include the same items, with slightly less trendy brands, and cost $30/day. Kids’ packages are $18/day, which is a true deal. As mentioned, you can also shop a la carte, plus can add base layers and socks, which you buy instead of rent. If you don’t have base layers, we highly recommend getting them. They’re listed for approximately the same prices you’ll pay anywhere else.

In the ski gear category, you can rent full ski or snowboard rental packages, starting at just $25/day for adults and $15/day for kids. Rental packages come with helmets as an optional addition (recommended). All ski wear and gear has a three-day minimum rental period outside of Colorado Rockies resorts.

Where is it offered?

Just about everywhere you might go for a destination ski vacation. The company is based on Colorado, but we used the service for a ski trip to Lake Tahoe, California.

Our experience with GetOutfitted, start to finish:

We didn’t need to rent full outerwear packages from GetOutfitted, which is the most affordable way to do it. We still got a good value, however, renting pants for our Pit Stops for Kids’ dad. His pants were $48/3 days. Buying him a pair of pants for the trip would cost $150 at the minimum, assuming we found a good deal on quality pants, and buying the exact pants he rented would have been $299.

getoutfitted ski gear

Pit Stops for Kids’ dad in GetOutfitted ski pants.

While we were renting pants, we decided it would be fun to rent a Go Pro for the teens to use on the mountain. Merry Christmas to them! The Go Pro rented for $40/3 days, and the chest mount to wear it cost $12/3 days. Is this $52 critical to our ski trip? No, of course not. But it’s a vast savings on buying action camera equipment we’ll only use occasionally, and the kids really loved it.

While on the site, I initiated a chat with a GetOutfitted expert, who answered my questions promptly. What I asked: ‘Can I reserve for fewer than three days?’ and ‘Do you rent helmets’. The latter is not obvious until you select the ski resort or town you’ll be visiting, which pairs you with a local rental company. When I placed items in my shopping cart, I selected the exact dates of rental, and when I checked out, I entered our vacation rental home address. The ski wear and gear were sent directly to our rental.

When we arrived at our vacation rental, the box from GetOutfitted was waiting for us by the front door. Inside, we found the ski pants and Go Pro, plus a large, prepaid return envelope. Included with the Go Pro was a set of instructions, which, combined with a Google search for the Go Pro website, proved adequate for figuring it all out. We were provided with a memory card, USB cable, and the chest mount equipment (which we paid for), plus a few more mounts, which we could use to mount the Go Pro onto our helmets (after buying disposable adhesive mount stickers, which are found at any ski gear store at most ski resorts).

GetOutfitted

The kids had fun taking video on the mountain, which we downloaded to our computer at the vacation home (use the USB cable). You’ll want to make sure to download all your videos before returning the Go Pro (or pay a fee for GetOutfitted to download it all for you).

The ski pants worked perfectly, and we returned everything at the end of our trip by dropping off the package at a USPS store. Easy-peasy. To rent your own ski gear, start at GetOutfitted.com and go from there!

We tried out GetOutfitted free of charge, for the purpose of review.

Tips for planning a family reunion

Planning a family reunion can take as much effort and attention to detail as planning a small wedding. Bringing far-flung family members together in a way that’s both convenient and fun for everyone is possible, however, if you know when to start, where to look for lodging, and what to plan to ensure success. Use the following family reunion planning hacks to become the hero of your next family get-together!

family reunion

How to Pick a Family Reunion Destination

The first step in family reunion planning is to decide where to hold the grand event. It’s important to take into account invitees’ geographical location, budget, and the overall theme of your reunion. Here’s how to go about it:

1. Choose a central location. Depending on distance between family members, pick a central location within driving distance, ideally near a major interstate, or adjacent to a “hub” airport everyone can fly into with minimal stress and cost.

2. Decide on a focus. Your reunion will be all about family time, but will you spend it outdoors enjoying a common activity, in a city with access to museums and culture, or primarily indoors?

3. Decide on a budget. Before determining a destination and lodging option, it’s essential to set a general budget. Will every family member be responsible for their own transportation and lodging? Will some costs be shared among the group? An informal poll among family members can be valuable at this stage.

4. Decide on lodging type. The cost and theme of a family reunion will vary based on the type of lodging chosen. Ask yourself whether your family will want to stay all together, or spread out in individual units or rooms. Do you want meals and activities to be included, or would you rather plan your own?

5. Think “large group” as you plan. Ask hotel or resort booking agents for a deal on booking multiple rooms, or for their group rate. Consider what lodging options are less likely to be at capacity during your reunion, to ensure you can get the space you need. For example, a ski resort has plenty of rooms (with discounts) during the fall, and a warm-weather golf resort will have extra space during the hotter months.

Determining a Family Reunion Timeline

Once you’ve decided where to go, what type of lodging would be best, and what type of activities family members would enjoy, it’s time to start booking.

8-12 months out: Book lodging, depending on the popularity of the destination. Many lodging options have limited space for large groups, making early bookings essential. Be aware of the cancellation policy at your venue before making the decision to book. Send out reunion invitations to family members. Sending invites out now ensures invitees have enough time to plan and book travel.

Six months out: Buy airfare for domestic travel.

Three months out: Plan a daily itinerary of any activities or events. Three months is the standard amount of time needed by hotel or resort personnel you enlist, concierges, or tour operators.

One month out: Organize family members with meal lists, menus, or cooking duties.

Two weeks out: Email or mail driving directions, reservation numbers, or any other detailed information guests will need when they arrive.

Day of event: Greet family members and have a great time!

Planning Food, Dining, and Activities

Once you’ve determined where to go and where to stay, the next step in planning a family reunion is to organize activities and dining. To ensure your family members don’t scatter to the wind (or become bored), keep them in the loop with the following hacks for organizing family members:

Make a meal list and share cooking duties: If your lodging option leaves the cooking (and cleaning) to you, share the load. After all, that’s what family is for, right? Assign each night’s main meal to a different family member. Decide ahead of time whether groceries will be bought together or separately.

Create an activity itinerary: Not every family member will have the same interests, but you’re hosting a family reunion to be together, so plan at least one activity per day that everyone can enjoy together. This activity can be as simple as a family walk or as elaborate as a family photography session or scavenger hunt, depending on ages, mobility, and interests. Have additional daily activity options, which family members can join at will.

Book group tours and experiences: Book a class, tour, or experience that will be new (and accessible) to everyone in the group, such as a cooking class, bird-watching tour, or nature or historic walk.

Communicating With Family Members

Finally, it’s essential to have strong communication with family members during the planning process as well as during the actual reunion. Use the following tools to aid communication:

Download resort or vacation rental company apps: Most resorts have their own app, which includes maps, walking tours, activities, and cost information. Some apps, such as vacation rental apps, even include secure messaging between home owners and renters.

Use HipChat or WhatsApp: Talk among family members for free both before and during the reunion, no matter what carrier or data plan is used. Family members must have a smartphone, however, to use these mobile apps.

Use TripIt to share vacation plans: TripIt can be used on a desktop or laptop computer or on a smartphone, allowing the trip planner to share important travel information, reservation numbers, and itineraries with select people.

Use a Facebook private group to share info: Provided family members use Facebook, a private group page can allow members to share photos, itinerary ideas, links, and lodging picks in a free-form way.

Enjoy your family reunion, and remember to take plenty of photos!


Source: Fix.com Blog

Disneyland California Adventure MaxPass and how to use it

Have you heard of the new Disneyland and California Adventure MaxPass yet? Here’s what you need to know about Maxpass, in order to maximize your time in the parks.

disney maxpass

First, the facts of Disneyland California Adventure MaxPass:

Disney’s optional MaxPass designed to do two basic things: 1. take FASTPASS paperless in the parks, and 2. streamline your PhotoPass experience. Here’s how:

With MaxPass, families can reserve FASTPASS tickets for rides on the MaxPass app, which eliminates the need to run across the parks to get FASTPASS tickets out of the kiosks. I know what you’re thinking…how will we get our steps in now? MaxPass does not alter the way FASTPASS works: you’ll still only be able to hold one FASTPASS at a time (unless you’ve reached the window of time in which an new one is available), and the rides offering FastPass are the same as before.

I tried out the Maxpass system recently, and I did notice a few small changes going paperless. The longest period of time between making reservations is an hour and a half with MaxPass (instead of two hours with paper FASTPASS), and the return time windows are often sooner than with paper FASTPASS.

And if you use MaxPass, you can have your park photos (you know, the ones taken by official Disney photographers) and character photos put directly onto your app account, instead of having to buy them later. (You have until your park tickets expire to download them). You can also scan your ride photos and put them in the app, too.

When I used the app, I had trouble with the ride photo option: it notes that it can take up to 20 minutes for ride photos to appear, but I didn’t get mine until the next morning…hopefully this is just a temporary or isolated glitch.

How to get MaxPass:

  1. Download the Disneyland app.
  2. Enter the park you’re visiting using your tickets.
  3. Open the app.
  4. Tap the circular character icon at the bottom of the screen (it looks like a Mickey).
  5. Sign in to the app with your Disney account (or create one).
  6. Tap “Get FASTPASS”.
  7. Select all family members who want to use the Disney MaxPass feature (if someone is not listed, link their ticket or pass).
  8. Purchase the Disney MaxPass feature (right on the app).
  9. Go to the FASTPASS section and reserve.

MaxPass facts and tips:

  • MaxPass is optional and it’s a paid upgrade. I’m disappointed about this, because I loved that Disney resisted adding paid upgrades until now. It’s $10 per family member. (I’ll get to whether I think it’s worth it in a bit.)
  • The regular (paper) FASTPASS system is still in place. You don’t have to upgrade to MaxPass.
  • You can pay for MaxPass as an add-on when you purchase your park tickets, or later, right on the app.
  • MaxPass is unlike Magic Bands (in DisneyWorld) in that you must reserve your FASTPASSes the day-of, in the parks, not before your trip. You can’t even do it in your hotel room….you must be in the parks (though either park is fine).
  • If some members of your group are using paper FASTPASS instead of MaxPass, you can still link those people to your MaxPass. You won’t be able to reserve FASTPASSes for them, but you can see their schedule and return times.
  • If you have problems with MaxPass, any Guest Service location can run tech support.
  • You’ll want to get the app and register as a user before your trip. It’s a hassle to do in the parks.
  • You can’t get World of Color or Fantastic FASTPASS with MaxPass…just rides.
  • You’ll absolutely need a portable charger to use MaxPass, as it drains your phone! And it takes data, because the WiFi in the parks is simply not adequate.
  • If you have kids who don’t have their own phones, one adult can ‘hold’ their FASTPASSES on their device (but the kids will still need to ‘buy’ MaxPass).

Disneyland_hotel

Is MaxPass worth the upgrade? It is, if you answer yes to at least a few of these questions:

1. Your family often changes plans mid-day (you can cancel FASTPASS reservations right on the app and start over).

2. You hate running around to physically get passes.

3. You want to see all available ride and return windows at once (the handy map on the app shows you all this, plus your personal reservations for your whole group). If this is your main ‘want’, simply upgrade ONE person to MaxPass.

4. You often buy PhotoPass photos or ride photos (making the $10 worth it for unlimited downloads).

Tip: I recommend trying MaxPass on one or two phones to start with, and if you love the system, splurging for everyone in your group.

How to physically use MaxPass to get FASTPASS:

Follow the prompts one the app to reserve FASTPASSes (you’ll see a list of all available, plus their return windows). If you already have a FASTPASS, it will not allow you to get another one (unless you’re in the time window).

At your return time, go to the FASTPASS return lane and scan your FASTPASS at the computer kiosk at the entrance to the return line (a Cast Member will be there to assist you). Don’t put your phone away yet, though, because you’ll need to scan it again before loading (just like you have to show your paper FASTPASS twice).

After your ride, your FASTPASS will disappear from the app. In the event of a ride closure or breakdown, you’ll automatically receive a Multiple Attraction FASTPASS, which is good for one ride on any attraction with FASTPASS.

Have you tried the new MaxPass system? Do you like it?

Planning a Family Ski Vacation: Where to Go for Snow

In the past few years, the ski scene has changed with changing weather patterns. For the many families who only take one major ski vacation per season, it’s more important than ever to know where to go for the best conditions. And yes, NOW is the time to book!

Planning a family ski vacation: Where to go for snow

While no resort or ski area can guarantee good snow pack when families book in advance, it’s possible to increase the odds of enjoying peak conditions (no pun intended) by booking one of the following US and Canadian ski resorts with the most consistent annual snowfall. When you want a sure thing for your family ski vacation during an unpredictable winter, go here:

1. Alta Ski Area, Utah

What places Alta at the top of the list? With a base elevation of 8,530, Alta has a leg up on many resorts. The dry, light snow of the Wasatch Mountain Range of Utah isn’t quick to melt, and Alta’s location west of Park City seems to be a magnet for regular snowfall. Still unsure? Trust fellow skiers and snowboarders: Alta was voted best ski resort for consistent annual snowfall in the recent Best Family Ski Resorts poll conducted by family travel expert Trekaroo.

2. Whistler Blackcomb, British Columbia 

Don’t be fooled by the rain that often falls at Whistler’s base area, which is hit by precipitation from the nearby Pacific. Higher up, the powder will be accumulating. Recognized as one of the most reliable North American resorts for snow pack, Whistler Blackcomb also has one of the most comprehensive village scenes, aiding in a great vacation, even if, by chance, the snow isn’t want you were hoping for.

3.  Jackson Hole, Wyoming

The cowboy town of Jackson Hole has as much going for it in winter as in summer. Known for its powder bowls and backcountry ski terrain, Jackson Hole consistently receives over 9 meters of snow due to its location in the Teton Mountains of the Rockies. Book this ski resort in December, January, or February for the best conditions; the season starts in November and ends earlier than its snowpack requires, due to its placement on an elk migration site.

4. Big Sky Resort, Montana 

With an average of 400 inches, it’s no wonder Big Sky, located in southwestern Montana, needs snowmaking capabilities on only 10% of the mountain. Plus, Big Sky now has more snow to play in, thanks to the acquisition of adjacent Moonlight Basin. It’s known for its deep stashes, but also has perfect groomers for younger kids and beginners. After a day of ripping it up on the mountain, be sure to stay at the Summit at Big Sky, where a 100-person hot tub awaits.

5. Northstar California

Located in the heart of North Tahoe, Northstar doesn’t always get the biggest natural snowpack among North American resorts. However, it’s makes the list for an important reason: Northstar has the best snowmaking capabilities in Lake Tahoe. What this means for skiing and snowboarding families: a sure thing, even when other resorts in the area are closed. Northstar is a great pick for early ski season trips, when it’s unclear what Mother Nature will bring.

Now, book early and without fear of a lack of snow upon your arrival!

10 tips for using ferries for Northwest travel with kids

If you travel extensively throughout the coastal northwest, your route will eventually necessitate using Washington State (WSDOT) ferries or BC Ferries. Both are well-run ferry transportation options, but can seem intimidating to the occasional Northwest traveler. My family and I learned the ropes (at least, most of them) the fun way on a 10 day trip throughout coastal BC and Washington islands. What we found families need to know before traveling by ferry with kids in the Pacific Northwest:

10 tips for using ferries:

tips for using ferries


1. Know which ferry passages can be reserved in advance.

Most BC Ferry routes can be reserved ahead of time (though not all…more on that below), whereas most Washington State ferries cannot. If you’re traveling during peak tourist season (summer), reservations are at very least helpful, and sometimes crucial. BC Ferry schedules are listed clearly, and travelers can create an account on the BC Ferry website to make reservations for most routes. Reserving ahead of time is helpful not only because it ensures your passage, but also because it allows you to use the website to receive email alerts for any schedule changes to your route. Smaller routes, such as the ‘most scenic short-cut in the Northwest’ from Mill Bay, BC to Brentwood Bay, BC, are not reservable, but the heavily traveled routes, such as Vancouver to Nanaimo, always are.

Schedule your ferry passages at the time you plan your travel itinerary.

Ferry passages (and their schedules) just might change your plans. For instance, I was surprised to find out that my preferred route of travel from the San Juan Islands straight to Seattle was not possible, despite being geographically close by, nautically-speaking. Neither was my plan to traverse from Victoria to Friday Harbor. No worries: once I’d seen where offered ferries do travel, I was happy to adjust my plans. After all, there’s really no bad place to be along the Pacific Northwest coast.

bc ferries

3. Be on time.

And by on time, I mean at least 1 hour early, if you’re driving a car onto the ferry. Yes, even if you have a reservation. And yes, even on the small ferry routes. This seems inconvenient, but on our recent trip throughout Vancouver Island, Washington, and Vancouver BC, we didn’t mind. Once you’ve queued, you’re free to turn off your engine and get out of your car. At every ferry terminal we encountered, restrooms were available at minimum. At maximum, we enjoyed restaurants, scenic views, gift shops, and more.

4. Consider purchasing a Waves2Go or Experience Card if you’ll be using ferries for an extended time (or numerous passages).

Waves2Go is WSDOT’s monthly pass, and the Experience Card is BC Ferries convenient swipe card that can be preloaded with fare (at a discount).

bc ferries

5. Budget in the cost of bringing your car along for the ride.

The most expensive passenger on any ferry ride is your car. On our BC Ferry passage from Horseshoe Bay (Vancouver) to Nanaimo, our car cost us $75, and our Washington ferry ride from Sidney BC to Friday Harbor, WA cost us $45 in car fare. (Passengers are typically around $15 on longer passages, and as low as $7.50 on shorter passages.

6. Consider your ferry passage as both transportation and a scenic tour.

Northwest ferry passages are downright beautiful, and often wildlife can be spotted. (We saw jelly fish swimming on our shorter passage, and harbor seals in the San Juans.) In poor weather, most viewing decks have covered areas; go outside rain or shine!

bc ferries

7. Get out of your car as soon as you’re given the go-ahead by ferry personnel.

We quickly learned that there’s precious real estate on every ferry: window seats. The sooner you’re up from the car decks, the better your chances of snagging some. A few seats do have outlets, so don’t forget to bring any devices that need charging from the car. The ‘get out of the car early’ rule goes double on large BC Ferries if you’re planning to purchase a meal (at mealtime) onboard. Lines at breakfast and lunch go long.

bc ferries

8. Entertainment on board a Northwest ferry varies.

On large BC Ferries, you can expect gift shops, child play spaces (similar to what you’d find in airports) and even small arcades. Inter-island and Anacortes ferries in Washington will have snack shops and viewing decks, but little else. Tip: look for partially completed jigsaw puzzles on random ferry tables…they’ve been left for the next passengers. See how many pieces you can contribute before disembarking.

9. Remember to convert your money before leaving BC for Washington, or vice versa.

Washington ferries no longer take Canadian currency for on-board purchases, and shops and restaurants on the Sidney, BC side will not take American as a rule.

10. Don’t forget your passports.

Crossing the border by sea requires the same documentation and immigration process as crossing by land. All adults will need a passport, and kids will need a passport or birth certificate. If you’re traveling without one custodial parent, a letter of consent is required. (We didn’t have one from my husband, who was not with us, and we were allowed to enter Canada anyway, but the officer let us know it is needed.)

15 ways to fill the dog days of summer: late summer getaways and tips

By this part of summer, some families have already begun the school year, and the rest of us are in the last leg of vacation. If you’re like us, the planned summer trips are behind you, yet empty days still stretch ahead. How to fill these dog days of summer? We have 15 ideas for late summer getaways, day trips, and pit stops.

dog-days-summer

1. Check ReserveAmerica for last-minute cancellations at a local state park.

Yes, you’ll remember we recommended getting summer camping reservations months ago. But last-minute cancellations happen all the time. If your dates are flexible (the days seem to stretch out endlessly at this time of year), make a habit of checking the reservation page for your favorite local campground each morning when you check your email. You never know when an overnight opening may pop up!

2. Find a summer festival.

Look in your local paper or the tourism website of your state or city, and make a plan to experience a new-to-you festival. Last summer, we were happily surprised by both a local brewfest (surprisingly kid-friendly!) and local kite festival. Other popular festivals include music festivals and art festivals. Make a day of it, packing a lunch or even planning an overnight.

3. Take a day hike.

Too worn out to plan a camping trip? Take a long day hike. Use the long summer daylight hours to plan a multi-hour hike on a trail near home, and bring enough provisions (such as swimsuits, food, water, and towels) to really make a day of it.

4. Backpack in a nearby national forest.

Feeling more ambitious? An overnight backpacking trip can make you feel as if you’ve really gotten away from it all, without too much time or cash investment. If you have your own gear, all you need is a local national forest (and possibly a permit, usually granted at the forest service office nearest the trailhead). Don’t have backpacking gear? Rent it!

5. Try a new museum.

Do you have a membership to a science or children’s museum? Are you sick of it after visiting all summer? We hear you. Try a new one in another city within your region. Most museum memberships come with to perk of visiting others in a network, which will honor your local membership with free admission. Learn more here.

6. Use a summer hotel deal.

Many hotels offer great incentives to visit at the tail end of summer. Check the website of your favorite hotel nearby or in an adjacent city for an easy getaway. Look for back-to-school specials or themed deals, such as museum packages, mother-daughter packages, or dining packages. Here are some deals available nation-wide at one of my favorite hotel brands, Kimpton.

7. Take the dog to a public pool.

Look for the announcement: at most public city pools, the city offers a ‘dog day’ on the day after the last day the public pool is open for swimming. This is a fun time to let the dogs swim before the pool is drained for the year. If your local pool does not offer a dog day, or you don’t have a dog, look for other fun end-of-summer pool events, such as rubber duck races or boat derbies.

8. Find a wine or ale trail.

Surprisingly, wine tasting and cider or ale tasting can be a family-friendly activity. Many agricultural regions around the country now sport wine or ale trails, where families can drive from location to location for tastings. Many wineries have nice outdoor spaces perfect for picnics or lawn games like bocce ball. Don’t have a wine trail near you? Look for a farm trail with farmsteads to frequent, or find a farmer’s market. Here’s our local wine trail.

9. Look for a living history day.

Give the kids a history lesson before school starts. We’ve found living history days locally that cover everything from pioneering history to Civil War battles. Most living history days will be hosted by a local history association chapter, historical site, or state park. Start your search at the National Historical Society.

10. Raft a river.

While we certainly love multi-day rafting trips, day trips can be wonderfully fun as well. Take your own inflatable rafts on a tame river, or rent a raft from a local rafting company. Even fairly small rivers tend to have recreational enterprises along them. Don’t want to plan it yourself? Go with an outfitter. Some of our favorite day tripping rivers include the Deerfield in Massachusetts and the Deschutes in Oregon.

11. Have a stay-cation.

Eat out at your favorite restaurant, get tickets to the latest blockbuster, and round out your day with a game of mini-golf. Better yet, plan a ‘local food’ day, and head to the farmer’s market, followed by a trip to a local farm, orchard, or factory, sampling local foods along the way.

12. Camp in the backyard.

Tried and true! We have a large tent set up in our backyard most of the summer, and the kids enjoy inviting friends for tented sleepovers. Don’t forget to move the tent every few days to keep your grass alive, and be sure to turn off any automatic sprinklers! Place a small table in your tent and keep a deck of cards or a board game at the ready, along with a camping lantern.

13. Plan a bike trip.

Take your bikes and find a local trail. Many towns and cities now have specialized cycling paths, or families can find single track mountain biking trails. Be sure the trail system you chose allows bikes (as opposed to only hikers) and if you can’t transport bikes easily, find a route from your own neighborhood. Find trails near you.

14. Rent a new water toy.

Head to your local lake and rent a row boat, stand-up paddle board, kayak, or raft. The cost of the rental will be worth it when you don’t have to haul the toy to and from home, and having a novel pastime will keep kids busy for a number of hours. We love playing on SUPs (stand-up paddle boards) the best!

15. Take a tour or have an experience with Groupon or Cloud9.

Find a local activity at a discount with Groupon, or search Cloud9 to find out what adventurous or new experiences are offered in your area. Activities range from paint ball to sky diving to kayaking. Either site can help you find something new to do that you may not have tried otherwise.

What are your end-of-summer plans? How do you beat August boredom?

How to get kids to sleep while traveling (no matter what age)

I’ll be honest: we’ve had some insanely sleep deprived family vacations. We followed every parenting book in the…well, book, but when our kids were babies, toddlers, and preschoolers, they struggled to sleep anywhere, no matter what we did. This torture, of course, followed us on any trip we took. Now that our kids are older, we all sleep better, but there are still nights on the road when we need some extra help getting everyone enough rest.

how-to-get-kids-to-sleep

If you, too, struggle knowing how to get kids to sleep while traveling, this post is for you. I polled family travel experts across the globe, soliciting sleep ideas from everyone with babies to teens. Not every idea will work for every family, but hopefully at least a few of these tips will resonate with you and your crew. Our own Pit Stops for Kids tips are listed first in each category, with tips from other experts below, marked by author and a handy link to each external site.

For parents with babies, toddlers and preschoolers:

Try to keep your child’s nap and bedtime schedule as close to normal as possible. This may mean skipping an afternoon activity or returning early from a tour to respect nap time, or settling kids in bed earlier than you’d like at night. Of course, short trips can survive a less rigid sleep schedule, while longer trips require more planning. Check out this nap guide from Nicole Wiltrout of Arrows Sent Forth. As an alternative viewpoint (parents have many styles!), try Jessica Bowers of Suitcases and Sippycups idea of doing whatever it takes to get kids to sleep, even if it means changing the rules.

Get a suite whenever possible! The good news: more and more hotels offer suites or ‘family’ room configurations than ever before. Having two separate spaces, even if it’s a bedroom and a living area, is immensely helpful when family members have different bedtimes. We often put the kids in the master bedroom and slept on the pull-out couch in the living space, just to ensure four walls and a door around our sleeping kids. Nicole Wears of Traveling Canucks echoes this tip!

Turn off air-conditioners and heating units. In mild seasons, turn off those noisy air conditioner and heater units that kick on and off all night long, waking everyone up. I’m embarrassed to say how long it took me to realize I could pull the plug on these and sleep better though the night.

sleeping-in-hotels

Use a white noise machine. Cue up white noise on your phone (there are many apps for that), or bring along a travel-sized white noise machine. I know for a fact that my love of white noise machines is shared by Li Ling Pang of Trekaroo and Keryn Means of Walking On Travels!

Black out windows. The darker the room, the more likely it is you will all get more sleep. Robin Hutson of Luxe Recess says, “You can still make the room nice and dark by packing six dark black garbage bags and painters’ tape. Yes, garbage bags! If you tape the garbage bags up to the windows, it will create a serene sleep environment for you and your family. If you forget your garbage bags and tape, you can clip together curtains that won’t shut using the skirt hanger clips from the closet.” See more tips from Luxe Recess.

Break up the day. Marisa Langford of Trekaroo says, “Having four kids spanning from 2-10, we have 2 “fun shifts” on vacation, early and later. We are up early playing pool side or out and about in the new city, but them it’s back to the hotel to nap….and typically everyone naps, including my 10-year-old. We get up and we are back at it. This prevents melt downs from the baby and doesn’t push everyone to the brink of exhaustion. 

Bring comforts of home. Hilarye Fuller of Dotting the Map says, “It really helps my little ones sleep in a new place that is unfamiliar with them if they bring a few comfort items with them that remind them of home such as a blanket, baby doll or stuffed animal.” Corinne McDermott of Have Baby Will Travel takes this idea a step further, and always brings baby’s own sheets from home to acclimate him or her to a new crib.

For parents with school-aged kids:

Consider meditation. Sounds too far out there? I get it. But for our kids, it has worked. Especially if kids listen to meditation CDs or audio at home, they will find the familiar routine soothing. We have recently been introduced to the kid-specific meditations at JoyOhBoy.

Only loosen bedtime rules if kids have time to sleep in. The way we travel, we’re busy during the day, and often getting up at the same time we do for school in our daily life, to meet guides, take tours, or explore. Therefore, it doesn’t make sense to extend bedtime for ‘vacation mode’.

Read together before bedtime: I know, that hotel TV has a zillion channels, and the kids haven’t gotten their Nick fix in a long time. But studies have proven that reading before bed instead of watching a screen helps kids relax. Get that required reading for school out of the way and allow the kids to doze off with books in bed. Better yet, read aloud to kids nightly as a family activity.

For parents with teens:

Adjust travel itineraries to allow for sleep-in days. This has been a lesson I’ve learned in the past few years. I’ve adjusted our go-go-go schedule slightly, to allow the kids to sleep in (even just until 8 am) a few mornings. This way, they can take up later at night to enjoy the destination or resort.

Eat healthy. When kids travel, they often eat differently while rules go out the window. Extra sugar, processed foods, and caffeine can affect sleep, as we all know. Stick to your usual diet, or at very least, limit sugar and soda after dinner.

Allow teens some ‘downtime’ with TV. Everyone, including teens, should read right before lights out, instead of looking at a screen, but first, some TV time can ease teens into a less-than-desireable bedtime. Note: if you watch programs via Netflix and you’re traveling outside the U.S., you may need to ‘unlock’ first with a vpn that works with Netflix, so you’re not blocked from viewing internationally.

On jet lag and time zones:

Don’t try to adjust to slight time zone changes. Leslie Harvey of Trips with Tykes says, “On short trips (2-3 days) where you are only changing a few time zones, don’t try to adjust your child to the new time zone. Stay on the time back home to avoid too many changes in such a short period of time. This method works especially well for West Coasters heading East, as you can keep your children up until 9 or 10 pm Eastern time with no problems. Just make sure your hotel has good blackout shades to prevent any early wakeups with the sunrise.

Embrace jet lag when it can’t be helped. Keryn Means of Walking On Travels says, “Embrace the 2 am or 4 am wake ups that come with jet lag, especially when traveling outside of the U.S. Have snacks or breakfast ready at those times so you can get up, have a little breakfast, watch a TV show or play for a little bit. After an hour or so go through your bed time routine again and hope the kids will go back to sleep.

Get sunlight. Becky Morales of Kid World Citizen says, “I really believe in getting outside in the sunlight to reset our natural, circadian rhythms. When it’s not the time zone change, but just the long days of traveling that’s causing stress, I like to get an early-ish start on the day, but then come back to the hotel for a siesta in mid-afternoon. Everyone can rest/read/sleep and then head back out for more sight-seeing and dinners outside enjoying the evenings.

Photo credit: Flickr/Ryan Dickey

SaveSave

SaveSave

SaveSave

SaveSave

SaveSave

SaveSave

Tips for kids flying solo as unaccompanied minors (STEP BY STEP GUIDE)

Once upon a time, the whole family was enjoying a Laguna Beach vacation. The only thing missing: my son Calvin, age 11. We booked him a one-way flight on Alaska Airlines (escorted to the plane by his grandfather). And it was easy! If you’ve never booked an unaccompanied minor’s flight, we’ll walk you through the steps for kids flying solo.

flying tips

Step 1: book your minor’s flight

On Alaska Airlines, booking your unaccompanied minor’s flight is as easy as clicking ‘0’ in the ‘adults’ field when booking a ticket online. Once you’ve done so, you’ll be automatically directed to Alaska’s unaccompanied minor page, which will list restrictions and fees ($25 each way at the time of our flight) and provide the Guardian Contact Form you’ll need to fill out to ensure your child’s parent or guardian can pick him or her up on the other end.

Note: Children ages 5-17 can fly as unaccompanied minors. Kids 5-7 are restricted to only direct flights (recommended for all unaccompanied minors if possible).

Step 2: Fill out the Guardian Contact Form

Once you have your child’s flight number(s), fill out the Guardian Contact Form, keeping in mind that your child will only be released to a person listed on it (be sure to have at least two listed, just in case). Print the form using your child’s confirmation number, and bring it with you to the airport.

unaccompanied minorNote: What you’ll also need at the airport: your child’s e-ticket or confirmation number, and a debit card for your child to use if you’d like him or her able to purchase food on the plane. (We recommend simply feeding your child a meal or purchasing a meal prior to boarding instead, if possible.)

Step 3: Arrive at the airport 90 minutes prior to departure to accompany your child to the gate

An escort pass to accompany your child through security must be obtained prior to the standard check-in process, and can be obtained at the check-in counter. Be sure to have your ID handy, and make sure any purse or bag you’re carrying is security-ready. What else you’ll need at check-in: your child’s passport if flying internationally (no picture ID was needed for a minor’s domestic flight) and your Guardian Contact form.

Step 4: Arrive at the gate 30 minutes before departure:

Alert the gate attendant that your child is flying unaccompanied, and he or she will board first with an escort. Before he or she boards: make sure he or she has eaten (or has food with him or her) and has a carry-on that is manageable, in which his or her on-board entertainment is readily accessible. If your minor will be connecting with another flight, it can be useful to give him or her a cell phone. The gate attendant will ask you to wait until the flight has departed.

Step 5: Picking up your minor

The parent or guardian at the other end of the journey will need to arrive at the check-in counter of your airline in time to get through security before the plane lands (I recommend 1 hour prior, to be safe). At the counter, the guardian will identify him or herself, show ID, and be given a pass to allow your through security to the gate. (You should also be given gate information, including the time the plane is due to arrive.)

Once your child has deplaned, an escort will check the guardian’s ID against names listed on the Guardian Contact Form, and release your child.

Why Alaska Airlines? Alaska Airlines did not sponsor this post in any way. We used Alaska in this step-by-step guide because we it’s the airline we patronized when flying Calvin solo, and (to no surprise) found the process to be friendly, easy, and enjoyable. Alaska is a top family-friendly airline, and Pit Stops for Kids recommends it wholeheartedly for its efficiency and stellar service.

Tip! Have a teen flying solo? Read our tips for teen international travel…and what to do when things go wrong.

What to expect on an O.A.R.S. river rafting trip

Earlier this month, we enjoyed our fourth multi-night rafting trip with O.A.R.S. If you do something four times, it’s because you love it, and there are very few vacations we’ve loved as much as O.A.R.S. trips. This unique family vacation combines some of our favorite things: outdoor exploration, adventure, isolation and off-the-grid family time, and conservation. And it packages all these elements into a vacation where my husband and I don’t have to worry about directions, dining, or any other major decisions.

oars river rafting

If you’ve read our previous reports from O.A.R.S. trips, which include our two times on the Rogue River, our trip on the Salmon, and our trip in the Tetons, and you still haven’t booked a river rafting trip with your family, maybe it’s because you’re not quite sure what to expect, are not quite convinced such an outdoor trip will be in your family’s comfort zone, or maybe just fear the unknown. I understand. I’m here to help, and I’m going to get really nitty-gritty with you, because knowledge is power, right?

What to expect on an O.A.R.S. river rafting trip:

What to expect from your guides: The night before your trip begins, you’ll meet your trip leader and fellow rafting companions at a nearby hotel or resort. I’ll go into more detail about those fellow rafting companions in a bit, but first: the trip leader. This is an individual, male or female, who has the most authority during your trip. Trip leaders rotate throughout the season, so keep in mind that some of your additional guides on your trip may also have trip leadership experience and be every bit as competent. In my experience, O.A.R.S. trip leaders are ruggedly outdoorsy types between age 30-45, who have often made the outdoor recreation industry their career choice. Your trip leader will go over logistics for the launch the next day, issue your dry bags (more on that soon, too), and tell you any updates on weather, packing, or water conditions.

oars river rafting trip

You’ll meet your additional guides the following day, at the put-in location. Sometimes, the put-in is nearby, just a short van ride away, and sometimes, as is the case on the Salmon River in Idaho, it’s a charter plane flight away. On our trips, which ranged from as few as 10 guests total to 18 guests, we always had 3-4 additional guides. These guides are generally younger (with the exception of any guides who are also trip leaders). Some are college students, but most are in their 20s. We’ve had some great guides and some just ok guides, but never a bad guide.

What to expect from your fellow guests: Well, you can expect just about anything and everything, which is one of the ‘unknown variables’ of commercial river rafting. In a small group, in a fairly intimate setting of camping together, it is frankly a big bummer to get saddled with people you don’t get along with or don’t like for whatever reason. It’s a risk, no way around that. However, while we have been on O.A.R.S. trips with guests who occasionally annoy us, we have never experienced a downright ‘bad’ guest. I believe this is because in general, the individuals and families who book multi-night river rafting trips have something essential in common: we all value the outdoors and the opportunity to explore the scenic river.

rapid-scouting-oars

If you do encounter a guest who is, shall we say, difficult, there are a few things you can do to help the situation. First, trust the guides. If a guest is difficult, they are aware of it, and are the best authority to curb any unwanted behavior. Best to allow the guides to be the ones to tell guests where to place their trash, not to hog the kayaks, or to stop diving headfirst into the water. Second, if both you and the other guests have kids, it can help to set some basic shared rules in place right away. That way, kids don’t feel frustrated when rules are different for others. Most of the time, this happens naturally, because O.A.R.S. sets the rules for rafting, swimming, use of PFDs and helmets, and even how many sodas and snacks are consumed (by kids). There’s very limited ability to be on screens on an O.A.R.S. trip, so likely, you won’t have to contend with varying electronics rules. A few times, we’ve encountered families with vastly different parenting styles from us, but all it took was a brief family meeting to remind our kids that our rules would remain in place for our kids, and that was that.

What to expect from meals and drinks: Aside from group dynamics, people worry most about food on trips, don’t you think? On each of our O.A.R.S. trips, we ate better on the river than we do at home. Every meal was made from scratch with whole food ingredients, and all were cooked and prepared swiftly and efficiently by our guides. Between meals, GORP (trail mix) was available, and before each meal, ‘appetizers’ were set out, even at breakfast and lunch. For example, at breakfast, coffee came out first, along with dry cereal (usually Cheerios and granola), yogurt, and orange juice. When ‘real’ breakfast followed, it might be French toast, eggs Benedict, or pancakes. At lunch, while our guides prepared the meal, snacks were set out such as cut veggies and dip, chips, fruit, and cookies. A typical lunch would include sandwich fixings and/or a hearty salad. Before dinner, a cooler with sodas, beer, and wine was available (with a ration of approximately one soda per day for kids and 2 drinks for adults), along with appetizers such as chips and salsa, bruschetta and toast points, or veggies, followed by salmon and cous cous, steak and potatoes, or enchiladas, always followed by dessert.

OARS-food

If you want to bring additional drinks, families are free to do so, with the general understanding that they’ll be willing to share. Guides store your additional drinks for you, keeping them cooled.

What to expect from the camping experience: On our last O.A.R.S. trip on the Rogue River, we rafted with a family who had never camped outside before, and they rocked it! You get tents from O.A.R.S., which you set up yourself after a demo, at each campsite. You can also rent a sleep kit, which includes a sleeping bag and paco pad (big thick rafting pad) and liner. Or, you can bring your own sleeping bag and pad (though if you do, I still recommend using a paco pad for comfort…you can rent this solo). Most nights on the Rogue and Salmon, we didn’t even bother sleeping in our tent, the weather was so nice. We slept under the stars, setting up a tent only for changing clothes and storing belongings.

OARS

Within each campsite, it’s easy to find a little corner for your family, but you’ll want to remember that you won’t have total isolation or much privacy. Expect to still see the other tents, the guides’ sleep pads, and the camp kitchen area. I promise this is no big deal: you get to know fellow guests very quickly on an O.A.R.S. trip, and you can always set up your tent for some privacy.

What to expect from the bathroom experience: Okay. Let’s get real: this is the issue people are afraid of most. How do you take care of your bathroom needs when you’re in complete wilderness, away from any plumbing whatsoever? Two ways: first, you pee in the river, as mandated by Leave No Trace (dilution is the solution to pollution). This is easy to do during the day…after all, you’re in the river most of the time. It’s harder during the evenings and mornings at camp, especially for women. Men tend to just walk a few paces downriver and stand to pee into the current from the shore…no biggie, no one even notices. Women, here’s what you do…and sorry for going here, but I’m in the outdoors a lot, and very comfortable with this stuff: if you need to pee and you’re out of the water for the day, you go behind one of the rafts, which will be ‘parked’ at the shoreline for the night. Behind their protective wall, you squat by the water, facing the camp. This ensures you moon the river, not the camp. After a few tries, I promise you’ll get good at this and no one will see a thing. When you’re getting used to this technique, it helps to wear a skirt or sarong, so you can eliminate even the mooning part.

For #2, O.A.R.S. sets up what they call the Groover (so named because it used to be a simple bucket or square metal box that would leave grooves on your backside). Now, it has a toilet seat (luxury!). The guides always set up the Groover at camp, in a discreet (but rarely discreet as you’d like) location from the hub of camp activity. You’ll know where the Groover is because there will be a hand wash station (two buckets of water with a foot pump and soap)…and the Groover will be a short walk from this station, hidden as best as possible behind trees, willows, or other natural barriers. It is by no means completely private, with doors that lock, etc, and I know that’s hard to handle at first. But I promise you’ll get used to it. And the thing is, everyone is in the same boat. You’ll know you won’t be interrupted because if you have the TP, others know someone is using the Groover, and when you’re done, you bring the TP back to the hand wash station. The Groover is for solid waste only, as everything in it is packed back out (per Leave No Trace rules), so no peeing in the Groover. However, if you would rather not pee in the river, there is a pee bucket next to the Groover, for that use. I know, this is so gross, but this is the nitty-gritty part, and I bet it helps to know what to expect ahead of time.

salmon-river

What to expect on the river: The actual river is probably what people worry least about, but I’ll cover a few things anyway. Depending on your destination, most O.A.R.S. trips include paddle rafts (where lots of people can paddle together, with a guide), oar rafts (with a guide rowing only), and IKs or duckies (inflatable kayaks), paddled by guests individually. Sometimes, there are also stand-up paddle boards. IKs and paddle boards provide the most adventurous way to experience the river, but all the methods of river transportation are fun. Guides do a good job of making sure popular boats are shared evenly, but you can help by not ‘hogging’ certain things, like IKs. Often, rafters using IKs will need to take a ‘ducky test’ or ‘ducky practice’, where they’re required to purposely flip it over, flip it back upright, and get back in, in water over their head. This is not as hard as it sounds, and most people can do it with some practice and instruction. Kids usually need to be 12 to ‘ducky’ on their own, but tandems to be shared with parents are also available. Most of the time, you paddle the river for a few hours in the morning and a few hours in the afternoon, with the remainder of the time used for lunch, short side trip hikes, and swimming time.

Have additional questions about what to expect on an O.A.R.S. river rafting trip? Ask me in the comments! 

SaveSave