On a budget? Cruise tips for saving money!

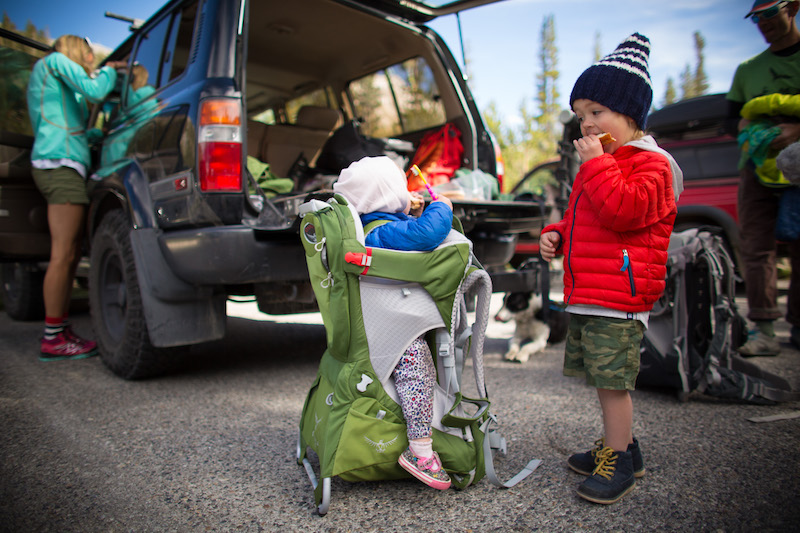
Cruise vacations remain some of the most budget-friendly family vacation options available. While I admit to being quite picky about cruises, experience has taught me that cruises make for excellent multi-generational trips, allowing diverse family groups to have a great time together without extensive effort, stress, time, and, if you do it right, money.

cruise

On a budget: cruise tips! How to save money  (and when it’s worth paying full price):

In travel, just like in anything else, you get what you pay for. However, whether you’re springing for a exotic small-ship adventure cruise or a mega-ship family cruise, within your budget category, it’s absolutely possible to save money. Here’s how:

Cruise in the off-season:

Is there still an off-season in cruising? Yes. Families willing to avoid the busy holiday and summer break periods will snag deals on cruise lines across the board, especially if they’re willing to cruise to the Caribbean or Bahamas during September through mid-November. While this time period sees primarily adult travelers without kids in tow, families able to break free from the traditional school schedule will be rewarded with deals and less crowded ships. While I realize this is not always possible, it’s a great strategy to have in parents’ back pocket.

Take a weekend getaway cruise:

Obviously, the longer your vacation, the more it is apt to cost. Consider a land-cruise combination holiday, or a shorter, weekend-long cruise of 2-3 nights. Cruise lines such as Royal Seas Cruises regularly offer 2-3 night cruises to the Bahamas, which can either whet the appetite for longer journeys or simply serve as a short trip that doesn’t have to break the bank. Naturally, weekend-length cruises are easiest to manage if you live near a cruise port in Florida, where most of these shorter trips depart.

Cruise from a port within driving distance:

You don’t have to live in Florida to take advantage of longer cruise itineraries that depart from cities as diverse as Galveston, New York City, Seattle, Vancouver, and Los Angeles. Additional ports on the eastern seaboard host shorter cruises into the waters of eastern Canada and Europe as well. Picking a cruise based on the port can save hundreds or even thousands of dollars in airfare, and had the added benefit of causing less stress pre-cruise: there’s no worry about missing your cruise due to airline delays or cancellations.

Find the most inclusive cruise in your budget category:

Unless you have incredible will power, it can be hard to resist the many, many upgrades sold on cruise ships. Start fighting this battle by picking the most inclusive cruise you can afford. For instance, many cruise lines charge extra per person for all types of drinks, including soda and tea, while only a handful include these beverages in their base rate (and even fewer include alcoholic drinks). If you must cruise on a less-than-inclusive cruise line, and you can resist these types of packages, bring your own travel water filter along and filter your own drinking water to use in a reusable water bottle (the water in buffets and restaurants onboard cruise ships is potable, but sometimes not very tasty).

Set a daily budget for extras onboard cruise ships, to be put to use at cruise ship arcades, casinos, dining upgrades, and bars. Decide before your trip what extras you won’t be paying for, and then stay away from those areas of the ship. If you enjoy spa treatments, consider booking on less desirable days, such as port days, when discounts are offered on most cruise lines, or the same day you embark on the ship.

Opt out of cruise line excursions:

Booking your excursions via your cruise line is convenient, but more costly than booking them on your own, and almost always a less satisfying travel experience, too. Unless you are very tight on time at your port (in which case only the cruise line’s excursions guarantee you’ll be back in time), book your own getaways off the ship. Read through the cruise line’s offerings, then do some research on your own, finding reputable companies offering similar excursions for less. TripAdvisor and your favorite travel blogs are a good place to start. Often, booking solo will result in a more personalized tour or experience for less money. If you don’t want to plan ahead, exit the port and simply find a local taxi, and ask for a rate for half a day. You may end up with a local tour guide for a personalized experience. If in doubt about reputable taxis or guides, as the tourism police who are almost always stationed at cruise ports.

Should you take a ‘budget’ cruise? 

I personally believe that we all get what we pay for, which is why I’d rather take a shorter cruise or watch my budget more closely on a quality cruise line than take a chance on a budget or bare bones cruise line. That said, I know travelers who have had good experiences on cheap cruises by managing their expectations, being flexible, and enjoying the ride.

Need more tips? Check out our mega guide to cruise vacations!

This story was sponsored by Royal Sea Cruises but the opinions are the author’s own.

SaveSave

Three northwest backpacking routes for families

Parents with young children: you absolutely can backpack with kids! Our family has found success by choosing backpacking routes that are short on distance but big on rewards, whether that be in the form of a fun lake or river to swim in, dramatic scenery, or both. The following three northwest backpacking routes for families deliver.

Before you read on, check out our tips for backpacking with kids!

northwest backpacking routes

Northern California’s Trinity Alps:

Just south of dramatic Mt. Shasta at the top of Northern California, the Shasta-Trinity National Forest offers some of the best backpacking for families. While word is now getting out, the Trinity Alps used to be very uncrowded, while still offering up vistas on par with the Sierra Nevada.

For families, we recommend the 5.2 mile route from Swift Creek Trailhead to Granite Lake. From the Swift Creek Trailhead of the Trinity Alps, families hike for one mile before crossing Swift Creek at a large bridge and taking the Granite Lake Trail. After that, it’s 4.2 miles of a pretty strenuous uphill hike. Take your time, knowing that you don’t have to hike too far but will be rewarded with one of the most stunning alpine lakes you could ask for.

Make a home base at Granite Lake, and spend an extra day day-hiking up above it (the terrain turns to sub-alpine granite with great views). If you want to make a full loop of it, you can continue to Horseshoe Lake, reconnecting with the original Swift Creek Trail to follow the creek back to the parking lot. We have always been content to simply play at Granite Lake, however.

How to get to the trailhead: Swift Creek Trailhead is at the end of Swift Creek Road, accessed from Highway 3. (From I-5, grab Highway 3 at Yreka.) You’ll pass a national forest ranger station near Fort Jones, where you can grab your backcountry permit.

backpacking-trail

On the Granite Lake Trail

Southern Oregon’s Sky Lakes Wilderness:

The Sky Lakes are beloved to our family. They’re right in our backyard, so we’ve logged a lot of hours on trails here. The great thing about Sky Lakes is the flexibility; there are multiple options for making larger or shorter loops between its many small alpine lakes. The elevation is lower than many backpacking routes, so the nights will remain warmer (but you’ll also experience more mosquitoes, so aim to visit in August or September).

The Sky Lakes are generally split between Lower Sky Lakes Basin and Upper Sky Lakes Basin. You can see it all in a 12 to 14 miles loop, but we recommend staying on the Upper Sky Lakes Basin end to see Trapper Lake and Lake Margurette. You can camp at either, and experience the other in a day hike, should you wish. Start at Cold Springs Trailhead, and when the trail splits, follow the upper toward Natasha and Margurette lakes. The entire hike is only about 3.2 miles, and isn’t too steep. If you’re ambitious, you can also access the Pacific Crest Trail above Trapper, and walk along it for a while.

How to get to the trailhead: Cold Springs Trailhead is located off Highway 140. From Medford (and I-5), take Highway 62 to Highway 140. At mile marker 41, you’ll take gravel road FR 3651 at the Cold Spring Trailhead sign, and follow it 10 miles to the parking lot.

stuffing backpacking bags

Setting up camp

Central Oregon’s Jefferson Park:

Very few wilderness areas are as breathtakingly beautiful as Jefferson Park. And yes, it is indeed a veritable ‘park’ of alpine creeks, lakes, trickling waterfalls, and towering peaks. You have to earn it though: the route in from either side takes some time for families. We recommend the slightly shorter route from Whitewater Trailhead (the other option is Breitenbush Trailhead further north).

You’ll go about four miles before reaching Whitewater Creek, with stunning views of Mt. Jefferson all the while. After the creek, you’ll join the PCT temporarily as you enter the park. Once in, you’ll see many trail options leading a short distance to multiple small lakes. We suggest Russell Lake or Scout Lake. Take fishing poles, and the fish seem to really bite here. You can rejoin the PCT for a long day hike should you wish, or can simply set up camp and enjoy the lake. No matter which lake you pick in the park, the round-trip mileage will be about the same: 11 miles or so.

How to get to the trailhead: Take exit 253 off I-5 in Salem. Drive 60 miles east on North Santiam Highway 22. Between mileposts 60 and 61 (10 miles beyond Detroit), turn left on Whitewater Road 2243. This gravel road forks in about 100 yards, keep right. Follow this road 7.5 miles where it dead-ends at a large parking area.

Jefferson-peak

Jefferson peak

I think it’s time for us to discover some shorter backpacking routes in Washington state next! While we have experience in this region, it’s for longer hikes for more experienced backpackers. If you know of great routes for families in Washington, please leave them in the comments. And always remember to call the local ranger station before your trip for weather and trail closure information, as well as any detailed driving directions you may need.

Renting an RV: Tips for RV summer travel

As a parent, I understand it can be appealing to rent an RV for a family road trip. Your schedule is your own (and so is your bathroom!), and you’re not confined to airports, flight delays, or even hotel reservations. On a whim, you can detour to visit something new, or delay a day to remain somewhere special. Before you take the plunge and rent an RV for a family road trip, however, read the following tips gleaned from hard-earned experience.

rv-road-trip-tips

Weigh the costs to have an affordable RV experience:

Consider what is typical for you while on vacation: do you seek a relaxed experience? Are you content exploring a single destination for longer stretches of time, and do you want the flexibility of making your own meals? Would you rather have your own space (which is mobile!) than nightly hotel rooms that are less flexible? The amount of vacation money you’ll save by renting an RV depends on your road trip style.

Ways to save money with an RV:

  • Stay in one place longer to save on fuel.
  • Plan to cook in your RV or over a campfire.
  • RV reasonably close to home.
  • Skip hotel rooms (more on this below).

If, for example, you normally spend a decent chunk of your vacation budget on hotel rooms, the $30-$45 per night on an RV camping space will be a deal. Of course, if you’re accustomed to renting tent sites, you’ll need to budget for the upgrade necessary for an RV space. As a beginning guide, use this Vacation Value Generator from Go RVing to directly compare vacation prices.

Embrace the RV vacation lifestyle during your road trip:

Repeat after me: you’re not in a hurry. You’re not in a hurry. You’re not in a hurry… The beauty of RV vacations is the slower pace. Plan a route that takes you along scenic byways and off the interstate. Create an itinerary that ensures less mileage and more pit stops. In most cases, it’s more affordable to rent and return your RV at the same city. In other words, travel in a loop instead of in Point A to Point B style.

Consider driving or flying to your destination, then renting an RV:

This combination seemed perfect for us. We knew we wanted to fly from our hometown to our primary destination (in this case, Chicago). From there, we wanted to take it slow, so we planned an RV road trip around the Great Lakes. We didn’t need to rent a car, and skipped all hotel and dining costs while in the region. After our Great Lakes tour, it made since for us to fly to our next destination. The moral of the story? Don’t be afraid to think outside the box and create the transportation combination that works for your family.

Eat on the road so you don’t feel deprived of restaurant dining:

If the thought of preparing all meals while RVing doesn’t appeal, try these ‘tricks’ to feel less deprived of restaurant food:

  • stop at farmer’s markets and roadside stands en route
  • eat a big breakfast out (the cheapest meal of the day) and skip lunch entirely
  • let the kids cook: in an RV, it’s somehow fun to plan and create meals
  • cook over a campfire (we love this Guide to Campfire Cooking)

guide to summer RV camping

Get more tips on RV rental affordability at GoRVing.com. As I disclose whenever applicable, this post was written in partnership with Go RVing. I found the information on GoRVing.com to be useful for planning an RV trip, and hope you will, too.

Photo credit: Trekaroo/mcfam

SaveSave

How to get your kids to sleep in hotel rooms

Vacation time means travel time. And travel time can mean less sleep…for everyone in the family. When we’re lucky, we’ve booked a vacation home, suite, or apartment where everyone can spread out, but there are plenty of times when we all find ourselves in a standard hotel room. But, how to get the kids sleeping in noisy places like hotel rooms?

sleep in hotel rooms

Nine ways to help get your kids sleep in hotel rooms! 

Bring one of their comfort items:

Kids have a hard time adjusting to the luxuries of a room other than their own. Therefore, it is always a good idea to carry one of their favorite comfort items with you. This could be a toy, blanket, pillow, or food item. Anything which makes them feel at home and sleep even while traveling.

Older kids like privacy:

The current generation does not tolerate someone invading in their space. At home, kids mostly have a separate room from an early age. Hence, they lose their habit of sleeping with their parents. Sometimes, it can be worth it to either book a separate hotel room for them or build a make-shift wall in the room between the beds using sofas, chair and curtains.

Upgrade to a suite:

Sometimes this is not possible, but when it is, go for it! If the room is spacious and comfortable, they won’t have a hard time sleeping. The high-end bedding and large, feather-filled mattresses with soft pillows will surely captivate them in a deep slumber.

Read to them before bedtime:

Maintaining routine as much as possible is key! Reading to kids before bed-time is a tried and tested remedy, one that our parents’ parents even used when putting them to sleep. So, always carry your kid’s favorite story books on the trip and if they have a hard time sleeping, read it to them in a hushed, sleepy tone to induce the sleepy effect.

Exhaust them during the day so they are tired at night:

This seems to work wonders for some kids. Mine, not so much. But theoretically, when kids don’t have any energy left at night, they are likely to sleep immediately. Therefore, it is good to engage them in various activities during the day that could exhaust them enough to go to deep sleep early.

Use white noise machines:

This is my #1 tip! You may not be aware of the surroundings of your hotel. Is it situated at a peaceful place or a noisy street? So, it is always good to carry a white noise app or a travel-sized machine that asks sounds and helps the kids to sleep in noisy places.

Maintain room temperature:

Kids generally have a hard time sleeping in extreme temperatures; too hot or too hold and they will be up all night. So, maintain optimum temperature at night-time to prevent any interruptions in sleep. Sometimes, we turn off the in-room heating/AC unit entirely, to avoid the loud noises it makes.

Use a vaporizer for snoring problems:

A snoring problem may not only deprive a kid from a sound sleep, but will also affect the sleep of others around. Hence, make sure to carry a vaporizer for immediate relief.

Turn on a night lamp:

Most kids have a hard time sleeping in complete darkness. The hotel rooms are either too bright or too dark (if you switch off the lights). Hence, it would be smart to carry a small night lamp or just the right kind of lighting kids are used at home. Look for a small camping lantern that uses LED bulbs.

SaveSave

Travel Gear We Use: Top sleeping bags for backpacking families

It’s time to think family camping! Get your family geared up for the summer camping season by snuggling up in a down or down-alternative sleeping bag! Today on Travel Gear We Use, we’re listing our favorite sleeping bags for backpacking and camping families, with lightweight and kids’ picks.

Best sleeping bag we use for kids:

north-face-for-kids


We love our son’s The North Face Dolomite 20F Youth Sleeping Bag. No, it’s not the most compact bag on the market, but that’s ok with us. Kids’ bags, by definition, are smaller, so it’s possible to get away with a bulkier model and still fit it into smaller sleeping bag compartments in youth-sized backpacks. The Dolomite is rated to 20 degrees, plenty warm enough for us, and ours has lasted through three kids and counting! The price is right, too, at only $119.

Best sleeping bag with a larger toe box:

big-agnes-lulu

If you’re wondering what a ‘toe box’ is, you either haven’t used a ‘mummy’-style sleeping bag, or don’t mind its restricting nature. I fall in the latter category (I actually love the tight space that warms me up faster), but some members of our family hate it. They’ve been looking everywhere for a sleeping bag made for backpacking that offers a roomier toe box, and we finally found it. The Big Agnes Lulu 15 stuffs into a compression sack and is lightweight enough for carrying long distance (it weighs in at just over 3 pounds), but features a wider bottom half that most bags. It’s rated at 15 degrees, with a fill weight of 24 ounces. Pick one up for as low as $139.

Best sleeping bag for ultra-light backpackers:

kelty-trail-logic

Maybe you’re not trying to beat any ultra-light backpacking records, but you’d still like to carry one of the lightest sleeping bags on the market. Or maybe, you’d like your older kids or elderly parents to carry a lighter bag. We love the Kelty TrailLogic Kelty SB20 delivers, with a weight of two pounds. The best benefit of a lighter bag? It fits into a stuff sack roughly half the size of its counterparts, which means more room in your backpack. Hey wait a minute…that means I carry more gear, doesn’t it? The SB20 will set you back $299, but you’ll see why once you pick it up.

Best sleeping bags for those who prefer a quilt:

backcountry-quiltDid you know there was such thing as a sleeping quilt or backcountry quilt? These ‘sleeping bags’ don’t zip all the way around, which prevents that clammy, enclosed feeling some of us just can’t stand. If you’d rather sleep outdoors under a blanket or quilt than in a sleeping bag (but still need the warmth of a bag), Sierra Design’s Backcountry Quilt may be for you. You still get the 2-season warmth of 800-fill synthetic down, plus a hide-away hood and hand pockets to keep extremities warm at night. But the design remains open on the upper half, which allows you to feel like you’re under a blanket, not wrapped like a burrito.

The Backcountry Quilt is sold for as little as $150 for a 1.5 season weight, but you’ll want to spring for the $250 version to ensure you can use it in almost all conditions.

Our other favorite is the new Big Agnes Big Pine bag, which works with any pad size and is a great quilt option for road tripping, couch surfing, hotel stays where perhaps a child is on a rollaway bed, and the like. It can be used as a quilt or can be zipped to be a sleeping bag. It’s also great for summer season camping and backpacking. Our favorite feature is that it’s made with DownTek, which is sustainable down that’s water repellent. You can even zip two together for a double sleeping bag! This is by far the most versatile quilt option we’ve tried.

Best budget sleeping bag:

cosmic-20
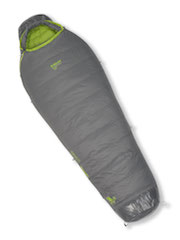
If you need a solid sleeping bag for a family member that is rated to 20 degrees for three-season comfort in the backcountry, you don’t have to break the bank. The Kelty Cosmic 20 gets our pick for the best bag for your buck. It’s only $149, and while a little heavier than most bags, you still get DriDown, Kelty’s down blend that resists moisture (so you don’t get that soggy, damp issue with your down sleeping bag after being dusted with morning dew). You also get a draft collar, a feature that used to be found only on more expensive models. It packs down into a stuff sack, though again, it won’t be as compressible as it’s more expensive cousin, the SB20.

Best luxury car camping sleeping bag:

sierra-designsThe Sierra Design backcountry beds are so comfortable, you’ll think you’re sleeping in a bed…really. They’re not as lightweight as some, so we think they’re best for car camping and road tripping, but they’re ultra-plush and fit nicely on or over think pads and cots. They come in single or duo size, with two basic designs: front country (rectangular for comfort) or backcountry (mummy-style and more packable for backpacking). They all come with an extra blanket flap that makes the sleeping bag feel more like a made bed, as well as hand pockets and slips for your pad. We love them!

How to choose sleeping bags for your family:

Start by deciding whether to go with down or a down alternative. It’s hard to ethically harvest down for sleeping bags, and since the synthetic version is arguably just as good, it’s easy to go without. Not sure which is best for you? We like this down vs synthetic guide from Sierra Trading Post.

Next, access your temperature needs. Will a bag rated at 30 degrees be enough for your use? Will you need a zero degree-rated bag? Determine where you’ll be using it, and in which season.

Finally, make sure a ‘youth’ sized bag will fit your kids (tweens may fit better in adult bags). Go into your local outdoor store to try out bags, and while you’re at it, bring your backpacks so you can be sure the sleeping bag of your choice fits into the sleeping bag compartment (if you care about that).

Once you’ve bought your bags and brought them home, remember to store them in a space where they can remain free of their stuff sacks. This is better for the bags. We hang ours from pegs in our garage, with each bag’s stuff sack set inside.

Find more gear in the Travel Gear We Use series (click below):

10 ways to travel eco-friendly as a family

April is the month we celebrate Earth Day and the more-encompassing ‘Earth Month’, but really, we try very hard at Pit Stops for Kids to travel eco-friendly all year round. Unfortunately, there’s something about seeing the Alaskan glaciers melt before our eyes or watching the world’s coral reefs shrink that really drives home the importance of taking care of our natural environment. I know our readers also want to travel eco-friendly, so read on for ideas large and small that can make a difference!

born-wild

Bring your own reusable water bottles:

This is a small action that can have a big impact. Purchase water bottles for your family, then reuse them everywhere from fast food joints to theme parks. You’ll save money if you opt only for water (which is ideal for health on your trip, too), but even if you refill with other drinks, you’ll be skipping unnecessary paper or plastic cups, lids, and straws.

Drive instead of fly:

Did you know a family’s carbon footprint is smaller driving in a car than flying? Even better yet: take a bus. I actually hadn’t thought about traveling long distance by bus since my college days, but companies like Megabus.com have made the experience comfortable and affordable. Especially if you plan to follow the tip below about public transit, taking the bus from city to city in the US, Canada, UK, and Europe is a really economical and earth-conscious plan.

Take public transportation at your destination:

If your vacation is in a city, try out the local public transit once you’re at your destination. Taking the subway, metro, or city bus is a great way to get to know the city more intimately than in a car, and is almost always more affordable than renting a car. We see more parts of the city, and meet more locals, by taking public transportation, and with a family of five, it’s almost always cheaper than taxis or even Uber.

Eat at farmers markets and local food stands:

Skip chain restaurants that source their food from who knows where, and opt for local food stands, farmers markets, or farm-to-fork dining options. In cities, these are easy to find: think Seattle’s Pike Place Market or Philadelphia’s Reading Market. In rural areas, look for roadside produce stands and natural grocery stores: go shopping then eat an outdoor picnic at a local park!

Skip the mega cruise ships for small ships or private tours:

Large cruise ships are notoriously bad for Mother Earth, thanks to possible dumping of gray water and sewage and the air pollutants from smoke stacks (though things are getting better). Instead, book a small ship cruise, which has a smaller footprint due it its smaller size (which also helps rural local economies more en route, too). If a small ship cruise is not in the budget, book a smaller or private land tour at your destination instead of a large group tour. The more intimate number will equal a better experience for you, and will also avoid the waste generated by large groups.

Reuse your towels in hotels:

Or better yet, book local apartments when you travel to avoid industrial-sized washers and dryers (and the other waste in hotels) when you travel. A home or apartment rental (such as HomeAway or AirBnb) usually saves money, gives families a more intimate and personalized travel experience, and leaves a smaller carbon footprint. If you do opt for a hotel, look for LEED certification, which means the hotel has taken strides to become more eco-friendly in their electricity use, water use, and more.

Camp or backpack off the grid:

When you’re in the outdoors, you’re naturally less impactful on the environment. Use solar camping lanterns or headlamps, turn off your phones, and relax in the outdoors. You’ll use less water by taking fewer (if any) showers, and little or no electricity. And getting back to nature helps to remind kids that they don’t need to be on the grid all the time.

Take kids to natural wonders:

Studies have shown that people care more about issues if they feel a personal connection to them. When kids have seen glaciers shrinking, coral reefs disappearing, and native species dwindling, they remember these issues as they grow into adults. Teach your kids to be responsible stewards of the environment through experience and education.

Go to science museums while you travel:

Along the same lines, kids’ science museums across the world teach kids about the importance of conservation with hands-on learning opportunities. Let your kids pedal a bike to produce energy, or design their own eco-friendly airplane model. As a bonus, visiting science museums on vacation provides a fun way to expend energy after a long day traveling or city touring.

Travel to an eco-resort:

To really become inspired this Earth Month, plan your vacation around an eco resort (many of which can be found in Central and South America, for instance). Eco resorts walk the talk, so to speak, and during your stay, you can see alternative energy use and sustainable practices up close. It can be very inspiring: an eco resort stay may result in your going home to install solar panels or a wind turbine…you never know!

Ready for action? Encourage kids to enter the Megabus Masterpiece contest with their own earth-inspired piece of art. The grand prize winner’s artwork will be displayed across the side of a megabus and will receive $1,000 for art classes or more eco-friendly travel! (Contest ends April 22, 2017, and winners announced May 15 on Megabus social channels.)

earth-month

This is a sponsored conversation written by me on behalf of megabus.com. The opinions and text are all mine.

var ts=document.getElementById(‘ti-pixel-tracker’); var axel = Math.random() + “”; var num = axel * 1000000000000000000; var ti=document.createElement(“img”); ti.style.display=”none”; ti.src=”https://tracking.tapinfluence.com/trk/HhvJb/y0AfQ/p.png?p=PKJi1″ + String.fromCharCode(38) + “i=xgp6m” + String.fromCharCode(38) + “ord=”+ num + String.fromCharCode(38) + “s=” + encodeURIComponent(document.referrer); ts.parentNode.replaceChild(ti,ts); JSON.stringify({“program_id”:”60317cd2-1972-11e7-97fc-22000a7d00a4″,”post_id”:”78e6f612-1e0e-11e7-a5ae-22000a7d00a4″});

How to teach kids the joys of fishing (and plan a fishing trip)

Fishing is an easy and relaxing activity that’s easy for children to learn and gets them outside to enjoy nature. If you’re interested in learning how to teach your children the joys of fishing, discover some helpful tips and advice for making memories and new experiences for you and your children.

how to teach kids the joy of fishing

Foster an Interest in Fish First

Before you take your children out for their first fishing trip, help them learn more about water and fish by taking them to the beach, aquarium, or nature center. Being able to learn about where fish live and how they survive will help foster children’s natural curiosity. When you feel like your children are able to handle a day on the water, you can use what they’ve already learned to make the fishing trip more enjoyable for everyone.

Fish in Well-Stocked Water

Any experienced angler can tell you that fishing has much downtime when you’re simply waiting for the fish to bite. For adults, this time is usually relaxing, but for young children, this time can try their patience. While you can use the experience to teach them about patience, you also want them to enjoy a reward for their efforts. When you start out by fishing in well-stocked ponds or lakes, you lessen the chances of leaving empty-handed.

Need gear? Discover some helpful tips about beginners fishing rods.

Get Equipment Appropriate for Children

Fishing rods made for adults are too big and heavy for children to handle. Instead, you’ll want to buy equipment made specifically with their size in mind. Read more here about choosing the best fishing pole. Even with the right equipment, children won’t be able to cast the line on their own at first. Either cast it for them and then hand them their rods or place sinkers on their lines and let them drop the sinkers directly in the water.

Additionally, consider using a small piece of rope to tie the fishing rod to the boat or dock. If they accidentally drop their rods, the rods won’t end up at the bottom of the water.

Try a Fishing Charter

As your children start to learn the joys of fishing, you can add some extra adventure and make great memories together by booking a fishing charter. Your captain will typically know the waters well and can take you to places where you’ll increase your likelihood of a catch. Additionally, most fishing charters also offer bait, tackle, and fishing licenses; all you and your children have to worry about is having a good time.

Watch the Weather and Time

When you decide on taking a fishing day, make sure the weather is perfect. If the weather for the day will be windy, rainy, cold, or very hot, consider postponing the trip to another day. Additionally, you want to keep your children’s first few fishing trips short. Most young children can handle only one or two hours at a time.

Help your children learn more about the outdoors by teaching them the joys of fishing. With the tips presented above, you and your children will make wonderful memories as you enjoy fishing together.

Image via Flickr by Lake Mead National Recreation Area

Central America packing list and gear picks

Heading to Central America? You’re going to need to pack smart, for both sun protection and insect protection. And of course, you’ll want to be comfortable in humid and tropical weather. We just returned from Panama and Costa Rica, where we stayed relatively cool and safe from the elements by following this Central America packing list.

central america packing list

Central America packing list:

  • 2-3 lightweight, long-sleeved travel shirts
  • 2-3 lightweight t-shirts or tank tops
  • 2 pairs quick-dry, wicking travel pants (convertible a plus)
  • 2 pairs of shorts, skirts, or dresses
  • 4-5 pair quick-dry travel underwear/bras (trust us)
  • 1 swim suit (preferably a ‘sporty’ type for activities)
  • 1 light pullover, sweater, or cardigan
  • 1 breathable rain jacket
  • 1 pair walking or hiking shoes
  • 1 pair water-ready sandals
  • 3-5 pair hiking socks (preferably lightweight wool)
  • 1 wide-brimmed, lightweight hat (think safari style)

Gear picks: the brands and products we recommend:

Look for clothing that’s specifically designed for hot, humid environments with lots of bright sunshine and more than its share of insects. Your clothing needs to be breathable, loose enough to be comfortable while you’re active, and quick-drying for water sports (and humidity and sweat). Here’s what we took to Panama and Costa Rica and loved:

Toad & Co Debug line: Toad & Co’s ‘Debug’ line comes treated with insect shield technology that lasts through years of washes. It’s much safer to wear bug-treated clothing than to spray insect repellent directly onto your skin, and because Toad & Co’s Debug line is designed for tropical environments, most items are also very breathable and lightweight. I wore the Debug Hike Thru shirt both onboard our UnCruise on travel days and in the jungle. Their bandana scarf is also a great item to accessorize with, giving your debug benefits without buying a whole outfit.

Craghoppers Insect shield line: Craghoppers’ Insect Shield line is made for men and women, and offers both long and short-sleeved ‘Panama’ shirts, lightweight jackets with multiple pockets, and hiking pants. Our Pit Stops Dad loved the NatGeo Insect Shield cargo shorts and I liked the NatGeo adventure shirt. Best of all, there’s a nice line of kids’ insect shield clothing, which can be hard to find elsewhere! Our son wore the Insect Shield half-zip.

amzn_assoc_placement = “adunit0”;
amzn_assoc_search_bar = “true”;
amzn_assoc_tracking_id = “pitstoforkid-20”;
amzn_assoc_ad_mode = “manual”;
amzn_assoc_ad_type = “smart”;
amzn_assoc_marketplace = “amazon”;
amzn_assoc_region = “US”;
amzn_assoc_title = “My Amazon Picks”;
amzn_assoc_linkid = “c0e81bd1f53dedc8669ba2ef6c71c93e”;
amzn_assoc_asins = “B00ZE4O4W2,B00ZE6BV6C,B00O3X4UKG,B00SAZW7QW”;

ExOfficio BugsAway line: I’ve always loved ExOfficio for travel wear, and their BugsAway line is fashionable and comfortable. I’ve worn their Damselfly pant in the Dominican Republic, Mexico, and Costa Rica. And ExOfficio is absolutely where to go for quick dry underwear for your trip!

amzn_assoc_placement = “adunit0”;
amzn_assoc_search_bar = “true”;
amzn_assoc_tracking_id = “pitstoforkid-20”;
amzn_assoc_ad_mode = “manual”;
amzn_assoc_ad_type = “smart”;
amzn_assoc_marketplace = “amazon”;
amzn_assoc_region = “US”;
amzn_assoc_title = “My Amazon Picks”;
amzn_assoc_linkid = “c0e81bd1f53dedc8669ba2ef6c71c93e”;
amzn_assoc_asins = “B00DZLVIZM,B00HUVUBGA,B011D4SCZ6,B00LCL9JBM”;

Columbia Sportswear: Columbia doesn’t make insect-treated clothing (that we are aware of), but they do make some of our favorite hiking/travel shirts and pants, and are less expensive than most. They come in kid sizes too, and our son’s favorite is the Bahama long-sleeve. Definitely shop Columbia for zip-off convertible hiking pants, too.

amzn_assoc_placement = “adunit0”;
amzn_assoc_search_bar = “true”;
amzn_assoc_tracking_id = “pitstoforkid-20”;
amzn_assoc_ad_mode = “manual”;
amzn_assoc_ad_type = “smart”;
amzn_assoc_marketplace = “amazon”;
amzn_assoc_region = “US”;
amzn_assoc_title = “My Amazon Picks”;
amzn_assoc_linkid = “c0e81bd1f53dedc8669ba2ef6c71c93e”;
amzn_assoc_asins = “B0089FB5JI,B00DCZJINU,B01GOQ5NP0,B00DCYCK8G”;

Mountain Khakis’ Equatorial shirt and pants: This line isn’t insect-repellant, but it IS SPF-blocking and when we wore Equatorial shirts in the jungles of Panama and Costa Rica, these were the ONLY shirts that stood up to more than one wear. Somehow, the sweat wicked off; we called them our ‘magic’ shirts. MK also makes an Equatorial pant that zips off. Both are recommended.

Aventura Clothing: Again, no bug-proaction line (but maybe if I keep hinting?), but Aventura Clothing makes THE best after-adventure clothing out there. When you get back from your paddle boarding session or jungle trek, put on soft, organic cotton for your evening indoors. This spring, I am loving Aventura’s Hannah cardigan and Pearson tank for layering. The men’s line, Ecoths, makes really stylish and comfortable short-sleeved, button-down shirts perfect for cocktail hour and dinner. Pit Stop Dad’s favorite: Garrick Polo.

See also: our most comfortable travel pants for moms!

Sun hats: The most important thing about sun hats in Central America is…wear one. So pick a wide-brimmed style you like, and bring it along! It helps to pick a style that flattens easily for travel, and has a strap to secure it both when wore and when you want to strap it to your bag or backpack. We love the sun hats for kids at Sunday Afternoons and Columbia, and the adult offerings at Tilley.

amzn_assoc_placement = “adunit0”;
amzn_assoc_search_bar = “true”;
amzn_assoc_tracking_id = “pitstoforkid-20”;
amzn_assoc_ad_mode = “manual”;
amzn_assoc_ad_type = “smart”;
amzn_assoc_marketplace = “amazon”;
amzn_assoc_region = “US”;
amzn_assoc_title = “My Amazon Picks”;
amzn_assoc_linkid = “c0e81bd1f53dedc8669ba2ef6c71c93e”;
amzn_assoc_asins = “B01CZ18II2,B000AMJWCU,B008FIFFY0,B010M3PL6M”;

Road trips with teens

Anytime you travel with kids, you can expect a bit of work. Things that worked on your last trip might not work on your next one, especially if you will be traveling with a teen. This is also especially true if your travel includes hours upon hours of being in the car. Fine tuning travel with teens can be something that is tricky but especially when that travel will be in the car. A little bit of preparation can go a long way.

road-trip

Driving

Depending on how old your teen is, learning to drive, or driving might be a segment of your itinerary. Don’t forget about that. Learning the ins and outs of driving can go a long way toward making sure that your teen is engaged while you are going down the road. If your teen has their learner’s permit or their license, make sure that you let them get behind the wheel… at least for a little while. Before you do that, though, make sure that they are listed on your auto insurance policy.

Involve Them

We all know that the best vacations are the ones that have something for everyone. Before you plan the itinerary for your trip, talk to your teen and find out what they would like to do. Traveling across the USA with kids can be more fun for them if they are involved. That doesn’t mean that you need to let them have complete control over the planning of the trip, though. Maybe they can help with narrowing down some of the possible activities or tours, choose a hotel, or even choose what roadside attractions you might stop to see. Giving them a say in the planning of the trip means that it will be more difficult for them to complain while you are on the trip.

Food

When you are traveling with teens on a road trip, you can really rack up the costs when it comes to eating. Kids can be picky, and finding a place to eat that you can all agree on can be a trial, too. However, if you have room in your vehicle for a cooler, you can alleviate this issue. Pack a cooler with somewhat healthy food that you guys can make meals out of or healthy snacks. Then, when you stop, it can be to see the sights as opposed to having to stop just to eat. This can save you money while also saving you time on the road.

Keep Them Charged

You can find internet access even when you are in remote locations nowadays. It might make sense to request that your teens take a breather from their iPods, phones, and other electronic devices, but taking those things completely away can mean wreaking havoc on your peace.

Keep Them Connected

Going a bit further with keeping them charged… Most teens are constantly messaging people or on social media sites such as Snapchat, Instagram, and Facebook. If they do this at home, it wouldn’t be right to all of a sudden change the rules while you are driving down the road. Allow them to communicate with their friends. If you made sure to do your homework before your trip, the chances will be good that they will be bragging about their trip or sharing photos from the trip.

Space to Pace

When you spend an entire day in the car, you will need to have a bit of time to stretch your legs. This is something that applies to all members of the family, not just the parents. Try to choose resorts or hotels where there will be space to pace after you guys have spent a grueling day on the road. Learning about the grounds of the property before you get there will let you know how much freedom you can give your teen while you are there. There are even some locations where the staff will get to know your child by sight and name, and this can give them even more freedom because they will all be watching out for them wherever they might wander off to.

Teen travel checklist: Preparing your teen to travel abroad

Last week, our teen departed for three weeks in Italy, without his parents. He traveled with a small group of student ambassadors for a cultural exchange and school program, and while chaperones will be available, they won’t be with him 24/7. Because our teen is still under age 18, there are some things he needed us to prepare for him before his trip.

teen travel

Teen travel checklist: Preparing your teen to travel abroad:

In addition to packing appropriately for the length and location of a teen trip, these practical steps should be taken before departure:

Make color copies of:

  • Color copies of your teen’s passport to be distributed to 1. his or her trip leader or chaperone, 2. into teen’s own bag as a back up, 3. to you, his or her parents. Remember that your teen’s passport should be valid for at least six months past the date of the trip.
  • Photocopy of all credit cards or debit cards, both front and back, to be distributed it 1. you, the parents and 2. teen.
  • Copy of any doctor note needed and health insurance card (especially if your teen is on any prescription medication), distributed to 1. you, the parents, and 2. teen. Remember, all prescriptions need to travel in their original bottles.
  • Copy of any travel insurance plan to 1. teen and 2. parents.
  • Copies of health insurance plan.
  • Make paper copies of phone numbers needed, both at the destination and at home. Include parents’ contact numbers, host family numbers, chaperone numbers, and the teen’s cell phone number (since it may differ than the usual).

Make a phone/communication plan:

Parents and teens have several choices when it comes to a phone plan abroad.

  • Cell service plan: You can check with your cell service carrier to see what types of international plans are available to you short term. Ours used to be $30/month data plan, with no sign-up cost, with AT&T, but it’s recently switched to a less desirable $9.99 per day.
  • SIM card with unlocked phone: If you have an unlocked cell phone (such as an old phone that’s no longer attached to a plan), you can have your teen bring this phone and purchase a SIM card once in the country he or she will be visiting. SIM cards are fairly inexpensive, and allow teens to use a short term local data plan that’s prepaid.
  • Cheap new phone in destination country: Of course, teens can simply purchase a cheap phone with a local pay-as-you-go plan in the country they’re visiting. Pick one up at most pharmacies and convenience stores.
  • WiFi only plan: If your teen will have WiFi access in the form of hot spots where he or she is traveling, you could opt for him or her to simply bring a phone that’s kept in airplane mode, for WiFi use only. Buy a mobile WiFi hot spot plan, or rely on free WiFi in hotels, cafes, and the like. Whether this route is an option for you will depend on the destination.

teen travel

Make a money plan:

How will your teen access cash and pay for things on their own? Savvy travelers know that it’s best to use debit cards for accessing cash from ATMs, and credit cards for other purchases and reservations, provided said cards have low foreign transaction fees. However, if you have a teen who is travel at under age 18, some banks in the US will not issue him or her a debit card in their name. Instead, before the trip, add your teen as a named user on one parent credit card. The teen will be issued a card in his or her own name, which can be used for emergencies.

Then, we suggest purchasing a prepaid travel gift card, such as Visa TravelMoney, which teens can use like debit cards. These cards are travel-specific, so they come with low currency exchange fees and low ATM fees (look for ones with ATM fees of less than $4). Even better: if you’re a AAA member, go to your local branch and buy a AAA travel card. You will need your teen’s driver’s license or passport, plus date of birth and SS# in order to get the card in his or her name, but this card has fewer fees attached to it than the ones you can buy in any pharmacy or grocery store. Parents can add money to these cards as needed from home, and view the balance at any given time, which is a nice feature.

Tip: If your teen is supposed to start his or her trip with foreign currency already in hand, make the request for the exchange at your bank at least one week ahead of time.

Enroll your teen in STEP:

First, you’ll want to check the CDC for any needed vaccines for travel. Next, head to the Smart Traveler Enrollment Program, or STEP, to enroll your teen for their destination. All STEP does is alert you to any travel warnings, with the peace of mind of knowing that your child’s travel plans are noted with the Department of State. Should he or she need any help in case of emergency while traveling, alerts and instructions will automatically be communicated to her.

Stock your teen with over-the-counter medications:

I always create a personalized first-aid/medical kit before traveling abroad, because it can be challenging to find the same medications in foreign countries (or at least the same brands, so you can recognize their uses). I include standard over-the-counter medications for headaches, nausea, sinus colds, and flu, plus band-aids, medical wrap/tape, and vitamins. For teens, I write the use of each medication on the back of the boxes clearly in sharpie pen, just to make it easy. Of course, if your teen needs to take prescription medications, have them carry them in their carry-on luggage in their original containers.

Talk with your teen before departure:

Make sure your teen knows that he or she will be acting as an ambassador for our country. With international relations tense in this era, it’s more important than ever that your teen act with respect, kindness, and awareness while abroad. Encourage them to embrace the new, to look for commonalities, and to forge friendships while traveling. Pack thank you cards for your teen to fill out and hand to people who help them or host them during their travels.

Discuss any laws or rules that may differ from your home country. For instance, we talk with our teens about our family rules for drinking alcohol abroad, since the legal age limit differs in most countries, and we remind them of laws they may not be aware of in their destination countries. We encourage trip leaders to require ‘code of conduct’ type contracts with teens, to ensure respectful and safe behavior.

Tip: Read our post on travel safety and getting past the ‘fear factor’.

teen travel checklist

Do you have tips for preparing teens to travel abroad? I’d love to hear them in the comments!

Tip: Check out our other posts about teen travel!