Travel Gear We Use: family tents for camping

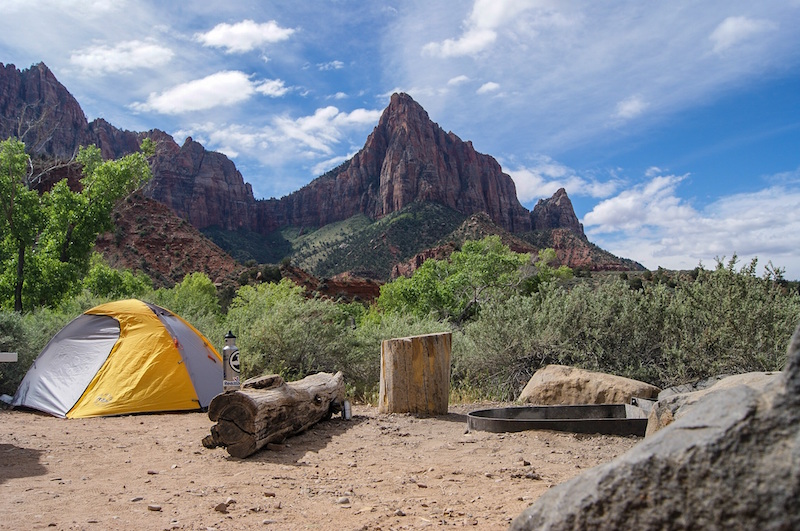
This week in our Travel Gear We Use series, we’re talking about best family tents for camping. There are a mind-boggling array of family camping tents on the market, in a very wide price range. What’s best for your family will depend on where you’re camping, how often you camp, and the size of your family.

camping-tips

Best family tents for minimalists or backpackers:

All purpose: We love, love, love Kelty’s Trail Ridge tent.The Trail Ridge 4 is affordable yet high quality, making it a great double-duty tent: it can be used backpacking or car camping. It falls in the middle weight range for family backpacking–not the lightest tent you’ll find, but also not the most cumbersome-and it’s beautifully affordable at only $279. It technically sleeps 4, which to us, means it sleeps 3 (we always reduce the sleep number by 1 to be comfortable). Another solid option is the REI Half Dome tent, which is one of the easiest to set up of any we’ve tried.

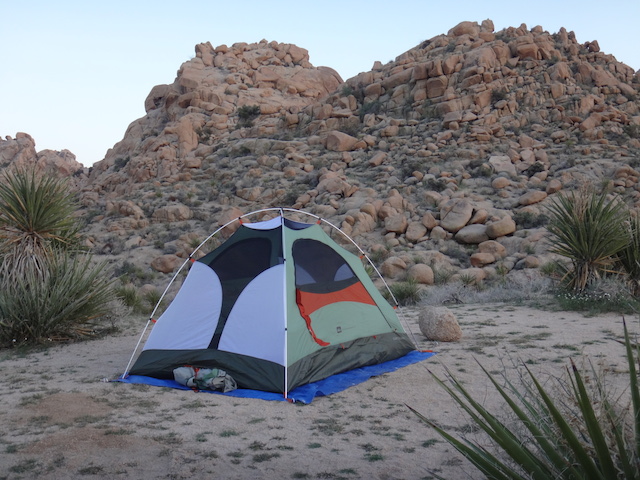
Ultralight: Want to carry as little tent weight as possible? Camping with just one kid or as a couple? Try the Nemo Meta. The Meta is our go-to tent for these situations. It weights just two pounds, but is roomy for a two-person tent, with respectable height too. The catch: you set up the Meta with trekking poles (it does not come with tent poles at all). Set up takes some getting used to, but once you learn how to do it, it only takes about five minutes. You need to stake the tent every night, in order to keep it upright, and of course, you need to be hiking with trekking poles, which we do.

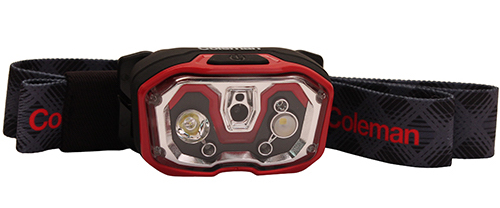
Only need a single person tent? Sometimes you have one extra person or are planning a solo adventure. Our teen checked out the Big Agnes Fly Creek UL1 during his PCT hike, and loved it so much, he uses it all the time now. Like the Meta, it’s just over 2 pounds, but on the Fly Creek, this includes the tent poles. If you want to get really posh, get the Fly Creek with Big Agnes’ light system, Mtn Glo. This LED light system illuminates the interior of the tent, freeing you up to go without a headlamp or flashlight inside. We’re spoiled now!

Best backpacking and small family tents at a glance:

amzn_assoc_placement = “adunit0”;
amzn_assoc_search_bar = “true”;
amzn_assoc_tracking_id = “pitstoforkid-20”;
amzn_assoc_ad_mode = “manual”;
amzn_assoc_ad_type = “smart”;
amzn_assoc_marketplace = “amazon”;
amzn_assoc_region = “US”;
amzn_assoc_title = “My Amazon Picks”;
amzn_assoc_linkid = “2b3ff3efebcf632ee007032e7c7a5424”;
amzn_assoc_asins = “B012FCHED6,B019UFVLKI,B00GSYH1T0,B012W1NT34”;

Best family tents for car camping or large families:

joshua-tree-camping

Best big tent: As our family grows (in height and age, not number!) we’ve found the need for a larger, less portable tent for family car camping adventures in campgrounds and state or national parks. Enter the Slumberjack Grand Lodge 8-Person Tent. Sounds pretty fancy, doesn’t it? And to our minimalist standards, it feels pretty fancy, too: the Slumberjack has room dividers, multiple entrances and windows, and great ventilation. We can even stand up inside it! The Grand Lodge comes in an 8-person or a mind-boggling 12-person. Even for the 8-person, you’ll want to make sure your tent space is large in your campsite! The downside of such a large tent is the set up time: it takes considerably longer to set up the Slumberjack than the Kelty, and it’s definitely not pack-ready. However, it does get easier with experience, and does pack down into its own (large) duffel for car or garage storage.

Coleman-tent

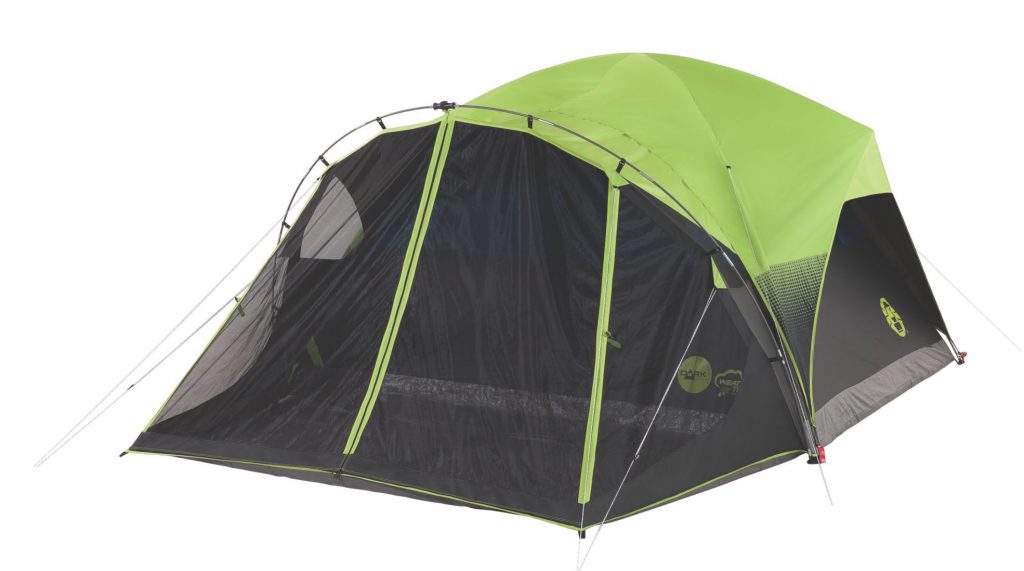
Six person or less: Don’t need the 8-person capacity of the Slumberjack? Try the Coleman Carlsbad. This six-person tent includes a screen room attached, PLUS has ‘dark room’ technology, which is designed to help kids fall asleep when it’s still light out (does the sun EVER set in summer?). We’ve found our kids, naturally early risers, also sleep in with this tent. It does feel dark when you’re inside, however, so this isn’t the tent to hang out in during the daytime. It also comes in a 4-person size.

All the bells and whistles: Want lots of storage space and technology in your tent? Try the Eureka Jade Canyon. This six-person tent has 10 x 10 feet of space, with lots of built in pockets and sleeves. It even has a media pocket, where you can prop up your iPad in a transparent pocket to view movies or TV. It also features E!Luminate, which is Eureka’s technology that enhances light. You simply place the provided panels on your ceiling of the Jade Canyon, and your headlamp or lantern light will shine brighter. It really does work.

Best large family tents at a glance:

amzn_assoc_placement = “adunit0”;
amzn_assoc_search_bar = “true”;
amzn_assoc_tracking_id = “pitstoforkid-20”;
amzn_assoc_ad_mode = “manual”;
amzn_assoc_ad_type = “smart”;
amzn_assoc_marketplace = “amazon”;
amzn_assoc_region = “US”;
amzn_assoc_title = “My Amazon Picks”;
amzn_assoc_linkid = “2b3ff3efebcf632ee007032e7c7a5424”;
amzn_assoc_asins = “B00SPOA2G0,B0068BGQKS,B019YDV6A6,B001RPIOMI”;

Pin it for later!

best-tents

Want more camping info? Get Pit Stops for Kids’ camping gear list!

Teaching Kids About Travel Photography Etiquette

Everyone takes photos when traveling—it’s part of the whole experience. Now if you enjoy traveling to new and exciting places with your kids, then at some point they are going to want to take some photos of their own. Children today are particularly tech-savvy and can work most devices without needing much instruction, so photography is something that you can (and should) allow and encourage them to learn. Parents can even provide their children with a simple, kid-friendly camera to practice on, so that they won’t have to keep whipping out smartphones or iPads (a surefire way to attract thieves) to capture the sights.

kids-photography

But before you give your child a camera, remember that there are certain rules in travel photography that everyone (even non-professional shutterbugs) need to adhere to. Here are some of the most important rules of photography etiquette that you need to teach your kids:

Always ask permission from a parent, guardian, or any adult companion.

In travel photography, the golden rule is to ask permission from the people whom you plan to feature in your photos. But for your children, the golden rule should be to ask you for your permission before taking photos of anything—at least until they are old enough to know how to discern which situations are appropriate for taking photos and which are not. This way, you can properly guide them, as well as facilitate their interactions with the locals. After all, someone will still need to ask permission from whomever your child wants to take photos of—a crucial step that you cannot forego, particularly in foreign countries where the customs and norms may be different from where you are from.

kids-photography

Having your child inform you first before taking pictures prevents him from breaking certain social rules (regarding photography)—and getting himself into trouble—in the country you are visiting. Some places, like in Indian or Japanese temples, have a strict ban on any type of photography. In other places, it may be considered rude to take photos of people in the street. You cannot expect your child to be aware of or remember all these different rules, so it’s best to have him ask you before he whips out a camera.

Respect personal boundaries.

If you have yet to teach your kids about the concept of personal space and boundaries, then this is the perfect time to address it. Unlike adults, children are accustomed to affectionate physical interactions (mostly with their parents, grandparents, siblings, and even their friends). It is completely normal for a child to, say, touch his mother’s face or sit on his father’s lap, which is why he might find it strange that this type of interaction may not be accepted or welcomed by other adults.

Before you decide to trust your child with a camera on your travels, you need to teach him about the “personal bubble.” Most children would normally have no qualms about thrusting a camera into someone’s face or squeezing beside someone to take a quick selfie, so it is important for your child to understand that some people are very particular with their personal space and may possibly take offense when other people—children included—violate their sense of space by entering their “personal bubble.”

Avoid using the flash (unless absolutely necessary).

As you probably already know, some tourist spots—particularly art galleries, museums, or zoos—do not allow flash photography within the premises. But children aren’t particularly fond of reading signs, so there’s a very good chance that they wouldn’t automatically know this important rule. Therefore, you need to make sure that your child is made aware of these crucial rules and that he learns how to turn the camera’s flash on or off before allowing him to take photos in public places. Otherwise, this can lead to some very embarrassing situations.

Also, people generally don’t like having a bright camera flash go off in their faces, so make sure that your child knows to turn off the flash when taking photos of the locals and other tourists.

Don’t block the view.

Children aren’t always aware of what is going on in their surroundings, so it’s important to remind them that they have to be mindful and considerate of other people when taking photos. For instance, when you visit a tourist hotspot like a historical landmark or any of the other popular photo-op spots, there will most likely be a horde of other tourists and photographers there who are also trying to take photos of their own. Remind your child not to block anyone’s shot or “photobomb” another tourist family’s photo session. Teach him to patiently wait his turn until other people are finished, so that he can take his photos without bothering anyone or ruining other people’s photo-ops.

Being polite when taking photos in tourist spots must be a continuous learning process—it doesn’t end with just telling your kid what he can or cannot do. Keep an eye on your little one’s behavior, remind him if you must, and don’t forget to give words of affirmation every time he does something right.

Harry Potter road trip: UK filming sites worth visiting

There’s are many filming locations for the Harry Potter movie franchise scattered over the UK and Scotland, but frankly, not all of them are visit-worthy. For instance, the campsite Harry and Hermione find themselves in during the last book and movie is really more of a sewage treatment center with some grass outside. Other sites, however, have been destinations in their own right for years, and a few gems were virtually undiscovered by visitors until Harry Potter put them on the map. We’ve compiled our favorites. All you need to do is grab a flight and rent a car to check out these stops along a Harry Potter road trip of the UK.

harry-potter-uk-road-trip

Start in London:

King’s Cross Station: Visiting King’s Cross, the site of famous Platform 9 3/4 is a must for most Harry Potter fans. The wall that witches and wizards run into to access it is actually located between platforms 4 and 5. You can check out the location, then enjoy the decidedly Muggle ambiance of the busy station.

London Zoo: The Reptile House where Harry first learned he could talk to snakes on Dudley’s birthday looks just as it appears in the movie. Plan to stay and enjoy the rest of the London Zoo for at least the better part of a day. The zoo has an excellent lion exhibit and ‘sunset safari’.

Whitehall: The Palace of Whitehall was the main residence of the English monarchs in Londonfrom 1530 until 1698. While filming the Harry Potter series, the Ministry of Magic was set between Trafalgar Square and the Houses of Parliament in Westminster.

whitehall

 Drive to Oxford:

From London, take A40 to M40 to Oxford. Once in the area, there are numerous Harry Potter sites to visit.

Oxford Library: The Hogwarts library, pictured numerous times, including when Harry researches Nicholas Flamel, is located in Oxford’s Duke Humphrey’s Library, which is one of the special collections reading rooms at the Bodleian. Hermione also reads about Polyjuice Potion there, and Harry and Hermione discuss who to take to Slughorn’s Christmas party here.

Divinity School: The Divinity School at Oxford is the setting for the Hogwarts infirmary. Even if you know nothing of Harry Potter, stop in here. It’s breathtakingly beautiful.

divinity-school-oxford

From Oxford, continue on A40 to Gloucester:

Gloucester Cathedral: The corridor that leads to The Fat Lady and Gryffindor’s common room is located in the cloisters of Gloucester Cathedral, beautiful to visit whether a Potter fan or no. You may also recognize it as the corridor where Ginny writes “The Chamber of Secrets has been opened” in blood on the walls.

Drive to Wiltshire:

Drive the A417 out of Gloucester to the A361 to Wiltshire. Continue out of town to Lacock.

Lacock Abbey: Lacock Abbey is a treasure trove of Harry Potter sites. Professor Snape’s classroom is located in the Lacock Abbey Sacristy. Also located in the Wiltshire Abbey is professor Quirrell’s classroom. Of note: this room houses a genuine cauldron. The room where Harry views his deceased parents in the mirror is also in Lacock Abbey. In Chamber of Secrets, professor McGonagall uses the same room for her lesson on how to turn animals into water goblets. Horace Slughorn’s house is nearby in Chapel Hill, Lacock, Wiltshire.

lacock-abbey

Return toward London:

12 Picket Post Close, Martins Heron: Better known as 4 Privet Drive, Little Whinging, this is the exact home depicted as the Dursleys’ house in the films. Martin’s Heron in en route back to London, but it’s fairly close to the city, so this stop can certainly be done as part of your London itinerary as well.

Going further afield:

To continue your Harry Potter tour through the north, start by driving up A120 toward Suffolk.

Lavenham: This charming village is the filming site of Godric’s Hollow. A wonderful medieval village worthy of your visit, Lavenham may not be covered in snow during your visit, as it was during Harry’s Christmas pilgrimage, but you’ll still find plenty to occupy yourself here.

Goathland Station: The station that serves both the village of Hogsmeade and Hogwarts is actually Goathland Station, on the North Yorkshire Moors Railway.

More to see in Scotland:

alnwick-castle

Alnwick Castle: Known as a popular filming location (it was featured in Downton Abbey, Robin Hood, and more), Alnwick Castle, Northumberland is the location for Madam Hooch’s first flying lesson. You’ll need to walk to the Outer Bailey (courtyard). Harry and Ron also land the Ford Anglia here in Chamber of Secrets.

Loch Shiel, Glencoe: The setting for the Hogwarts Lake (most of the time, anyway), Loch Shiel is located near the Glenfinnan Viaduct. You can definitely see both in a day.

Glenfinnan Viaduct, Lochaber: One of the most recognizable settings from Harry Potter, this viaduct is the one the Hogwarts Express is crossing when Harry and Ron almost crash the Ford Anglia. During the summer months, you can take a ride along the track through West Coast Railways.

Bonus stops:

Wales: In scenic Pembrokeshire, Dobby’s tragic death takes place at Freshwater West.

Ireland: The well-known Cliffs of Moher on the Atlantic coast of County Clare are featured when Dumbledore takes Harry to find the Horcrux in the sea cave. If you also want to see the rock on which Harry and Dumbledore stand, however, that’s 90 miles away off Iveragh Peninsula.

harry-potter-road-trip

This post was written in partnership with Alamo Europe. Photo credit

Subscribe to our Pit Stops for Kids seasonal newsletter, and get an exclusive tips sheet FREE! Join us!

Impact travel with teens: What to expect on a Fathom cruise

If you have kids over age 8, and are ready to dive into some form of volun-tourism while you vacation, a Fathom cruise to the Dominican Republic may be a great place to start. Fathom cruises combine the fun of a cruise vacation with a meaningful way to give back, and, perhaps even more importantly, a way to connect with local people in a meaningful way, getting to understand local issues, customs, and dynamics.

Adonia

Fathom, a child company of Carnival Cruise Lines, is the first cruise line to dedicate itself to this type of ‘impact travel’, with week-long routes to the Dominican Republic, and (currently without impact activities), to Cuba. The ship, Adonia, docks in the new Amber Cove port by Puerto Plata, far from the all-inclusive resorts of touristy Punta Cana, and focuses on the under-developed side of the island.

fathom-cruise

The concept is a simple one: bring in cruise passengers on a regular basis who can 1. impact the economic situation of northern Dominican Republic, 2. come alongside Dominicans to add manpower (and woman and child power) to their current, established projects, classrooms, and businesses, and 3. make meaningful interpersonal connections in the process.

The regular, scheduled shiploads of volunteers give your week-long effort a bigger impact, and your tourism dollars help a part of the country that otherwise is often overlooked.

fathom-cruise-line

I took my 17-year-old and 14-year-old on the Adonia to the Dominican Republic in June, to see exactly how it all works and how much impact we felt we had. I’ve taken part in ‘mission trip’ type vacations before, and the level of actual usefulness of such trips vary greatly. I wanted to know whether Fathom’s formula was different, how much good was being done, and how it actually felt to go on their ‘impact activities’ with my teens. And because the ship and cruise line is so new, I wanted to share the scoop on what to expect from embarkation to disembarkation.

What to expect pre-trip:

When you book a Fathom cruise (which, by the way, is a bargain compared to other Caribbean cruises…see pricing here), you’ll be sent an informational email with information about your boarding date and disembarkation date. The Fathom’s home port is Miami. It’s important to note the exact time on the dates, because like any cruise, the ship won’t wait for you. Be sure to book a flight that allows plenty of time to get to the port, even taking possible delays into account. From the west coast, we opted to take a flight an entire day early.

Fathom-cruise

You’ll also get access to the Fathom Trip Planner, which you can log onto online at Fathom.com once you have a booking number. Get onto your trip planner as soon as possible, because this is where you sign up for your impact activities…the activities you’ll do in the Dominican Republic alongside locals. Examples of impact activities include laying concrete flooring, building water filters, planting trees, helping in a chocolate production facility, and teaching English. Alongside these activities are also ‘recreational’ activities you can book through Fathom, which are essentially organized cruise excursions such as snorkeling, city tours, catamaran sailings, and the like. You can book up to six activities total per person, and impact activities DO fill up fast.

  • Some things to note when deciding on impact activities:
  • Kids need to be on the same impact activity as at least one parent
  • Impact activities are all free, apart from a small supply fee for a few of them ($10 range)
  • Most impact activities are half a day (either before lunch or after), then a few take 3/4 a day
  • If the impact activity you want is full, try again a few more times before your cruise (people drop things as their schedules change)

I recommend picking your impact activities first, then filling in the rest of the space with ‘for fun’ activities. The offered port excursions are solid, but pretty expensive, like all cruise excursions. We actually only did one of them, the power-assisted snorkeling afternoon. The other things we were interested, which included a city tour of Puerto Plata and a hike to the 27 Waterfalls, we opted to book on our own.

27-waterfalls

It’s easy to book excursions on your own, either before your trip (recommended) or at Amber Cove. For a private tour of Puerto Plata and the surrounding area for less cost than the big group bus tour offered by Fathom, we hired a private guide (basically a taxi) through Marysol Tours.

We booked our hike and swim at the 27 Waterfalls through Iguana Mama, a local company that now operates tours out of Amber Cove. We went with other cruise passengers, but booked this on our own because Fathom did not yet offer it officially.

See all our posts about Dominican adventures.

snorkel-dominican-republic

Up next, packing advice for a Fathom cruise! Click on the button below to continue.

fathom-cruise

Pages: 1 2 3 4

Travel Gear We Use: GoTenna review

When we visited Paris last winter, we spent a wonderful day in the Louvre. At least, it was mostly wonderful, except for the two hours we spent looking for each other. My husband had our two older sons in one section, and I had our youngest in another, and our plans to ‘find each other later’ went woefully sideways. We both had phones, but had put them in airplane mode to save on our international data plan. When I turned my phone on to contact him, he had his turned off, and vice versa.

GoTenna-review

Months later, I was introduced to GoTenna. The minute I saw what it did, I knew we could have used it in Paris. And in Rome. And in Costa Rica. And so on and so forth. GoTenna is a thin, 2-ounce wand that connects to a smartphone app via Bluetooth low energy (LE). It creates a low-frequency radio wave network for its iOS and Android app that reaches about 1 mile in skyscraper-filled urban areas, and, supposedly, up to 9 miles in most open outdoor areas (even longer on mountain tops).

How to use GoTenna:

When you buy GoTenna, it comes in a pack of two (for $199). I had ours set up in about two minutes. You just take the wands out of the package, and pull the little tab on each to extend the stick. When it clicks, you can see whether the GoTenna wand is charged by waiting for the light to blink. If it does, you’re in business. If not, charge the wands first using the included USB cords.

gotenna

Once they’re ready, turn them off, and download the free GoTenna app. It will walk you through the activation steps, which, again, took me only a minute or so. You turn the GoTenna back on to pair it with your phone via Bluetooth (one wand per phone), add your phone number and name, and you’re in business. You can import your contacts, so it’s easy to find other people when you need to contact them (more on that in a minute) and download maps to use off-line (more on that, too).

Once you and a partner both have the wands paired to your phones, you can use them offline to contact each other. Each GoTenna has a nylon loop so you can attach it to a backpack, jacket, or hat. You don’t hold it; you need it to have a clear path to get a signal. Think of GoTenna like a messaging app: it has the capability to send messages and location, but not much else. You cannot use GoTenna to send photos or video, make phone calls, or scroll through social media. It’s like a walkie-talkie, only much better.

You do everything you want with GoTenna from the app.

GoTenna-app

  • Send one-on-one messages: this is the primary thing we’ve done with it. You can send messages to anyone in your contacts who also has a GoTenna (this is the reason for the pack of two).
  • Send Shout messages to everyone in the area with a GoTenna: A ‘shout’ message is basically a general message that will go out to everyone with a GoTenna within range. Not many people have these, so it’s not much of an issue right now, but in theory, you could use this feature to send out a general invite to meet up at a location at a concert or festival to meet other users, or send an ‘all call’ as an emergency.
  • Send emergency messages: this feature is deceiving, because GoTenna cannot actually connect with emergency services (a con to using it, for sure). It can only connect with other GoTennas (not satellites), so this emergency feature is just a ‘shout’ set in priority mode. If anyone nearby is also using GoTenna, they’ll get a message that someone needs assistance. I guess it’s better than nothing.
  • Use maps: I love this feature. While online, you can download tons of pre-existing maps in GoTenna’s app. (This feature is under ‘location’). Then you can use the maps while offline. We could have used this in Paris, and we will be using it in Central America this fall.

When and why to use GoTenna:

GoTenna is touted as a solution for communicating in the outdoors, when traveling without coverage, and during natural disasters other situations when off the grid. I initially thought I’d like using the wands while backpacking and camping, but in practice, we leave GoTenna at home during outdoor trips. Why? The range isn’t long enough for hikers or campers to communicate with family back at home (reason #1 I’d use it), and to use it hiker to hiker, we’d also have to carry multiple cell phones in the wilderness, which would require bringing solar chargers. While we might do this occasionally (I love the Waka Waka solar charger for this purpose), most often, we’re tech-free in the wilderness.

So what DO we use GoTenna for? International travel. We’re also glad to have it in case of a natural disaster when we may need to communicate off the grid, but primarily, it’s a wonderful tool for travel. When we travel internationally, we pay for limited service plans, so more often than not, we’re in Airplane mode and offline. With GoTenna, we can continue to communicate when we separate during the day, and we can use the maps. The teens and I used GoTenna last month in the Caribbean, when we were doing different service projects a few miles apart, and we’ll use it again in Costa Rica and Panama later this year. The only place we’ve used GoTenna where it’s only worked so-so was on a cruise ship. I think all the metal walls and doors messed with it.

Pick up GoTenna for $199 or look for it at REI. If you travel even a few times per year off the grid (or in Airplane mode), it’s well worth the investment.

Disclosure: We were given a GoTenna to test, for the purpose of review. As always, all opinions are our own.

Subscribe to our Pit Stops for Kids seasonal newsletter, and get exclusive tips, free! Click here!

Coleman camping gear and #FindYourPark

It’s camping season in most of the US and Canada, and I’m excited to spend time in the outdoors for the next few months. Most of us are now familiar with our National Park system’s #FindYourPark initiative, which is helping more families than ever discover outdoor recreation in state and national parks.
coleman-camping-gear
Most families are also familiar with Coleman, an outdoor gear brand with a long tradition of creating family-friendly camping equipment. We’ve been using Coleman gear since I was a kid. Right now, Coleman is partnering with #FindYourPark. Through 2017, Coleman will host a variety of outdoor experiences that will enable America’s youth and their families to connect with our national parks in unique ways.

Want more camping info? Get Pit Stops for Kids’ camping gear list!

To round out this partnership, Coleman will also offer a limited edition line of products including grills, stoves, lanterns and coolers that commemorate our national parks to ensure Americans are well equipped to head out to the parks. To kick off the camping season, we wanted to share reviews of some of our favorites, and let you know how to get them.

Coleman camping gear we’re using this summer:

Carlsbad Fast-Pitch tent:

carlsbad-tent

The Carlsbad tent sleeps six and includes two living spaces: a 10 x 9 ft. tented space and a 10 x 5 ft. screen room. It’s roomy vertically too, with a ceiling of 5 ft. 8 in. Families can easily spread out, with extra sleeping space in the screen room if the weather is dry, or you can use that space for a few chairs, a game of Uno, or everyone’s shoes and gear.

A few features we love: The Carlsbad features Coleman’s ‘Dark Room Technology’, which means it stays darker inside than the average tent. When you have kids with an earlier bedtime or hope that you’ll all sleep in a bit, this is golden. You also get window awnings, which is more than just a cute feature: they allow you to keep windows zippered down, even in rain, which reduces condensation in the tent. Lastly, the Carlsbad is one of Coleman’s ‘Fast Pitch’ tents, which means that for its size, it’s very easy to set up. Forget the heavy, awkward set up stage: some of the poles are pre-inserted, and it really only takes five minutes to be up and running. Buy on sale for $169 on Amazon, or grab a 4-person model for only $134.

Big N Tall cot:

coleman-cot

 We’ve really fallen in love with cot sleeping when we’re car camping. To be honest, we sleep outside on cots much of the summer. Cots are more comfortable than air mattresses for us, and sleeping off the ground simply feels like a luxury when we’re camping. The Coleman Big N Tall cot is part of their Big N Tall line, which, in our opinion, isn’t just for bigger people. The oversized cot is simply more stable and wider, which is good news for anyone. It’s designed in a military style with an X frame, and is quick to set up.

A few features we love: The design on the Big N Tall cot is a manly yet understated topography map design in sand tones. I realize a cot’s selling feature isn’t its looks, but it’s always nice to have something nice looking in your campsite! It comes in a rolling carrying case, with is really good, since this baby is heavy! Pick up the Big N Tall for $135. You can also find standard-sized Coleman cots for $79 and under.

Mountain View Screen Dome Shelter:

mountain view-screen

Coleman’s 12×12 screen dome shelter went up in our yard in May and won’t come down until August, except to go camping! We use it daily for bug-free outdoor space and outside sleeping space throughout the summer months, and it’s a wonderful addition to car camping sites when you need a bug-free zone. It has an open bottom/floor, which means you can set it up around fixed picnic tables at campsites for mosquito-free eating or card games during the twilight hour. I won’t lie: set up takes longer than for your average tent (it took us about 15 minutes) and the poles are bulky and heavy.

A few features we love: You get 50+ UPF, and the roof is waterproof (we’ve tested it extensively). You get some side-panel ‘walls’ you can drape on one or more sides if you desire, which is helpful for keeping out sun on one side, privacy, or during rain storms. If you don’t need the shelter to be screened to keep out bugs, you can zip away the attached screens to use the shelter as just a sun dome (great for sporting events). The inside height is over 7 feet, so you won’t need to duck. Pick it up for $181 on Amazon.

Conquer 200L LED Headlamp:

coleman-conquer

Sorry, flashlights, but we’ve switched entirely over to headlamps for our illumination needs while camping. We love the hands-free convenience, and the way headlamps easily convert from pathway illumination to reading lights to lanterns (just wrap one around a large plastic bottle of water). The Conquer headlamp is bulkier than we’d like for backpacking, but ideal for car camping and for kids to take to camp. It’s rugged exterior can take a beating, and the headband can be adjusted to fit just about everyone.

A few features we love: The Conquer features BatteryLock, which stops battery drain. Believe it or not, you won’t be changing out the batteries constantly! It has five modes, including high spot, high flood, low spot, low flood, and red, and lumens ranging from 200 (high spot), 150 (high flood), 70 (low spot), and 20 (low flood). You need three AAA batteries, but the LEDs never need replacing. Pick it up for just $25. There are stronger, brighter models available as well, going up to about $45, but honestly, this is all you need.

Trip planning with Momaboard Family Trip Planners

I have a confession: I love planning trips. For me, it’s like a puzzle to put together or a painting to outline and fill in…first you choose your family travel destination, then you book airfare and hotel rooms, then finally, you fill in the details of what you’ll do, where you’ll eat, and what you’ll see.

notre-dame

It’s this last part that can be tricky, however, especially in a brand-new-to-you location. For our most recent major trip to Paris, I tried out Momaboard‘s Family Trip Planning Service (FTPS). This online service is wonderfully simple: you select the city of your choice, you read about the local, parent expert for that region (Mombassador), and you click ‘Let Momaboard Plan My Trip’. Don’t worry: they don’t plan the whole thing, and they don’t book things for you. (This fact appeals to a control freak like me.) Instead, you fill out a short questionnaire about your trip (who’s going, your dates, what you like to do), and the Mombassador provides you with a day-to-day itinerary with suggested activities, dining picks, and routes.

How I used the Family Trip Planning Service:

When I discovered Momaboard’s FTPS, I already had several days of my Paris trip pretty well organized. However, two additional days were still blank slates on the calendar. When I filled out my questionnaire, I asked Paris Mombassador Coralie Grassint to focus on these two days, letting her know what I already had in the works for my additional days and what I still wanted to see, such as the Montmartre neighborhood, Notre Dame, and the Louvre.

After only a few days, Coralie provided me with a detailed itinerary (again, just suggestions) that I could access via the Momaboard site using a secure password. From there, I was able to download the entire itinerary as a PDF, which I saved on my phone for reference during the trip.


When I clicked on the locations, they expanded, showing me more details. At the bottom, I was given maps and specific walking and metro directions, in addition to generalized tips and helpful local phone numbers. Here’s what an expanded page looked like:

momaboard

The way Coralie organized the activities per day was extremely useful, because while I knew basically what I wanted to do, I wasn’t sure which attractions to bundle together in each day, based on proximity and walking routes. Perhaps most useful of all, Coralie included restaurant picks for each day, based on both kid-friendliness and location. More than any other feature of the service, I used these restaurant recommendations. Without them, I would have had no idea which dining establishments to try in each area. (By the way, I told Coralie that we planned to eat at casual, budget-friendly restaurants, but I could have asked for upscale recommendations.)

Using the PDF, I added some of my two day itinerary to my TripIt app for easy reference, but also kept both a printed and digital copy of the entire itinerary so I could use it as needed. I found the level of involvement to be just right: I was still in control of my itinerary and could tweak it at will, but I had solid recommendations from a local parent at my fingertips.

So what does it cost?

A Momaboard itinerary of 0-7 days is $50, and an 8-14 day itinerary is $100. If you’ll be spanning multiple cities, you can email for a quote. We only needed advice for two days, but had I known about the service sooner, I would have asked for our full Paris week to be included. The suggestions based on your kids’ ages and interest combined with the step-by-step directions for navigation make a Momaboard itinerary absolutely worth the cost. I’m sure I’ll be using them again when we travel internationally.

To create your own itinerary:

Start at Momaboard.com, and follow the prompts to select the city you’re headed to. Their list of destinations can be found here.

As we disclose whenever applicable, we were offered a Momaboard itinerary free of charge, for the purpose of review. I’m sure I’ll be using them again, on my own dime!


Preparing kids for mountain biking adventures

When it comes to mountain biking, kids and younger riders are often left behind. For many, the sport is viewed as dangerous and not fit for kids. However, that couldn’t be further from the truth. Mountain biking is a great sport for kids of all ages. While they may be limited to safer trails in the beginning, kids can enjoy the perks of off-road biking all the same.

mountain-biking

Mountain biking offers a number of benefits that kids can take advantage of. Not only is it enjoyable, but it’s a great opportunity for kids to explore the world around them while getting some exercise. Families that ride together also have the chance to bond as they make their way through a trail.

Before you venture off, you should prepare your child for what’s to come. Mountain biking is very different from a casual ride through the park. Whether the child is apprehensive about their first foray off-road or excited to explore some trails, you should prepare them to make the trip safe and fun.

Get in Physical and Mental Shape for Mountain Biking Adventures

Depending on your child, you may have to do a bit of ongoing physical and mental preparation prior to your first ride. As with adults, being in great shape is a necessity. Even on smoother trails designed for beginners, obstacles will demand a lot from riders. It’s a good idea to do a bit of physical conditioning.

This can include fun and enjoyable workouts that appeal to kids. Instead of a staunch exercise regime, you can play physically demanding games that push the child’s body. The better shape the kid is in, the better they will be at biking safely.

In addition to physical preparation, you should speak to them about what they can expect. They should understand the types of obstacles they’ll face and how to get over them. If the child is a bit nervous, mental preparation will ensure that they face their fears safely. The same goes for a kid that’s overconfident in their skills.

Gather the Right Equipment

It’s crucial to choose the right bike for going through a trail. Kid bikes can be a bit tougher to fit than adult bikes. It’s a good idea to let the child be a part of the decision process. Not only will they enjoy choosing something they like, but you’ll be able to teach them how to properly fit the bike and what types of things they should look for.

A solid frame and large wheels are always a good thing to look for. This will make the bike easier and more comfortable to ride. Obviously, higher end components like brakes and shifters are a good idea. However, if you’re on a budget, a solid frame with basic components is a good place to start. You can always upgrade components as the child grows and improves.

The bike should fit the child perfectly. A bike that’s too small or too large can lead to falls and injuries. Make sure that the child sits on the bike and takes a ride on flat ground prior to making a purchase.

In addition to the bike, safety equipment is a must. The kid will need a high-quality helmet to protect them from bumps and falls. Protective clothing and guards will also help keep them safe throughout the ride.

mountain-biking

Pre-ride Training

The feeling of riding off-road is something that requires a bit of getting used to. It’s never a good idea to just hit the trail and hope for the best. Children need to know what to expect in terms of terrain. Starting off on some grass will give them an idea of what to expect.

A park with numerous hills will expose them to the feeling of riding down a slope. Even something as simple as riding off of a small curb is beneficial. This will allow them to learn how to maneuver different obstacles and terrain as well as how to ride in different positions. For even more training, parents can set up a small course in the backyard that teaches them how to get through basic hazards.

Start Off Easy

Make the first trail ride the child takes an easy one. Simple trails with minimal obstacles will allow the kid to ease into the sport. Dirt roads or jeep trails are perfect for kids just starting out. These trails provide the feeling of off-road biking while allowing the kid to build their strength and comfort level.

Parents and experienced riders should hang back. Never stray too far from the child, just in case they need your help. By letting them take the lead, you can follow along at a comfortable pace and make judgment calls on when to rest. The child should be able to ride as please without feeling pressured to attempt something harder. Without being pushed, kids will naturally improve and move on to more difficult trails at their own pace.

canyons bike park

Learning Techniques Safely

As the child improves, it’s important that you teach them how to ride technically. You can do this by introducing simple moves and techniques throughout the ride. Of course, you should never pressure them to try something they’re not comfortable with. While it may seem easy to you, a young child may find it terrifying.

Constant affirmation and praise will help them learn with time. Technical riding is crucial, and it’s good to start teaching children as soon as possible so that they adopt good riding habits in the future. Things like steering, riding positions, and obstacle maneuvers are all good things to learn.

As the child learns, it’s important to monitor them at all times. Kids are notorious for being overconfident. In the sport of mountain biking, overconfidence can be dangerous. They should learn new techniques while also being aware that of what can go wrong.

All in all, taking your kid out to the trail with you doesn’t have to be difficult. It can be incredibly fun and rewarding to ride a mountain trail with a kid. All it takes is proper preparation and patience to teach kids how to ride safely. Before long, the child will be your go-to riding buddy for all of your mountain biking adventures.

Jet lag: kids get it too! Tips for dealing

On my kids’ first cross-Atlantic journey, we did everything we could to ease the effects of jet lag. We drank a lot of water, got as good a night’s sleep beforehand as possible, and established a ‘bedtime’ on the plane. And everything went well…until our 11-year-old began vomiting as we weaved our way through customs. Not a pleasant story, I know, but nausea is a more common symptom of jet lag than you’d think. Read on for what to watch for, best prevention, and how to deal with jet lag…kids, adults, everyone! 

jet-lag-in-kids

Prevention of jet lag in kids is best:

As noted above, there are steps you can take to help ease the effects of jet lag in kids. Here they are in a nut shell. (And no, we have not found any of the gimmicky natural remedies to work.)

  1. Drink lots of fluids, especially water. We already drink a large amount of water per day at home, so we thought this would be no problem in flight. However, water is only available every so often. Bring your own refillable water containers and stock up in the airport before your flight or flights. Sip often.
  2. Pound the Vitamin C. It helps to stay heathy when dealing with jet lag, and traveling across time zones can really wear out your body. This includes your immune system, and the immune systems of kids. We brought Airborne chewables to take every few hours, plus mandated that kids order at least 1-2 glasses of orange juice during complimentary drink services onboard.
  3. Get sleep the night before. Of course, this is easier said than done if you’re overnighting in an airport hotel or if you have an early morning departure. But do your best. Don’t be tempted to think kids will sleep better on the plane if they skip sleep the night before. An overtired body doesn’t deal with jet lag well.
  4. Bring pillows, eye shades, ear plugs, and a plan for ‘bedtime’. Again…this is easier said than done. We established a time for our kids to stop watching airplane movies at their seat and lean their seats back to try to sleep. It sort of worked. Banning drinks with caffeine in the evening helped.

Dealing with jet lag once you arrive:

  1. Drink more water. Be aware that public drinking fountains may be scarce (we find them much more plentiful in the States than abroad). Be prepared to spend a significant sum on bottled water.
  2. Get Vitamin D, but continue with Vitamin C. Get outside as soon as you can. Take a walk in the neighborhood of your hotel or vacation rental. Avoid going into darker spaces the day you arrive, such as museums or movie theaters.
  3. Put your watches and clocks on local time immediately, and make yourself (and your family) honor it. Yes, it may feel like 3 am to you, but if it’s lunchtime, eat lunch and be as active as possible. Do your best to prevent naps. It’s far better to allow an early bedtime than to allow kids to nap immediately, unless of course, you want to be up all night.
  4. Leave an ‘empty’ morning in your itinerary for the day after you arrive. We’re early risers, but after arriving in Paris at about 3 pm local time and pushing ourselves through to 8 pm before going to bed, we still woke at 8 am. We needed those twelve hours of sleep, so I’m glad I didn’t plan a morning activity.
  5. Consider a sleeping aid for Night 1. We opted to medicate with a mild sleeping pill. This is a personal choice of course, but we found that it helped our older kids fall asleep more easily those first few nights.

jet-lag

A dose of realism: what to look for and expect:

  1. Difficulty getting to sleep: This seems odd, but even if you or the kids feel very tired, it can be hard to get to sleep if your body thinks it’s mid-day. We found this problem persisted for 4-5 days. To combat it, we did move bedtime back (which allowed for some later evenings out), but still forced ourselves to lie in bed with the lights off before we felt tired. After several days, our bodies made the minor adjustment to be truly on schedule. A natural sleeping aid, reading, or a cup of non-caffeinated tea at bedtime helps, if that’s your thing.
  2. Nausea: Our son started feeling nauseous and dizzy on the last leg of our three-leg set of flights. By this time, he’d been awake almost 24 hours, with only a few cat naps. Luckily, we grabbed an air sickness bag from the plane before we disembarked, because he lost his breakfast by the time we were queuing for customs. Not fun, but we dealt with it with water and some fresh air. He felt fully recovered by the time we arrived at our accommodations.
  3. Constipation: Pack an over-the-counter medication of your choice. Check in with kids about their bathroom habits during the first few days. If you have teens, this will embarrass them horribly, which is a fun silver lining.
  4. Headaches: We also brought Tylenol for headaches, which are common while fighting jet lag. Ultimately, sleep and hydration will fix this problem best.

Realistically, you may not be able to prevent young kids, or even teens, from falling asleep upon arrival. We let ours take a nap between shorter flights (we landed in Rome and took a small jet to Paris) but once we had arrived at our final destination, we immediately went outside, grocery shopped, and explored our neighborhood. Were we tired? Goodness yes. Was it hard to deal with the language barrier while fallowing a grocery list in an unfamiliar store with tired kids? Double yes. But it was worth it when we fell into bed that night!

What are your best tips for combatting jet lag? I’d love to hear them in the comments.

Tips for AirBnb Italy: Where to stay in Florence and Rome

Originally thought of as only a step up from couch surfing, Airbnb has caught on with family travelers in the US. But what about using Airbnb while traveling abroad? We used Airbnb exclusively throughout Italy, and found the process to be just as secure and convenient as in the states. If anything, Airbnb Italy owners were even easier to work with, and the lodging savings were even better!

airbnb-italy

Airbnb Italy: Where to stay in Florence and Rome

When renting with Airbnb, it can be hard to know much about the apartment owner or manager. Will he or she be the type to welcome you with a bottle of wine and a binder of suggested itineraries, or be more hands off? You can’t be certain, but while reading reviews, look for information about the owner in addition to the apartment itself. The ‘best’ owners will receive glowing reviews of their own.

We had the pleasure of staying in this lovely Florence apartment, which was only steps from the central Ponte Vecchio bridge. Tucked away behind a pottery shop, this apartment was absolutely ideal. (The photo above is the actual entrance to this apartment.) Better yet, no one was using the owner’s second apartment rental, and she graciously offered our family both. For the first time in a week, our family of five was able to spread out. Our owner was the ‘bottle of wine upon arrival’ type, and even scoured the neighborhood for Christmas Day restaurant reservations for us. Truly, this was above and beyond.

airbnb-apartment

The apartment we rented had a living room, bedroom with extra day bed, and pull-out bed to sleep five. There was a full kitchen (without oven…just stove top) and a dining table. All the little things were there: a hair dryer, shampoo and soap, detergent, and kitchen staples such as olive oil and coffee filters. A grocery store was located just around the corner.

airbnb-florence

We had a small patio and air conditioning and heat, plus the second apartment with all the same amenities. In fact, the apartment layouts are almost identical. The only exception: the bedroom is bigger in the lower apartment and the living space is bigger in the upper apartment.

In Rome, we rented from Airbnb again, and again, we had a great experience with the owner in terms of the accommodations, communication, and ease. We rented this unit, which was located in an upper middle class neighborhood directly on the Tiber. We were in easy walking distance of the Vatican area, a ten minute walk to Piazza Populo and Villa Borghese, and only meters from the Metro station where we could grab a train to other points in the city. Our longest ‘commute’ was to the Centro Storico (old city) where we spent a lot of time. It was a thirty minute walk without much in terms of metro access, but the entire way was scenic.

rome-apartment

This apartment was by far the roomiest we had in Europe, with two bathrooms (a luxury!) and three bedrooms (one of which could be a living room space instead). The kitchen is very small, but we used it for snacks and breakfasts, opting to eat out for dinners. The grocery store is just around the corner, though it does close early and open late by American standards. We felt very secure here, as the apartment building had a doorman and a very elegant lobby. We loved all the space we enjoyed here; our only complaint: the street noise could get loud. I used ear plugs.

What to expect with any Airbnb rental in Italy:

  • Communication from the owner. You should hear from them within a week of your check-in date, with detailed instructions for finding the apartment and asking about your arrival time. Download the AirBnB app for the easiest communication.
  • Personal greeting. You will be met at the apartment by the owner or manager and given a tour.
  • A per-night, per-person lodging fee. This is paid in cash to the owner (usually at the end of the stay). It’s 2,50 euro per person, per night in most cases.
  • Feedback left for you after you depart. Remember to leave the owner feedback as well. This helps both of you for future trips.

What to expect only sometimes:

  • Some apartments require a deposit, usually in cash, which is returned before your departure. It will be disclosed whether this is required in the apartment description on AirBnB.
  • Some will have a bottle of Italian wine ready for you to uncork. Others won’t even have a bottle opener in the house. You just never know!