How to pack for a camping trip and organize your campsite

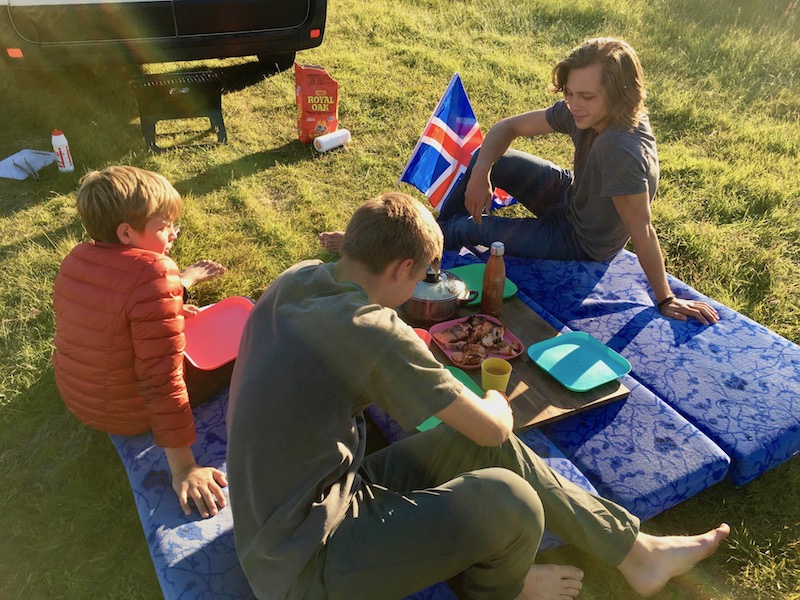
Camping with the family is supposed to be relaxing, but it can feel stressful if you don’t know how to pack for a camping trip, and set up your campsite efficiently. After all, no one wants to spend all their time unpacking gear, looking for things, and hauling stuff around their campsite! Read on to learn how to efficiently pack and set up all your gear!

OARS

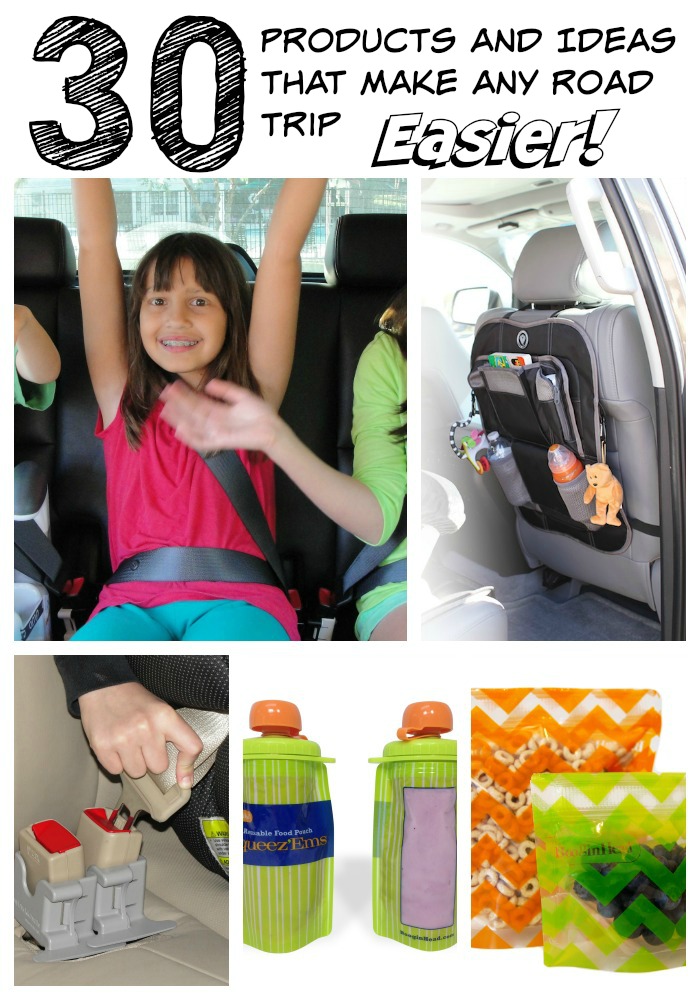
How to Pack for a Camping Trip: Easy Set Up at the Campground

Start your packing process with stackable rubber storage totes. You’ll need at least three (one for each camping “section” of your campsite, including the kitchen, sleeping, and living areas). Larger families or those with extensive gear will probably need more than one tote for each section. Once you arrive at your campsite, simply set each tote in the designated area you’ll need it in, such as the area around your picnic table for the kitchen tote, your tent area for your sleeping tote, and near your campfire pit for your living area tote. Color code your totes to remember where each one belongs.

Try this kitchen packing hack: Store your kitchen tools and utensils in a toiletry bag or other small bag to keep them organized and clean between uses at a dusty campground. You can hang them from a tree branch for easy access when you’re at your site.

In addition to your three “main section” totes, assign a smaller tote to each family member. This tote will hold that person’s clothing and personal items. Using totes for this purpose, instead of duffel bags or suitcases, saves space in your car, trailer, or RV. This especially helps save up room in an RV for important items like an extra RV battery. You can read about which RV battery to buy here https://www.stayontrails.com/best-rv-battery.

Place items you’ll need at the ready in a mesh laundry sack (which can be re-purposed later for dirty clothes). These items may include swimsuits and towels you’ll want as soon as you arrive at the campground or jackets and boots if you’re camping in damp areas or in the off-season.

How to Find a Good Campsite and Set Up Efficiently

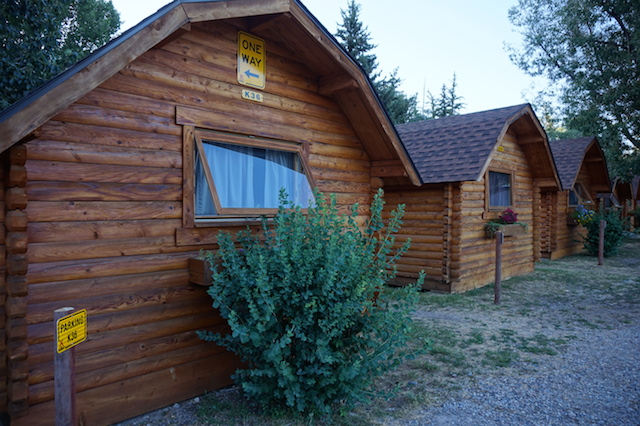
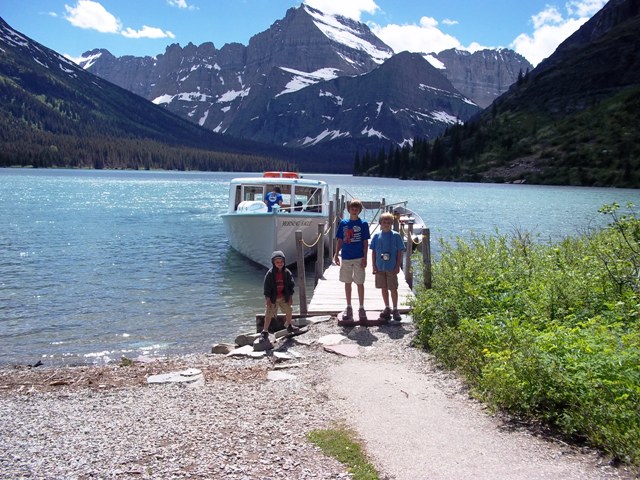
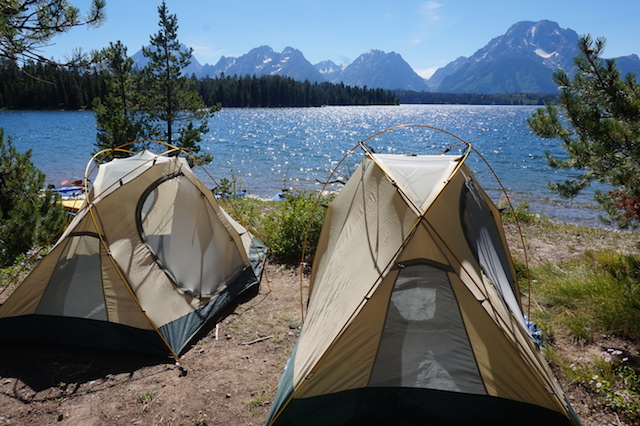
If you can reserve your campsite ahead of time, do so online as early as possible. Look at the campground map and note campsites that back up to the wilderness instead of other sites. In addition, look at the bathroom and shower locations (you may want to be close to one or you may want to be farther away from foot traffic). If you are camping at a campground that does not take reservations, arrive at the campground as early in the day as possible. When you arrive, look for a campsite that backs up to the forest or scenery to minimize noise from any neighbors.

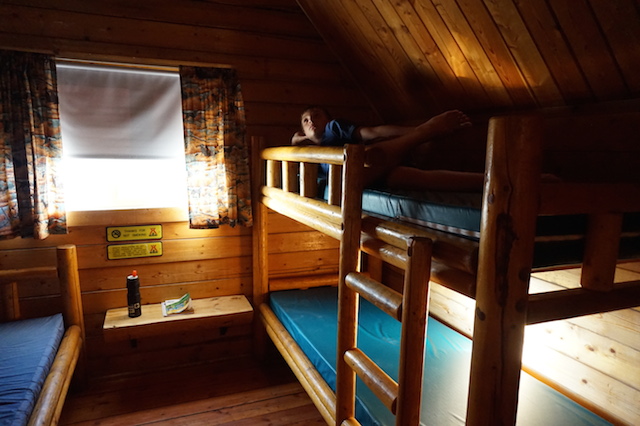
Find a campsite with equal parts shade and sun to maximize your exposure and enjoy warmth in the mornings and cooler temperatures in the afternoon. Once you’ve selected a site, set up your sleeping area in the shade (so your tents don’t heat up during the day) on flat ground away from the fire ring and kitchen area.

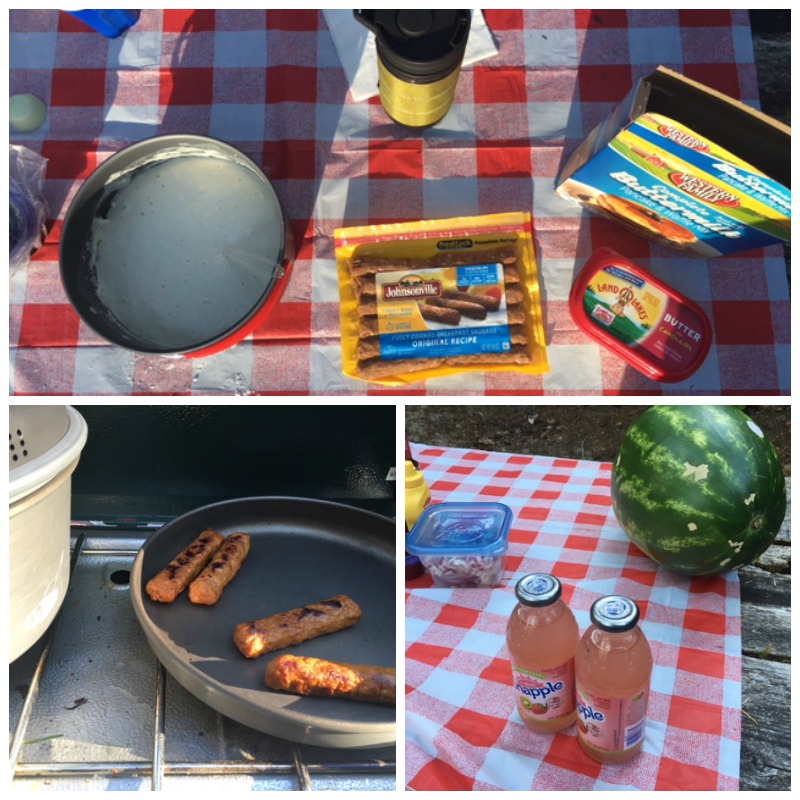
Set up your kitchen adjacent to the fire ring and picnic table. You may want to consider setting up a screen dome or shade shelter over the table to reduce unwanted quality time with insects and mosquitos. Make sure you place your cooler in the shade.

camping-recipes

How to Have a Safe Campfire

First, always make sure the campground permits campfires. Campfire policies can change seasonally, and they may be prohibited during peak forest fire danger periods. If campfires are permitted, make sure to gather sticks and wood from the ground around your site, taking care not to break branches off living trees. Dead wood is drier and better for burning.

If you need to buy firewood, buy it at your campground or at a local store. This practice saves space in your vehicle for your other gear, and it is far better for the environment. When you bring wood from home, you can unknowingly bring unwanted, non-native insects or parasites along with it.

Start your campfire with kindling or small sticks from around the campsite, combined with some newspaper or store-bought fire starter.

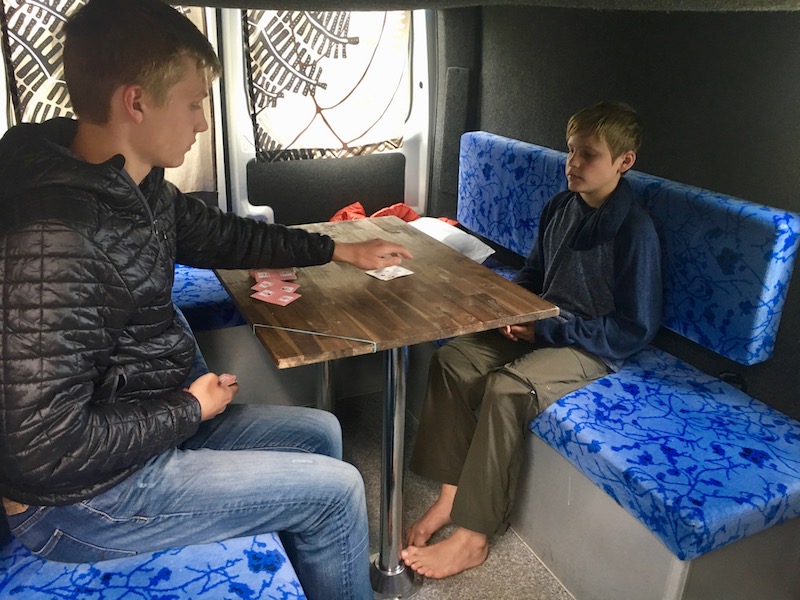
Always let your campfire start to die out one hour before bedtime. This is a great time to light a camping lantern and play a few rounds of cards or a board game. Of course, you should always put your fire completely out before leaving your campsite (for the day or at the end of the trip). To extinguish your fire quickly, separate the burned coals with a stick. Once they’re not touching, they will become cool to the touch within 15-20 minutes on average. After spreading the coals, ensure that the fire is fully out by throwing buckets of water or sand or them.
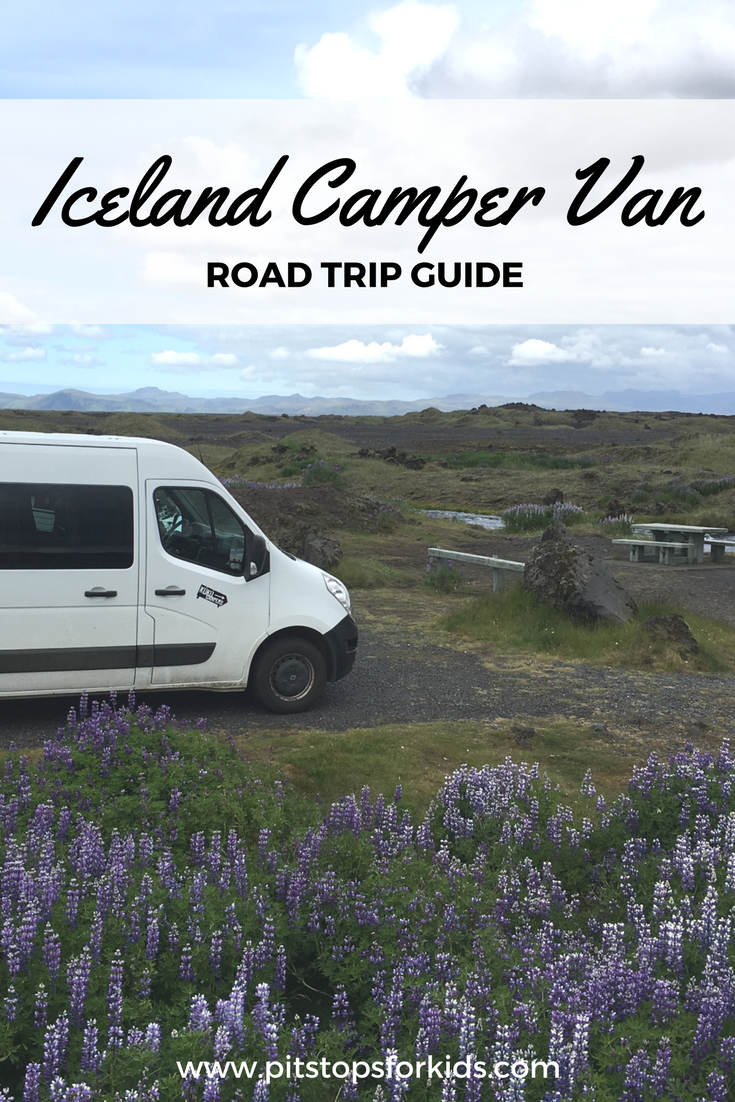
Pin it for later!


Source: eReplacementParts.com

Tips for keeping kids healthy on family trips

A great family road trip can teach valuable lessons and help your child expand their world view. It can also, though, put them at risk of getting sick. Motion sickness, changes in climate, and lots of germ-ridden tourist stops can spell trouble for children with susceptible immune systems.

Tips for keeping kids healthy:

To keep everyone right on track and healthy, follow these health tips. This expert advice can help your kids make the most out of this family trip, without having to miss out and stay homesick.

Equip Yourself For Weather Conditions

If you are a native to warmer weather, traveling somewhere in a higher altitude could spell trouble for your child’s lungs. Harsh, dry air can lead to chapped and bleeding lips, sore throat, and difficulty breathing. For young children, this can make enjoying the vacation almost impossible.

There are lots of ways to protect your kids from harsh weather and dry air. Here are what the experts recommend.

Moisturize

To keep your child’s lips and skin safe from chafing, drying out, and bleeding, bring along simple moisturizers. Lip balm and body lotion are both great for the skin. Reapply these lotions on your child throughout the day to keep their skin protected.

Other than transdermal moisturizing, it is vital to keep the entire system hydrated and moisturized. Difficulty breathing or a sore throat could be a result of the dry air. Use a state of the art humidifier during the night while your child sleeps. This will rehydrate their damaged system and keep them healthy despite changing climates.

Of course, the simplest solution to stay healthy is to drink plenty of fluids. Bring a portable water bottle with you wherever you go so that you can continue to refill and hydrate all day.

Sooth and Medicate

For a sore throat, coughing is natural, but it tends to exacerbate conditions. Bring cough drops with you everywhere to prevent intense bouts of coughing. You can also soothe your throat with specific teas with lots of honey.

There are tons of over the counter medicines to help clear up mucus and prevent infection. These are essential to staying healthy and preventing one sickness from spiraling into a worse one. Weather can bring on cold symptoms. If untreated, these can lead to worse bacterial infections that can last for weeks or even months and may require antibiotics.

Keep a Schedule

One of the most significant risks to your child’s health is their sleep schedule. Not getting enough sleep means putting your child at a disadvantage when it comes to fighting off illnesses. If you have lots of busy days planned with a full itinerary, be sure to leave lots of wind-down time. This way, your kids can get a nice nine or ten hours of rest before tackling the new day.

Scheduling time for rest is essential, and so is scheduling healthy meals. If you don’t make time to invest in preparing healthy snacks, your child could get so caught up in the excitement that they forget to eat, equally as unhealthy is choosing a junk food alternative at the last minute just because it is easy. Keeping a schedule means always leaving enough time to eat and sleep. Your children deserve to spend time taking care of their bodies, even on vacation.

The Bottom Line

However you choose to travel, your kids can always stay healthy if they follow these expert tips. While you are bound to encounter illness or symptoms at some point, this advice can keep setbacks like the common cold or a dry throat from becoming something worse.

Travel Gear We Use: All-time favorite healthy travel snacks

Today’s Travel Gear We Use segment isn’t exactly gear, but does help us as we travel: we’re rounding up our favorite healthy travel snacks. There are many, many products out there that claim to be wholesome, organic, and tasty. We’ve tried almost all of them. Yet, this list is short. Very short. Why? Let’s be real: most so-called healthy travel snacks are gross. Even my kids, who know their way around a natural foods store, go to schools that are GMO-free, and live in hippie-friendly Oregon, have their limits. Here are the winners that are kid-tested and kid-approved in our house. Buy these snacks for your next road trip or air travel day, and you won’t be wasting your money.

road-trip-snacks

SunRidge Farms mixes:

sunridge-farms
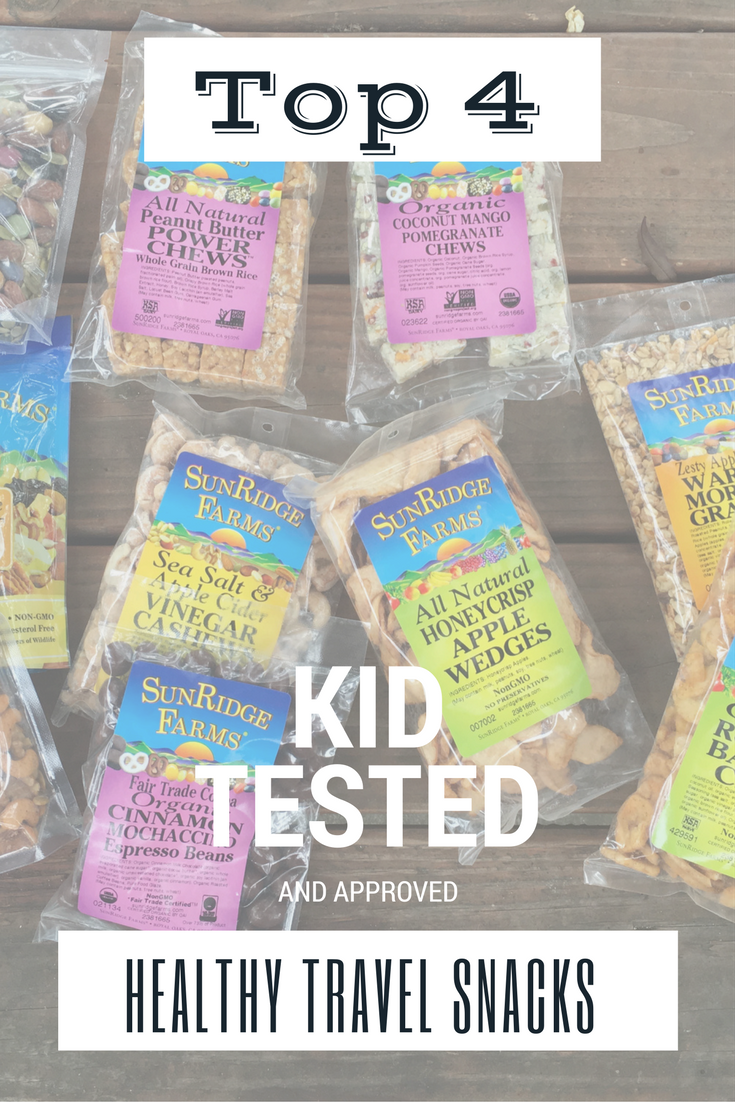
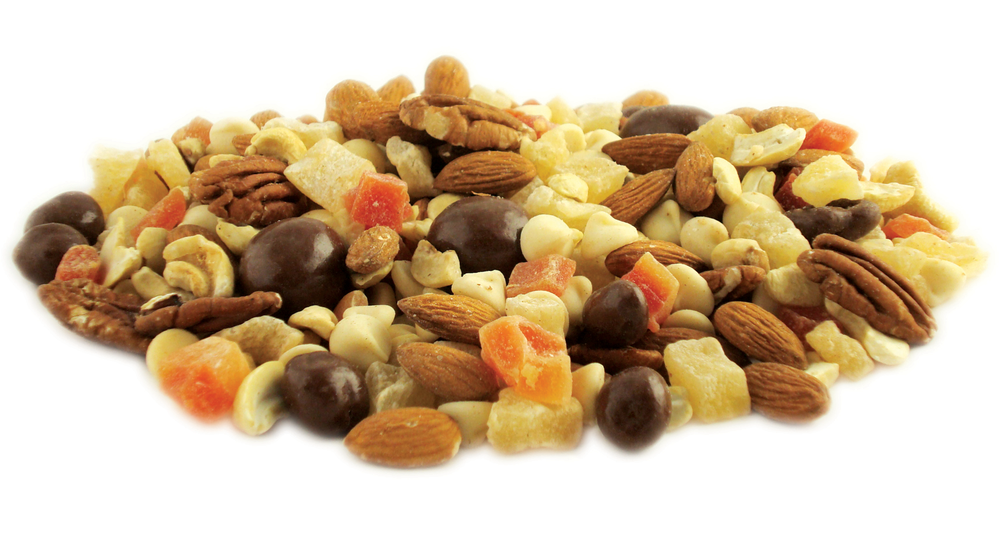
OMG, you guys. If you want to ensure everyone in the family has a healthy, delicious and dare I say, downright exciting trail mix to call their own for your next trip, check out SunRidge Farms. Their many, many trail mix varieties can be bought in 6-8 ounce bags, but also come in bulk. I love this option, as we bring our own containers and bento boxes when we travel to cut down on waste. You can create your own trail mixes by looking through their many nut, seed, dried fruit, and organic chocolate offerings, but save yourself some time and check out their pre-packaged ones. We love the Berries and Chocolate. You can also get square protein chews that my kids gave a thumbs up: the peanut butter power chews are a favorite. I love that SunRidge Farm’s production facility is powered by solar energy and that their foods are GMO-free, organic, and much of the chocolate and coffee offerings are Fair Trade. Yes, SunRidge Farms’ trail mixes are more expensive than average, but we found them on Amazon and if you buy in bulk, you’ll get high quality snack food for a reasonable price! You can even get gummies for a treat on the road you don’t have to feel guilty about!

Kate’s Real Food:

kates-real-food

Haven’t heard of Kate’s Real Food bars? I love these all-natural, organic creations originating in Jackson Hole, WY. Kate’s bars have been embraced by serious hikers, mountain bikers, climbers, and skiers all over the West, so you know it’s good enough for road trip noshing, too. We love that these bars are made from locally-sourced ingredients whenever applicable, and they never freeze…even when skiing or in the cold car. My kids quickly tire of the usual protein bars and granola bars, but Kate’s are just wholesome enough that they taste like, well, real food, instead of chalk or powder. And bonus: they’re on Amazon in bulk, too!

Nut butters from PB Crave

This high energy, high protein food is perfect for road trips because it can survive just fine without refrigeration and doesn’t melt (too much) in a hot car. Kids find peanut butter to be boring? They won’t if you try PB Crave. These peanupb-crave
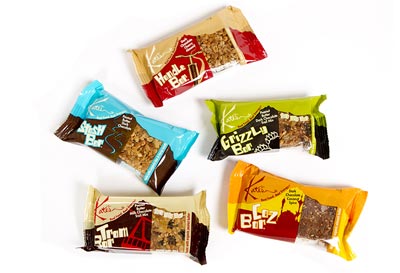
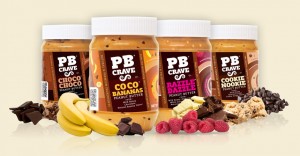
t butters come in super fun flavors, like Cookie Nookie (chocolate chips and cookie dough flavor) and Razzle Dazzle (dark chocolate, white cocoa butter drops, and natural raspberry flavor). They taste very sweet (maybe too sweet for grown ups), but all PB Crave flavors are sweetened with wild honey, and their more affordable than ‘gourmet’ nut butters. We put a jar in the car and toss in crackers, bread, or apple slices to eat with it.

Matt’s Munchiesmatts-munchies

Forget about any other fruit leather or fruit roll-up, and definitely forget about those artificial fruit snacks. My kids LOVED Matt’s Munchies dried fruit strips, and I loved that each package could feed two hungry kids…no skimping here! We love the tropical flavors with real strips of coconut blended in, but get a variety pack to start with and discover your favorites. For picky eaters used to basic flavors, try the Apple-licious.

As a peanut butter alternative, you can also try an almond butter. It could also be used as a good travel snack. Here’s a review on the best almond butter from Kitchenistic.

Bottom line: can you supply your family with travel snacks for less money? Sure, we know that. And our family can’t realistically buy these types of snacks every day. But eating healthy, wholesome, naturally sweetened snacks while traveling can enhance every part of your vacation. Kids will feel better, be better behaved, and have more energy to play and explore. And the truth is, so will you!

Subscribe to our Pit Stops for Kids seasonal newsletter, and get an exclusive travel ‘cheat sheet’, free! Click here!

Top 4 healthy snacks for travel

Road Trip Travel Hack: Stay nights at KOA Kampgrounds!

We love to review destination hotels and resorts, but let’s face it: roadside motels booked solely for the purpose of an overnight pit stop en route on a road trip are usually nothing to write home about. Plus, an average motel stay is now over $100 per night. In the last year or so, we’ve been thinking outside the box (or motel room) and booking cabin, yurt, or campground stays instead.

koa jackson hole

I know what you’re thinking: you don’t want to pack everything needed for a camping overnight during your road trip, right? And you’re not keen on the dirt and work involved, just for one night. But wait, we have a solution: campgrounds with cabins.

Many state parks and wildlife reserves have wonderful cabin or yurt options (check out this one right outside Yellowstone National Park), and most well-traveled interstates and highways now have KOA Kampgrounds en route. A number of years ago, I would not have considered staying at a KOA. But times truly have changed. We stayed at our first KOA in a decade two years ago, while traveling through Oregon to Mt. Hood in winter. We needed a low-cost, fun, and friendly place to stay the night, and a KOA cabin in Redmond fit the bill. Last week, we repeated the process, staying at a KOA cabin in Mountain Home, Idaho en route to Wyoming. Both of these cabins were listed as one of their standard options, which include electricity, heat, and beds for 4-6 people. They are not deluxe, and meals need to be cooked outside the cabin. Bathrooms are located in a different building close by.

koa-interior

For us, standard cabins work just fine. We usually have our own sleeping bags with us, and when we’re road tripping, we like to grab dinner out and eat a simple breakfast in our cabin that doesn’t require a kitchen. The Mountain Home and Redmond KOAs offered room to run around for the kids, a friendly community atmosphere, and the basic supplies we needed, like groceries, sunscreen, and bug spray in their stores. Some KOA locations aren’t anything special, but I’ve never experienced one that did not include a friendly, welcoming staff and clean amenities.  The rate is about half that of a motel room.

But what if you don’t want to rough it?

Try a KOA Deluxe Kabin! On our same Wyoming road trip, we stayed at the Jackson Hole/Snake River KOA in Jackson, and upgraded to a cabin with two rooms, a bathroom, and a full kitchen. Our cabin was located right on the Snake River, and when we arrived, the kids could immediately go play while we unloaded. We could cook our own dinner (the kitchen includes everything but an oven, and there’s a great BBQ, too) and sit outside at night, watching the stars come out instead of being stuck in a small motel room.

koa deluxe cabins

At KOA Jackson Hole/Snake River, there’s guided river rafting on-site, and in late summer, when the Snake River is running less rapidly, families can rent inner tubes to float down the river right next to the campground. The tent sites are located right on the banks (try to get site #1 for the best creekside playing) and the deluxe cabins overlook the river on higher ground. You can also opt for a standard cabin at this location, of course. We loved the friendly staff, and the fun activities on-site for kids. For instance: if kids find one of the painted rocks on property, they can turn it in for free ice cream!

deluxe-cabin

Deluxe cabins are as nice as you’d expect from an upscale rental home booking. Who knew? But be aware: these cabins can cost as much as, or more than, a motel room. It’s important to decide what your vacation goals are. If you’re booking primarily for budget reasons, opt for a standard cabin, and if you’re booking primarily for the outdoor experience instead of a motel experience, upgrade to a deluxe. Not all KOAs offer both, but you can get a good indication of the range of options by checking out the Jackson Hole camping cabin page.

koa-bedroom

What KOAs have you stayed in? Have your tried a cabin? We’d love your recommendations!

Iceland camper van road trip tips

Iceland has become a popular family vacation destination for many reasons: it is every bit as breathtakingly beautiful as it looks in photographs, there’s essentially no language barrier, it’s extremely family-friendly, and the outdoor recreation and sightseeing is almost endless.

What Iceland is not: cheap. Standard hotels can cost families as much as $400 per night on top of expensive rental car fees (especially if you need a 4×4 car for rough roads). Dining in Iceland is very expensive as well; fast food meals at a basic grill during the time of our 2017 trip were about $15 U.S. per person, and standard sit-down restaurant meals were closer to $45-50 per person. The solution: take an Iceland camper van road trip and combine your lodging and car rental cost and eliminate your restaurant dining out cost. Ready for Iceland camper van road trip tips? Let’s get started!

iceland camper van road trip tips

Start with your camper van rental:

The first stage of planning your Iceland road trip is booking your camper van rental. We used Kuku Campers, one of the largest camper van rental companies in Iceland. Kuku Campers offers just about every size and type of camper van, ranging from small vans that sleep 2-3 people to the larger style we rented, which sleeps five (both are Class C, which don’t require any additional training or know-how to drive). You can also opt between 2×2 or 4×4.

kuku camper

Kuku 2×2 category C camper

We picked this 2×2 van for five people (click on the link to see detailed interior photos) which cost approximately $1800 for nine days ($200 per night). This cost was significantly less than we’d spend on hotels and a rental car. Kuku Campers offers this van in standard (stick shift) or automatic. We opted for standard, as it was cheaper, and  I am comfortable driving a stick shift.

Note: Do you need a 4×4 vehicle? If you’re a regular reader of Pit Stops for Kids, you know we’re a pretty adventurous family. We rented a 2×2 van, and were able to access everything we wanted, and more. You need a 4×4 vehicle only if you plan to drive F roads (Iceland’s most rugged dirt roads), which is needed if you plan to backpack or hike deep in the interior.

The features and configuration of our camper van:

In the front were two bucket seats (the driver’s seat and the front passenger seat). Behind those seats was the kitchen area: a countertop/food prep surface with sink and faucet, storage area for a portable stove/cook top, electric refrigerator (which runs when the car is running), dishes and kitchen utensils and silverware, a large water storage container, and a pantry area for food. Behind the kitchen was the main compartment of the van, which had a padded bench seat in a U shape, surrounded by a roomy kitchen table. Above this was a sleeping bunk. At night, the table and bench seat easily folded down to become a second sleeping area. The bottom slept three, and the top slept two. During the day, passengers could sit on the bench seat with seatbelt while the van was on the road.

kuku-camper

Lots of space: to the front of this photo would be the kitchen area.

In addition to the running water, which ran from a hose from the water container to the kitchen sink, the van had two overhead lights and a nighttime heater (which could be run when the van was turned off). There is no bathroom in the van, but this isn’t a problem (we’ll get to that soon). We found sufficient storage in the van for our bags under the bench seats and at the very back of the van, in addition to smaller storage areas above the front seats and above the kitchen. Lastly, there were useful hooks to hold jackets and rain pants, as well as curtains to pull around the windows at night. These hung on elastic cords, which we used to hang additional items like wet towels and swimsuits.

But was the van hard to drive? 

At first, a little bit, yes. I don’t ever drive anything larger than a minivan at home, so for me, it took a day to get comfortable driving something taller and wider. Icelandic roads are narrower than US roads, so there is definitely a learning curve. I also needed time to get used to backing up the van (though it was far easier than trying to back up a van with a trailer). By Day 2, I was quite comfortable. Overall, driving the van was no big deal, even on dirt and gravel roads, though the van certainly got dirty!

iceland road trip

Stopping to make a snack and take photos on a gravel road. There are plenty of turn-outs to use!

The van took diesel fuel, which seemed to be easily available at every gas station, and it cost me about $160 to fill the tank. We drove for eight days, I filled up twice and topped off once, and I spent a total of $360 on gas. At all campgrounds and parking lots for trails, scenic overlooks, and historic sites, there was ample room to park the van. The only place I had trouble navigating parking was in downtown Reykjavik, and even there, I managed (but it was stressful).

Next plan your trip! Here’s what to expect:

I’m going to say something now that I never say on this site: don’t over-plan. If you allow your itinerary to stay flexible, you’ll be able to advantage of all the many moments of spontaneity possible in Iceland. There are natural wonders and historic sites every few kilometers at times; you can’t do it all, but you can decide what to do in the moment. We planned a general route which included the south, west, and east. We purposely didn’t travel the entire Ring Road because with only eight full days on the road, we wanted to spend more time on side roads than Route 1.

iceland camper van

Waterfall at the base of one of our campsites.

I absolutely loved having our Kuku Camper, because of the freedom it offered. Every day, we traveled WITH our lodging and dining, so we never had to worry about getting to an exact place to eat or sleep each night. In Iceland, especially in the rural areas (which is most areas), we found that restaurants and shops closed relatively early in the day, even in the peak of summer. We were hard pressed to find dining options open after 6 pm, so we loved the ability to picnic our meals anytime, anyplace. We got into a routine of making breakfast in our camper at the campground in the morning, making a picnic or packed lunch to enjoy out and about, and then stopping at one of Iceland’s many, many scenic overlooks to BBQ or cook our dinner on the road. We arrived at each campground at night well-fed and ready to make camp. While we were driving, if someone was hungry, they could simply make a sandwich on the road, and if we decided at the last minute to detour to see or do something, we never had to care about missing reservations.

iceland picnic

Iceland outdoor picnic!

The most unnatural thing to me, as a natural planner, was the fact that you do not need to make campground reservations. If you’ve tried to camp in popular campgrounds in the US in summer, you know this simply isn’t true at home. But in Iceland, they really do mean it when they say their campgrounds do not fill up. They really don’t. Not anywhere. Not ever.

uncruise-review

Pages: 1 2 3

Outdoor adventure road trip: 30 days on an outdoor adventure itinerary

Our absolute favorite type of travel involves an outdoor adventure itinerary, the longer the better! However, even we don’t cherish the idea of roughing it continuously for weeks on-end. While we will be spending a full week (or more) on the PCT with kids soon, we opted to plan the rest of our summer outdoor adventures with a little more comfort in mind. Here’s how we’ll be spending 30 days on an outdoor adventure itinerary in the Northwest US this summer, without channeling our inner Bear Grylls.

OARS

Day 1-5: Out on the water at the edge of Washington State

We’ll be starting our month of outdoor adventure on scenic San Juan Island, Washington. The San Juan islands are one of our favorite outdoor playgrounds for families, because they offer unparalleled beauty and nature as well as comfort and relaxation, should you want it. It’s easy to get around the island, exploring beaches, forts, and harbors. We’ll spend a night enjoying in San Juan Island hospitality, then set out for two days and two nights with Crystal Seas, kayaking around the side of the island and in the sound. I won’t lie: on this kayaking camping trip, I am very much hoping to see orcas…wildlife that has eluded me so far during multiple trips in the Pacific Northwest. Fingers crossed!

friday-harbor

Day 6-8: Mt. Rainer National Park

After one more night of R&R after our outdoor kayaking days at Snug Harbor Resort, we’ll say goodbye to the San Juans and drive back onto the mainland for a few days in Mt. Rainer National Park. Since we just camped out a few days on the island, we’ve reserved a cozy cabin outside the park instead (we got ours through HomeAway). While in the park, we have long day hikes planned; while it will be too early in the season for us to tackle the famous Wonderland Trail (we won’t have time, anyway), we’ll be trying a few of these day hikes. The teens and I will be wearing our Oboz hiking shoes, of course. (Curious about this? Check out why I’m an Oboz ambassador.) As the last Pacific Northwest national park we have yet to visit, I can’t wait to explore Rainer!

Day 9-11: Playtime at Suncadia

Our next set of stops on the itinerary will take us east across Washington, then up to British Columbia, but we don’t want to be in a rush, so we’re planning a relaxing stop at Suncadia. Located in Cle Elum, Washington, Suncadia is one of those one-stop outdoor resorts the Pacific NW is so good at creating. We’ll be able to spread out for a few days in a vacation rental, swim in the pools, ride rental bikes along the Suncadia paths (and perhaps embark on a little mountain biking). While at Suncadia, I’m looking forward to a well-deserved bottle of wine, some nice meals, and maybe even a round of golf.

Day 12-13: Rest(ful) stop in Spokane

spokane-riverfront-park

After leaving Suncadia, we’ll have a long drive ahead of us as we travel to Cranbrook, BC. Spokane Washington is a natural stopping point, with a lively and revitalized downtown and plenty of outdoor pursuits. We lived in Spokane for many years (in fact, two of the Pit Stops kids were born here), and I can’t wait to show them beautiful Riverfront Park and the Spokane River. We’ll be staying the night at the Red Lion Hotel at Riverfront Park, where the kids will get an evening of waterslides and pool fun. We’ll actually be returning to this hotel later, to watch Spokane’s well-known Hoopfest basketball tournament.

Day 14-20: Cowboy (and girl) living at Three Bars Ranch

After leaving Spokane, we’ll arrive in Cranbrook, BC, in the heart of the Canadian Rockies. Located between two of our favorite outdoor playgrounds–Glacier National Park and Banff, Alberta–the Three Bars Ranch is an all-inclusive dude ranch perfect for families. After trying our first dude ranch last year at Triangle X Ranch, Wyoming, we’re really excited to repeat a week on horseback. Every dude ranch is different, and we’re looking forward to reporting on how Three Bars differs from our Triangle X experience. Already, I know the boys are looking forward to using the tennis courts and pool at Three Bars! While I know our days will be filled with outdoor adventure, we’ll be sleeping in comfortable lodging every night, and able to soak sore muscles in the hot tub.

Day 21-27: Tackling the Main Salmon with O.A.R.S. Rafting

OARS river rafting

It’s no secret that we absolutely love O.A.R.S., so we’re very excited to announce we’ll be back on the river with this amazing company, this time on the Main Salmon in Idaho. After leaving Three Bars Ranch, we’ll return to Spokane, then head east to lovely McCall, Idaho. After our pre-rafting trip team meeting, we’ll be flying to our put-in spot on the Main Salmon, in the heart of the Frank Church ‘River of No Return’ Wilderness. For six days, we’ll be out in the elements, sleeping in tents and paddling the river, but with the O.A.R.S. team, families still feel pampered, even when on multi-day trips. I know there will be good food, comfy tents, and lots of fun and games.

If you’d love to spend the majority of your summer out-of-doors, but the thought of roughing it for days on end have you hesitating, consider one of the trips listed above…or be crazy like us and do them all! Look for detailed reviews of our experiences with Crystal Seas, Three Bars Ranch, Suncadia, and O.A.R.S. in the months to come!

Travel Gear We Use: 30 Road Trip Products

I know, your car is already packed to the gills for your family road trip. But trust us, you need these 30 road trip products and ideas to make your travel day run smoothly. We travel every month of the year, and test new road trip products every time we hit the road. Check out our list of road trip gear, updated to include new gear for 2017, and see what you’re missing!

road-trip-products

Road trip safety gear:

1. My Bucklemate: This innovative little piece of plastic makes it easy for young kids to buckle themselves into their seats more easily…without mom or dad needing to crawl into the back seat to dig the seat belt clip out of the seat crease! Pick up Bucklemate on Amazon.

2. Cardiff Booster Seat Headrest: By far, the best headrest we’ve seen for toddlers and preschoolers. No more floppy heads when kids are trying to nap!

3. Bubblebum: This portable booster seat goes everywhere, from your own car to taxis to theaters. We guarantee you’ll use it in at least three ways on any road trip!

4. Adventure Medical Kit: There are several pre-made first aid kits to choose from when you browse the offerings at Adventure Medical Kits. Our favorites are listed here!

5. AAA Emergency Road Assistance Kit: Pick out a pre-made kit like this one, or design your own, ensuring you have flares, chains, and the gear you need to change a tire.

bucklemate

Car organizational gear:

6. Seatback car organizer: Every family needs at least one of these organizers that fit on the seat back, for storing books, DVDs, games, and cups. Don’t want to spend much money? Check for a hanging shoe organizer at your local dollar store. Pictured above: Prince Lionheart Backseat Organizer.

7. Trash bags: Yep, good old-fashioned trash bags. Don’t forget them! You’ll need them for the obvious purpose, but trash bags also pull double-duty as wet storage for swimsuits or soggy gloves and hats, storage for muddy shoes, and, unfortunately, as a much-needed receptacle if someone gets car sick.

8. Packing cubes: Used by our family for so much more than packing, packing cubes are ideal during road trips as carry-alls for kids’ gear. Give each child a large packing cube to fill up with his or her items for the ride. Packing cubes are easier to stow under the seat than backpacks, take up less room, and are easy to open and close. Here are our favorites.

9. Mesh laundry bagsGo ahead and use these cheap, lightweight laundry bags for their intended purpose once you arrive at your destination, but while on your road trip, use them to store boots and jackets the family will want at pit stops in winter and sandals or swimsuits in summer. Grab one bag when you reach your pit stop, and off you go.

10. KIDS ‘N’ PETS All Purpose Stain & Odor remover: You might need it. Ok, you’ll probably need it. Fine. We always need it. If you want something more portable than the liquid version, try their new Stain and Odor Remover wipes! We keep a tube of these in one of the car’s drink holders.

11. Refresh your Car: These car freshener products are the only ones my kids will tolerate. Plus, you can use these products to clean your dashboard, too. Here’s our full review.

In-car and rest stop entertainment:

12. SOL REPUBLIC headphones: These are the only headphones we use now, because they’re nearly indestructible. Kids can twist them, step on them, or toss them into a bag, and they keep on delivering high-quality sound. Check out more info in our best electronics picks for travel.

13. Splitter for headphones: Don’t forget one of these! When kids want to listen to a DVD or CD together, they need a splicer for their headphones. Forget it, and you’ll be listening to the entire soundtrack of Frozen too, Mom and Dad. Pair with the screen of your choice. Don’t forget about Kindles!

14. Brunton Revolt: This power cube is worth the investment. Even with in-car chargers and USB ports, everyone needs more power at some point. The Brunton can go from the car to your hotel room, offering an extra place to plug in. Plus, it comes with lots of built-in cables, so there’s no need to bring a tangle of your own.

15. Family puzzle and coloring books: Guess what? It turns out you’re never too old for Where’s Waldo. Candlewick Press’ Where’s Waldo: The Totally Essential Travel Collection includes hundreds of pages of Waldo illustrations, all in a compact, durable book. Like to color instead? ColorIt sells adult coloring books also ideal for kids. Try the Greatest Adventure Adult Coloring Book…it’s packed with pages suitable for kids or adults, and is in a durable spiral-bound notebook ideal for the road. Keep it in the car…you won’t be sorry!

16. Redbox movies: Don’t want to (or can’t) stream movies en route? Get the Redbox movie app, and find Redbox kiosks en route via your car’s entertainment system or a portable DVD player. We like to utilize Redbox because we never have to pay late fees (we find another Redbox to turn movies into down the road) and we have a constant supply of new movies without needing 4G.

17. SOL REPUBLIC Punk SpeakerWant to listen to audio books or podcasts as a family on the road, but don’t have the capability of plugging a smart phone into the car’s audio system? Use a Punk speaker! This little portable speaker packs a big punch. It’s also good for small kids who don’t like to use headphones.

18. Outside Inside Adventure Games: Have you ever stopped at a rest stop so the kids could stretch their legs, only to find nothing to do? We absolutely love these portable games for kids! Some are best for the campsite or fire pit, but others are ideal for grassy spaces, playgrounds, and even hotel rooms. Plus, they all pack down for easy transport. The magnetic darts are our favorite for the hotel room, and the bocce ball set and ladder ball/cornhole games are our favorite for rest stops.

bocce-ball

19. Wipe board and dry erase marker: Don’t underestimate the power of a simple board and marker. Kids can play classic games like ‘hangman’ or ‘tic tac toe’. No need to invest in expensive versions of these games!

20. Magnetic Fun: Can’t go wrong with these tried-and-true car entertainment kits! Magnetic Fun is ideal for the toddler and preschool set, but older kids will play too.

Road trip snacks and food:

21. Yeti cooler: A Yeti is a big investment, but if you road trip often, it’s well worth it to have this top-of-the-line cooler. Foods will stay cold in a Yeti far longer than in standard coolers, allowing families to stop and drain it less often and eat more meals on the road. We have the Tundra 45. Can’t swing the cost of a Yeti? Try Mountain Khakis’ new rugged Compass Cooler.

22. BooginHead Pack ‘Ems snack bags: We only use reusable snack bags. BooginHead are our current favorite, because they wipe down easily, are washable, and stand up on their own when packed. Plus, they velcro open and closed, making it easy for little hands to open them. They’re very affordable, too.

23. Sea to Summit Seal ‘n Go: We’ve long been fans of Sea to Summit’s bowls and cups for backcountry camping, and now they have a product perfect for families on the go, whether you’re on a road trip or simply serving kids a snack in the car on the way to school. The Seal ‘n Go comes in multiple sizes, and is a collapsible container with a threaded lid for secure food carrying. They pack down small when you don’t need them, and are virtually accident-proof.  Of  course, you can take them camping, too! Each piece is around $20.

patagonia-provisions

24. Patagonia Provisions: Bet you haven’t heard of this! Patagonia (yes, the brand that brings you ski wear and down vests) also makes road trip-ready food. You can buy their energy bars, or better yet, get their breakfast grains to make in hotel rooms for an easy and healthy breakfast (just add hot water from a coffee maker). They also make healthy soup mixes for in-room dinners.

25. GSI Outdoors macro camp table: Made with camping in mind, the GSI Outdoors Macro Table is also excellent for road trips. It collapses completely for easy transport, is lightweight, and opens up for an instant table anywhere. We love it on road trips for pit stops at parks where we’re setting out a snack or lunch, in addition to a meal prep space at campsites. It comes in a micro size, too!

26. Jelly Belly candies: You have to have some candy on your road trip, and Jelly Belly candies entertain with their many flavor options while kids (and adults) snack on them. If you’re driving through California, take a Jelly Belly tour at the factory in the San Francisco Bay Area!

rumpl

Miscellaneous items:

27. Water bottles: Everyone needs to stay hydrated on a road trip, and personal water bottles help families save money when they stop for food, too. We love HydroFlask bottles, because they’re insulated and stainless steel. For a lighter weight bottle, go with Camelbak Eddy or Chute.

28. Duct tape: We won’t judge parents on how duct tape is used, especially at the end of a road trip, but here are our ideas: use it to designate ‘territory’ within the car, to keep kids in their own space, or allow kids to create art with it. Ours like to make their own wallets or frisbees.

29. Paper maps: Go old-school when you stop at gas stations or welcome centers, and pick up paper maps of the region you’re road tripping. Allow kids to follow your route by themselves, or enlist their help navigating. Older kids can pick out pit stops en route, or calculate distance.

30. Pillows and blankets: Make your road trip a slumber party with small pillows and lap blankets to make the drive more comfortable. If you don’t have room for full-sized pillows, opt for travel pillows. We love Rumpl’s travel blanket, which packs down small and is waterproof against spills.

Need kids’ gear for the road and want to shop online? Find great deals on essential baby and child gear.

SaveSave

Five pet-friendly road trip ideas

If you’re planning a road trip with the kids, you won’t want to leave your furry family members behind! It just wouldn’t be a vacation without them. Yet just like travelling with the little ones, a bit of advance planning can make a world of difference once you’re on the road. To get started, you’ll want to choose road trip destinations that are ideal for both kids and pets. Here are five of the best!

See also: pet friendly road trip tips!

Five pet-friendly road trip ideas:

dog-friendly road trip

1. The Grand Canyon

Some of America’s top destinations are more pet-friendly than others. National Parks like Yellowstone are always a hit for the kids, but they’re not so great for dogs who aren’t allowed in many campgrounds. The Grand Canyon in Arizona is a notable exception. Your pooch will be allowed to tackle the trails along with the kids, making this a great road trip pit stop for the whole family. Remember to bring plenty of snacks and water for everyone, as temperatures can soar and the trails go on for miles.

2. Nevada and Las Vegas 

Las Vegas may not be the first road trip stop to come to mind when you’re thinking about where to take the kids and pets. While you can’t take Fido into the casinos, there are plenty of dog-friendly stops along the strip including many restaurants and shops. Many of the larger hotel chains also offer pet beds and food bowls upon request. The kids will be entertained by live shows and swimming pools, and outside of the city there are plenty of attractions to drive to. Don’t miss Red Rock Canyon, only a 30-minute drive away.

3. Upstate New York

Explore New York State with a drive away from Manhattan towards the Adirondacks. Road trip destinations like Mirror Lake are family and pet-friendly. A prime example is Lake Placid Lodge, which offers cabins fully stocked with homemade doggie treats and pet beds. The children will love wandering around the numerous hiking trails in the area, while upstate NY’s charming villages are filled with boutiques and organic cafes for the grownups.

4. North Carolina

North Carolina’s scenic highways are tailor-made for family fun. Get away to sandy beaches where the kids and pets can run free, or head to Jockey Ridge State Park to tackle the impressive sand dunes. Dogs are allowed on the boardwalk, which offers sweeping views and plenty of ice cream stands for the kids.

5. The California Coast 

Finally, a classic road trip idea is to wind your way up or down California’s scenic coastline. Whether or not you have a Mustang convertible to feel the wind in your hair, you’ll be able to soak in Pacific views and plenty of sunshine. California’s a particularly pet-loving state, with dog friendly restaurants and local festivals ready to welcome your furry friend. Pet-friendly beaches are clearly marked, particularly in the San Francisco Bay Area.

Make the most of your family road trip by including destinations like these, which are capable of accommodating everyone.

SaveSave

Three best road trip itineraries for active families


best-road-trips

No matter how much we vacation, road trips remain one of our favorite modes of travel. Why? Road trips offer a sense of adventure and freedom that’s hard to beat. Plus, they’re often more affordable, more flexible, and allow us to see the country up-close and personally. I’m offering up our three best road trip itineraries for active families in the western US and Canada:

1. Northern California Coastal Road Trip

Think a road trip down California’s fabled Highway 1 is only for romantic getaways, ideally in a convertible? Well sure, that’d be nice, but a Highway 1 road trip is excellent with kids in tow, too. Our trip started in San Francisco and ended in San Simeon, with both city and country stops.

monterey bike path

Highlights for active families:

  • Hiking along Big Sur
  • Biking along Monterey Bay
  • Kayaking and seal watching
  • city exploration in San Francisco

Read our full Highway 1 itinerary.

2. Vancouver Island Road Trip

Head over the border to Canada, and explore all the rugged beauty of Vancouver Island, BC. We started in the city of Vancouver, then took a BC ferry at Horseshoe Bay. Once we were on Vancouver Island, we explored the east coast of the shore (known for its sunny weather), then crossed the island for breathtaking views and wildlife spotting on the western side.

remote passages

Highlights for active families:

  • Kayaking in Ucluelet
  • Whale watching via zephyr boat in Tofino
  • Exploring Pacific Rim National Park
  • Ferrying to old growth forests in Meares Island

Read our full Vancouver Island itinerary. Want to add a bit more Pacific Northwest south of the border?  Explore San Juan Islands, WA as well.

3. Western National Parks road trip: Montana, Wyoming, and Utah

Want to see Glacier, Yellowstone, Grand Teton, and Zion, but can’t decide which epic national park to visit? Neither could we! For this national park-focused road trip, we started in Spokane, WA, and drove to Montana to see Glacier, then dropped down Big Sky for some outdoor playtime before driving to Wyoming to see Yellowstone and Grand Teton. Next, we headed to Park City, Utah for a breather before driving south to Zion.

swiftcurrent cruise Many Glacier

Highlights for active families:

  • Exploring 4 national parks in about 3 weeks
  • Camping in yurts and tents
  • Playing on ropes courses and zip lines in Park City and Big Sky
  • Boating on Glacier lakes
  • horseback riding in view of the Tetons

Read our full Western National Parks itinerary. Need a great detour? Drive to Cody, Wyoming after visiting Grand Teton to learn about Buffalo Bill and explore cowboy country.

Additional picks:

Pin it for later!


Georgia road trip: Five pit stops from the mountains to the coast

The following is a guest post by Sue Rodman, managing editor of 365 Atlanta Family.

Why rush to get to your destination when there is so much to see and do along the way? For those who like to enjoy the journey, we’ve put together a Georgia road trip that will take you on winding mountain roads, zipping along the highways, and cruising toward the sunshine coast. Yes, Georgia does have a coast, and we promise you’re going to love it.

Georgia road trip

North Georgia Route 76

Our journey begins in the North Georgia Mountains along the east-west Route 76, which is easy to get to from the north-south I-75 or I-85. This winding trail takes you through the friendly mountain towns of Ellijay, Blue Ridge, Blairsville, Hiawassee and Clayton. Here are some places you’ll want to get out and stretch your legs along this mountain highway.

Ellijay, Ga. This is the apple capital of the state. In fall, pull over at Red Barn Apple House for a peck and some apple cider. Note, Georgia’s apple season begins in late August and runs through the beginning of October.

Blue Ridge, Ga. About 15 minutes off Route 76 down Rock Creek Road is the Fall Branch Falls. This is a great family-friendly hike, and even young kids can make it to the lower falls section. The seclusion here is a nice break from the road.

Blairsville, Ga. Along Route 76 (also called Young Harris Hwy or Route 515) is a quick stop at Sleepy Hollow Enterprises. Explore the whimsical “fairy houses” made by this former Disney Imagineer, and then tour the store. The colorful creations will delight your soul.

Hiawassee, Ga. Along Route 76 in Hiawassee is the Georgia Mountain Fairgrounds. The Georgia Mountain Fairgrounds is open for year round camping along Lake Chatuge, but what it’s best known for are the big events it hosts every year, including the Georgia Mountain Fair, the Superstar Concert Series in the Anderson Music Hall, the Georgia Mountain Fall Festival and Georgia’s State Fiddler’s Convention. If you aren’t visiting during any of these events, check the website, they offer lots of smaller events too.

Clayton, Ga. As you make the turn to get on Route 23 toward I-85, take a break at the Clayton Pharmacy. Tucked inside this pharmacy is an old-fashioned soda shop with milkshakes, hot dogs, and more. I also read their egg salad sandwiches are awesome for packing on a hike.

georgia road trip

Atlanta Georgia I-75/I-85

Whether you take I-75 or I-85 south, they’ll merge together for a bit between Midtown and Downtown Atlanta. If you hit things during rush hour (could be anytime, depending on what’s going on in the city that day), grab a bite from the car hops at the Varsity. You’ll see the sign from the highway on the North Avenue exit. And if you want to spend more time in the city, choose from these 140+ Things to do in Atlanta.

In Atlanta you have two choices, stay on the highway or continue to follow the road less traveled and head east on I-20 toward Augusta where you’ll take Route 25 to Savannah. Along this route you’ll pass the antebellum towns of Social Circle, Madison and Rutledge. Stretch your legs with some shopping at Rutledge Hardware. My favorite things, like a 1940’s ledger, peanut warmer and letter from the 1800’s aren’t for sale, but you can get any number of other essentials. Do yourself a favor and go next door for a piece of buttermilk pie from Yesterdays before hitting the road again.

Middle Georgia I-16

If you’d rather take the shortest route possible to the beach, stay on I-75, but plan to make a pit stop in Macon to learn a bit about the city’s musical roots on a Rock Candy Walking Tour. Macon was once home to Little Richard, James Brown, and Otis Redding — and let’s not forget the Allman Brothers Band! — so there is plenty to see and learn from these local tour guides.

In Macon, you’ll veer off I-75 onto I-16 toward Savannah where you’ll pick up I-95 South. It’s worth a slight detour to Savannah to walk among the live oaks dripping with Spanish moss in the city’s many squares. If you only have a little time, combine a ghost tour with a history lesson and a meal at the Pirates House. Some say it’s a bit touristy, but we love the stories of drunken locals carried off to sea, and they have delicious fried chicken, plus pirate hats for the kids.

Georgia Coast Route 17

From Savannah you can take Route 17 for a back road path through the towns of Richmond Hill, Milton and Darien, or go straight down I-95 to the coast. Follow the signs to St. Simons or Jekyll Islands. On St. Simons look for tree spirits on a very unusual scavenger hunt. These spirits are carved into the live oaks around the island. Be sure to look for the lovely full-sized mermaid!

For a more structured outing, we love the Tidelands Nature Center on Jekyll Island. It’s a bit less flashy than it’s better known cousin the Georgia Sea Turtle Center (which is also excellent). Be sure to check out the special programs like guided kayak tours and dock studies.

Photo credit: Sue Rodman