Backcountry skiing basics: How to get into the sport

It’s never been a better time to get into the backcountry and leave the crowds behind! Here’s how to get into the sport during the COVID season!

An avid downhill skier and snowshoer, I’ve been noting the small but growing trend toward backcountry skiing for some time now. This sport, which combines a love of nordic exploration and downhill excitement, attracts men and women (and yes, some kids) who want to carve their own line down mountain terrain and explore the wilderness at the same time.
backcountry-skiing

I got my first pair of backcountry skis in 2012, which were basically fat nordic skis with a three-pin binding. I found I could navigate single-track nordic trails with steep inclines much better than my nordic skier counterparts, and I was hooked. Today, all-terrain (or AT) ski gear is much more involved, but AT skiing is still a fairly diverse term. Just like the sport itself, it can mean something different to every enthusiast, from short hikes up to freshies from lift-accessed runs to full-day expeditions with beacons and probes.

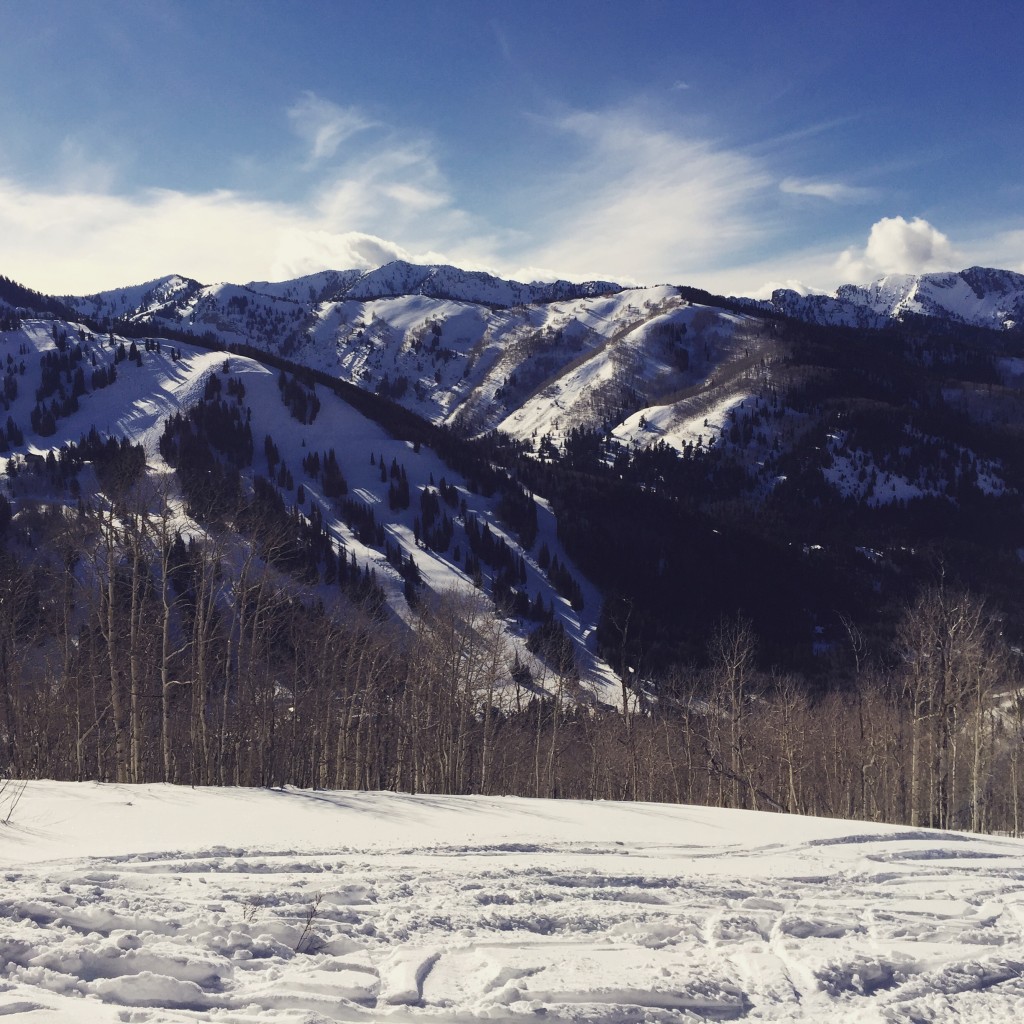
In January, I was lucky enough to experience the sport in more depth, this time trying out top-of-the-line AT skis, boots, and bindings on a half-day, strenuous backcountry ski day in Utah’s Cottonwood Canyon near Solitude Mountain Resort.

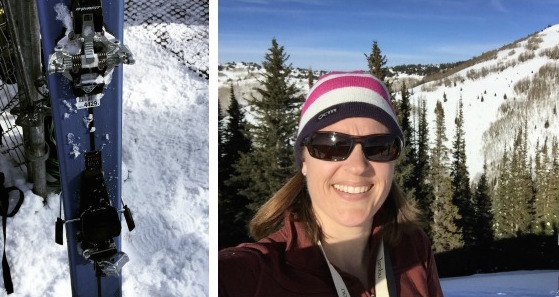
I headed out with Utah Mountain Adventures after getting outfitted with Voile skis with Dynafit bindings and Scarpa AT boots. I carried a backpack with plenty of water, plus a shovel and avalanche probe. I strapped an avalanche beacon, provided by Utah Mountain Adventures, to my body.
AT-skiing

The only way to get fresh powder runs was to climb uphill, so my first lesson was in putting on skins. Turns out, this is easy. The hard part is to climb upslope. We climbed for over two hours, stopping for a few breaks, skinning up a mountainside in the Wasatch Mountains. I’d like to say I enjoyed the whole experience,  but in truth, by hour two, I was sweating enough to shed a layer and starting to feel hot spots (which turned into blisters) where my socks rubbed in my boots. I was told to loosen my AT boots for the uphill climb (there’s a walk mode and ski mode), and while I’m sure this is sound advice, it didn’t help on the blister front.

The whole uphill experience reminded me of hiking: there were periods of enjoyment while I took in breathtaking views and reveled in being in the wilderness in winter, but also periods during which I had to set tiny goals–get to the next tree, get to the next open slope–in order to carry on. In other words, it’s crucial to love the outdoors and the uphill ‘hiking’ process, or the joys of backcountry skiing may be lost on you.

Climbing in AT skis is not very difficult–it’s much like cross-country skiing–but there are moments when kick turns may be necessary to zig-zag along steep grades. Yes, there’s a learning curve to this, but here’s what I was told (and it helped): use as much of the flat plane of your ski base as possible. Staying on your edges, where you don’t have skins, won’t help you keep traction.

backcountry-skiing

Once we’d summited a peak in Cottonwood Canyon, the fun began. We took off our skins, stowed them in our packs, and switched our boots and bindings to downhill mode. (Dynafit bindings are unique in that they transition from climbing mode, with the heel untethered, to downhill mode, with the heel locked down just like alpine skiing, with one twist of the back binding. They also feature ‘risers’ that can be raised while in climbing mode, which assist on steep ascents, much like going a gear lower on a bike. Yes, they’re nifty.)

We picked our line for the descent, and carved down the beautiful, light powder. Thanks to the efforts of our uphill hike, the terrain wasn’t skied out like it quickly becomes on lift-accessed terrain. I happily followed the lead of our guide, who knew the area and how to traverse through the glades and open slopes and still find our starting point back at base. Without him, I would have needed a GPS in unfamiliar territory.

Raised in the deep powder of Tahoe, skiing off-piste before I knew what that meant, I loved every second of the descent. Yes, it was challenging, but also very satisfying, knowing I’d earned my turns. I never needed my beacon, but was glad for the security it offered. Back at the base of the mountain, I switched my skis back to climb mode, and ‘cross-country skied’ my way back to the car on flat terrain. The sun was setting by the time we returned, and trust me, I’d earned my pizza and beer.

What you’ll need to get started in AT skiing:

  • AT or telemark skis (these are the skis I tried)
  • AT or telemark boots (the most comfortable seem to be Dynafit)
  • any ski poles
  • backpack
  • shovel, probe, and beacon
  • breathable outerwear
  • plenty of layers (wool is best)

Tips for beginners (like me):

I recommend going with a guide, like I did, your first time out (or any time out in an unfamiliar area). Most guide services can also rent AT skis and boots, which are expensive to buy yourself at first. More importantly, guides know where to go and are trained in avalanche safety (check to make sure!).
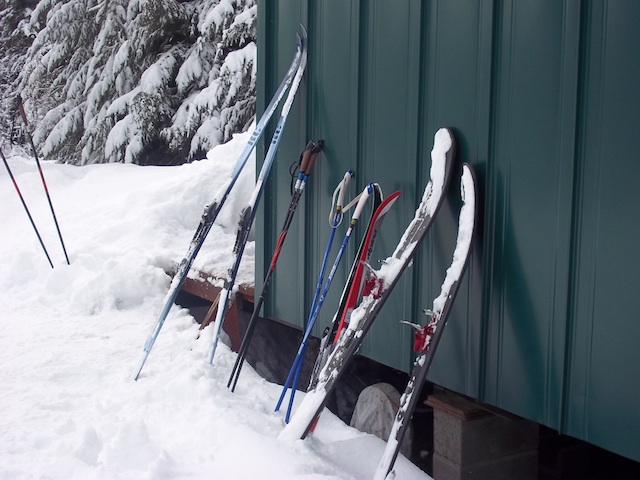
Cascade Huts

Any time out in the backcountry, everyone in your party should carry a beacon and shovel, at very least. I fell once during my trip, and lost one ski. It was deeply buried almost instantly, and had it been me, I would have been glad for my beacon, guiding others to me. Luckily, I found the ski without needing my shovel. If you go out without a guide, you should have completed an avalanche safety course. They are offered almost everywhere now, from gear stores to ski resorts.

If you haven’t explored winter terrain at all yet, start by snowshoeing or cross-country skiing. Hit trails you’re familiar with in the summer months; they’ll have a different feel in winter! Alternatively, try backcountry skiing from lift-accessed terrain. At any ski resort, look at a terrain map to see where off-piste (or non-groomed) terrain is located. Make sure it’s open the morning of your ski, and then climb only from the top of a lift (shortening your ‘hike’). Yes, others will have the same idea, so make this one of your first few runs of the day. Afterward, relax with some cruisers. Some resorts, such as Keystone Mountain in Colorado, even offer cat rides to off-piste terrain, allowing skiers to find fresh powder without AT gear.
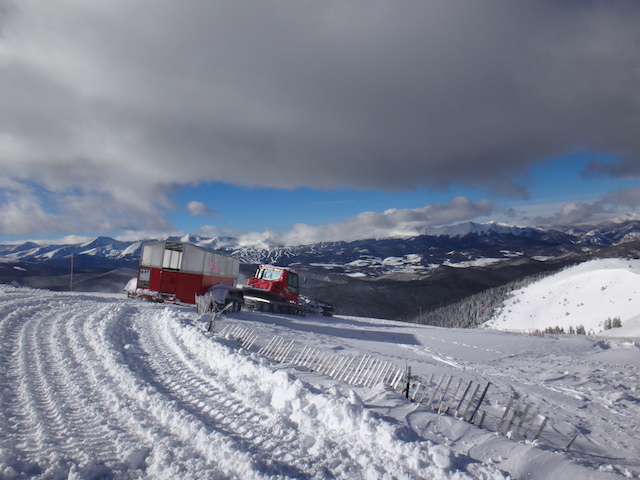
kat-skiing-at-keystone

Can kids AT ski? Sure, though it’s currently hard to find skis and boots to fit kids under age 12 or so. There’s a reason for this: AT skiing is a lot of work. My recommendation (that I’m following with my own kids): introduce the idea of backcountry exploration when kids are small, with snowshoe treks. Then, graduate to AT skiing when kids are teens. Make sure they’re expert skiers on groomed terrain, too.

Can snowboarders AT ‘ski’? Yes, Voile and other makers are now creating split snowboards, which split into two short ‘skis’ for the uphill climb, then come together to create a board for the downhill. It’s the coolest transformer yet!

I’ve heard the argument that AT skiing is popular because skiers can avoid the high cost of lift tickets. While this is true, and while I do think most lift ticket prices have gotten out-of-hand, I don’t think true AT ski lovers climb miles of terrain for this savings. It’s simply too much work to do it for any reason but a love of the outdoors and the sense of freedom. It’s a way to challenge oneself outside of the ski resorts, and well worth the effort of learning a new discipline within alpine skiing.

I toured the Wasatch with Utah Mountain Adventures at no cost, for the purpose of testing AT ski gear.

What to expect from a ski vacation during COVID

Skiing and snowboarding families should expect some differences at ski resorts this year. Ready to try a ski vacation during COVID? Read on!

Ski vacation during COVID: what to expect!

The good news: ski vacations are inherently safe, since they’re outdoors with plenty of fresh air and exercise. Families can pod together easily at ski resorts, and many resorts are expects a La Nina year! Here’s what to expect from a ski vacation during COVID:

Masks in lift lines and in lodges:

This is easy…you and your family are probably already wearing Buffs or other face coverings. If not, outfit your family with any type of balaclava, buff, bandana, or ski mask. If it’s a warm day, simply wear your face covering around your neck when you’re on the slopes. And be sure to check out ski and snowboard in Idaho for fantastic vacation ideas. 

Chair lift rides with your crew only:

Again, no big deal, since most chairs seat 4-6 people, and you probably ride up the slopes with your family anyway. Could this mean longer than usual lift lines, as lifties are required to load some chairs with fewer people on them? Yes, so be prepared to rest your legs a bit longer than you might like.

Some lodges closed for the season:

This one can be seen as a bummer, or as an opportunity: some ski resorts will be limiting lodge services. For instance, Mt. Ashland Ski Area‘s historic lodge will be closed for warming, lift ticket purchases, and food services, and will only be open for families to pick up rentals or meet for lessons.

This means that skiing and snowboarding may remind parents of the slopes of their childhoods, when a ski day did not include a $15 burger or ramen bar at lunch. Families will need to tailgate, bring packed sandwiches to eat on the chair, or plan more half-day experiences.

Walk-up ticket sales will be limited:

Most resorts, such as Squaw Valley, will limit walk-up tickets, in order to better control how many guests are on the slopes any given day. Day tickets will still be available, but they will need to be purchased in advance on the website. If day-of tickets are still available online, they may still be purchased.

fOther resorts, such as most Vail Resorts, plan to use a reservation system directly limiting the number of guests per day. This reservation system may be lifted later in the season. At Northstar California, for example, day passes won’t be sold at all until after a soft start for season passholders from opening day until mid-December.

This is the year to splurge on that annual pass:

Because of reservation systems and limits on walk-up sales, the best way to ensure your ski vacation during COVID–and the best way to plan in advance–is to purchase annual passes at your favorite resort. Annual passholders will be granted the most access and receive the most perks this ski season.

Are you ready for the 2020-21 ski season? Prep now by waxing and tuning your own skis with our DIY guide!

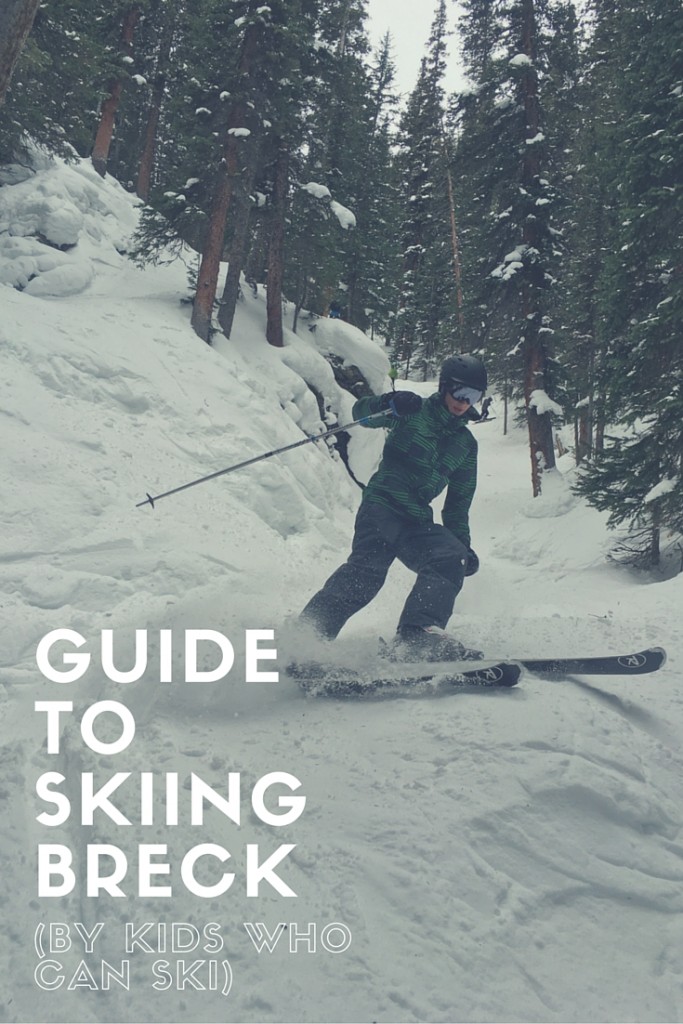
Guide to skiing Breckenridge with teens (by teens)

Breckenridge Mountain is a huge ski resort with something for absolutely every type of skier and rider. On our latest trip, we went with our teens and pre-teen, who are all expert skiers and riders. I thought I’d let them tell readers their favorite places on the mountain from their perspective. If you have older kids and teens who like steeps and deeps, this is the post to read!

guide-to-skiing-breck

Note to parents with beginning skiers and riders: Breckenridge’s ski school is among the best we’ve seen, and entire sections of the resort are devoted to green and blue (beginner and intermediate) runs. While this is not the ‘Breck’ we’re covering in this post, learners will be right at home!

Guide to skiing Breckenridge, according to kids who like moguls, trees, and bowls:

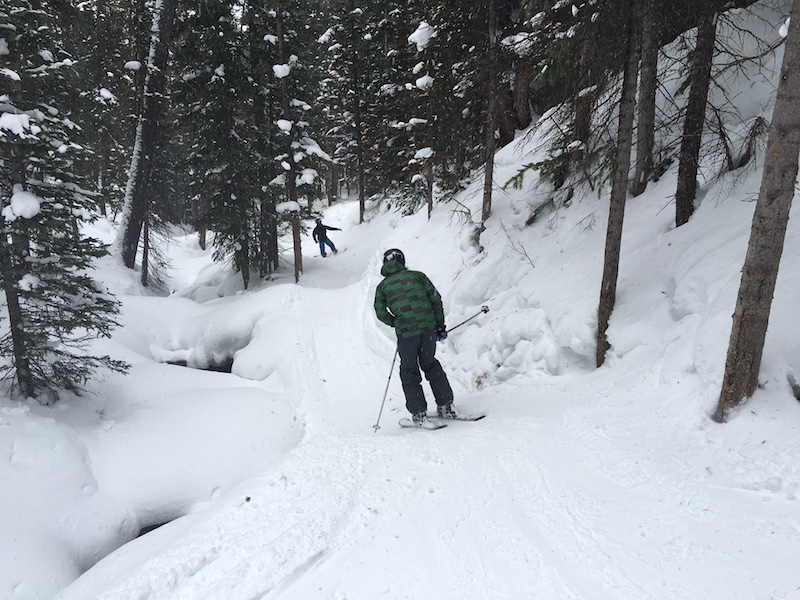
The bowls above the tree line are amazing, but only if conditions are right. On windy days or when they’re not open, due to avalanche control, head into the trees! Our favorite tree skiing at Breck is probably the Windows off Peak 9. From the Mercury SuperChair or the E Chair, take the trail to Window 1 and 2, and ski through trees into our favorite place in all of Breck: the ravine bordering a creek! There are winding trails, jumps, and bumps here and it goes on for ages!

breckenridge-bowls

There is a lot of out-of-boundary terrain at Breck, and there are gates to access these areas in designated spots. Don’t duck the rope! At the top of Peak 9, there’s a gate where you can hike for about 20 minutes to access some fun stuff, but remember: you have to have a pack, beacon, and shovel with you (and a friend). Our parents’ rule is that we have to take an avalanche safety course before they’ll buy us beacons, so we had to skip this spot.

But: if you still want to hike to great terrain, there are places to do this without leaving the resort boundary. If Imperial chair is not running, we like to hike from Peak 9 at the top of E Chair to the Back 9. The hike is long and hard (about 20 minutes, but it feels longer and you’ll get sweaty) but then you get to ski down your choice of double blacks that haven’t been skied out. After the open bowls, you’ll end up in the same creek run from above.

For lots of steep, mogul runs, head to Peak 10. This was our mom’s favorite peak. Go left at the top of Falcon SuperChair, and try Black Hawk or Dark Rider (double black diamonds).

Breck-skiing

Peak 7 is an intermediate hill, but at the top is lots of good stuff you can access if Imperial is open. We also liked 6 Chair, which had more moguls and above-tree stuff, on the side of Peak 8.

There are several terrain parks, but be warned: the large and medium ones are HUGE! We like terrain parks but had to stay on the small one…which was like our medium one at home! You can find the small one on Peak 9, called the Highway.

If you like bowls with plenty of spots to find trees to run through, get yourself to the T Bar. Riding the T Bar can be tricky at first, but just watch the people ahead of you, and don’t forget to stay standing…you don’t sit on the T. It’s harder to ride for snowboarders than skiers. When snowboarding, we place the T closer to our hip than our behinds. Riding the T Bar is entertaining, too, because about 1 in 10 people fall off.

breckenridge

Even if you are a very good skier, Breck’s kid zones are a lot of fun. Look for the small terrain trails throughout the family zones and intermediate runs. We found one with a mock mine tunnel to ski through and one with an ore bucket. It’s just lots of fun.

Disclosure: We skied and rode Breck as guests of the resort, in order to report back on where to go for the best runs. All opinions are our own! 

Skiing in Utah: Eagle Point ski vacation planning

When planning a ski vacation in Utah, families are spoiled for choice. There are over a dozen major resorts in the Salt Lake City area alone, and many of them are probably on your radar. We love Salt Lake ski resorts, but before you make the decision to head to one of the big destination resorts of Utah, consider a little gem in the southern end of the state.

Eagle-Point

What is Eagle Point, where is it, and why should we go there?

Ready to get your Eagle Point ski vacation planning on? Eagle Point is a small, boutique ski resort just outside of Beaver, Utah. It’s about three hours’ drive from Las Vegas and Salt Lake City, depending on which way you’re coming on I-15, followed by a winding, steep access road that you’ll want to ascend in the daylight. I’m using the word ‘boutique’ in the sense that Eagle Point is small, personalized, and niche, not that it’s upscale…because it’s not. In fact, it’s delightfully rustic, with a rough-around-the-edges feel that makes me think of my childhood ski trips.

Why bring your family all the way to Eagle Point? The easy answer would be, price. Families can still ski Eagle Point for under $50 for an adult lift ticket (around $30 for kids), and the resort’s ski-in, ski-out condos are incredibly affordable. You could spend a week at Eagle Point for a fraction of the cost of a week at a larger ski resort. But an affordable price is not the full story.

canyonside-lodge

Eagle Point is a resort that still retains the friendly, everyone-knows-each-other, hey-welcome-back atmosphere that’s been lost in many places. When you arrive at the check in desk at Canyonside Lodge, you might just be checked in by one of the resort’s enthusiastic owners, and the friendly waitress at the bar just might be your ski instructor the next day. The relatively small staff all know each other and seem to interact like family, and the small size of the resort means your kids will feel right at home in no time.

Lodging at Eagle Point:

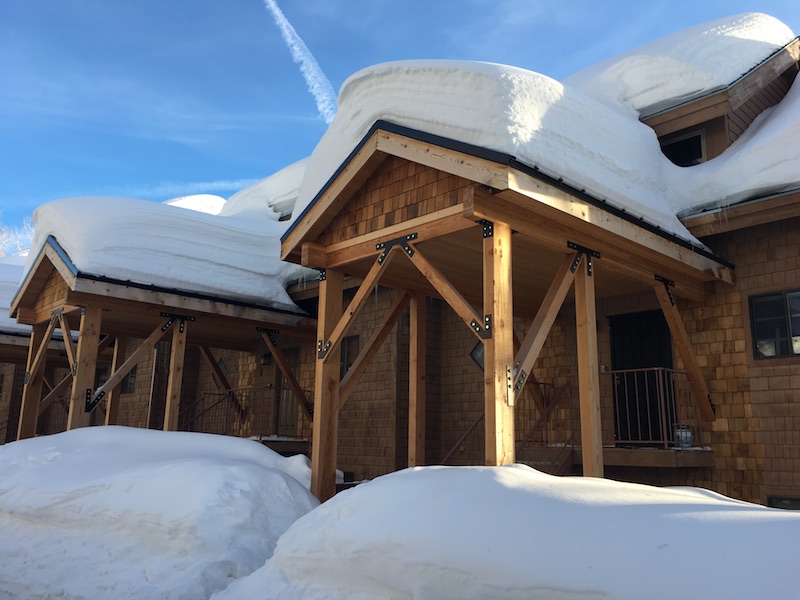
I stayed at a condo in Wooded Ridge, which is one of the condo development options at Eagle Point. There are a few full houses to rent, but otherwise, Eagle Point is all condos, many of which are ski-in, ski-out, or close to it. A free shuttle goes back and forth between condos and both base areas every 20 minutes.

Eagle-Point-loding

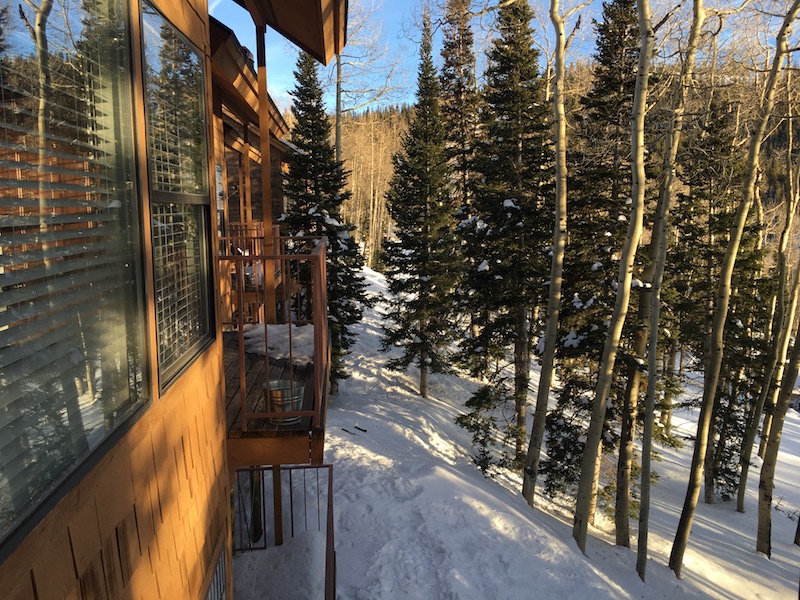
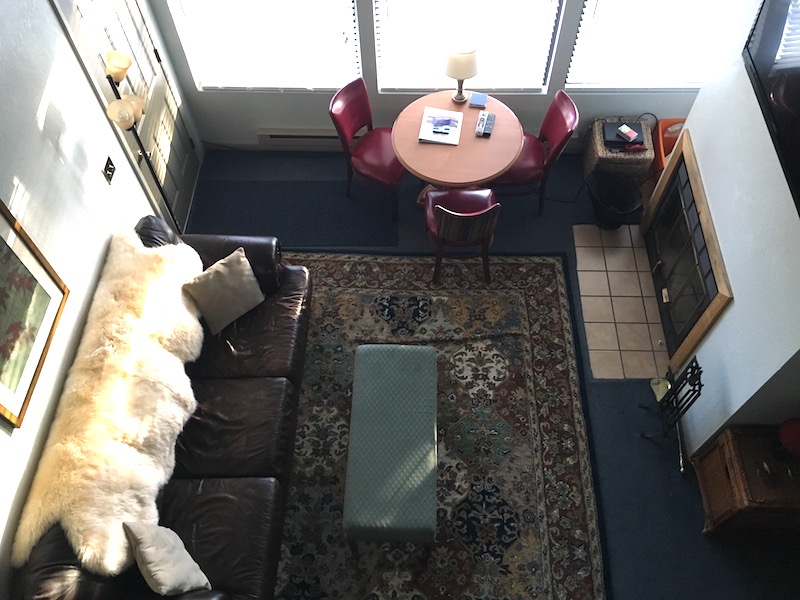
My condo slept at least five; we had a bedroom downstairs and a loft with bunk beds for three. It also had a full kitchen and living room with dining space, and ample storage space for ski gear. I loved the views of aspen trees from the outdoor balconies, and the fact that the kitchen was fully stocked with spices, cooking oil, all the pots and pans needed, a crock pot, a dishwasher with detergent, and a full-sized washer and dryer (also with detergent).
Tip: If you want to be close to Canyonside Lodge and its dining options and hot tubs, book a Canyonside area condo. You’ll be ski-in, ski-out on the Canyonside part of the resort. If anyone in your family is a beginner, however, you’ll want to start at Skyline, which will require a shuttle ride (this is explained in more depth below).

eagle-point

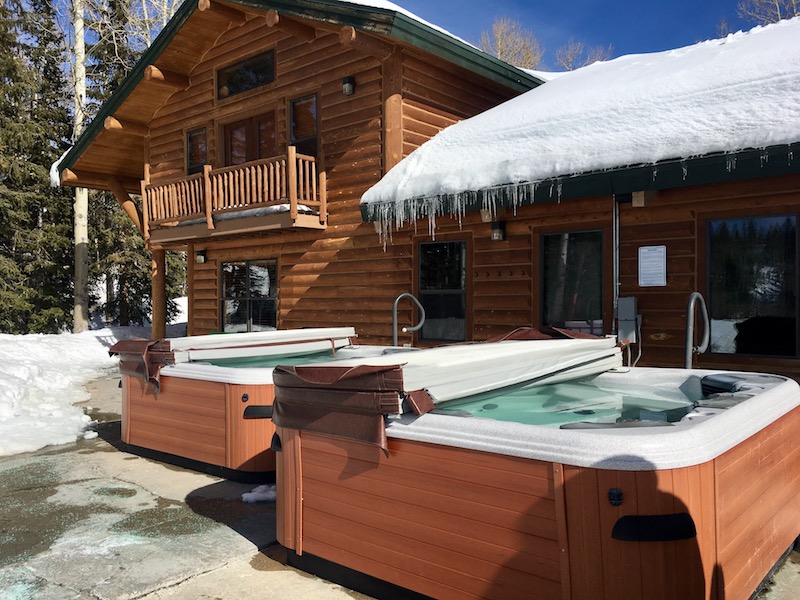
At Eagle Point, you’ll cook in your condo most of the time, so definitely stop in Beaver to buy groceries before coming up the mountain. There’s not much in the way of provisions once you’re at Eagle Point, with the exception of a small mercantile and a few dining venues (more on that in a minute). Condo renters have access to two hot tubs, which are outside behind Canyonside Lodge. There are bathrooms to change there, and a fireplace in the dining area where you can warm up after soaking.

wooded-ridge

Note: There is very limited cell service and no wifi at Eagle Point. I am told wifi is coming in 2018, but for now, plan to be off-line during your stay. Time to get out the board games!

Skiing at Eagle Point:

Eagle Point, like many Utah ski resorts, has two distinct sections, each with its own base area. The Canyonside Lodge, where you check in to your lodging, is the gateway to the expert terrain, served by Lookout lift, and a few miles up the road, the Skyline Lodge is where you’ll find the beginner and intermediate terrain, as well as the ski rentals and lessons. You’ll use the Skyline chair and Monarch chair on that side.

A ski tunnel connects the two sides, and there is a small amount of intermediate runs off Lookout chair, though not as many as we’d like. Everyone in your family really needs to be an expert skier or rider to have fun together for more than a few runs on Lookout. Gates off Lookout lead to backcountry terrain, in cooperation with the forest service, so that’s an option for expert skiers who are prepared to go outside the resort boundary.

eagle-point

Because the Skyline Lodge is at the TOP of the Skyline area and the Canyonside Lodge is at the bottom  of the Canyonside area, getting from Canyonside to Skyline requires a shuttle ride. (You can, however, get from Skyline to the Canyonside Lodge on intermediate terrain,  through the tunnel followed by a lift.) This would come in handy if the family divided up in the morning and wanted to meet for lunch.) From the Skyline side, it’s possible to ski down to most condos in the resort.

skiing-eagle-point

Note: Eagle Point is conservative about grooming runs. The Skyline area with beginner and intermediate terrain will all be groomed, but during my visit, only a few runs were groomed on Canyonside. This makes for a lot of non-groomed black diamonds.

Dining at Eagle Point:

For ski lunches and even breakfast, if you don’t prepare it in your condo, Skyline Lodge has the Skyline Cafe, which serves your basic ski fare. We found three options on the breakfast menu, plus coffee and drinks, and another handful of options at lunch. It’s counter service only. At Canyonside Lodge, the Outpost Grill has a full bar and dining room, with moderate pricing for burgers, wraps, and pizza, and slightly higher prices for steaks, salmon, and pasta dishes. It’s open both lunch and dinner. The food was good here, and I recommend eating out for dinner at least once during your trip, to save on the hassle of cooking in your condo.

Note: if you come back to Canyonside for dinner, remember that the free ‘mountain taxi’ shuttle only runs until 5 pm. You’ll need to drive your car or walk the short distance. 

What you sacrifice in the name of low lift ticket prices at Eagle Point:

Great value in pricing comes at a cost, of course. It’s important that parents know what they WON’T find at Eagle Point, so they can make an educated decision for their family. Eagle Point does not have:

eagle-point

  • Wifi or much cell service: you can get a cell signal at Skyline Lodge area, but that’s it for most carriers. Bring DVDs to watch in the condo, because you won’t have Netflix. You may not even be able to make a call or send a text, so plan accordingly.
  • Fine dining: the Outpost Grill is friendly and has decently good food, but it is not gourmet.
  • Convenient access to hot tubs or any access to a health center: the hot tubs at Canyonside Lodge are stand-alone tubs in the snow out back of the building, with a fun, low-key atmosphere. Close to your condo they are probably not.
  • Terrain for advanced-intermediate skiers and riders. This is a biggie: Eagle Point has a wonderful array of beginner and easy intermediate terrain at Skyline and incredibly steep, ungroomed expert terrain at Canyonside…but not too much in-between.
  • Easy access from lodge to lodge. (See explanation above.)

What you WILL get is challenging skiing at a great price, with comfortable, mostly convenient lodging and a down-to-earth vibe.

Getting here:

Eagle Point is located 18 windy, steep miles off I-15 past Beaver. Take the access road slowly, as it can be difficult in ice and snow. The commute on I-15 is easy from both Las Vegas and SLC.

I was a guest of Eagle Point for the purpose of review. All opinion remains my own.

Photo credit: Amy Whitley and Paul Marshall/Ski Utah

Where to ski in Utah: Brighton Resort

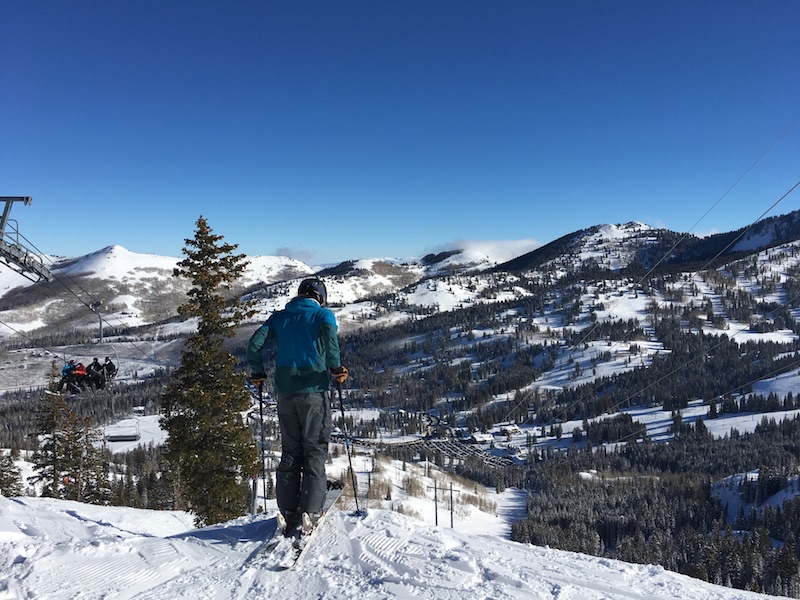
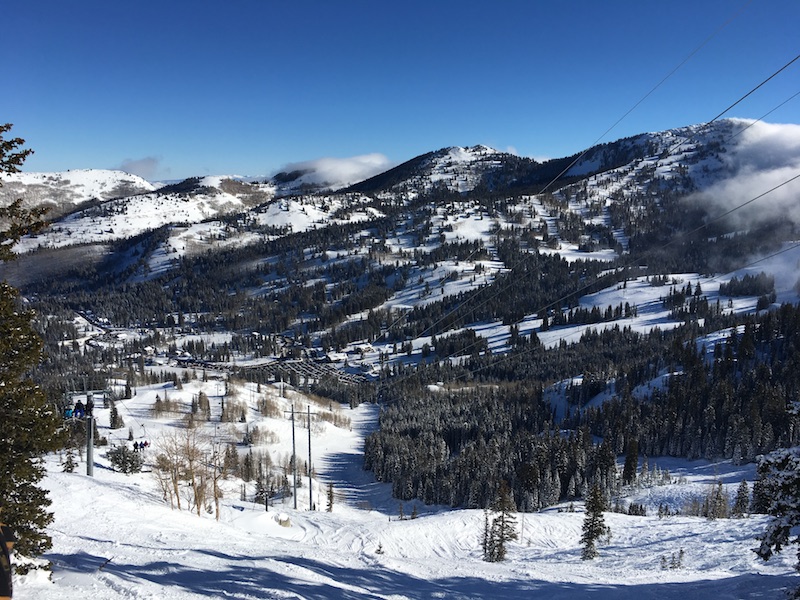
If you just read my post reviewing Utah skiing at Solitude Mountain Resort, you know that Brighton Resort is its closest neighbor, nestled right next door in Big Cottonwood Canyon outside of Salt Lake City. Both resorts offer incredible ski terrain for experts and backcountry skiers and snowboarders, both offer a friendly, local vibe, and both have enough skiable terrain for a family to be happy for days.

brighton-resort

Brighton Resort differs in that it does not offer on-site lodging, apart from private home rentals. There’s a big base area with a day lodge and a separate lodge with gear rentals and a snow sports shop, and a smaller lodge at an adjacent base area on the other end of the parking area. The resorts are only five minutes’ drive apart, so families can certainly stay in the Solitude village if they’re looking to stay in the canyon, and can even ski between the resorts with a resort hopper pass.

So who is Brighton Resort for?

Take a look at the Brighton mountain map, and you’ll see a sea of black diamonds. Like Solitude, Brighton is big and bold, with incredible pitches, glades, bowls, and backcountry for serious, expert skiers and riders. If you’re looking for challenge and seemingly endless skiable terrain during big snow years like 2017 has proven to be, you’ve found your place. But what if you’re a beginner or intermediate skier? The good news is that there are green circle runs even at the top of the resort, a nice touch for those who get tired of always being at or near the base while they’re learning. You’ll find green runs off the Snake Creek chair, and even off the Milly chair, which also has some of the steepest, deepest runs in the resort. Intermediate skiers and riders will want to focus on the blue-friendly Crest and Majestic chairs; this is also where you’ll find a surprisingly big selection of terrain park features.

If you’re an expert skier or rider:

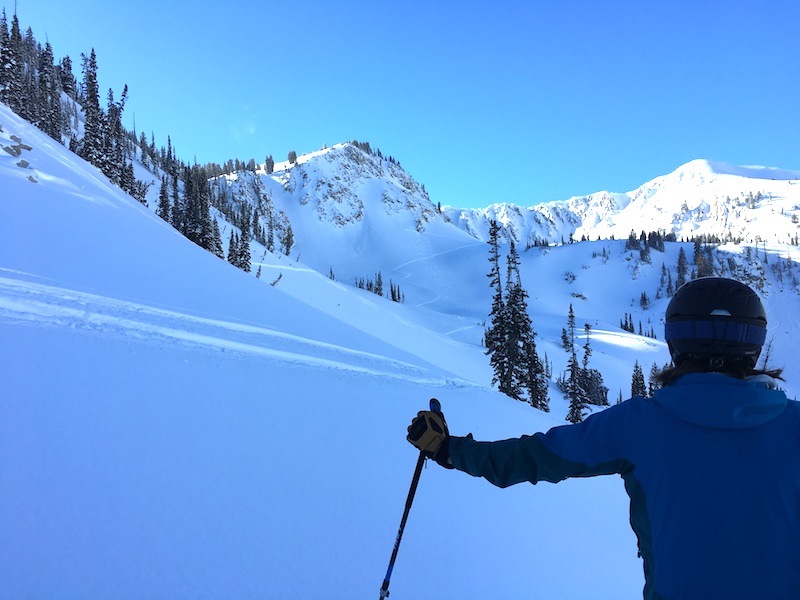
Trust us, you could do laps all day on the Milly Express chair, and never get tired of the terrain. Your legs will, however, get tired. This chair was our favorite, with double-blacks on both sides of the chair, hike-to terrain along the ridge, and back bowls accessible for backcountry skiers with touring skis. Of course, all of this is dependent on conditions, and it’s essential to look at signage to see what’s open. This is big avalanche country, and the mountains should be respected.

Brighton

Over on the Great Western chair, some of the steepest pitches take you down wide, mogul-filled black diamonds, and there are more tree glades with powder stashes along the far end of the resort. However, some of my favorite skiing all day at Brighton was found in what I deemed the ‘peaceful powder forest’, located near the top of Snake Creek and Crest. The woods here seemed to go on and on, with lots of powder between the trees and a more relaxing pitch.

If there’s less snow, you’ll definitely find less variety, but even then, the groomers along Crest and Big Western and Milly proved excellent. I loved the rollers and gentle curves to these runs, which got great sun throughout the day. We opted to break for lunch at the base of Milly, where the newest lodge of Brighton was far less crowded and offered excellent burgers and soups.

Planning your day at Brighton Resort:

As noted above, there is no overnight lodging at Brighton, so it will probably be a day trip for you. If you’re driving up Big Cottonwood Canyon (i.e., not staying at Solitude or in a nearby home rental), plan at least 25 minutes on an average day, and up to an hour on a holiday weekend…the traffic goes slowly on really great ski days.

Tip: Big Cottonwood Canyon is 15 miles of pretty curvy, mountainous roadway, and 4×4 drive or chains ARE required fairly regularly. You can opt to take a bus from the base of the canyon, where there’s a convenient park and ride parking lot for your car.

Because Brighton Resort is a day use resort, the parking lot does fill up on busy days. We skied Brighton on a holiday weekend after a big dump of snow, and were glad we arrived just after 9 am…by 11 am, the parking lot was completely full and people were parking on the road.

brighton-resort

Lift tickets are under $80 per day per adult, which is relatively reasonable, by ski resort standards. Better yet, you can ‘reload’ your day pass the next day for $10 less. Kids 10 and under are FREE at Brighton, which is a fantastic perk. To save money, consider a Brighton pass if you plan to ski regularly there, because it includes free ski bus access, or, if you have a pass elsewhere, see if it’s a M.A.X. Pass resort and do a M.A.X. Pass add-on for the best value. You can get a Solitude-Brighton ticket for under $100, and ski between the two resorts, but I bet you’ll have enough to keep you busy right at Brighton.

Pin it for later!

Why Brighton: Top resorts for experts

Disclosure: I visited Brighton as a guest of the resort for the purpose of reviewing M.A.X. Pass resorts. All opinions are my own.

Ski Vacation Hack: How to tune and wax your own skis

Winter outdoors enthusiasts gearing up for ski and snowboard season know how expensive snow sports can be, and how important it is to take care of skiing equipment. But if you don’t have $40 to $50 to spend on every professional tuning and waxing session, you can easily do it yourself! This is one of our favorite ski vacation hack ideas! For about the same one-time investment, skiers and snowboarders can tune and wax their own gear all season long.

smuggs for teens

What You’ll Need

The items below can be picked up individually (some you’ll already have on hand at home) or bought in a ski and snowboard tuning kit.

  • Wax: pick up a stick of all-purpose (all-weather) wax at your local ski shop or outdoor store.
  • Iron: use an old iron at home, or buy a ski-tuning iron.
  • Means of securing skis or board: most tuners use a wooden table and vise, but any workbench will do, and a two-person team can hold skis securely without a vise.
  • Metal scraper: found in ski shops, a metal scraper is for scraping P-Tex only.
  • Plastic scraper: any plastic scraper with an edge will do! Pick one up for just a few dollars at any ski shop.
  • File and file guide: a metal file specifically made for edging skis and boards can be found in ski shops or outdoor stores; pair it with a file guide.
  • Edge tool (alternative or in addition to the file): included in most ski-tuning kits, edge tools make finding the correct file angle easy.
  • Brush and cloth: a soft brush is important for wiping away wax shavings, and a damp cloth will remove dirt and dust from bases.
  • Stone: ski stones are useful for removing rust from edges.
  • P-Tex: a must for filling deep scrapes or gouges in ski and snowboard bases, found at ski shops and in tuning kits.
  • Lighter or matches: for lighting your P-Tex.

Preparation

Once you have the necessary tools assembled, it’s time to get started! To prepare your skis or board for tuning and waxing, it’s important to prep the bases. Start by securing your ski brakes, so they’re out of the way. Simply pull them back with a large rubber band. Next, wipe down the bases with your damp cloth. You’ll want to remove any dirt, dust, or grime that may remain from last season or from “summering” in your garage. Finally, remove any rust from your edges using your stone. Hold the stone horizontally (like a harmonica) and pass it across the edges at a 90-degree angle, working from tip to tail. Prep both bases before moving on.

Base Repair

Now that your base is prepped, it’s time to fix any major scrapes or gouges. Light the end of your stick of P-Tex with a match or lighter, then touch the lighted end to the scrape, allowing the melted P-Tex to fill it. Be careful not to drip the P-Tex in from a height, as this will burn the base. Once the scrape is filled, remove the P-Tex stick and blow it out gently. Let the base cool for approximately 10 minutes, then scrape away any excess P-Tex with your metal scraper until the base is smooth. You’ll want to hold your scraper horizontally, with your thumbs behind it. Push the scraper along the gouge until the P-Tex is flat and smooth. Alternatively, you can pull the scraper toward you, “cutting” the P-Tex until smooth. Repeat for both ski bases, as needed.

See the rest at our fix.com article, or follow the illustration below:


Source: Fix.com

Photo source: Smuggler’s Notch, VT

Sun Valley skiing with kids: How to plan a Sun Valley Idaho adventure

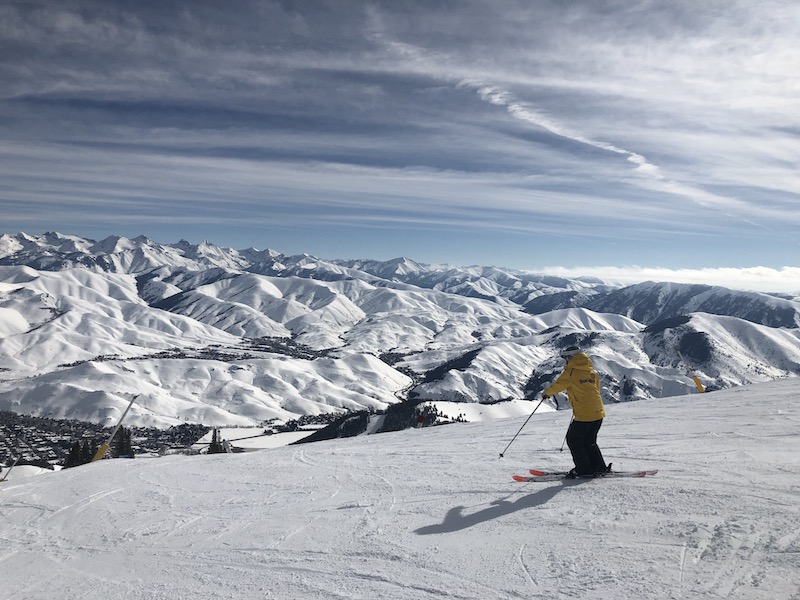
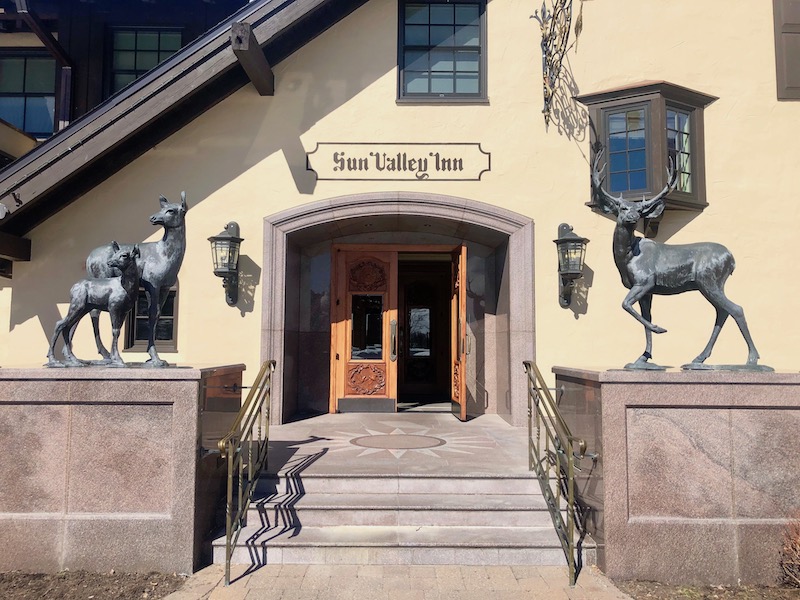
If you want to go to the source of American ski culture, Sun Valley, Idaho is the country’s original destination ski resort. Thanks to the resort’s iconic reputation coupled with ongoing new projects and improvements, you’ll step into a mountain experience that’s steeped in history while alive with newfound vigor. What’s new: Sun Valley’s Warm Springs day lodge has a whole new look, complete with expansive windows facing the mountain that set the perfect scene for aprés cocktail hour; the Sun Valley Inn has undergone an extensive remodel; and a brand new performance space, The Argyros, hosts annual events such as the Sun Valley Film Festival as well as arts performances throughout the year.
 

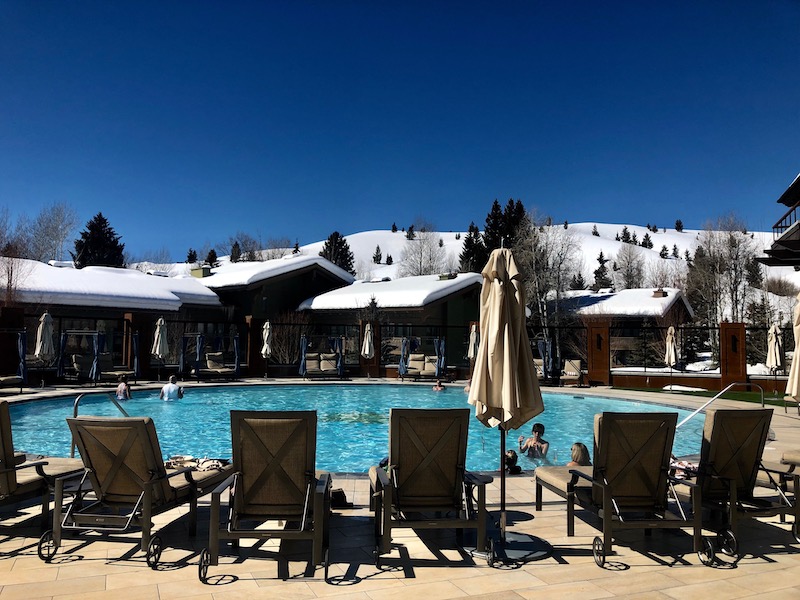
What’s tradition: two mountains ready for fresh turns in Idaho’s light powder, and a village with a distinctly European feel, a historic downtown (the town of Ketchum is a charming combination of wild west meets ski chic). Plus, you get Idaho’s famous blue skies for much of the winter season, and the long summer season filled with mountain biking, hiking, fishing and golf. Here’s what you need to know to get the lay of the land before your Sun Valley winter ski trip.

Overview of the mountains:

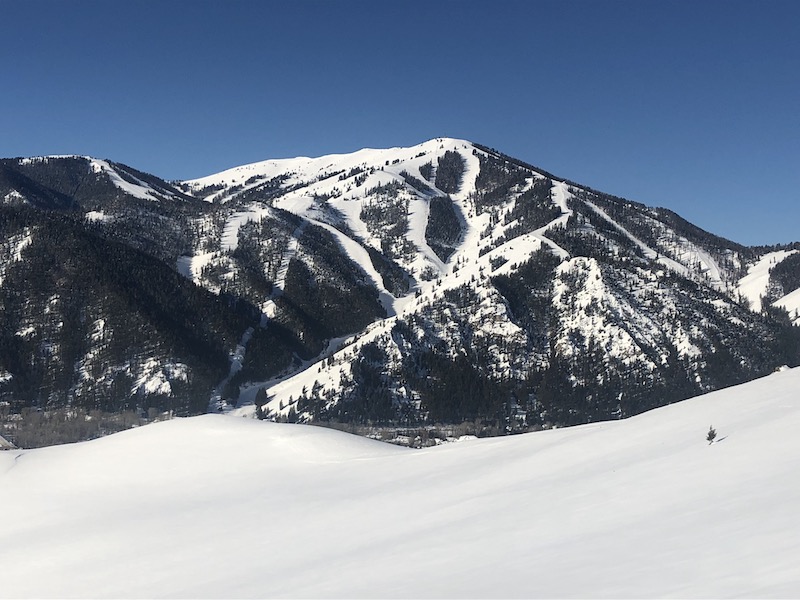
Sun Valley is spread out, but in the best possible way, allowing for a sense of tranquil instead of a bustling base area/village combo. It has two mountains, but in European-style, they’re not adjacent. Situated next to the town of Ketchum and a mile or so from the Sun Valley village, you’ll need to shuttle between the two mountains, the village, and the town, but you won’t mind, because the Sun Valley Ride shuttle system is free and efficient. Plus, most likely, you’ll spend your whole day at one mountain or the other. Here’s why:

Dollar Mountain is the beginning mountain, housing the snowsports school, the daycare, and a very innovative ‘Terrain that Teaches’ program, for which the snow is actually sculpted in such a way that helps you learn (and is totally fun, too). What you’ll see in the Terrain that Teaches areas are rollers, banks, and bumps designed to teach you how to turn, how to balance, and more. While smaller (Dollar has four lifts plus a magic carpet), Dollar is very manageable for families with young kids; the lodge is beautiful and quiet, there’s a full rental system in place, and terrain parks for those who want to challenge themselves. If all you need is Dollar, you’ll pay a lower lift ticket price, too. Guest services are extremely attentive at Dollar, assisting families with gear and providing wagons for toting skis and tired kids.

Bald Mountain, or Baldy, boosts the advanced terrain, and they do mean advanced. If you’re unsure of your ski or snowboard level, definitely start on Dollar, where the green and blue runs are plentiful. Over at Baldy, the greens truly are more like advanced blues, and the blues are often more like blacks. The grooming on Baldy is phenomenal, so you can usually count on groomed blues and greens, but the steep vertical still makes them very challenging. The widest, easiest greens and blues can be found on the Seattle Ridge side, where you can look across the way to the ‘bowls’, Baldy’s least groomed and arguably most challenging terrain.

The Roundhouse Restaurant

Tip: Join Sun Valley’s mountain guides for a guided 1.5-hour tour of Baldy, offered complimentarily. This tour is rich in Sun Valley history and also helps you get the lay of the land. Intermediate skiing and above needed.

But with over 2000 acres, everyone who is intermediate-level and above will find something perfect for their ski needs. There are two main base areas at Baldy: River Run and Warm Springs. Both are downright relaxing: since the main Sun Valley village atmosphere is found on the other side of Ketchum at Sun Valley, what you find at both River Run and Warm Springs is a single large day lodge and rental snowsports retail. It’s very manageable, which starts your ski day off right. On the Warm Springs side, you’ll find Greyhawk lift and Challenger lift, both of which service long, steep groomers with some tucked away mogul skiing throughout. River Run houses the Roundhouse Gondola and River Run chair, with more blues and a few greens, plus some shorter, steeper blacks. Head to Cold Springs (soon to be upgraded) and Mayday to access the bowls, and head to Seattle Ridge for more contained blues and greens.

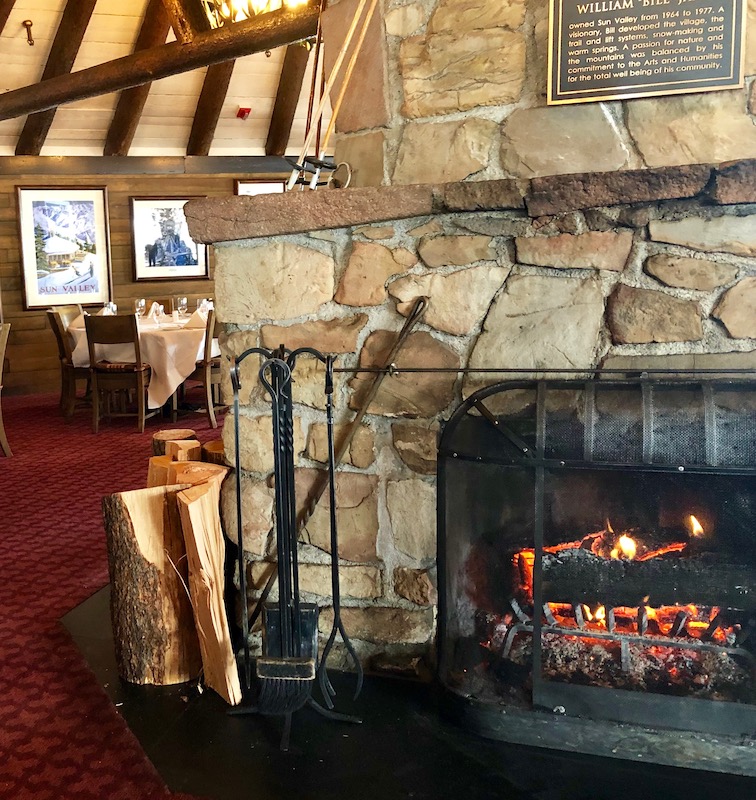
Tip: The top of the mountain, at Lookout, is a central hub: you can ski down to either base area from the top. Dining on the mountain is plentiful, with the beautiful and historic Roundhouse Restaurant the sit-down option at mid-mountain (definitely at least peek inside) and Lookout Restaurant serving grab-and-go Mexican food. For all the other standard ski fare (with some gourmet twists) Warm Springs, Seattle Ridge, and River Run are all there to serve you.

Where to stay:

Families have several generalized options: lodge stays at Sun Valley Lodge or Sun Valley Inn, both located in the Sun Valley village (just a few minutes’ shuttle to Ketchum and the base areas), condo stays associated with these Sun Valley hotels, in-town hotel stays (the Ketchum Inn and the Limelight are popular options), and area house vacation rentals in Ketchum and Hailey.

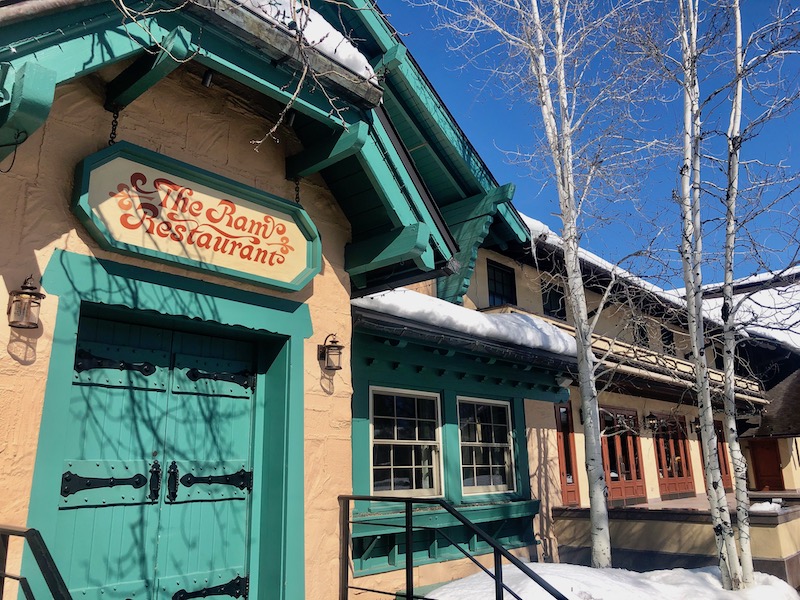
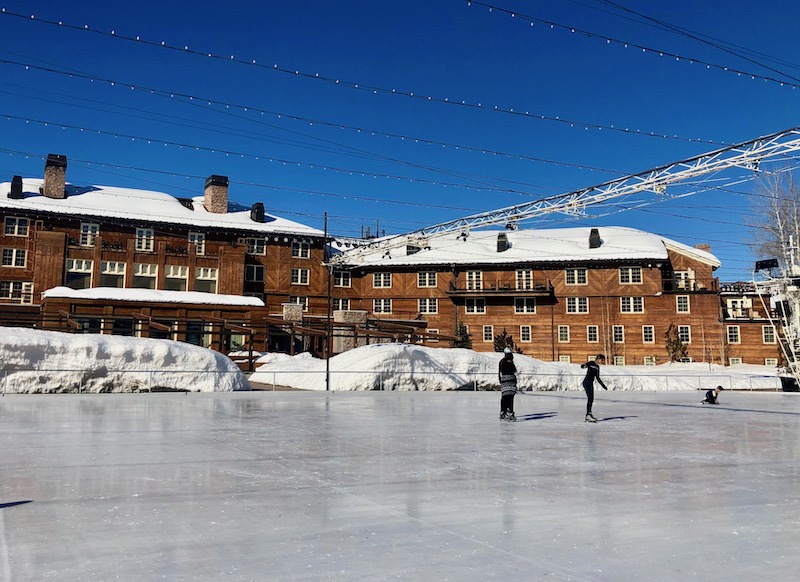
We stayed at the Sun Valley Inn, which had it’s perks and its challenges. On the pro side, the inn is typically more affordable than the nearby lodge, with all the amenity access to the latter. Yes, this means you need to walk across the village to use the Sun Valley Lodge heated outdoor pool and hot tub, expanded fitness center, and spa, but access is there. At the inn, you get a smaller heated pool (almost hot tub temperature) and a smaller fitness center. Excellent dining options are available in both; at the inn, we loved the traditional fare at the Ram Restaurant and newly remodeled Ram bar, but I was disappointed to find a lack of a central lobby area in the inn. At the lodge, the lobby area is expansive, looking out over the year-round ice skating rink, and dining options include Gretchen’s and the Duchin Lounge. At both the inn and the lodge, be sure to linger in the public hallways to take in all the framed photos chronicling the visits of celebrities and who have visited and loved the resort.

Tip: From either the inn or the lodge, it’s very easy to access Ketchum (only about a mile away), the base ski areas for both mountains, and the airport via the complimentary shuttle system. I never waited longer than five minutes for a shuttle and never needed a car during my stay.

Where else to eat in Sun Valley and Ketchum:

We loved Konditorei in the village for breakfast and lunch. The Austrian feel was both cozy and delicious. In town, Warfields is the only area distillery and brew pub (although Sun Valley Brewery is located in Hailey) and currently makes their own gin and vodka, with whiskey coming soon. We loved the ambiance inside Warfields, but if you want something more distinctly local, the Casino is right down the street, with pool tables and pretty basic (but good) drinks and plenty of local flavor (21 and over). At the Limelight hotel, Ketchum’s newest lodging option, their large ‘living room’ serves as an informal dining option, with space for kids to spread out and play (a big plus for parents). The Covey is one of Ketchum’s newest restaurants and popular enough to warrant a line outside the door when it opens at 5:30 pm (no reservations taken). The atmosphere is cozy but modern, with an open kitchen concept and a wide selection of beer and wine. We loved the winter squash appetizer. Also popular are the Pioneer (for the steak and potatoes crowd) and Village Station (in Sun Valley village) for a classic pub fare option.

What else to do in winter:

The town of Ketchum is worth spending at least one afternoon perusing, and the Sun Valley Nordic and Snowshoe Center is the hub for winter snowsports activity aside from downhill skiing. (In the summer, this area transforms into a golf haven.) At the Nordic center, families can snowshoe, classic XC ski, or skate ski on the perfectly groomed 25-mile trail system, which includes dedicated snowshoe trails as well. Rental fees are reasonable at approximately $20-30 for half-day rentals (depending on the rental choice) and trail fees of only $28 for adults and $10 for youth. We spend a very happy morning at the Nordic center and highly recommend it as an alternative to downhill skiing. Or, spend the day here on your ‘ski rest’ day if you’ve purchased 2 out of 3 or 4 out of 6 day ski passes.

There’s also ice skating and bowling at the Sun Valley Lodge, adjacent to the village.

Tip: the Nordic center also has fat bike rentals. During our visit, they were not available, however. There’s also a full restaurant at the Nordic center, as well as a full bar.
For parents, a half day at the Spa at Sun Valley, located in the Sun Valley Lodge, is a win. While it’s relaxation rooms are not large, they do have steam rooms, dry saunas, and experience showers in both male and female relaxation areas, and spa guests can go back and forth between the second-floor relaxation area and the ground floor outdoor pool and hot tub. Spa treatments are in the full range, and there are beauty services available as well.

After spending a wintery getaway in Sun Valley, you may, like me, be tempted to return in summer. The ‘off’ season of summer is actually Sun Valley’s busier time period, with outdoor symphony performances, trail systems, golf, fishing and rafting. Consider a trip back!
Have you been to Sun Valley with kids in the winter? Disclosure: we experienced Sun Valley for the purpose of review. All opinions remain our own.

Keystone lodging review: The Springs at River Run Village

During or latest winter Keystone ski trip with kids, we stayed in a two-bedroom condo in River Run’s The Springs. At the end of our trip, my nine-year-old declared it the best ski lodging he’d experienced. Why did he rate it above other ski-in, ski-out resort lodging? Three reasons: 1. the Springs pool, 2. the proximity to the River Run Gondola, and 3. the fact that it’s surrounded by woods.

the-springs-keystone-resort

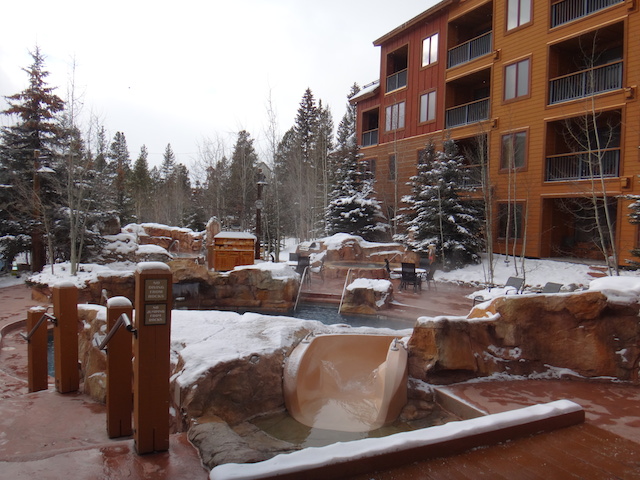
The Springs is located at the far end of River Run Village, just far enough away from ‘village life’ to be tranquil (with plenty of snow to play in around the building), but close enough that you’re literally two minutes from dining and lifts. I loved the decor of the building, which is accented with lovely wall displays of wildlife, aspen trees, and other nature scenes. The lobby of The Springs features a bubbling creek, which flows outside to the pool area and funnels into the pool slide. The entire building is open, bright, and peaceful.

Amenities:

the-springs-two-room-suite

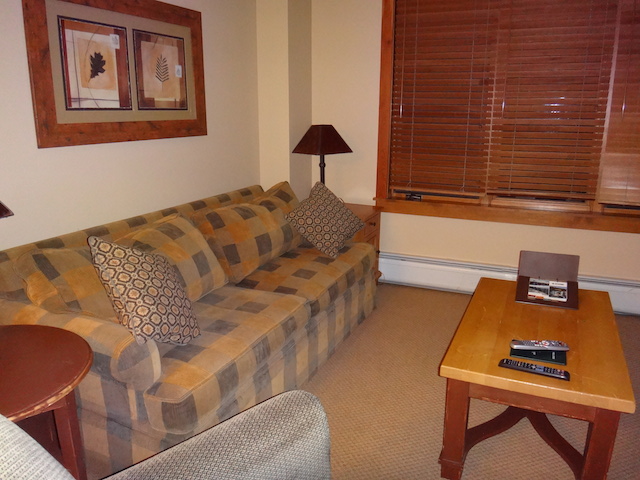
Our two-bedroom unit included a master bedroom with king bed and bathroom with jacuzzi tub and shower (plus a vanity with two sinks), a second bedroom with queen bed and bathroom with shower and tub, a full kitchen (with full-sized appliances), a roomy living space with couch and fireplace, and an entry with lots of hooks for coats and space for ski boots. We had three flat-sceen TVs in the unit, a large balcony, and lovely wooded views. We wished we had a washer and dryer in our unit; this may have been the only thing lacking.

The kitchen was well-stocked with plates, utensils, pots and pans, and the like. Bring your own coffee (though there is a coffee-maker and filters), plus items such as ziplock bags. Free wifi is in all rooms. Your unit comes with a parking pass for the heated underground garage, should you need it, and all units are assigned a ski locker. From the locker, it’s a one-minute walk to the River Run Gondola.

Located in the lobby is a media room set up to watch movies with stadium seating (first come, first served, though we never saw it used) and a nice toddler and preschool play room. There’s a pool table in the lobby, and space for board games or card games.

Pool and fitness center:

the-springs-river-run

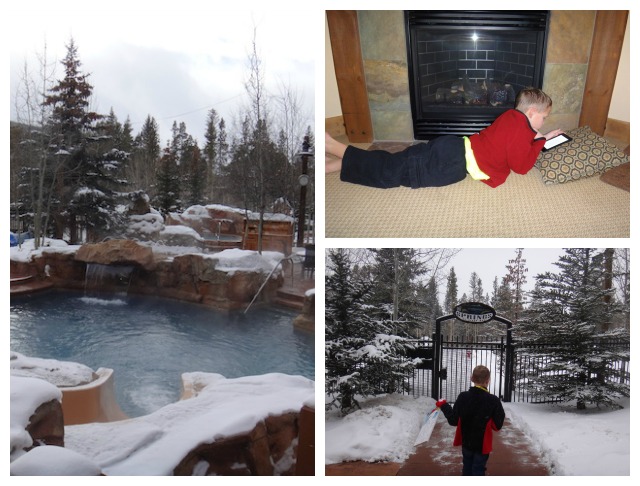
Yes, there’s a full fitness center at The Springs, though when I’m on a ski vacation, I get enough exercise on the slopes! Adjacent to the fitness center (and accessed from the lobby) is the outdoor pool complex. Included is a beautiful free-form heated pool with waterfall and small slide, plus a heated kids’ wading pool with fountains, and two hot tubs. One hot tub is designated as adults-only, but we found both hot tubs to get so crowded, we let the kids warm up where they liked (don’t tell). There’s plenty of seating with tables and lounge chairs in the pool area, plus a BBQ for communal use, though during our trip, it was much too cold outside to utilize either. We loved the gated entry at the back of the pool area, which leads directly into the parking area for the gondola and to the pedestrian bridge to the village; this made for a nice shortcut to and from The Springs.

the-springs-river-run

Rates:

At the time of our visit, a two-bedroom unit was listed for $394 a night (one bedroom condos, which would easily house a family of four were $284). Shop around between River Run lodging options: nearly all buildings have some sort of pool amenity (though not all have slides) and all are in walking distance of the slopes.

Location within Keystone:

River Run Village is definitely our pick among Keystone lodging locations: kids have Kidtopia, the ice rink, the gondola and slopes, and rentals within walking distance, as well as dining options galore. The only time we needed to utilize the free Village to Village Shuttle was to go to Mountain House for Kamp Keystone and Lakeside Village for lake ice skating at the Adventure Center.

Directions:

From Denver, travel west on Interstate 70. Exit at the Silverthorne/Dillon exit #205. At the end of the exit ramp turn left (East) at the stop light onto Highway 6. Travel 6.2 miles into Keystone Resort.

As I disclose whenever applicable, we enjoyed a complimentary stay at The Springs for the purpose of review. Comped stays make it possible for us to provide readers with accurate reviews of kid-friendly properties.

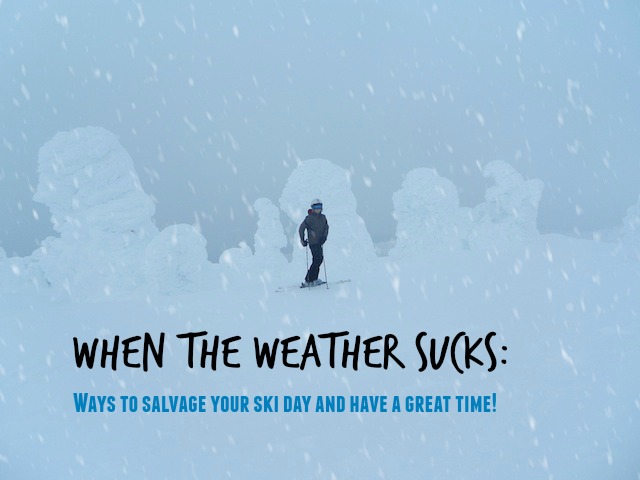
When the skiing sucks: what to do when your ski vacation is ‘ruined’ by weather

On a recent weekend, we decided to take an impromptu ski trip. We spent $135 on a hotel room in the resort area, $250 on one-day lift tickets for our family of five (a discounted rate due to being season ticket holders at a neighboring resort), and about $150 on food and gas. We drove three hours each way for our getaway.

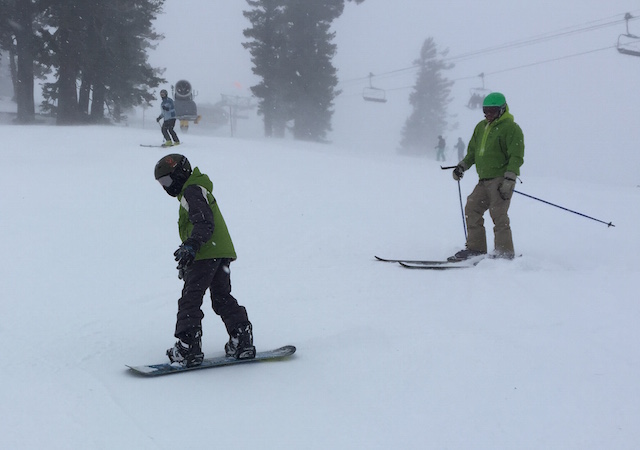
When we arrived at Mt. Bachelor Ski Area (a resort we’re very fond of) at 8:30 am for our ski day, the wind was picking up, and snow was falling. By midday, the gusts made visibility nearly impossible and the snowfall had turned to icy sleet. By 2 pm, we were soaked through, one kid was in pain from a nasty fall, and morale was low. Instead of continuing through poor conditions, we called it a day.

bad-ski-day-fix

We didn’t get the standard 9 am to 4 pm use out of our ski passes, and for the time we were on the mountain, we didn’t get that many laps in. We stopped three times for lodge warm-ups (whereas we usually stay out nearly all day without breaking). By the time we ‘gave up’ and headed to the car, we could have wrung our jackets out like towels. But guess what: we still had a great time. And we don’t consider our $535 a waste of money. But it’s taken us years of skiing to see it this way.

A ski trip is a vacation with a lot of variables, many of which are out of our control. It’s painful to lay down hundreds of dollars, sometimes thousands, and have conditions not meet expectations. Maybe your kids are miserable on the snow, or maybe you get rained out or a blizzard hits, making leisurely family turns impossible. Hearing, ‘I hate this’, seeing kids cry because they’re cold, or looking out the lodge window to see a white-out after purchasing 3-day tickets is a very real stress of a ski vacation. And it’s a total downer.

poor-ski-day

Sometimes I forget this, despite being there many times during the 30+ years I’ve taken ski vacations as a kid and as a parent. In full disclosure, my family and I are usually hosted by ski resorts, thanks to my job. In other words, we rarely shell out cash to ski. It’s easy to have a good time when skiing is part of your job, instead of an expense. But we’ve been on the other side. Certainly, our recent weekend trip could have been a real bummer. Instead, we were still smiling as we piled wet ski clothes into the car and headed home. Why? We kept the following things in mind:

1. Not all ski days can be bluebird days.

We can only appreciate those crystal clear, blue sky days when we’ve shivered through some wet, snowy ones, right? We try to look at the long-term picture when we ski: hey, this day may have been miserable, but remember last month, when we got sunburned? Or let’s look forward to spring break, when we’ll likely BBQ on the lodge deck in shirtsleeves. Consider each day’s investment as part of a season-long investment. It will be the overall experience that will stick with kids (hey, skiing is fun!), punctuated, of course, by battle tales of days gone array, which are somehow wonderfully fun to tell later.

2. Season passes are great investments.

If you truly want to leave the mountain at mid-day without regrets, invest in season passes to your closest resort. I realize this may not be possible for families living a plane ride from any ski resorts, but for those with resorts in a 2-3 hour radius, consider investing. The pressure is off single day experiences when you know you’ll be back multiple times. Look for season pass sales in October, and you may be surprised to find how affordable most passes can be.

getoutfitted ski gear

Skiing is only one part of the ski vacation experience:

Embrace the entire ski vacation ambiance, which includes hot cocoa by a fire, cozying up for a condo movie night, hot tubbing, and yummy ski village meals. If your vacation is for 3-4 days, look for flexible tickets (such as ski 2 out of 3 days) so you can decide to forego the slopes after waking up one morning. If you’re just on a single day trip, as we were, look for a pizza joint or brew pub after ending your day early.

Decide you’re paying for exclusive time with your family, not for certain number of runs per day.

Stop counting laps! No one wants to keep skiing after lunch? Swallow the pain of that lift ticket expense, and get out a deck of cards. Buy everyone a hot drink (what does it matter now?) and deal…literally and figuratively. Have a fun afternoon in the lodge, saying ‘yes’ to what the kids want and need instead of no. If everyone is smiling and having fun together, didn’t you still accomplish your goals for a family vacation day?

What to bring on any ski day in case of bad weather:

Yes, I believe in all the advice above, but there are a few things you can always have with you that will help kids weather nearly any ski weather…at least for a while. I always carry a small ski backpack so I have these items at the ready. Sometimes, I make everyone carry their own stuff, however.

  • extra pair of gloves for everyone (cheap is fine)
  • face mask for everyone
  • snack for everyone (Clif bars or HoneyStingers work well)
  • hand warmers for everyone (just stick them in pockets)

Of course, you also want to make sure everyone’s outerwear is waterproofed (we use NikWax) and that everyone has warm, quality base layers, either synthetic or Merino wool. Keep in mind however, that no matter what you spend on gear, there will be days when Mother Nature wins.

Have you had a terrible, no good, very bad ski day? Do tell!

Photo courtesy Flickr.

Northstar California Resort with kids: what you need to know for a great ski vacation

Between the expense, the equipment, and the logistics of getting everyone where they need to be (preferably with both gloves), skiing with kids can be daunting. Northstar California makes it easier by continuing to be one of the friendliest and most family-oriented mountains my family and I have ever skied. With a fun, centralized ski village, luxury accommodation options, and multiple ski school programs, Northstar offers everything your family needs to have a successful, memorable Tahoe ski vacation. Here’s how to get the most out of a trip to Northstar California Resort with kids:

Northstar

Plan to stay a minimum of three days.

With 170 acres of newly skiable side-terrain, a new express quad chairlift doubling the capacity on the backside, and one of the best terrain parks (including the new 22′ Shaun White super pipe), families simply can’t full experience Northstar in only a day, especially if they plan to spend even half a day in group or private lessons. Renting equipment, buying tickets, and registering for ski and board school all take time: you only want to have to do it once per ski vacation. Staying at Northstar more than one day saves you money too: buying 3, 5, or 7 day passes is much cheaper than day-of ticket window pricing. If you plan to ski more than seven days, consider purchasing a local Epic Pass instead, which allows entry to both Northstar and Heavenly.

Immerse yourself in ‘village life’.

We loved staying in the heart of the Northstar Village at Tahoe Mountain Lodging’s Big Horn Lodge. Of course, it’s convenient to be steps away from the slopes, ice skating rink, equipment rentals, restaurants, shops, and hot tubs, but what we hadn’t counted on was how much enjoyment we’d gain from staying in the heart of such a contagious ‘ski town’ atmosphere. The Northstar-at-Tahoe Village truly is the heart of the resort; we loved the cheery bonfires lining the village streets (bring marshmallows!), the live music in the evenings, and the view from our balcony of the Northstar gondola whisking guests up and over the snow-blanketed slopes.

northstar

Take advantage of private family lessons.

Like many resorts, Northstar-at-Tahoe offers a wide variety of ski and board lessons, from group classes for kids as young as three to adventure and ‘guided’ sessions for advanced skiers and riders. At first glance, springing for a private lesson may seem like an extravagance, but because families can add up to six people to one private lesson, the cost can become equal or even less than a group lesson. Your children will get far more personalized instruction, and if you join in as well, you’ll learn how to help your kids learn! Our kids (ages 7, 10, and 12) had a great time with their private instructor, Jon, who served as not only a teacher, but a guide, familiarizing the kids with the mountain as they zipped around, enjoying twice as many runs in as most guests (by utilizing private lesson lines). Time is money, and dedicating half a day or one full day to a family private lesson can not only jump start your ski instruction, but get your group familiarized with Northstar like nothing else!

Northstar

Utilize EpicMix.

A brand new social networking and tracking service offered by all Vail Resorts (of which Northstar is a part), EpicMix is touted everywhere you go at Northstar, and for good reason: you should be using this fun and free tool! In fact, if you have a ski pass, you already are: every time you enter a lift line, an EpicMix sensor scans your pass, recording your lift habits, total vertical feet, and lots of other fun stats throughout your day. After skiing, families can log into their account (kids are securely added by you to yours), select avatars, compare stats and achievement ‘buttons’, and view photos taken by the equally free EpicMix photographers (which work just like Disney’s PhotoPass photographers). And if your tween or teen is skiing without you (or your kids are in lessons while you’re in the lodge), you can log onto EpicMix from any smart phone to find out where on the mountain they’d last ‘checked in’.

Save time for all the extras.

Northstar offers so much more than skiing: in the village, families can take in a first-run movie, ice skate on the public rink (skating is free; if you need skates, rentals are $10/person), roast marshmallows over the open fire pits, and tube at mid-mountain.

Much thanks to Northstar-at-Tahoe for hosting our stay. This compensation came with no expectation of a positive review.