Two ways to ski backcountry terrain on your next ski trip

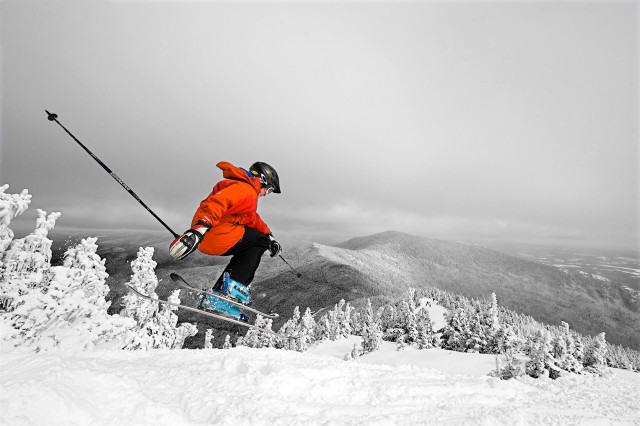
If you’re one of those skiers or snowboarders who looks up at the most distant peak from the chairlift and says, “How do I get up there?” or notes tracks in fresh powder and wishes you’d put them there, you may want to elevate your next ski trip to include a day of backcountry terrain. Or, if you have teens (16 or older) who are yearning to learn what AT or touring skiing is all about, it might be time to try a backcountry experience as a family.
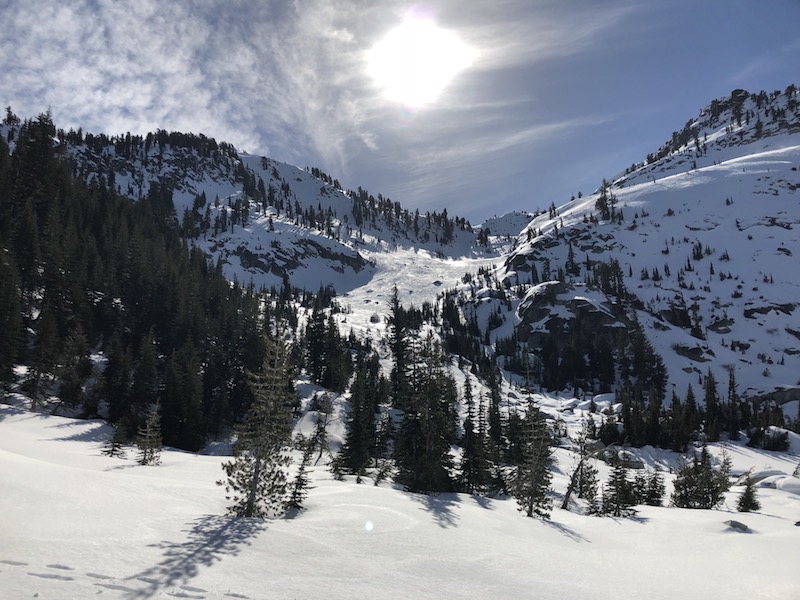
Backcountry skiing off-piste and outside ski resort boundaries can expand your ski horizons exponentially, but it’s crucial to go with a guide until you’ve become trained in reading snow conditions and have the right gear (which often includes an avalanche beacon, shovel, probe, and AT or Alpine Touring skis and boots with skins and a backpack to put it all in). I explored two gorgeous backcountry regions with two fantastic guide services, and highly recommend them both.

Two ways to ski backcountry terrain on your next ski trip

Alpenglow Expeditions, North Lake Tahoe:

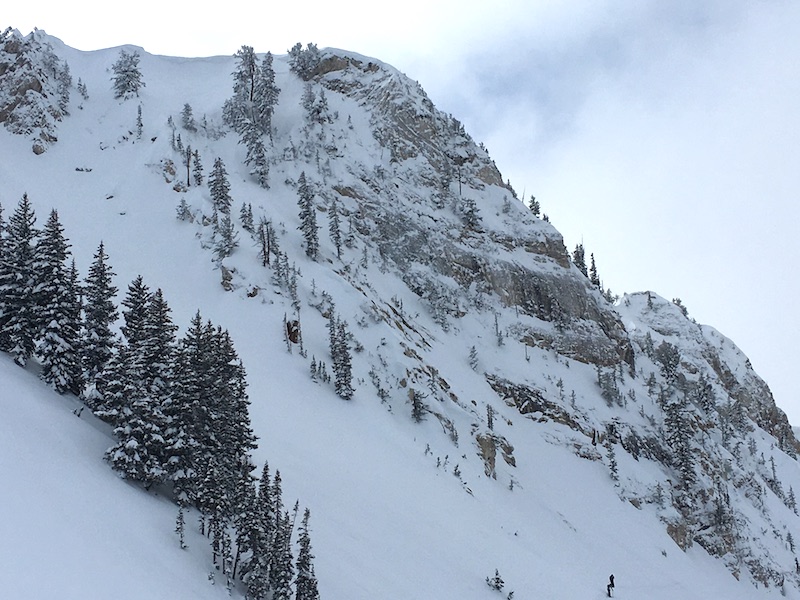
Alpenglow Expeditions operates out of Squaw Valley Alpine Meadows in California, and offers both backcountry tours and a variety of snow safety courses. I joined them for a full day in the Squaw Valley backcountry, where we did two laps of the National Geographic Bowl.
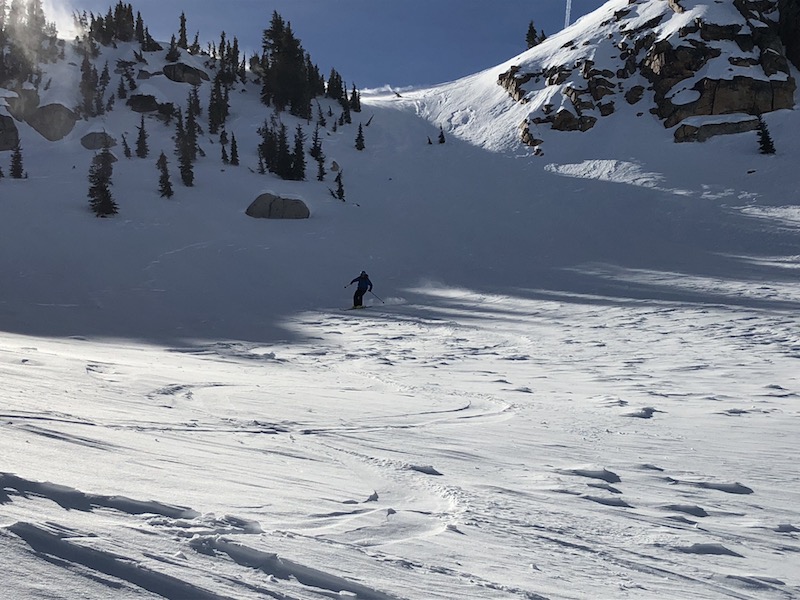
I arrived at their office in the Village at Squaw Valley at 8:30 am, ready to ski…minus the gear. Alpenglow can outfit you, which is nice if you don’t already own AT gear. It allows you to try a full backcountry experience before committing to the equipment. The guides at Alpenglow set me up with a ski pack with all the necessities, plus AT skis and boots. I brought my own helmet, goggles, lunch, water, and ski apparel.

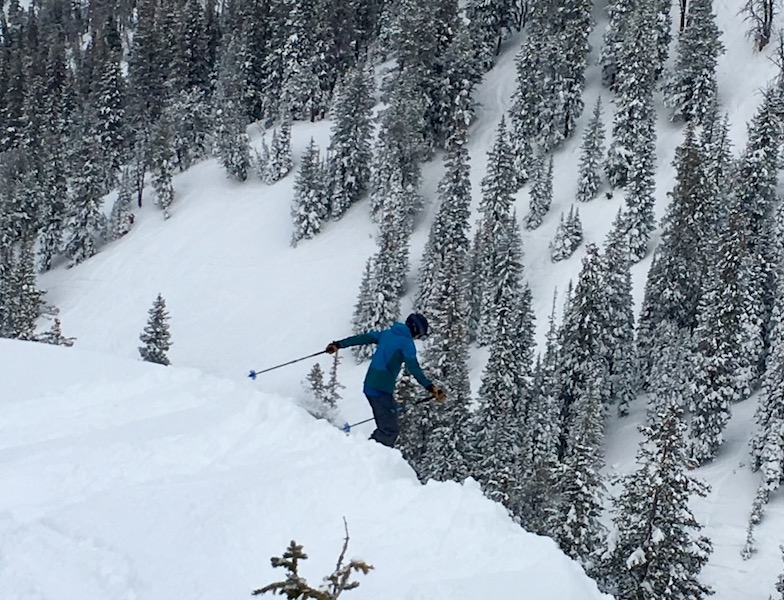
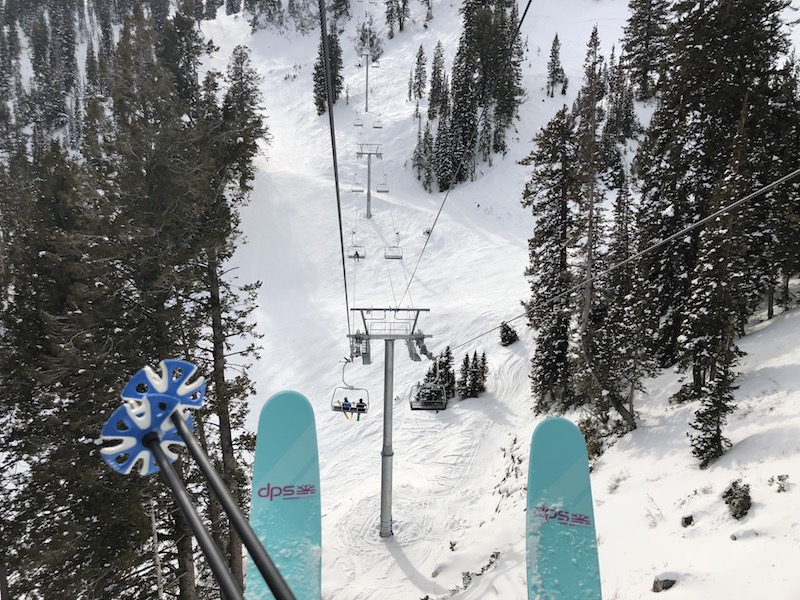
The nice thing about Alpenglow’s location is that you can ride the Squaw lifts to where you need to start, saving time and effort. We headed out by 9 am on the Squaw lifts and reached the top of Granite Chief lift by 9:30 am. From here, we boot packed to the top of Granite Chief Peak (approximately a 20 minute, fairly strenuous hike) with our skis strapped on our backs. At the ridge, the snow was fabulous (despite fairly challenging conditions on the lift-served areas). We transitioned into our skis (the guides will help you do this if you haven’t skied AT before). We skied down the bowl, and at the bottom, transitioned again to skin up the trail that led to a side ridge, where we could ski back down to the Granite Chief lift. The skinning uphill took longer…probably an hour or so, and if you haven’t used skins on your skis before, there is a learning curve here. Your heel is freed and the skins on your skis give you traction, so the climb feels similar to cross-country skiing (but a bit more difficult).
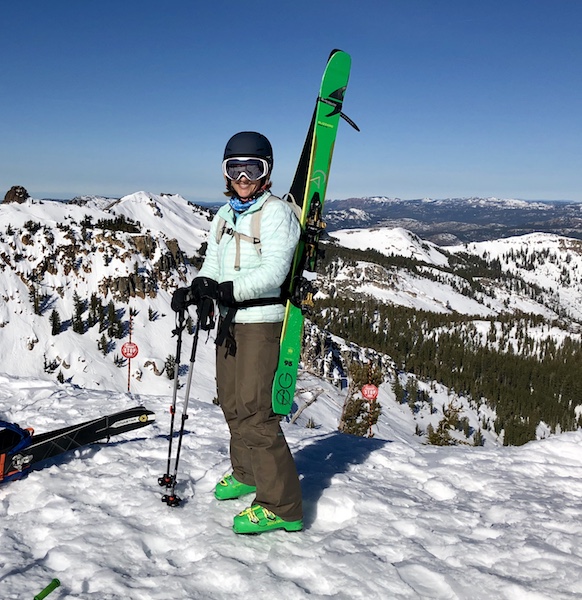
When we reached the ridge, we skied down to the chair and did it again! This time, we boot packed a bit farther to explore a different descent, and at the bottom, we enjoyed our packed lunch in the sunshine. We achieved two laps by 1:30 pm, and were back at the village by 2:30 pm. We probably had time for one more lap, but my legs didn’t have the power!

The day proved to be an excellent introduction to Squaw’s backcountry, and since my teenage boys are interested in exploring terrain outside ski area boundaries, I’d definitely sign them up next time. All tours are individual (with either just yourself or just your group) so you can customize as needed. All guides are highly trained in avalanche certification and first aid, and carry radios. I was given an avi beacon and shown how to use it.

Ski Utah Interconnect, Cottonwood Canyons

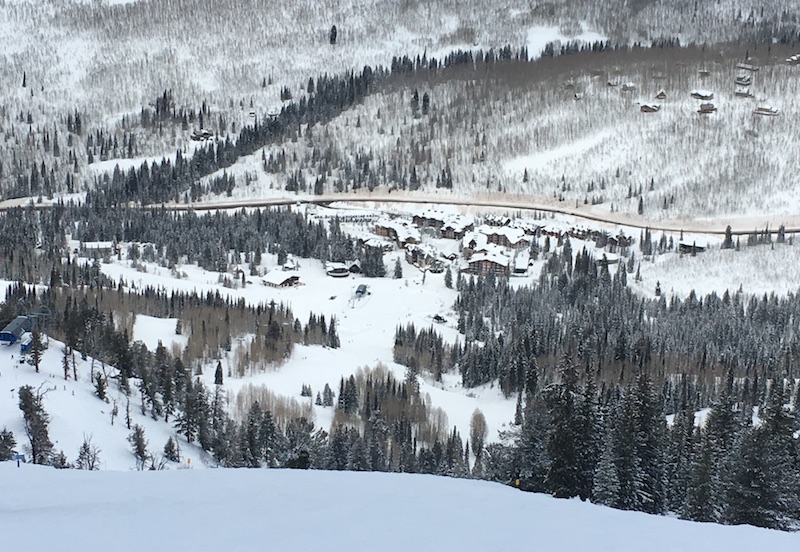
Headed to Utah instead of Tahoe? I also tried out Ski Utah’s Interconnect tour, which allows you to check out backcountry terrain on your downhill (Alpine) skis. You can read about the Ski Utah Interconnect here, and watch a helpful video starring Deb Lovci, lead guide, but even after doing your research, the Interconnect is hard to explain. It really needs to be experienced. It’s part backcountry adventure, part (permitted) rope ducking, part on-piste hidden tracks, and part off-piste (as in way, way off). No matter what way you look at it, you’re in for seven hours of breathtaking views of the Wasatch Front Range and Heber Valley. Along the way, you get a ski resort sampler platter, with 1-3 runs in each of Deer Valley, Park City, Snowbird, Alta, Brighton and Solitude.
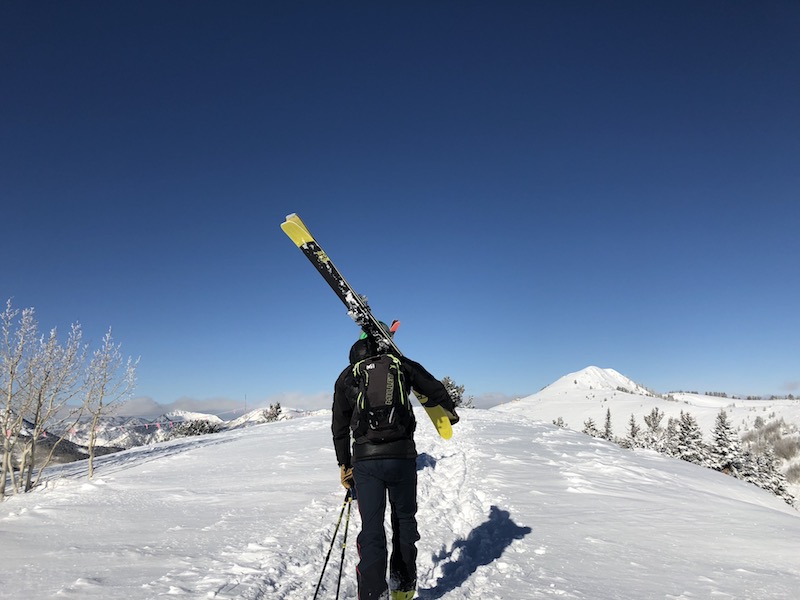
You start your day at Deer Valley Ski Resort, where you meet up in a base lodge and are briefed by your guides. As noted, you can use your own downhill gear, but you’re given a beacon to use for the day. In contrast with my Alpenglow trip, I didn’t need a shovel or probe of my own, so I could use my own small backpack, and I didn’t need to carry a lunch, as it’s provided on the trip.

We started out by skiing a few Deer Valley groomers to get warmed up, then ducked the rope (with permission) and traversed through the backcountry to Park City resort, where we rode another chair up before skiing off-piste through pristine powder toward our next resort on our itinerary. We boot packed a few short times (holding our skis) before making it to Solitude for a delicious lunch at their Roundhouse mid-mountain lodge, which serves up Himalayan mountain cuisine (included). We rode the lifts here to access a backside bowl to Brighton, then rode up again to take the most beautiful traverse, the Highway to Heaven trail toward Alta and Snowbird.
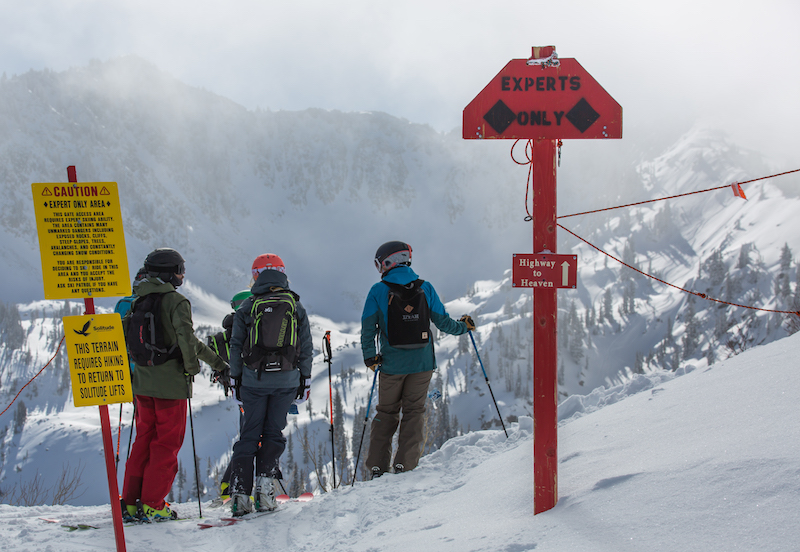
 

This part of the journey definitely proved most strenuous, but we were rewarded with more gorgeous backcountry on the descent. We skied through Alta and reached Snowbird by 3:30 pm. Skiing six resorts in one day definitely made for a long ski tour, but it didn’t feel that long, thanks to some lift access along the way.

What to know before you book:

For both of these tours, it’s important to be a strong skier, able to ski ungroomed runs with confidence (intermediate or advanced). Perhaps even more importantly, you do need to be fit. The uphill boot packing, skinning, and/or sidestepping will work up a sweat and leave you legs like jell-o! For the Interconnect, you need to be a skier, not a snowboarder, due to restrictions on snowboarding in several of the resorts.

If you’re used to getting plenty of exercise and are a decent (don’t need to be great) skier, don’t hesitate to try one of these tours! It will open your eyes to new skiing possibilities, and greatly enhance your ski trip. Take a day to enjoy the backcountry, then return on-piste with more confidence.

Call the office of either tour to ask any specific questions; they’re eager to help walk you through the process and explain what gear you’ll need and what lift tickets might be required. Let them know of any limitations of your group and be honest with them about capabilities, and they can answer any doubts you may have.

Want a taste of non-lift-served terrain by exploring some side country (within ski area boundaries)? You can expand your limits on downhill skis by signing up for a Hidden Tracks guided day. I checked this out at Solitude Mountain Resort and had a blast with my private guide, who could show me all the hidden stashes and boot-pack trails to (mostly) uncharted terrain. He showed me Solitude’s many gated areas, and we hiked to several pitches of fresh powder. The rest of the time, we traversed and side-slipped to new-to-me slopes within boundary. At Solitude, you can opt for a full day or half day tour; I went half-day, which gave me a nice balance of challenging terrain and some nice groomers after my legs got tired.

Where to ski in Utah: Solitude Mountain Resort

Solitude Mountain Resort is one of those ski resorts that grows on you. The first time I skied Solitude was as part of a demo day experience, and I only traversed part of the mountain. Still, I enjoyed it. The next time I visited, my teenage son and I zipped all over the mountain during an epic powder day…hard to dislike that! The third time I skied this Big Cottonwood Canyon resort, the snow was so-so, but hidden stashes remained, and the true peace and tranquility to be found here won me over.

solitude-mountain-resort

What to expect at Solitude Mountain Resort:

Let’s start with what not to expect: don’t expect crowds, as Solitude really does live up to its name. You also don’t need to expect the usual high lift ticket prices. Even if you opt to buy tickets at the window or online, instead of getting a M.A.X. Pass, Solitude lift tickets are on the reasonable side, comparatively speaking. And I have visited during a long holiday weekend.

Instead, at Solitude, you can expect a local vibe, despite the presence of a base village with lodging for out-of-town guests. There’s an emphasis on off-piste (off the run) skiing and even backcountry skiing (out of bounds), which means the mountain ‘skis bigger than it is’. What do I mean by this? At 1200 acres, Solitude is not considered a very large resort, but if you include all the glade skiing, powder bowls, and off-piste options, which exist depending on snow conditions, it’s very large indeed.

solitude-ski-terrain

The lifts at Solitude are spaced out enough that some traversing will be necessary at times, but the newest chair, Summit, is not only fast but offers incredible views as you ascend. The village is compact, with condo-style lodging, an inn, a few restaurants, gear rentals, and a snow sports shop, and extremely cozy.

How to plan your trip to Solitude:

I love skiing Utah resorts because so many of them are within an easy commute of Salt Lake City and the international airport. Solitude was within 45 minutes of downtown during my visits. From the base of Big Cottonwood Canyon, it’s only 12 miles. On one trip, because my son and I were skiing multiple resorts during my second time at Solitude, we stayed at the entrance to the canyon, at Residence Inn by Marriott. It was comfortable, convenient, had an excellent complimentary breakfast, and was only about 25 minutes from the Solitude parking lot. I highly recommend this hotel if you want to stay central to both Big and Little Cottonwood canyons.

solitude-village

If your ski trip will be solely at Solitude and/or Solitude and its neighbor, Brighton, definitely stay in the Solitude Village. I stayed two nights at the Inn at Solitude on my third visit and loved the proximity to the mountain. My fourth-floor balcony literally overlooked the Apex Chair, and the heated, outdoor hot tub and pool soothed sore muscles each evening. The Inn at Solitude is just steps from The Hungry Squirrel, which became my go-to apres-ski watering hole, and there are spa services on-site, too. St. Bernard’s restaurant, directly inside the inn, offers an Alpine-style buffet dinner with charcuterie, hot soups, roasts and cobblers every night, and serves an equally satisfying buffet breakfast each morning. The atmosphere is warm and relaxing; we enjoyed drinks in the Library Bar seating area outside the dining room before our leisurely meal. St. Bernard’s was a definite highlight of our time at Solitude. You also get access to Club Solitude by staying at the Inn at Solitude, which has additional pools, a lounge area with video games and a movie screening room, exercise spaces and saunas.

As noted, the village is small, but has what you need (eliminating any need to commute down the canyon for food or supplies). You can find a very small convenience store right at the entrance to Solitude by the real estate office; this is not a grocery store by any means, but does have wine, beer, convenience items and toiletry items. If you are staying in the village and want a second option in addition to St. Bernard’s, head to Honeycomb Grille for excellent American bistro cuisine or to the small pizzeria. Every option is within walking distance of everything else.

You’ll be ski-in, ski-out at Solitude, and only a five-minute drive from Brighton. There are buses that connect the two as well (and you can ski between them…more on that in a minute).

Getting your bearings at Solitude:

There are two base areas at Solitude, at Solitude Village and Moonbeam base area. It’s nice that both have parking lots, to spread out day guests, and both have base lodges with ticket sales and food services. Moonbeam is home to the snowsports center, which is where to go if you’re taking a lesson or dropping off kids for lessons. There are some food venues there, as well as bathrooms.

solitude

The village has additional food services, a rental shop and tuning shop, and all the lodging options (which include condos in addition to the inn). A good lunch option can be found at Last Chance Lodge, right on the snow at the edge of the village, where you can find excellent made-to-order tacos and a salad bar. Hang tight though, because the absolute best lunch spot is at mid-mountain (read on to find out where).

Skiing Solitude:

If you enjoy skiing off-piste, Solitude is heaven. The Summit chair drops you off at the entry to Honeycomb Canyon, named, it turns out, not after Utah’s honey production, but after the many mines that dotted the canyon a century ago. Multiple gated chutes connect with the bowl, giving skiers and snowboarders a very long and powdery run to the base near Eagle chair. There’s also a front face at Summit, plenty of tree skiing, and groomer runs for intermediate level.

Tip: if you’re a beginner, pay attention to notices at the base of each chair. Solitude is very good about placing signage where beginner terrain will be lacking, so you can know before going up.

Additional glade skiing is excellent off the older (and slower moving) Sunrise chair, and lots of nice blue groomers can be found off Moonbeam and Eagle. If you’re willing to hike, even more bowl skiing opens up, and backcountry skiers will be happy too: just look for the signage indicating when you need your own backcountry shovel, avalanche beacon, and probe to continue. (This is a good indication that you may need to hike out of the run, too.)

solitude-mountain-resort

Overall, look at signage no matter your ski ability, and be ready to ask for advice from locals…there will be plenty of skiers and snowboarders around who are familiar with the mountain. If you have a M.A.X. pass or combined ticket for Solitude and Brighton, know that you can ski between the resorts via the Solbright run. And, er, if you accidentally ski that run and end up at the wrong base area without a combined ticket, the nice lifties will let you return via the lift…once.

If you’re an intermediate to advanced skier and want to open up more terrain for yourself, book one of Solitude’s Hidden Tracks mornings. Operating as snow and weather permits, Hidden Tracks is an opportunity to ski with a local instructor who can show you all those hidden stashes and glades you might have missed. And there are a lot! During my Hidden Tracks experience, my guide Josh described skiing off-piste at Solitude as ‘a game of gates’. What he meant: there are gated entrances to off-piste terrain all over the place! These gated areas are maintained by ski patrol for safety and opened and closed at their discretion. Once you know where they all are, as well as which ones will require boot packing (or hiking) to get to the great snow, you’ll be an informed skier who can continue to enjoy these gates the rest of your trip. Have adventurous teens? This session is ideal for them to know their options!

At a mountain like Solitude, which has so much backcountry and side country terrain, Hidden Tracks is well worth your time and money. And while it’s not a lesson, if you’d like instruction or pointers during the morning, your guide will be happy to accommodate you.

roundhouse-lodge

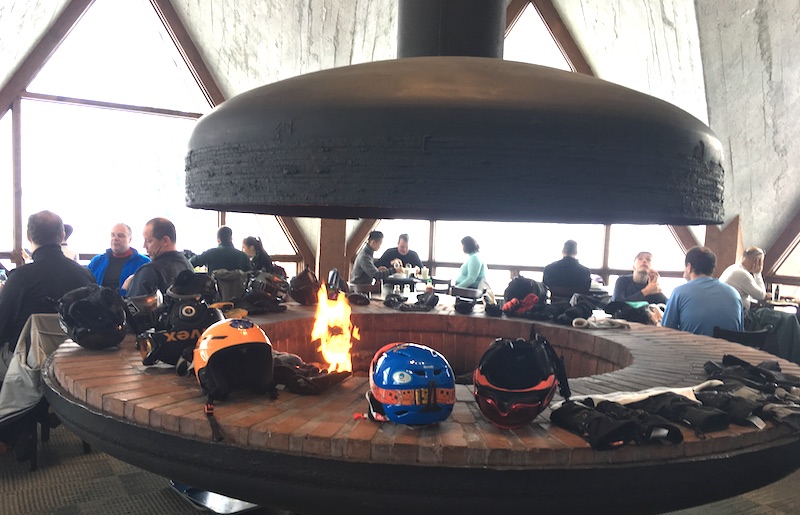
Tip: definitely plan to eat your lunch at the Roundhouse mid-mountain between the Moonbeam and Eagle lifts. This circular lodge has a lot of history, and serves just two types of food: Wasatch mountain food (Utah-inspired soups, stews, and burgers), and Himalayan mountain food (wonderful curries and rice dishes). The food is excellent, and we found there was plenty of room…no hunting for a table at lunch.

Solitude lift tickets:

As with all ski vacations, ease the burden on your wallet by planning your lift ticket purchase ahead of time at Solitude. If you only plan to spend a few days, buy multi-day tickets online ahead of time to save money off the approximate $85 adult day pass price. There’s also a Solbright day pass, which gives you access to all of Brighton, too. Personally, I think you’ll be busy enough at just one or the other, but the flexibility is nice.

Pin for later!

Wondering where to ski in Utah? Solitude shines for teens. Here's why!

Disclosure: We skied Solitude as guests of the resort, for the purpose of reviewing the M.A.X. Pass option. All opinions are my own.


Family Apres Ski at Whistler Village

After a full day of skiing or boarding, nothing is so satisfying as unbuckling your boots and shedding your coat to warm up amid the lively ambiance of fellow skiers and perhaps a live band. Add a cold brew or warm beverage, and you just might be in heaven. We’ve already told you where to eat on a budget at Whistler, but you don’t have to pass up the fun of apres ski drinks and appetizers, even if you do have a full kitchen at your Whistler home rental. Check out the following family-friendly apres ski at Whistler Village locations.

apres ski with kids

1. Mallard Lounge, Fairmont Chateau Whistler:

Located within the elegant lobby of the Fairmont (right off Blackcomb’s Wizard chair), the Mallard offers cozy couches fireside and a designated family seating area. In fact, the whole lounge is kid-friendly until 8 pm. On Friday nights until peak season, parents can order $5 drink specials while the kids sip gourmet hot chocolates and listen to nightly live entertainment.

2. Earl’s:

Earl’s is hard to miss coming down from any of Whistler’s main runs into the Village. Ski right to the front door, and grab a spot by the fire. The atmosphere here is very casual and fun; no one minds kids underfoot and the crowd is very family-oriented in the early evening after the lifts stop turning. Stay for dinner or depart after a drink or two (the burgers are great, but pricy).

3. Elements:

Located off the beaten path in Whistler Village North, Elements manages to be both casual and upscale, with inventive cocktails and appetizers that don’t break the bank. Kids will like the tapas that are disguised as finger foods. Unlike some of the noisier bars and pubs along the Village and Upper Village (think Wizard Bistro), Elements remains full without feeling crowded.

While you wait for drinks or while you’re still deciding where to go, let the kids play on one of the many snow hills piled up along the pedestrian streets of the Village Stroll. They’ll have a blast playing ‘king of the hill’ or sledding down them in their ski pants even after a full day on the slopes. (If only I had that sort of energy!)

Photo credit

Back to Ski: Smugglers Notch Resort for teens and advanced skiers

We covered Smugglers’ Notch amenities for young kids and babies last winter, but Vermont-based Smuggs has older kids, teens, and advanced skiers covered as well. In fact, this combination makes Smuggs an excellent resort pick for multigenerational family travel, so bring Grandma and Grandpa along, too. If you have expert skiers and older kids or teens in your midst, here’s what you need to know about Smugglers Notch Resort for teens:

smuggs for teens

Two-hour lessons appeal to older kids:  

My kids—all of whom are expert skiers—balk at all-day lesson programs. They long to explore the mountain on their own, but we insist they continue to work on their skills. At Smuggs, advanced skiers can opt for two-hour lessons (ages 6-17), giving kids plenty of time for free skiing. Tip: book the afternoon session instead of morning for a less crowded lesson. You may even luck out with a private experience! 

Mountain configuration is teen-friendly:

Smuggs is comprised of three interconnected mountains. Morse Mountain is where all the action is: you’ll find the childcare and ski school at its base, along with the entire Village Center, and a network of trails primarily for beginners, with a sprinkling of blues for intermediate levels. Madonna and Sterling mountains are further afield, and offer a solid helping of intermediate runs, plus the resort’s black diamond, double-black diamond, and even triple-black diamond runs. To get there, skiers need to ride the chairlift up Morse Mountain, ski the access trail, then catch the double chairlifts at Madonna and Sterling. What this means for parents of teens: to get back down the mountain, runs funnel back down to Morse, ensuring there’s only one place your kids will end up. It’s easy to plan meeting places for tweens and teens, and if you have kids in advanced ski school while you’re hitting the slopes solo, you can meet them at the Madonna/Sterling base lodge.

smuggs adult lessons

Adult lessons are not just for beginners:

Practice what you preach to your kids, and take a lesson yourself! If you’re an expert skier, consider your time to be a lesson on Smuggs as well as a lesson on ski form. Madonna and Sterling mountains are chock full of secret stashes, hike-only terrain, backcountry tree runs, and hidden powder pockets. Newbies to the mountain cannot hope to find many of them on their own, and ski instructors act as mountain guides, showing you where all the fun stuff is. (Tip: be a hero and show your kids the best tree runs after your lesson.)

No need to sweat about snow conditions:

Families can plan their entire ski vacation carefully, but no one has control over the weather. Smuggs takes care of this worry as well with advanced—and ever-increasing—snowmaking abilities. With 150 new snowmaking guns last season and another 100 in place for this winter, families can book late or early in the season with confidence, taking advantage of school holidays and long weekends. (Though the resort’s traditional 300 inches from Mother Nature per year certainly help!)

Don’t forget about cross-country terrain:

Included in the vacation packages, the resort’s Nordic terrain includes 30 km of cross-country trails and 24 km of snowshoe terrain.  Lessons are available if you’re new to the sports, and ice skating is on-site as well (we find our kids prefer skating while we enjoy the tranquility of the trails). Rent equipment at the center or bring your own.

Teen clubs:

Teens and tweens are usually forgotten when it comes to kids’ clubs (most end at age 12), but Smuggs offers not one, but two! Kids ages 13-15 have their own space at Teen Alley, and 16-17-year-olds have access to Outer Limits. Both clubs are open for après ski fun without parents, and programming includes organized games, video game tournaments, movie nights, and dance jams. How teens have the energy for all this after a day of skiing, I’ll never know, but they do!

Photo credit: Smuggler’s Notch


Ski trip planning hack: Using GetOutfitted to rent ski wear

Ski and snowboard wear is expensive–very expensive, in fact–and for some families, the cost to outfit everyone for one or two ski trips per season is simply not worth it. Our family skis much more often than that, but with the rate my teens are growing, I never know what will still fit them, even from month to month! Enter an interesting solution: GetOutfitted.

What is GetOutfitted?

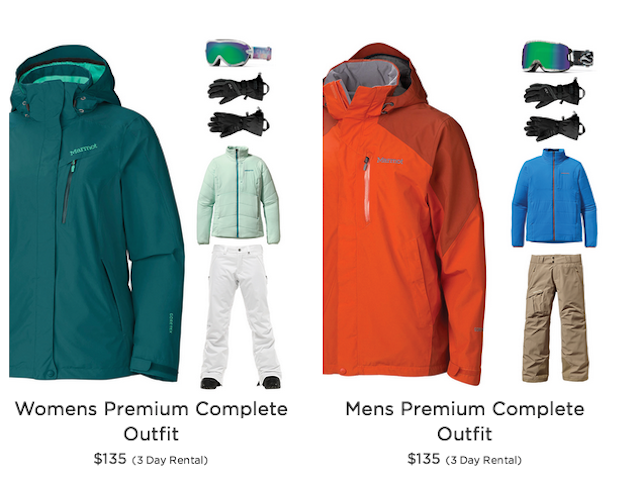
It’s a new service that rents outer wear, plus ski gear ranging from ski packages to Go Pros. You select the items you need online, picking your jacket and snow pants a la carte based on the styles you like, or selecting a pre-determined package. I’m very familiar with the latest outdoor wear brands, and they’re all here. Once you’ve made your selections, you input your vacation dates and destination, and GetOutfitted will FedEx your ski wear directly to your hotel, condo, or vacation home. If you opt to rent skis and/or snowboards, too, they’ll be delivered to your door via a local ski rental partner. When you’re done with you vacation, you just put the ski wear in their pre-paid, included package and drop it off at any USPS mail center. You get free shipping both ways.

What can I get?

rent-ski-wear

Premium outerwear packages for women or men include a top-brand jacket, pants, gloves, and googles and rent for approximately $45/day. Standard packages include the same items, with slightly less trendy brands, and cost $30/day. Kids’ packages are $18/day, which is a true deal. As mentioned, you can also shop a la carte, plus can add base layers and socks, which you buy instead of rent. If you don’t have base layers, we highly recommend getting them. They’re listed for approximately the same prices you’ll pay anywhere else.

In the ski gear category, you can rent full ski or snowboard rental packages, starting at just $25/day for adults and $15/day for kids. Rental packages come with helmets as an optional addition (recommended). All ski wear and gear has a three-day minimum rental period outside of Colorado Rockies resorts.

Where is it offered?

Just about everywhere you might go for a destination ski vacation. The company is based on Colorado, but we used the service for a ski trip to Lake Tahoe, California.

Our experience with GetOutfitted, start to finish:

We didn’t need to rent full outerwear packages from GetOutfitted, which is the most affordable way to do it. We still got a good value, however, renting pants for our Pit Stops for Kids’ dad. His pants were $48/3 days. Buying him a pair of pants for the trip would cost $150 at the minimum, assuming we found a good deal on quality pants, and buying the exact pants he rented would have been $299.

getoutfitted ski gear

Pit Stops for Kids’ dad in GetOutfitted ski pants.

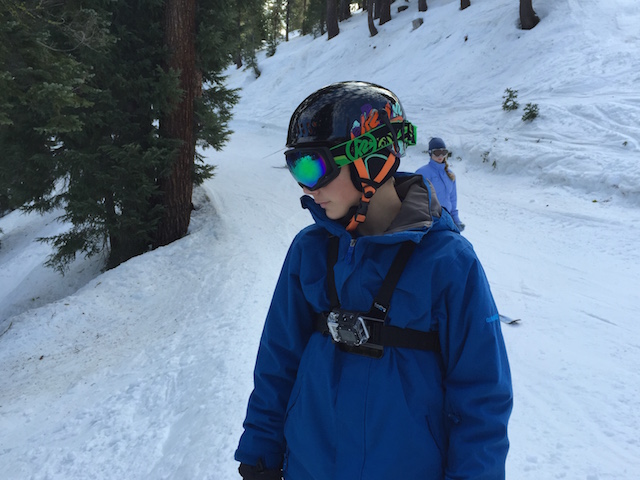
While we were renting pants, we decided it would be fun to rent a Go Pro for the teens to use on the mountain. Merry Christmas to them! The Go Pro rented for $40/3 days, and the chest mount to wear it cost $12/3 days. Is this $52 critical to our ski trip? No, of course not. But it’s a vast savings on buying action camera equipment we’ll only use occasionally, and the kids really loved it.

While on the site, I initiated a chat with a GetOutfitted expert, who answered my questions promptly. What I asked: ‘Can I reserve for fewer than three days?’ and ‘Do you rent helmets’. The latter is not obvious until you select the ski resort or town you’ll be visiting, which pairs you with a local rental company. When I placed items in my shopping cart, I selected the exact dates of rental, and when I checked out, I entered our vacation rental home address. The ski wear and gear were sent directly to our rental.

When we arrived at our vacation rental, the box from GetOutfitted was waiting for us by the front door. Inside, we found the ski pants and Go Pro, plus a large, prepaid return envelope. Included with the Go Pro was a set of instructions, which, combined with a Google search for the Go Pro website, proved adequate for figuring it all out. We were provided with a memory card, USB cable, and the chest mount equipment (which we paid for), plus a few more mounts, which we could use to mount the Go Pro onto our helmets (after buying disposable adhesive mount stickers, which are found at any ski gear store at most ski resorts).

GetOutfitted

The kids had fun taking video on the mountain, which we downloaded to our computer at the vacation home (use the USB cable). You’ll want to make sure to download all your videos before returning the Go Pro (or pay a fee for GetOutfitted to download it all for you).

The ski pants worked perfectly, and we returned everything at the end of our trip by dropping off the package at a USPS store. Easy-peasy. To rent your own ski gear, start at GetOutfitted.com and go from there!

We tried out GetOutfitted free of charge, for the purpose of review.

Planning a Family Ski Vacation: Where to Go for Snow

In the past few years, the ski scene has changed with changing weather patterns. For the many families who only take one major ski vacation per season, it’s more important than ever to know where to go for the best conditions. And yes, NOW is the time to book!

Planning a family ski vacation: Where to go for snow

While no resort or ski area can guarantee good snow pack when families book in advance, it’s possible to increase the odds of enjoying peak conditions (no pun intended) by booking one of the following US and Canadian ski resorts with the most consistent annual snowfall. When you want a sure thing for your family ski vacation during an unpredictable winter, go here:

1. Alta Ski Area, Utah

What places Alta at the top of the list? With a base elevation of 8,530, Alta has a leg up on many resorts. The dry, light snow of the Wasatch Mountain Range of Utah isn’t quick to melt, and Alta’s location west of Park City seems to be a magnet for regular snowfall. Still unsure? Trust fellow skiers and snowboarders: Alta was voted best ski resort for consistent annual snowfall in the recent Best Family Ski Resorts poll conducted by family travel expert Trekaroo.

2. Whistler Blackcomb, British Columbia 

Don’t be fooled by the rain that often falls at Whistler’s base area, which is hit by precipitation from the nearby Pacific. Higher up, the powder will be accumulating. Recognized as one of the most reliable North American resorts for snow pack, Whistler Blackcomb also has one of the most comprehensive village scenes, aiding in a great vacation, even if, by chance, the snow isn’t want you were hoping for.

3.  Jackson Hole, Wyoming

The cowboy town of Jackson Hole has as much going for it in winter as in summer. Known for its powder bowls and backcountry ski terrain, Jackson Hole consistently receives over 9 meters of snow due to its location in the Teton Mountains of the Rockies. Book this ski resort in December, January, or February for the best conditions; the season starts in November and ends earlier than its snowpack requires, due to its placement on an elk migration site.

4. Big Sky Resort, Montana 

With an average of 400 inches, it’s no wonder Big Sky, located in southwestern Montana, needs snowmaking capabilities on only 10% of the mountain. Plus, Big Sky now has more snow to play in, thanks to the acquisition of adjacent Moonlight Basin. It’s known for its deep stashes, but also has perfect groomers for younger kids and beginners. After a day of ripping it up on the mountain, be sure to stay at the Summit at Big Sky, where a 100-person hot tub awaits.

5. Northstar California

Located in the heart of North Tahoe, Northstar doesn’t always get the biggest natural snowpack among North American resorts. However, it’s makes the list for an important reason: Northstar has the best snowmaking capabilities in Lake Tahoe. What this means for skiing and snowboarding families: a sure thing, even when other resorts in the area are closed. Northstar is a great pick for early ski season trips, when it’s unclear what Mother Nature will bring.

Now, book early and without fear of a lack of snow upon your arrival!

Where to ski in Utah: Brian Head Resort with kids

Deciding where to ski in Utah is a little like deciding which tropical island to buy…you really can’t go wrong, wherever you choose.  That said, there are distinct differences between Utah resorts, and perhaps an even bigger difference between Salt Lake City and Provo area resort and Southern Utah resorts. For the first time, I explored the skiing options in Southern Utah, where I loved the friendly, relaxed, and sometimes almost eccentric vibe.

brian-head

Brian Head Resort with kids:

Brian Head Resort has the highest base elevation in Utah (you’ll be at over 9000 feet at all times, and up to 11,000+ feet while skiing). It offers 650 acres with eight chairs. It’s not the largest Utah ski resort, and also not the most challenging in terms of expert terrain, but it has something distinct going for it that really plays in its favor: isolation.

brian-head

Because Brian Head is pretty far from a metropolis (you’re 3.5 hours from SLC and 3 hours from Las Vegas), your closest neighbors during your stay are national parks and monuments. Brian Head has the distinction of being a Dark Sky location, which means you’re free from light pollution. All this isolation means Brian Head Resort makes its own fun. Events, apres ski dining options, live bands, and special programming seems to be scheduled for just about every night. Need proof? Just take a look at their event schedule.

Getting the lay of the land:

When skiing Brian Head resort with kids, it’s important to note Brian Head has two distinct base areas: Navajo and Giant Steps. They are separated by the highway, with a ski bridge that links them. Base lodges are at both locations. The simplest way to categorize them is to say that Navajo offers the beginner and intermediate terrain, and Giant Steps offers intermediate and expert terrain. There’s a meeting place for the winter sports school at both locations, but the kids’ camp is at Navajo. The two Brian Head hotel lodges are a couple minutes’ drive from the Navajo side, but there are many house rentals and condos available at both base areas.

brian-head

You can absolutely ski between the two sides using the ski bridge, but it does take a few chairs and some traversing. There is also a  free shuttle that connects the base areas, convenient if you have family members skiing at different levels but want to meet up for lunch or apres ski.

Skiing at Brian Head:

Brian Head is one of those resorts that seems to double its size on powder days…there are just so many open areas to ski. (The openness of the resort is actually due to the need to remove many trees during a beetle infestation years ago.) But of course, not every day can be a powder day. During my visit, we stuck mostly to groomed runs, which were plentiful and pleasant. There are a number of great chutes near the top of Giant Steps, and even after the fluffy powder is skied out, hidden stashes remain in the trees. On the Navajo side, the green beginner runs are some of the most interesting I’ve seen…think winding paths through forests and fun curves.

brian-head

From both sides, skiers are rewarded with views of classic Southern Utah red rock, and glimpses of nearby Cedar Breaks National Monument. On clear days, it’s possible to see all the way to Great Basin National Park in Nevada. What you won’t see often are crowds. We visited on a Saturday in January, and it felt like a quiet Tuesday morning.

Other things to do at Brian Head:

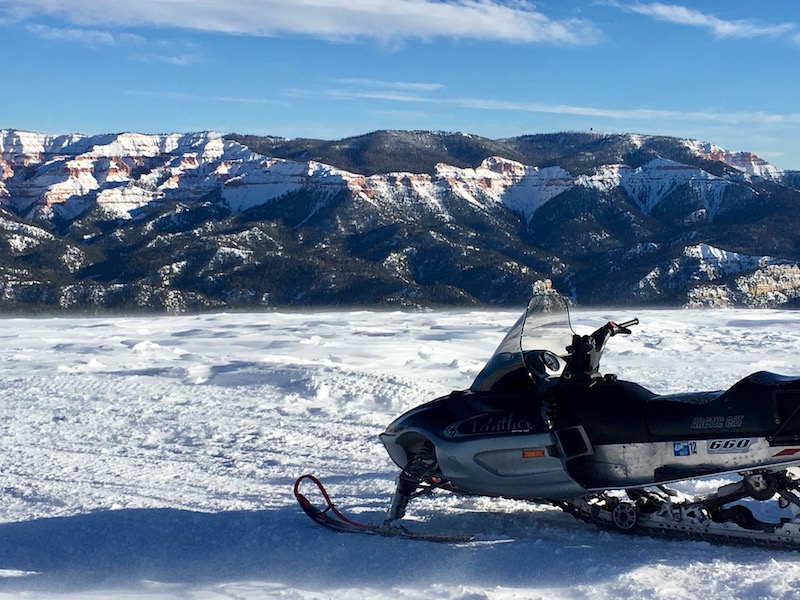
Remember how close you are to Cedar Breaks while in Brian Head? If you want to take an afternoon off from skiing, you can actually take a snowmobile tour from the resort area to High Mountain, which offers incredible close-up views of the red rock of Cedar Breaks. Thunder Mountain Motorsports offers 1.5 hour, 3 hour, and all day rides. We found 1.5 hours to be just enough time to go through the backcountry of Brian Head to High Mountain and back, with time to play around in snow-filled meadows and learn about the natural history of the area. Our guide was fantastic: the perfect mixture of helpful and informative but also lighthearted and fun. Tours start at $85/machine, which families can ride double for only $15 extra. If you have it, you can even take your own machine and follow the tour for $20.

snowmobiling

If snowmobiling isn’t your thing, you can also snowshoe or cross-country ski in Cedar Breaks. It’s best to call for up-to-date info on road conditions and where to start your winter exploration: 435-586-9451.

Brian Head also offers snow tubing, which I’m told is on a steeper track than most. (I didn’t get a chance to try it.) However, one of the best things I did at Brian Head was their free ‘Star Party’. Held once a month at Navajo base lodge, star parties are a fun and informative viewing of the night sky. Because Brian Head is a Dark Sky location, the view on clear nights is fantastic. They bring out ‘dark rangers’ (like park rangers) to lead short talks, in which they point out constellations and planets and give families time to look through telescopes. There are fire pits and hot chocolate as well.

Where (and what) to eat at Brian Head:

Remember how I said Brian Head was just a bit eccentric? This characteristic is most evident in their dining and entertainment scene. Brian Head was bought by a new owner a few years ago; owner John Grissinger has brought his love of Kansas City BBQ to the resort, and everyone benefits! At least once a week (and usually more often), families can find ‘John’s KC style BBQ’ on the events calendar. Held at Last Chair Saloon at Giant Steps base, this BBQ meal is not to be missed. You may get two choices on the menu, but don’t expect more. What you’ll get is amazing BBQ meat (usually ribs, catfish, or tri-tip) served with sides. It’s accompanied by live music, and the whole event is very family-friendly.

When you can’t get BBQ, you have other options: Giant Steps lodge and Navajo have your standard ski day fare, and if you want to dine out in the evening, the Grand Lodge offers a simple but solid menu at their Lift Bar and Grill. Cedar Breaks Lodge offers a restaurant as well.

Where to stay at Brian Head:

As noted above, there are many condo rentals and home rentals in Brian Head. If you opt for a hotel, you have the choice between the Grand Lodge and Cedar Breaks Lodge. We stayed at Grand Lodge, which has a great indoor pool and hot tub, plus an outdoor hot tub. Their spa was closed for the season, but it is on offer in summer months. They have a decent continental breakfast at the Lift Bar and Grill, which is convenient before your ski day, though it does cost extra (around $10 pp). I found this price to be too high for the standard fare; at some chain hotels, you can get a similar spread complimentarily). However, our waitress did charge less for those who were eating less, which was nice.

grand lodge

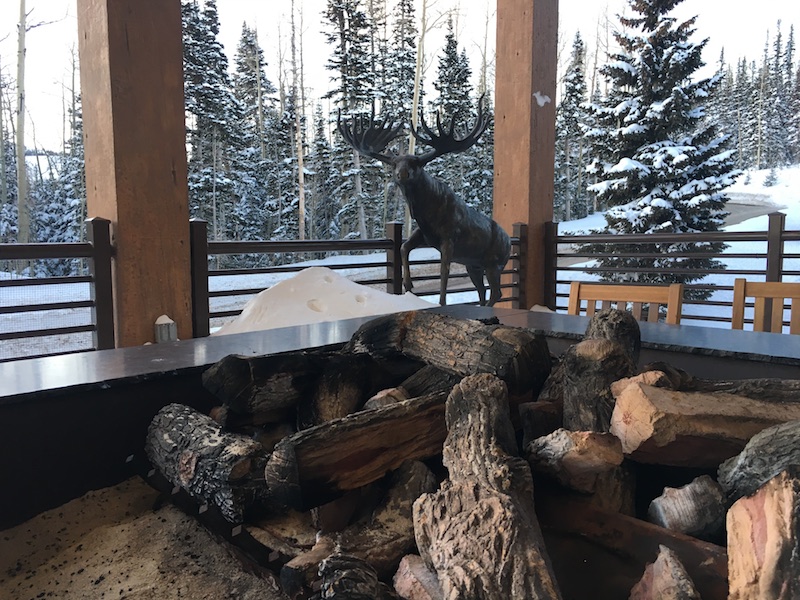
Rooms are standard, with mini fridges and microwaves, which is nice to have, and the lodge has fun live music and a pretty hopping bar on weekends. It’s a friendly, welcoming vibe. You’re about a one minute drive to the base of Navajo, or you can get on the free Brian Head shuttle.

Getting to Brian Head: Take I-15 to Parowan, then Highway 143 to Brian Head. It’s about 3.5 hours from Salt Lake City or 3 hours from Las Vegas.

Pin it for later:

Ever heard of Brian Head? Here's why you should take note of this small ski resort!

Disclosure: I experienced Brian Head as a guest of the resort, for the purpose of review. All opinions are my own.

Boreal Mountain Resort with the M.A.X. Pass

If you read Pit Stops for Kids’ ski coverage regularly, you know we’re big fans of Lake Tahoe, CA skiing. I grew up in the area, skiing at resorts throughout Tahoe, and we try to visit our favorite resorts at least once a season. However, until our visit last month, it had been YEARS since I’d been at Boreal Mountain Resort.

Boreal Mountain Resort

One of the oldest and most established ski resorts in the Tahoe region, Boreal has always been known for its terrain parks, affordability, and easy access from I-80. I remember it best as the first Tahoe resort (to my knowledge) to allow snowboarding. Ever since, it’s been snowboard-centric. Because I’ve never been an avid snowboarder or lover of big jumps, Boreal hasn’t been on my radar for some time.

However, I now have three kids who love terrain parks (one of whom exclusively snowboards). I knew they’d love Boreal’s five terrain parks and half-pipe. But as one of the most affordable resorts in Tahoe, Boreal is on the small side. Before we arrived, I wondered whether its acreage would keep us occupied for a full day.

Enter Woodward Tahoe, located directly at the base of Boreal. This indoor action sport training facility is every kid’s dream: it’s filled with indoor trampolines, foam pits, skate parks, ramps, and more. With a Boreal OnePass, you get access to Woodward in addition to the slopes at Boreal (and nearby Soda Springs ski area if you’re interested). We got our tickets through The M.A.X. Pass, which is a 39-mountain season pass that includes Boreal (more on that below).

How Boreal and Woodward work together:

When you arrive at Boreal and get your Boreal OnePass, you have access to both Woodward and Boreal. Woodward is used in several ways: extreme action sport athletes use it for serious training, classes and camps are offered, and single use sessions are available to the public. To use Woodward during your ski day, you’ll want to make a reservation. Your OnePass gets you a three-hour session, which we found to be more than enough time. We opted to make a Woodward reservation for after lunch, then skied and snowboarded all morning, switching to indoors in the afternoon. Of course, you could do the reverse.

Woodward Tahoe

First-timers at Woodward need to take a 30 minute orientation session, in which instructors explain the equipment and show you the proper way to jump (and fall) safely. It’s easy and really helpful. After that, you’re let loose on all the trampolines, foam pits, ramps, and ropes. If you want to use a scooter (to jump off ramps into a pit), you can rent one by the hour. I believe it was $15/hour. Kids can also bring their own, as well as their own BMX bikes or skateboards. To skateboard and ride, helmets are required. We simply used our ski helmets. Check out our favorite Woodward video!
You’ll want to bring a change of clothes for anyone playing in Woodward before or after skiing or snowboarding; there are bathrooms to change in at Woodward, and cubbies in which to store your ski stuff. There’s a nice counter-service lunch and drink place upstairs, where there’s also a nice viewing and lounging area for anyone not participating.

What to expect on the slopes at Boreal:

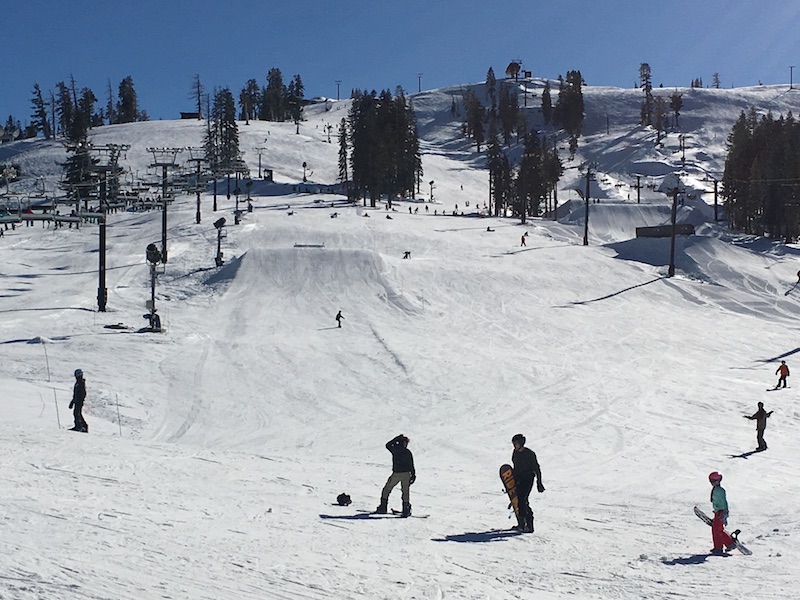
As noted above, Boreal is known for its terrain parks, and it definitely delivers. We were there in late December, and not every terrain park was up and running yet, but there were still about four to pick from. As a parent, I appreciated the option of an extra-small park, where the jumps and ramps were beginner-sized. Sometimes, beginners and young kids can get in the way or even hurt on large terrain parks. From there, it goes up all the way to expert level. There’s a half pipe, and an additional park called Neff Land, which is sponsored by Neff and includes fun elements like tunnels and side walls.

Boreal

For those not into terrain parks (like me), Boreal has a surprising amount of glade and off-piste skiing, which I found on the extreme far sides of the resort. The Cedar Ridge chair was especially lovely, with a ride up the mountain amid deep forests. While the overall ambiance at Boreal is still snowboarder-centric, I did find my own place there.

Using The M.A.X. Pass:

As noted above, I visited Boreal after so many years because it is one of the 39 resorts included in our M.A.X. Pass, which our family is trying out this year. Yes, you read that right: the M.A.X. Pass includes 39 different resorts across the US. Many are on the east coast, with a handful in Utah, Colorado, California, and the Pacific Northwest. I’ll be reviewing additional M.A.X. Pass resorts later this winter. For $749, M.A.X. Pass users get five days at each of the resorts, with no blackout dates. I buy a season pass at our local mountain annually, and I can tell you it’s not far off that $749 price just for one property. If your family plans to spend five days at a single M.A.X. Pass resort on vacation this winter, plus could use the pass for a day here and there throughout the rest of the season, the value is definitely there. Check out all the resorts offered on the MAX Pass.

I visited Boreal in partnership with the M.A.X. Pass, for the purpose of review. All opinion remains my own.


Whistler Blackcomb Ski Resort: what not to miss with kids

Twenty minutes before lifts stopped turning on a perfect Whistler ski trip, we were still finding fresh powder. Whistler Blackcomb is just that big. Everywhere we skied at Whistler Blackcomb, the kids discovered new routes, new glades, and new jumps. After spending two full ski days exploring the duel mountains, we could only say we’d had a ‘sampler’ of what this resort offers to families.

Whistler Blackcomb skiing with kids

Whether you have an ideal 3-4 ski days at Whistler Blackcomb, or just a short few like we did, Pit Stops for Kids is happy to share our top sections of the mountain for families, including runs, lifts, lodges, and dining.

Where to ski or snowboard on a Whistler ski trip:

The best thing about Whistler Blackcomb’s mountain layout is the fact that no matter where you are on either of the mountains, from peak to base, beginner (green), intermediate (blue), and advanced (black) runs are available. This means families can ride the lifts together even if they’re of different ability levels, and even young kids and novice skiers and riders can experience the whole resort. Our favorite sections of the two peaks for kids (of any level):

Blackcomb skiing

1. Jersey Cream area of Blackcomb: This area is accessed by the Solar Express lift (from Wizard Express at the base), and provides expert to beginner runs situated high enough on the mountain to be challenging but just below the tree-line (to keep out of the wind). We spent the majority of our time here, alternating between the double-black-diamond Jersey Cream Bowl and its many side runs (most of which are intermediate). The Green Line (beginner) offers a fun alternative to those not so sure about moguls and steeps. For those wanting to go higher up, the Glacier Express loads adjacent to Jersey Cream.

Family Zone at Whistler Blackcomb

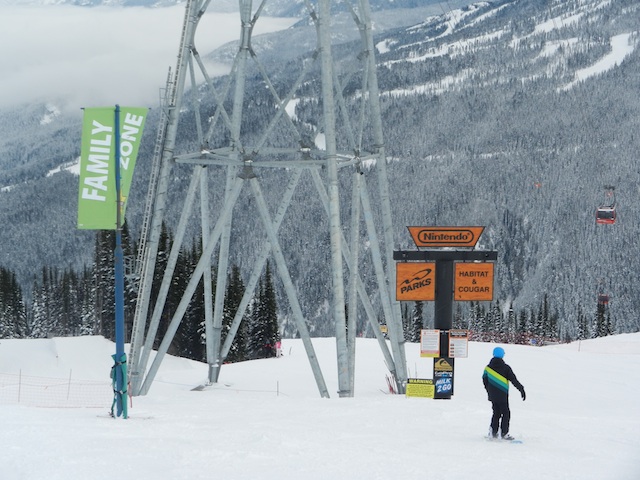
2. Whistler Family Zone: Located on Whistler Peak directly across from Blackcomb after off-loading from the Peak 2 Peak Gondola (or off the Whistler Village Gondola), this Family Zone is a relaxing place to try out new skills without fear of fast skiers or riders nearby. Marked by bright green flags, the Family Zone offers groomed slopes and is placed next to one of Whistler Blackcomb’s many Nintendo Terrain Parks. It’s easy for kids to dip in and out of the terrain park (every feature is clearly marked as S (small), M (medium) or L (large) and still meet up with non-jumping family members. If your kids like easy glided skiing or riding, look for the large wooden arch marking the entrance to a not-so-steep tree glade filled with powder and trails (when snow levels permit).

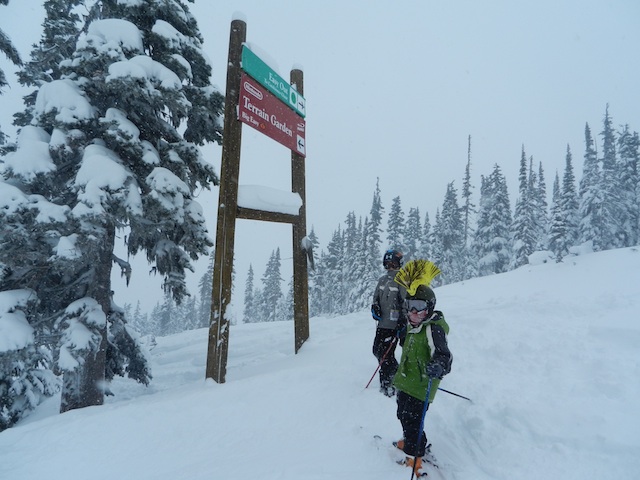
3. Blackcomb lower mountain: Younger kids will like the numerous intermediate runs off the Wizard Express (and parents will like that the Blackcomb lower mountain gets less traffic than the Whistler lower mountain). When they’re ready, take intermediate and beginner kids up Solar Express for new terrain, including another Nintendo Terrain Park. (Look for the magic ‘castle’ play area nearby…though we had trouble finding it in deep snow, even with signage!)

Tip: If you’re new to the mountain, a great way to orient yourself is to ride to the top of Blackcomb and take the Green Line (beginner) all the way down. This cat-track trail, marked ‘Easiest Way Down’, traverses the entirety of Blackcomb while winding slowly down. Parents can get a feel for the mountain while kids get their ‘feet wet’. Plus, we clocked it: it’s a 30 minute run!

Rendezvous Lodge, Blackcomb

Where to eat and rest:

Whistler Blackcomb is very big, which means that traversing to your favorite pit stop could take a while, depending upon where you are on the mountain. Families will waste time getting from Point A to Point B if they’re not careful. The good news is, there are dining options on both mountains, of course. Our best advice: no matter where you eat, try to avoid the two largest lodges, Roundhouse and Rendezvous, during peak lunch hours (12-1pm).

1. Glacier Lodge: Located at the base of Jersey Cream and Glacier lifts, this smaller lodge is just enough off the beaten path to be an ideal lunch spot for families. (Also recommended is Crystal Lodge, but it’s so far off the main lifts it may take too much time to get to.)

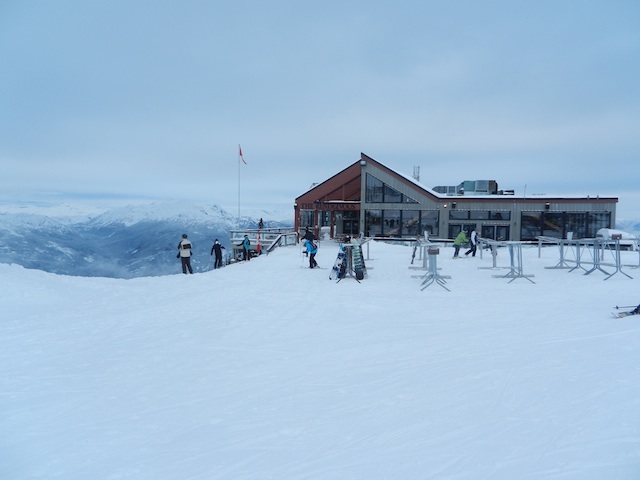
2. Rendezvous Lodge: As long as you avoid the peak lunch hour, Rendezvous is a good bet (and easy to get to from either Whistler–take the Peak 2 Peak–or Blackcomb). Even during the busy holiday season, we didn’t have trouble finding a table or getting through the cafeteria-style dining area. Tip: even adults can order kid meals, which are a great value at $8.99 and include an entree, two snacks (all healthy options), a piece of fruit, and a drink. If the kids finish eating before you do, let them go downstairs to the Nintendo gaming area, where they can play the latest Wii and Nintendo DS 3D games for free!

Nintendo play area Whistler

3. Try to avoid Whistler Village at lunch, as this congested area will delay your return to the slopes. The exception: if you’re staying at a ski-in-ski-out hotel. During our stay at the Fairmont Chateau, we were able to ski down to the hotel, eat a healthy meal in our room, and be back on the hill within 45 minutes. It was worth returning to the base to skip the lunchtime crowds (and hassle).

Riding the Peak 2 Peak:

At some point, you’ll want to cross between Whistler Peak and Blackcomb Peak, and while you can return to the Whistler Village and ride the Excalibur Gondola to the Blackcomb side, you’ll have far more fun riding the Peak 2 Peak. Located between the Rendezvous and Roundhouse lodges, the Peak 2 Peak takes about 20 minutes to ride. This is a great time to adjust clothing and gloves, eat a snack, or simply warm up! The views are jaw-dropping (as is the height!). Your lift ticket includes the Peak 2 Peak, so take advantage of it!

Peak 2 Peak

Don’t be surprised if you experience less than 30 percent of Whistler Blackcomb in one day, and don’t be afraid to ride lifts all the way to the peaks (when open). There will be an easy way down option every time!

As I disclose whenever applicable, my family and I experienced Whistler Blackcomb as guests of the resort. While we appreciated this opportunity to share tips and advice with other traveling families, it not come with the expectation of a positive review.


Family ski wear checklist: What you need and which brands are best

Ski season is upon us, and if you’re a skiing family, you’re busy cataloguing your gear and checking to see what fits each family member. If you don’t ski often, you may not be outfitted yet at all. If you only ski once a year or so, we highly recommend using a ski wear rental service like Get Outfitted (see our full review), but if you plan to go several times this winter, it’s worth investing in the basics. In this post, I’m not going to list exact items, since that can change in a season or two. Instead, I’ll list quality brands you can trust for each category. Here’s what everyone in the family needs:

Best ski wear for families


Family ski wear checklist

Ski pants: 

Each family member’s ski pants should be waterproof (of course), and ideally, they should grow with your kid. To that end, we love Obermeyer’s ‘I-Grow’ system, which integrates cuffs and hems that are designed to be taken in and then let out to give you more life out of your pants. Young kids will appreciate ski ‘bib’ style pants, which do a great job of keeping cold and snow out, especially if they may spend a significant amount of time on the snow, and older kids will like the ‘cool factor’ of pants with suspenders or strap-free waistlines. Make sure your kid’s ski pants come down over his or her boots, with an inner lining to keep out slush. No matter which style you prefer, these are the brands we love best, based on affordability, value, and quality:

amzn_assoc_placement = “adunit0”;
amzn_assoc_search_bar = “true”;
amzn_assoc_tracking_id = “pitstoforkid-20”;
amzn_assoc_ad_mode = “manual”;
amzn_assoc_ad_type = “smart”;
amzn_assoc_marketplace = “amazon”;
amzn_assoc_region = “US”;
amzn_assoc_title = “My Amazon Picks”;
amzn_assoc_linkid = “ff6bed00d9f521159bee92ae31c3e5d1”;
amzn_assoc_asins = “B00RHSJ720,B0187XXU7Q,B00QHNWWM8,B006E886NU”;

Ski jackets: 

Picking the right ski jacket for your kid is a bit more complex than picking a pair of pants. Style comes into play even more, and since it’s nice to try to get at least two seasons out of a jacket, be sure to go with the style your child prefers. You can opt for a two-part jacket that features an inner fleece layer that zips out for solo use and an outer waterproof shell, or you can get an all-in-one. If you’re only getting one jacket, be sure it’s a waterproof shell with some insulation; otherwise, I prefer to outfit my kids with a ‘puffy’, which is what we call a down jacket or sweater layer, covered with a thin but waterproof shell. That way, they can go with just the puffy on cold but dry days, and have the shell to go over on wet days. If you have advanced extreme skiers or riders, I suggest getting a jacket with a built-in Recco avalanche beacon system. You’ll see the Recco logo displayed on these jackets, which are, as you might guess, more expensive.

Favorite brands for puffy jackets and shells:

Favorite all-in-ones or two-part system jackets:

  • Columbia: The Snowcation is a great value
  • High Sierra: The Frankie is fleece-lined
  • Craghoppers: We love the NatGeo Oliver Pro shell for our teens, paired with the Liston Half Zip
  • Free Country: The boys’ Helium is extra warm

amzn_assoc_placement = “adunit0”;
amzn_assoc_search_bar = “true”;
amzn_assoc_tracking_id = “pitstoforkid-20”;
amzn_assoc_ad_mode = “manual”;
amzn_assoc_ad_type = “smart”;
amzn_assoc_marketplace = “amazon”;
amzn_assoc_region = “US”;
amzn_assoc_title = “My Amazon Picks”;
amzn_assoc_linkid = “bdfd8deddb28085ddcb3d18f1046347e”;
amzn_assoc_asins = “B00HZHBAQO,B00PDHWFGM,B018RHAMVO,B00XRE764E”;

Base layers:

Base layers are so crucial, and so many people neglect to get high quality Merino wool or synthetic base layers! They can get expensive, but in our experience, good base layers will last through a few seasons for each kid, and can be passed down. Look for wool, as it wicks away moisture from the body, but most importantly, find a brand and material that your kids can tolerate. Some kids don’t like the feel of wool. Here’s where to shop:

amzn_assoc_placement = “adunit0”;
amzn_assoc_search_bar = “true”;
amzn_assoc_tracking_id = “pitstoforkid-20”;
amzn_assoc_ad_mode = “manual”;
amzn_assoc_ad_type = “smart”;
amzn_assoc_marketplace = “amazon”;
amzn_assoc_region = “US”;
amzn_assoc_title = “My Amazon Picks”;
amzn_assoc_linkid = “ff6bed00d9f521159bee92ae31c3e5d1”;
amzn_assoc_asins = “B000V5C7J6,B00DDYLY1Y,B009Y7M5CQ,B000V5ABSA”;

Gloves or mittens:

This is another ski wear category that centers around personal preference. I love mittens, as they keep my hands warmer (since your fingers are together and share body heat). My kids like gloves. Whichever you prefer, think QUALITY when it comes to hand protection. The last thing you want are soggy gloves. You can always buy a back up pair on the cheap, just in case. Best brands:

  • Head: Their kids’ ski mittens are colorful…you won’t lose them
  • Spyder: Try the Mini Cubbies
  • Outdoor Research: We like Revolution gloves for high quality for a great price for teens
  • Whatever Costco is selling (we’ve always found them to be good quality!)

amzn_assoc_placement = “adunit0”;
amzn_assoc_search_bar = “true”;
amzn_assoc_tracking_id = “pitstoforkid-20”;
amzn_assoc_ad_mode = “manual”;
amzn_assoc_ad_type = “smart”;
amzn_assoc_marketplace = “amazon”;
amzn_assoc_region = “US”;
amzn_assoc_title = “My Amazon Picks”;
amzn_assoc_linkid = “ff6bed00d9f521159bee92ae31c3e5d1”;
amzn_assoc_asins = “B000V5C7J6,B01A67XOHC,B014WSLPZE,B00RW5JV4W,B002U0COHA”;

Socks:

This is another highly important category…we always want to make sure feet stay dry and toasty warm! Sorry to be repetitive, but go with wool, folks. Make sure you select a ski/snowboard dedicated sock, which will come up to the knee. Otherwise, your kid will be complaining about pain in their shins in no time. Top sock brands for ski days:

amzn_assoc_placement = “adunit0”;
amzn_assoc_search_bar = “true”;
amzn_assoc_tracking_id = “pitstoforkid-20”;
amzn_assoc_ad_mode = “manual”;
amzn_assoc_ad_type = “smart”;
amzn_assoc_marketplace = “amazon”;
amzn_assoc_region = “US”;
amzn_assoc_title = “My Amazon Picks”;
amzn_assoc_linkid = “ff6bed00d9f521159bee92ae31c3e5d1”;
amzn_assoc_asins = “B0100LX8G6,B0100LXRTY,B00KNRC1RA,B00CSGMUYS”;

Goggles:

Don’t forget goggles! This is a category of gear that can vary greatly in terms of both quality and price. For newbies to the sport, no need to spend a lot of money for top-of-the-line goggles. Instead, look for used gear at your local ski swap or ski store. But if you’re an experienced skier or snowboarder, you’ll definitely notice a difference wearing quality goggles. What we recommend:

  • Native Eyewear Upslope: Native goggles have a great anti-fog coating, which really makes a difference in most weather conditions.  The lenses also have multi-mirror, hydrophobic, and oleophobic coatings to repel oils and water. The Upslope works well for women because they fit a smaller face.
  • Native Eyewear Backbowl: The Backbowl has all the same features as above, with a wider frame and wider field of vision. I love the mirror lenses…they just look so cool! These are perfect for the men in your family.
  • K2 Captura: These women’s goggles are a good mid-price option, with spherical lenses and a smaller frame.
  • Smith Optics Sidekick: Great for kids, these goggles are a solid choice that won’t set you back!

amzn_assoc_placement = “adunit0”;
amzn_assoc_search_bar = “true”;
amzn_assoc_tracking_id = “pitstoforkid-20”;
amzn_assoc_ad_mode = “manual”;
amzn_assoc_ad_type = “smart”;
amzn_assoc_marketplace = “amazon”;
amzn_assoc_region = “US”;
amzn_assoc_title = “My Amazon Picks”;
amzn_assoc_linkid = “c99d4f9749c59462a3ead5d80fc06f45”;
amzn_assoc_asins = “B00U7XP7HG,B00EO1IIH8,B01BQ2EJE8,B01BQ2EZSI”;

Ok, you’re outfitted! All you need now are your ski rentals, a helmet, and a face mask or bandana in case of wind and cold! Have a great ski season!