Exploring the Cotswolds with kids

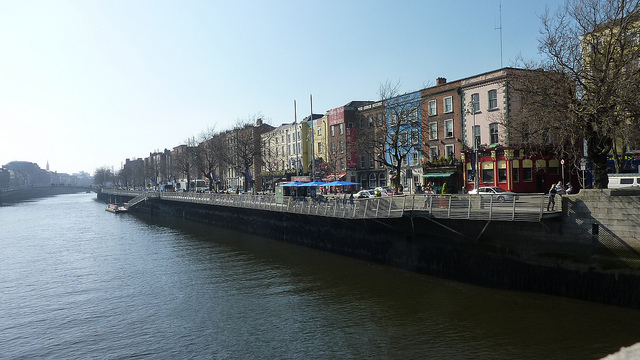
Want to add a dash of English country charm to your UK vacation? The Cotswolds are located within a day trip from London, but deserve a 2-3 day itinerary all their own. Unlike many European destinations which are ideal for public transit, the Cotswolds are best explored by car. This way, families can plan their own itinerary, take their time, lingering where desired, and go off the beaten path.

cotswolds-with-kids

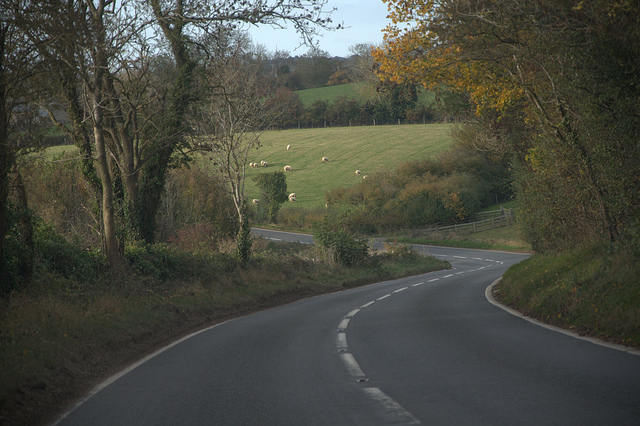
Pick up a rental car in London, and head to any of the following towns and villages that make up the Cotswolds, or venture just a bit off-course to include history-rich towns such as Stratford-Upon-Avon. Get ready to be charmed: these villages boast more than just pretty names.

Bourton-on-the-water:

When I first visited the Cotswolds as a girl, my favorite town was–and remains–Bourton-on-the-Water. With the River Windrush flowing through the village (navigated by stone footpaths) and ducks making the town center home, I was charmed even at age 12. I also loved the Model Village (yes, of the village), which is located in the gardens of the Old New Inn. What to do with kids: check out the model village and try the Butterfly Maze (both on Rissington Road).

Gloucester:

Gloucester is a very historic city (largest in the area) with a cathedral, cemeteries, and historic walking trails. Plan to spend at least a full day or overnight in Gloucester, and don’t be dissuaded by the few chain shops and restaurants you’ll find here. Gloucester is modernized, but not without its due share of Cotswolds charm. What to do with kids: head to Beatrix Potter’s House of the Tailor of Gloucester. See the inspiration for her beloved tales, and then check out the Folk Museum. If you have soccer fans in your midst, take in a game.

cotwolds-with-kids

Stroud:

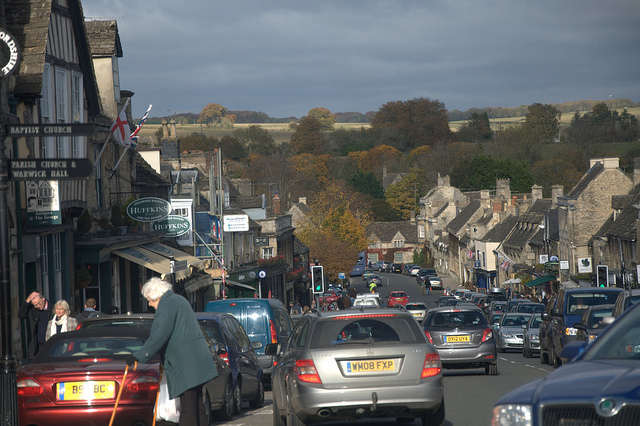
Known for its festivals and shops, Stroud leaves commercialization behind and embraces tourists with local culture and custom. The Stroud is the perfect place for walking (don’t tell the kids they’re hiking, and they’ll never notice). Trails bypass stone walls and pasture land, and offer ample opportunity for kids to stop and play, climb low trees, and spot wildlife. What to do with kids: take the family to Stroud’s award-winning farmer’s market or just hit the shops. What might be a chore at home (shopping, ick!) becomes a day of discovery at Stroud.

Berkeley:

Berkeley is home to Berkeley Castle, a 12th century castle with a dark history. It’s been home to 24 generations of the Berkeley family, and presides over the town, which is worth exploring in its own right. Stop by Dr. Jenner’s house, the pioneer of the smallpox vaccine, and at least stay for the day, exploring the shops and eateries. What to do with kids: let them burn off energy at the Cattle Country Adventure Park, where slides and play areas combine with petting zoos.

Bonus: Stratford-Upon-Avon:

Head north from Gloucester, and you’ll arrive within an hour in Stratford-Upon-Avon, the famous birthplace of William Shakespeare. En route, you’ll pass through Tewkesbury, an excellent medieval town, and once you’ve arrived, you can also tour Anne Hathaway’s home. Older children can see a play at the Royal Shakespearean Club theater, and everyone can walk through the town streets, gaining a feel for Olde England.
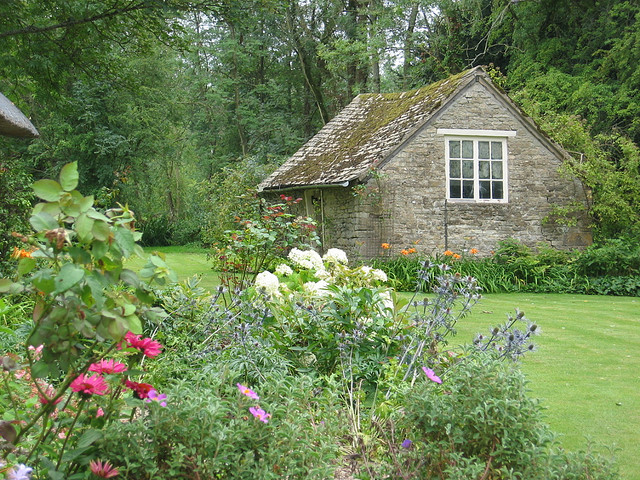
Where to stay:

You can’t really go wrong in the Cotswolds. This section of the UK houses a great number of their luxury house hotels (estate homes turned into hotels) and B&Bs shine here. With kids, we recommend house hotels for a slightly less intimate feel, and no matter where you stay, we suggest looking for properties with space for kids to play. One of my favorite Cotswolds memories is of floating paper boats down a creek outside our Stroud hotel.

cotwolds-with-kids

Driving tips in the UK:

All visitors will know to stay on the left side of the road in the UK, but keep the following advice in mind:

  • select a small to mid-sized rental car (parking spaces, roads, and alleys are smaller in the UK than in the US)
  • take things slowly: take extra time to look behind you before moving into traffic, navigating roundabouts, and dealing with highway traffic
  • keep a sense of humor: our family still talks about the time Grandpa stalled out in front of a group of punk rockers by Stonehenge and almost took on several unwelcome hitchhikers.

Enjoy the Cotswolds!

This post was done in partnership with Enterprise Rent-a-Car but they had no input on the content. All opinions are my own.

Photo credit: Flickr/tlarescott and Francisco Antunes

Top five cities for 4th of July fireworks

Where will you celebrate the 4th? If you’ll be in the following top five cities for 4th of July fireworks, you’re in for a treat! Here’s the low-down on where to be this July 4th, how best to view the fireworks, and how to stay safe and sane in firework crowds.

best-fireworks-displays

Washington, DC:

We’ll be in Washington, DC this 4th of July, experiencing the fireworks in America’s capital. We even extended our planned DC vacation to include the 4th! How could we not? The Celebrate Freedom firework display on the National Mall is the epitome of the American national celebration. This is an all-day event in the nation’s capital, beginning with a parade along Constitution Avenue and ending with a spectacular display of fireworks over the Washington Monument. The best places to view the fireworks is right in the thick of it: hang by any of the monuments on the Mall, or set up camp near the capital building. The best hotel viewing is at the Hay Adams.

New York City:

The Macy’s Ignite the Night fireworks display is a tradition in New York City, with fireworks launched from the Brooklyn Bridge and coverage on NBC. If you’ll be there, get live updates on the excitement by texting SPARK to 62297. The display will be cast over the Hudson River, and starts at approximately 9:20 pm.

The best place to watch: 

  • from the water (take a Circle Line sightseeing cruise or water taxi)
  • from the Empire State Building (special ticketing will apply)
  • from the West Side Highway (between 22nd and 55th streets)

Boston:

The Boston Pops fireworks display takes place at the DCR Hatch Shell on the Esplanade, utilizing a budget of over $100,000 during the 20 minute show. How to tackle this massive event? Start early, and make a day of it! The grounds open at 9 am (yes, in the morning!) and beach blanket real estate is serious business. Get there using Boston’s public transit, so you can skip the parking and traffic hassle. The closest stations are Charles Street/Massachusetts General Hospital station on the Red Line and Arlington Street Station on the Green Line. Make sure you get a wristband so you can enter and leave the bandshell during the day, and be ready for the crowds to really press in by the time the Pops Orchestra starts playing at 8:30 pm.

Philadelphia:

The 4th is celebrated in colonial style in Philly, with Pops on Independence at Independence Hall and parades. The fireworks display is on Benjamin Franklin Parkway, with free concerts across the city all day to get you excited. Period costume is optional. The best places to watch are:

  • Benjamin Franklin Parkway
  • Paine’s Park
  • Martin Luther King Drive
  • Schuylkill River Park
  • Lemon Hill in Fairmount Park


Dallas:

Well, not quite Dallas…the suburb of Addison is home to the best fireworks display in the state (or so say locals). This smaller town boosts a budget of over $220,000 for their annual extravaganza, which takes place in Addison Circle Park. Before the big show, enjoy air shows, musical acts, and more. The fireworks display lasts 30 minutes (long by industry standards) and offers visitors a true slice of Americana.

Where will you celebrate the 4th?

Photo credit: Curtis Palmer

Sending your kid on a teen service trip

This July, my 15-year-old son, Nate, will take his first trip out of the country without me. He’ll be flying solo to San Jose, Costa Rica, where he’ll meet up with a small group of like-minded teens and adult leaders to embark upon a two week teen service trip with Adventures Cross Country.

During the trip, Nate will be reporting for Pit Stops for Kids, taking video and recording his experiences. His first-hand impressions of his trip will be published here for other teens and parents to read. In the meantime, I’m experiencing the Adventures Cross Country process for parents: including questions to ask, paper work to fill out, and what to expect from the trip leadership.

adventures-cross-country

All parents feel some trepidation before sending their child on a trip without them, and I’m no exception. Nate won’t know anyone before he goes, will need to make an airline connection and navigate customs on his own, and will be relying on two years of high school Spanish. But I’m not worried about him–just jealous, really!–because I trust in the program and people we’ve selected for this adventure. On the Costa Rica Classic trip, Nate will help build structures in a mountain village, teach Costa Rican school kids English, and explore the country by way of a river rafting expedition and surf camp.

Nate’s trip departs in two months, and I’ve learned the following about selecting a teen service trip and the pre-trip process at Adventures Cross Country:

1. Shop around before you select a program.

Teen service trips are expensive and require a serious investment of time, too. There are many companies offering trips these days, and Adventures Cross Country encourages parents to shop around. What we looked for:

  • Proven safety track record
  • Long history working with kids
  • Well trained staff
  • Meaningful service
  • Good communication with the home office

We absolutely found all of the above with Adventures Cross Country. Before we’d selected which trip to send Nate on, we were able to join a live webinar with the president of Adventures Cross Country, Scott von Eschen, during which each type of trip offered was described in detail. After we’d selected the Costa Rica Classic trip, we were immediately assigned a regional director. Ours is Bridget Reynolds, and we’ve experienced frequent, consistent communication from her. Bridget makes sure we understand (and turn in) all our paperwork, is on-hand for any destination-specific questions, and basically holds our hand. She also orchestrates an additional webinar just for the families of our particular trip. Thank you, Bridget! Adventures Cross Country has one of the best safety records in the business and their leaders are carefully selected and highly trained. Of course, we’ll have first-hand knowledge of the latter after Nate returns.

2. Budget time and money.

We recommend making a plan at least one year in advance of a teen service trip in order to save money and allow your teen to earn money for the experience. Kids are encouraged to fund raise locally; the upside of a program that brings kids together from all parts of the US is that there’s no local competition for fund raising. Kids can also write letters to friends and family members explaining the trip and asking for donations.

The paperwork involved in applying for a service trip isn’t terrifying, but it is extensive. The good news: Adventures Cross Country makes it easy by giving parents (and teens) their own portal, where all paperwork lives. In the portal, you can upload documents, print them, and see which are still due. Here’s what ours looks like:

teen-service-trip

Kids will need to plan ahead to get letters of recommendation and a physical from their doctor. Depending on the destination of the trip, immunizations may be required. What I love about Adventures Cross Country: kids are required to write a short essay (within a form) explaining why they want to go on the trip. This process, sometimes combined with a phone call from an Adventures Cross Country leader, eliminates kids who are only applying because their parents want them to attend.

3. Study up before your child goes!

The preparation process is part of the fun and excitement: Nate and I have had a good time purchasing the clothes he’ll need, selecting what backpack to take, and making sure he has a good camera to use. But just as important are the books on Costa Rica that have been recommended to him by Bridget. During the first few weeks of summer, Nate’s Kindle will be loaded with guides on Costa Rica to add to his excitement and knowledge base.

4. Secure airfare based on your location and your child’s comfort levels.

With Adventures Cross Country, the trip officially starts when kids arrive at the destination airport. However, a chaperoned flight is offered from the US for those who want it. While we would have rather Nate take this accompanied flight, it departs from Miami, and doesn’t make sense for us from the West Coast. Instead, he’ll be flying to San Jose unaccompanied. Nate is well-traveled, and feels comfortable flying solo. However, we downloaded a map of the airports he’ll be in to help orient him before he goes, and we’ll be checking gate information more than usual to help him from afar. He’s never navigated customs in a foreign country on his own, so that gives me pause, but I know it will be part of this great adventure, and will boost his confidence in later travel.

A basic timeline for preparing for an Adventures Cross Country trip:

To use as a general guide, here’s the timeline we’ve experienced from first signing up with Adventures Cross Country to putting Nate (in a few short weeks!) onto the plane:

7-9 months out:

  • Select a program
  • apply
  • ‘meet’ your regional director via email
  • fund raise if you haven’t already
  • first payment will be due

4-6 months out:

  • get all paperwork in
  • order your child’s passport if he or she doesn’t have one
  • remaining payments will be due
  • join a live webinar on your destination
  • secure your child’s airfare

No more than 1 month out:

  • final call for paperwork
  • shop for packing list items
  • read up on the destination

1-2 weeks out:

  • double-check airline connections, prepare teen for any layovers, gate changes, etc
  • pack
  • make sure the passport arrived!

Disclosure: Nate will be attending this trip as a guest of Adventures Cross Country, for the purpose of review. He’ll be writing about his experiences for other kids at Pit Stops for Kids and Trekaroo.com.

How to make a 5 item outdoor survival kit for $5

survival-kit-for-kids
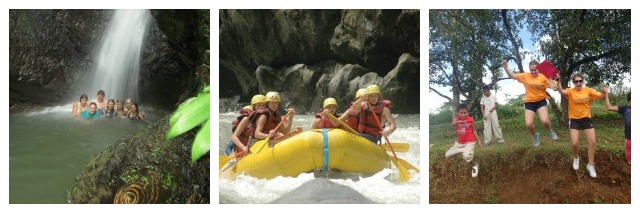
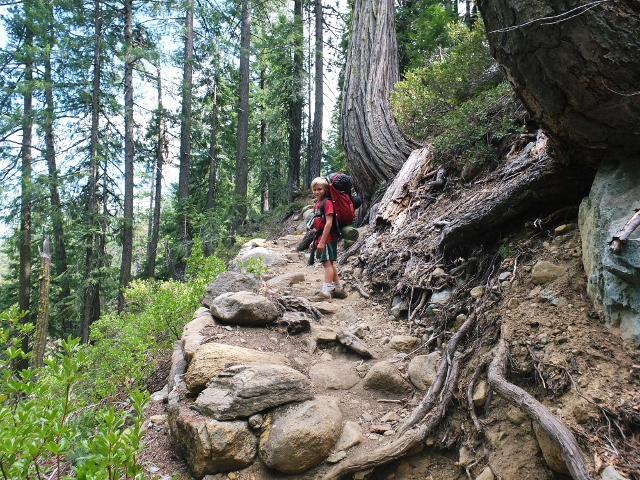
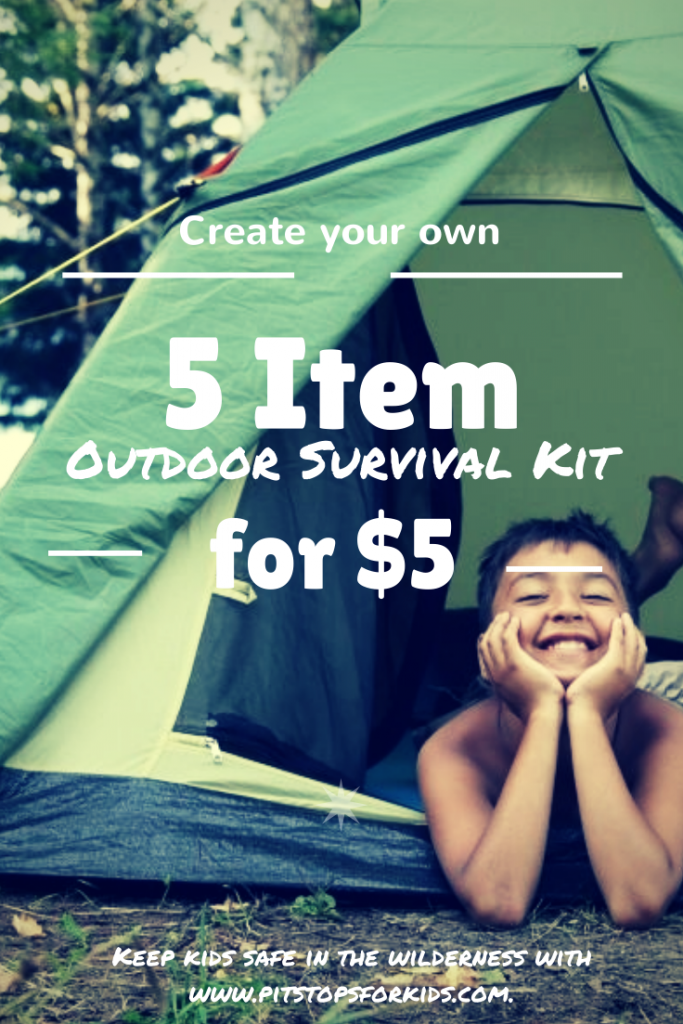
We love getting kids into the outdoors! At Pit Stops for Kids, we’re fans of backpacking, camping, climbing, mountain biking, geo-caching…you get the idea. But as a one-time Search and Rescue volunteer who has spent countless hours teaching school kids how to stay safe in the woods, I want families to be prepared. Kids can occasionally get lost in the wilderness, but by heeding the following advice and being prepared, almost all are found almost immediately by their parents.

The best advice to give your kids: if you get lost, stay in one place. 


The second best thing to do: make your kids this 5 item outdoor survival kit for $5. These items fit easily into a waist pack or into any day pack.

5 item outdoor survival kit for kids:

1. Whistle

Go to your local sports equipment store or dollar store, and buy a cheap whistle. Let your kids know this is an emergency whistle: not to be used for play. The sound of a whistle in the wilderness carries 10x further than a shout or scream, and doesn’t wear down with use. Instruct kids to blow their whistle in blasts of three if lost.

2. Plastic poncho

Is an expensive jacket better protection than a dollar store poncho? Sure, but chances are, your kid won’t want to bring it along on a hot summer day. A plastic poncho fits down to the size of a fist (or smaller) and weighs almost nothing. When needed, it retains body heat well.

3. Glow stick

Grab a cheap glow stick and put it in your kid’s kit. Glow sticks don’t require any batteries, and will give off light in 360 degree direction. A glow stick will last 12 hours, getting  a kid through a night if necessary.

4. Bandana

Search and Rescue volunteers are trained to look for anything out of the element when searching in the wilderness. Therefore, a bright color, such as neon green or yellow, will stand out and alert searchers to the presence of a person. Instruct kids to hang their bandana on a tree limb, wearing it on their head, or spread it out in the open. Alternative item: a used or blank music CD or DVD can be used as a cheap reflecting device, often seen by spotters in helicopters.

5. Non-perishable snack

Why not water? Because for almost any hike or outdoor excursion, parents have already thought to pack a water bottle for their child. In addition to water, a non-perishable snack is cheap and light to pack. We keep a Nature’s Valley granola bar in each of our kids’ packs. Power Bars or other energy bars last a long time, too. Alternative: a bouillon cube.

99% of the time, kids are completely safe in the wilderness. But for piece of mind, the above items in your kid’s pack will go a long way. For more information on kids’ wilderness safety, check out the Lost But Found Search and Rescue program I’ve been a part of.


Where to backpack with kids in Northern California

Will you be backpacking with kids this coming summer? Most families who love backpacking with kids are familiar with backpacking options in popular regions such as Yosemite National Park, but the following lesser known areas offer backpacking just as scenic and often crowd-free.

where-to-backpack-with-kids

Tahoe and Northeastern Sierra Nevada:

Our favorite section of the Northeastern Sierra Nevada mountain range is located in California’s Plumas County, adjacent to the town of Graeagle. The Lakes Basin Recreation Area, just south of Graeagle up Gold Lake Road, offers 47 trails and over 30 alpine lakes. Some of these trails are available only for day hikers, but link families to backpacking regions. To start out directly on a backpacking route, begin at the Jamison Mine Trailhead en route to historic Johnsville (10 miles from Graeagle) and hike approximately three miles uphill to beautiful Rock Lake. This alpine lake offers idyllic camping, swimming, and rock jumping. Adjacent Jamison Lake offers great trout fishing.

Tip: consider renting a Tahoe vacation home before or after your backpack trip. We like to spend a few days pre-trip in a home, where we can organize backpacking foods, pack our backpacks, and enjoy a few luxurious days before entering the backcountry.

Trinity Alps and Marble Mountains:

Further north near the California/Oregon border, the Trinity Alps Wilderness in Shasta Trinity National Forest consists of chiseled granite peaks and alpine lakes, with elevations from 2,000 feet in creek drainages to 9,000 feet at summits. This wilderness offers many different trails ranging from 1.5 miles to 15 miles at varying levels of difficulty. Spring backpacking is often an option here (in the lower elevations) and mid-week trips are encouraged to beat crowds. Our pick: the five mile hike to Granite Lake on the Swift Creek trailhead. Tip: families will want to arrive early on weekends or during mid-week to secure the prime campsite lakeside.

granite-lake-backpacking

The nearby Marble Mountains are less populated, and easily accessed from I-5. Our favorite backpacking route through the Marble Mountains is to Campbell Lake, located off the Shackleford Creek Trail (three hour hike). Visibly stunning, Campbell Lake offers great swimming. The Trinity Alps and Marble Mountain region offers many loop trails perfect for families wanting to adjust their trip to suit kids’ abilities.

Lassen National Park:

Lassen National Park is one of the least visited in the US, and we have no idea why! However, families can take advantage of the low crowds and find prime backpacking wilderness with relative ease. Grab a wilderness backpacking permit when you enter the park, and then head east, to where the top backpacking loop trails depart. You’ll find alpine lakes, creeks, and lodgepole pine forests in ample supply. The weather tends toward hot and dry, which means families will encounter fewer mosquitos than in damper areas. If you head toward geothermal regions of the park, bear in mind that camps cannot be set within 1/4 mile of geothermal activity (bubbling pots, etc).

backpacking-trail

No matter where you backpack, be sure to get the necessary permits at the ranger station or forest service station nearest your trailhead, and check conditions before arriving. Make sure you have a water filtration system or means of fresh water, and bear canisters where required. For more general backpacking tips, read How to Plan a Multi-Day Backpacking Trip with Kids. For gear suitable for kids while backpacking, check out our Travel Gear We Use series.

The above post is written in partnership with VacationRoost.com.

How to plan your Disney Vacation with FastPass+

We have written extensively about enjoying Disney parks using FastPass. Is all this advice out the window now that Disney has introduced FastPass+ and Disney Magic Bands? The short answer: maybe. The game certainly has changed.

How to plan your Disney vacation using FastPass+ and why it will make touring Disney parks easier than ever for those who dislike planning (but harder for those who do):

fastpass-+-in-Disney-parks

Step 1: Know what’s included in your FastPass+ options

If you’ve been in a Disney park in the last year and have paid attention, you’ll have seen gradual changes to the current FastPass system, starting with FastPass options to nighttime entertainment, and the arrival of new Mickey ear-sporting Magic Band kiosks. The new Magic Bands utilized by Disney use RFID technology, and hold your park ticket, room key, dining plan, dining reservations, Fastpass + reservations and much more. Say goodbye to Key to the World (KTTW) cards. The band ‘holds’ your FastPass reservations (up to three per day, per park, per user).

More than double the current FastPass attractions are offered with FastPass+, as well as reserved seating for shows, parades, and dining reservations. FastPass+ is available for ALL Disney guests, not just those staying on-site. (Disney hotel guests can make FastPass+ reservations up to 60 days in advance, however.) What does this mean for your park touring strategy? You may want to consider making FastPass+ reservations for several attractions that have not previously been included in the traditional FastPass list. Then, hit the traditionally popular rides at the very start of your day, knowing you have reservations for those rides that fill up after park-goers cross the ‘top’ experiences off their lists.

disney-magic-band

The number of FastPass+ reservations per guest per day per park varies slightly depending on crowds and season, but is generally 3-4. While this number might mirror the number of traditional FASTPASS tickets an average guest might secure during a day, it’s less than that which a savvy guest (willing to do the legwork across the park) has gotten in the past. That said, the new FastPass+ reservations do include evening entertainment options and meet-and-greets not previously available.

Step 2: Make your FastPass reservations online before you arrive

As a Type A Disney planner, I’m giddy about the ability to pre-reserve FastPasses! If you’re not a planner, and now groaning about this development, take heart: Disney makes it easy to make FastPass+ reservations, even if you don’t like to ‘map out’ your day. When you get your park tickets (or hotel reservations), you’ll be prompted to select your Magic Bands (and colors), assign them to your family members, and start making FastPass+ reservations. As soon as you designate a park and select your attractions, the site will automatically suggest the best order in which to schedule your FastPasses, utilizing a park map and known parade and entertainment schedules. A planning nut like me would have done this anyway, but I realize I’m in the vast minority!

And if you decide to change your plans on the fly while at Disney, it’s easy to alter your FastPass+ reservations from the My Disney Experience App. You can make new reservations, opting for the ‘earliest time available’ feature, or skip it altogether. Even I realize that plans do change!

Step 3: Make sure you have the FastPass+ app downloaded on your smart phone

disney-magic-bands
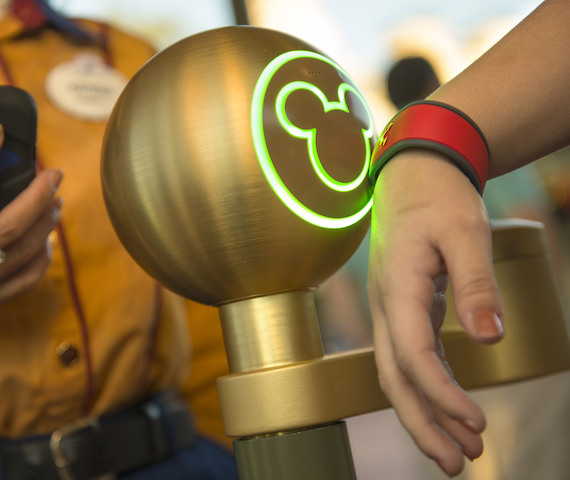
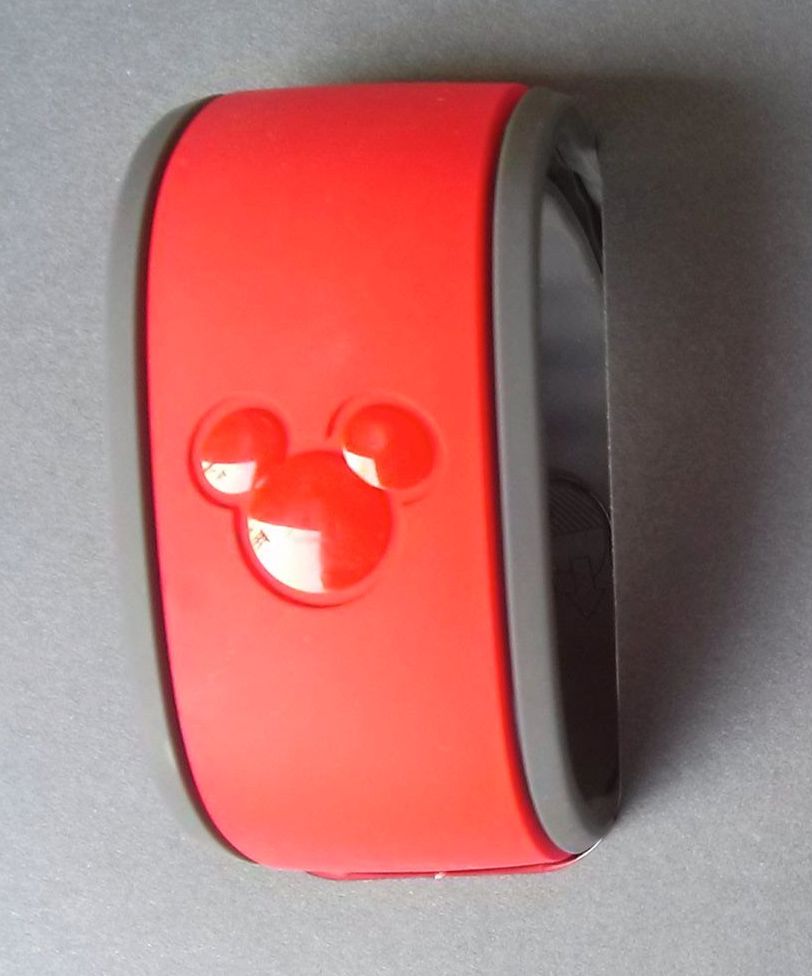
This is the easiest step, but crucial. Download the My Disney Experience App, so you’re ready to make any necessary changes to your FastPass+ schedule. If you don’t make changes, no need to check the app every time you arrive at a FastPass line: the new kiosks allow you to simply touch your Mickey ears on your Magic Band to the Mickey ears on the kiosk. Yep, it’s pretty cute.

So, how will this change the way you currently plan your Disney park day?

Here’s how I see it: extensive advanced planning will only make you more efficient in the parks and more prepared for your day. The bad news: mega planners who used to secure 6-8 FASTPASSES per day will now be limited. The good news: My old strategies for obtaining FASTPASSES throughout the day included a lot of trekking back and forth through the parks, which will now be eliminated. Families will be able to arrive at the park of their choice and virtually have three passes in their pockets, instead of the traditional none.

Because families are currently limited to three FastPass+ reservations per person (and times cannot overlap), here’s my strategy in a nutshell: 1. get to the park early, 2. ride stand-by before the park fills up, 3. have FastPass+ reservations for the afternoon, allowing for a relaxed day. Now you can use the rest of your time discovering unique things to do at DisneyWorld.

For a full play-by-play of the FastPass+ reservation process, including screen captures to illustrate the process, check out this post.

Ready to travel? Sign up for our FREE subscription list and receive an air travel and road trip ‘cheat sheet’

Questions I have been asked:

Can I still use traditional FastPass kiosks using my Key to the World card? 

The answer is, sometimes. Traditional FastPass kiosks are being phased out, and Magic Bands are replacing KTTW cards. If your Disney hotel still issues you a KTTW card (as I’ve heard some are still doing), you may have the option of using both FastPass methods. However, since the vast majority of users get 3 or fewer FastPass tickets per person per park, you’re not likely to ‘need’ both. Better to get used to the new system. If you really, really want a card or ticket to put into the kiosks, you can obtain the paper ticket type by buying admission to the parks at Downtown Disney locations or online.

Can individual members of my family reserve FastPasses to different attractions?

Of course! Just like with traditional FastPass, each Magic Band is entitled to three reservations per park, and is not tied to family members. In your park touring plan, take into account instances in which kids of various ages will want to tour separate attractions, and reserve FastPasses accordingly.

What if we’re park hopping?

Well, my answer to families wanting to park hop is usually, ‘don’t’. I advice not park hopping in most instances, the exceptions being to see a show or dine in a different park in the evening. If this is your situation, my advice is to arrive at your first park early, ride stand-by, and make your FastPass+ reservations (including the one for your entertainment or dinner) at the second park. FastPasses are at their most valuable in the afternoon, anyway.

Learn more about FastPass+ and My Magic here! And then get more DisneyWorld secrets!

How to plan your Disney vacation with FastPass+

Photo credit: Amy Whitley and Walt Disney World Resorts.


Five kid friendly New York City hotels for spring break travel

 Who doesn’t love New York City in the spring? Great travel deals abound in this ‘off season’, the weather is perfectly suited to museum touring or watching Broadway shows, and you might even luck out with a sunny day for Central Park. If you’re planning to visit New York City this spring break, pick from among the following five kid friendly New York City hotels

kid-friendly-hotel-nyc

1. Westin New York Grand Central:

Not only is the Westin New York Grand Central located–you guessed it–adjacent to Grand Central Terminal in Midtown Manhattan, but its new Family Fun travel package hooks kids up with a New York-themed backpack and travel activity kit and a special audio tour of Grand Central. The hotel’s guest rooms are all 310+ square feet or larger (big by New York City standards), and families booking the Family Fun package get a complimentary room upgrade when available.

family-friendly-hotel-perks

2. Affinia 50

We loved our stay at Midtown’s Affinia 50! Not only this hotel close in proximity to nearly everything–families can walk to Central Park, Broadway and Times Square, and Rockefeller Center–but the rooms are spacious beyond belief. Our family of six was able to stay in one suite, with room to spare. Plus, select rooms at Affinia 50 include full kitchens, which really assists a New York City travel budget. Affinia 50 also allows for ample downtime with a second floor guest lobby filled with comfy chairs, newspapers, TVs, and gaming centers for kids.

Affinia-50-hotel

3.  Hotel Beacon:

If you want to situate your stay on Manhattan’s Upper West Side, Hotel Beacon is for you. Half of Hotel Beacon‘s rooms are one or two-bedroom suites ideal for families, and the tree-lined streets up the West Side are quiet and safe. Families staying here are close to Central Park and its museums, including the popular American Museum of Natural History, and all rooms have kitchenettes.

Affinia-50-hotel

4. Gansevoort Meatpacking NYC:

With a reputation as a party hotel for young, hip New Yorkers, not many families consider a stay here. In truth, Gansevoort Meatpacking offers many incentives to families, including free baby amenities (such as wipes and even strollers on loan), Nintendo gaming consoles in the rooms, and a room service kid menu. Best of all, Gansevoort offers what few New York hotels can boost: a swimming pool. Located on the rooftop, the Gansevoort pool will be a vacation favorite!

5.  Omni Berkshire Place:

We love Omni hotels! Whenever we stay at one, the kids can’t wait to stand at the check-in counter with me. Why? They know they’ll get something special. At Omni Berkshire Place, kids receive a full suitcase of toys upon check-in, in additional to Omni’s promise of milk and cookies during turn-down service. Berkshire’s On a Whim package gives families 15% off even when booked last minute, and for families booking for spring break, their spring package includes a hotel credit and welcome fruit plate (always appreciated by our crowd!).

Best family travel experiences of 2013 (that you can book for 2014)

Our last post of the year is always a round up of best trips we’ve experienced in the last 12 months. 2013 has been rich with travel for the Pit Stops for Kids crew, with top trips ranging from icebergs in Alaska to snorkeling in the Yucatan. For our family, it was certainly the year of ‘outdoor travel’. Below, find our top five travel experiences of 2013, with links to information on the destinations’ 2014 travel seasons. Enjoy ‘window shopping’ this holiday season, or spoil your family with a  holiday gift of travel!

best family travel

1. Cruising SE Alaska’s Inside Passage with Alaskan Dream Cruises:

We devoted almost two full weeks on Pit Stops for Kids to Alaskan Dream Cruises, and for good reason. This Alaskan family owned small ship cruise company provided one of the absolute best vacation experiences we’ve ever had. We learned more about SE Alaska and its people during our nine days aboard the Baranof Dream than we ever imagined, and enjoyed good food, good company, and great tour leadership the entire time. Start here to read our full review of Alaskan Dream Cruises. Book for the 2014 season now (space is limited).

2. Rafting the Wild and Scenic Rogue River with O.A.R.S.:

An O.A.R.S. river rafting vacation is the most adventurous trip you’ll ever take…where you don’t have to lift a finger. During our five days on the Rogue River in Oregon, I could navigate rapids when I felt like it, float quietly when I preferred, sit back and take in the setting sun on the water while our guides prepared the evening meal, and sleep out under the stars. It was truly the most relaxing vacation of our year. For my son Calvin, it was the most exciting. Somehow, O.A.R.S. is all things to all people! Read our full review of the O.A.R.S. Rogue River five day trip. Book your own trip at O.A.R.S.

best travel of 2013

3. Exploring the Yucatan Peninsula along the Riviera Maya:

Families can certainly spend their entire vacation on the Yucatan Peninsula lying on the sand working on a tan. And that’s ok! But if your crew seeks out adventure, Riviera Maya will provide it! During our one week in this section of Mexico, we snorkeled with whale sharks, rappelled down cenotes, swam into caves, watched ancient Mayan ceremonies, rode ATVs through mud, and toured ruins. And yes, we had time by the pool, too. Anxious to plan your own trip? Start with the Riviera Maya site for lodging and activity recommendations you can trust. it Pit Stops for Kids coverage coming in January! 

4. Experiencing train travel through the Canadian Rockies with VIA Rail:

Gorgeous scenery? Check. Luxurious, though somewhat cozy, accommodations? Check. Gourmet dining amid a relaxed, family-friendly atmosphere? Check and check. And when you arrive at your destination in the Canadian Rockies, the fun is just beginning; VIA Rail deposits you in the heart of national park territory in Jasper. Read our full review on VIA Rail’s Canadian line. Interested in booking your own trip? Start at VIA Rail.

5. Skiing Tahoe with family-friendly Northstar California:

Northstar California is one of the top family-friendly ski resorts in the US, and we love that it’s located adjacent to one of the world’s best outdoor playgrounds: Lake Tahoe. At Northstar, we enjoyed a multigenerational trip with the whole family–their slopes, programs, and lodging cater to multi-aged groups–and spent five days snowboarding and skiing. If you want a varied vacation, spend a few days snowshoeing or snowmobiling by the lake. Read our full review of Northstar. Book 2014 vacations now, while early bird ski deals still exist!

Travel gift for families: The Family Traveler’s Handbook

Today, instead of offering a travel gift idea for kids, we’re reviewing a great travel gift from which the whole family can benefit. The The Family Traveler’s Handbook by Mara Gorman is a slam dunk of a stocking stuffer for any family on your list this season. This guidebook isn’t geared toward a single destination or style of travel; rather, it’s your new bible for family travel inspiration and how-to. Whether you love camping, road tripping, luxury travel, international travel, or any other sort, the Family Traveler’s Handbook helps you get started. Once you’ve targeted a destination, the book also carries you through your trip, with practical sections on making the most of your trip and traveling smarter.

family traveler's handbook

What’s between the covers:

The Family Traveler’s Handbook answers the big questions first: where should you go on your annual family vacation? Should you fly or drive? How can you book hotel rooms or vacation homes smarter? I know from experience as a family travel expert that many parents get stuck right here. Travel can feel overwhelming–after all, it’s a big expense and you don’t want to mess it up! The Family Traveler’s Handbook offers answers that help parents identify what type of vacation would work best for them, and how to go about planning it.

Of course, you need the nitty-gritty, too. The subsequent sections of the book cover all those details you might not even think about, but make any family travel experience richer: how to keep your kid napping on the road. How to save money on food. Should you use public transit? Why or why not? How about public parks or local restaurants? How to know which are worth your time? All ages of kids are covered, helping parents plan whether they have toddlers or teens.

camping with kids

What sets The Family Traveler’s Handbook apart:

See these kids? You’re going to get to know them. And if you read author Mara Gorman’s blog, The Mother of All Trips, you already do. Let’s be honest here: even the most travel-crazy among us get bogged down reading a highly technical or practical travel guide. Instead, we want real, from-the-road stories, and in Mara’s book, you get just that. The practical information is there, don’t worry, but it’s peppered throughout with real-life anecdotes about real family travel…the good, the bad, and the hilariously funny. In other words, you’ll learn all you need to know about planning a family trip without even realizing it, you’ll be so entertained.

Read more testimonials, from additional family travel experts I know and trust, on the Traveler’s Handbook website. Pick up your copy on Amazon for just $15 or at Barnes and Noble or in ebook format. You have plenty of time to get one for the holidays!

In full disclosure, Pit Stops for Kids and yours truly are quoted in The Family Traveler’s Handbook, as we offer camping and outdoor adventure advice. However, I’d recommend the book regardless and was not compensated in any way to promote it. You can be sure it will be under our own tree this holiday season.

Follow our year-round Travel Gear We Use series, as well as our current Travel Gifts for Kids posts throughout December!

Trips to Ireland with kids: tips for exploring Dublin, Cork, and Galway

Our Pit Stops for Kids international travel tips section is growing! Have you noticed? While the bulk of our travel focus remains on US and Canadian destinations, we encourage families to expand to international travel as well. Trips to Ireland with kids is often recommended because, in our experience, Ireland is one of the most accessible countries to visit with kids, and an easy place to start your international travel journey.

ireland with kids

In this post, we offer general tips for travel through some of the most popular destinations in Ireland–Dublin, Cork, and Galway–in typical Pit Stops for Kids’ fashion…by road trip!

Whether you’re a lover of the island or you’re a complete newbie, taking your children for an Irish adventure will be incredibly rewarding. Rather than choosing to stay static in one place, consider renting a car and exploring as much as possible – that way, your kids won’t get bored with a city break and they’ll have plenty of experiences along the way.

For example, start your journey in Dublin, drive down the coast to Cork and finish off on the west coast at one of the hotels in Galway. Incorporate plenty of child-friendly activities in your itinerary as well as those that the grownups want to do – that way, everyone in your party will be happy! We love that Ireland is filled with outdoor splendor in the form of hikes, caves, and castles…kids and adults enjoy the history and beauty, and kids get plenty of exercise.

If you chose to start your road trip in Dublin, book a couple of nights in your first hotel rather than feeling like you’ve barely seen the city. While much of a city break focuses around adults and their interests, you’d be surprised at how much the Irish capital has to offer for little ones too. From exploring Dublin Castle and all its medieval delights to Dublin Zoo, located inside the massive Phoenix Park, youngsters will be happy with a couple of days here before heading off towards Cork.

The great thing about driving along the coast is there are always places to stop a while to absorb the beauty of what’s around you. Make sure you pack travel bags with plenty of goodies for your children to play with and snack on, to keep them occupied on the drive. Games consoles, coloring books and portable DVD players are ideal to keep them quiet! Think of some family games for the drive too – there’s nothing with a traditional round of I-Spy!

During your stay in Cork, stop by the Fota Wildlife Park, found on Fota Island – the only wildlife park in the country and well worth a visit to see the animals roam free.

Once you’ve made your way around the southern tip of Ireland, you’re on the home stretch towards County Galway, home to the incredible Connemara National Park and the Aran Islands, great trips with plenty of hiking for active kids. Bring your hiking or walking shoes!

While the drive between these cities will take less than three hours per leg of the journey, what can be found in between adds to the holiday even more. A week exploring as much as you can will be ideal, although if you want to see as much as possible, perhaps a fortnight would be better.

Photo credit.