Backcountry skiing basics: How to get into the sport

It’s never been a better time to get into the backcountry and leave the crowds behind! Here’s how to get into the sport during the COVID season!

An avid downhill skier and snowshoer, I’ve been noting the small but growing trend toward backcountry skiing for some time now. This sport, which combines a love of nordic exploration and downhill excitement, attracts men and women (and yes, some kids) who want to carve their own line down mountain terrain and explore the wilderness at the same time.

backcountry-skiing

I got my first pair of backcountry skis in 2012, which were basically fat nordic skis with a three-pin binding. I found I could navigate single-track nordic trails with steep inclines much better than my nordic skier counterparts, and I was hooked. Today, all-terrain (or AT) ski gear is much more involved, but AT skiing is still a fairly diverse term. Just like the sport itself, it can mean something different to every enthusiast, from short hikes up to freshies from lift-accessed runs to full-day expeditions with beacons and probes.

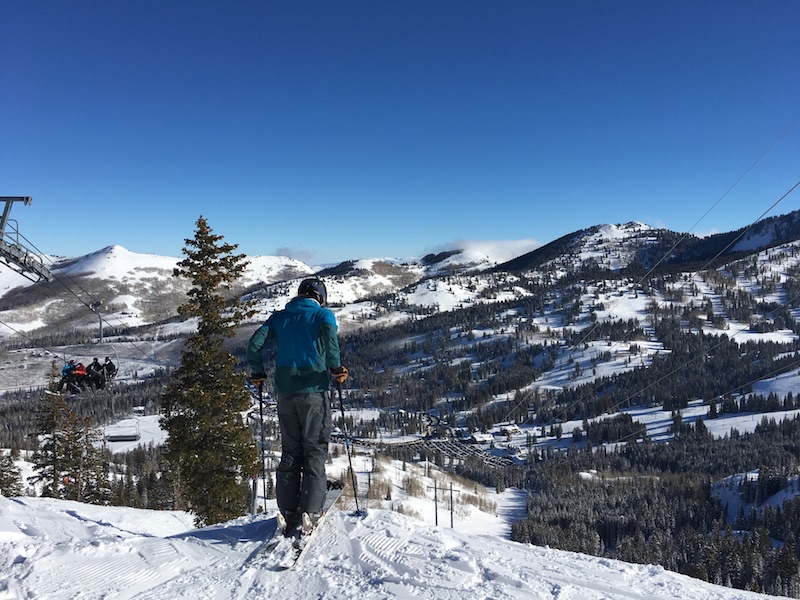
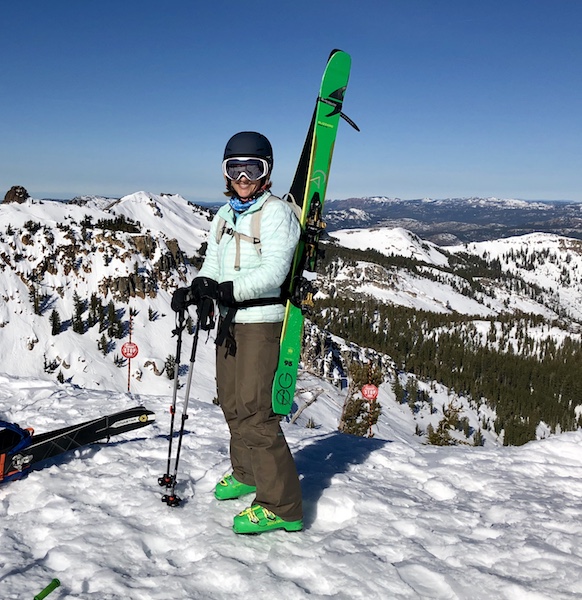
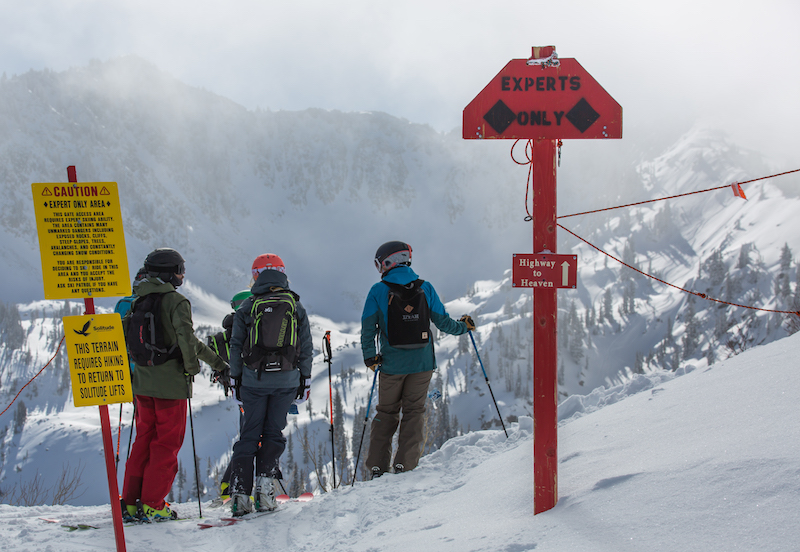
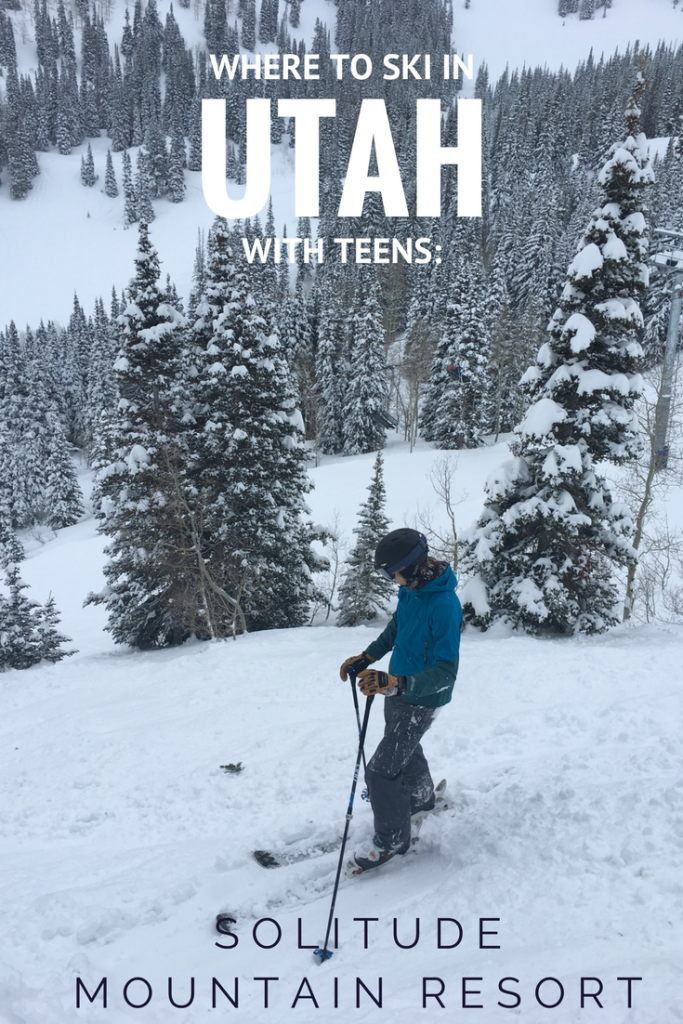
In January, I was lucky enough to experience the sport in more depth, this time trying out top-of-the-line AT skis, boots, and bindings on a half-day, strenuous backcountry ski day in Utah’s Cottonwood Canyon near Solitude Mountain Resort.

I headed out with Utah Mountain Adventures after getting outfitted with Voile skis with Dynafit bindings and Scarpa AT boots. I carried a backpack with plenty of water, plus a shovel and avalanche probe. I strapped an avalanche beacon, provided by Utah Mountain Adventures, to my body.

AT-skiing

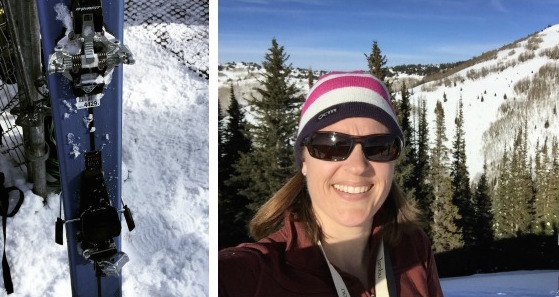
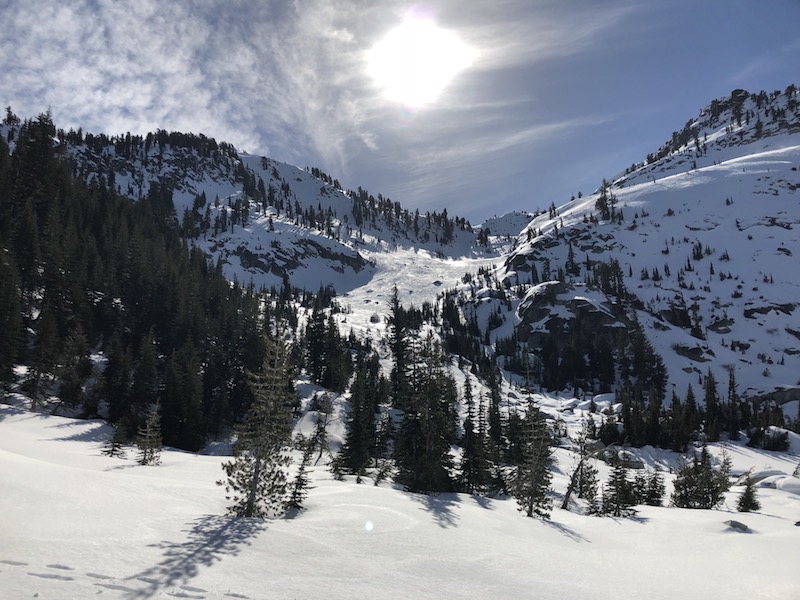
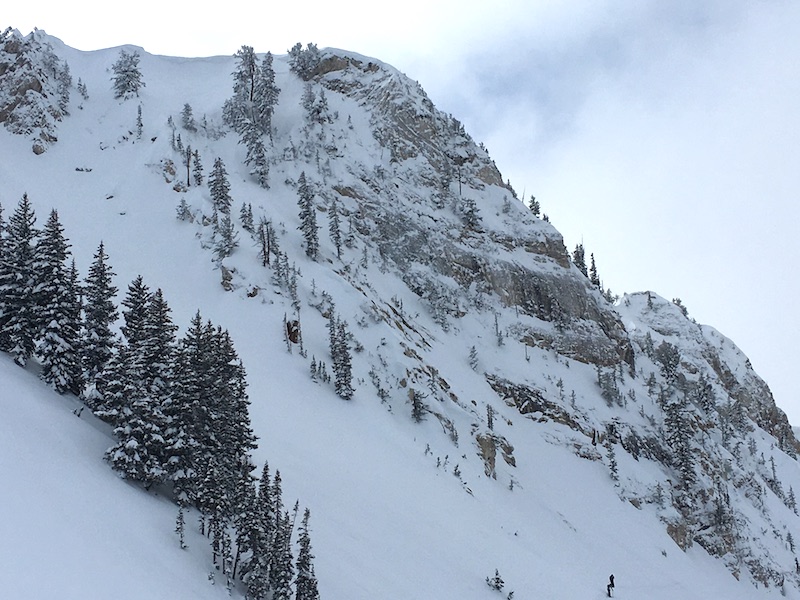
The only way to get fresh powder runs was to climb uphill, so my first lesson was in putting on skins. Turns out, this is easy. The hard part is to climb upslope. We climbed for over two hours, stopping for a few breaks, skinning up a mountainside in the Wasatch Mountains. I’d like to say I enjoyed the whole experience,  but in truth, by hour two, I was sweating enough to shed a layer and starting to feel hot spots (which turned into blisters) where my socks rubbed in my boots. I was told to loosen my AT boots for the uphill climb (there’s a walk mode and ski mode), and while I’m sure this is sound advice, it didn’t help on the blister front.

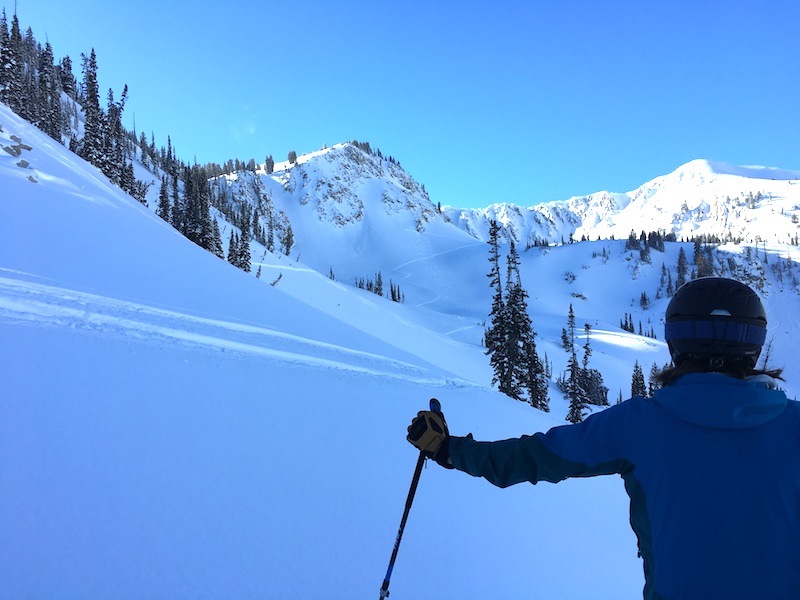
The whole uphill experience reminded me of hiking: there were periods of enjoyment while I took in breathtaking views and reveled in being in the wilderness in winter, but also periods during which I had to set tiny goals–get to the next tree, get to the next open slope–in order to carry on. In other words, it’s crucial to love the outdoors and the uphill ‘hiking’ process, or the joys of backcountry skiing may be lost on you.

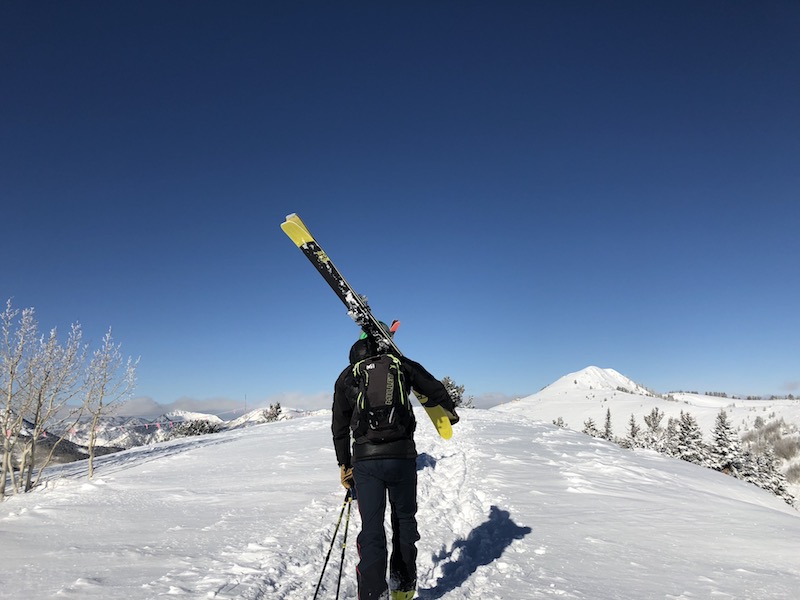
Climbing in AT skis is not very difficult–it’s much like cross-country skiing–but there are moments when kick turns may be necessary to zig-zag along steep grades. Yes, there’s a learning curve to this, but here’s what I was told (and it helped): use as much of the flat plane of your ski base as possible. Staying on your edges, where you don’t have skins, won’t help you keep traction.

backcountry-skiing

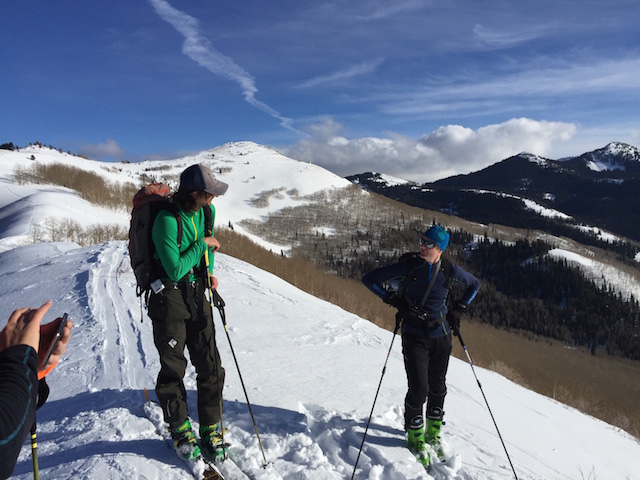
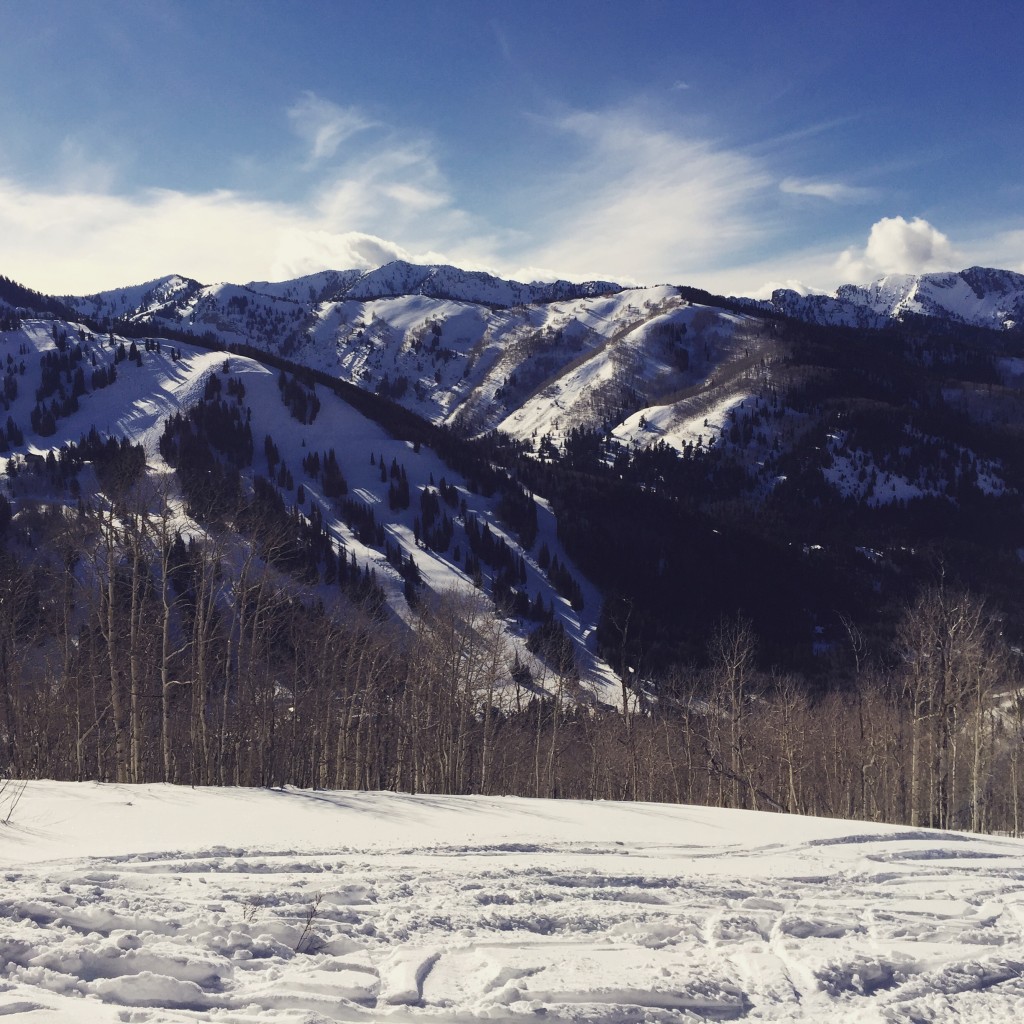
Once we’d summited a peak in Cottonwood Canyon, the fun began. We took off our skins, stowed them in our packs, and switched our boots and bindings to downhill mode. (Dynafit bindings are unique in that they transition from climbing mode, with the heel untethered, to downhill mode, with the heel locked down just like alpine skiing, with one twist of the back binding. They also feature ‘risers’ that can be raised while in climbing mode, which assist on steep ascents, much like going a gear lower on a bike. Yes, they’re nifty.)

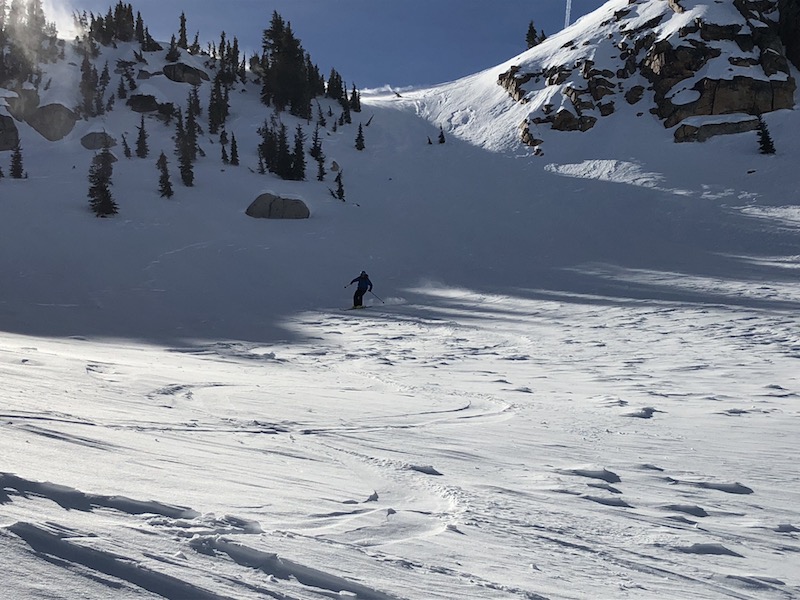
We picked our line for the descent, and carved down the beautiful, light powder. Thanks to the efforts of our uphill hike, the terrain wasn’t skied out like it quickly becomes on lift-accessed terrain. I happily followed the lead of our guide, who knew the area and how to traverse through the glades and open slopes and still find our starting point back at base. Without him, I would have needed a GPS in unfamiliar territory.

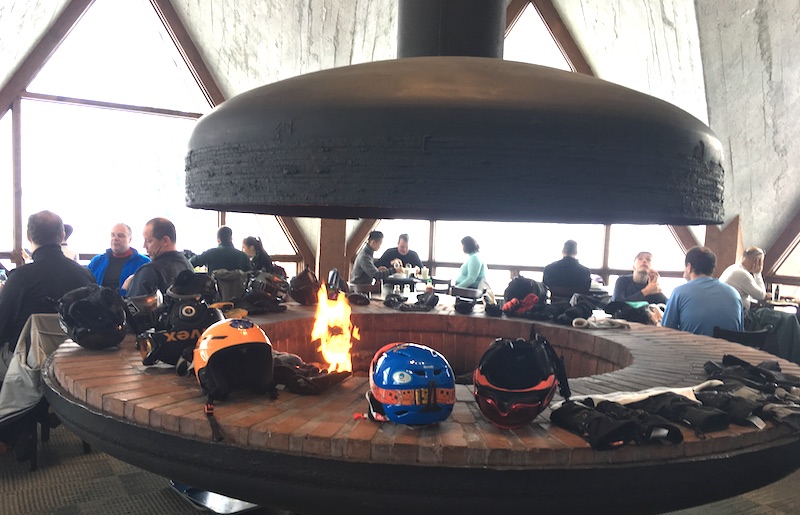
Raised in the deep powder of Tahoe, skiing off-piste before I knew what that meant, I loved every second of the descent. Yes, it was challenging, but also very satisfying, knowing I’d earned my turns. I never needed my beacon, but was glad for the security it offered. Back at the base of the mountain, I switched my skis back to climb mode, and ‘cross-country skied’ my way back to the car on flat terrain. The sun was setting by the time we returned, and trust me, I’d earned my pizza and beer.

What you’ll need to get started in AT skiing:

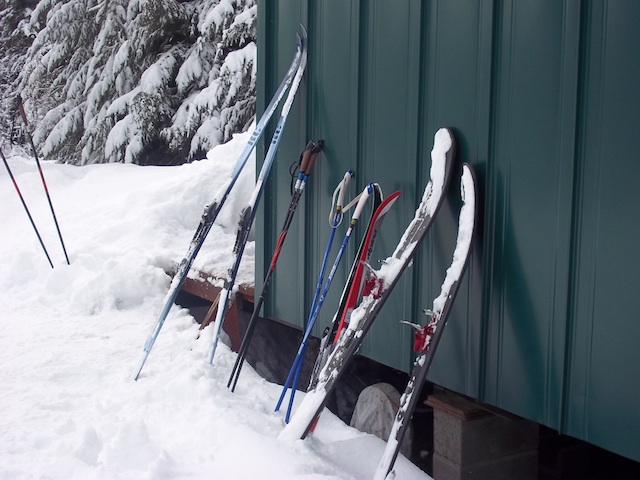
  • AT or telemark skis (these are the skis I tried)
  • AT or telemark boots (the most comfortable seem to be Dynafit)
  • any ski poles
  • backpack
  • shovel, probe, and beacon
  • breathable outerwear
  • plenty of layers (wool is best)

Tips for beginners (like me):

I recommend going with a guide, like I did, your first time out (or any time out in an unfamiliar area). Most guide services can also rent AT skis and boots, which are expensive to buy yourself at first. More importantly, guides know where to go and are trained in avalanche safety (check to make sure!).

Cascade Huts

Any time out in the backcountry, everyone in your party should carry a beacon and shovel, at very least. I fell once during my trip, and lost one ski. It was deeply buried almost instantly, and had it been me, I would have been glad for my beacon, guiding others to me. Luckily, I found the ski without needing my shovel. If you go out without a guide, you should have completed an avalanche safety course. They are offered almost everywhere now, from gear stores to ski resorts.

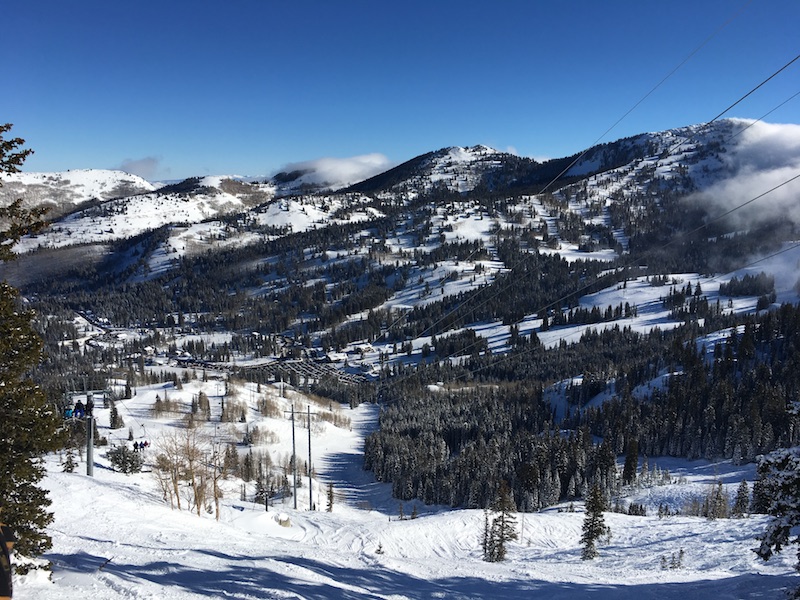
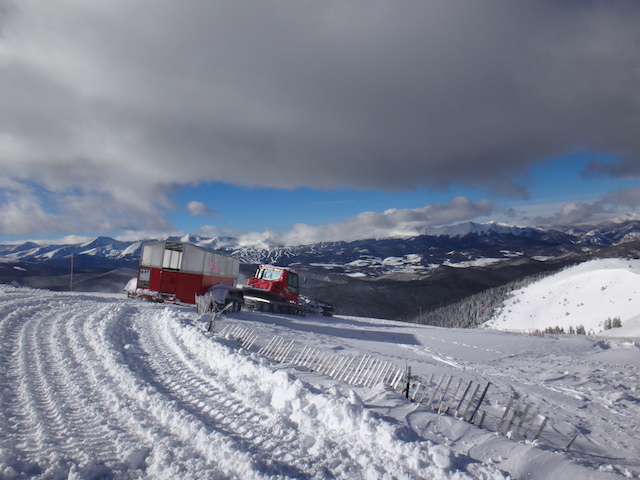
If you haven’t explored winter terrain at all yet, start by snowshoeing or cross-country skiing. Hit trails you’re familiar with in the summer months; they’ll have a different feel in winter! Alternatively, try backcountry skiing from lift-accessed terrain. At any ski resort, look at a terrain map to see where off-piste (or non-groomed) terrain is located. Make sure it’s open the morning of your ski, and then climb only from the top of a lift (shortening your ‘hike’). Yes, others will have the same idea, so make this one of your first few runs of the day. Afterward, relax with some cruisers. Some resorts, such as Keystone Mountain in Colorado, even offer cat rides to off-piste terrain, allowing skiers to find fresh powder without AT gear.

kat-skiing-at-keystone

Can kids AT ski? Sure, though it’s currently hard to find skis and boots to fit kids under age 12 or so. There’s a reason for this: AT skiing is a lot of work. My recommendation (that I’m following with my own kids): introduce the idea of backcountry exploration when kids are small, with snowshoe treks. Then, graduate to AT skiing when kids are teens. Make sure they’re expert skiers on groomed terrain, too.

Can snowboarders AT ‘ski’? Yes, Voile and other makers are now creating split snowboards, which split into two short ‘skis’ for the uphill climb, then come together to create a board for the downhill. It’s the coolest transformer yet!

I’ve heard the argument that AT skiing is popular because skiers can avoid the high cost of lift tickets. While this is true, and while I do think most lift ticket prices have gotten out-of-hand, I don’t think true AT ski lovers climb miles of terrain for this savings. It’s simply too much work to do it for any reason but a love of the outdoors and the sense of freedom. It’s a way to challenge oneself outside of the ski resorts, and well worth the effort of learning a new discipline within alpine skiing.

I toured the Wasatch with Utah Mountain Adventures at no cost, for the purpose of testing AT ski gear.

Winter backcountry skiing: a stay with Cascade Huts

As soon as I was made aware of Cascade Huts, a system of backcountry cabins in the Mt. Hood wilderness near Government Camp, Oregon, I knew we had to review it! Set miles away from civilization, each of Cascade Huts’ three rustic cabins are situated along backcountry ski and bike trails accessible in winter from any of three area sno parks. Overnight guests snowshoe or cross-country ski in, stay a night (or two or three!), and hike out on any of several available routes.

Cascade Huts outdoor adventure

We’re avid backpackers, but even so, the idea of packing in overnight supplies (even to a shelter) in winter with the kids was intimidating. From the moment I contacted owners James and Don, my worries were set aside. James emailed me many times, answering all my questions in a very professional and knowledgable manner. One of the nicest things about the Cascade Hut system is its flexibility: guests can opt to hike a short or long distance, choose difficult or easier (note I didn’t say easy) terrain, and even navigate their own routes if they’re skilled in GPS navigation.

cascade huts

Since we’re not expert navigators, I asked James to choose the best route for our single overnight to the White River Hut. Because I was trekking in with kids who are new to cross-country skiing, and I’d be using the provided maps and directions instead of a GPS unit, he suggested we travel the historic Barlow Road from the Barlow Pass Sno-Park, on Highway 35 (longer in distance, but easier to navigate). On the provided maps, I noted that this route was marked as ‘intermediate’, as opposed to the ‘expert’ route also available.

Even so, the Barlow Road was no joke: we navigated the six mile wet powder trail (with multiple small creek crossings and over 1000 feet of elevation change) in just over five hours, needing to stop often to make adjustments, carefully cross creeks, and pick each other up! Luckily, we had planned to be on the trail most of the day, so we’d gotten an early start and made sure to have a picnic lunch ready for the route. Note: even in winter…especially in winter…make sure you include enough water for all members of your group, and keep hydrated.)

cascade hut

We arrived at the White River Hut before sundown, and trust me, it was a welcome sight! The kids (with their endless energy) made snow forts outside while we prepped the cabin: detailed instructions await you upon arrival, and include turning on the propane to run the heater, stove, and gas lanterns. The hut is 256 square feet and sleeps up to eight people. Four bunks line two walls, a third wall features a kitchen counter, supplies, and a stove, and the fourth houses the front door and wall-mounted propane heater. Small windows provide adequate light and ventilation (be careful of CO2 poisoning while using propane!), and a table and chairs provide a nice space to eat and play games.

Cascade Huts

While staying in Cascade Huts, there’s no need to overpack! I admit, we did just that; not being certain what would be provided (better safe than sorry), we packed in more equipment and water than necessary. Though there is no running water (or electricity), the cabin-side creek was running freely in February, and we were able to both pump clean water and boil snow on the stove for drinking water. In the cabin are sleeping bags (just bring liners), lots of board games (we didn’t need to haul in our poker chips and cards!), all kitchen utensils, pots, pans, plates, and mugs (could have saved pack space there!). Also stocked was a good first aid kit, toilet paper, a snow shovel, and plenty of extra gas cylinders for the portable heater. There’s also an outhouse about 40 yards down the trail, but we found it very difficult to access in the winter, due to a nearby stream.

Note: Summer guests are provided with food and water as well, but in the winter, it would freeze!

Once we figured out the propane and various features of the cabin, we were quite comfortable (cozy, even!) all night. It’s important to bring plenty of layers of clothing for each person, as drying out wet gear is tough. We brought two sets of gloves, hats, and under layers for everyone, and were glad we did, when we were caught in a snow/rain storm on our hike back out.

Barlow Road Cascade Hut

If you go:

1. Make sure you feel comfortable in the backcountry. The Mt. Hood wilderness is very remote, and all guests should be comfortable following topographical maps and/or GPS units. We had several maps as well as a compass, and used all three. You won’t get cell phone service at the cabin, but it still doesn’t hurt to bring one along. My iPhone didn’t get a signal (though my compass app came in handy), but T-Mobile BlackBerry phones or other smart phones might. Cascasde Huts does a great job of preparing guests (and putting them at ease), and every guest signs a waiver, which isn’t only due to liability, but also ensure their location is known on the date they’ve reserved the cabin(s), an important safety step.

2. If cross-country skiing or snowshoeing is new to you, take a trial run. Since we’re expert downhill skiers, we underestimated the difficulty of cross-country skiing. Though I grew up with the sport, it was Nate (12) and Calvin’s (10) first time, and there was a slight learning curve. The terrain to the huts is steep in places, involves obstacles like logs, creeks, and rocks, and shouldn’t be taken lightly.

3. If you need to rent equipment, go to MountainTracks in the nearby town of Government Camp. You can reserve what you need ahead of time online, making for an easy pick-up!

4. If you’re going the distance (six miles or more), opt for skis instead of snowshoes. Maps of all routes will be sent to you from Cascade Huts, but I also recommend picking up a snowshoe and backcountry trail map at MountainTracks.

Check out the Pit Stops for Kids’ Kid Cam video for a better glimpse of our experience:

Date last visited: February 20, 2012

Distance from the interstate: The Barlow Pass Sno Park (trailhead) is on Hwy 35 (just shy of Hwy 26). The area is approximately 1 hour from Portland, OR.

Nightly Rate: In winter, a Cascade Hut cabin can be reserved for $150 per night (for up to eight people). Additional nights (up to three) can be reserved for a discounted price. In summer, mountain bike routes are available, and prices start at $300 per person for a 4-day, 3-night itinerary that includes meals.

Directions: Depending on your route and hut destination, trailheads are located at any of three area sno parks. Our adventure began at the Barlow Pass Sno Park, located one mile from Government Camp on Highway 35. Be sure to get a sno park permit!

Thanks to Cascade Huts for providing us with one night’s lodging at the White River Hut. This compensation came with no expectation of a positive review.

Where to ski in Utah: Brighton Resort

If you just read my post reviewing Utah skiing at Solitude Mountain Resort, you know that Brighton Resort is its closest neighbor, nestled right next door in Big Cottonwood Canyon outside of Salt Lake City. Both resorts offer incredible ski terrain for experts and backcountry skiers and snowboarders, both offer a friendly, local vibe, and both have enough skiable terrain for a family to be happy for days.

brighton-resort

Brighton Resort differs in that it does not offer on-site lodging, apart from private home rentals. There’s a big base area with a day lodge and a separate lodge with gear rentals and a snow sports shop, and a smaller lodge at an adjacent base area on the other end of the parking area. The resorts are only five minutes’ drive apart, so families can certainly stay in the Solitude village if they’re looking to stay in the canyon, and can even ski between the resorts with a resort hopper pass.

So who is Brighton Resort for?

Take a look at the Brighton mountain map, and you’ll see a sea of black diamonds. Like Solitude, Brighton is big and bold, with incredible pitches, glades, bowls, and backcountry for serious, expert skiers and riders. If you’re looking for challenge and seemingly endless skiable terrain during big snow years like 2017 has proven to be, you’ve found your place. But what if you’re a beginner or intermediate skier? The good news is that there are green circle runs even at the top of the resort, a nice touch for those who get tired of always being at or near the base while they’re learning. You’ll find green runs off the Snake Creek chair, and even off the Milly chair, which also has some of the steepest, deepest runs in the resort. Intermediate skiers and riders will want to focus on the blue-friendly Crest and Majestic chairs; this is also where you’ll find a surprisingly big selection of terrain park features.

If you’re an expert skier or rider:

Trust us, you could do laps all day on the Milly Express chair, and never get tired of the terrain. Your legs will, however, get tired. This chair was our favorite, with double-blacks on both sides of the chair, hike-to terrain along the ridge, and back bowls accessible for backcountry skiers with touring skis. Of course, all of this is dependent on conditions, and it’s essential to look at signage to see what’s open. This is big avalanche country, and the mountains should be respected.

Brighton

Over on the Great Western chair, some of the steepest pitches take you down wide, mogul-filled black diamonds, and there are more tree glades with powder stashes along the far end of the resort. However, some of my favorite skiing all day at Brighton was found in what I deemed the ‘peaceful powder forest’, located near the top of Snake Creek and Crest. The woods here seemed to go on and on, with lots of powder between the trees and a more relaxing pitch.

If there’s less snow, you’ll definitely find less variety, but even then, the groomers along Crest and Big Western and Milly proved excellent. I loved the rollers and gentle curves to these runs, which got great sun throughout the day. We opted to break for lunch at the base of Milly, where the newest lodge of Brighton was far less crowded and offered excellent burgers and soups.

Planning your day at Brighton Resort:

As noted above, there is no overnight lodging at Brighton, so it will probably be a day trip for you. If you’re driving up Big Cottonwood Canyon (i.e., not staying at Solitude or in a nearby home rental), plan at least 25 minutes on an average day, and up to an hour on a holiday weekend…the traffic goes slowly on really great ski days.

Tip: Big Cottonwood Canyon is 15 miles of pretty curvy, mountainous roadway, and 4×4 drive or chains ARE required fairly regularly. You can opt to take a bus from the base of the canyon, where there’s a convenient park and ride parking lot for your car.

Because Brighton Resort is a day use resort, the parking lot does fill up on busy days. We skied Brighton on a holiday weekend after a big dump of snow, and were glad we arrived just after 9 am…by 11 am, the parking lot was completely full and people were parking on the road.

brighton-resort

Lift tickets are under $80 per day per adult, which is relatively reasonable, by ski resort standards. Better yet, you can ‘reload’ your day pass the next day for $10 less. Kids 10 and under are FREE at Brighton, which is a fantastic perk. To save money, consider a Brighton pass if you plan to ski regularly there, because it includes free ski bus access, or, if you have a pass elsewhere, see if it’s a M.A.X. Pass resort and do a M.A.X. Pass add-on for the best value. You can get a Solitude-Brighton ticket for under $100, and ski between the two resorts, but I bet you’ll have enough to keep you busy right at Brighton.

Pin it for later!

Why Brighton: Top resorts for experts

Disclosure: I visited Brighton as a guest of the resort for the purpose of reviewing M.A.X. Pass resorts. All opinions are my own.

Two ways to ski backcountry terrain on your next ski trip

If you’re one of those skiers or snowboarders who looks up at the most distant peak from the chairlift and says, “How do I get up there?” or notes tracks in fresh powder and wishes you’d put them there, you may want to elevate your next ski trip to include a day of backcountry terrain. Or, if you have teens (16 or older) who are yearning to learn what AT or touring skiing is all about, it might be time to try a backcountry experience as a family.

Backcountry skiing off-piste and outside ski resort boundaries can expand your ski horizons exponentially, but it’s crucial to go with a guide until you’ve become trained in reading snow conditions and have the right gear (which often includes an avalanche beacon, shovel, probe, and AT or Alpine Touring skis and boots with skins and a backpack to put it all in). I explored two gorgeous backcountry regions with two fantastic guide services, and highly recommend them both.

Two ways to ski backcountry terrain on your next ski trip

Alpenglow Expeditions, North Lake Tahoe:

Alpenglow Expeditions operates out of Squaw Valley Alpine Meadows in California, and offers both backcountry tours and a variety of snow safety courses. I joined them for a full day in the Squaw Valley backcountry, where we did two laps of the National Geographic Bowl.

I arrived at their office in the Village at Squaw Valley at 8:30 am, ready to ski…minus the gear. Alpenglow can outfit you, which is nice if you don’t already own AT gear. It allows you to try a full backcountry experience before committing to the equipment. The guides at Alpenglow set me up with a ski pack with all the necessities, plus AT skis and boots. I brought my own helmet, goggles, lunch, water, and ski apparel.

The nice thing about Alpenglow’s location is that you can ride the Squaw lifts to where you need to start, saving time and effort. We headed out by 9 am on the Squaw lifts and reached the top of Granite Chief lift by 9:30 am. From here, we boot packed to the top of Granite Chief Peak (approximately a 20 minute, fairly strenuous hike) with our skis strapped on our backs. At the ridge, the snow was fabulous (despite fairly challenging conditions on the lift-served areas). We transitioned into our skis (the guides will help you do this if you haven’t skied AT before). We skied down the bowl, and at the bottom, transitioned again to skin up the trail that led to a side ridge, where we could ski back down to the Granite Chief lift. The skinning uphill took longer…probably an hour or so, and if you haven’t used skins on your skis before, there is a learning curve here. Your heel is freed and the skins on your skis give you traction, so the climb feels similar to cross-country skiing (but a bit more difficult).

When we reached the ridge, we skied down to the chair and did it again! This time, we boot packed a bit farther to explore a different descent, and at the bottom, we enjoyed our packed lunch in the sunshine. We achieved two laps by 1:30 pm, and were back at the village by 2:30 pm. We probably had time for one more lap, but my legs didn’t have the power!

The day proved to be an excellent introduction to Squaw’s backcountry, and since my teenage boys are interested in exploring terrain outside ski area boundaries, I’d definitely sign them up next time. All tours are individual (with either just yourself or just your group) so you can customize as needed. All guides are highly trained in avalanche certification and first aid, and carry radios. I was given an avi beacon and shown how to use it.

Ski Utah Interconnect, Cottonwood Canyons

Headed to Utah instead of Tahoe? I also tried out Ski Utah’s Interconnect tour, which allows you to check out backcountry terrain on your downhill (Alpine) skis. You can read about the Ski Utah Interconnect here, and watch a helpful video starring Deb Lovci, lead guide, but even after doing your research, the Interconnect is hard to explain. It really needs to be experienced. It’s part backcountry adventure, part (permitted) rope ducking, part on-piste hidden tracks, and part off-piste (as in way, way off). No matter what way you look at it, you’re in for seven hours of breathtaking views of the Wasatch Front Range and Heber Valley. Along the way, you get a ski resort sampler platter, with 1-3 runs in each of Deer Valley, Park City, Snowbird, Alta, Brighton and Solitude.

You start your day at Deer Valley Ski Resort, where you meet up in a base lodge and are briefed by your guides. As noted, you can use your own downhill gear, but you’re given a beacon to use for the day. In contrast with my Alpenglow trip, I didn’t need a shovel or probe of my own, so I could use my own small backpack, and I didn’t need to carry a lunch, as it’s provided on the trip.

We started out by skiing a few Deer Valley groomers to get warmed up, then ducked the rope (with permission) and traversed through the backcountry to Park City resort, where we rode another chair up before skiing off-piste through pristine powder toward our next resort on our itinerary. We boot packed a few short times (holding our skis) before making it to Solitude for a delicious lunch at their Roundhouse mid-mountain lodge, which serves up Himalayan mountain cuisine (included). We rode the lifts here to access a backside bowl to Brighton, then rode up again to take the most beautiful traverse, the Highway to Heaven trail toward Alta and Snowbird.


This part of the journey definitely proved most strenuous, but we were rewarded with more gorgeous backcountry on the descent. We skied through Alta and reached Snowbird by 3:30 pm. Skiing six resorts in one day definitely made for a long ski tour, but it didn’t feel that long, thanks to some lift access along the way.

What to know before you book:

For both of these tours, it’s important to be a strong skier, able to ski ungroomed runs with confidence (intermediate or advanced). Perhaps even more importantly, you do need to be fit. The uphill boot packing, skinning, and/or sidestepping will work up a sweat and leave you legs like jell-o! For the Interconnect, you need to be a skier, not a snowboarder, due to restrictions on snowboarding in several of the resorts.

If you’re used to getting plenty of exercise and are a decent (don’t need to be great) skier, don’t hesitate to try one of these tours! It will open your eyes to new skiing possibilities, and greatly enhance your ski trip. Take a day to enjoy the backcountry, then return on-piste with more confidence.

Call the office of either tour to ask any specific questions; they’re eager to help walk you through the process and explain what gear you’ll need and what lift tickets might be required. Let them know of any limitations of your group and be honest with them about capabilities, and they can answer any doubts you may have.

Want a taste of non-lift-served terrain by exploring some side country (within ski area boundaries)? You can expand your limits on downhill skis by signing up for a Hidden Tracks guided day. I checked this out at Solitude Mountain Resort and had a blast with my private guide, who could show me all the hidden stashes and boot-pack trails to (mostly) uncharted terrain. He showed me Solitude’s many gated areas, and we hiked to several pitches of fresh powder. The rest of the time, we traversed and side-slipped to new-to-me slopes within boundary. At Solitude, you can opt for a full day or half day tour; I went half-day, which gave me a nice balance of challenging terrain and some nice groomers after my legs got tired.

Where to ski in Utah: Solitude Mountain Resort

Solitude Mountain Resort is one of those ski resorts that grows on you. The first time I skied Solitude was as part of a demo day experience, and I only traversed part of the mountain. Still, I enjoyed it. The next time I visited, my teenage son and I zipped all over the mountain during an epic powder day…hard to dislike that! The third time I skied this Big Cottonwood Canyon resort, the snow was so-so, but hidden stashes remained, and the true peace and tranquility to be found here won me over.

solitude-mountain-resort

What to expect at Solitude Mountain Resort:

Let’s start with what not to expect: don’t expect crowds, as Solitude really does live up to its name. You also don’t need to expect the usual high lift ticket prices. Even if you opt to buy tickets at the window or online, instead of getting a M.A.X. Pass, Solitude lift tickets are on the reasonable side, comparatively speaking. And I have visited during a long holiday weekend.

Instead, at Solitude, you can expect a local vibe, despite the presence of a base village with lodging for out-of-town guests. There’s an emphasis on off-piste (off the run) skiing and even backcountry skiing (out of bounds), which means the mountain ‘skis bigger than it is’. What do I mean by this? At 1200 acres, Solitude is not considered a very large resort, but if you include all the glade skiing, powder bowls, and off-piste options, which exist depending on snow conditions, it’s very large indeed.

solitude-ski-terrain

The lifts at Solitude are spaced out enough that some traversing will be necessary at times, but the newest chair, Summit, is not only fast but offers incredible views as you ascend. The village is compact, with condo-style lodging, an inn, a few restaurants, gear rentals, and a snow sports shop, and extremely cozy.

How to plan your trip to Solitude:

I love skiing Utah resorts because so many of them are within an easy commute of Salt Lake City and the international airport. Solitude was within 45 minutes of downtown during my visits. From the base of Big Cottonwood Canyon, it’s only 12 miles. On one trip, because my son and I were skiing multiple resorts during my second time at Solitude, we stayed at the entrance to the canyon, at Residence Inn by Marriott. It was comfortable, convenient, had an excellent complimentary breakfast, and was only about 25 minutes from the Solitude parking lot. I highly recommend this hotel if you want to stay central to both Big and Little Cottonwood canyons.

solitude-village

If your ski trip will be solely at Solitude and/or Solitude and its neighbor, Brighton, definitely stay in the Solitude Village. I stayed two nights at the Inn at Solitude on my third visit and loved the proximity to the mountain. My fourth-floor balcony literally overlooked the Apex Chair, and the heated, outdoor hot tub and pool soothed sore muscles each evening. The Inn at Solitude is just steps from The Hungry Squirrel, which became my go-to apres-ski watering hole, and there are spa services on-site, too. St. Bernard’s restaurant, directly inside the inn, offers an Alpine-style buffet dinner with charcuterie, hot soups, roasts and cobblers every night, and serves an equally satisfying buffet breakfast each morning. The atmosphere is warm and relaxing; we enjoyed drinks in the Library Bar seating area outside the dining room before our leisurely meal. St. Bernard’s was a definite highlight of our time at Solitude. You also get access to Club Solitude by staying at the Inn at Solitude, which has additional pools, a lounge area with video games and a movie screening room, exercise spaces and saunas.

As noted, the village is small, but has what you need (eliminating any need to commute down the canyon for food or supplies). You can find a very small convenience store right at the entrance to Solitude by the real estate office; this is not a grocery store by any means, but does have wine, beer, convenience items and toiletry items. If you are staying in the village and want a second option in addition to St. Bernard’s, head to Honeycomb Grille for excellent American bistro cuisine or to the small pizzeria. Every option is within walking distance of everything else.

You’ll be ski-in, ski-out at Solitude, and only a five-minute drive from Brighton. There are buses that connect the two as well (and you can ski between them…more on that in a minute).

Getting your bearings at Solitude:

There are two base areas at Solitude, at Solitude Village and Moonbeam base area. It’s nice that both have parking lots, to spread out day guests, and both have base lodges with ticket sales and food services. Moonbeam is home to the snowsports center, which is where to go if you’re taking a lesson or dropping off kids for lessons. There are some food venues there, as well as bathrooms.

solitude

The village has additional food services, a rental shop and tuning shop, and all the lodging options (which include condos in addition to the inn). A good lunch option can be found at Last Chance Lodge, right on the snow at the edge of the village, where you can find excellent made-to-order tacos and a salad bar. Hang tight though, because the absolute best lunch spot is at mid-mountain (read on to find out where).

Skiing Solitude:

If you enjoy skiing off-piste, Solitude is heaven. The Summit chair drops you off at the entry to Honeycomb Canyon, named, it turns out, not after Utah’s honey production, but after the many mines that dotted the canyon a century ago. Multiple gated chutes connect with the bowl, giving skiers and snowboarders a very long and powdery run to the base near Eagle chair. There’s also a front face at Summit, plenty of tree skiing, and groomer runs for intermediate level.

Tip: if you’re a beginner, pay attention to notices at the base of each chair. Solitude is very good about placing signage where beginner terrain will be lacking, so you can know before going up.

Additional glade skiing is excellent off the older (and slower moving) Sunrise chair, and lots of nice blue groomers can be found off Moonbeam and Eagle. If you’re willing to hike, even more bowl skiing opens up, and backcountry skiers will be happy too: just look for the signage indicating when you need your own backcountry shovel, avalanche beacon, and probe to continue. (This is a good indication that you may need to hike out of the run, too.)

solitude-mountain-resort

Overall, look at signage no matter your ski ability, and be ready to ask for advice from locals…there will be plenty of skiers and snowboarders around who are familiar with the mountain. If you have a M.A.X. pass or combined ticket for Solitude and Brighton, know that you can ski between the resorts via the Solbright run. And, er, if you accidentally ski that run and end up at the wrong base area without a combined ticket, the nice lifties will let you return via the lift…once.

If you’re an intermediate to advanced skier and want to open up more terrain for yourself, book one of Solitude’s Hidden Tracks mornings. Operating as snow and weather permits, Hidden Tracks is an opportunity to ski with a local instructor who can show you all those hidden stashes and glades you might have missed. And there are a lot! During my Hidden Tracks experience, my guide Josh described skiing off-piste at Solitude as ‘a game of gates’. What he meant: there are gated entrances to off-piste terrain all over the place! These gated areas are maintained by ski patrol for safety and opened and closed at their discretion. Once you know where they all are, as well as which ones will require boot packing (or hiking) to get to the great snow, you’ll be an informed skier who can continue to enjoy these gates the rest of your trip. Have adventurous teens? This session is ideal for them to know their options!

At a mountain like Solitude, which has so much backcountry and side country terrain, Hidden Tracks is well worth your time and money. And while it’s not a lesson, if you’d like instruction or pointers during the morning, your guide will be happy to accommodate you.

roundhouse-lodge

Tip: definitely plan to eat your lunch at the Roundhouse mid-mountain between the Moonbeam and Eagle lifts. This circular lodge has a lot of history, and serves just two types of food: Wasatch mountain food (Utah-inspired soups, stews, and burgers), and Himalayan mountain food (wonderful curries and rice dishes). The food is excellent, and we found there was plenty of room…no hunting for a table at lunch.

Solitude lift tickets:

As with all ski vacations, ease the burden on your wallet by planning your lift ticket purchase ahead of time at Solitude. If you only plan to spend a few days, buy multi-day tickets online ahead of time to save money off the approximate $85 adult day pass price. There’s also a Solbright day pass, which gives you access to all of Brighton, too. Personally, I think you’ll be busy enough at just one or the other, but the flexibility is nice.

Pin for later!

Wondering where to ski in Utah? Solitude shines for teens. Here's why!

Disclosure: We skied Solitude as guests of the resort, for the purpose of reviewing the M.A.X. Pass option. All opinions are my own.