Winter backcountry skiing: a stay with Cascade Huts

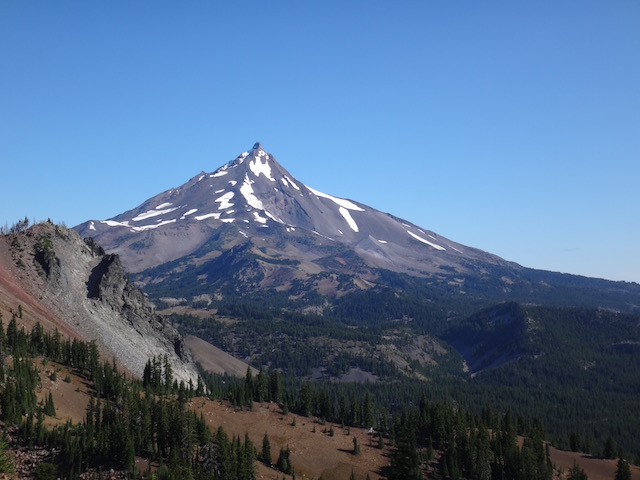
As soon as I was made aware of Cascade Huts, a system of backcountry cabins in the Mt. Hood wilderness near Government Camp, Oregon, I knew we had to review it! Set miles away from civilization, each of Cascade Huts’ three rustic cabins are situated along backcountry ski and bike trails accessible in winter from any of three area sno parks. Overnight guests snowshoe or cross-country ski in, stay a night (or two or three!), and hike out on any of several available routes.

Cascade Huts outdoor adventure

We’re avid backpackers, but even so, the idea of packing in overnight supplies (even to a shelter) in winter with the kids was intimidating. From the moment I contacted owners James and Don, my worries were set aside. James emailed me many times, answering all my questions in a very professional and knowledgable manner. One of the nicest things about the Cascade Hut system is its flexibility: guests can opt to hike a short or long distance, choose difficult or easier (note I didn’t say easy) terrain, and even navigate their own routes if they’re skilled in GPS navigation.

cascade huts

Since we’re not expert navigators, I asked James to choose the best route for our single overnight to the White River Hut. Because I was trekking in with kids who are new to cross-country skiing, and I’d be using the provided maps and directions instead of a GPS unit, he suggested we travel the historic Barlow Road from the Barlow Pass Sno-Park, on Highway 35 (longer in distance, but easier to navigate). On the provided maps, I noted that this route was marked as ‘intermediate’, as opposed to the ‘expert’ route also available.

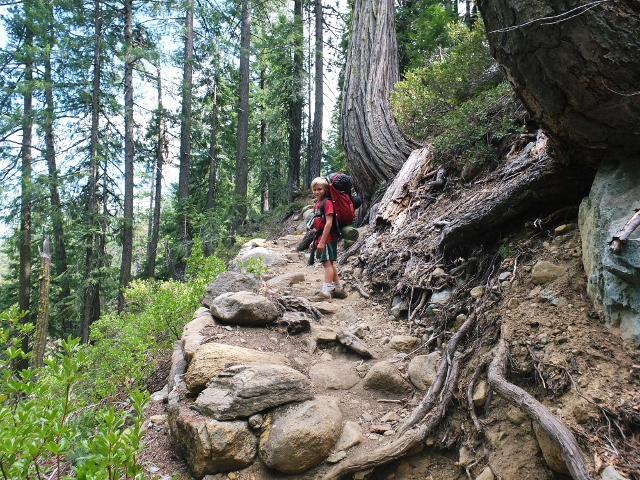
Even so, the Barlow Road was no joke: we navigated the six mile wet powder trail (with multiple small creek crossings and over 1000 feet of elevation change) in just over five hours, needing to stop often to make adjustments, carefully cross creeks, and pick each other up! Luckily, we had planned to be on the trail most of the day, so we’d gotten an early start and made sure to have a picnic lunch ready for the route. Note: even in winter…especially in winter…make sure you include enough water for all members of your group, and keep hydrated.)

cascade hut

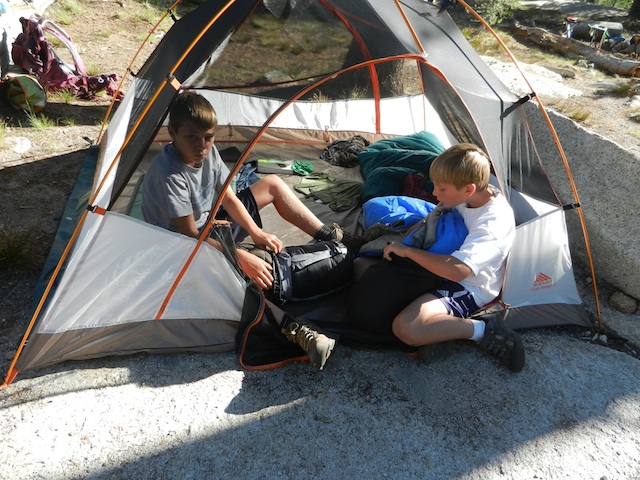
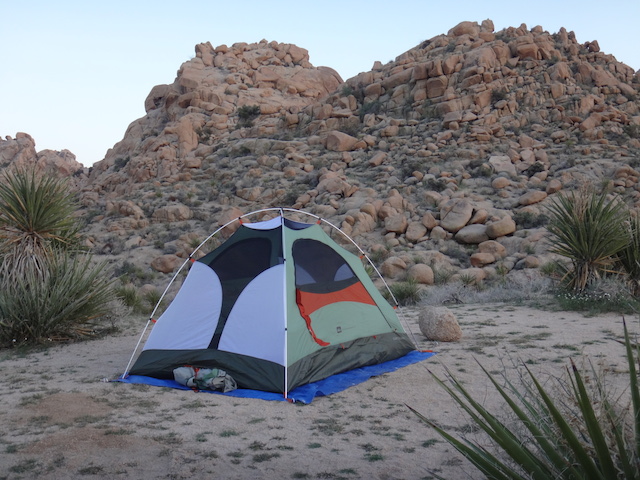
We arrived at the White River Hut before sundown, and trust me, it was a welcome sight! The kids (with their endless energy) made snow forts outside while we prepped the cabin: detailed instructions await you upon arrival, and include turning on the propane to run the heater, stove, and gas lanterns. The hut is 256 square feet and sleeps up to eight people. Four bunks line two walls, a third wall features a kitchen counter, supplies, and a stove, and the fourth houses the front door and wall-mounted propane heater. Small windows provide adequate light and ventilation (be careful of CO2 poisoning while using propane!), and a table and chairs provide a nice space to eat and play games.

Cascade Huts

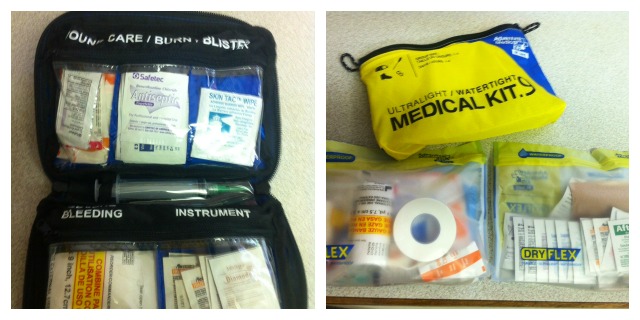
While staying in Cascade Huts, there’s no need to overpack! I admit, we did just that; not being certain what would be provided (better safe than sorry), we packed in more equipment and water than necessary. Though there is no running water (or electricity), the cabin-side creek was running freely in February, and we were able to both pump clean water and boil snow on the stove for drinking water. In the cabin are sleeping bags (just bring liners), lots of board games (we didn’t need to haul in our poker chips and cards!), all kitchen utensils, pots, pans, plates, and mugs (could have saved pack space there!). Also stocked was a good first aid kit, toilet paper, a snow shovel, and plenty of extra gas cylinders for the portable heater. There’s also an outhouse about 40 yards down the trail, but we found it very difficult to access in the winter, due to a nearby stream.

Note: Summer guests are provided with food and water as well, but in the winter, it would freeze!

Once we figured out the propane and various features of the cabin, we were quite comfortable (cozy, even!) all night. It’s important to bring plenty of layers of clothing for each person, as drying out wet gear is tough. We brought two sets of gloves, hats, and under layers for everyone, and were glad we did, when we were caught in a snow/rain storm on our hike back out.

Barlow Road Cascade Hut

If you go:

1. Make sure you feel comfortable in the backcountry. The Mt. Hood wilderness is very remote, and all guests should be comfortable following topographical maps and/or GPS units. We had several maps as well as a compass, and used all three. You won’t get cell phone service at the cabin, but it still doesn’t hurt to bring one along. My iPhone didn’t get a signal (though my compass app came in handy), but T-Mobile BlackBerry phones or other smart phones might. Cascasde Huts does a great job of preparing guests (and putting them at ease), and every guest signs a waiver, which isn’t only due to liability, but also ensure their location is known on the date they’ve reserved the cabin(s), an important safety step.

2. If cross-country skiing or snowshoeing is new to you, take a trial run. Since we’re expert downhill skiers, we underestimated the difficulty of cross-country skiing. Though I grew up with the sport, it was Nate (12) and Calvin’s (10) first time, and there was a slight learning curve. The terrain to the huts is steep in places, involves obstacles like logs, creeks, and rocks, and shouldn’t be taken lightly.

3. If you need to rent equipment, go to MountainTracks in the nearby town of Government Camp. You can reserve what you need ahead of time online, making for an easy pick-up!

4. If you’re going the distance (six miles or more), opt for skis instead of snowshoes. Maps of all routes will be sent to you from Cascade Huts, but I also recommend picking up a snowshoe and backcountry trail map at MountainTracks.

Check out the Pit Stops for Kids’ Kid Cam video for a better glimpse of our experience:

Date last visited: February 20, 2012

Distance from the interstate: The Barlow Pass Sno Park (trailhead) is on Hwy 35 (just shy of Hwy 26). The area is approximately 1 hour from Portland, OR.

Nightly Rate: In winter, a Cascade Hut cabin can be reserved for $150 per night (for up to eight people). Additional nights (up to three) can be reserved for a discounted price. In summer, mountain bike routes are available, and prices start at $300 per person for a 4-day, 3-night itinerary that includes meals.

Directions: Depending on your route and hut destination, trailheads are located at any of three area sno parks. Our adventure began at the Barlow Pass Sno Park, located one mile from Government Camp on Highway 35. Be sure to get a sno park permit!

Thanks to Cascade Huts for providing us with one night’s lodging at the White River Hut. This compensation came with no expectation of a positive review.

Family camping hack: Dispersed camping tips

Have you ever been on a road trip, paid around $100 a night to stay at a basic motel, and thought to yourself that you’d rather pay less and see more nature along the way? Or have you ever camped in a campground amid loud neighbors and wished you could find a place to pitch your tent away from the masses? If either question has crossed your family’s minds while traveling, dispersed camping might be a good option for you. If dispersed camping sounds intimidating, we have dispersed camping tips ready for you.

What is dispersed camping?

Dispersed camping simply means camping anywhere in the National Forest outside of a designated campground. No services will be available. such as trash removal, and little or no facilities will be at your disposal, such as tables and fire pits, or bathrooms or showers. However, dispersed camping is free, and you can usually count on finding a campsite where you can be alone in the wilderness, via car instead of hike-in.

You’ll be responsible for packing out everything you pack in (follow Leave No Trace principles), and you’ll need to remember to bring basics you might not think about when camping in campgrounds, such as potable water, toilet paper (and a shovel), and portable chargers for phones, lanterns and the like. Store all your food items in your car or in a bear canister at night, as food storage lockers will not be present. Think of dispersed camping as backpacking, but with your car: you need to be completely self-contained.

So how do you find dispersed camping locations?

This is the tricky part. You can use any road map to locate National Forest Service land in the vicinity in which you want to camp, but the best way to find out what areas are open to dispersed camping is to contact the nearest Forest Service office to the area you wish to visit. Many people drive out on forest service roads into the woods and find a clearing or a spot near a stream or with a view of the mountains. Use maps to find water sources near your desired camp area (but remember it will not be potable).

Only drive on existing roads to prevent resource damage. Dispersed camping is allowed in a one-mile perimeter away from campgrounds and 100 feet from any stream. To prevent resource damage please keep your campsite within 150 feet from a roadway.

Sometimes, though, it’s hard to identify exactly what is forest service land and what is private land. When we’re unsure, we’ve found its sometimes worth spending a few dollars to use Hipcamp.

Hipcamp is a website that mimics AirBnb, but for campsites. Private owners (hosts) post their camping options, which families can search for by location and date. Essentially, Hipcamp sites are dispersed camping on private land with permission. We have paid about $20 per Hipcamp site, paid via the website much as you’d do for AirBnb. The host then contacts you with exact directions to the site. Like when using AirBnb, it’s important to read reviews before booking, to make sure the host will be a good communicator and offer solid directions. And just like when disperse camping on forest service land, it’s crucial to pack everything out and leave the site as nice as when you found it (or better).

Hipcamp is popular with young adults looking to camp in groups (think festival-goers) but is a great option for families as well. Look for options with plenty of space in which to find a private area to camp. On a recent road trip through Nevada, we found a completely isolated Hipcamp location, and enjoyed a night to ourselves amid antelope and a perfectly starry sky. We brought a small stove, potable water, headlamps, food and a tent, and were completely cozy and self-contained for $20 instead of the $100 we would have spent on a not-so-great hotel room in a nearby town.

Have you disperse camped or used Hipcamp? Let us know in the comments!

Three northwest backpacking routes for families

Parents with young children: you absolutely can backpack with kids! Our family has found success by choosing backpacking routes that are short on distance but big on rewards, whether that be in the form of a fun lake or river to swim in, dramatic scenery, or both. The following three northwest backpacking routes for families deliver.

Before you read on, check out our tips for backpacking with kids!

northwest backpacking routes

Northern California’s Trinity Alps:

Just south of dramatic Mt. Shasta at the top of Northern California, the Shasta-Trinity National Forest offers some of the best backpacking for families. While word is now getting out, the Trinity Alps used to be very uncrowded, while still offering up vistas on par with the Sierra Nevada.

For families, we recommend the 5.2 mile route from Swift Creek Trailhead to Granite Lake. From the Swift Creek Trailhead of the Trinity Alps, families hike for one mile before crossing Swift Creek at a large bridge and taking the Granite Lake Trail. After that, it’s 4.2 miles of a pretty strenuous uphill hike. Take your time, knowing that you don’t have to hike too far but will be rewarded with one of the most stunning alpine lakes you could ask for.

Make a home base at Granite Lake, and spend an extra day day-hiking up above it (the terrain turns to sub-alpine granite with great views). If you want to make a full loop of it, you can continue to Horseshoe Lake, reconnecting with the original Swift Creek Trail to follow the creek back to the parking lot. We have always been content to simply play at Granite Lake, however.

How to get to the trailhead: Swift Creek Trailhead is at the end of Swift Creek Road, accessed from Highway 3. (From I-5, grab Highway 3 at Yreka.) You’ll pass a national forest ranger station near Fort Jones, where you can grab your backcountry permit.

backpacking-trail

On the Granite Lake Trail

Southern Oregon’s Sky Lakes Wilderness:

The Sky Lakes are beloved to our family. They’re right in our backyard, so we’ve logged a lot of hours on trails here. The great thing about Sky Lakes is the flexibility; there are multiple options for making larger or shorter loops between its many small alpine lakes. The elevation is lower than many backpacking routes, so the nights will remain warmer (but you’ll also experience more mosquitoes, so aim to visit in August or September).

The Sky Lakes are generally split between Lower Sky Lakes Basin and Upper Sky Lakes Basin. You can see it all in a 12 to 14 miles loop, but we recommend staying on the Upper Sky Lakes Basin end to see Trapper Lake and Lake Margurette. You can camp at either, and experience the other in a day hike, should you wish. Start at Cold Springs Trailhead, and when the trail splits, follow the upper toward Natasha and Margurette lakes. The entire hike is only about 3.2 miles, and isn’t too steep. If you’re ambitious, you can also access the Pacific Crest Trail above Trapper, and walk along it for a while.

How to get to the trailhead: Cold Springs Trailhead is located off Highway 140. From Medford (and I-5), take Highway 62 to Highway 140. At mile marker 41, you’ll take gravel road FR 3651 at the Cold Spring Trailhead sign, and follow it 10 miles to the parking lot.

stuffing backpacking bags

Setting up camp

Central Oregon’s Jefferson Park:

Very few wilderness areas are as breathtakingly beautiful as Jefferson Park. And yes, it is indeed a veritable ‘park’ of alpine creeks, lakes, trickling waterfalls, and towering peaks. You have to earn it though: the route in from either side takes some time for families. We recommend the slightly shorter route from Whitewater Trailhead (the other option is Breitenbush Trailhead further north).

You’ll go about four miles before reaching Whitewater Creek, with stunning views of Mt. Jefferson all the while. After the creek, you’ll join the PCT temporarily as you enter the park. Once in, you’ll see many trail options leading a short distance to multiple small lakes. We suggest Russell Lake or Scout Lake. Take fishing poles, and the fish seem to really bite here. You can rejoin the PCT for a long day hike should you wish, or can simply set up camp and enjoy the lake. No matter which lake you pick in the park, the round-trip mileage will be about the same: 11 miles or so.

How to get to the trailhead: Take exit 253 off I-5 in Salem. Drive 60 miles east on North Santiam Highway 22. Between mileposts 60 and 61 (10 miles beyond Detroit), turn left on Whitewater Road 2243. This gravel road forks in about 100 yards, keep right. Follow this road 7.5 miles where it dead-ends at a large parking area.

Jefferson-peak

Jefferson peak

I think it’s time for us to discover some shorter backpacking routes in Washington state next! While we have experience in this region, it’s for longer hikes for more experienced backpackers. If you know of great routes for families in Washington, please leave them in the comments. And always remember to call the local ranger station before your trip for weather and trail closure information, as well as any detailed driving directions you may need.

Travel Gear We Use: Best first aid kits for family travel

Several years ago, I became certified as a wilderness EMT and decided to create my own first aid kit for family travel. I created the ultimate kit: I left nothing out, and when I was done, there was no medical emergency I was not prepared for. The only trouble: my kit was the size of a pillowcase and had cost me almost $60 to put together.

best first aid

I’m often asked how to make a homemade first aid kit, but what I tell people now is: don’t. There are a number of excellent portable first aid kits for family travel on the market that are more affordable. Here are the best first aid kits we use.

Adventure Medical Kit Ultralight/Watertight Kit:

Depending on the size you select (we opt for the 1-4 people for 1-4 days size), the Ultralight/Watertight kit weighs in at under 12 ounces, and is slim and compact to boot. This is our #1 pick for outdoor travel, such as backpacking, camping, and boating. Inside the main pouch, you get two waterproof pouches with inventory lists on the side (they’re also see-through). Included is everything you need for at least a long weekend in the woods (with the exception of very few items…see below). At the top of the ‘thank goodness they thought of this’ list is: antihistamine, moleskin, duct tape, lots of bandages, after-bite itch relief. You get very few bells and whistles with this kit–no fancy organizational pockets or handles–but the best medical kit is the one you actually have with you when you need it. Pick the Adventure Medical Kits UltraLight & Watertight up on Amazon for only $26: you can’t make it for less.

best-first-aid-kits

Adventure Medical Kits Mountain Series Day Tripper:

Yep, another kit from Adventure Medical Kits. Why? Because of the extra touches: their kits are extremely well-organized, and come with either see-through lining or clearly marked categories, so you can find things fast. Also, all Adventure Medical Kits can be restocked at refillyourkit.com. No more half-empty first aid kits lying around! The Day Tripper is the perfect size for a family’s general use while traveling. Yes, you can get a bigger kit, but be careful: will you really drag it around with you? The Day Tripper weighs under a pound, and fits easily in any day pack for any sort of travel day. It serves 1-5 people. Unlike the Ultralight, it contains smaller pockets and sleeves within the kit to help you stay organized. You get everything you get in the Ultralight, plus an ace bandage and paperback medical book to use as a guide. Pick up the Adventure Medical Kits Day Tripper on Amazon for only $27.

Adventure Medical Kits Medical Kit .5:

Want to go very small and light? Don’t shy away from a medical kit designed for one person. The .5 isn’t big enough for our whole family while camping and backpacking, but it is perfect for day trips and air travel trips when space is tight. In it, you get enough bandages, tape, and gauze for several days of use, plus the same standard medications, like ibuprofen, aspirin, and antihistamine that’s in other kits. There are even a few towelettes and packs of antibiotic ointment. Best of all, this kit is only $17.

What to add to your kit:

If you’ll be in the wilderness, add the following:

  • extra trauma bandages
  • snakebite kit ($3-5 at your local outdoors store)
  • extra antihistamine (my son recently got stung by 23 bees at once, while 5 miles from the car)
  • extra moleskin
  • a blister kit, such as BlisterMedic

If you’ll be traveling abroad:

  • extra of all medications (in case they’re hard to find)
  • hand sanitizer
  • vitamins to prevent sickness, such as Vitamin C, or Cold-Eeze, which will shorten most colds

Find more Travel Gear We Use!

GetOutfitted camping gear review

Remember our #1 ski tip from last winter? We described how to use GetOutfitted to outfit yourself, or supplement your outfit, for winter sports. We used GetOutfitted to ‘rent’ a pair of ski pants for my husband, who didn’t want to invest in a new pair mid-way through the ski season. Now, GetOutfitted is also renting camping gear.

joshua-tree-camping

I am in love with this idea. Even though we personally own all our own camping gear, we know many families who do not, and I have seen how it limits their ability to explore the outdoors. After all, who wants to buy the entire collection of gear needed to go camping when they’re still trying it out? With GetOutfitted, families can rent a ready-made camping package that includes a tent, sleeping bags, and sleeping pads, or rent things a la carte, like lights, stoves, backpacks, and trekking poles. Backpacking packages are also available (they include the same basic items as in the camping package, plus a backpack).

Kelty quality:

One potential problem of a system like GetOutfitted is that families new to camping may not know if the gear they’re renting is quality stuff. Thanks to my job as an outdoor gear reviewer and decades of outdoor experience, I can tell you GetOutfitted is using good gear. Their tents and bags are new Kelty models; in fact, the Trail Ridge tents and PDa pads are the exact items we have at home. They trade out their gear regularly, upgrading just as they do their ski gear.

Cost:

Packages vary, obviously, but a basic camping package for a family of four comes to $159 for a three-day rental. Should a family buy each item, the cost would be well over $1000. If you decide to camp regularly, I’d recommend buying your own equipment, of course, but if you just camp once a year, GetOutfitted is the way to go. Plus, if you rent, you don’t have to store all this stuff in your garage or basement all year!

How it works:

Even though we have gear, we wanted to try GetOutfitted’s summer stuff before recommending it. Last week, my oldest son and I hiked 65 miles along the Pacific Crest Trail, and we decided to supplement our gear with an item I’ve been wanting for a while, but haven’t bought: trekking poles. We rented trekking poles from GetOutfitted, which are only $9 for a three-day rental. After ordering online, I got a tracking code immediately, and they arrived in just a few days. There’s free shipping both ways, and when we returned, we simply put the poles back in the supplied packaging and sent them back.

It was a great way to try out trekking poles and decide if they’d be worth the investment. Our verdict: my son and I both loved them and will plan on buying pair of our own. The best part: at the end of each season, renters have the option of buying the gear they used. We bought our trekking poles at a discount off the retail price.

Want more camping info? Get Pit Stops for Kids’ camping gear list!

Disclosure: We were invited to try GetOutfitted’s summer camping line free of charge, for the purpose of review. All opinions remain our own.

How to plan a multi-night PCT hike with kids

If you backpack with kids, your family will eventually become interested in tackling an iconic backpacking route such as the Pacific Crest Trail. Unless you have a lot of time and stamina, you probably aren’t ready to through-hike the PCT, but a shorter PCT hike with kids is absolutely possible.

backpacking-trail

Planning a PCT backpacking trip is complicated, so we turned to the experts before planning ours. The folks at pcta.org put us in touch with trail expert Dana Hendricks, who has led volunteer crews for AmeriCorps, the Appalachian Trail Conservancy, and the American Hiking Society. She has through-hiked much of the PCT herself. We asked Dana the following questions as we set to work planning our hike.

Who should go?

Dana recommended anyone planning to hike a section of the PCT ‘warm up’ with day hikes or shorter overnight backpacking trips. Our family backpacks regularly, but never more than four days at a time. Because this trip would be at least one week on the trail, we decided two adults and the teens would backpack the entire trip, and another adult and the youngest (10 years old) would meet us for three days of the trip.

Where should we go?

The PCT is three states long, and not all sections are created equal. Our first question for Dana focused on where we should spend the seven days we decided to devote to the PCT. The good news: many people opt for day or section hikes on the PCT, so there’s a lot of research out there. Dana suggested we pick up PCT books at pcta.org to find the best section for our needs. The Day and Section Hikes series are excellent: we found detailed information on starting and ending points, and trail conditions and elevations.

Dana told us the PCT was designed as a stock trail, so the grade is 10% or less. This means most sections are suitable for kids who are used to hiking. There were no sections she felt were ‘off limits’ due to terrain. There are, however, dry sections which require carrying more water, and sections where snow may be a factor. For the sake of simplicity, we decided to eliminate these areas (the CA desert, Crater Lake, and the high Sierras). We also eliminated any areas without many landmarks to make the hike interesting, or areas that may be crowded with day hikers.

stuffing backpacking bags

After studying day and section hike books, and looking at our own needs for bodies of water (lakes or streams) and forest, we decided on a section in Central Oregon. Our route, which we’ll tackle in July, spans approximately 90 miles from Elk Lake Resort, through Sisters, to Olallie Lake. Here’s a screen shot of our route:

PCT-section-hike

How long to stay out?

How long our 90 mile route would take us depended entirely on our hiking speed, of course. While many PCT hikers crush the trail, hiking up to 20 miles a day or more, we wanted a more leisurely pace. We used PCT Planner (above) to gauge our distance and time on the trail. It was easy: we just input our starting and ending points, then added our planned hiking time per day. At the pace we felt comfortable with, we’d spend seven days on the trail. This would be longer than our longest backpacking trip so far, which led us to our next question…

How to plan food drops?

backpacking with kids bear canisters

Dana explained that most PCT hikers arrange to have food drops well before their trip. Hikers can mail food to themselves to post offices along the trail, but the idea of leaving the trail and restarting during such a short trip didn’t appeal to us. Instead, we’ve decided to have friends and family meet us on the trail with a resupply of food. We have this luxury because the PCT section we’ve decided to hike is within a few hours’ drive of our home. We know we can comfortably carry four days’ worth of food from previous trips. We will be met on the trail by family members at the end of Day 3, which will coincide with our path through Sisters.  We couldn’t arbitrarily decide when they’d meet us, however: there are set places where it’s easy to access the PCT, and we needed to plan our reunion accordingly. Another way to tackle food drops is to have a non-hiking friend or family member meet you with food at a designated trailhead en route. All re-entry points along the trail are listed on PCT Planner.

How light should we pack?

While we backpack regularly, we’re not what you’d call ultra-light backpackers. We like our luxuries, like hammocks and coffee presses. While Dana agreed with me that some of these items will need to be left at home to leave room for more food, she did remind me not to compromise on any items that keep us warm and dry. A full list of tips for backpacking with kids can be found here. In short, we needed layers, waterproof clothing, shelter in the form of a lightweight tent, food and cooking supplies. We will bring books and a deck of cards, but no other major luxuries. By keeping our packs light, we’ll adjust more quickly to seven days of hiking. Tip: For basics in backpacking gear for kids, check our Backpacking Gear page and How to Plan a Multi-Day Backpacking Trip.

How best to follow Leave No Trace principles on the trail?

We always practice Leave No Trace while in the wilderness, and we wondered whether it would be harder than usual to find established camp sites en route on the PCT. Dana says no: we’ll be able to find established sites virtually everywhere on the trail. She reminded me to camp 100 feet from water sources, and to leave recovering sites alone if possible.

Additional PCT hikes suggested by Dana and PCTA:

There are many other route options for families looking to hike a section of the PCT, of course. Dana also suggests Mt Hood National Forest from Lost Lake to Wahtum Lake to Eagle Creek (a PCT alternate) into the Columbia Gorge or Rock and Snag Creeks, near Bridge of the Gods in Washington.  Dana describes the latter as kid-friendly, as either a short out and back day trip or a 22 mile section hike. Find additional staff recommendations here.

Where to backpack with kids in Northern California

Will you be backpacking with kids this coming summer? Most families who love backpacking with kids are familiar with backpacking options in popular regions such as Yosemite National Park, but the following lesser known areas offer backpacking just as scenic and often crowd-free.

where-to-backpack-with-kids

Tahoe and Northeastern Sierra Nevada:

Our favorite section of the Northeastern Sierra Nevada mountain range is located in California’s Plumas County, adjacent to the town of Graeagle. The Lakes Basin Recreation Area, just south of Graeagle up Gold Lake Road, offers 47 trails and over 30 alpine lakes. Some of these trails are available only for day hikers, but link families to backpacking regions. To start out directly on a backpacking route, begin at the Jamison Mine Trailhead en route to historic Johnsville (10 miles from Graeagle) and hike approximately three miles uphill to beautiful Rock Lake. This alpine lake offers idyllic camping, swimming, and rock jumping. Adjacent Jamison Lake offers great trout fishing.

Tip: consider renting a Tahoe vacation home before or after your backpack trip. We like to spend a few days pre-trip in a home, where we can organize backpacking foods, pack our backpacks, and enjoy a few luxurious days before entering the backcountry.

Trinity Alps and Marble Mountains:

Further north near the California/Oregon border, the Trinity Alps Wilderness in Shasta Trinity National Forest consists of chiseled granite peaks and alpine lakes, with elevations from 2,000 feet in creek drainages to 9,000 feet at summits. This wilderness offers many different trails ranging from 1.5 miles to 15 miles at varying levels of difficulty. Spring backpacking is often an option here (in the lower elevations) and mid-week trips are encouraged to beat crowds. Our pick: the five mile hike to Granite Lake on the Swift Creek trailhead. Tip: families will want to arrive early on weekends or during mid-week to secure the prime campsite lakeside.

granite-lake-backpacking

The nearby Marble Mountains are less populated, and easily accessed from I-5. Our favorite backpacking route through the Marble Mountains is to Campbell Lake, located off the Shackleford Creek Trail (three hour hike). Visibly stunning, Campbell Lake offers great swimming. The Trinity Alps and Marble Mountain region offers many loop trails perfect for families wanting to adjust their trip to suit kids’ abilities.

Lassen National Park:

Lassen National Park is one of the least visited in the US, and we have no idea why! However, families can take advantage of the low crowds and find prime backpacking wilderness with relative ease. Grab a wilderness backpacking permit when you enter the park, and then head east, to where the top backpacking loop trails depart. You’ll find alpine lakes, creeks, and lodgepole pine forests in ample supply. The weather tends toward hot and dry, which means families will encounter fewer mosquitos than in damper areas. If you head toward geothermal regions of the park, bear in mind that camps cannot be set within 1/4 mile of geothermal activity (bubbling pots, etc).

backpacking-trail

No matter where you backpack, be sure to get the necessary permits at the ranger station or forest service station nearest your trailhead, and check conditions before arriving. Make sure you have a water filtration system or means of fresh water, and bear canisters where required. For more general backpacking tips, read How to Plan a Multi-Day Backpacking Trip with Kids. For gear suitable for kids while backpacking, check out our Travel Gear We Use series.

The above post is written in partnership with VacationRoost.com.

Camping with babies and toddlers: gear up!

The first time my family and I took our eldest son out camping, it was a three-day backpacking trek into Oregon’s Columbia Gorge near Multnomah Falls, and he was 13-months old. Were we crazy? Well, yes, but we had a great time introducing baby Nate to the outdoors we loved, and I believe the experience (and others that followed) helped him acclimate at a young age to the idea of roughing it.

Is your young one ready to camp or backpack once the snows melt and the sun shines? To make the trip easier on the adults in the group), I offer the following well-earned tips:

1. Bring a backpack baby or toddler carrier. We loved our sturdy REI backpack carrier, but that was, ahem, over a decade ago. If you’re looking for more updated equipment, I recommend Kelty’s line of carriers, and look for my review of their newest at Practical Travel Gear soon. (By the way, at the Campfire live chat, we’ll be giving one away.) Not only is a backpack carrier useful for its intended purpose of carrying the baby while hiking, it serves as an excellent mountain high chair. With a squirmy toddler and a rustic camp, the only other place you might find to serve him or her dinner is on the ground. Bear in mind: if one adult is ‘packing’ the baby, the other(s) are overly burdened with necessary supplies. Either pack light (good luck with a kid in tow) or invite friends (good luck with that, too, come to think of it).

2. If you’re car camping instead of backpacking, utilize a portable bed such as Regalo My Cot Portable Bed It’s more to pack than a traditional backpacking pad, but little children and babies slip and slide all night long on the regular ones. Dress babies warmly at night, and play by the same rules at home (no extra bedding around faces, etc). Obviously, you’ll want to camp in a warm climate while kids are very small.

3. If your child is walking, put bells on his or her shoes. Yes, they get annoying, but this wasn’t going to be the trip in which you waited patiently for hours for a glimpse of wildlife, anyway. Bells keep kids within close proximity and provide peace of mind. Bright colored clothing is a must, too!

4. Stick as much as possible to your child’s normal foods. Yes, changes will have to be made to accommodate for packs and weight, but in general, pack your child’s familiar foods. Great backpacking fare includes fruit leather, trail mix (for older kids), organic pouched baby food (like these from Ella’s Kitchen), and instant soup.

5. Don’t slack on sun protection, bring basic medications, and pack a big first aid kit. Give up on keeping the kid clean, however. Just really…give up. Now. Preferrably before you even leave. In all seriousness, a little dirt won’t hurt, and you can’t avoid it. Just bring wet wipes and antiseptic wipes in case of cuts (and to wipe down hands before meals), and plan on a soapy, long bath upon return to civilization.

amzn_assoc_placement = “adunit0”;
amzn_assoc_search_bar = “true”;
amzn_assoc_tracking_id = “pitstoforkid-20”;
amzn_assoc_ad_mode = “manual”;
amzn_assoc_ad_type = “smart”;
amzn_assoc_marketplace = “amazon”;
amzn_assoc_region = “US”;
amzn_assoc_title = “My Amazon Picks”;
amzn_assoc_linkid = “5cff3a8b5f0e508e11c71a553e7363cc”;
amzn_assoc_asins = “B009FRKXKG,B005F5LYQO,B00KBGTRAC,B01LF3A302”;

Lastly, don’t be afraid! Just get out there and go! Your camping or backpacking trip will be more work than most, but the rewards will take your breath away (even more than a steep climb with 40 pounds of toddler on your back)!