DeLorme inReach or SPOT Gen3: Which GPS messenger to buy for outdoor adventure

Do your teens hike without you? Do you venture into the backcountry as a family? In winter, do you like to snowshoe, camp, or ski off-piste? If you answered ‘yes’ to any of the above, you’ve probably considered outfitting yourself or your kids with a GPS device for the field. In our opinion, these two devices are the best on the market for hikers, backpackers, and backcountry skiers. Here’s our observations and recommendations for which GPS messenger to buy for outdoor adventure:

The difference between DeLorme inReach SE and SPOT Gen3:

GPS-messenger

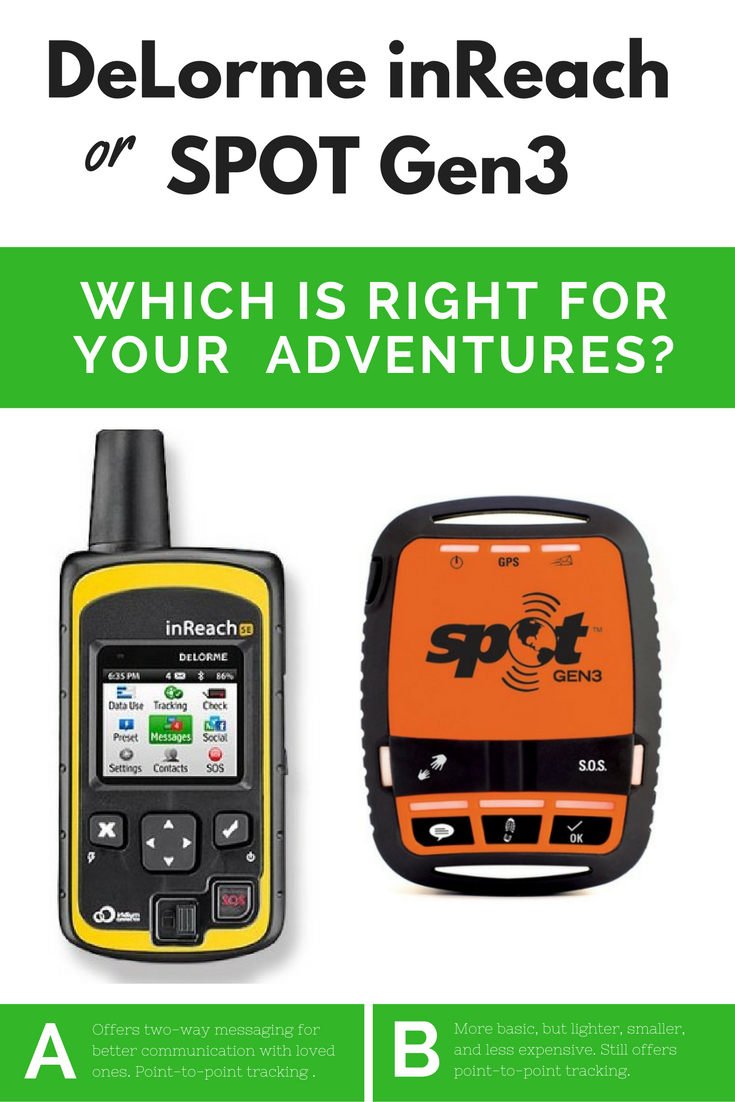
DeLorme inReach SE in a nutshell:

Our inReach SE and I are very close, because I clung it its updates as our son was hiking on the PCT. He used it for the entire 457 miles. This was the lifeline we absolutely needed with a kid on the trail. The SE does the following:

  • Emergency service: Your personal locator beacon sends SOS signals with GPS location data to GEOS worldwide emergency response; communicate with GEOS via 2-way text messaging throughout the rescue. We’ve never used it, and in fact, you have to slide a little panel over to activate this button, to prevent accidental activation.
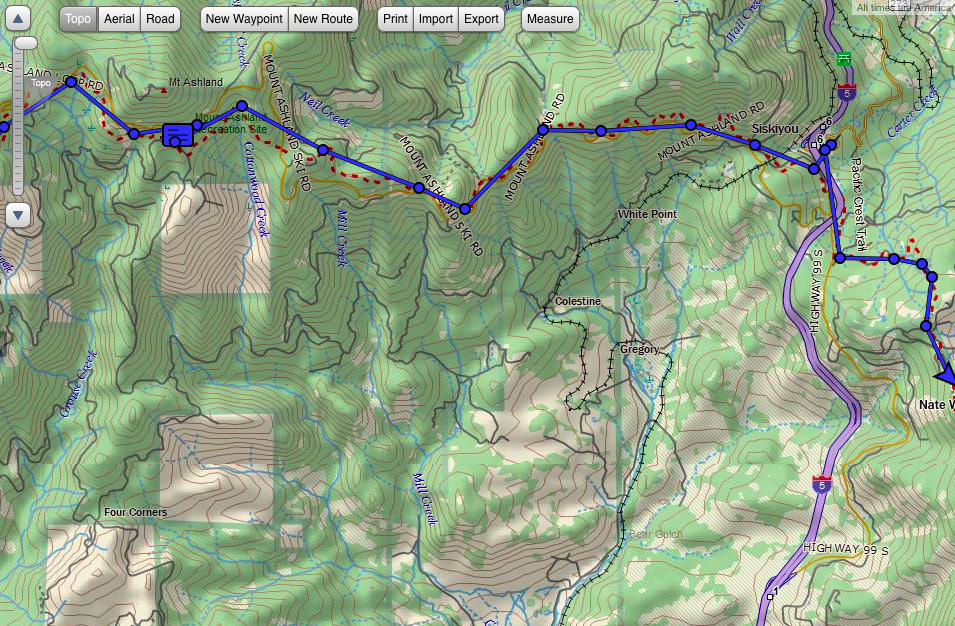
  • Point-by-point tracking: You can set the SE to track progress as often as every 10 minutes. Progress is shown on DeLorme’s website portal, MapShare. You invite people to MapShare, which is where you follow along at home.
  • Two-way messaging: Pay attention, because this is inReach’s best feature. You can send both pre-set messages that you customize yourself to friends or family (things like Everything is ok to I may need help) AND you can message free-form, just as you would via text. This means you can have actual conversations with the inReach. Example: Stopping here for the night. From parent: Did you find water? Answer: Yes, great spring here. You can text via the inReach’s key pad (clunky and slow, but it works) or via your phone, if you’ve opted to pair it. For the person at home, messages come through as either emails or texts (you decide). You text back via the MapShare portal, either on your phone or on a computer screen.
  • Smart phone pairing: Before leaving on your trip, you can pair your inReach with your phone, which allows you to use the included EarthMate app in the field (even when you don’t have cell service). This app gives you a map view, and also lets you text with more ease. Bear in mind: if you do this, you’ll need to worry about keeping two devices charged: your inReach and your phone.

So, does it work?! YES. We loved the inReach, and found it reliable. You can expect delays from five to 20 minutes in some areas (both in tracking and texting), but it literally worked everywhere, with one exception: while hiking through Native American reservation land, it went dark. The MapShare portal was easy to use, too.

DeLorme-in-Reach

Things to keep in mind with inReach:

Battery life is pretty good; we found that when placed in ‘track every 10 minutes’ mode and turned off at night, the inReach had about three days in it before needing to recharge (via USB cable). We charged with a wall plug when possible, and with a solar panel charger in the field.

The inReach weighs about seven ounces, and attaches to any backpack strap via a clip. We liked that it beeped when there was a new message (helpful when it’s not always in front of you) and beeped to confirm messages were sent. You navigate around the inReach with the keypad and up-down arrows. If you remember your old phones of years bygone the ‘up-arrow, left, left, down-arrow, enter’ drill to command it, it’s like that.

You DO need a subscription plan with the inReach: you can opt to do month-to-month (starting at $14/month) or annual plans (around $150 or starting at $12/month). The plan we picked was about $30/month, which included unlimited texting and tracking. The cost of the actual device is $299. Right now, it’s on sale on Amazon for $263.

Can you upgrade? Yes. If, in addition to all the features above, if you also want to have built-in navigation (in which you plan your route, drop waypoints, and then follow the path with arrows on your screen), you’ll want to upgrade to the DeLorme inReach Explorer for an extra $100 or so. We wished we had this feature a few times when in snowfields, when the trail was not visible. It would also be good for anyone who travels off-trail. This said, it’s possible to pair the inReach with your phone, and download maps there. Then you have two things to carry and charge, though.

SPOT Gen3 in a nutshell:

If your explorer in the field doesn’t need quite as much hand-holding (or you’re better at letting go than I am!), the SPOT Gen3 is simpler, lighter, and more streamlined than the inReach. If you want the TL;DR version of this entire review, here’s the difference between them: the SPOT Gen3 does NOT text back and forth, and therefore does not allow for a two-way conversation. But it has other great features. Here’s what it does:

SPOT-Gen3

  • Emergency service: SPOT’s emergency service is the same as inReach; you get immediately connected to GEOS. But there’s a second feature that inReach lacks: there’s also a NON-emergency help button. This button goes out to your pre-set friends and family (NOT to 911), alerting them that you need assistance. It sends your GPS location on a map when it does so. This is a nice feature for if you get a flat tire, run out of food and need a person to bring you some, or hurt yourself but can walk your way out.
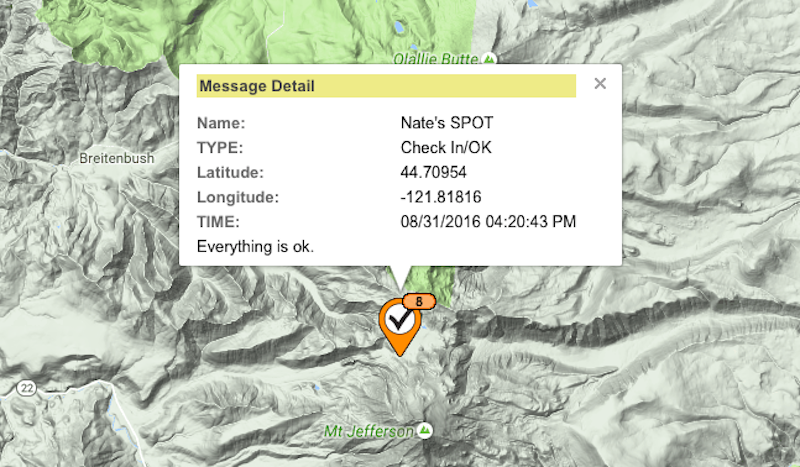
  • Point-by-point tracking: Yes, you get this too…same as the inReach, for the most part. SPOT will track your movements as often as every 2.5 minutes, if you opt for an upgraded plan (more on that below), but generally tracks every 10, 30, or 60 minutes. Family at home can see tracking in almost real time via SPOT’s portal, called FindMeSPOT.
  • Custom messages: Like inReach, you can create custom messages you want to use with SPOT, which you set ahead of time on the web portal. Think Found our campsite or Having a great time. There’s also a set button for OK. That’s all it will say (with GPS location via a map), but it’s very convenient if you don’t want to hassle with buttons and key pads.

Does it work? Definitely. The Gen3 does what it says it will do, so as long as you know its limitations, you won’t be disappointed.

Subscribe to our Pit Stops for Kids seasonal newsletter, and get an exclusive travel ‘cheat sheet’, free! Click here!

backpacking-trail

Things to keep in mind with SPOT Gen3:

This is the way to go if you don’t need to download maps (there are lots of other apps for maps, if you want them on your phone separately from your GPS device), don’t need to have back-and-forth conversations with people, and don’t want to mess with navigating through a clunky keypad to do things. We love that one button sends an OK message with a map of location, and that the SPOT is only four ounces and attaches to your pack with a carabiner.

Battery life is longer on SPOT than inReach (they claim 150 hours, but I don’t think it was quite that great). You re-charge it via USB, just like the inReach. I like that both these GPS units have rechargeable batteries; some other devices require you to buy expensive replacements.

The SPOT doesn’t make noises to indicate messages have been sent, but it does light up, which is nice. I just like having some sort of confirmation.

The Gen3 is $150 (half the price of the inReach), so if you don’t want two-way communication, by all means, don’t pay for it. You do still need a service plan, and it will be about the same price as the inReach: $14/month or $150/year. There is NOT an option of a month-to-month plan, which is a bummer.

Can you upgrade? No, but you can downgrade to the $99 SPOT Trace, but it’s pretty bare-bones and designed for car tracking.

Interested in staying in touch when TWO parties are close by in the wilderness? Consider GoTenna: review here!


Three northwest backpacking routes for families

Parents with young children: you absolutely can backpack with kids! Our family has found success by choosing backpacking routes that are short on distance but big on rewards, whether that be in the form of a fun lake or river to swim in, dramatic scenery, or both. The following three northwest backpacking routes for families deliver.

Before you read on, check out our tips for backpacking with kids!

northwest backpacking routes

Northern California’s Trinity Alps:

Just south of dramatic Mt. Shasta at the top of Northern California, the Shasta-Trinity National Forest offers some of the best backpacking for families. While word is now getting out, the Trinity Alps used to be very uncrowded, while still offering up vistas on par with the Sierra Nevada.

For families, we recommend the 5.2 mile route from Swift Creek Trailhead to Granite Lake. From the Swift Creek Trailhead of the Trinity Alps, families hike for one mile before crossing Swift Creek at a large bridge and taking the Granite Lake Trail. After that, it’s 4.2 miles of a pretty strenuous uphill hike. Take your time, knowing that you don’t have to hike too far but will be rewarded with one of the most stunning alpine lakes you could ask for.

Make a home base at Granite Lake, and spend an extra day day-hiking up above it (the terrain turns to sub-alpine granite with great views). If you want to make a full loop of it, you can continue to Horseshoe Lake, reconnecting with the original Swift Creek Trail to follow the creek back to the parking lot. We have always been content to simply play at Granite Lake, however.

How to get to the trailhead: Swift Creek Trailhead is at the end of Swift Creek Road, accessed from Highway 3. (From I-5, grab Highway 3 at Yreka.) You’ll pass a national forest ranger station near Fort Jones, where you can grab your backcountry permit.

backpacking-trail

On the Granite Lake Trail

Southern Oregon’s Sky Lakes Wilderness:

The Sky Lakes are beloved to our family. They’re right in our backyard, so we’ve logged a lot of hours on trails here. The great thing about Sky Lakes is the flexibility; there are multiple options for making larger or shorter loops between its many small alpine lakes. The elevation is lower than many backpacking routes, so the nights will remain warmer (but you’ll also experience more mosquitoes, so aim to visit in August or September).

The Sky Lakes are generally split between Lower Sky Lakes Basin and Upper Sky Lakes Basin. You can see it all in a 12 to 14 miles loop, but we recommend staying on the Upper Sky Lakes Basin end to see Trapper Lake and Lake Margurette. You can camp at either, and experience the other in a day hike, should you wish. Start at Cold Springs Trailhead, and when the trail splits, follow the upper toward Natasha and Margurette lakes. The entire hike is only about 3.2 miles, and isn’t too steep. If you’re ambitious, you can also access the Pacific Crest Trail above Trapper, and walk along it for a while.

How to get to the trailhead: Cold Springs Trailhead is located off Highway 140. From Medford (and I-5), take Highway 62 to Highway 140. At mile marker 41, you’ll take gravel road FR 3651 at the Cold Spring Trailhead sign, and follow it 10 miles to the parking lot.

stuffing backpacking bags

Setting up camp

Central Oregon’s Jefferson Park:

Very few wilderness areas are as breathtakingly beautiful as Jefferson Park. And yes, it is indeed a veritable ‘park’ of alpine creeks, lakes, trickling waterfalls, and towering peaks. You have to earn it though: the route in from either side takes some time for families. We recommend the slightly shorter route from Whitewater Trailhead (the other option is Breitenbush Trailhead further north).

You’ll go about four miles before reaching Whitewater Creek, with stunning views of Mt. Jefferson all the while. After the creek, you’ll join the PCT temporarily as you enter the park. Once in, you’ll see many trail options leading a short distance to multiple small lakes. We suggest Russell Lake or Scout Lake. Take fishing poles, and the fish seem to really bite here. You can rejoin the PCT for a long day hike should you wish, or can simply set up camp and enjoy the lake. No matter which lake you pick in the park, the round-trip mileage will be about the same: 11 miles or so.

How to get to the trailhead: Take exit 253 off I-5 in Salem. Drive 60 miles east on North Santiam Highway 22. Between mileposts 60 and 61 (10 miles beyond Detroit), turn left on Whitewater Road 2243. This gravel road forks in about 100 yards, keep right. Follow this road 7.5 miles where it dead-ends at a large parking area.

Jefferson-peak

Jefferson peak

I think it’s time for us to discover some shorter backpacking routes in Washington state next! While we have experience in this region, it’s for longer hikes for more experienced backpackers. If you know of great routes for families in Washington, please leave them in the comments. And always remember to call the local ranger station before your trip for weather and trail closure information, as well as any detailed driving directions you may need.

Travel Gear We Use: Top sleeping bags for backpacking families

It’s time to think family camping! Get your family geared up for the summer camping season by snuggling up in a down or down-alternative sleeping bag! Today on Travel Gear We Use, we’re listing our favorite sleeping bags for backpacking and camping families, with lightweight and kids’ picks.

Best sleeping bag we use for kids:

north-face-for-kids


We love our son’s The North Face Dolomite 20F Youth Sleeping Bag. No, it’s not the most compact bag on the market, but that’s ok with us. Kids’ bags, by definition, are smaller, so it’s possible to get away with a bulkier model and still fit it into smaller sleeping bag compartments in youth-sized backpacks. The Dolomite is rated to 20 degrees, plenty warm enough for us, and ours has lasted through three kids and counting! The price is right, too, at only $119.

Best sleeping bag with a larger toe box:

big-agnes-lulu

If you’re wondering what a ‘toe box’ is, you either haven’t used a ‘mummy’-style sleeping bag, or don’t mind its restricting nature. I fall in the latter category (I actually love the tight space that warms me up faster), but some members of our family hate it. They’ve been looking everywhere for a sleeping bag made for backpacking that offers a roomier toe box, and we finally found it. The Big Agnes Lulu 15 stuffs into a compression sack and is lightweight enough for carrying long distance (it weighs in at just over 3 pounds), but features a wider bottom half that most bags. It’s rated at 15 degrees, with a fill weight of 24 ounces. Pick one up for as low as $139.

Best sleeping bag for ultra-light backpackers:

kelty-trail-logic

Maybe you’re not trying to beat any ultra-light backpacking records, but you’d still like to carry one of the lightest sleeping bags on the market. Or maybe, you’d like your older kids or elderly parents to carry a lighter bag. We love the Kelty TrailLogic Kelty SB20 delivers, with a weight of two pounds. The best benefit of a lighter bag? It fits into a stuff sack roughly half the size of its counterparts, which means more room in your backpack. Hey wait a minute…that means I carry more gear, doesn’t it? The SB20 will set you back $299, but you’ll see why once you pick it up.

Best sleeping bags for those who prefer a quilt:

backcountry-quilt
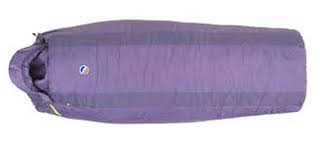
Did you know there was such thing as a sleeping quilt or backcountry quilt? These ‘sleeping bags’ don’t zip all the way around, which prevents that clammy, enclosed feeling some of us just can’t stand. If you’d rather sleep outdoors under a blanket or quilt than in a sleeping bag (but still need the warmth of a bag), Sierra Design’s Backcountry Quilt may be for you. You still get the 2-season warmth of 800-fill synthetic down, plus a hide-away hood and hand pockets to keep extremities warm at night. But the design remains open on the upper half, which allows you to feel like you’re under a blanket, not wrapped like a burrito.

The Backcountry Quilt is sold for as little as $150 for a 1.5 season weight, but you’ll want to spring for the $250 version to ensure you can use it in almost all conditions.

Our other favorite is the new Big Agnes Big Pine bag, which works with any pad size and is a great quilt option for road tripping, couch surfing, hotel stays where perhaps a child is on a rollaway bed, and the like. It can be used as a quilt or can be zipped to be a sleeping bag. It’s also great for summer season camping and backpacking. Our favorite feature is that it’s made with DownTek, which is sustainable down that’s water repellent. You can even zip two together for a double sleeping bag! This is by far the most versatile quilt option we’ve tried.

Best budget sleeping bag:

cosmic-20
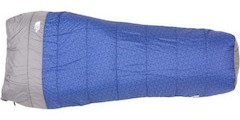
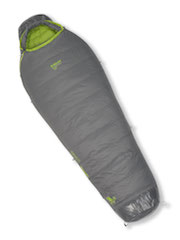
If you need a solid sleeping bag for a family member that is rated to 20 degrees for three-season comfort in the backcountry, you don’t have to break the bank. The Kelty Cosmic 20 gets our pick for the best bag for your buck. It’s only $149, and while a little heavier than most bags, you still get DriDown, Kelty’s down blend that resists moisture (so you don’t get that soggy, damp issue with your down sleeping bag after being dusted with morning dew). You also get a draft collar, a feature that used to be found only on more expensive models. It packs down into a stuff sack, though again, it won’t be as compressible as it’s more expensive cousin, the SB20.
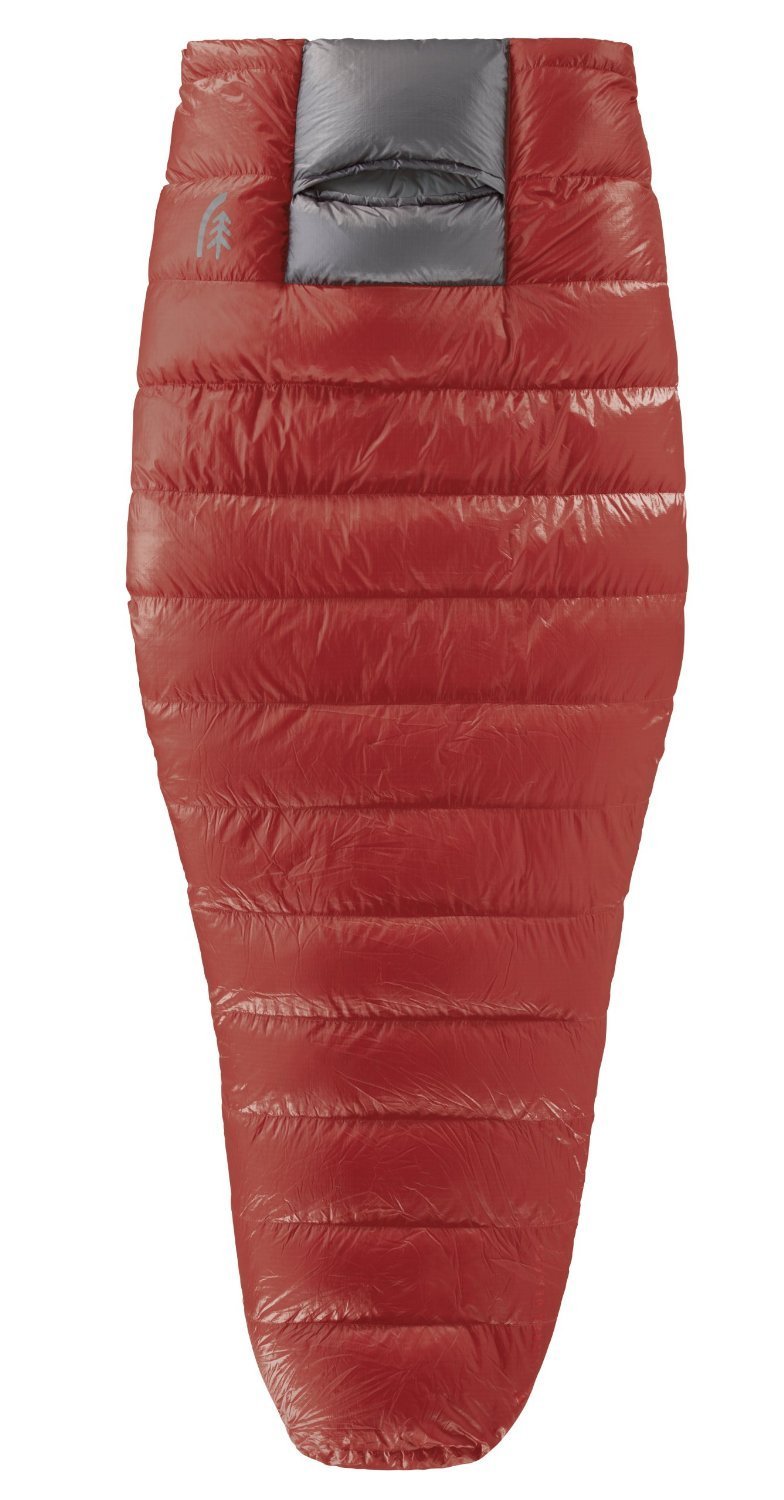
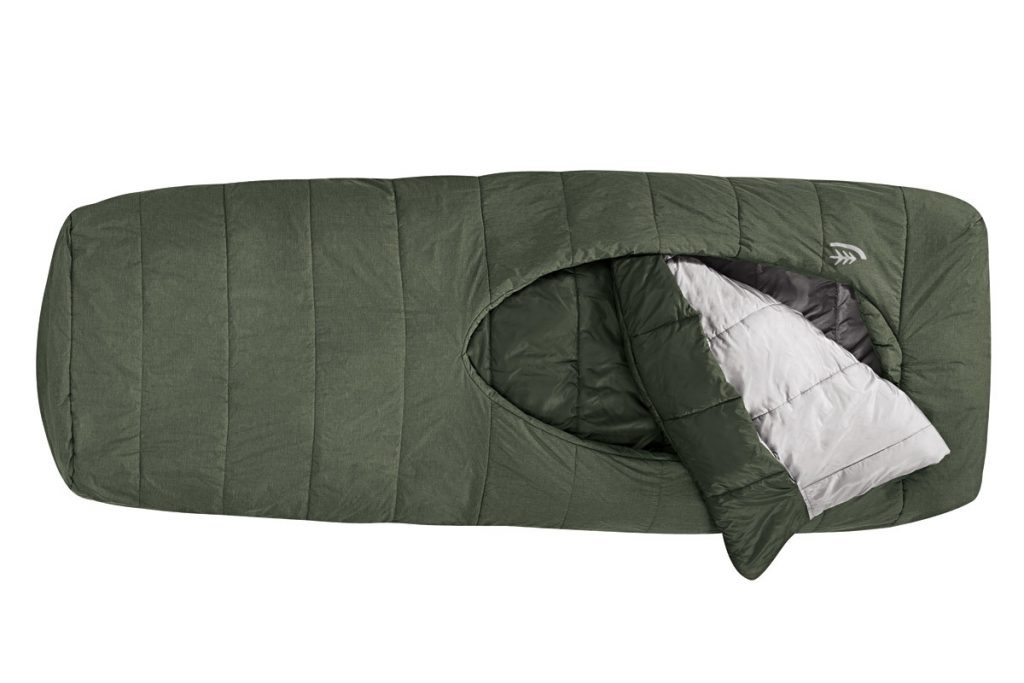
Best luxury car camping sleeping bag:

sierra-designsThe Sierra Design backcountry beds are so comfortable, you’ll think you’re sleeping in a bed…really. They’re not as lightweight as some, so we think they’re best for car camping and road tripping, but they’re ultra-plush and fit nicely on or over think pads and cots. They come in single or duo size, with two basic designs: front country (rectangular for comfort) or backcountry (mummy-style and more packable for backpacking). They all come with an extra blanket flap that makes the sleeping bag feel more like a made bed, as well as hand pockets and slips for your pad. We love them!

How to choose sleeping bags for your family:

Start by deciding whether to go with down or a down alternative. It’s hard to ethically harvest down for sleeping bags, and since the synthetic version is arguably just as good, it’s easy to go without. Not sure which is best for you? We like this down vs synthetic guide from Sierra Trading Post.

Next, access your temperature needs. Will a bag rated at 30 degrees be enough for your use? Will you need a zero degree-rated bag? Determine where you’ll be using it, and in which season.

Finally, make sure a ‘youth’ sized bag will fit your kids (tweens may fit better in adult bags). Go into your local outdoor store to try out bags, and while you’re at it, bring your backpacks so you can be sure the sleeping bag of your choice fits into the sleeping bag compartment (if you care about that).

Once you’ve bought your bags and brought them home, remember to store them in a space where they can remain free of their stuff sacks. This is better for the bags. We hang ours from pegs in our garage, with each bag’s stuff sack set inside.

Find more gear in the Travel Gear We Use series (click below):

Travel Gear We Use: best overnight backpack brands for kids and youth

As an editor at Practical Travel Gear and a gear reviewer for OutdoorsNW, I test a lot of travel products and outdoor gear. Some of this gear we keep and continue to use as a family, and some of it gets pushed to the wayside. Some of the most-frequent questions I’m asked on Pit Stops for Kids is related to what to pack, what to bring, and what to wear. Our Travel Gear We Use series will address our most commonly requested gear recommendations.

best overnight backpack

Quality, backpack trip-worthy packs are hard to find that fit young kids and youth (tweens and teens). Many so-called kids’ packs are flimsy, or simply not designed for multi-day, serious hiking and trekking. It’s very important to find a pack for your kids that takes the weight off their shoulders and onto their hips, just like the grown-up models do. As with all travel-related activities, your kids will have better success and more fun when backpacking with the right gear. Here’s what we use when it comes to best overnight backpack picks for kids:

For young kids (ages 6-11):

Kelty Junior Tioga External Frame Pack

jr tioga
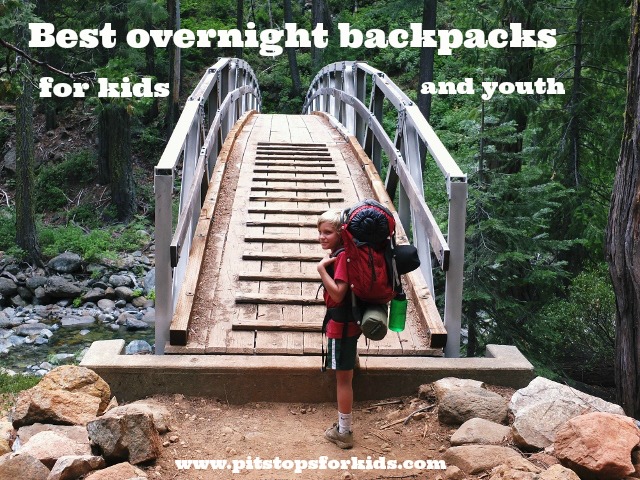
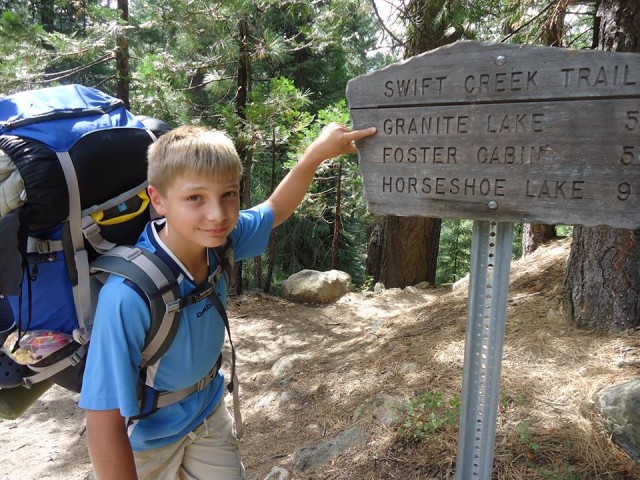
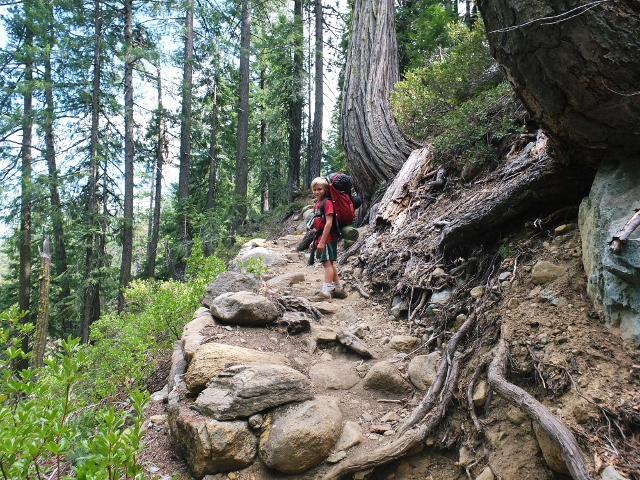
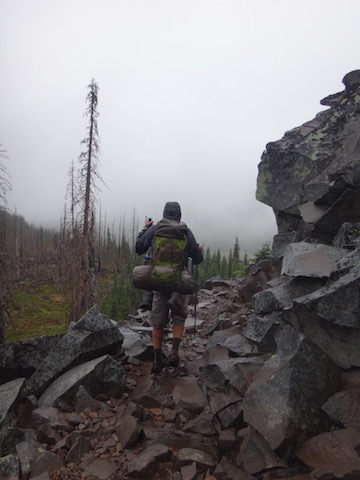
Why we use this pack: firstly, Kelty is a brand we trust to be of quality design at a reasonable price. Kids grow out of gear quickly and pack styles are improved upon often…no need to spend top dollar to hand-down something obsolete. The Kelty Jr. Tioga (shown in the photo above, worn by Toby, age 8) is 34L, which offers a large enough capacity to be helpful, but not so large that the child is over-burdened with too much weight. (Tip: our young kids carry only their own clothing, their own sleeping bag and pad, and lightweight food items, such as freeze-dried meals). 

While the Jr. Tioga isn’t too large, it still offers a secure waist belt and sternum straps, allowing weight to be carried on the hips. The external frame is nice at this age, because the pack is more highly adjustable than most with internal frames. Not only can the waist belt and shoulder straps be adjusted to size, but the frame can be made larger or smaller. This pack has grown with our kids from age 6-11. Buy at sale price on Amazon.

Deuter Fox 40

deuter-fox
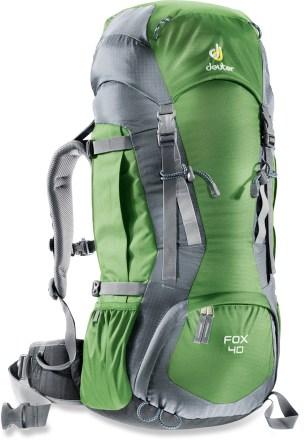
Why this pack: once kids have outgrown the external frame pack above, enter the Deuter Fox. We tried many internal frame packs for kids in the 40-45L range, and found the Deuter to provide the best ‘adult’ features in a kid-friendly package. There’s a dedicated sleeping bag compartment and an adjustable torso, and good ventilation on the back panel and hip belt. We kind of wish it wasn’t top-loading, and kids tend to toss everything out of the bag to find that one thing at the bottom, but this is a feature we can live with. Buy on Amazon for $109.

Note: if you find you simply can’t find a narrow enough hip belt for a thin child, try the REI brand Passage 38. It was the only pack to properly fit our narrow-hipped child!

For tweens and teens (ages 12-17):

Mountainsmith Youth Pursuit

youth pursuit
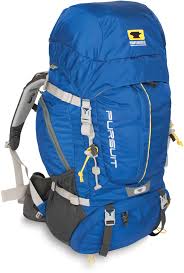
Why we use this pack: It is so hard to correctly size tweens and teens! They may be ready to carry the load of many adults, but for most teens, adult packs are still too large-framed, either in torso length or sternum/waist belt width or both. The Youth Pursuit is 45L (a nice in-between capacity) and offers an internal frame that’s fully customizable by velcro adjustment (for torso length). The waist belt fits our 12-year-old and our 14-year-old, and there are plenty of organizational pockets so older kids can be in charge of packing and using their own tools and gear. Kids get adult-pack quality ventilation on the pack pads, and pack material is equal to that of mom’s and dad’s. Read a full review here. Buy at sale price on Amazon.

Granite Gear Leopard

Why this pack: the Granite Gear Leopard is our older teen son’s all-time favorite pack. Yes, he’s in a height category that opens up his options to include any men’s pack, but with a thin waist, it can still be hard to find a proper fit. The Granite Gear Leopard fits perfectly, isn’t too big  at 58L (most men’s packs are 65 L or more), and doesn’t break the bank. It also comes in a minimalist 46 liters! He loves all the pockets and included loops for his accessories like an axe and a collapsible shovel, and how easily it can be cinched down or expanded. Buy on Amazon for under $150.

Top youth backpacking packs at a glance:

amzn_assoc_placement = “adunit0”;
amzn_assoc_search_bar = “true”;
amzn_assoc_tracking_id = “pitstoforkid-20”;
amzn_assoc_ad_mode = “manual”;
amzn_assoc_ad_type = “smart”;
amzn_assoc_marketplace = “amazon”;
amzn_assoc_region = “US”;
amzn_assoc_title = “My Amazon Picks”;
amzn_assoc_linkid = “2b3ff3efebcf632ee007032e7c7a5424”;
amzn_assoc_asins = “B00CQ9L2X2,B013FUTBAG,B009407Y60,B00BU96YIM”;

PCT section hiking with teens

We’ve been wanting to backpack on the Pacific Crest Trail (PCT) long before it was cool. This summer, my 16-year-old and I finally set out, tackling almost 70 miles of the PCT in Central Oregon. We built up to this trip with years of family backpacking, including several 3-4 night trips, starting when my son was just a toddler. How did we fare? We had one of our best backpacking trips ever!

hiking-PCT

Our PCT section hike spanned over 65 miles from Central Oregon’s Mckenzie Pass by Sisters to Olallie Lake, outside Detroit, Oregon. It took us through the Jefferson National Forest and Jefferson Park, past the three Sisters peaks, Broken Top, Three Fingered Jack, Mount Washington, and Mount Jefferson. Every day brought new scenery, from forests depleted by fire to mountain meadows still filled with wildflowers, to rushing creek crossings, to mountain ridge lines, saddles, and peaks.

Jefferson-peak

My son and I felt a keen sense of accomplishment as we navigated landmarks along the trail with our PCT data book and topographical maps, found our own water resupplies, made and broke down camp every night and morning, carried everything we needed on our backs, and relied entirely upon each other for basic survival. This trip was a chance for my son to shine as a young man, for me to let go a bit as a mom, and for both of us to bond. We met amazing people on the PCT, both fellow section hikers like us and thru-hikers going to Canada. The community spirit was uplifting, the scenery breathtaking, and the uninterrupted time in the wilderness invigorating.

A day in the life of a PCT section hiking with teens:

PCT-hike

Each section hike will look different, depending on where you start and end, of course, but a typical day on the PCT for us looked something like this:

7 am: Wake up. Stumble out of sleeping bags on stiff legs, retrieve the food bag (hung in the night to discourage critters from nibbling), and start boiling water for coffee and oatmeal (assuming we had enough water to spare for a hot meal).

8 am: Change into hiking clothes (our only hiking clothes), doctor any blisters on our feet, and tear down camp. This involves washing any dishes (we quickly learned to have as few as possible), putting away our stove and cooking pot, stuffing our sleeping bags and pads, taking down our little tent, and filling our water bottles for the day.

8:30 am: Hit the trail. Depending on the day, we hiked between 10-15 miles. Some days, we took a break mid-morning at a water source to cook a meal if we hadn’t had enough water to do so earlier, other days we hiked straight until lunch. When is lunch? When we were hungry. Regular rules about meals and routine don’t matter on the PCT: our bodies very quickly adjusted to a natural rhythm of eating when we were hungry and sleeping when we were tired.

Mid-day stop at a vista, lake, stream, or otherwise interesting landmark: Some days, we’d go for a swim in a lake if one crossed our path, other days we washed our clothes in a creek or sat on the saddle of a ridge, taking in the view.

Late-day stop: We’d always stop at least once or twice per day to filter more drinking water as the opportunity arose. We had to keep a steady eye on our drinking supply and the water sources listed in our data book. Every day, we ran into others on the trail, and we always stopped to talk a bit. We met wonderful people, all on the PCT for essentially the same reasons as us: to commune with nature, to challenge themselves, and to live deliberately and peacefully.

lake-on-PCT

5-6 pm: Arrive at the night’s camp. Where was camp? Wherever we could find one. We always had an ‘ending mile’ planned (aka, mile 14 of the day, for instance) that was near some landmark desirable for camping, such as a lake or stream. However, campsites didn’t always appear on cue. We sometimes stopped shy of our goal, but more often hiked further, in order to come to a good campsite.

7 pm: Set up camp, make dinner (usually mashed potatoes or noodles, as we always craved carbs), and filter water, unless at a dry camp. If we had wet clothes we’d washed in a lake or stream, we hung them to dry.

8 pm: Do any dishes (remembering to follow Leave No Trace practices), string up the food bag, make sure all our supplies are tucked away in our bags, get in our sleeping bags. Once in our sleeping bags, we’d study our topographical map to get a preview of the next day’s hike, then read our books until we fell asleep (usually as the sun went down around 9 pm).

campsite-on-PCT

How to plan:

Readers of Pit Stops for Kids may remember we started planning our PCT section hike months ago, using information gleaned from PCTA.org. Click on our post, ‘How to plan a multi-night PCT hike with kids’ for details on how we chose when and where to hike.

Since that post, our section hike plan changed a few times. We lost some participants, making the trip a mother-son endeavor, and gained support via car in the form of a trailhead drop-off on Day 1, a check-in and resupply late Day 2, and a pick-up on Day 6.

Once we knew where we wanted our hike to start and end, and how many days we had to accomplish our goal, it was a simple task to break down the trip in miles per day. We then cross-referenced this information with the possible ‘drops’ along the trail (places we could be met by others who could give us aid), and determined to have just one drop during our 6 days out. To do all this, we used the Pacific Crest Trail Data Book and the topographical map dedicated to Central Oregon’s section of the PCT (available at outdoor stores or online).

three-fingered-jack

The data book will tell you where along the trail water will be available (in the form of a creek, stream, pond, or lake), but does not tell you where to find campsites (though some GPS programs do). In many sections of the PCT, hikers are permitted to camp anywhere they find an established campsite. You can tell an established site because the ground will be packed down and there may be a small spur trail leading to it from the PCT. Often, other hikers will mark good campsites with cairns (piles or rock), handmade signs using sticks for arrows on the dirt, or trail marking tape.

How to pack:

When we backpack for a weekend or up to three days, we like a few luxuries in our packs, such as hammocks, camp chairs, and java presses. I know, I know. But when we section hiked the PCT, we went bare bones, in order to be as lightweight as possible. Here was what was in our packs (and nothing else), for a total of about 25 pounds per pack:

Clothing:

  • 1 set of hiking clothing (quick dry pants, t-shirt)
  • 3 pairs wool hiking socks
  • 2 pairs underwear
  • 1 set of base layers (long underwear, preferably wool)
  • 1 down or down-alternative jacket (lightweight, easily stuff-able)
  • 1 rain jacket
  • 1 pair of lightweight sandals
  • 1 pair hiking boots
  • sunglasses
  • sun hat
  • thin gloves

Equipment (divided between two people):

Food (again, divided between us):

We have a tendency to over-pack food, and we managed to do this again, even though we meticulously planned our meals. We have much smaller appetites than we anticbackpacking-food
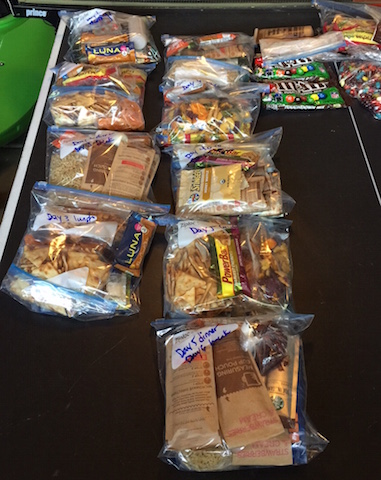
ipated, given how much we worked on the trail. We could barely manage to eat about 300 calories each during the evening meal, and we calculated double this amount. Whoops.

Breakfasts:

  • instant oatmeal packets (mix the hot water right into the paper sleeves if they’re the lined kind)
  • instant coffee (for us, only Starbucks VIA will do)
  • handful of dried fruit

Lunches:

  • protein bar of your choice
  • dried fruit
  • veggie chips or pita chips
  • tube of peanut butter to spread on chips
  • envelope of tuna
  • beef jerky
  • snickers bar or M&Ms to snack on

Dinners (one of the following):

  • instant mashed potatoes (we like Idahoan)
  • Top Ramen
  • dehydrated backpacking meal
  • mac and cheese
  • instant soup
  • envelope of smoked salmon or jerky to add to the carb-heavy meals

We essentially rotated these basic foods over and over. And yes, we got tired of them.

Tips we learned on the trail:

Look for trail signs: while many places along the PCT are not officially marked with mileage and other helpful tidbits, other hikers have often left signs to follow. Look for cairns that will direct you to the correct trail, or hand-scratched ‘pct’ letters in logs or even rocks. During one lucky moment, someone just ahead of us on the trail had made an arrow of sticks to indicate a hidden spur trail to an excellent camping site. When we met her later, we thanked her! Another time, we were almost out of water when we ran across a stick with these words in Magic Marker: “Washington Pond: 1/4 mile, muddy but if desperate?!” We were!

sign-on-PCT

Stop to talk with other hikers. They’re awesome, down to a person.

Let your kids have responsibilities. During our hike, my son was pretty much an equal with me, making important decisions and partnering in all the tasks and work. We both loved this. He’s preparing for bigger and longer hikes in his future, and I will know he’s prepared.

Stop to rest when it feels right. A few times on the trail, we pushed ourselves for no reason other than to ‘make good time’. When the only task of the day is to hike to the day’s destination, don’t be afraid to spend the whole day doing it.

Eat when you’re hungry. Once, we stopped at a creek mid-hike and decided to get out the stove and make a big bowl of chowder at 3 pm. It was supposed to be our dinner, but we wanted it then. We didn’t regret it.

Don’t duplicate equipment. It seems silly now, but we brought two stoves (very small and lightweight) and two pots (not so lightweight). We thought we might want to convenience of boiling two pots of water simultaneously (to have coffee and oatmeal at the same time, for example). We ended up preferring to have patience rather than carry the extra weight.

Issues to be prepared for:

When hiking most of the day, every day (regardless of mileage), certain physical issues may occur. It’s not fun to talk about, but…

rain-PCTChaffing: Skin rubbing against skin for hours at a time can cause major discomfort in sensitive areas. The solution: antibiotic ointment or Vasoline applied before hiking. It can also help to change underwear.

Diarrhea: Lots of water, plus lots of physical exertion, plus exposure to the elements and different food than usual can wreak havoc on the digestive system. Give it a day or two before worrying, making sure you continue to hydrate. Of course, make sure to filter or boil all water.

Bad moments: There will be low moments. Maybe the incline in the trail will seem endless, or a wind and hailstorm will beat down. Maybe you’ll be thirsty or hungry or your feet will be in agony. It’s good for kids (and adults) to remember that pain, discouragement, and suffering can be temporary, and that they can get through these times. Truly.

Blisters: AKA, the bane of my existence on the trail. I always get blisters, no matter what preventative measures I take. Bring lots of moleskin and athletic tape, use skin-tac to make your skin around the blister tacky before applying moleskin or bandages, and make sure your shoes fit properly. If you have tips for avoiding or fixing blisters on the trail, please let me know.

Dehydration: Ask your hiking partner when he or she peed last. Trust me, it’s an acceptable question on the trail.

Was it all worth it? Absolutely. Would we do it again? We definitely will, in-between more 2-3 day backpacking trips with all the kids.

How to plan a multi-night PCT hike with kids

If you backpack with kids, your family will eventually become interested in tackling an iconic backpacking route such as the Pacific Crest Trail. Unless you have a lot of time and stamina, you probably aren’t ready to through-hike the PCT, but a shorter PCT hike with kids is absolutely possible.

backpacking-trail

Planning a PCT backpacking trip is complicated, so we turned to the experts before planning ours. The folks at pcta.org put us in touch with trail expert Dana Hendricks, who has led volunteer crews for AmeriCorps, the Appalachian Trail Conservancy, and the American Hiking Society. She has through-hiked much of the PCT herself. We asked Dana the following questions as we set to work planning our hike.

Who should go?

Dana recommended anyone planning to hike a section of the PCT ‘warm up’ with day hikes or shorter overnight backpacking trips. Our family backpacks regularly, but never more than four days at a time. Because this trip would be at least one week on the trail, we decided two adults and the teens would backpack the entire trip, and another adult and the youngest (10 years old) would meet us for three days of the trip.

Where should we go?

The PCT is three states long, and not all sections are created equal. Our first question for Dana focused on where we should spend the seven days we decided to devote to the PCT. The good news: many people opt for day or section hikes on the PCT, so there’s a lot of research out there. Dana suggested we pick up PCT books at pcta.org to find the best section for our needs. The Day and Section Hikes series are excellent: we found detailed information on starting and ending points, and trail conditions and elevations.

Dana told us the PCT was designed as a stock trail, so the grade is 10% or less. This means most sections are suitable for kids who are used to hiking. There were no sections she felt were ‘off limits’ due to terrain. There are, however, dry sections which require carrying more water, and sections where snow may be a factor. For the sake of simplicity, we decided to eliminate these areas (the CA desert, Crater Lake, and the high Sierras). We also eliminated any areas without many landmarks to make the hike interesting, or areas that may be crowded with day hikers.

stuffing backpacking bags

After studying day and section hike books, and looking at our own needs for bodies of water (lakes or streams) and forest, we decided on a section in Central Oregon. Our route, which we’ll tackle in July, spans approximately 90 miles from Elk Lake Resort, through Sisters, to Olallie Lake. Here’s a screen shot of our route:

PCT-section-hike

How long to stay out?

How long our 90 mile route would take us depended entirely on our hiking speed, of course. While many PCT hikers crush the trail, hiking up to 20 miles a day or more, we wanted a more leisurely pace. We used PCT Planner (above) to gauge our distance and time on the trail. It was easy: we just input our starting and ending points, then added our planned hiking time per day. At the pace we felt comfortable with, we’d spend seven days on the trail. This would be longer than our longest backpacking trip so far, which led us to our next question…

How to plan food drops?

backpacking with kids bear canisters

Dana explained that most PCT hikers arrange to have food drops well before their trip. Hikers can mail food to themselves to post offices along the trail, but the idea of leaving the trail and restarting during such a short trip didn’t appeal to us. Instead, we’ve decided to have friends and family meet us on the trail with a resupply of food. We have this luxury because the PCT section we’ve decided to hike is within a few hours’ drive of our home. We know we can comfortably carry four days’ worth of food from previous trips. We will be met on the trail by family members at the end of Day 3, which will coincide with our path through Sisters.  We couldn’t arbitrarily decide when they’d meet us, however: there are set places where it’s easy to access the PCT, and we needed to plan our reunion accordingly. Another way to tackle food drops is to have a non-hiking friend or family member meet you with food at a designated trailhead en route. All re-entry points along the trail are listed on PCT Planner.

How light should we pack?

While we backpack regularly, we’re not what you’d call ultra-light backpackers. We like our luxuries, like hammocks and coffee presses. While Dana agreed with me that some of these items will need to be left at home to leave room for more food, she did remind me not to compromise on any items that keep us warm and dry. A full list of tips for backpacking with kids can be found here. In short, we needed layers, waterproof clothing, shelter in the form of a lightweight tent, food and cooking supplies. We will bring books and a deck of cards, but no other major luxuries. By keeping our packs light, we’ll adjust more quickly to seven days of hiking. Tip: For basics in backpacking gear for kids, check our Backpacking Gear page and How to Plan a Multi-Day Backpacking Trip.

How best to follow Leave No Trace principles on the trail?

We always practice Leave No Trace while in the wilderness, and we wondered whether it would be harder than usual to find established camp sites en route on the PCT. Dana says no: we’ll be able to find established sites virtually everywhere on the trail. She reminded me to camp 100 feet from water sources, and to leave recovering sites alone if possible.

Additional PCT hikes suggested by Dana and PCTA:

There are many other route options for families looking to hike a section of the PCT, of course. Dana also suggests Mt Hood National Forest from Lost Lake to Wahtum Lake to Eagle Creek (a PCT alternate) into the Columbia Gorge or Rock and Snag Creeks, near Bridge of the Gods in Washington.  Dana describes the latter as kid-friendly, as either a short out and back day trip or a 22 mile section hike. Find additional staff recommendations here.

Pit Stops for Kids selected as Oboz Footwear Ambassador

Readers of Pit Stops for Kids know how much we love to cover outdoor travel, and how we advocate equipping kids (and Mom and Dad) in proper outdoor gear in our Travel Gear We Use series. This year, we’ll be taking this passion a step further as official ambassadors for Oboz Footwear.

Clouds Rest Yosemite National Park


If you look on the right-hand side bar of the site, you’ll see at glance the brands and publications with whom the Pit Stops for Kids team works most closely. These are not advertisers. They are not chosen at random. I either write additional content for their sites, or, in the case of Oboz and Aventura Clothing, which I introduced readers to last year, we have a working partnership.

My East Coast editor and I test a lot of gear and travel products each year, and we don’t take this lightly. As a parent, I understand how difficult it can be to find solid gear reviews, and how big an investment quality gear can be. We are not paid by Oboz (or any other brand to review their items). Paid posts are always clearly marked on Pit Stops for Kids, or are displayed as ads.

Oboz makes hiking boots and shoes for men and women, not kids, but I decided to accept Oboz’ invitation to become an ambassador for two reasons. Firstly, Oboz supports our mission of whole families getting outdoors and into nature. Plus, those teen boys grow into adult shoes in a hurry, don’t they? Secondly, I am already familiar with Oboz products, and know I can stand behind them. I told Oboz as much when they interviewed me for this position, but I never told them–until now–the exact experience I have with their hiking boots.

Here’s what happened. Last summer, our family embarked upon our annual three-day backpacking trip. I had reviewed the Oboz Bridger Mid BDry earlier in the year for Practical Travel Gear, and loved them, so I grabbed them for the trip. We began hiking well after dinner, and wanted to make good time. We covered six miles fairly quickly. So quickly, in fact, that I didn’t notice the hot spots developing on the back of my heels until about mile five, at which time it was really too late to prevent them from becoming full blown blisters. I nursed my wounds during our camp day that followed, but when it came time to pack out, my feet were still angry and raw. I was forced to cover the distance back to the trailhead in my water shoes, paired with wool socks to keep out pebbles and dirt. I was so angry at my Oboz I wanted to fling them from a summit (and this was before Cheryl Strayed made this trendy).

granite-lake-backpacking

Calvin, wishing his mom would hobble along faster.

When I got home, I looked up Oboz Footwear’s customer service information. It’s important to note that when we review products, we often work directly with brand representatives. Therefore, if there’s a problem, it’s fixed fast. Is it fixed that fast for other customers? Sometimes I don’t know. So I made a point to go through the usual channels at Oboz instead of calling my PR rep. I got a response to my email lightning fast. The service rep asked me many questions about my boots, about my feet, and the terrain of my trip. Yes, I told him, I’d definitely broken them in beforehand. Yes, I’m an experienced hiker. We both scratched our heads. Finally, their team asked me to send photos of the shoes. When I went to do so, I noticed something…I’d taken the insoles out of my Bridgers a few weeks before to wash them, and never put them back in. 

The obvious result: way too much room in my boots, leading to friction and blisters. I was so embarrassed as I apologized to the folks at Oboz. They were kind enough to pretend this happened all the time. I found my insoles and all was well again with my boots. Moral of the story: Oboz has great customer service and will help make sure your boots work for you, even if you’re an idiot. (Now we’ll just have to wait and see if they still want an idiot for an ambassador.)

If they keep me, I’ll be writing regularly for Oboz during 2015, offering hiking and backpacking tips, shoe reviews, and backpacking trip reports both here and on their blog. I’ll cover expert stuff like, ‘hey, don’t forget to assemble your shoe before wearing it’ and other high-level ideas. I hope you’ll follow along, and get inspired for your own family outdoor adventures! If I can do it, you can!

Where to backpack with kids in Northern California

Will you be backpacking with kids this coming summer? Most families who love backpacking with kids are familiar with backpacking options in popular regions such as Yosemite National Park, but the following lesser known areas offer backpacking just as scenic and often crowd-free.

where-to-backpack-with-kids

Tahoe and Northeastern Sierra Nevada:

Our favorite section of the Northeastern Sierra Nevada mountain range is located in California’s Plumas County, adjacent to the town of Graeagle. The Lakes Basin Recreation Area, just south of Graeagle up Gold Lake Road, offers 47 trails and over 30 alpine lakes. Some of these trails are available only for day hikers, but link families to backpacking regions. To start out directly on a backpacking route, begin at the Jamison Mine Trailhead en route to historic Johnsville (10 miles from Graeagle) and hike approximately three miles uphill to beautiful Rock Lake. This alpine lake offers idyllic camping, swimming, and rock jumping. Adjacent Jamison Lake offers great trout fishing.

Tip: consider renting a Tahoe vacation home before or after your backpack trip. We like to spend a few days pre-trip in a home, where we can organize backpacking foods, pack our backpacks, and enjoy a few luxurious days before entering the backcountry.

Trinity Alps and Marble Mountains:

Further north near the California/Oregon border, the Trinity Alps Wilderness in Shasta Trinity National Forest consists of chiseled granite peaks and alpine lakes, with elevations from 2,000 feet in creek drainages to 9,000 feet at summits. This wilderness offers many different trails ranging from 1.5 miles to 15 miles at varying levels of difficulty. Spring backpacking is often an option here (in the lower elevations) and mid-week trips are encouraged to beat crowds. Our pick: the five mile hike to Granite Lake on the Swift Creek trailhead. Tip: families will want to arrive early on weekends or during mid-week to secure the prime campsite lakeside.

granite-lake-backpacking

The nearby Marble Mountains are less populated, and easily accessed from I-5. Our favorite backpacking route through the Marble Mountains is to Campbell Lake, located off the Shackleford Creek Trail (three hour hike). Visibly stunning, Campbell Lake offers great swimming. The Trinity Alps and Marble Mountain region offers many loop trails perfect for families wanting to adjust their trip to suit kids’ abilities.

Lassen National Park:

Lassen National Park is one of the least visited in the US, and we have no idea why! However, families can take advantage of the low crowds and find prime backpacking wilderness with relative ease. Grab a wilderness backpacking permit when you enter the park, and then head east, to where the top backpacking loop trails depart. You’ll find alpine lakes, creeks, and lodgepole pine forests in ample supply. The weather tends toward hot and dry, which means families will encounter fewer mosquitos than in damper areas. If you head toward geothermal regions of the park, bear in mind that camps cannot be set within 1/4 mile of geothermal activity (bubbling pots, etc).

backpacking-trail

No matter where you backpack, be sure to get the necessary permits at the ranger station or forest service station nearest your trailhead, and check conditions before arriving. Make sure you have a water filtration system or means of fresh water, and bear canisters where required. For more general backpacking tips, read How to Plan a Multi-Day Backpacking Trip with Kids. For gear suitable for kids while backpacking, check out our Travel Gear We Use series.

The above post is written in partnership with VacationRoost.com.

Uncrowded Yosemite: backpacking Yosemite National Park with kids

Would you believe that in July, in the center of Yosemite National Park, we enjoyed an entire day where we never saw another soul? It’s possible, provided you depart from the usual tourist destinations in the valley and explore Yosemite backcountry.

Yosemite backcountry with kids

Backpacking Yosemite National Park with kids:

We chose to hike a portion of The John Muir Trail, a 211 mile path between Happy Isles in Yosemite Valley and Mt. Whitney in the California desert. While hardcore backpackers will hike the entire length in as little as 15 days, the Yosemite National Park portion of the John Muir Trail makes for a nice escape for backpackers with less time (or young kids). Backpackers hiking the John Muir trail in Yosemite traditionally start at the base of Vernal Fall in Yosemite National Park, and climb upward past Vernal and Nevada falls, Half Dome, and Little Yosemite Valley campground while making their way toward Tuolumne Meadows. For our John Muir Tail trip with young kids, we decided to tackle the John Muir Trail in reverse, which allowed for more downhill sections of trail and fewer crowds until the end of our journey.

Planning a Yosemite backcountry trip:

Backpacking the Yosemite National park backcountry with kids involves planning. Anyone planning to hike any portion of the John Muir Trail must obtain a Yosemite wilderness permit. Permits can be secured up to 168 days prior to the date desired, and for summer backpacking in Yosemite, reserving a permit the full 168 days out is recommended.

Upon arrival to Yosemite, you’ll need to check in at a Yosemite National Park Wilderness Center, where you’ll pick up your permit as well as bear canisters if you don’t have your own. Bear canisters must be used to store all food and scented items such as toothpaste, medications, and lotion, and can be rented (for only the price of a deposit). You’ll need to leave space in your packs for these.

If you plan to hike Half Dome, Half Dome permits are required, and they are separate from backcountry permits (though you can obtain both simultaneously). And if you plan to stay a night before or after your backpacking trek in Yosemite National Park (recommended), be sure to secure lodging early, as this is one of the most crowded national parks in America. Backpackers can also make use of free backpacker campgrounds the day before and after their backpacking trip.

Mist Trail Yosemite National Park

On the John Muir Trail:

Day 1: Tuolumne Meadows to Sunrise Lake (3 miles)
In order to start our Yosemite backpacking trip in Tuolumne Meadows, we began at the Sunrise Trail Head at Tenaya Lake on Tioga Road. We followed the Sunrise Trail up steep switchbacks to connect with the Forsyth Trail near beautiful Sunrise Lake (a great first night camping option).

Day 2: Forsyth Trail to Clouds Rest and beyond (8 miles)
From Sunrise Lake, we continued to follow the Forsyth Trail to intersect with the Clouds Rest junction, leading 2 miles to arguably the best viewpoint in Yosemite National Park. From Clouds Rest, hikers can see the entire Yosemite Valley, including an unique view of Half Dome. Note: the pinnacle of Clouds Rest is fully exposed, with steep drop offs on each side. This is not a place for young children or anyone with vertigo or a fear of heights. Since I fall into that category (hiking with a small child), we viewed the Yosemite landscape from just .2 mile below the top, which also offers wonderful vistas.

Hikers can continue past Clouds Rest to intersect with the John Muir Trail several miles later, but as this section of trail is still exposed and at great heights, we opted to return the 2 miles back to the Forsyth Trail and join the John Muir Trail much earlier. This first section of John Muir winds through old growth forest alongside Sunrise Creek, and affords several nice camp sites adjacent to this water source. This section of the John Muir Trail is less traveled, but we were still surprised to find we didn’t encounter a single hiker all evening, night, or morning.

Clouds Rest Yosemite National Park

Day 3: Sunrise Creek to Little Yosemite Valley (5 miles)
Day 3 took us along the John Muir Trail from Sunrise Creek into Little Yosemite Valley. This backpackers’ haven offers numerous campsites along the Merced River (perfect for swimming in after a long day hiking!). Though lively, Little Yosemite is a fun oasis for hikers, offering conversation and companionship around the communal fire pit after days of relative isolation.

En route to Little Yosemite Valley, the John Muir Trail offers views of Half Dome, and the steady accent of hikers navigating its cable system to the top. Should you wish to ascend Half Dome yourself, the trail intersects with the final 2 miles of the Half Dome Trail mid-way through your hike down to Little Yosemite. Note: this is another steep, exposed trail. Though children can ascend it, be advised that very small kids may not be able to reach the cables, essential to a safe ascent. Our 13 and 11-year-olds could make the trek, but not our seven-year-old. For those not challenging Half Dome, it’s fun stop on John Muir Trail or Little Yosemite Valley and use binoculars to watch the climbers.

Day 4: Little Yosemite to Valley Floor (4.5 miles)
Our final day on the John Muir Trail led us down from Little Yosemite Valley to spectacular Nevada Fall, where the trail splits into the John Muir or the popular Mist Trail. We opted for the Mist Trail in order to glimpse the best views of nearby Vernal Fall, but the steps descending both falls are steep and can be slippery when wet. Be advised that the Mist Trail gets crowded with day hikers, and can be hard to navigate with overnight backpacks. The option of continuing on the John Muir Trail has its own set of disadvantages: it’s a longer route to the valley floor, and more exposed, providing little shade.

Safety on the John Muir Trail and in the Yosemite backcountry:

In addition to dizzying heights, bears, and crowds near the valley floor, backpackers need to be aware of the significant elevation gains to be experienced on the Yosemite section of the John Muir Trail. Elevations reach over 9,000 feet, necessitating plenty of water intake to prevent headaches and nausea. Other wildlife can pose a threat if hikers are not alert, including rattlesnakes — we encountered the biggest we’ve ever seen at Little Yosemite Valley.

Getting to and from Your Car:

Whether you hike the John Muir Trail from the valley floor up or from Tuolumne Meadows down, as we did, you’ll need transportation back to your car at the end of your trip. Yosemite National Park offers free shuttle service throughout the valley, but to travel to Tuolumne or vice versa, you’ll need to take Yarts, a paid shuttle service with stops in Yosemite Village and points throughout Tuolumne. Hikers cannot make reservations in advance for Yarts, and though we were told busses never fill up, that was not the case. Be sure to be at the stop before the allotted time and have cash in hand. One-way tickets were $8 at the time of our visit.

How to plan a multi-day backpacking trip with kids

Yes, kids can backpack! And yes, it’s a bit more work than traditional tent or RV camping with kids, but twice as rewarding. We’ve backpacked annually with our kids since Nate (now age 13) was 13 months old, and while older kids make for the best backpackers, even backpacking with babies and toddlers is possible. To ensure a successful backpacking trip with kids, most of the work will take place ahead of time. What you need to do to prepare for safe backpacking with kids:

backpacking with kids

Start with no more than 2-3 days out.

Backpacking for only one night out is kind of pointless (the effort put into packing and organizing all the stuff you’ll need hardly justifies it), but if you’re backpacking with kids who cannot carry the weight of adults, you will be limited to no more than 3 days in the wilderness unless you can arrange for more food supplies to be delivered to you. Remember that you need to pack in (and out) everything.

Plan your route with your kids’ ages and abilities in mind.

While older kids or veteran backpackers will enjoy the challenge of packing from point A to point B, younger kids and novices benefit from a base camp. Consider packing a few miles into your wilderness destination and camping more than one night at a desirable landmark, such as a lake or river. Those who want to do more hiking can opt for a day hike, and younger kids can stay by the water to play. (This eliminates the need to break down a camp every day, which can be draining.)

backpacking with kids

Make camp food fun.

While backpacking, every ounce of weight matters, and most of the ‘fun’ camping food will need to be left behind in favor of freeze-dried meals. But you can still make backpacking food fun for kids by allowing them to create their own trail mixes from bulk food offerings pre-trip. (Just avoid chocolate items that will melt.) We allow each kid to take three individualized trail mix baggies per three-day trip. Other ‘fun’ foods that backpack well: Babybel cheese, beef jerky, hot cocoa packets, and hard candies that won’t melt. Kids also love having their own plate, cup, and utensils. We make our kids carry (and clean) their own.

backpacking foods for kids

Carry the right equipment.

Having quality equipment for kids is vastly important while backpacking. The wrong-sized pack or an inadequate sleeping bag can make a great trip miserable. Kids age 6 and up should have packs that fit them properly (head to your local outdoors store to try on models). We love Kelty Junior Tioga External Frame packs for younger kids, and Mountainsmith Youth Pursuit packs for older kids. Sleeping bags should be kid-sized (no point in them carrying something too large for them), and pads should be small enough. Our kids each carry their own sleeping bag, pad, clothing, and food utensils in their pack (among other things for the older kids). It’s also useful for kids to each have their own flashlight or headlamp, and be responsible for making sure it’s loaded with batteries. Tip: Kids should take care of all their own equipment. All of mine know how to stuff their own bags and clean their own mess kits.

stuffing backpacking bags

Leave the toys at home.

Kids will invent games and create new toys on the trail out of sticks, rocks, and all sorts of new treasures they find. Leave the rest at home! The only exception: a book for everyone (Kindles are lighter than paperbacks now) and a deck of playing cards.

Be safe.

Find out what safety measures need to be taken where you’ll be going. Use bear canisters where required, and store food away from camp where not required. We carry bear spray for emergencies, and carry one cell phone to be activated if we’re lost. (Five years as a Search and Rescue volunteer taught me that cell signal pings do often assist searches.) Kids should carry whistles to use in case separated, and bright clothing is useful as well. Always check in with the local ranger’s station or let family at home know where you’re going and for how long.

backpacking with kids bear canisters

If you’re destination requires it, remember to bring bear canisters to store all food items (even toiletry and first aid items with an scent, like toothpaste or ointment). Where canisters are not required, store all food in a sack to hang in a tree at night to deter foraging, and wash dishes and brush teeth away from sleeping areas.

Plan when to go.

‘Summer’ means different things in different places. Make sure the dates you choose to backpack don’t coincide with heavy mosquito season, or aren’t pre-snow melt. If you’re planning to backpack on a summer weekend in a popular wilderness area, start out early to ensure a site, and no matter where you’re headed, check to find out whether you’ll need your own water source (at very least, you’ll need a filtration system).

Read other backpackers’ accounts of the area you plan to hike, and always carry a topographic map of your hiking route. Tip: some areas require a backpacking permit. Start planning your trip early to figure out what you’ll need, when you’ll need it.

Pin for later!

how-to-plan-a-backpacking-trip