Maine with kids: Baxter State Park backcountry itinerary for families

Baxter State Park is Maine’s largest expanse of untamed public wilderness. With almost 210,000 acres to explore, where do you start? Our Baxter State Park backcountry itinerary for families includes days in the frontcountry enjoying Baxter’s car camping options, several days in Baxter’s backcountry, then a rest day to play and explore before departure.

Baxter’s scope and size is on a national park scale, but unlike national parks, almost every lake, pond, waterfall and stream in the park is accessible only by trail. In very few places in Baxter can you drive up to see anything, and even then, you must drive miles upon miles on dirt roads. In other words, you earn you sightseeing! Baxter limits the number of visitors to the park daily, which means you won’t be rubbing elbows with crowds of tourists. It also means you have to be organized about your trip and get the required permits you need early. Here’s how!
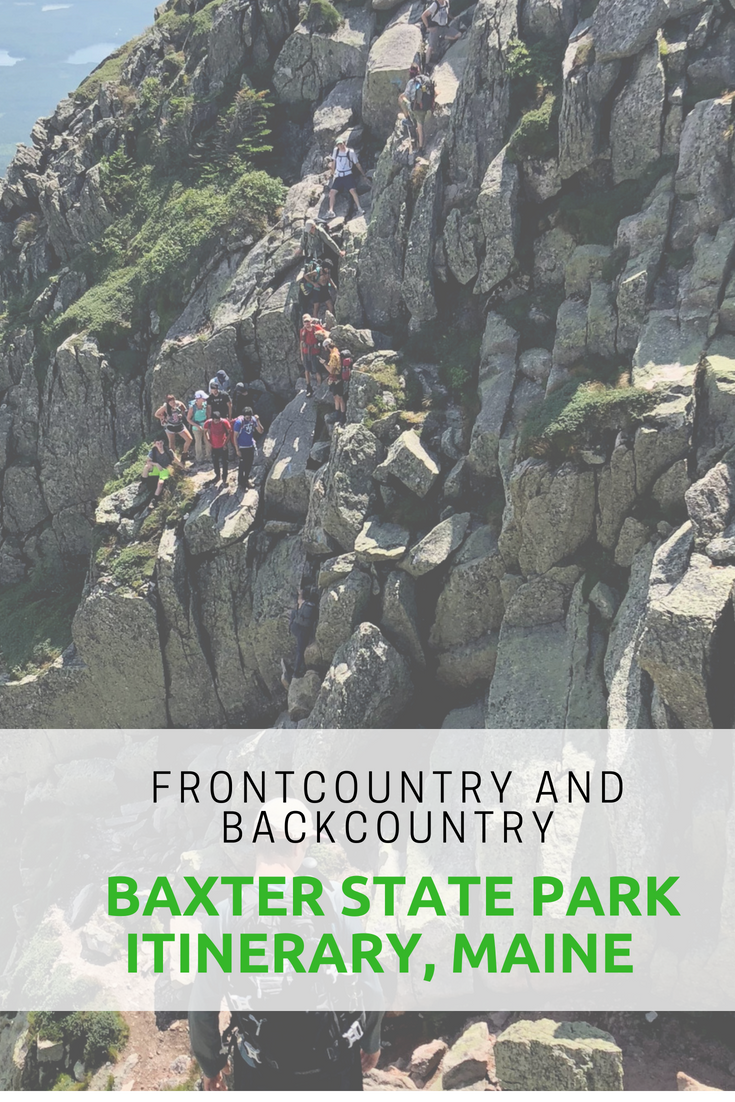
The best way to experience Baxter State Park is by camping, though day permits are available as well (if you opt for that, stay in nearby Millinocket). Here’s our suggested itinerary, after doing most things right and a few things wrong during our five days in Baxter.

Day 1: Frontcountry camp at Roaring Brook Campground

In case you’re not sure, when I say ‘frontcountry camp’, I mean ‘car camp’, or camping via car access. Roaring Brook Campground is about eight miles into the park after you check in at the ranger station at the Togue Pond entrance, past Millinocket via dirt road. The campground, like all in Baxter, is remote and basic, with nicely-kept pit toilets, a place to purchase firewood (bring cash), and a staffed ranger station, but no other amenities, such as showers or potable water.
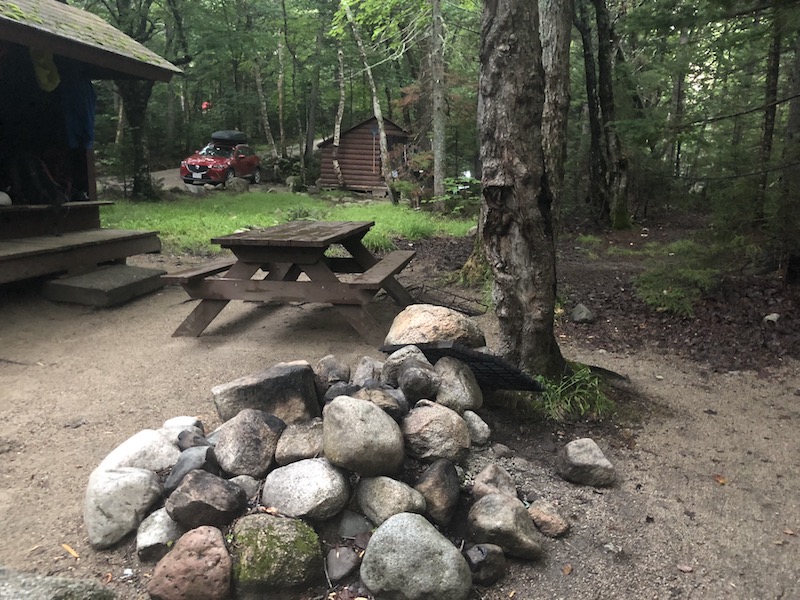
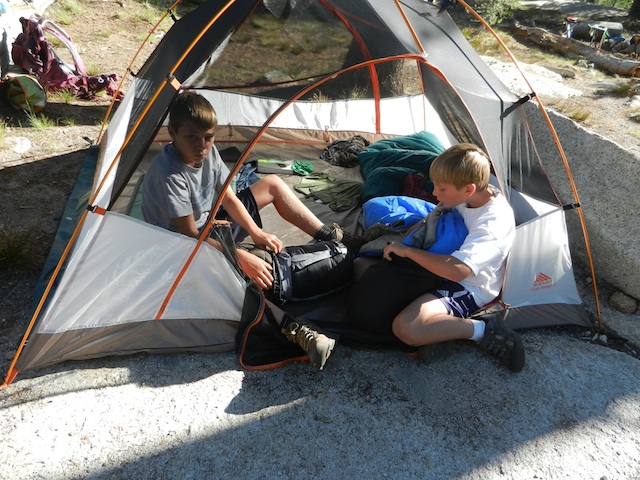
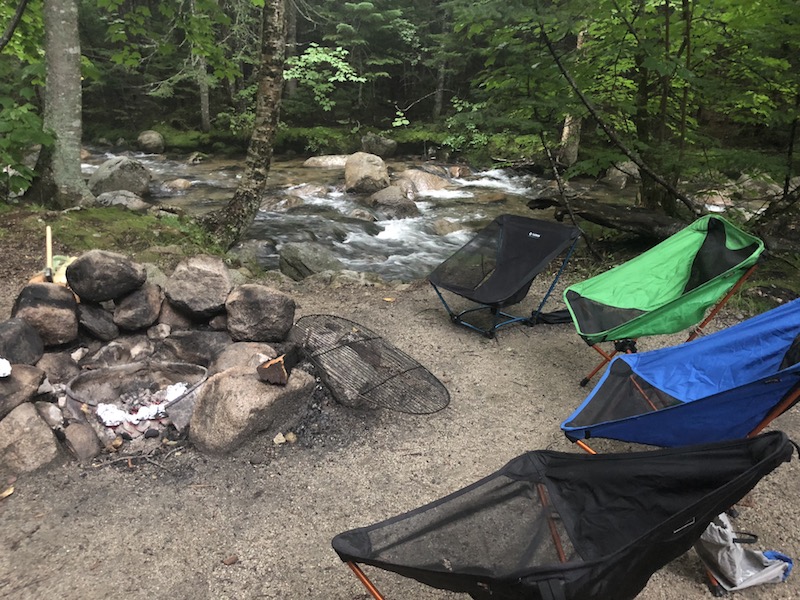
You can pick between tent sites and lean-to sites, and I recommend the latter, because they’re on the brook. You get a basic wooden shelter with a platform for each site, plus a picnic table and fire pit. We loved the shelters (lean-tos) throughout Baxter, as they provided just enough protection from the afternoon rainstorms and gave us a place to roll out our sleeping bags off the dirt. They’re not enclosed, however, and you won’t be safe from mosquitos there, so you can opt to set up a tent inside the shelter (but not outside of it). Roaring Brook is cold and clear, and we loved swimming in it.


Tip: You MUST enter Baxter State Park before 8:30 pm, so time your arrival accordingly. Also, the entirety of Baxter is ‘carry out’ for all your trash, so bring trash bags and plan on storing your trash in your car at night. You must also stow away all your food at night.

Day 2: Hike Mount Katahdin

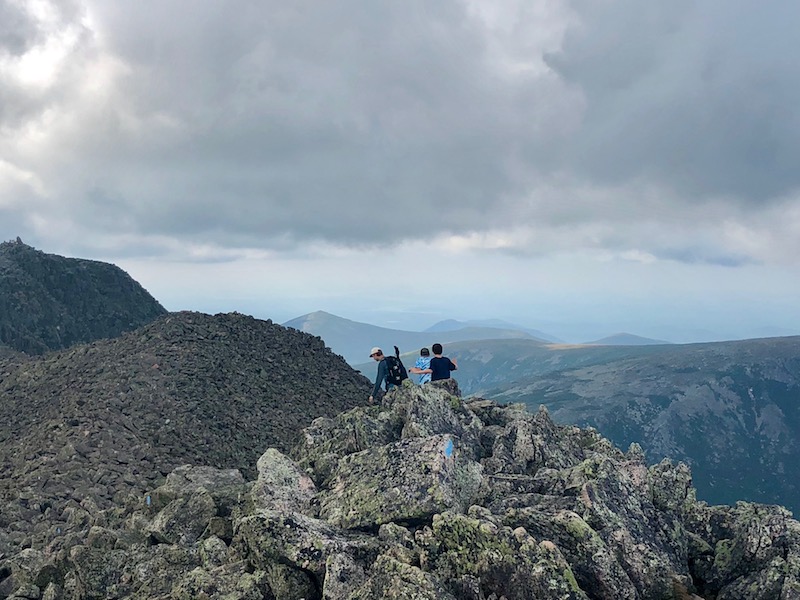
If summiting Mount Katahdin is on your to-do list in the park, do it early in your trip, while you’re still fresh. It’s 5.5 miles (pretty much straight up) from the Roaring Brook Campground, and it took our family (seasoned hikers) 12 hours to complete. The trail is extremely strenuous, and the final mile of the summit hike is along a ‘knife edge’ with some scary-looking drops. If you go: bring tons of water, and a means to filter more on the trail (you’ll need it). Also bring headlamps in case you’re caught hiking after dark. We took the following route: Roaring Brook to the Helon Taylor Trail, to the Knife Edge, to the Saddle Trail, to the Chimney Pond to Roaring Brook trail. It was 11 miles that took us forever to complete.
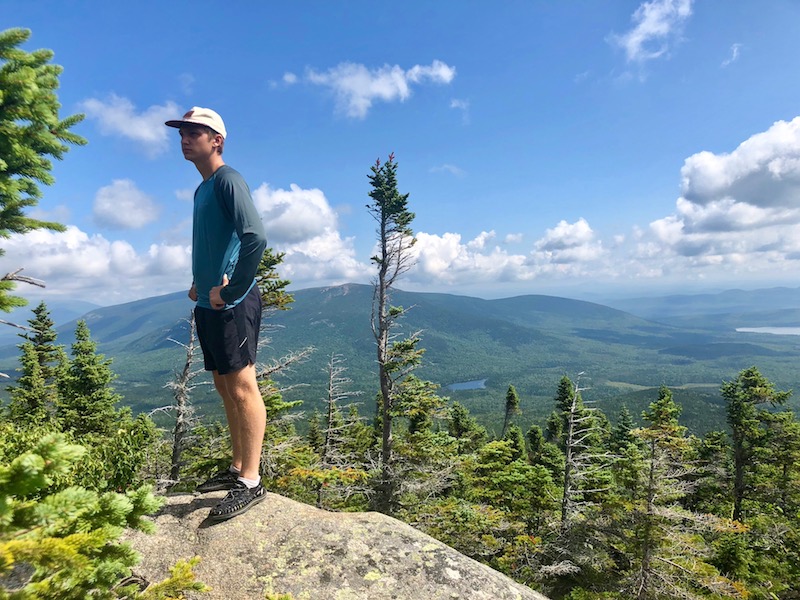
Note: Kids under age six are NOT ALLOWED above the treeline at Katahdin, though on our visit, we did not see a ranger monitoring this. I’m told there usually are. We took a seven-year-old, my niece, who rocked it, but she’s unusual in her awesomeness.

If you don’t want to tackel Katahdin, I recommend the Chimney Pond trail from Roaring Brook (3.3 fairly strenuous miles) to enjoy a picnic lunch at Chimney Pond, which has fantastic views of Katahdin right at the base of the mountain.
Day 3: Recover from Katahdin

This is where we made a mistake in our itinerary. We didn’t give ourselves a rest day after summiting Katahdin. Stay one more night in Roaring Brook and plan on sticking around camp. Enjoy the swimming and maybe go .2 mile to Sandy Pond, to try to spot the moose who like to hang out there at twilight. No nothing more!

Day 4: Head into the backcountry

If you’re prepared for backpacking in Baxter, depart Roaring Brook today, hitting the Russell/Sandy Stream trail. The destination: either Russell Pond Campground with lean-tos (7.2 miles away), or, if you don’t want to go quite so far, reserve at Wassataquoik Stream, which offers several more lean-tos with great swimming (5 miles away). If you’re ambitious, you could aim for Wassataquoik Lake, 9 miles distant, which doesn’t have a campground but does have several more lean-tos. Russell Lake has a staffed ranger office and lean-tos, a bear line, and pit toilets, and we settled in at two of them, adding a tent site for our group of 10.

Note: Baxter State Park is VERY strict about group size and where you can camp. This is a good thing, as it eliminates big groups in campsites they don’t fit into. If you reserve a lean-to made for four, you can ONLY have four people sleep there. Ditto for six-person lean-tos and tent sites.

At Russell Pond, you can use the provided canoes at the dock for a small fee (I believe it was $1/hour, on the honor system) and you can swim, though we don’t recommend it (there are many leeches here). It is, however, a good place to spot moose. The Wassataquoik Stream lean-tos are better for swimming, and theWassataquoik Lake lean-tos offer a bigger lake (better for swimming) and more canoes.
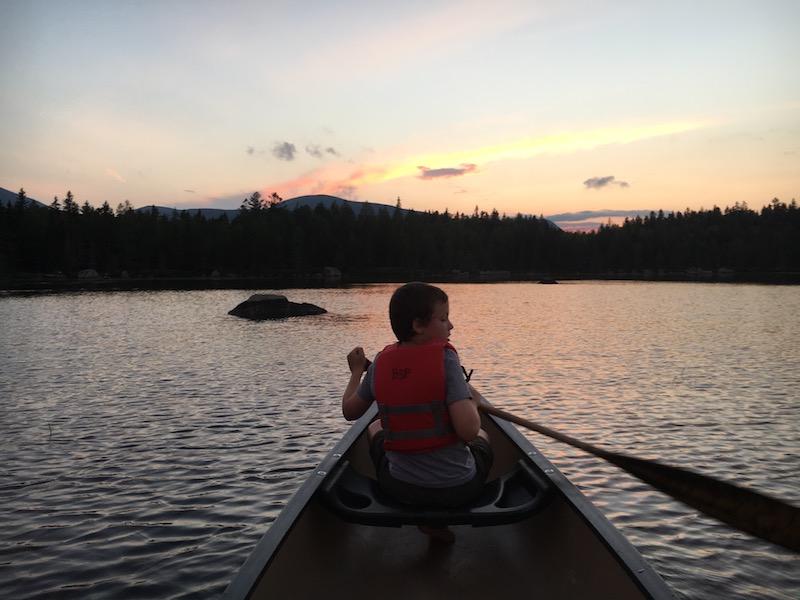
Alternatively, you could backcountry camp at Chimney Pond instead of Russell Pond (see description above). It’s a shorter distance, though a rockier trail.

Day 5: Day hike from Russell Pond

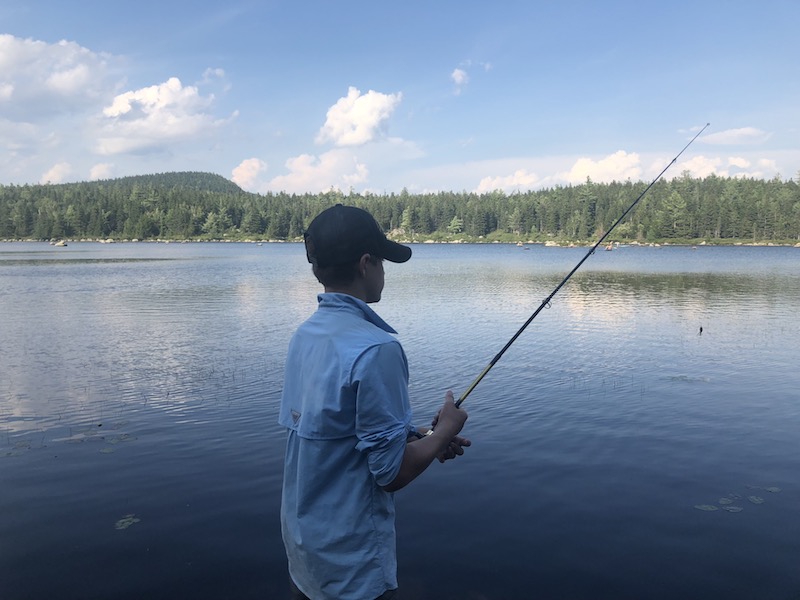
We enjoyed hanging around camp and day hiking from Russell Pond to Wassataquoik Lake (2 miles) on this day. We played board games and cards in our lean-tos, picked blueberries in the wild patches nearby, and tried to spot moose.
Day 6: Hike back to the frontcountry

Return to Roaring Brook today, and spend the late afternoon cooling off in the brook. Pack up and depart Baxter the next morning, checking out additional parts of Baxter if time allows. We recommend Blueberry Ridges or Ledge Falls if so, and if not, hit a last swim spot just outside the park boundary at Togue Pond. You can grab a nice sandwich and some souvenirs from the North Woods Trading Post just outside the park toward Millinocket, and if you want a bigger meal, we recommend the friendly and affordable Sawmill Bar and Grill.

How to reserve your campsites:

Baxter State Park is popular, and as mentioned, entry is limited. To ensure you get your campsite, reserve far in advance. Baxter uses four month rolling reservations, so you’ll want to reserve exactly four months before you desired time. You can reserve online or by phone.
More tips:

  • If you’re day hiking Katahdin (staying in Millinocket), you’ll want to reserve your parking space (these are limited as well!). Here’s how. Parking reservations are only held for you until 7 am, then are given away on a first-come, first-served basis. Yes, you really need to start that early. If you’re camping in the park, you don’t need a parking reservation.
  • You’ll need to treat ALL your water in the park. Bring a good filter. We like the Sawyer Squeeze to bring on day hikes and the Platypus GravityWorks for in camp.
  • You cannot bring firewood into the park. You must purchase it in camp.
  • No pets are allowed, even in car camping campgrounds. Plan accordingly.
  • Check in at every ranger station as you hike. Bring a phone and treat it as an emergency device (you won’t get service in the park anyway).
  • Pack out all your trash…make it easier on yourself by reducing packaging on your food before you arrive. Store all food and trash in your car at night in the frontcountry, and on bear lines in the backcountry (use your sleeping bag stuff sacks to store food and hang it from the line provided).
  • Backcountry campgrounds DO include pit toilets with toilet paper. They were all in good condition during our visit.
  • Enjoy the Maine wilderness!
 

Family camping hack: Dispersed camping tips

Have you ever been on a road trip, paid around $100 a night to stay at a basic motel, and thought to yourself that you’d rather pay less and see more nature along the way? Or have you ever camped in a campground amid loud neighbors and wished you could find a place to pitch your tent away from the masses? If either question has crossed your family’s minds while traveling, dispersed camping might be a good option for you. If dispersed camping sounds intimidating, we have dispersed camping tips ready for you.

What is dispersed camping?

Dispersed camping simply means camping anywhere in the National Forest outside of a designated campground. No services will be available. such as trash removal, and little or no facilities will be at your disposal, such as tables and fire pits, or bathrooms or showers. However, dispersed camping is free, and you can usually count on finding a campsite where you can be alone in the wilderness, via car instead of hike-in.

You’ll be responsible for packing out everything you pack in (follow Leave No Trace principles), and you’ll need to remember to bring basics you might not think about when camping in campgrounds, such as potable water, toilet paper (and a shovel), and portable chargers for phones, lanterns and the like. Store all your food items in your car or in a bear canister at night, as food storage lockers will not be present. Think of dispersed camping as backpacking, but with your car: you need to be completely self-contained.

So how do you find dispersed camping locations?

This is the tricky part. You can use any road map to locate National Forest Service land in the vicinity in which you want to camp, but the best way to find out what areas are open to dispersed camping is to contact the nearest Forest Service office to the area you wish to visit. Many people drive out on forest service roads into the woods and find a clearing or a spot near a stream or with a view of the mountains. Use maps to find water sources near your desired camp area (but remember it will not be potable).

Only drive on existing roads to prevent resource damage. Dispersed camping is allowed in a one-mile perimeter away from campgrounds and 100 feet from any stream. To prevent resource damage please keep your campsite within 150 feet from a roadway.

Sometimes, though, it’s hard to identify exactly what is forest service land and what is private land. When we’re unsure, we’ve found its sometimes worth spending a few dollars to use Hipcamp.

Hipcamp is a website that mimics AirBnb, but for campsites. Private owners (hosts) post their camping options, which families can search for by location and date. Essentially, Hipcamp sites are dispersed camping on private land with permission. We have paid about $20 per Hipcamp site, paid via the website much as you’d do for AirBnb. The host then contacts you with exact directions to the site. Like when using AirBnb, it’s important to read reviews before booking, to make sure the host will be a good communicator and offer solid directions. And just like when disperse camping on forest service land, it’s crucial to pack everything out and leave the site as nice as when you found it (or better).

Hipcamp is popular with young adults looking to camp in groups (think festival-goers) but is a great option for families as well. Look for options with plenty of space in which to find a private area to camp. On a recent road trip through Nevada, we found a completely isolated Hipcamp location, and enjoyed a night to ourselves amid antelope and a perfectly starry sky. We brought a small stove, potable water, headlamps, food and a tent, and were completely cozy and self-contained for $20 instead of the $100 we would have spent on a not-so-great hotel room in a nearby town.

Have you disperse camped or used Hipcamp? Let us know in the comments!
Lakedale Resort: San Juan Islands glamping

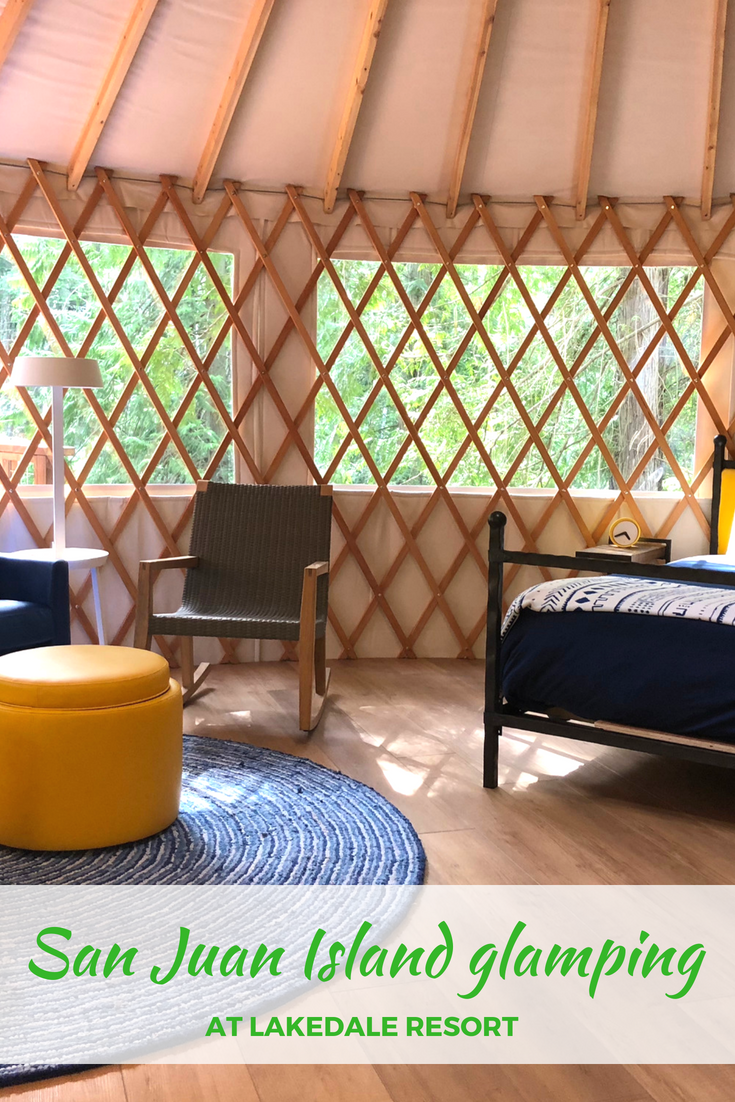
After a stay in 2015, we listed Lakedale Resort at Three Lakes as our #1 kid-friendly resort pick on San Juan Island Washington. And guess what? In the years since, they’ve only improved their offerings. New this summer, Lakedale has become the premier location for San Juan Islands glamping, as well as continuing to offer a diverse list of additional accommodation options.

Located conveniently between Friday Harbor and Roche Harbor (less than a ten-minute drive from both), Lakedale began humbly as a private campground and has been adding to its offerings ever since. Visitors can now choose between a lodge stay (16 years and up), a cabin stay, canvas tent cabins and cottages, tent camping spaces, a vintage Airstream, or, new this year, glamping yurts. Here’s what you need to know about all your options:

Glamping yurts:

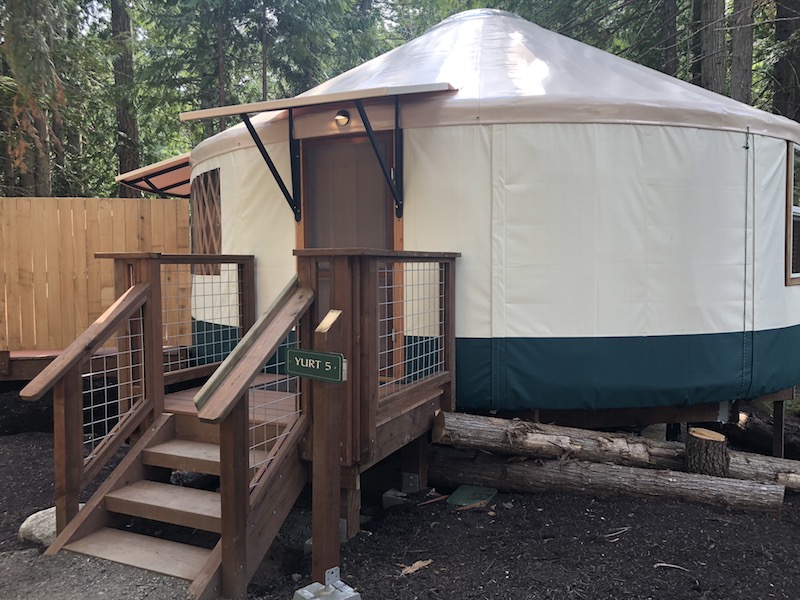
The yurt village is located at the far end of the property, tucked away past an area called ‘the meadow’ by Fish Hook Lake. All seven 24 foot-diameter yurts feel secluded enough, and private. You get 450-square-feet of room, and inside and out, it’s all luxury.

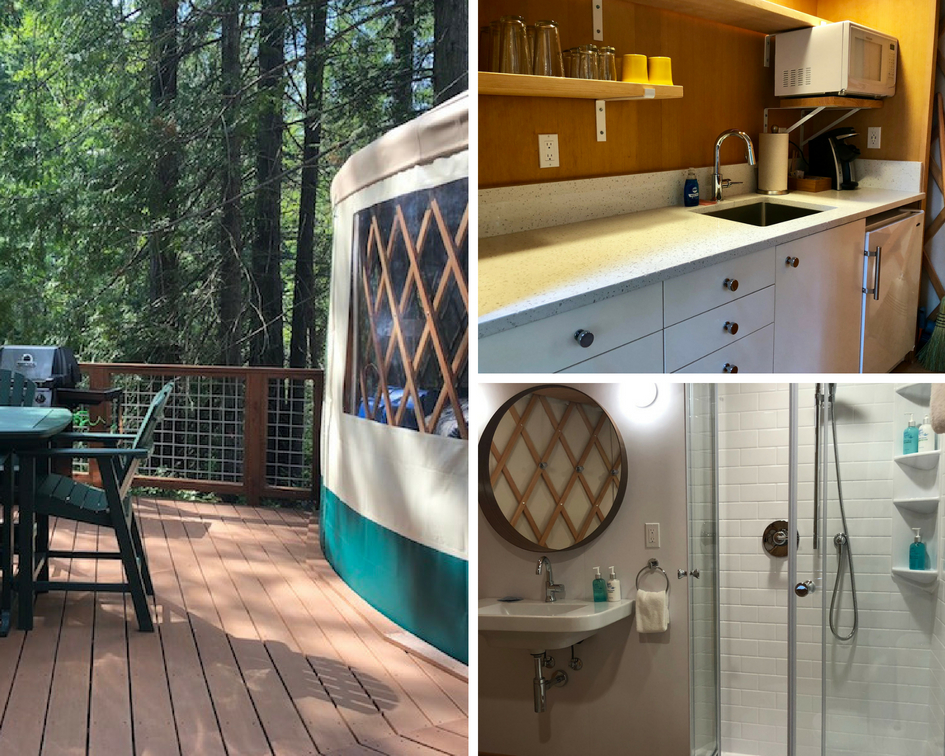
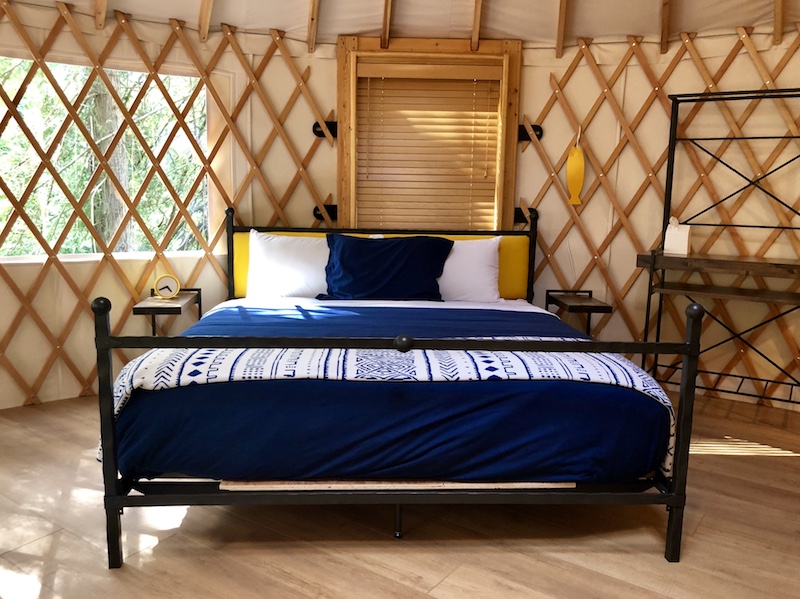
The living room area includes a full sleeper sofa, rocking chair, dining table and chairs for four, and a flat-panel smart TV (just log in with your own Netflix, Hulu, or Amazon account). Adjacent you get a kitchenette, including a wet bar and mid-sized fridge. The bedroom area (all open concept) has a king-sized bed that’s extremely comfortable. And yes, you get a bathroom inside the yurt, with full plumbing. It’s roomy and equipped with everything you need, from towels to a hair dryer.

Each yurt has full electricity (though no air conditioning…don’t worry, you don’t need it) and a big deck with a hot tub (yes, truly!), two chairs, and an outdoor dining area with table and four chairs, plus a barbeque. All your linens, blankets and towels are at the ready, including hot tub/beach towels, and there’s a communal fire pit for the yurt village adjacent. The kitchen area is fully equipped with dishes, cups, a coffee service, and a microwave.

Additional lodging options:

Log cabins:

When our family came in 2015, we stayed in one of Lakedale’s two bedroom, two full bath cabins, with a sofa bed that sleeps six. If you need a full kitchen and lots of space, this is the place to be. Outdoors, you get your own fire ring, and there’s a communal hot tub for the cabins.

Canvas cottages:

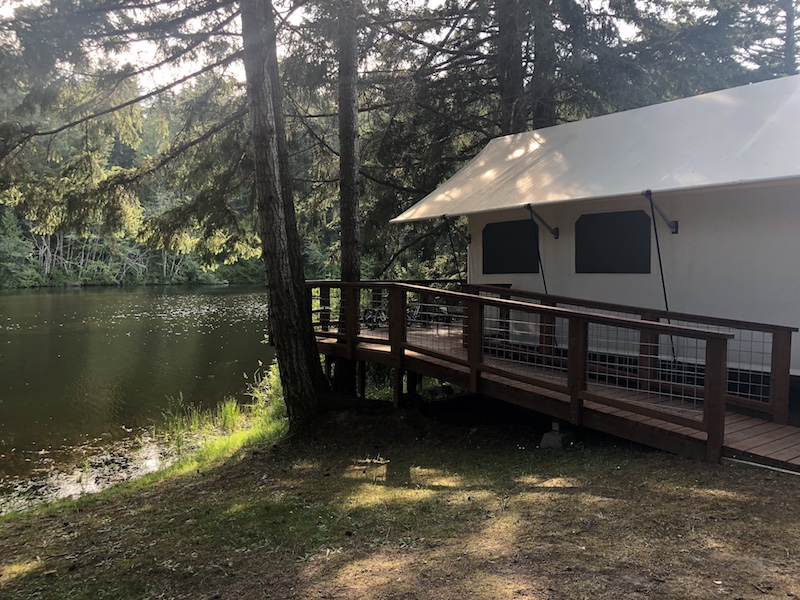
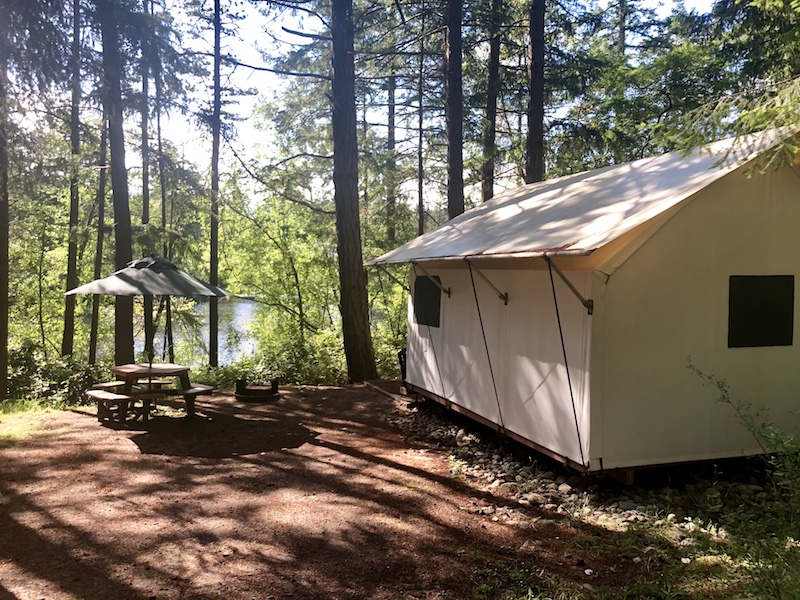
Lakedale’s original glamping option is found in the canvas cottage village, located in the middle of the property.  You get 350 square feet of space, with king-size pillow top beds with flannel duvet covers, your own bathroom complete with shower, daybed sleeper (extending to king-size) a chandelier (yep!), a table with four chairs and a fire ring. All cottages are lakefront, which might make them even more popular for families than the yurts.

Canvas tents:

Want a hybrid between tent camping and glamping?  The smaller canvas cabins feature a queen-size bed with pillow-top bedding and flannel duvet, a table and four chairs, a cordless lantern, bath linens, as well as a full-size futon that sleeps two. You get turn-down service in both the cottages and the tents, during which Lakedale will deliver two fleece-covered hot water bottles to keep you warm. Note: there is no electricity or running water in the canvas tents, but the shower building is located right across the way.

With both the canvas cottages and tents, your nightly rate includes a complimentary breakfast in the Mess Hall Tent, located in the heart of the village. You’ll find a pancake machine, granola, oatmeal, yogurt hard-boiled eggs, cereal, fruit, danishes, and coffee, tea, and juices.

Note: the Airstream is bundled with the canvas village and enjoys the same continental breakfast offerings in the Mess Hall Tent.

Tent camping sites:

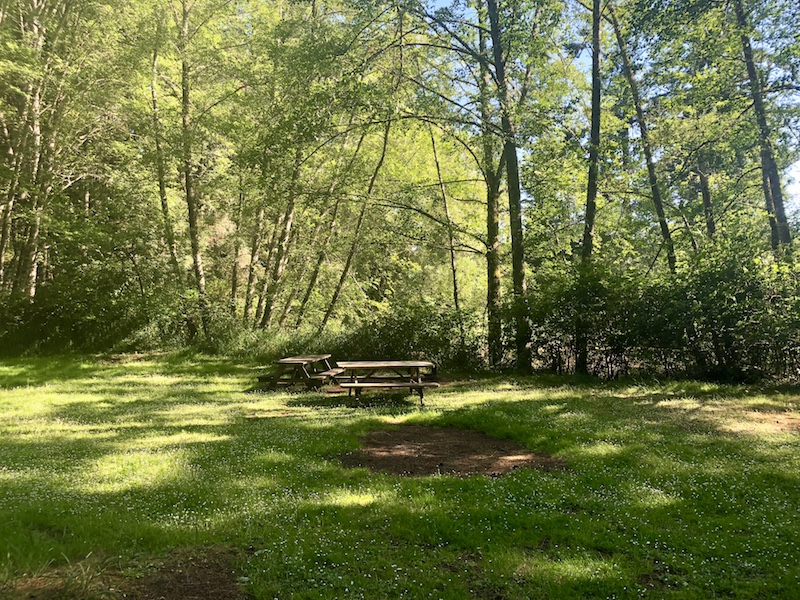
There are a wide variety of campsites, which all share a shower building and bathroom, with additional port-a-potties throughout the meandering campground. I love that each site is different, and many are tucked away (it is easy to find privacy, usually hard to come by at a large campground). The classic campsite accommodates one tent (four people) and one vehicle. Every campsite has a fire pit and picnic table. Family campsites are larger and can fit more than one tent and two vehicles. You can also upgrade to a lakeside campsite in either size, which I recommend. There are a few really large group sites and some hike-in/bike-in sites for ultimate quiet and privacy.

Tip: for an extra $45, Lakedale will set up a two-person tent, two cots, and two chairs for you before you arrive. It can be difficult to bring all your camping gear with you if you’re not driving over (walk-on ferry passenger), so this is a great option.

If you don’t want to be near a neighbor, I recommend a site in the 200-loop (there are not 200+ sites; they are simply numbered this way) on the outer edge of the ring. Site 110 and site 30 are also ideal.

Note: there are only five RV sites in Lakedale. There simply isn’t space, as their camping sites are all different shapes and sizes to fit the natural surroundings.

Lodge stay:

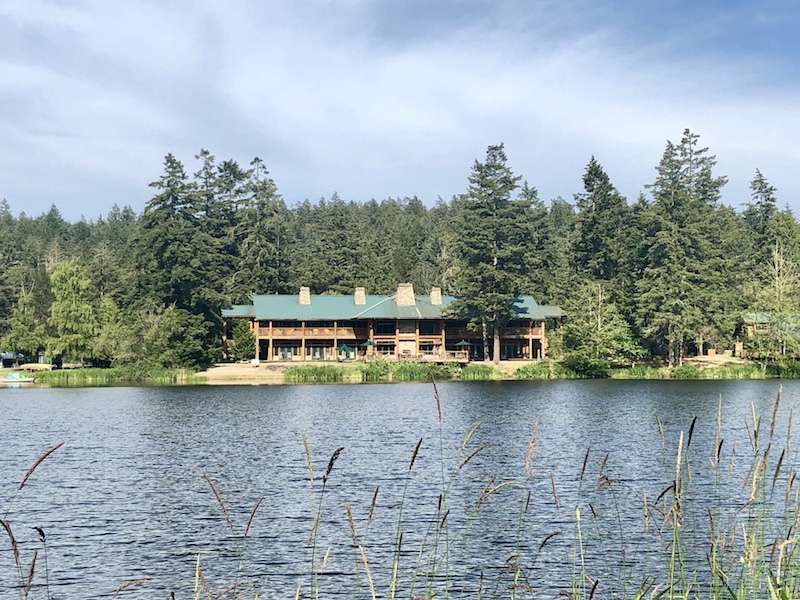
Lodge rooms are limited and for adults only (each sleep two). You get a full breakfast in the lodge included in your stay, and the back deck of the lodge is a very tranquil place. I recommend coming to Lakedale with kids, then returning in the off-season to enjoy the lodge as a grown-up getaway. The lodge and log cabins are open year-round at Lakedale, but camping and glamping is currently seasonal.

Lakedale Activities:

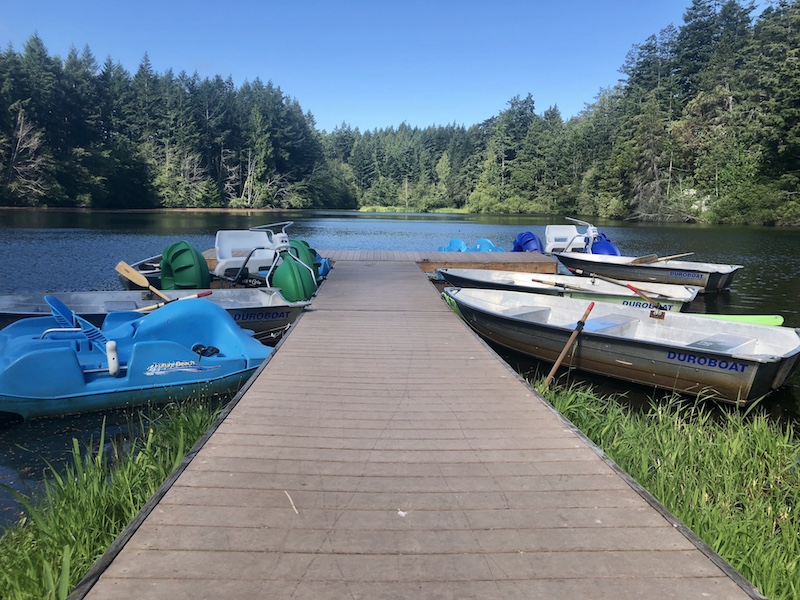
There is so much to do on-site! Bring bikes, as you’ll want them cruising around the resort (or borrow one of the bikes available on a first-come, first-served basis). The General Store is the central hub of activity, where watersport rentals are offered (water trikes, paddleboards, kayaks, etc) and fishing gear can be procured. You can also grab lunch here, plus ice cream, fire wood, and gourmet items for the grill, such as pre-made kabobs and burgers.
Swimming is popular at Lakedale, and there’s a nice beach area with shallow entry for young kids. Lawn games such as horseshoes, bocce ball and giant chess are plentiful. The activities tent always has activities for kids, such as boat races, birdhouse building, t-shirt tie-dying, and more. Some activities come with an added cost, but most are free. And of course, you’re close to all San Juan Island has to offer. Check out our suggested two-day itinerary, which could be stretched to 3-4 days while staying at Lakedale.

For pricing on lodging options at Lakedale, we suggest calling the friendly front desk of the lodge, as prices do vary by season and they can help you find just the right option for your family.

Disclosure: I experienced San Juan glamping at Lakedale as a guest of the resort, for the purpose of review. All opinions remain my own.

Tips for getting your RV summer-ready

Summer has arrived, and while you might be ready for a family camping trip, or road trip, can the same be said about your RV? If your Class C camper or trailer is still winterized, it’s time to get it summer-ready. You’ll want to begin your preparations a week or more before your first camping trip of the season, to ensure you have time to replace any necessary parts and pack for your trip.

rv-road-trip-tips

Getting your RV summer-ready:

Begin with a basic spring or summer maintenance check, which will ensure your safety while enjoying your RV. Start by checking your batteries and smoke detectors, and checking for any rips or tears in seams. Next, check for leaks to your water system. Run fresh water through the whole system, checking valves, and if desired, sanitize your water pump system with a bleach-water solution after filling your fresh water holding tank with water. Here’s how: turn the water pump on and run water through all hot and cold faucets until you smell the bleach (1/4 cup for every 15 gallons your tank holds). Close the faucets and let sit for twelve hours. Drain and re-fill the tank with potable water, running the water until you no longer smell any bleach.

Check all fluid levels next, then test your hydraulics (if you have them), kitchen appliances, and oil levels. You don’t want any surprises after you’ve left the comforts of home and the conveniences of retail stores.

The day of your camping trip, it’s time to pack up your RV, taking care to secure all loose items. It can be a good idea to place a pad or cushion on the floor of the RV in case items fall (you’ll probably pack a few to sleep on anyway).

Take a walk around your RV, making sure you’ve secured everything on the outside, too, such as bikes and scooters, lawn chairs, or awnings. Check antennas and satellite dishes, and lock all external doors (closing internal doors, too). Empty your black and gray water tanks, and disconnect any cables or cords connected to your RV.

Once you’ve secured everything for travel, it’s time for final safety checks to your headlamps, trailer brakes, tires, and mirrors. It will be hard enough backing into narrow campsites without worrying about your mirror placements!

Lastly, stock your RV with gear you’ll use all summer (the stuff that stays in your RV). These items include travel-friendly magnetic board games, flashlights and lanterns for outdoors (don’t forget batteries), pantry staples like flour, sugar, coffee and spices, and dishware (consider silicone cups, tumblers and wine glasses that won’t crash to the floor while driving…we love silipint’s bright designs.

family RV camping

Upon arrival at the campground:

When you arrive at your campground, it’s a good idea to park near the entry booth (taking care not to block others) and first check out your campsite on foot. This way, you can double check that the needed amenities are ready to use, including any hook-ups or water, and you can make a plan for approaching the site in the RV (backing up or driving through).

Check for any low-hanging branches or rocks in the way, then be sure to stabilize your RV once you’re settled in your spot. At many campgrounds, a campground attendant or camp host is happy to assist with this process if the campground is not busy. Connect your water and power, ensuring they are in working order, then switch your refrigerator from portable power to plugged in power. Set up your campsite with any chairs or awnings, and take a stroll around the campground to meet your neighbors.
The small space afforded by most RVs can make camping challenging, especially if you like to camp in comfort, but it’s possible to save space while still bringing (most of) what you want. Focus on elevated space saving measures: hang items from magnets or hooks, install hanging trash receptacles and organizers, and add dividers or lightweight shelving to your top cabinets.

Dividing storage areas into smaller spaces can help you stay organized and find gear faster; divide bigger cabinets and shelves with office file folder baskets, tension curtain rods, or simple wooden slats.

Keep as much bigger gear outdoors as possible, including your grill, bikes, chairs, and larger kitchen items. Enjoy the great outdoors while keeping your RV neat and organized.


Source: Fix.com Blog

Where to stay on Orcas Island: a review of Doe Bay Resort and Retreat

Popular Orcas Island, WA can get busy during the summer season, and lodging on this less developed San Juan Islands vacation destination can fill up fast. Families will find they don’t have too many options: only a few established hotel resorts, lots of B&Bs (not all of them kid-friendly), and two campground choices exist. Camping at Moran State Park and Doe Bay Resort fill up as fast as the rest!

doe bay

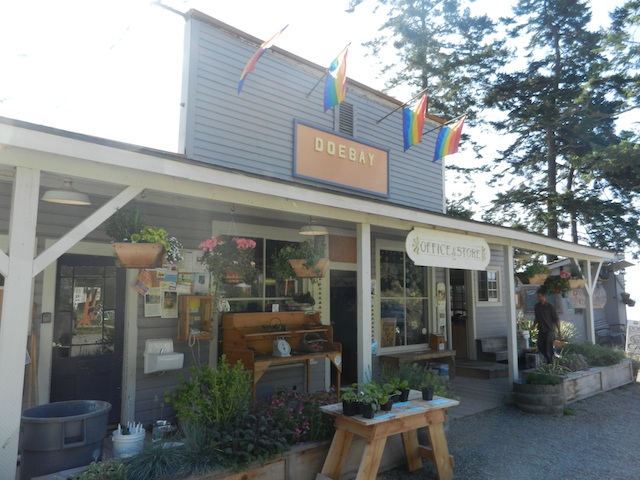
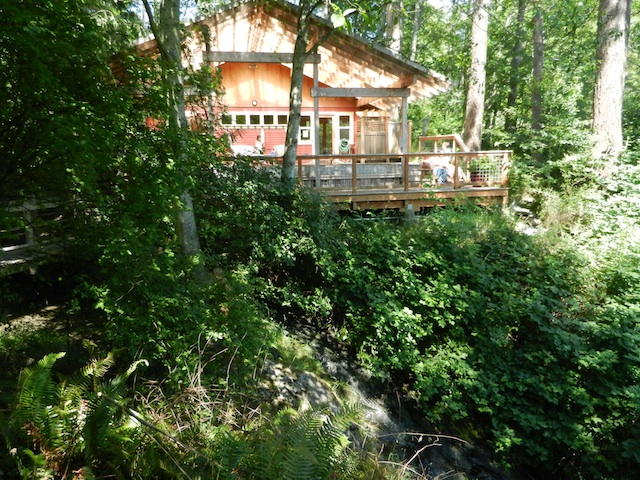
Doe Bay Resort is located right on Doe Bay, and resort grounds directly overlook the bluff. The whole property has a friendly, communal feel, from the general store selling organic local produce, vegan snacks, and sundries to the small restaurant to the group fire pit surrounded by an eclectic mix of cabins, yurts, and camp sites. In fact, the resort is known locally for their music scene: supposedly, they played host to a number of successful alternative bands in recent years. Most of the cabins and yurts are listed as two-person accommodations, so we chose a drive-in camp site (walk-in sites are also available, and if you don’t have too much stuff to cart, would be worth it: sites sit right on the bluff). If you have young kids, I’d opt for something on lower ground.

doe bay

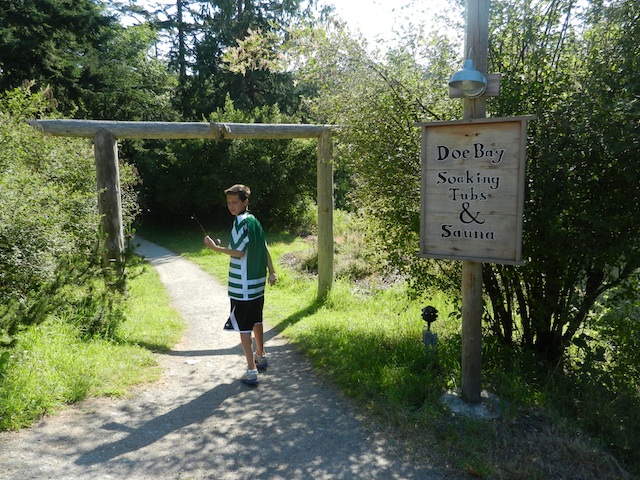
On resort grounds, families will find a nice grassy area, a restaurant serving breakfast and lunch, and friendly lounge with plenty of games, books, and free wifi, a nice playground, views of the bay (we saw a harbor seal enjoying a morning swim) and most interestingly, natural springs soaking tubs and sauna. Note: the latter is clothing-optional, and they mean it. Children are only permitted in the tubs during certain hours (at the time of our visit, it was 11 am to 5 pm) and they should be prepared to see nudity. In fact, every adult enjoying the tubs were in the nude (apart from me, should you be wondering). I felt it was a good travel experience for my kids, but should you feel differently, you’re now aware. There is a beautiful view from the tubs (with deck area) and a lovely waterfall adjacent, next to which our boys loved climbing and playing.

doe bay

doe bay

A word on Doe Bay campsites: Families should be aware that some sites are very small. We were given ‘Antelope’, which was large enough only for a 2-3 person tent, and situated dangerously close to a sharp decline overlooking the common grass area and fire pit. Had we not arrived at the resort after midnight (due to ferry schedules), we would have avoided a very uncomfortable night. Instead, we requested a change in the morning, and were given a far more adequate location for our size party. In general, sites on the right-hand side of the camping loop are larger and flatter, while sites on the left-hand side are smaller and higher up.


Rates and reservations:

Get reservations well ahead of time, particularly for summer weekends. At the time of our visit, we paid $45 per night for a tent site. Yes, this is high, but nearby Moran State Park has similar pricing, and is very hard to get into without far advance reservations.

Amenities:

A laundry room is available for a charge, and camp sites are near a full bath house, which has showers, wash rooms, and flushing toilets. A communal kitchen is also available adjacent.

Dining options:

Families can use the communal kitchen to cook meals (individual fire pit are not available and families are not permitted to make fires. We didn’t eat in the Doe Bay cafe, but it is available (and boosts stunning views in a very relaxed setting). The store also offers some necessities.

Directions:

From the ferry terminal, take Orcas Road toward East Sound. From there, take Olga Road through Moran State Park, then Pt. Lawrence Road to Doe Bay. You’ll see a sign for the resort on the right.

Three northwest backpacking routes for families

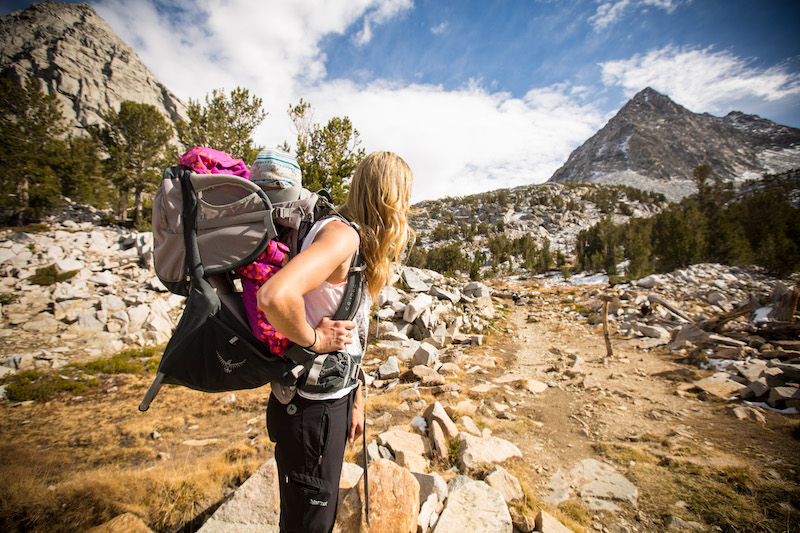
Parents with young children: you absolutely can backpack with kids! Our family has found success by choosing backpacking routes that are short on distance but big on rewards, whether that be in the form of a fun lake or river to swim in, dramatic scenery, or both. The following three northwest backpacking routes for families deliver.

Before you read on, check out our tips for backpacking with kids!

northwest backpacking routes

Northern California’s Trinity Alps:

Just south of dramatic Mt. Shasta at the top of Northern California, the Shasta-Trinity National Forest offers some of the best backpacking for families. While word is now getting out, the Trinity Alps used to be very uncrowded, while still offering up vistas on par with the Sierra Nevada.

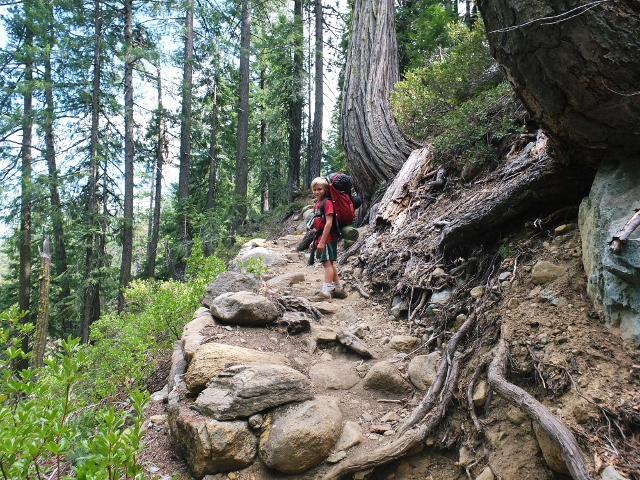
For families, we recommend the 5.2 mile route from Swift Creek Trailhead to Granite Lake. From the Swift Creek Trailhead of the Trinity Alps, families hike for one mile before crossing Swift Creek at a large bridge and taking the Granite Lake Trail. After that, it’s 4.2 miles of a pretty strenuous uphill hike. Take your time, knowing that you don’t have to hike too far but will be rewarded with one of the most stunning alpine lakes you could ask for.

Make a home base at Granite Lake, and spend an extra day day-hiking up above it (the terrain turns to sub-alpine granite with great views). If you want to make a full loop of it, you can continue to Horseshoe Lake, reconnecting with the original Swift Creek Trail to follow the creek back to the parking lot. We have always been content to simply play at Granite Lake, however.

How to get to the trailhead: Swift Creek Trailhead is at the end of Swift Creek Road, accessed from Highway 3. (From I-5, grab Highway 3 at Yreka.) You’ll pass a national forest ranger station near Fort Jones, where you can grab your backcountry permit.

backpacking-trail

On the Granite Lake Trail

Southern Oregon’s Sky Lakes Wilderness:

The Sky Lakes are beloved to our family. They’re right in our backyard, so we’ve logged a lot of hours on trails here. The great thing about Sky Lakes is the flexibility; there are multiple options for making larger or shorter loops between its many small alpine lakes. The elevation is lower than many backpacking routes, so the nights will remain warmer (but you’ll also experience more mosquitoes, so aim to visit in August or September).

The Sky Lakes are generally split between Lower Sky Lakes Basin and Upper Sky Lakes Basin. You can see it all in a 12 to 14 miles loop, but we recommend staying on the Upper Sky Lakes Basin end to see Trapper Lake and Lake Margurette. You can camp at either, and experience the other in a day hike, should you wish. Start at Cold Springs Trailhead, and when the trail splits, follow the upper toward Natasha and Margurette lakes. The entire hike is only about 3.2 miles, and isn’t too steep. If you’re ambitious, you can also access the Pacific Crest Trail above Trapper, and walk along it for a while.

How to get to the trailhead: Cold Springs Trailhead is located off Highway 140. From Medford (and I-5), take Highway 62 to Highway 140. At mile marker 41, you’ll take gravel road FR 3651 at the Cold Spring Trailhead sign, and follow it 10 miles to the parking lot.

stuffing backpacking bags

Setting up camp

Central Oregon’s Jefferson Park:

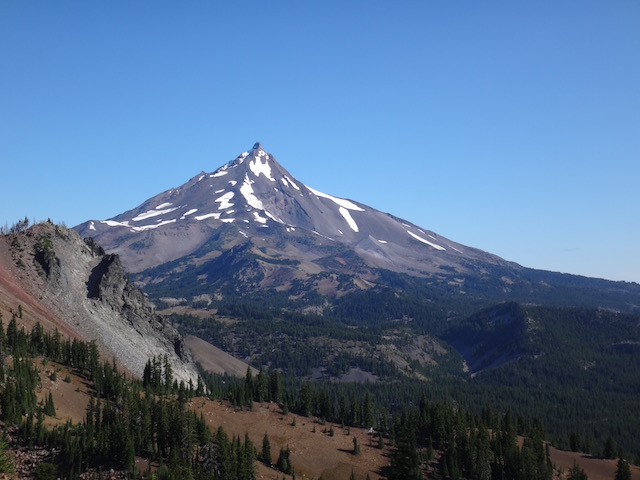
Very few wilderness areas are as breathtakingly beautiful as Jefferson Park. And yes, it is indeed a veritable ‘park’ of alpine creeks, lakes, trickling waterfalls, and towering peaks. You have to earn it though: the route in from either side takes some time for families. We recommend the slightly shorter route from Whitewater Trailhead (the other option is Breitenbush Trailhead further north).

You’ll go about four miles before reaching Whitewater Creek, with stunning views of Mt. Jefferson all the while. After the creek, you’ll join the PCT temporarily as you enter the park. Once in, you’ll see many trail options leading a short distance to multiple small lakes. We suggest Russell Lake or Scout Lake. Take fishing poles, and the fish seem to really bite here. You can rejoin the PCT for a long day hike should you wish, or can simply set up camp and enjoy the lake. No matter which lake you pick in the park, the round-trip mileage will be about the same: 11 miles or so.

How to get to the trailhead: Take exit 253 off I-5 in Salem. Drive 60 miles east on North Santiam Highway 22. Between mileposts 60 and 61 (10 miles beyond Detroit), turn left on Whitewater Road 2243. This gravel road forks in about 100 yards, keep right. Follow this road 7.5 miles where it dead-ends at a large parking area.

Jefferson-peak

Jefferson peak

I think it’s time for us to discover some shorter backpacking routes in Washington state next! While we have experience in this region, it’s for longer hikes for more experienced backpackers. If you know of great routes for families in Washington, please leave them in the comments. And always remember to call the local ranger station before your trip for weather and trail closure information, as well as any detailed driving directions you may need.

How to prepare meals in a camper van

When your family hits the road in a camper van, you want your kids to be well nourished throughout your journey. After all, well-fed kids are generally happy kids, which can make your road trip more enjoyable. However, a small campervan kitchen might pose a challenge and leave you scrambling for diverse and delicious meal options that your youngsters can enjoy. Once you’ve devised your road trip and secured your camper van rental, take time to meal plan before you hit the open road.

camper van

Know What You’re Working With

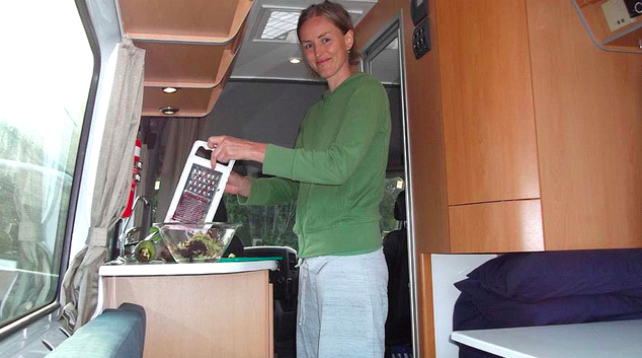
Before your trip, familiarize yourself with the campervan kitchen. Typically, you’ll have a refrigerator, a couple of burners, and a small grill. So, while real estate might be small, you’ll have enough basic tools to throw together a variety of meals for your hungry family.

Focus on One-Pot Meals

You don’t have to rely on hot dogs every night—even if your kids might love that—when you’re road tripping in a campervan. However, you do need to get creative to provide a well-rounded meal that doesn’t require too many pots and pans. One-skillet meals are a smart solution when you’re cooking in a campervan. For breakfast, brown sausage in a skillet, pour eggs over the cooked sausage, and top with cheese. You’ll have a hearty breakfast skillet, which you can serve on its own or wrap in a tortilla to make breakfast burritos. Diced potatoes, veggies, and kielbasa or turkey sausage is another mouthwatering meal that requires just one skillet.

Get Grilling

If your campervan includes a small grill, take advantage of this versatile appliance. Hot dogs and hamburgers are, of course, a simple and kid-friendly option when you’re exploring the open road, but don’t limit yourself to these classics. Tortillas can double as pizza crust—just top them with sauce and your kids’ favorite toppings for a simple and crowd-pleasing dish. Enjoy a Mexican-inspired night with bean and cheese quesadillas cooked on the grill. Grill packets are also convenient when you’re on the road, and they minimize messes. Chopped veggies and potatoes, along with an easy-to-grill meat, wrapped in aluminum foil requires little effort and delivers a hearty meal every time.

Minimize Cooking But Maximize Meals

Don’t spend too much time on your journey in the campervan kitchen. Instead, focus on ways to cook in bulk for your family and use up every last ingredient to create a diverse menu that pleases both kids and adults. For example, chicken breasts have a variety of uses, so cook several pounds of breasts at once. You can boil the chicken and shred it or fire up the campervan grill. Make chicken salad for sandwiches, add shredded chicken to tortillas for tacos or quesadillas, or toss some barbecue sauce on it and add it to a bun. This way, you’ll devise several convenient meals in one cooking session, which leaves you more time to enjoy your adventure.

Tip: Looking to have a camper van adventure outside of the states? Check out RV hire Australia for great options.

Even though the quarters are tight and the resources limited, cooking in a campervan doesn’t have to be frustrating. You can keep your family well fed during your getaway with thoughtful meal planning, simple recipes, and versatile ingredients.

Image BY studio tdes via flickr.com under a Creative Commons License CC BY 2.0

Born Wild: The importance of getting our kids into the outdoors

Happy New Year! I’d like to start 2017 with what I believe is an important subject: the value of getting our kids into the outdoors. Long-time readers of Pit Stops for Kids know that as often as possible, our pit stops, destinations, and adventures are of the outdoor variety. We ski, hike, snowshoe, mountain bike, camp, backpack, kayak, raft, and fish, and while we’d be crazy not to enjoy five-star hotels and luxury resorts, we’ve noticed something over the years:

born-wild

Our kids remember their outdoor adventures most fondly, and the vacations they ask to repeat are ones spent in tents and hammocks, not luxury hotels.

The articles on Pit Stops for Kids that I am most proud of help parents explore nature with their kids: tips for backpacking, advice for road trips that explore national parks, reviews of river rafting expeditions, and the like. We know it can feel intimidating to get outside with kids. We know that for parents without experience in the outdoors themselves, there are real questions and concerns. So I’m excited to introduce a new website with core values that align with ours: the importance of getting our kids in to the outdoors, and the benefits families can find from communing with nature.

born-wild

The Born Wild Project is a brand new site that serves as a hub for the adventure-ready and adventure-curious. It includes tips and tricks, how-to’s, gear reviews, and regular blogging by their growing collective of awesome parents. I hope to contribute there, as I believe wholeheartedly with their mission.

So why is it so important to get kids outdoors?

I believe in getting kids outside, in the dirt, in trees, on the sand, in the water, and on the snow because in the last generation or so, we’ve seen a barrier build between humans and nature. The more kids stay indoors, the less ‘real’ nature feels to them. It’s something scary, something ‘other’. And when that happens, a whole generation loses their love of, and desire to protect, planet Earth. Plus, kids love the outdoors!

I promise, you can spend a fraction of the cost of a Disney trip camping with your family, and your kids will remember it more fondly, if you give it a chance.

Parents who fear the outdoors can embrace it with the help of a community.

I love that the Born Wild Project offers a community of like-minded parents who either want to get outdoors with their kids or already do. We can learn so much from one another! Even those of us who spend a lot of time outdoors have questions and need advice. When we decided to sea kayak on the marine trail through the San Juan Islands, we didn’t have any experience with ocean kayaking. We relied on the help of guides and the packing lists provided to us from fellow parents. Likewise, after we allowed our 17-year-old to hike the Pacific Crest Trail for a month, many parents asked us specific questions so they could plan their own adventures.

born-wild

So if you’re ready to go outdoors on your next trip or at home, get inspired from Born Wild’s documentary series, showcasing families who decided to make outdoor trips part of their lifestyle. And check out our Adventures for Kids section, of course!

What to do on Mt. Hood in summer: a three day itinerary

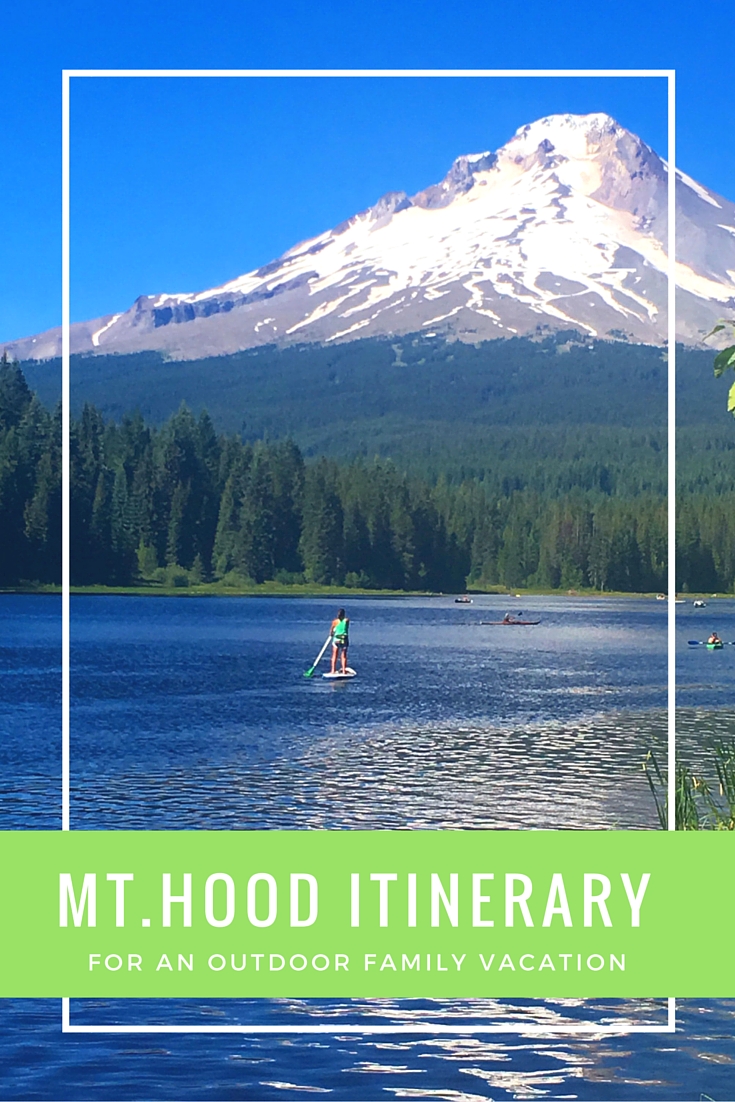
Mt. Hood Oregon is a winter playground, but it’s an amazing outdoor destination in the summer months as well. Located just an hour from Portland, Mt. Hood National Forest offers stunning mountain vistas for hikers, backpackers, campers, and kayakers. The central ‘town’ is Government Camp, which is a smaller community of outdoor-focused shops and dining, but the actual towns of Welches and Rhododendron are nearby and have more options. Families can fill their days walking in the woods, swimming in alpine lakes, and enjoying the fun of Mt. Hood’s ski areas in the off-season. Here’s what to do on Mt. Hood in summer!

Trillium-lake

Spend a day at Trillium Lake:

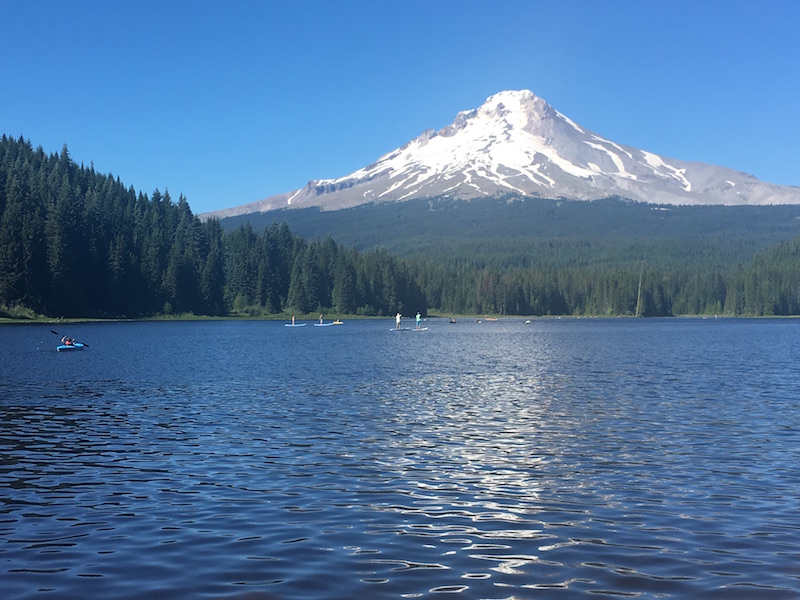
This stunning lake sits beneath Mt. Hood, allowing families to view the mountain from just about all points. You can camp here, though most of the sites are away from the water in the woods, but the best feature is the day use area, which offers picnic areas lakeside around the whole far side of Trillium. Bring the water toys, including stand-up paddle boards and rafts…but no motorized craft. Plan to come early to get your pick of day use spots! You can also hike around the lake, which is a two mile loop.

Go hiking:

Best hiking in the Mount Hood National Forest:

crossing-sandy-river

  • Paradise Park: An eye-popping wildflower meadow lies about five miles west of Timberline Lodge via the Pacific Crest Trail. We saw blooms as late as early August. The route dips in an out of several of the southwest side’s big glacial stream canyons.
  • Cooper Spur: This hike starts from Cloud Cap on the mountain’s northeast side. Take the Timberline Trail, then veer off toward Mount Hood on the well-trod path along Cooper Spur. When you get to Tie-In Rock, at 8,600 feet, it’s time to turn around.
  • Mirror Lake: Always popular with day hikers, this hike begins on the south side of U.S. 26 about one mile west of Government Camp. It leads to a lake that reflects Mount Hood, and is a great place to sample local huckleberries in late August/early September.
  • Tamanawas Falls: This five mile loop is easy to moderate along the east fork of the Hood River, and starts off Hwy 35 past Government Camp. You can scramble up the back of the falls if you’re daring.
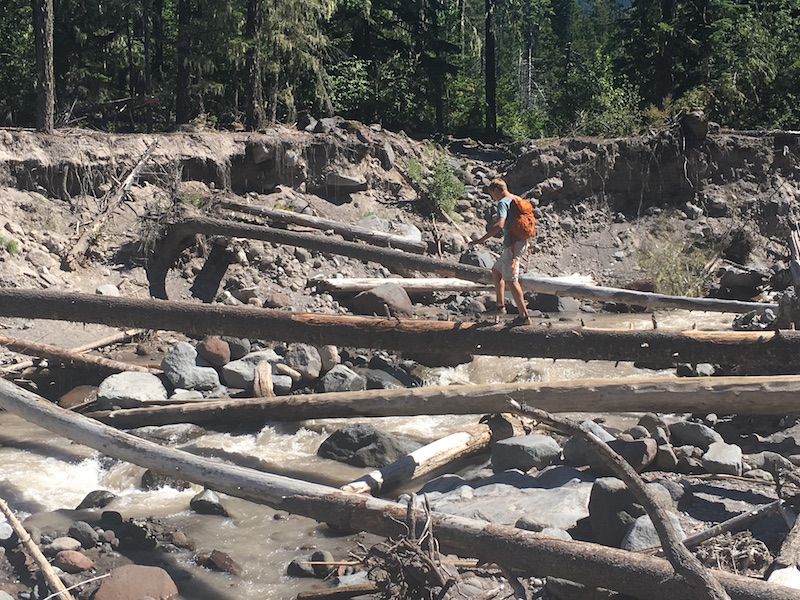
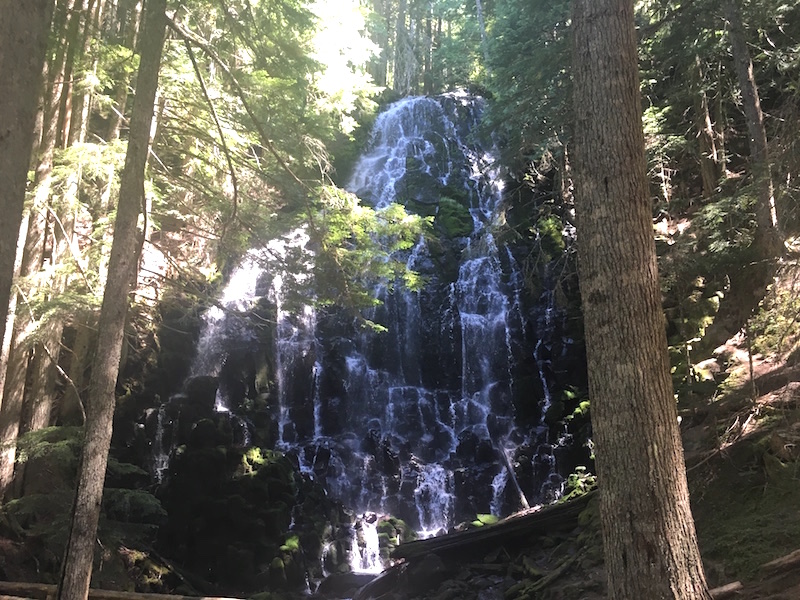
  • Ramona Falls: You cross the Sandy River and follow along the PCT for this seven-mile loop to and around Ramona Falls, arguably one of the most scenic of falls in Hood River National Forest. This is a fantastic hike…see photo below!
  • Timothy Lake: Start at Little Crater campground south of Mount Hood, which is a wonderful sight in its own right…this tiny lake is very deep and has an incredible blue color, much like its big sister, Crater Lake. Then tour around Timothy Lake for a 13 miler, with places to swim along the way.

ramona-falls

Go mountain biking:

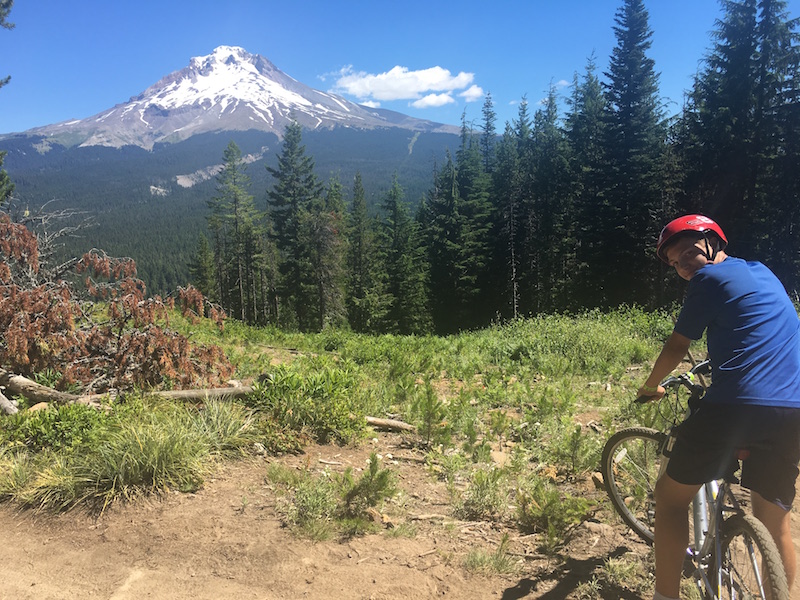
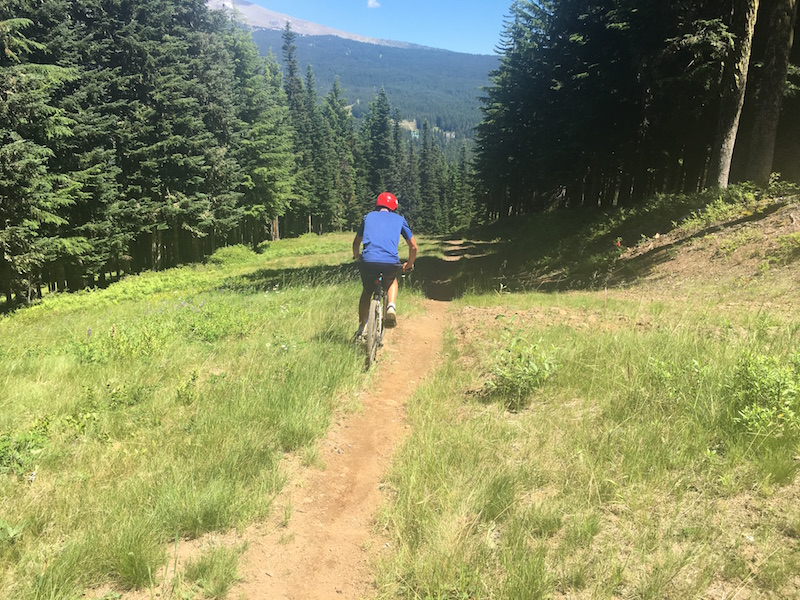
Families can try gravity-based mountain biking (lift-served) at Mt. Hood SkiBowl, one of Mt. Hood’s three local ski resorts. If you’re looking for something less steep but just as challenging in terms of exertion, Mt. Hood National Forest is criss-crossed with free mountain biking trails as well. We opted for SkiBowl mountain biking, at the West entrance of the resort.

mt-hood

It involved a $39 day lift ticket to ride the chair up with our bikes, and all-day access to their single track and dirt roads. If you need to rent bikes, they start at $15 for one hour, or up to $45 for all day. I rented for four hours for $35, and having a quality bike with shocks and sturdy tires was well worth it. Of course, you can bring your own bikes, too.

mountain-biking

If you bike at SkiBowl, be aware that Monday through Friday, only one chair is operating, giving access to the front face of the mountain with one main intermediate run and one black diamond run that ends in a bike park with various elements. To find more trails, simply go left at the top of the chair and access several additional green and blue single track runs via High Road or Low Road (dirt roads). You’ll be given a map when you get your lift ticket. On weekends, even more of the mountain is open.

Note: I would say it would be good to be at least an intermediate mountain biker to safely navigate even the green runs here.

Play at Mt. Hood SkiBowl:

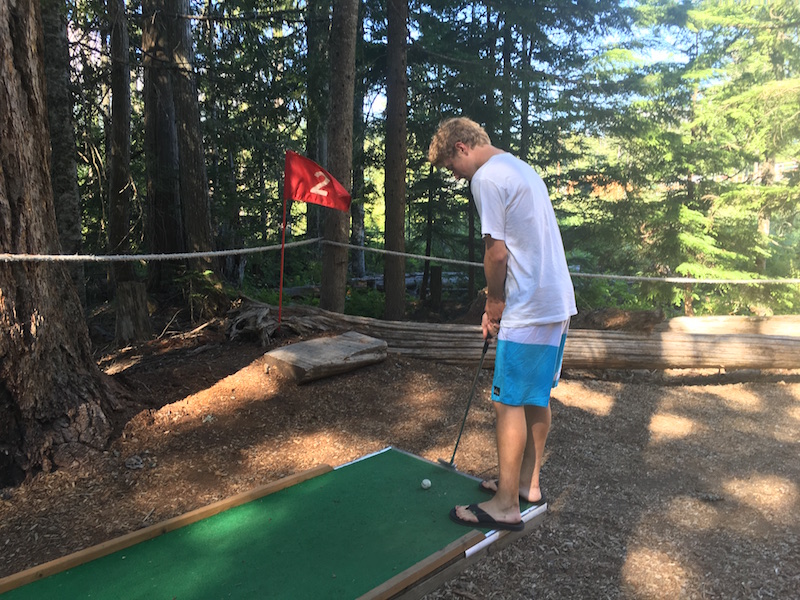
Not sure if you want to mountain bike? SkiBowl’s East Entrance has all sorts of fun summer activities, ranging from mini golf to go-karts to a bungee jump and bungee trampolines. There’s a canopy walk that’s similar to a ropes course, but much more low-key, and those ‘human hamster balls’ where you get into plastic balls and roll around. In other words, lots of fun to be had. You can get a day pass for all of it for around $40 a person, or pay for things a la carte. If you want to try the alpine slide, that’s over on the West entrance by the mountain biking. Go early if you want to really open up the track and go fast, as it gets congested later in the day, slowing everyone down. Disc golf is also located on the West side.

mini-golf

Where to eat:

First and foremost, opt to eat one breakfast at Timberline Lodge’s famous breakfast buffet. It’s $15 per person, and worth every penny. Plus, you get to explore this historic lodge located right at the base of Mt. Hood. It’s stunningly beautiful, with gorgeous mountain views, and a great starting place for a shorter hike around the base. Their breakfast buffet is served in their historic dining room, and includes numerous egg and meat dishes, huckleberry pancakes, house-made granola, fresh pastries and fruit, and even a Bloody Mary bar.

Rathskeller Alpine Bar and Pizzeria is located in the town of Government Camp, which is a small community built around the ski industry. In summer, it’s sleepy but quaint. The pizza joint in town has great slices, but also a friendly atmosphere with an arcade/game room for the kids.

High Mountain Cafe: this sandwich shop is located in Government Camp, and has the best sandwiches we’d tasted in a long while (but maybe we were just really hungry!). It’s counter service, so it’s quick!

Volcano Cone is a little kiosk ice cream place in Government Camp. The ice cream is nothing amazing, but the staff is very friendly and it’s an easy place to grab a nice dessert. Also look for various food trucks in Government Camp during the day, including Asian cuisine and gourmet hot dogs.

Where to stay:

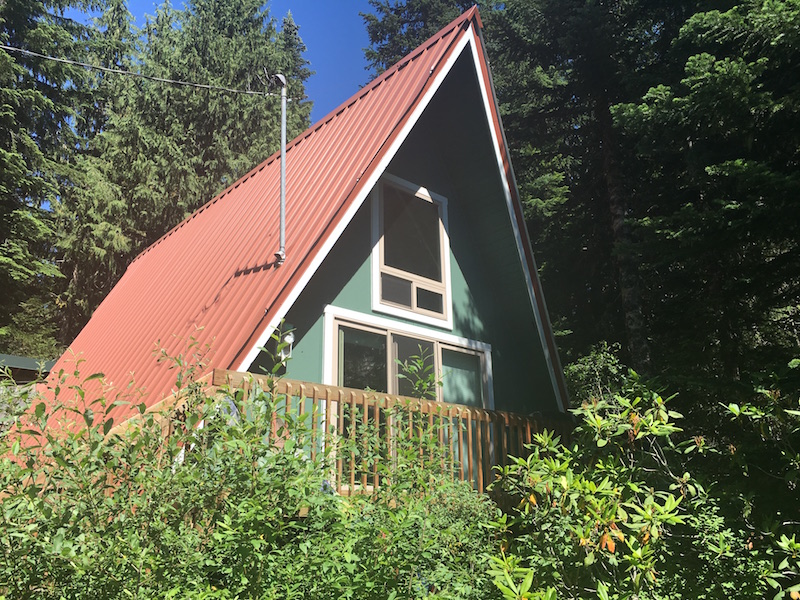
Cabin rental: We rented this HomeAway rental cabin in Government Camp via Vacasa. It was a rustic A-frame with a wood-fired stove and an outdoor fire pit, plus sleeping for eight. While small, this cabin was just what we needed, and no more. We could walk into Government Camp or to Ski Bowl.

mt-hood-rental

Local campgrounds: numerous Mt. Hood National Forest campgrounds are located in the Mt. Hood area. All of them are rustic, with pit toilets and no showers or plumbing. They are are very pretty and in wooded areas.

Resorts: A few resorts are in the area, though Mt. Hood is better known for camping and rustic rentals. Stay in Welches, just a few miles from Mt. Hood, at Resort at the Mountain, or at Collins Lake Resort closer to the action. Both are good options if you want a more pampered experience.

mt-hood-in-summer

Have you been in the Mt. Hood area? What do you like to do there?

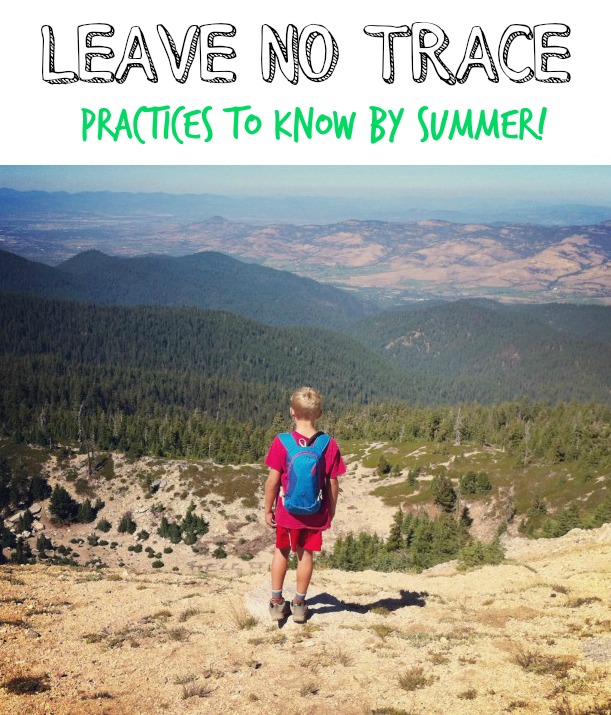
Leave No Trace principles every family needs to know

With Earth Day coming up later this month, April is the perfect time to talk about caring for our public lands. My kids have heard the Leave No Trace mantra since early childhood, but it’s always good to brush up on best practices for preserving the wilderness we love.

leave-no-trace


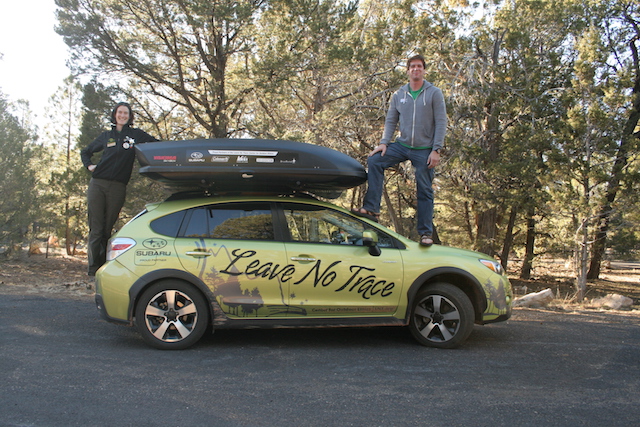
This season, Leave No Trace launches a multi-year, Leave No Trace in Every Park campaign. Subaru/Leave No Trace Traveling Trainers will be visiting ‘hot spots’ across the country (severely impacted areas), giving them attention and helping educate the public. I was lucky enough to sit down with one of them to ask top questions most families have about leaving a lesser impact on the wilderness.

Q: I am aware of the seven principles of Leave No Trace. Is there a ‘crowning’ principle in particular families would bear in mind while in the outdoors?

We encourage people to think of the cumulative impact as a crowning idea for the principles. Over one billion people visit federal and state lands each year. If one person leaves an impact such as litter, feeds wildlife, takes an item out the environment, or walks on a non-durable surface it will not impact the outdoor area significantly, but the cumulative effect of these impacts happening repeatedly over time would have a dramatic impact.

leave-no-trace

Q: How does trail cutting or ‘bush-whacking’ hurt the wilderness environment?

We encourage people to walk in the middle of the trails even when they are muddy. If you walk around the mud you will erode the sides of the trail making it wider and you could crush vegetation on the edge of trails.

As trails widen vegetation diminishes and eventually land management agencies will have to fix the trail. Along the same lines, we encourage people to not cut switchbacks since it can result in the hillsides between the trail to erode.

If a group of people wants to hike off trail we encourage them to disperse, rather than hike in a single file. By dispersing people won’t step on the same spot, which can cause a new undesignated trail to form.

learning-leave-no-trace

Q: Could you describe best practices for finding a suitable campsite in backcountry situations when established sites are rare?

If established sites are rare and the land management agency does not have designated spots that are provided for campers to use we recommend the following considerations. Camp 200 feet (the equivalent to 70 adult paces and 100 kid paces) away from water, trails, and other campsites. Find the most durable surface available such as rock, sand, snow, or dry grass to camp on. If you find a site that is showing some signs of impact, such as significant soil compaction, stay there, but if it is only showing small signs of impact leave it alone for the area to recover. Move on to another more durable site that is showing no signs of impact. Bonus: dish washing tips and car camping tips!

Q: What’s the best way to completely put a fire to ash and ensure it’s safely out before leaving?

Fires are a great part of camping; they give us light, warmth, and s’mores! Making sure that we are responsible with our fires ensures safety for you, other visitors, and wildlife.

Before having a fire, ensure that they are allowed in the area you are camping in.

Ensuring that your campfire is out completely before you leave or go to bed is a very important part of camping. First, choose firewood that is no larger than your wrist as it will burn to ash more easily than larger wood. Check local firewood regulations as some areas do not allow wood not from the area to be brought in as it may harbor invasive insects.

backpacking foods for kids

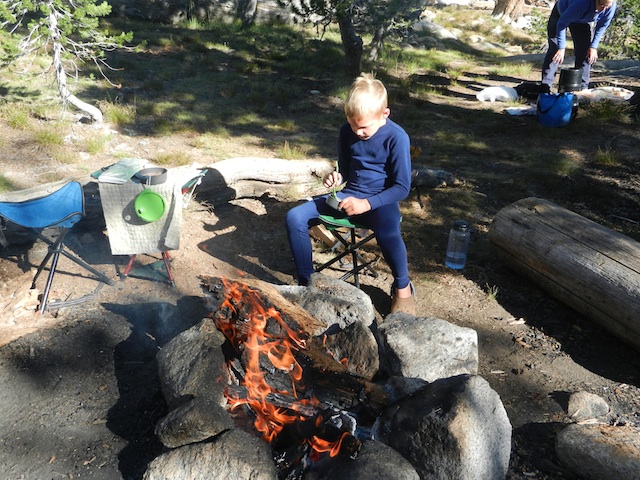
Be sure to burn all wood to ash. Then, you want to guarantee your campfire is out cold. First, use plenty of water and sprinkle it over the ashes: to help the process use a stick to stir the ashes while pouring the water. If the fire area is too hot to touch, it is too hot to leave or go to bed. Bonus: how to build a mound fire.

Q: Tips for carrying out all trash? For instance, our family always unwraps food items as much as possible before departure, so there’s less trash to carry out later. 

We encourage people to take a trash bag along with all of their other essential items for any outing. Repackaging food before heading to the trail helps decrease the amount of trash you will have to pack out. We also encourage people to even pack out all food scraps. Human food is unhealthy for wildlife; they become dependent on humans for food and become attracted and conditioned to human food and trash. Which is unhealthy for both the wildlife and humans. Fruit peels can take up to 2 years to biodegrade and most are not native to the areas they are left.

We like to say, if you weren’t there would it be there?

Q: Young kids naturally enjoy making forts, rock dams, or other ‘structures’ at backcountry campsites…how can they channel this desire to create and explore in line with Leave No Trace practices?

We get this question all the time. It is important to educate children on the importance of Leave No Trace while still inspiring creativity and fostering a sense of adventure to connect kids to the outdoors. We still encourage children to play in nature and still follow Leave No Trace. Kids can still build forts or structures at campsites and then before leaving they can simply dismantle the structures.

If kids want to collect items, first make sure to check the rules and regulations of the area to make sure it is ok to collect something.

We encourage only taking one item instead of several, this generally also makes that one item more important to the child as they often attach a special memory to one item they have really given some thought to during an adventure.

Q: A nitty-gritty bathroom-related question: Leave No Trace has always stated that human waste and soap or shampoo should be 100 feet from water sources. What about rafting companies’ ‘dilution is the solution to pollution’ method? 

Usually in the backcountry, we want to be 100 feet away from any water sources, trails, and campsites when doing dishes or bathing.

However, western river corridors sometimes have different recommendations for human waste and gray water. In river corridors, the river is usually the most durable surface. The rivers in deep canyons present difficulties for the normal recommendations because you usually cannot get 100 feet for gray water or 200 feet for human waste disposal away from the water.

Leave No Trace recommends packing out all solid human waste with a reusable, washable toilet system. Always follow local regulations as some areas allow the use of bag-type systems to pack out human waste. Often, urine and strained gray water are required to be deposited directly into the river.

The old saying goes, “dilution is the solution to pollution.”


Thank you, LNT, for helping educate Pit Stops for Kids families!