If you’re one of those skiers or snowboarders who looks up at the most distant peak from the chairlift and says, “How do I get up there?” or notes tracks in fresh powder and wishes you’d put them there, you may want to elevate your next ski trip to include a day of backcountry terrain. Or, if you have teens (16 or older) who are yearning to learn what AT or touring skiing is all about, it might be time to try a backcountry experience as a family.
Backcountry skiing off-piste and outside ski resort boundaries can expand your ski horizons exponentially, but it’s crucial to go with a guide until you’ve become trained in reading snow conditions and have the right gear (which often includes an avalanche beacon, shovel, probe, and AT or Alpine Touring skis and boots with skins and a backpack to put it all in). I explored two gorgeous backcountry regions with two fantastic guide services, and highly recommend them both.
Two ways to ski backcountry terrain on your next ski trip
Alpenglow Expeditions, North Lake Tahoe:
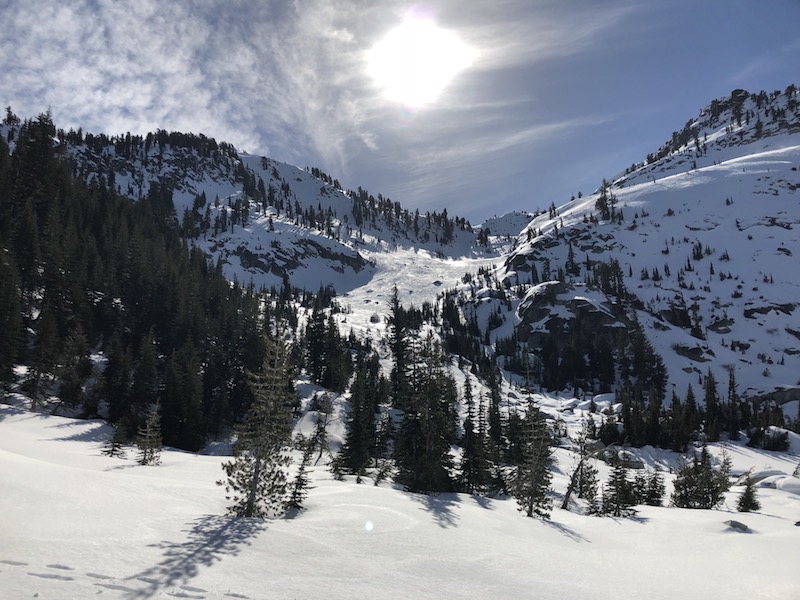
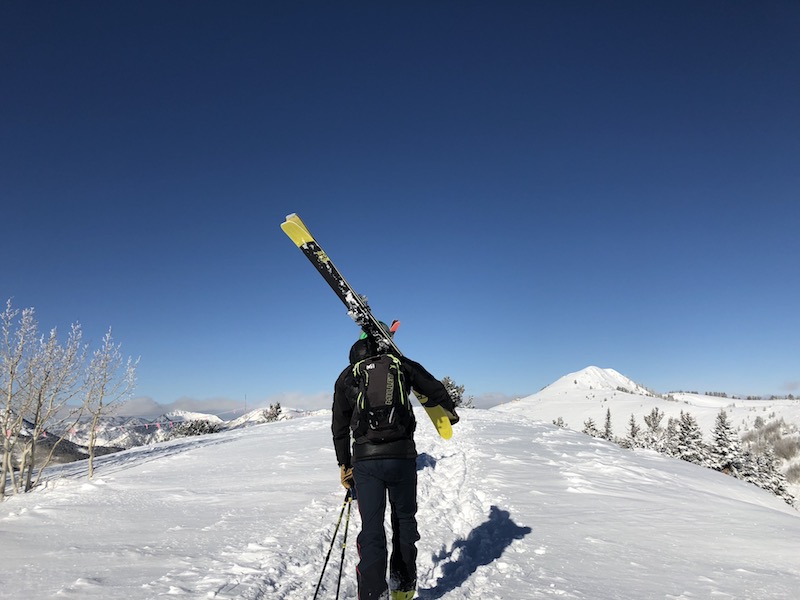
Alpenglow Expeditions operates out of Squaw Valley Alpine Meadows in California, and offers both backcountry tours and a variety of snow safety courses. I joined them for a full day in the Squaw Valley backcountry, where we did two laps of the National Geographic Bowl.
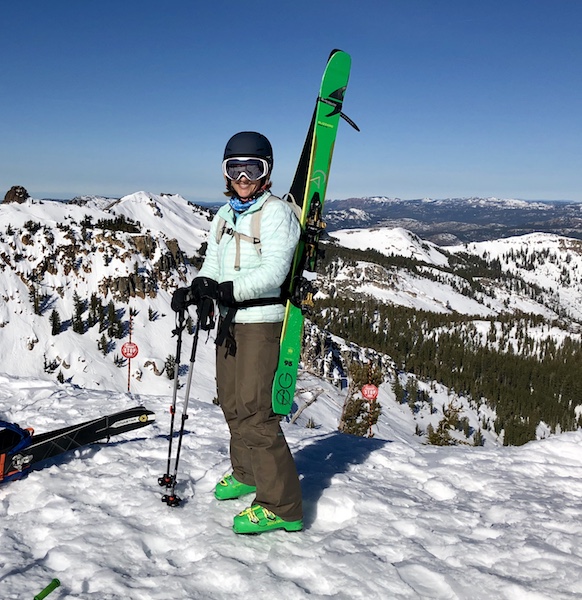
I arrived at their office in the Village at Squaw Valley at 8:30 am, ready to ski…minus the gear. Alpenglow can outfit you, which is nice if you don’t already own AT gear. It allows you to try a full backcountry experience before committing to the equipment. The guides at Alpenglow set me up with a ski pack with all the necessities, plus AT skis and boots. I brought my own helmet, goggles, lunch, water, and ski apparel.
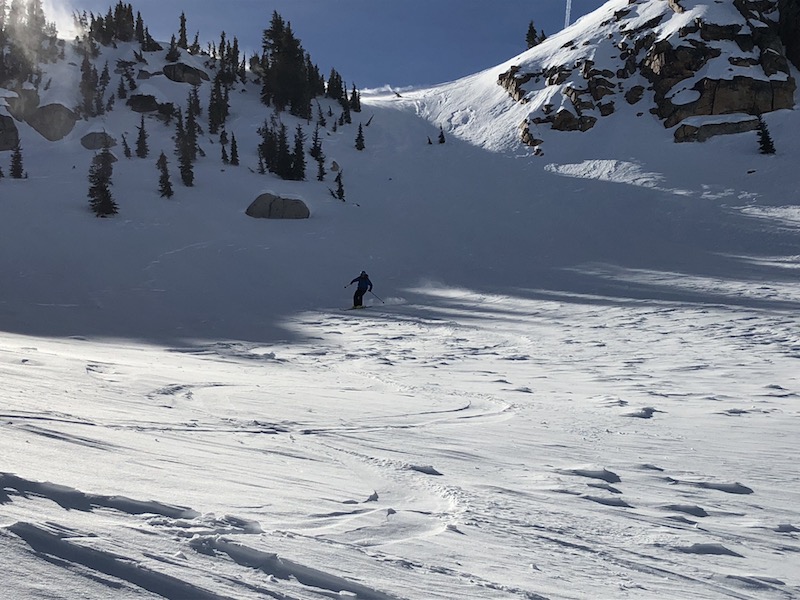
The nice thing about Alpenglow’s location is that you can ride the Squaw lifts to where you need to start, saving time and effort. We headed out by 9 am on the Squaw lifts and reached the top of Granite Chief lift by 9:30 am. From here, we boot packed to the top of Granite Chief Peak (approximately a 20 minute, fairly strenuous hike) with our skis strapped on our backs. At the ridge, the snow was fabulous (despite fairly challenging conditions on the lift-served areas). We transitioned into our skis (the guides will help you do this if you haven’t skied AT before). We skied down the bowl, and at the bottom, transitioned again to skin up the trail that led to a side ridge, where we could ski back down to the Granite Chief lift. The skinning uphill took longer…probably an hour or so, and if you haven’t used skins on your skis before, there is a learning curve here. Your heel is freed and the skins on your skis give you traction, so the climb feels similar to cross-country skiing (but a bit more difficult).
When we reached the ridge, we skied down to the chair and did it again! This time, we boot packed a bit farther to explore a different descent, and at the bottom, we enjoyed our packed lunch in the sunshine. We achieved two laps by 1:30 pm, and were back at the village by 2:30 pm. We probably had time for one more lap, but my legs didn’t have the power!
The day proved to be an excellent introduction to Squaw’s backcountry, and since my teenage boys are interested in exploring terrain outside ski area boundaries, I’d definitely sign them up next time. All tours are individual (with either just yourself or just your group) so you can customize as needed. All guides are highly trained in avalanche certification and first aid, and carry radios. I was given an avi beacon and shown how to use it.
Ski Utah Interconnect, Cottonwood Canyons
Headed to Utah instead of Tahoe? I also tried out Ski Utah’s Interconnect tour, which allows you to check out backcountry terrain on your downhill (Alpine) skis. You can read about the Ski Utah Interconnect here, and watch a helpful video starring Deb Lovci, lead guide, but even after doing your research, the Interconnect is hard to explain. It really needs to be experienced. It’s part backcountry adventure, part (permitted) rope ducking, part on-piste hidden tracks, and part off-piste (as in way, way off). No matter what way you look at it, you’re in for seven hours of breathtaking views of the Wasatch Front Range and Heber Valley. Along the way, you get a ski resort sampler platter, with 1-3 runs in each of Deer Valley, Park City, Snowbird, Alta, Brighton and Solitude.
You start your day at Deer Valley Ski Resort, where you meet up in a base lodge and are briefed by your guides. As noted, you can use your own downhill gear, but you’re given a beacon to use for the day. In contrast with my Alpenglow trip, I didn’t need a shovel or probe of my own, so I could use my own small backpack, and I didn’t need to carry a lunch, as it’s provided on the trip.
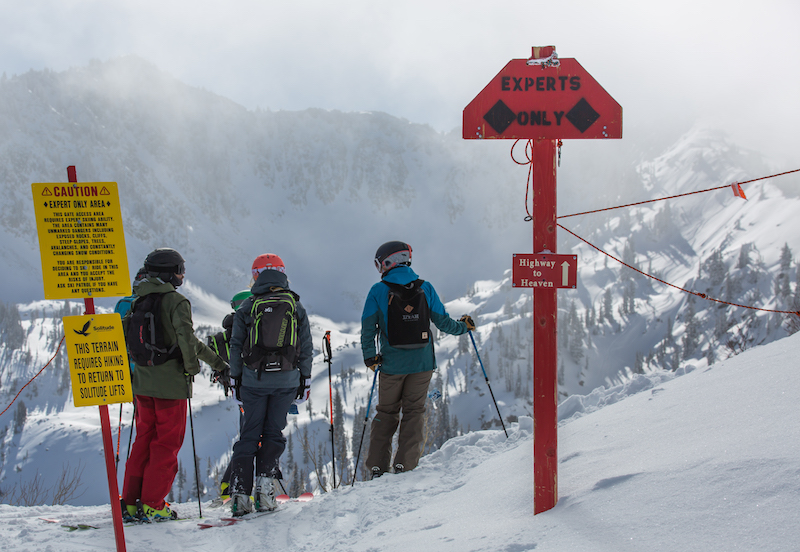
We started out by skiing a few Deer Valley groomers to get warmed up, then ducked the rope (with permission) and traversed through the backcountry to Park City resort, where we rode another chair up before skiing off-piste through pristine powder toward our next resort on our itinerary. We boot packed a few short times (holding our skis) before making it to Solitude for a delicious lunch at their Roundhouse mid-mountain lodge, which serves up Himalayan mountain cuisine (included). We rode the lifts here to access a backside bowl to Brighton, then rode up again to take the most beautiful traverse, the Highway to Heaven trail toward Alta and Snowbird.
This part of the journey definitely proved most strenuous, but we were rewarded with more gorgeous backcountry on the descent. We skied through Alta and reached Snowbird by 3:30 pm. Skiing six resorts in one day definitely made for a long ski tour, but it didn’t feel that long, thanks to some lift access along the way.
What to know before you book:
For both of these tours, it’s important to be a strong skier, able to ski ungroomed runs with confidence (intermediate or advanced). Perhaps even more importantly, you do need to be fit. The uphill boot packing, skinning, and/or sidestepping will work up a sweat and leave you legs like jell-o! For the Interconnect, you need to be a skier, not a snowboarder, due to restrictions on snowboarding in several of the resorts.
If you’re used to getting plenty of exercise and are a decent (don’t need to be great) skier, don’t hesitate to try one of these tours! It will open your eyes to new skiing possibilities, and greatly enhance your ski trip. Take a day to enjoy the backcountry, then return on-piste with more confidence.
Call the office of either tour to ask any specific questions; they’re eager to help walk you through the process and explain what gear you’ll need and what lift tickets might be required. Let them know of any limitations of your group and be honest with them about capabilities, and they can answer any doubts you may have.
Want a taste of non-lift-served terrain by exploring some side country (within ski area boundaries)? You can expand your limits on downhill skis by signing up for a Hidden Tracks guided day. I checked this out at Solitude Mountain Resort and had a blast with my private guide, who could show me all the hidden stashes and boot-pack trails to (mostly) uncharted terrain. He showed me Solitude’s many gated areas, and we hiked to several pitches of fresh powder. The rest of the time, we traversed and side-slipped to new-to-me slopes within boundary. At Solitude, you can opt for a full day or half day tour; I went half-day, which gave me a nice balance of challenging terrain and some nice groomers after my legs got tired.