Grown-up Getaway: What to do in Breckenridge in fall

Why would you go to Breckenridge in fall? As one local resident, mountain bike pro, and chef put it, “Why wouldn’t you?” Autumn is a special time in this Colorado mountain town.

breck-in-fall

When I arrived in mid-September, I half-expected a ghost town: after all, Breck is known for skiing. Instead, I found a town alive with a quiet, happy hum of activity: tourists and locals alike were enjoying the fall weather while hiking, biking, and enjoying special events only found in Breck in fall. Here’s what to do with a weekend getaway with or without the kids:

Go hiking:

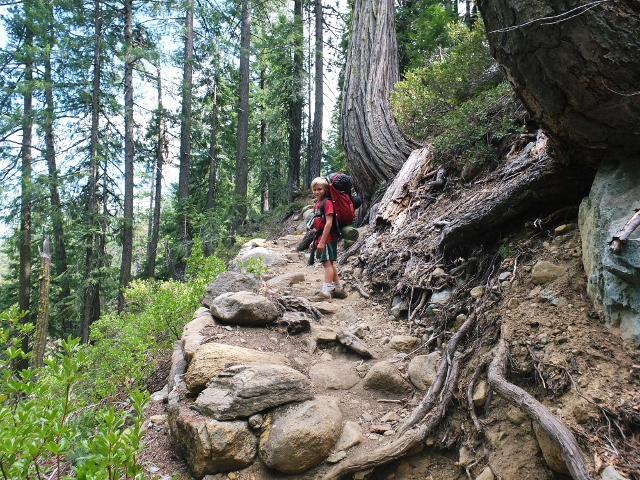
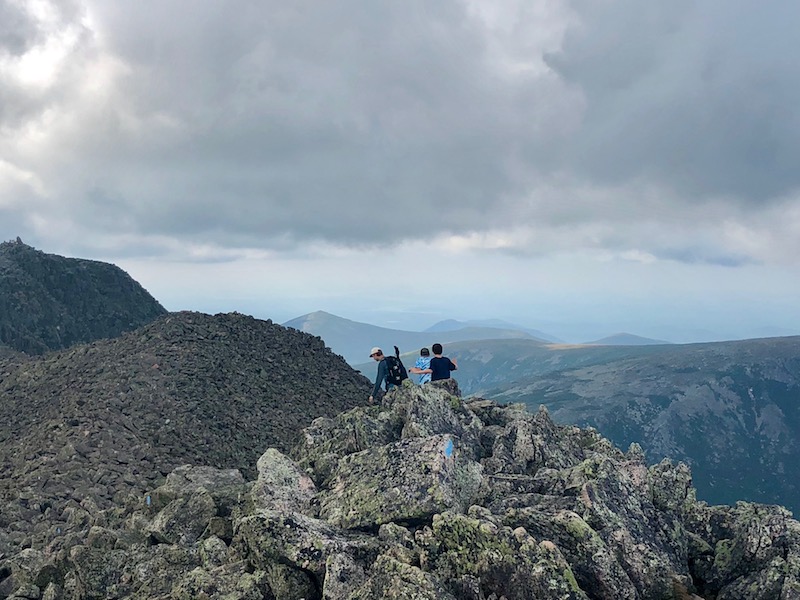
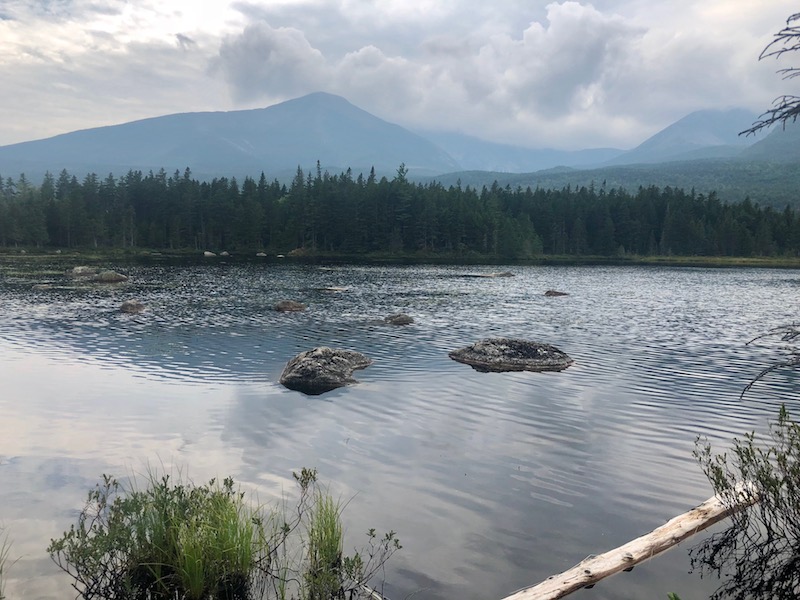
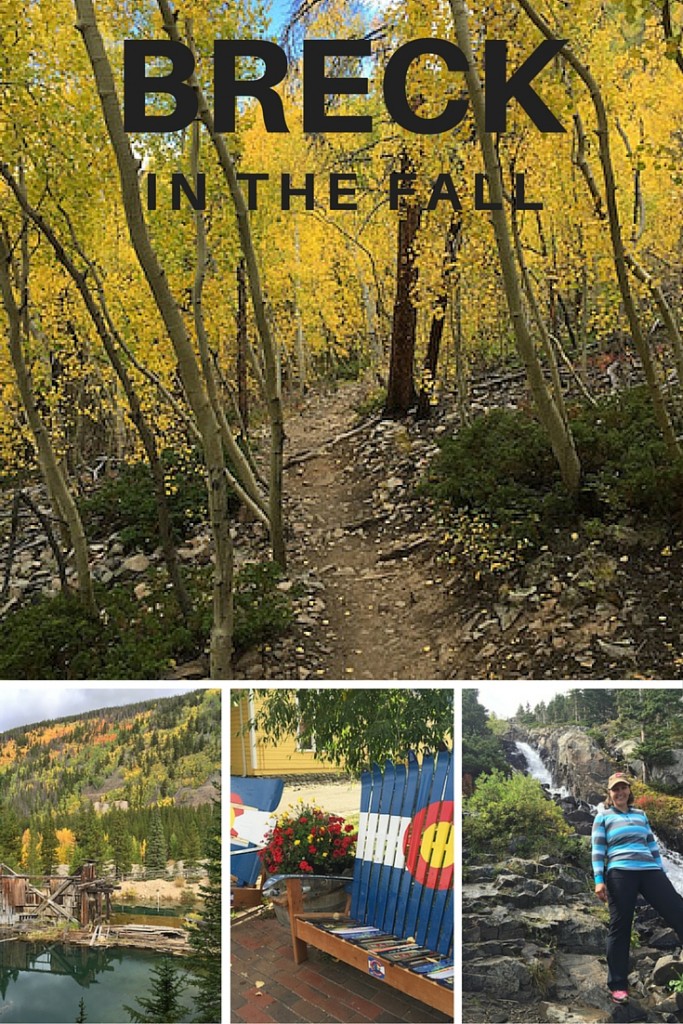
Leaf peeping is at its peak in September! For a challenging hike, head up Spruce Creek Road (just a few miles out of town off Hwy 9) and park at Spruce Creek Trailhead. The Spruce Creek Trail takes hikers through alpine forests for just over two miles, then connects with the Mohawk Lakes Trail. This final 1.7 mile section gets steep, past snow melt waterfalls and the remains of mining structures en route to Lower and Upper Mohawk lakes…well worth the effort. Look for mountain goats and plenty of fall color on the slopes opposite.

hiking-in-breck


Need more ideas for local hikes or want to hike with an expert? Contact CBST Adventures in town and go with a pro!

Get a massage:

While in Breck, I had the best massage of my life at Harmony Health Massage and Wellness Spa. What made it so special? Owner and massage therapist Inanna Hall, who took on the task of getting travel day stress out of my shoulders and neck from a holistic, almost spiritual approach. Her philosophy is to approach any massage from an intuitive angle, and it showed. I had one of her synergy massages, and added a session with oxygen for only $30. This is a smart thing to do while adjusting to Breckenridge’s high altitude.

Get on a mountain bike:

There’s more mountain biking in and around Breckenridge than you’ll know what to do with. Pick up a hiking and biking trail map when you arrive, and use the universal green (easy), blue (intermediate), and black (expert) color coding to pick your routes. Most of the marked trails around town are single or double track, though dirt roads can be tacked on for good measure. As a beginner-intermediate mountain biker, these are the trails I tackled:

breck-mountain-biking

  • Lower Flume: Access the Lower Flume trail directly from town via the recreational bike path (more on that below). From the Breckenridge Recreation Center, follow the path out of town to where it connects with Lower Flume. Or, follow Main Street down to the 7-Eleven, turn right, and access from the recycling center.
  • Betty’s Trail: Find this intermediate trail right off Reiling Road. It’s just under one mile, and parallels the road most of the way (you won’t get disoriented). While it goes up and down, it’s not too rocky, though you’ll want to take care on the sharp turns.
  • Turk’s Trail and Reiling Drudge Trail: Further up Reiling, a parking lot offers access to a wider network of trails, including intermediate Turk’s and easy (and short) Reiling Drudge. Turk’s has quite the incline and tends to be rocky, but intermediate to advanced riders will love that it connects to more in the blue category, or can be looped with easy B&B.The Reiling Drudge Trail is fun because of the historical plaques marking remnants of mining history in the area.
  • XLOU8: My favorite intermediate trail I experienced, XLOU8 can be accessed from the same Reiling Drudge parking lot, and connects to Minnie Mine trail. It’s up and down, fairly free of rocks, and has an interesting mine to ride past.
  • Pence Miller: This intermediate trail can be accessed directly from Mountain Thunder Lodge via a short access trail. It winds above the resort area at the bottom section of the ski runs.

Pick up a mountain bike to rent for the day or multiple days at Avalanche Sports, located on North Main. They’ll give you a helmet, which is essential. Also bring water, a snack, and a layer or two for any ride. While it’s easy to return back to town fairly quickly from most easy and intermediate trails, it’s still good to be prepared for any weather. Find trail maps here.

Not sure you want to mountain bike? Take the recreational bike path through town instead. This paved path runs almost to Keystone!

Take a distillery tour:

breckenridge-distillery

The Breckenridge Distillery has a tasting room on Main Street, but also a full factory tour offered at their distillery on Airport Road. This tour is fascinating…and yes, it includes samples. Each tour is 30 minutes, and takes guests from a tasting area to the distilling rooms and barreling rooms. Our tour guide knew the business inside-out, and answered all our questions relating to both the distilling process and the variety of spirits created (which include vodka, bourbon whiskey, bitters, and seasonal specialties). Tours are free! Must be 21 or over.
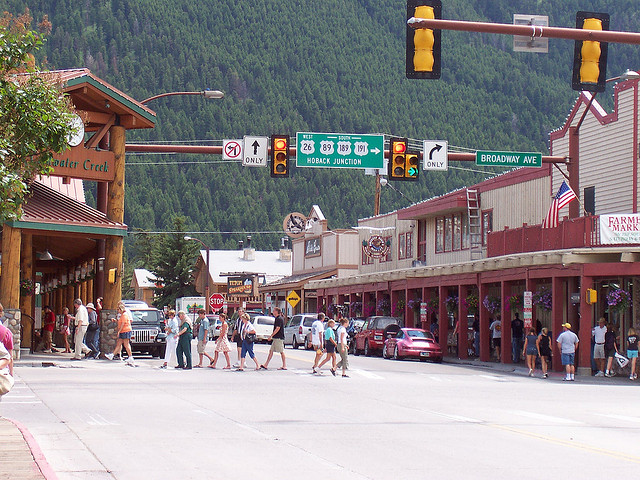
Stroll around town:

downtown-breck

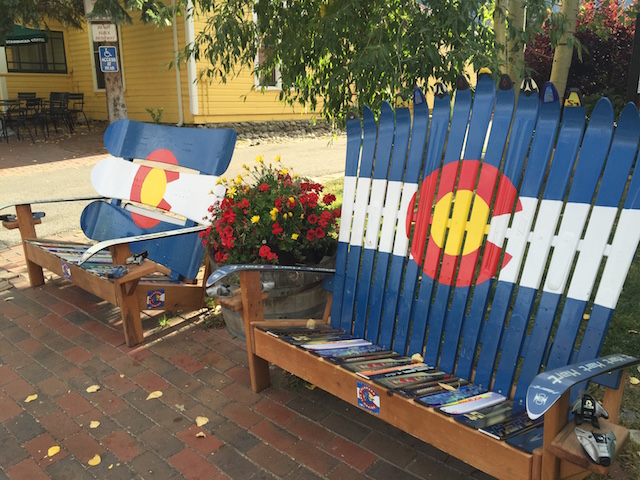
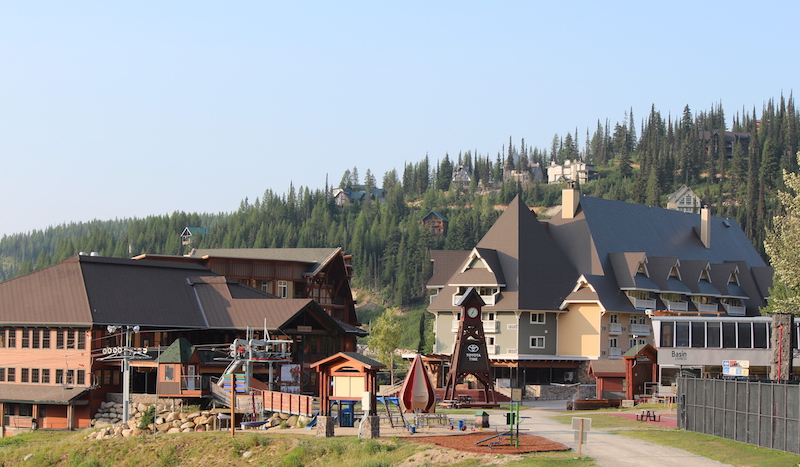
Main Street runs from the ski resort village all the way down to the far end of town, and is chock full of great dining and shopping. And no, it’s not dead in the fall. Instead, it’s intimate, with locals emerging after a busy tourist summer season. Check out the shops, eat a crepe at Crepes a la Cart, grab a craft cocktail at Modis, and just take in the scene. While walking downtown, consider taking a historic walking tour from the Breckenridge Heritage Alliance.

Need dining recs? We have them!

Take in the Breck Film Fest:

The Breck Film Fest takes over town one week every September, and is a fun opportunity to see Hollywood in the mountains. Come for opening night, and grab affordable tickets to the opening show or opening night party. We were lucky enough to see the feature film for the festival’s Adventure Reel, Snowman. The atmosphere is relaxed, casual, and ultra-cool.

What do you like to do in Breckenridge? In what season?

DeLorme inReach or SPOT Gen3: Which GPS messenger to buy for outdoor adventure

Do your teens hike without you? Do you venture into the backcountry as a family? In winter, do you like to snowshoe, camp, or ski off-piste? If you answered ‘yes’ to any of the above, you’ve probably considered outfitting yourself or your kids with a GPS device for the field. In our opinion, these two devices are the best on the market for hikers, backpackers, and backcountry skiers. Here’s our observations and recommendations for which GPS messenger to buy for outdoor adventure:

The difference between DeLorme inReach SE and SPOT Gen3:

GPS-messenger

DeLorme inReach SE in a nutshell:

Our inReach SE and I are very close, because I clung it its updates as our son was hiking on the PCT. He used it for the entire 457 miles. This was the lifeline we absolutely needed with a kid on the trail. The SE does the following:

  • Emergency service: Your personal locator beacon sends SOS signals with GPS location data to GEOS worldwide emergency response; communicate with GEOS via 2-way text messaging throughout the rescue. We’ve never used it, and in fact, you have to slide a little panel over to activate this button, to prevent accidental activation.
  • Point-by-point tracking: You can set the SE to track progress as often as every 10 minutes. Progress is shown on DeLorme’s website portal, MapShare. You invite people to MapShare, which is where you follow along at home.
  • Two-way messaging: Pay attention, because this is inReach’s best feature. You can send both pre-set messages that you customize yourself to friends or family (things like Everything is ok to I may need help) AND you can message free-form, just as you would via text. This means you can have actual conversations with the inReach. Example: Stopping here for the night. From parent: Did you find water? Answer: Yes, great spring here. You can text via the inReach’s key pad (clunky and slow, but it works) or via your phone, if you’ve opted to pair it. For the person at home, messages come through as either emails or texts (you decide). You text back via the MapShare portal, either on your phone or on a computer screen.
  • Smart phone pairing: Before leaving on your trip, you can pair your inReach with your phone, which allows you to use the included EarthMate app in the field (even when you don’t have cell service). This app gives you a map view, and also lets you text with more ease. Bear in mind: if you do this, you’ll need to worry about keeping two devices charged: your inReach and your phone.

So, does it work?! YES. We loved the inReach, and found it reliable. You can expect delays from five to 20 minutes in some areas (both in tracking and texting), but it literally worked everywhere, with one exception: while hiking through Native American reservation land, it went dark. The MapShare portal was easy to use, too.

DeLorme-in-Reach

Things to keep in mind with inReach:

Battery life is pretty good; we found that when placed in ‘track every 10 minutes’ mode and turned off at night, the inReach had about three days in it before needing to recharge (via USB cable). We charged with a wall plug when possible, and with a solar panel charger in the field.

The inReach weighs about seven ounces, and attaches to any backpack strap via a clip. We liked that it beeped when there was a new message (helpful when it’s not always in front of you) and beeped to confirm messages were sent. You navigate around the inReach with the keypad and up-down arrows. If you remember your old phones of years bygone the ‘up-arrow, left, left, down-arrow, enter’ drill to command it, it’s like that.

You DO need a subscription plan with the inReach: you can opt to do month-to-month (starting at $14/month) or annual plans (around $150 or starting at $12/month). The plan we picked was about $30/month, which included unlimited texting and tracking. The cost of the actual device is $299. Right now, it’s on sale on Amazon for $263.

Can you upgrade? Yes. If, in addition to all the features above, if you also want to have built-in navigation (in which you plan your route, drop waypoints, and then follow the path with arrows on your screen), you’ll want to upgrade to the DeLorme inReach Explorer for an extra $100 or so. We wished we had this feature a few times when in snowfields, when the trail was not visible. It would also be good for anyone who travels off-trail. This said, it’s possible to pair the inReach with your phone, and download maps there. Then you have two things to carry and charge, though.

SPOT Gen3 in a nutshell:

If your explorer in the field doesn’t need quite as much hand-holding (or you’re better at letting go than I am!), the SPOT Gen3 is simpler, lighter, and more streamlined than the inReach. If you want the TL;DR version of this entire review, here’s the difference between them: the SPOT Gen3 does NOT text back and forth, and therefore does not allow for a two-way conversation. But it has other great features. Here’s what it does:

SPOT-Gen3

  • Emergency service: SPOT’s emergency service is the same as inReach; you get immediately connected to GEOS. But there’s a second feature that inReach lacks: there’s also a NON-emergency help button. This button goes out to your pre-set friends and family (NOT to 911), alerting them that you need assistance. It sends your GPS location on a map when it does so. This is a nice feature for if you get a flat tire, run out of food and need a person to bring you some, or hurt yourself but can walk your way out.
  • Point-by-point tracking: Yes, you get this too…same as the inReach, for the most part. SPOT will track your movements as often as every 2.5 minutes, if you opt for an upgraded plan (more on that below), but generally tracks every 10, 30, or 60 minutes. Family at home can see tracking in almost real time via SPOT’s portal, called FindMeSPOT.
  • Custom messages: Like inReach, you can create custom messages you want to use with SPOT, which you set ahead of time on the web portal. Think Found our campsite or Having a great time. There’s also a set button for OK. That’s all it will say (with GPS location via a map), but it’s very convenient if you don’t want to hassle with buttons and key pads.

Does it work? Definitely. The Gen3 does what it says it will do, so as long as you know its limitations, you won’t be disappointed.

Subscribe to our Pit Stops for Kids seasonal newsletter, and get an exclusive travel ‘cheat sheet’, free! Click here!

backpacking-trail

Things to keep in mind with SPOT Gen3:

This is the way to go if you don’t need to download maps (there are lots of other apps for maps, if you want them on your phone separately from your GPS device), don’t need to have back-and-forth conversations with people, and don’t want to mess with navigating through a clunky keypad to do things. We love that one button sends an OK message with a map of location, and that the SPOT is only four ounces and attaches to your pack with a carabiner.

Battery life is longer on SPOT than inReach (they claim 150 hours, but I don’t think it was quite that great). You re-charge it via USB, just like the inReach. I like that both these GPS units have rechargeable batteries; some other devices require you to buy expensive replacements.

The SPOT doesn’t make noises to indicate messages have been sent, but it does light up, which is nice. I just like having some sort of confirmation.

The Gen3 is $150 (half the price of the inReach), so if you don’t want two-way communication, by all means, don’t pay for it. You do still need a service plan, and it will be about the same price as the inReach: $14/month or $150/year. There is NOT an option of a month-to-month plan, which is a bummer.

Can you upgrade? No, but you can downgrade to the $99 SPOT Trace, but it’s pretty bare-bones and designed for car tracking.

Interested in staying in touch when TWO parties are close by in the wilderness? Consider GoTenna: review here!


Day hikes in Joshua Tree National Park: Hiking off-trail

During a time when many vacations are not possible, outdoor activities in road trip-accessible locations offer the ability to safely social distance. Hotels.com asked me to share my favorite activities and tips for exploring the outdoors near Joshua Tree, so start here as you plan a safe and responsible vacation.

I love a guiding company that doesn’t ‘dumb down’ experiences for guests. Joshua Tree Excursions definitely doesn’t take the easy route, literally or figuratively. If you’re looking for day hikes in Joshua Tree National Park, guide and owner Kelly Crawford is who to get to know. He challenged us during a five-hour hike through Joshua Tree National Park, during which we went off-trail to trek, scramble, and climb the park’s famous granite boulders. He allowed us to rise to the occasion during moments of challenge in the terrain, and gave us confidence that we could all do it. And we did.

Hiking off-trail in Joshua Tree National Park

The Joshua Tree Excursion experience starts when you book it, as Kelly prides himself in offering a fully customizable day or weekend. If you want a mellow hike through the park with a knowledgable guide, they can certainly do that, but they can also offer hikes that involve bouldering, climbing, or backpacking. Joshua Tree Excursions will even set up your entire camp for you (at a site in the park or in the backcountry) and can even provide all meals.

hiking-joshua-tree

Most families will simply want a day of hiking off-trail, as day hikes in Joshua Tree National Park are short enough to be do-able. It’s is an excellent place for off-trail adventuring. Families experienced in backcountry hiking can certainly hike off-trail in Joshua Tree on their own, with the right navigational tools (and knowledge in using them). However, even though we’re familiar with all this, we’re not familiar with the desert landscape of Joshua Tree, so hiring Joshua Tree Excursions is a good solution.

wonderland-joshua-tree

Our trip off-trail started with our group of adults loading up in Kelly’s 4wd vehicle and entering the park. Anyone without day packs was provided one to use, along with plenty of water. Given the length of the hiking experience (ours was 5 hours) I do think it would be helpful to also have a few healthy snacks. We parked at the Barker Dam trailhead, and Kelly took some time to go over local geology, flora, and fauna.

Joshua Tree Excursions’ motto is ‘journeys, not destinations’, and we realized this concept was more than just a slogan right away, when we left the well-worn trail almost immediately. Kelly explained that we’d be hiking approximately five miles off-trail, in a large loop with time for shorter side excursions and exploration.

joshua-tree

We hiked through sandy washes, weaved past beds of cacti (pausing to learn each variety’s name), and climbed over rocks and boulders. It was exactly the type of hiking my kids love, so I’ll definitely be heading back to Joshua Tree with them again. Usually, I am perfectly content to hike on the trail, but I must say, Kelly’s version was much more fun and exciting. I felt like a kid again as I jumped, scrambled, and explored.

We stopped often for mini-lessons on Joshua Tree (and to drink water), and to take photos. While we didn’t have a precise destination, we did hit upon some landmarks that were amazing to see, such as Garrett Arch, the ‘cube’ (a huge square-shaped rock), and the Wall Street Mine (abandoned historic stamp mill). At a few junctions, such as at Garrett Arch, there was an option to climb higher up (or wait below).

joshua-tree

The level of difficulty was what I’d call intermediate, but others may call advanced. This is where the customized trip comes into play. When planning a trip with Joshua Tree Excursions, it’s important to explain not only what you hope to do, but your level of fitness and experience in the outdoors. Either way, I guarantee you can do more than you think you can!

We ended just before sunset and drove back to the Joshua Tree Excursions office below the park.

Pricing: Customized hiking trips usually start at $124 per person. Yes, this is a serious investment during your trip, but I believe it to be a worthwhile one. Kelly can provide families with an experience beyond what almost all can do themselves.

Lodging options nearby:

Lodging near Joshua Tree ranges from family-friendly roadside hotels to unique rentals to B&Bs. We have sampled quite a few options, all of which match the free-spirited nature of Joshua Tree, California itself. Within the park proper, car camping is beautiful as well, especially during the cooler months. In the heat of summer, you’ll probably want to find area lodging.

Don’t forget:

  • sunscreen
  • hats for everyone
  • sunglasses
  • water (more will be provided)
  • backpack (provided if you don’t have one)
  • long pants for hiking in (cacti hurt legs!)
  • snack such as a granola bar
  • a tip for your guide
  • trekking poles are a good idea if you’re not scrambling (but hiking)

joshua-tree

Bonus stop: After your day with Kelly, be sure to go back up to the park entrance at dark for a Sky’s the Limit presentation of the night sky. Offered on Saturday nights and some additional (see list of dates), this non-profit observatory offers the most accurate orrery in the world (a orrery is a replica of the solar system laid out on the ground, with the sun in the middle and the planets in their paths around it, set to real time). This, and the nature path around it, can be enjoyed at any time during the day, but at night when open, the observatory also has volunteers on-hand to give a star presentation, complete with high-powered telescopes for viewing planets and stars.

joshua-tree
As I disclose whenever applicable, we are partnering with Hotels.com to bring you this post on Joshua Tree.

Best Mountain Towns: Jackson Hole Wyoming

Ready for a Western vacation in a breathtaking setting? Jackson, Wyoming is one of the best vacation towns for families, in any season. We love to visit in summer, where we can base ourselves in Jackson to explore Grand Teton National Park, the Snake River, and area lakes and hikes. Here’s what you can expect in Jackson Hole, what to do, where to stay, and where to eat. Read on for our Jackson Hole Wyoming guide:

jackson-hole

During a time when many vacations are not possible, outdoor activities in road trip-accessible locations offer the ability to safely social distance. Hotels.com asked me to share my favorite activities and tips for exploring Jackson Hole, so start here as you plan a safe and responsible vacation.

The center of Jackson Hole is pedestrian-friendly, with a central square decorated with elk antlers and more than a few Western wear clothing stores and outdoor stores. You’ll find plenty of cowboy bars and casual eateries in the center of town, too. Along the outskirts, families will find the larger resorts, including the ski resorts of Snow King (just outside town) and Jackson Hole (a few miles away). The entire region is framed by the majesty of the Tetons….Grand Teton National Park is only 20 miles away, up Hwy 26 or Hwy 390.

Where to stay:

There are as many types of lodging in and around Jackson as there are ways to enjoy this town. Families can opt for luxury at the Four Seasons Jackson Hole or the Teton Village area, or find lower-budget motels in town (book early!). One travel hack for this area is to book a stay at the Snake River/Jackson Hole KOA just outside town. By far the nicest KOA we’ve stayed in, their luxury cabins are immaculate, and include full kitchens and bathrooms. Located directly on the Snake River about 15 minutes from Jackson Hole, this KOA also offers its own float trip in season. In addition to luxury cabins, they offer standard cabins for well under the cost of a hotel room, and standard RV and tent camping sites, some of which are directly on the river.

koa deluxe cabins

As travel today remains uncertain, please keep your safety and the safety of others in mind at all times. If you are comfortable with traveling, please travel responsibly and within regulation as any travel is at your own risk. If you do decide to travel at this time, here are our recommendations:

  • Wear a face mask.
  • Bring hand sanitizer and wash your hands on a regular basis.
  • Check official websites before your trip for the latest updates on policies, closures and status of local businesses.
  • Book a hotel with free cancellation in case you need to change your plans at the last minute.

What to do in Jackson Hole:

Plan at least one full day in town. Find parking once, then leave the car during the busy summer months and hoof it from place to place…everything is close by. Browse the fun shops in the heart of town, then head down Snow King Avenue to Snow King Mountain Resort. Try the alpine slide here, or the other summer recreational offerings.

maze 2 web

In warm weather, head next to the Amaz’n Jackson Hole Maze, where kids are given a water gun and sent into a large wooden maze to wage their water wars. This is good old fashioned fun at its best! Be sure to leave time to catch the historic Jackson Hole Rodeo, which performs every Wednesday and Saturday night in summer. Bring sweaters or a blanket…once the sun goes down over the Tetons, the summer air gets chilly!

Just outside of town, Jackson Hole Mountain Resort offers mountain biking with lift access during the summer months (and world-class skiing in winter). Families can also ride the ariel tram, try the bungee trampoline, or find hiking trails from Teton Village, at the base of the resort.

On a second day, plan a Snake River float trip from one of many operations based in Jackson Hole; we love to go with OARS. With the Tetons as a backdrop, Snake River floats are scenic but not high adrenaline affairs; look for wildlife and expect a packed lunch en route.

oars-jackson-lake

Head into Grand Teton National Park, entering the park at Moose to hike along Phelps Lake (we enjoyed bear sightings here), or continue on to Jenny Lake and String Lake for excellent swimming. Park at String Lake for the best kayaking, SUPing, and wading, but get there early in the summer months…it fills up fast. Farther into the park, rent canoes on Jackson Lake or take a horseback ride at Colter Bay Village.

horseback 2 web

Where to eat:

We’re not foodies. When we travel, we usually want healthy dining options in a casual atmosphere. In Jackson Hole, we love Pizzeria CalderaMacPhail’s Burgers, and the Snake River Brewing Company. For great coffee and wifi, the Bunnery is our go-to morning location.

As I disclose whenever applicable, we are partnering with Hotels.com to bring you this post on Jackson Hole.

Summer in Idaho: Schweitzer Mountain Resort with kids

In the panhandle of Idaho, high above Lake Pend Oreille and the picturesque town of Sandpoint sits Schweitzer Mountain Resort. While many people know Schweitzer as a ski destination, summer on the mountain has much to offer the active outdoor family from late June until early September. Find miles of trails to explore, ripe huckleberries to pick, free lawn games to play, sprawling vistas to gaze upon, Village attractions to thrill you, blooming wildflowers to photograph, and a chairlift ride to amaze (and somewhat scare) you.

Schweitzer caters to those who love the outdoors.  The main attraction is undeniably the over twenty miles of trails and its connection to the massive Selkirk Recreation District trail system. However, we found that Schweitzer in the summer offers many summer activities aimed at entertaining the whole family from hiking to a playground, pool and thrill attractions. And if you time it right and visit in late July or early August the wildflowers will be in bloom and the huckleberries delicious. 

Tip: Once you’ve explored the mountain, don’t forget to spend a day at City Beach in Sandpoint enjoying the sun, volleyball, sailing, beachside playground or swimming before heading a few blocks over to experience an “auto bridge” that is now enclosed and home to one of the most unique shopping experiences in the country.

Lodging accommodations

Schweitzer offers two on-site lodges, the Selkirk and White Pine, with a variety of room types to address different family needs.  The lodges offer rooms from the standard double queen to three bedroom condos that can sleep up to ten people. The Selkirk Family Suite met the needs of our family of five. It included a queen bed and a twin bed over a second queen, a small kitchenette and table for in-room dining. The room was spacious enough not to be overcrowded when all five of us were present and quiet and relaxing when our youngest went down for her afternoon nap. 

While the lodge included typical hotel amenities like an exercise room and small business center, it was the more unique features and Northwest flare that won over our family. The lodge includes a theater room (first family there picks the movie for the night!) as well as an outdoor heated pool with views of the mountain. It is difficult to describe how or why the pool won us over so completely, but unlike other experiences where the pool area is heavily regulated, Schweitzer takes a more relaxed approach. Do you want to take your food and beverages (even the adult type) out to the pool and eat dinner as the sun sets over the mountains and your children splash around in the shallow end or warm up in the hot tubs?  Of course you do.  And at Schweitzer they let you. 

Note: don’t leave your Pucci’s Pub nachos (they are delicious) unattended as the adorable marmots will move in on them quickly!

The Selkirk Lodge also shares space with the Chimney Rock Grill and Mojo Coyote’s Coffee Shop.  You don’t have to leave the building and both are excellent.  While it was nice to be just a flight of stairs away from our morning lattes, we especially enjoyed the ample portions of the kids’ meals at Chimney Rock. The food came with attentive and quick service that thoughtfully seated us on the shaded patio keeping us out of the more congested areas and provided us with another opportunity to admire the views. 

The Selkirk Lodge is centrally located in the Village and faces the common area on one side and the mountain on the other. From just outside our room we were able to play a game of giant checkers, spend time stargazing with our telescope, and watch the kids enjoy an impromptu dance party. A playground is adjacent, as is a massive colony of marmots, and deer and moose to spot. For reservations and rates go to Schweitzer.com.

The Schweitzer Ultimate Fun Pass

To help facilitate summertime fun in the Village, Schweitzer offers the Ultimate Fun Pass (UFP), which gives all-day (11am – 5pm) access to the chairlift and other paid attractions. The UFP attractions include unlimited chairlift rides, trips down the zip line (for those eight years old and 60 lbs), climbs up the climbing wall, and jumps on the trampoline jumper. Every UFP also includes one bag of dirt and jewels to be sluiced at Cranky Jennings Sluice Box which was a crowd favorite in our family.

Our 10-year-old took advantage of the unlimited rides on the 700’ foot long dual zip lines (and yes, mom did join her).  This was an exhilarating adventure for both child and parent to enjoy together while offering us a unique view of Lake Pend Orielle down the valley. The modest length and height, as well as the extremely accommodating and friendly staff at both ends of the zip line, made for a perfect introduction to the sport for our traditionally tentative and risk-averting daughter.  In fact, mom was more anxious than she was, especially the second time down the line. 

Since our three and six-year-olds did not meet the minimum age or weight requirements, the rest of us moved the short distance in the Village to the trampoline jumper and climbing wall while older sister and mom enjoyed the zip line. A single parent was able to simultaneously supervise the two younger kids on the trampoline jumper and the 25-foot tall rock wall. This was made possible by the attentive and helpful staff who supervise both locations. 

From all of the activities enjoyed with the UFP, surprisingly the sluice box was best received and enjoyed by all ages. Everyone who purchases the day pass receives a bag of dirt that contains hidden gems and stones. Using screens and a running channel of water you can wash away the dirt leaving just the treasures behind. From the magical discovery of a hidden gem to the trading of valuable items and even the imagining of enchanted powers related to different types of stones, the sluice box kept our kids entertained for an afternoon and their imaginations active for days. While we found one bag per kid to be an appropriate level of fun and amount of stones to haul around with us, for those wanting additional fun, individual bags are available for purchase in the Activity Center.

The most anticipated UFP activity for many is the chairlift ride to the summit. It was our three-year-old’s first open-air chairlift ride and we were a bit nervous starting out. Soon we were rewarded for our bravery with spectacular views of the valley below and a pleasant meal at the top of the mountain. Even for kids raised on the marvels of the computer-generated worlds of Star Wars, there is a jaw-dropping, ‘wow’-inducing moment, when you get to the top and turn around and look at the resort, tiny and insignificant by comparison, hovering above the valley and lake below.

The Nest at Sky House opened in 2016 and offers a relaxed but finer type of dining than we expected. If your family is looking for a kale Caesar, scallops, or steak sandwich, at 6000 plus elevation, you can’t go wrong. Kids under age 12 can pick from a cheese quesadilla, cheese pizza or bowl of noodles. The food was well prepared and our server was pleasant and attentive. The homemade raspberry lemonade was perfect for a hot summer day and fueled us up for another walk around the mountain’s summit. The Sky House Bar, also open 11am – 5pm, offers adults beverages as well. Staff will even provide to-go beverage cups as alcohol is permitted on all resort property. 

Tip: for the budget-conscious families or ones with picky eaters, you may want to consider packing a picnic and taking it with you to the summit. Plenty of picnic tables are available, all with a view.

After lunch, our kids took advantage of the opportunity to wrestle around in front of a ‘Danger: Cliff’ sign (increasing parent anxiety) while others could enjoy a round of disc golf, a hike, or mountain bike ride down the mountain.

If you fear heights or have particularly squirmy kids (thankfully our three-year-old sat still except for the last 25 feet), the ride down the lift can be a white-knuckle experience. Rather than looking into and up the hill, you look out over the drop. While most families won’t be fazed by it, some will be hugging the little ones and tightly clinching the safety bar.

There are some practical considerations before purchasing the Ultimate Fun Pass:

  • Weight: Between 30 and 240 lbs for most activities. (60 lbs for the zip line)
  • Age: At least 8 years old for the zip line.
  • Shoes: You must have shoes that are closed over your toes and heel. 

Note: Schweitzer may take a more relaxed approach around the pool; however, they do not mess around with age and weight limits on the Village attractions and mountain bike rentals.  Be warned, you will be weighed on site, on an actual scale. Attractions can be purchased a la carte as well, at the Activity Center, if you don’t think your little ones will make full use of the pass.

Up next, additional summer activities…click on the button below to continue!

fathom-cruise

Pages: 1 2

Maine with kids: Baxter State Park backcountry itinerary for families

Baxter State Park is Maine’s largest expanse of untamed public wilderness. With almost 210,000 acres to explore, where do you start? Our Baxter State Park backcountry itinerary for families includes days in the frontcountry enjoying Baxter’s car camping options, several days in Baxter’s backcountry, then a rest day to play and explore before departure.

Baxter’s scope and size is on a national park scale, but unlike national parks, almost every lake, pond, waterfall and stream in the park is accessible only by trail. In very few places in Baxter can you drive up to see anything, and even then, you must drive miles upon miles on dirt roads. In other words, you earn you sightseeing! Baxter limits the number of visitors to the park daily, which means you won’t be rubbing elbows with crowds of tourists. It also means you have to be organized about your trip and get the required permits you need early. Here’s how!

The best way to experience Baxter State Park is by camping, though day permits are available as well (if you opt for that, stay in nearby Millinocket). Here’s our suggested itinerary, after doing most things right and a few things wrong during our five days in Baxter.

Day 1: Frontcountry camp at Roaring Brook Campground

In case you’re not sure, when I say ‘frontcountry camp’, I mean ‘car camp’, or camping via car access. Roaring Brook Campground is about eight miles into the park after you check in at the ranger station at the Togue Pond entrance, past Millinocket via dirt road. The campground, like all in Baxter, is remote and basic, with nicely-kept pit toilets, a place to purchase firewood (bring cash), and a staffed ranger station, but no other amenities, such as showers or potable water.

You can pick between tent sites and lean-to sites, and I recommend the latter, because they’re on the brook. You get a basic wooden shelter with a platform for each site, plus a picnic table and fire pit. We loved the shelters (lean-tos) throughout Baxter, as they provided just enough protection from the afternoon rainstorms and gave us a place to roll out our sleeping bags off the dirt. They’re not enclosed, however, and you won’t be safe from mosquitos there, so you can opt to set up a tent inside the shelter (but not outside of it). Roaring Brook is cold and clear, and we loved swimming in it.


Tip: You MUST enter Baxter State Park before 8:30 pm, so time your arrival accordingly. Also, the entirety of Baxter is ‘carry out’ for all your trash, so bring trash bags and plan on storing your trash in your car at night. You must also stow away all your food at night.

Day 2: Hike Mount Katahdin

If summiting Mount Katahdin is on your to-do list in the park, do it early in your trip, while you’re still fresh. It’s 5.5 miles (pretty much straight up) from the Roaring Brook Campground, and it took our family (seasoned hikers) 12 hours to complete. The trail is extremely strenuous, and the final mile of the summit hike is along a ‘knife edge’ with some scary-looking drops. If you go: bring tons of water, and a means to filter more on the trail (you’ll need it). Also bring headlamps in case you’re caught hiking after dark. We took the following route: Roaring Brook to the Helon Taylor Trail, to the Knife Edge, to the Saddle Trail, to the Chimney Pond to Roaring Brook trail. It was 11 miles that took us forever to complete.

Note: Kids under age six are NOT ALLOWED above the treeline at Katahdin, though on our visit, we did not see a ranger monitoring this. I’m told there usually are. We took a seven-year-old, my niece, who rocked it, but she’s unusual in her awesomeness.

If you don’t want to tackel Katahdin, I recommend the Chimney Pond trail from Roaring Brook (3.3 fairly strenuous miles) to enjoy a picnic lunch at Chimney Pond, which has fantastic views of Katahdin right at the base of the mountain.

Day 3: Recover from Katahdin

This is where we made a mistake in our itinerary. We didn’t give ourselves a rest day after summiting Katahdin. Stay one more night in Roaring Brook and plan on sticking around camp. Enjoy the swimming and maybe go .2 mile to Sandy Pond, to try to spot the moose who like to hang out there at twilight. No nothing more!

Day 4: Head into the backcountry

If you’re prepared for backpacking in Baxter, depart Roaring Brook today, hitting the Russell/Sandy Stream trail. The destination: either Russell Pond Campground with lean-tos (7.2 miles away), or, if you don’t want to go quite so far, reserve at Wassataquoik Stream, which offers several more lean-tos with great swimming (5 miles away). If you’re ambitious, you could aim for Wassataquoik Lake, 9 miles distant, which doesn’t have a campground but does have several more lean-tos. Russell Lake has a staffed ranger office and lean-tos, a bear line, and pit toilets, and we settled in at two of them, adding a tent site for our group of 10.

Note: Baxter State Park is VERY strict about group size and where you can camp. This is a good thing, as it eliminates big groups in campsites they don’t fit into. If you reserve a lean-to made for four, you can ONLY have four people sleep there. Ditto for six-person lean-tos and tent sites.

At Russell Pond, you can use the provided canoes at the dock for a small fee (I believe it was $1/hour, on the honor system) and you can swim, though we don’t recommend it (there are many leeches here). It is, however, a good place to spot moose. The Wassataquoik Stream lean-tos are better for swimming, and theWassataquoik Lake lean-tos offer a bigger lake (better for swimming) and more canoes.

Alternatively, you could backcountry camp at Chimney Pond instead of Russell Pond (see description above). It’s a shorter distance, though a rockier trail.

Day 5: Day hike from Russell Pond

We enjoyed hanging around camp and day hiking from Russell Pond to Wassataquoik Lake (2 miles) on this day. We played board games and cards in our lean-tos, picked blueberries in the wild patches nearby, and tried to spot moose.

Day 6: Hike back to the frontcountry

Return to Roaring Brook today, and spend the late afternoon cooling off in the brook. Pack up and depart Baxter the next morning, checking out additional parts of Baxter if time allows. We recommend Blueberry Ridges or Ledge Falls if so, and if not, hit a last swim spot just outside the park boundary at Togue Pond. You can grab a nice sandwich and some souvenirs from the North Woods Trading Post just outside the park toward Millinocket, and if you want a bigger meal, we recommend the friendly and affordable Sawmill Bar and Grill.

How to reserve your campsites:

Baxter State Park is popular, and as mentioned, entry is limited. To ensure you get your campsite, reserve far in advance. Baxter uses four month rolling reservations, so you’ll want to reserve exactly four months before you desired time. You can reserve online or by phone.

More tips:

  • If you’re day hiking Katahdin (staying in Millinocket), you’ll want to reserve your parking space (these are limited as well!). Here’s how. Parking reservations are only held for you until 7 am, then are given away on a first-come, first-served basis. Yes, you really need to start that early. If you’re camping in the park, you don’t need a parking reservation.
  • You’ll need to treat ALL your water in the park. Bring a good filter. We like the Sawyer Squeeze to bring on day hikes and the Platypus GravityWorks for in camp.
  • You cannot bring firewood into the park. You must purchase it in camp.
  • No pets are allowed, even in car camping campgrounds. Plan accordingly.
  • Check in at every ranger station as you hike. Bring a phone and treat it as an emergency device (you won’t get service in the park anyway).
  • Pack out all your trash…make it easier on yourself by reducing packaging on your food before you arrive. Store all food and trash in your car at night in the frontcountry, and on bear lines in the backcountry (use your sleeping bag stuff sacks to store food and hang it from the line provided).
  • Backcountry campgrounds DO include pit toilets with toilet paper. They were all in good condition during our visit.
  • Enjoy the Maine wilderness!


Three northwest backpacking routes for families

Parents with young children: you absolutely can backpack with kids! Our family has found success by choosing backpacking routes that are short on distance but big on rewards, whether that be in the form of a fun lake or river to swim in, dramatic scenery, or both. The following three northwest backpacking routes for families deliver.

Before you read on, check out our tips for backpacking with kids!

northwest backpacking routes

Northern California’s Trinity Alps:

Just south of dramatic Mt. Shasta at the top of Northern California, the Shasta-Trinity National Forest offers some of the best backpacking for families. While word is now getting out, the Trinity Alps used to be very uncrowded, while still offering up vistas on par with the Sierra Nevada.

For families, we recommend the 5.2 mile route from Swift Creek Trailhead to Granite Lake. From the Swift Creek Trailhead of the Trinity Alps, families hike for one mile before crossing Swift Creek at a large bridge and taking the Granite Lake Trail. After that, it’s 4.2 miles of a pretty strenuous uphill hike. Take your time, knowing that you don’t have to hike too far but will be rewarded with one of the most stunning alpine lakes you could ask for.

Make a home base at Granite Lake, and spend an extra day day-hiking up above it (the terrain turns to sub-alpine granite with great views). If you want to make a full loop of it, you can continue to Horseshoe Lake, reconnecting with the original Swift Creek Trail to follow the creek back to the parking lot. We have always been content to simply play at Granite Lake, however.

How to get to the trailhead: Swift Creek Trailhead is at the end of Swift Creek Road, accessed from Highway 3. (From I-5, grab Highway 3 at Yreka.) You’ll pass a national forest ranger station near Fort Jones, where you can grab your backcountry permit.

backpacking-trail

On the Granite Lake Trail

Southern Oregon’s Sky Lakes Wilderness:

The Sky Lakes are beloved to our family. They’re right in our backyard, so we’ve logged a lot of hours on trails here. The great thing about Sky Lakes is the flexibility; there are multiple options for making larger or shorter loops between its many small alpine lakes. The elevation is lower than many backpacking routes, so the nights will remain warmer (but you’ll also experience more mosquitoes, so aim to visit in August or September).

The Sky Lakes are generally split between Lower Sky Lakes Basin and Upper Sky Lakes Basin. You can see it all in a 12 to 14 miles loop, but we recommend staying on the Upper Sky Lakes Basin end to see Trapper Lake and Lake Margurette. You can camp at either, and experience the other in a day hike, should you wish. Start at Cold Springs Trailhead, and when the trail splits, follow the upper toward Natasha and Margurette lakes. The entire hike is only about 3.2 miles, and isn’t too steep. If you’re ambitious, you can also access the Pacific Crest Trail above Trapper, and walk along it for a while.

How to get to the trailhead: Cold Springs Trailhead is located off Highway 140. From Medford (and I-5), take Highway 62 to Highway 140. At mile marker 41, you’ll take gravel road FR 3651 at the Cold Spring Trailhead sign, and follow it 10 miles to the parking lot.

stuffing backpacking bags

Setting up camp

Central Oregon’s Jefferson Park:

Very few wilderness areas are as breathtakingly beautiful as Jefferson Park. And yes, it is indeed a veritable ‘park’ of alpine creeks, lakes, trickling waterfalls, and towering peaks. You have to earn it though: the route in from either side takes some time for families. We recommend the slightly shorter route from Whitewater Trailhead (the other option is Breitenbush Trailhead further north).

You’ll go about four miles before reaching Whitewater Creek, with stunning views of Mt. Jefferson all the while. After the creek, you’ll join the PCT temporarily as you enter the park. Once in, you’ll see many trail options leading a short distance to multiple small lakes. We suggest Russell Lake or Scout Lake. Take fishing poles, and the fish seem to really bite here. You can rejoin the PCT for a long day hike should you wish, or can simply set up camp and enjoy the lake. No matter which lake you pick in the park, the round-trip mileage will be about the same: 11 miles or so.

How to get to the trailhead: Take exit 253 off I-5 in Salem. Drive 60 miles east on North Santiam Highway 22. Between mileposts 60 and 61 (10 miles beyond Detroit), turn left on Whitewater Road 2243. This gravel road forks in about 100 yards, keep right. Follow this road 7.5 miles where it dead-ends at a large parking area.

Jefferson-peak

Jefferson peak

I think it’s time for us to discover some shorter backpacking routes in Washington state next! While we have experience in this region, it’s for longer hikes for more experienced backpackers. If you know of great routes for families in Washington, please leave them in the comments. And always remember to call the local ranger station before your trip for weather and trail closure information, as well as any detailed driving directions you may need.

Travel Gear We Use: best hiking boots for the family

We’re continuing our Travel Gear We Use series with a category I’m asked about a lot: hiking boots. Need guidance on buying the best hiking boots for the family? The following picks for kids hiking boots (as well as adults) come from brands we use and trust to be sturdy, highly-functional, and affordable. All have been worn by us on our own backpacking and hiking trips.

Best hiking boots for kids:

This infographic is created by GoFindMe GPS Tracker.

Merrell Chameleon 4 Mid Ventilator Hiking Boot :

The Merrell Chameleon comes in a range of styles, from low-top hikers to high top boots with full ankle support. You can also opt for mesh ventilation or more water resistant models. Find the style that your child likes best. What we love about the Chameleon is how comfortable this shoe is on, and how easy it is to get on and off. I know it sounds simple, but these features can make or break a hiking shoe for our kids. The Merrells are well-constructed but still lightweight and flexible, and the low-top version can certainly pull double-duty as a school shoe. The mid-height Ventilator linked here is only $55, which means that if you kid wears them out in a season, you won’t cry.

KEEN Gypsum Hiking Shoe:

Like the Merrells, the Keen Gypsum retails for under $60, but it offers a lace capture system for even easier on-and-off (and a better fit while on the trail). They’re not too heavy (we really don’t recommend stiff, heavy boots for kids), and will flex with the soles of kids’ feet. They’re breathable, and they have the toe-protection that Keen does so well: no stubbed toes here! pick up a pair for $60

Vasque Breeze WP 2.0 Hiking Boot:

If you need something a little more technical for multi-night backpacking trips, we like the Breeze from Vasque. Kids get full ankle protection and a very rugged sole with strong grip, but also a nice ventilation system so they don’t feel like their feet are in an oven. They weigh in at 2 pounds, and feature a very ‘grown up’ lacing system and toe guards. They’ll set you back more than the other shoes, but might even survive to be handed down! Buy the Breeze for $79.

Hi-Tec Altitude Lite Jr:

We love Hi-Tec hiking boots for adults, so it stands to reason that the kids’ versions would be a great ‘fit’ too. Always affordable without sacrificing quality, Hi-Tec boots are our first pick for down-to-earth outdoorsy families who don’t care about having the absolute trendiest brands on their feet. Give Hi-Tec a try! The Altitude Lite Jr. is rugged, with full ankle support. Opt for the waterproof version to save your kid from wet feet after creek crossings and muddy trails. Pick them up for under $70 on the Hi-Tec site or Amazon.

amzn_assoc_placement = “adunit0”;
amzn_assoc_search_bar = “true”;
amzn_assoc_tracking_id = “pitstoforkid-20”;
amzn_assoc_ad_mode = “manual”;
amzn_assoc_ad_type = “smart”;
amzn_assoc_marketplace = “amazon”;
amzn_assoc_region = “US”;
amzn_assoc_title = “My Amazon Picks”;
amzn_assoc_linkid = “2b3ff3efebcf632ee007032e7c7a5424”;
amzn_assoc_asins = “B00Q66T13Y,B004LX007A,B008O5AQJI,B00LB7A150”;

Oboz Sundog:

For teens who say they don’t like hiking boots (and think they can hike in flip-flops) the Sundog is the next best thing, that will still make mom and dad happy. Extremely lightweight and in a fun citrusy color, the Sundog wears like a tennis shoe. It has a rugged outsole and laces tightly, so there’s some control amid the feeling of ‘I just have my sneakers on’. Win-win.

Best hiking boots for parents:

I’m going to say something radical here: 90% of the time, you don’t need a full-fledged hiking boot, even for multi-day backpacking trips. I LOVE to wear my LOWA Innox Evo shoes, both when I’m traveling and when I’m hiking, camping, and backpacking. For me, and I know it varies by person, this is the most comfortable trekking shoe out there. Check out a full review here. Buy the LOWAs, be happy, don’t worry about hiking shoes ever again.

BUT, if you need fuller protection for a seriously epic trip, read on:

GoLite Women’s XT89:

I love GoLite shoes, and their XT89 for women are lightweight while still offering full support and great traction. Plus, they’re comfortable enough to want to wear around camp, too. I found I needed to order a half-size up (as they run small), so definitely try these on before ordering online. For men, GoLite’s GoLite Men’s Quest Lite Hiking Boot is a great pick.

KEEN Terradora:

For women, it’s hard to beat the KEEN Terradora if you need the protection of a full-fledged hiking boot. (It does, however, come in a lightweight hiking shoe, to). The Terradora is made of knitted fabric that’s completely waterproof but still soft and flexible, and has a padded ankle support section to help with the discomfort of the usual stiff ankle coverage. Pick it up for $130 on Amazon.

Oboz Mystic Low BDry:

I love a lightweight, low-cut hiking shoe. (If you don’t, try the Oboz Bridger instead.) The Mystic is fully waterproof, yet light enough to be considered a sneaker, should you slide them on for a mid-week soccer practice, as I have. They’re substantial without being stiff, and responsive yet firm on the outsole. They’re my go-to backpacking shoe when I won’t need full-scale ankle support, and they’re competitively priced, too.

Need more shoe ideas? Check out more gear at gearweare.

amzn_assoc_placement = “adunit0”;
amzn_assoc_search_bar = “true”;
amzn_assoc_tracking_id = “pitstoforkid-20”;
amzn_assoc_ad_mode = “manual”;
amzn_assoc_ad_type = “smart”;
amzn_assoc_marketplace = “amazon”;
amzn_assoc_region = “US”;
amzn_assoc_title = “My Amazon Picks”;
amzn_assoc_linkid = “5cff3a8b5f0e508e11c71a553e7363cc”;
amzn_assoc_asins = “B009OZEN0A,B006S65U6E,B018WEJIRG,B0133B58BS”;

More Travel Gear We Use:
Best carry-on luggage for kids
Best overnight backpacks for kids and youth
Best packing cubes and TSA bags for the family

Best point and shoot camera for vacation photos
Best iPhone cases for travel

Travel Gear We Use: Best first aid kits for family travel

Several years ago, I became certified as a wilderness EMT and decided to create my own first aid kit for family travel. I created the ultimate kit: I left nothing out, and when I was done, there was no medical emergency I was not prepared for. The only trouble: my kit was the size of a pillowcase and had cost me almost $60 to put together.

best first aid

I’m often asked how to make a homemade first aid kit, but what I tell people now is: don’t. There are a number of excellent portable first aid kits for family travel on the market that are more affordable. Here are the best first aid kits we use.

Adventure Medical Kit Ultralight/Watertight Kit:

Depending on the size you select (we opt for the 1-4 people for 1-4 days size), the Ultralight/Watertight kit weighs in at under 12 ounces, and is slim and compact to boot. This is our #1 pick for outdoor travel, such as backpacking, camping, and boating. Inside the main pouch, you get two waterproof pouches with inventory lists on the side (they’re also see-through). Included is everything you need for at least a long weekend in the woods (with the exception of very few items…see below). At the top of the ‘thank goodness they thought of this’ list is: antihistamine, moleskin, duct tape, lots of bandages, after-bite itch relief. You get very few bells and whistles with this kit–no fancy organizational pockets or handles–but the best medical kit is the one you actually have with you when you need it. Pick the Adventure Medical Kits UltraLight & Watertight up on Amazon for only $26: you can’t make it for less.

best-first-aid-kits

Adventure Medical Kits Mountain Series Day Tripper:

Yep, another kit from Adventure Medical Kits. Why? Because of the extra touches: their kits are extremely well-organized, and come with either see-through lining or clearly marked categories, so you can find things fast. Also, all Adventure Medical Kits can be restocked at refillyourkit.com. No more half-empty first aid kits lying around! The Day Tripper is the perfect size for a family’s general use while traveling. Yes, you can get a bigger kit, but be careful: will you really drag it around with you? The Day Tripper weighs under a pound, and fits easily in any day pack for any sort of travel day. It serves 1-5 people. Unlike the Ultralight, it contains smaller pockets and sleeves within the kit to help you stay organized. You get everything you get in the Ultralight, plus an ace bandage and paperback medical book to use as a guide. Pick up the Adventure Medical Kits Day Tripper on Amazon for only $27.

Adventure Medical Kits Medical Kit .5:

Want to go very small and light? Don’t shy away from a medical kit designed for one person. The .5 isn’t big enough for our whole family while camping and backpacking, but it is perfect for day trips and air travel trips when space is tight. In it, you get enough bandages, tape, and gauze for several days of use, plus the same standard medications, like ibuprofen, aspirin, and antihistamine that’s in other kits. There are even a few towelettes and packs of antibiotic ointment. Best of all, this kit is only $17.

What to add to your kit:

If you’ll be in the wilderness, add the following:

  • extra trauma bandages
  • snakebite kit ($3-5 at your local outdoors store)
  • extra antihistamine (my son recently got stung by 23 bees at once, while 5 miles from the car)
  • extra moleskin
  • a blister kit, such as BlisterMedic

If you’ll be traveling abroad:

  • extra of all medications (in case they’re hard to find)
  • hand sanitizer
  • vitamins to prevent sickness, such as Vitamin C, or Cold-Eeze, which will shorten most colds

Find more Travel Gear We Use!

What to do on Mt. Hood in summer: a three day itinerary

Mt. Hood Oregon is a winter playground, but it’s an amazing outdoor destination in the summer months as well. Located just an hour from Portland, Mt. Hood National Forest offers stunning mountain vistas for hikers, backpackers, campers, and kayakers. The central ‘town’ is Government Camp, which is a smaller community of outdoor-focused shops and dining, but the actual towns of Welches and Rhododendron are nearby and have more options. Families can fill their days walking in the woods, swimming in alpine lakes, and enjoying the fun of Mt. Hood’s ski areas in the off-season. Here’s what to do on Mt. Hood in summer!

Trillium-lake

Spend a day at Trillium Lake:

This stunning lake sits beneath Mt. Hood, allowing families to view the mountain from just about all points. You can camp here, though most of the sites are away from the water in the woods, but the best feature is the day use area, which offers picnic areas lakeside around the whole far side of Trillium. Bring the water toys, including stand-up paddle boards and rafts…but no motorized craft. Plan to come early to get your pick of day use spots! You can also hike around the lake, which is a two mile loop.

Go hiking:

Best hiking in the Mount Hood National Forest:

crossing-sandy-river

  • Paradise Park: An eye-popping wildflower meadow lies about five miles west of Timberline Lodge via the Pacific Crest Trail. We saw blooms as late as early August. The route dips in an out of several of the southwest side’s big glacial stream canyons.
  • Cooper Spur: This hike starts from Cloud Cap on the mountain’s northeast side. Take the Timberline Trail, then veer off toward Mount Hood on the well-trod path along Cooper Spur. When you get to Tie-In Rock, at 8,600 feet, it’s time to turn around.
  • Mirror Lake: Always popular with day hikers, this hike begins on the south side of U.S. 26 about one mile west of Government Camp. It leads to a lake that reflects Mount Hood, and is a great place to sample local huckleberries in late August/early September.
  • Tamanawas Falls: This five mile loop is easy to moderate along the east fork of the Hood River, and starts off Hwy 35 past Government Camp. You can scramble up the back of the falls if you’re daring.
  • Ramona Falls: You cross the Sandy River and follow along the PCT for this seven-mile loop to and around Ramona Falls, arguably one of the most scenic of falls in Hood River National Forest. This is a fantastic hike…see photo below!
  • Timothy Lake: Start at Little Crater campground south of Mount Hood, which is a wonderful sight in its own right…this tiny lake is very deep and has an incredible blue color, much like its big sister, Crater Lake. Then tour around Timothy Lake for a 13 miler, with places to swim along the way.

ramona-falls

Go mountain biking:

Families can try gravity-based mountain biking (lift-served) at Mt. Hood SkiBowl, one of Mt. Hood’s three local ski resorts. If you’re looking for something less steep but just as challenging in terms of exertion, Mt. Hood National Forest is criss-crossed with free mountain biking trails as well. We opted for SkiBowl mountain biking, at the West entrance of the resort.

mt-hood

It involved a $39 day lift ticket to ride the chair up with our bikes, and all-day access to their single track and dirt roads. If you need to rent bikes, they start at $15 for one hour, or up to $45 for all day. I rented for four hours for $35, and having a quality bike with shocks and sturdy tires was well worth it. Of course, you can bring your own bikes, too.

mountain-biking

If you bike at SkiBowl, be aware that Monday through Friday, only one chair is operating, giving access to the front face of the mountain with one main intermediate run and one black diamond run that ends in a bike park with various elements. To find more trails, simply go left at the top of the chair and access several additional green and blue single track runs via High Road or Low Road (dirt roads). You’ll be given a map when you get your lift ticket. On weekends, even more of the mountain is open.

Note: I would say it would be good to be at least an intermediate mountain biker to safely navigate even the green runs here.

Play at Mt. Hood SkiBowl:

Not sure if you want to mountain bike? SkiBowl’s East Entrance has all sorts of fun summer activities, ranging from mini golf to go-karts to a bungee jump and bungee trampolines. There’s a canopy walk that’s similar to a ropes course, but much more low-key, and those ‘human hamster balls’ where you get into plastic balls and roll around. In other words, lots of fun to be had. You can get a day pass for all of it for around $40 a person, or pay for things a la carte. If you want to try the alpine slide, that’s over on the West entrance by the mountain biking. Go early if you want to really open up the track and go fast, as it gets congested later in the day, slowing everyone down. Disc golf is also located on the West side.

mini-golf

Where to eat:

First and foremost, opt to eat one breakfast at Timberline Lodge’s famous breakfast buffet. It’s $15 per person, and worth every penny. Plus, you get to explore this historic lodge located right at the base of Mt. Hood. It’s stunningly beautiful, with gorgeous mountain views, and a great starting place for a shorter hike around the base. Their breakfast buffet is served in their historic dining room, and includes numerous egg and meat dishes, huckleberry pancakes, house-made granola, fresh pastries and fruit, and even a Bloody Mary bar.

Rathskeller Alpine Bar and Pizzeria is located in the town of Government Camp, which is a small community built around the ski industry. In summer, it’s sleepy but quaint. The pizza joint in town has great slices, but also a friendly atmosphere with an arcade/game room for the kids.

High Mountain Cafe: this sandwich shop is located in Government Camp, and has the best sandwiches we’d tasted in a long while (but maybe we were just really hungry!). It’s counter service, so it’s quick!

Volcano Cone is a little kiosk ice cream place in Government Camp. The ice cream is nothing amazing, but the staff is very friendly and it’s an easy place to grab a nice dessert. Also look for various food trucks in Government Camp during the day, including Asian cuisine and gourmet hot dogs.

Where to stay:

Cabin rental: We rented this HomeAway rental cabin in Government Camp via Vacasa. It was a rustic A-frame with a wood-fired stove and an outdoor fire pit, plus sleeping for eight. While small, this cabin was just what we needed, and no more. We could walk into Government Camp or to Ski Bowl.

mt-hood-rental

Local campgrounds: numerous Mt. Hood National Forest campgrounds are located in the Mt. Hood area. All of them are rustic, with pit toilets and no showers or plumbing. They are are very pretty and in wooded areas.

Resorts: A few resorts are in the area, though Mt. Hood is better known for camping and rustic rentals. Stay in Welches, just a few miles from Mt. Hood, at Resort at the Mountain, or at Collins Lake Resort closer to the action. Both are good options if you want a more pampered experience.

mt-hood-in-summer

Have you been in the Mt. Hood area? What do you like to do there?