Where to hike in Breckenridge with kids

Think Breckenridge, Colorado is only a winter ski destination? No way! This mountain town is a great pick for summer and fall travel as well, offering historical significance, museums and culture, great dining, and, our personal favorite, excellent hiking for families.

Breckenridge-hiking

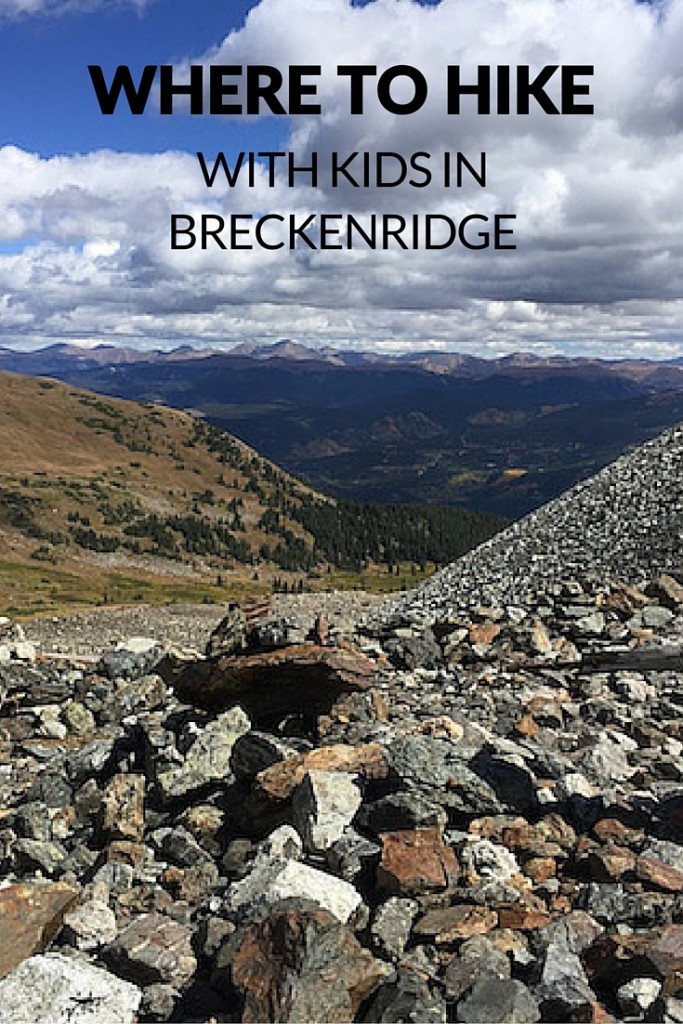
When families arrive in Breck, they’ll find maps with literally dozens of hiking trails accessible right from town. Many of these hikes will include mining history built in, either the form of signage explaining historical significance or historical structures or mining equipment that remains behind. Here’s where to hike in Breckenridge in multiple categories:

Easy hikes:

reiling-drudge

  • Burro Trail: Accessed directly in town, the Burro Trail has a gentle grade (it was literally the trail burros used to haul gear). The first half mile is easy-breezy, perfect for young kids, and then it keeps going for miles, all the way out of town to high elevations. Families can connect to the Spruce Creek Trail and Wheeler Trail further afield.
  • Sawmill Creek: This 1.5 mile loop starts just below and west of Snowflake Lift, which is close to Four O’Clock Road and Kings Crown Road. It has minimal altitude gain, and there’s plenty of shade along the way. The trail leads up to a beautiful reservoir: bring a picnic lunch!
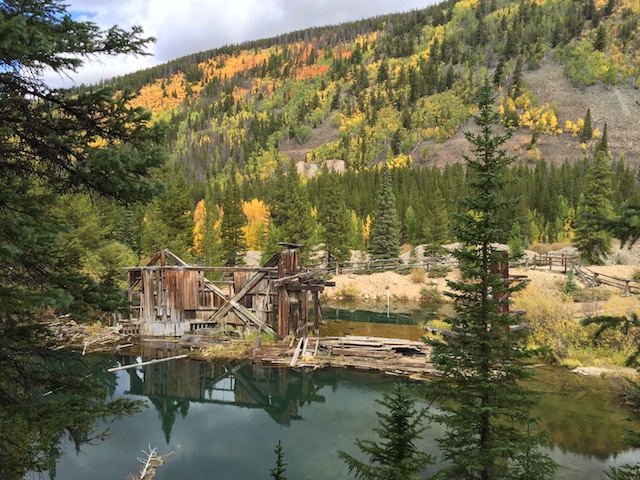
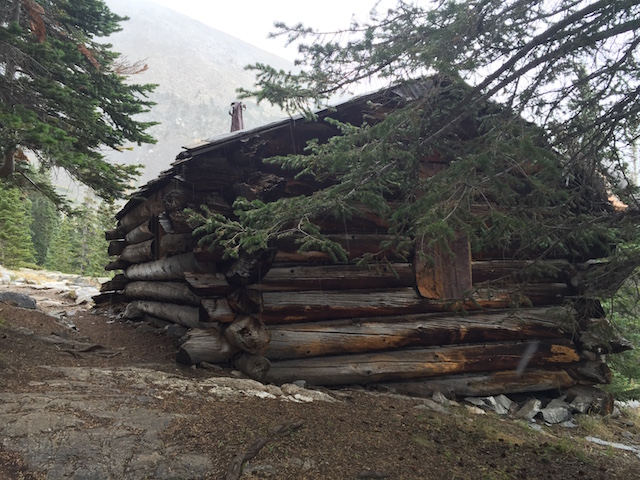
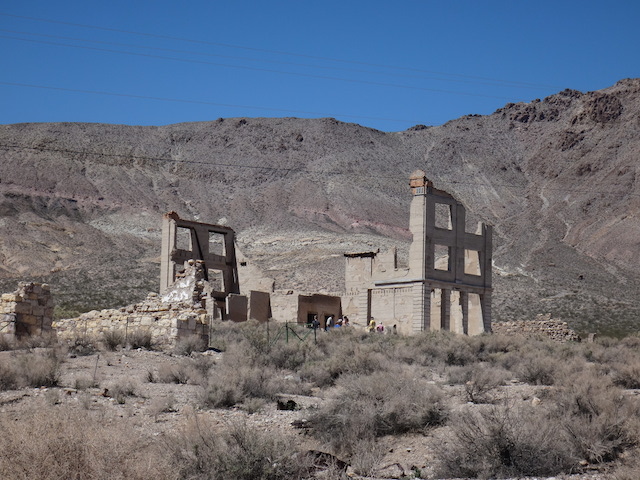
  • Reiling Drudge Trail: This trail, located at the top of Reiling Road, connects to several top-notch mountain biking trails. It’s multi-use, but an easy, short hike to the Reiling Drudge. This remnant from the mining era is impressively intact, and shows how this type of mining impacted the environment (you can see the piles of rock and ore still left behind, though the scenery is still very pretty). Historical markers tell hikers more about the site. If you want a longer hike, continue from the drudge trail to the Minnie Mine Trail. Here, you’ll see more plaques and remains of mining buildings.

river-walk-breckenridge

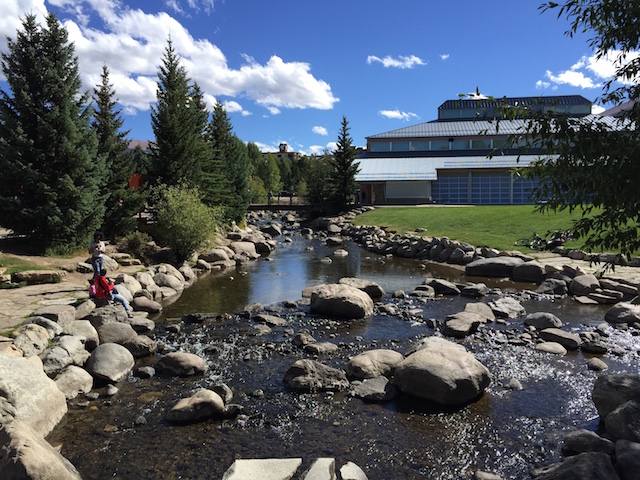
Kids don’t want to hike? Head to River Walk Park, where kids can wade in the Blue River in summer and fall and play on the playground in all seasons. 

Harder hikes:

lower-mohawk-lake

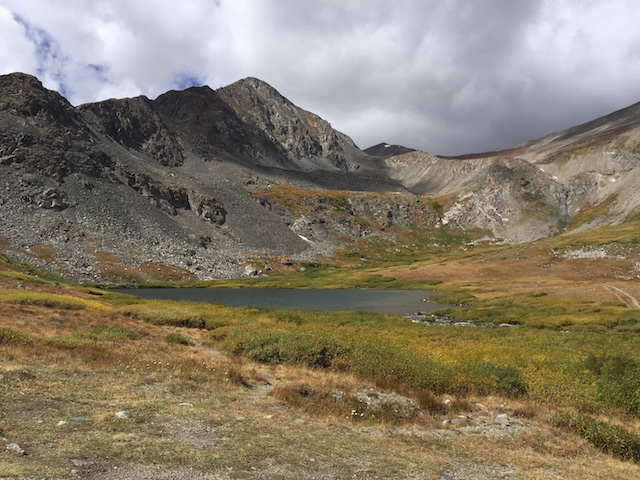
  • Mohawk Lakes: This series of alpine lakes can be tackled in an eight mile loop, or families can simply hike to the first few. From the trailhead, it’s just over three miles to Lower Mohawk, which sits in a bowl with Upper Mohawk just out of sight above it. They’re followed by several more lakes along a chain. The path can be steep at times, but the way is broken up by lots to look at: kids will love the historic mining remnants still cluttering the landscape, and snow melt waterfalls such as Continental Falls. Get to the trailhead by heading out Hwy 9 and turning right on Spruce Creek Road. Park at the trailhead 1.2 miles up.
  • Bakers Tank Loop: While most of this five mile loop trail is intermediate, there are a few climbs to be had. The trail follows an historic railroad line and has Western mountain views. Start at the Bakers Tank Trailhead on Boreas Pass Road. The first three miles are along Boreas Pass Road, heading south.
  • Black Powder Pass: At 3.4 miles (roundtrip) with an elevation gain, this hike is solidly in the intermediate range. From Boreas Pass Road, go up to the top of Boreas Pass, and take the trail just before the Section House. Families get above the tree line without a long hike, but remember, you’ll be at over 12,000 feet, so take your time. Look for views of the Tenmile Range.

Hardest hike:

crystal-lake

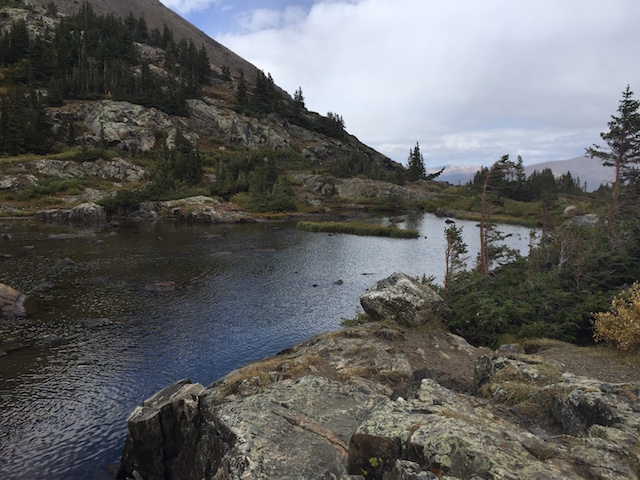
  • Crystal Lakes: Get above the tree line hiking to the Crystal Lakes. These small, high alpine lakes sit at over 11,000 feet, and the way is very steep in places, and mostly exposed. Access these lakes from the Burro Trail or drive partway up Spruce Creek Road or Crystal Lake Road (4×4 driving essential). Look for picas (like small rabbits that make a high pitched call) and mountain goats.

mining-cabin

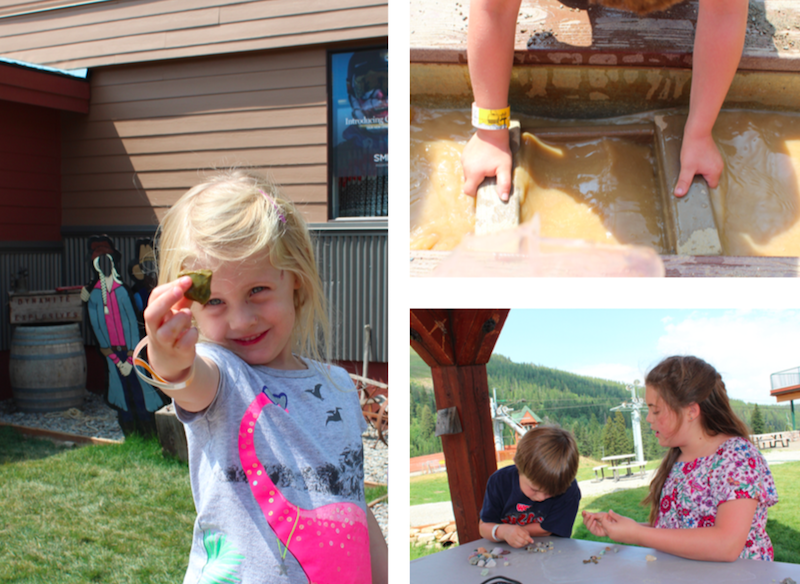
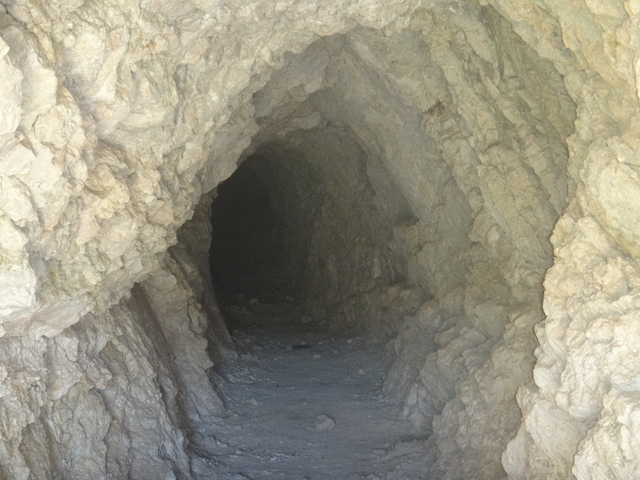
Tip: Want to get a taste of mining history in the area without hiking to it? Head to the Country Boy Mine, where kids can go inside mine shafts and pan for gold. This historical site has very good, though realistic, tours. Young kids may be frightened when the lights are turned off and hydraulic machinery is turned on to stimulate how it would have felt and sounded like in the mine in bygone eras.

Note: No matter where you hike in Breckenridge, you’ll feel the significant elevation. Get tips on dealing with high altitude!

Have you hiked in Breckenridge? Where do you recommend?

Zion National Park in winter

Before I visited Zion National Park in winter, I pictured the famed slot canyons and rock formations of the park buried in snow, with park amenities shuttered for the season and the adjacent town of Springdale hard to access on wintery roads. I could not have been more wrong. Thanks to it’s low elevation and Southern Utah location near St. George, Zion National Park in winter is completely accessible, and often warmer than you’d think.

zion-narrows

As we arrived from a weekend of skiing at Brian Head and Eagle Point (yes, you can ski and hike on the same road trip!), we rolled our windows down as we approached the park from Highway 9. It was a balmy 50 degrees when we entered the artsy, scenic town of Springdale, and inside the park, just enough snow dotted the ground and clung to the red rock to be picturesque but not problematic.

What to do in Zion National Park in winter:

narrows

The short answer: pretty much everything you’d do in summer, but without the crowds. We hiked several trails that are usually highly impacted during the warm weather months, encountering only a handful of other people. During the winter, the Zion Canyon Scenic Drive can be done by car; in summer, you must take the shuttle. Most of the hikes that start from points along the drive are open during the winter months, too, which makes Zion National Park your personal playground in December, January, and February.

Hike The Narrows in winter:

zion-national-park

Hiking The Narrows was the highlight of our Zion winter trip. While we loved The Narrows in summer, going in winter is an entirely different experience. Start at Zion Outfitter, located at the entrance of the park by the visitor center. These guys can set you up with dry suits, special river shoes, and booties, which you’ll definitely want for the Narrows in winter. For $45/person, you get dry bibs (that go chest high), Adidas HydroLace canyoneering boots, neoprene socks, and a wooden hiking stick. For a little less, you can opt for waist high pants.

Note: you can rent the boots and socks in summer too, which I now realize would work better than the Keens we wore last time!

You can arrange for a guide to go with you in The Narrows, but families can also do it solo, provided you check the weather and conditions first at the visitor center. The Narrows are known for flash floods, which can happen any time of the year. To get to the river, go up Zion Canyon Scenic Drive to the last stop, Temple of Sinawava. You’ll take a paved trail for one mile, which ends at a good entrance to the Virgin River. During our visit, the trail was icy, so go slowly if needed, and be aware of icicles and potential falling ice above you.

Once in the river, make your way at will, sticking to the shallow spots as desired. The entire way up The Narrows to where it splits with Orderville Canyon takes a couple hours (it’s about 3.5 miles), but families can stop anytime; it’s an out-and-back. Take care to keep your upper body dry; water WILL pour into your dry suit from the top of the bib if you go too deep. Otherwise, the dry suit set up kept us very dry and comfortable.

Note: the canyoneering shoes WILL let in water; this is normal, and the reason for the wetsuit-like sock.

The Narrows in winter are truly magical: the snow and ice contrast with the red rock and water with such beauty, you’ll want your camera out at all times. And unlike in summer, when you’re wading through the river with crowds of people, you may have the river to yourself. I found myself completely alone more than once in the canyon.

narrows


Additional hikes:

The easy hikes along the scenic drive, including the Grotto Trail and Weeping Rock Trail are usually open in winter, but be aware that they may be icy. Bring extra traction for your hiking boots, like YakTraks, and you should be ok. While we were at Zion, we also did the Canyon Overlook Trail, which is located just past the tunnel within the park (take a right at the ‘Y’). Canyon Overlook offers big views for little effort; the whole hike is less than 1.5 miles, and though fairly strenuous, includes features that will be fun for kids, like stair climbs, overhangs, and wooden planks. Just take care with young kids as there are drop-offs along the trail, though the end overlook does feature a railing.

canyon-overlook

While we were at Canyon Overlook, a park ranger also recommended Sand Bench trail to us in winter. The Sand Bench Loop starts at the Court of the Patriarchs shuttle stop and is roughly 3.5 miles (round trip). From the shuttle stop, take the hikers’ bridge across the Virgin River. The trail crosses a stream, then continues past a landslide area from the ’90s. You gain elevation of about 500 feet, much lower than any hikes to the canyon rims. Plan to encounter sand, but as a winter bonus, it may be frozen or at least hardened.

Where to stay at Zion National Park in winter:

We have stayed at Cliffrose Lodge in both summer and winter, and love this property. See why it’s great for families here. The Cliffrose has been family-owned for many years, and the owners are committed to the area, putting money back into their property, and elevating the tourism experience in Springdale and Zion National Park. The lodge is just outside the park boundary next to the visitor center, and the view out of every window is fantastic. In summer, the gardens and access to the river turn the Cliffrose into an extension of the park for outdoor play, and in winter, the open, elegant lobby beckons. A full restaurant is slated to open in 2017, as well.

cliffrose-view

In winter, three outdoor hot tubs are at your disposal (in summer, there’s also a spacious pool), and a breakfast-in-bed (in room) menu is available for $10/person. Cliffrose suites are perfect for larger families, as they have two bedrooms separated by a full kitchen and dining area, with balcony or patio.

Where to eat in Springdale:

Springdale, the tiny town at the entrance of the park, is unlike any other ‘national park town’ I’ve experienced. It’s a destination in its own right, with art galleries, eateries, and specialty shops hugging Highway 9 against the backdrop of jaw-dropping canyons. From the Cliffrose, you’re only a few blocks from just about everything. The following restaurants are our favorites, with a few we haven’t tried added in that have been recommended by locals:

  • 9 East: this upscale Italian and Mediterranean bistro has been opened by a recent executive chef from Las Vegas
  • The Spotted Dog: American bistro fare
  • Bit ‘n Spur: upscale Southwestern/Mexican hybrid cuisine
  • Oscars
  • Kings Landing

How to extend your Zion National Park trip in winter:

I recommend staying in Springdale at least three days in winter to enjoy both the town and the park, then extending your stay in Southern Utah to include Bryce Canyon National Park or a Southern Utah ski resort. Brian Head resort is only about an hour away, where families can snowmobile, ski, and snowboard to round out an adventurous vacation.

Pin it for later:

Zion National Park in winter? Yes, please!

I was a guest of the Cliffrose and Zion Outfitter for the purpose of review. All opinions remain my own.

Bryce Canyon National Park in winter

If you’ve been to Bryce Canyon in summer, you know this national park is incredibly scenic, and also incredibly crowded. Even the ‘shoulder’ seasons of late spring and early fall are becoming congested with tourists. But come in the heart of winter, and you’ll have this playground of natural wonders to yourself.

bryce-national-park

Things to do in Bryce Canyon National Park in winter:

Much of Bryce Canyon stays open year round. With an elevation of around 7000 feet, families may or may not encounter snow; we did, on  our trip, but I was told it varies by season. If there is snow, it’s possible to cross country ski or snowshoe in and around the park, and of course if you encounter dry ground, hiking is an option. Just keep an open mind and be flexible.

Start at Ruby’s:

On the north end of the park, just outside the boundary, lies Ruby’s Inn, which is actually an entire complex consisting of a activities center, wild west dinner show venue, restaurants, and hotel rooms. Reuben (Ruby) and Minnie Syrett arrived in the area in 1916 and founded Ruby’s in 1923. It’s owned by the family to this day.

If you need a place to stay overnight, Ruby’s has clean, basic hotel rooms on the edge of the park, but it’s a great stop if you’re in Bryce Canyon just for the day, too. In winter, Ruby’s offers a winter sports center with an ice skating rink, a nordic track with six miles of trails (which connects to more in the national park) and cross-country ski and skate rentals.

bryce-canyon

We rented skis and took to the nordic track, which curves around the Ruby’s complex to the edge of the canyon. After just a 15 minute ski, you are rewarded with amazing views of Bryce. I suggest taking the two mile loop with kids; cross-country skiing is not hard to learn and a fun way to see Bryce in the snow.

The restaurant at Ruby’s is adjacent, and has a family-friendly buffet at both breakfast and lunch, as well as a menu to order off of. At very low crowd time periods, such as when we visited, they may not offer the buffet, but will still have a full sale and soup bar. Ruby’s is not fine dining, by any means, but a solid choice for feeding the family. Next to the restaurant is an extensive store, where you can pick up souvenirs but also groceries, winter clothing, and anything else you may have forgotten.

See Bryce Canyon with an expert with Bryce Valley Tours:

You’ll have Bryce Canyon to yourself in the winter, but you may not know where to go or what you’re seeing. We had the opportunity to see the park with John of Bryce Valley Tours, who accompanied us on our ski trek and explained the geological history of the canyon as we skied. John also offers half-day and full-day tours, which can be tailored to your family’s interests. Half-day tours are $75/pp, which I think is a good value for the opportunity to have an expert guide you who knows which parts of accessible in snow, which are closed in winter, and the like.

bryce-valley-tours

Stop at the visitor’s center:

The Bryce Canyon visitor’s center is located directly past the entrance, and is small but worth the stop. The exhibit area explains the geological history of the canyon’s rock formations, including the hoodoos you’ll see everywhere. Get the kids their Junior Ranger booklets, and get stamps in your national park passports.

Drive to the most scenic lookouts in the park:

Bryce Canyon is a park that’s big on views. The major lookouts are all open in the winter, even in snow. Drive in and check out Inspiration Point—trust me, it’s aptly named—and Swamp Canyon. The latter is much more stunning than the name suggests. At each of these lookouts, short hiking trails are available. When we visited, the snow was several feet deep, but they were still open, albeit difficult to navigate. If you decide to walk a bit, be careful of your footing, as you ARE on the edge of a canyon. Snowshoes would help.

bryce-canyon

Tips for visiting Bryce Canyon National Park in winter:

  • Call the park ahead of your trip to stay up-to-date on any road closures or closed exhibits; this is the off-season.
  • Be prepared for any type of weather; you could get snow or sun. Make sure everyone in your group has winter boots, waterproof pants, a hat, gloves, and jacket. You don’t want to get caught off-guard and have to buy all this at Ruby’s!
  • If there IS snow, try snowshoeing to get around on the trails.
  • Wear sunscreen; the high elevation causes people to burn easily if the sun is out.
  • Hydrate and go slowly at elevation until you’ve acclimated. Check out our tips for adjusting to high elevations.

Everything you need to know about visiting Bryce Canyon in winter

Yosemite National Park travel tips: best tours, hikes, and advice

During a time when many vacations are not possible, outdoor activities in road trip-accessible locations offer the ability to safely social distance. Hotels.com asked me to share my favorite activities and tips for exploring the Yosemite area, so start here as you plan a safe and responsible vacation.

Yosemite National Park is one of the crown jewels of the national park system, and for good reason. Its stunning geological features, wildlife, and rich history make it ideal for an outdoors family vacation. This park has so much to offer, the following Yosemite National Park travel tips and touring advice are meant to supplement further research. Start with the official Yosemite National Park site to plan your trip, make sure activities and sites are open, and plan your lodging options! For touring advice and tips primarily for Yosemite’s Valley Floor region, read on.

Note: if you’re considering the Majestic Mountain Loop of three parks in one trip, start by viewing our Guide to Sequoia and Kings Canyon National Parks.

When to go:

Yosemite is open and active year round! While the vast majority of visitors arrive in the summer (of course), more is open during the off-season than many families realize. During fall and spring, some hikes and roads may be closed, but the majority are still at your disposal. Ditto for visitors centers and museums (just check seasonal hours). Winter is a wonderful time to stay on the valley floor without the crowds; families can easily rent snowshoes or Nordic skis to explore the area. If you must go in summer, don’t worry: the park is still very accessible with crowds. Plan to base your car in one location (ideally your lodging within the park) and take the free inter-park shuttle everywhere you need to go. We tried this out during a busy week in July (the peak of the busy season) and never waited more than five minutes for a shuttle bus. Busses run between campgrounds, lodges, visitors centers and hiking trailheads.

yosemite-national-park-tips

What to do on the valley floor:

Obviously, there’s too much to do in Yosemite to put into one post! The Tuolumne Meadows and Wawona regions are well-worth visits; however, if your family is new to the park, and you have at least three days, devote one morning to a Valley Floor Tour. This tour–conducted on motor coach in the off-season and open-air tram in the summer–offers a wonderful overview of the valley. If possible, ask for tour guide Bill: his knowledge is unparalleled, and he’s entertaining throughout! I loved that Bill described his tour as a ‘portal’ tour: he considered every major subject he addressed as merely a ‘portal’ to learning more (then gave the resources needed for those who wanted to dig deeper). Our Valley Floor Tour covered Yosemite Falls, Bridal Veil Falls, Tunnel View, Swinging Bridge, and Sentinel Rock, Cathedral rocks, and El Capitan. The bus stopped frequently, with plenty of photo ops. Because tours don’t stop for hiking, swimming, and the like, this is a good opportunity to note the areas you’d like to come back to on your own.

yosemite-valley-floor-tour

Lodging:

Where to stay in Yosemite National Park is as varied as individual family itineraries! For easiest access to the shuttle buses and to be within walking distance to the most sights, I’d opt for Yosemite Lodge or Camp Curry (be sure to reserve both well ahead of time). For families who may wish to divide their attention between Valley Floor activities and backcountry, many lodging options are located just outside the park.

Hiking:

Yosemite Falls: One of the easiest hikes to access from the valley floor, Yosemite Falls offers a very short hike to the lower falls, or a much more strenuous hike (3.8 miles one way) to Upper Yosemite Falls. Plan to spend the better part of the day if you tackle the latter! End your hike with a treat at the Food Court of Yosemite Lodge at the Falls.

yosemite-falls

Mist Trail: If you only do one hike in Yosemite, this should be it. But bear in mind that it will get very crowded in summer. Go early in the morning, or just before evening to beat the crowds (and heat). Enjoy the mist off Nevada and Vernal Falls as you make the short but very steep climb. If you’re up for more, this is the access point to hiking all the way to Half Dome to climb the backside using the cable system.

Note: permits are required for the Half Dome climb. You don’t need to be a rock climber, but you do have to be comfortable with heights and tall enough to hold the cables. If you’re not up for it, but do want a long hike, continue past the falls to Little Yosemite Camp, where you can watch the cable climbers.

yosemite-falls-trail

Glacier Point to Valley Floor: This is another hike for the hearty! Use the free shuttle system so you only have to go one-way! Because you are directly across from Yosemite falls, you get a great perspective since you start above the falls, and see it at every height as you descend to the valley floor. If the kids are up for it, bribe them with a promise of ice cream at Yosemite Village and keep trekking across the valley floor.

Our review of family backcountry hiking and backpacking in Yosemite.

Museums, programs, and visitors centers:

A trip to the Yosemite Village Visitor Center and museum is absolutely worth your time. Kids (and adults) learn about geography and wildlife in the center, then can tour an outdoor Miwok village at the attached museum. We also loved the baskets on display, and during the summer months, Native American artisans are on-hand to show you their techniques. The village center also has stores, restaurants, and the like.

yosemite-village-museum

For winter activities and snow play, start at Yosemite lodging, such as Yosemite Lodge or Camp Curry. Both locations will have sleds to purchase and snowshoes to rent. Camp Curry has an ice-skating rink (tickets can be bought at either lodge). Guided nordic skiing tours to Glacier Point depart regularly in winter. In fall, be sure to ask about the Swinging Bridge Ladybuy Hatch. This amazing event takes place annually on the Swinging Bridge in the valley, when hundreds of thousands of ladybugs hatch. An amazing sight, and one guests can only see in autumn.

Park programs and nature walks are available year-round at Yosemite! Definitely sign up for one of the park’s watercolor classes, Junior Ranger programs, or, my current favorite: the Night Prowl. Led by a naturalist, the Night Prowl takes visitors on wooded trails by moonlight, which chances to see or hear nocturnal animals. Even if you don’t see animals, guides do a great job of relaying interesting information and conducting fun group exercises to help you adjust to the dark and understand your surroundings. This program is ideal for school-aged kids, and is a deal at only $5.50 per person.

yosemite-programs

Tip: Did you know park rangers are not the only naturalists leading guided tours and programs in Yosemite National Park? The park’s chief concessionaire also employs naturalists to lead excursions, often filling the gap left by budget cuts. These services are available to book from park lodging!

One day in Badlands National Park itinerary with kids

We were blown away by the beauty and peacefulness of Badlands National Park! During our one day visit, we found ourselves comparing this dry, rugged, and dramatic park to other favorites: it has much of the same feel as Death Valley National Park and Joshua Tree National Park. However, Badlands adds another element: high prairie wildlife and terrain that will impress in a subtile, almost delicate manner. Here’s what to do with one day in Badlands National Park:

badlands-national-park

Allow me to explain: while the first thing visitors are likely to notice about the park is its dramatic rock formations and chasms (think of Grand Canyon in miniature, or as one fellow traveler put it, of being a giant hiking in the Grand Canyon), it’s quickly evident that beyond, and in some cases, above, these rock formations, lie plateaus, gulches, and lowlands blooming with sunflowers and wildflowers, harboring prairie dogs and rabbits, and opening up onto prairie grasses. The juxtaposition of dry, cracking rock and flowering plants is stunning.

badlands-sunflowers

The park is well-known for fossil finds dating to prehistoric eras, though we learned that dinosaur fossils are not found here. The region was underwater during that time period. Instead, early mammal fossils are found quite regularly, and dig sites can still be active.

How to spend a day at Badlands National Park:

Ready for your Badlands National Park itinerary with kids? Though the park area is quite large, most of the sites and hiking options are in a concentrated area, making this park do-able in a day, if needed. As we always suggest, start at the Badlands visitor center to get your bearings. Here, kids can see a well-made 20-minute video, then tour several rooms of exhibits on the park’s geological history, wildlife, and native history (this is Lakota territory). Stop at the desk and ask for a form on which to document any fossil finds. They can still be spotted in the rock throughout the park, and park scientists depend on visitor documentation to help their research. Cool, right?

badlands-fossils

After touring the visitor center, take the Badlands Loop Road. Backtrack to the Window Trail and Door Trail parking lot.

Tip: to do this itinerary as described, enter the park via I-90 Exit 131 instead of via Exit 110 near Wall. We suggest this direction because it places families at the visitor center early on.

The Door Trail offers an amazing vista of the canyons of the park, with half a mile of ‘trail’, which is actually rock hopping and free-form hiking from marked post to post (the rock bottom here doesn’t allow for a proper trail). The way is easy enough, but kids can make it more fun by climbing a few short rock formations along the path. The nearby Window Trail consists just of a boardwalk ending in a vista to see a very deep chasm in the canyon. Definitely do both. Note: we hit this trail at sunrise, which rewarded us with beautiful light against the stone.

sunrise-at-badlands

Accessed from the same parking lot, the short Notch Trail is great for kids who want more climbing, as this 1.5 mile loop descends through the canyon then up a wooden ladder to follow a ledge to a great view of the White River valley. Only proceed on this trail if you’re comfortable with heights.

badlands-hiking

For those wanting a longer hike, The Castle Trailhead is located just across the street from the Door and Window trails. This trail is 10 miles long, and travels west all the way to the opposite end of the Badlands Loop Road at the Fossil Exhibit. Those wanting to hike 10 miles will need a car to pick them up on the other end. However, thanks to a very user-friendly trail system in the park, it’s possible to hike only a portion of the Castle Trail. Starting at the trailhead at Door, hike a short distance on flat terrain to the junction of the Castle and Medicine Root trails. At this point, families have access to a loop of 4 miles, making the hike around 5.5 miles total, or can opt for an out-and-back for less mileage, turning around at the junction.

badlands-castle-trail

Or, do what we did: after seeing Door and Windows, head back on the Badlands Loop Road in your car and stop at the Saddle Pass trailhead. This quarter mile trail connects you to the Medicine Root/Castle Trail loop for a hike of 4.2 miles. The short Saddle Pass section is severely steep as you climb from the valley floor to the top of the ‘wall’, but once there, the terrain is quite flat. Up on this wall while hiking the Medicine Root Loop, you’ll see prairie grasses, sunflowers, wildflowers, and, possibly, snakes and other small animals. There is no shade up here, so plan to accomplish this part of your day in the morning.

Medicine-Loop-Trail

Further along the Badlands Loop Road, families will come to the Fossil Exhibit Trail. This boardwalk loop of about half a mile features well-done displays en route, which describe the various fossils found here, and whether these prehistoric animals ended up adapting, moving to a new region, or becoming extinct.

badlands

If you depart the park via the Badlands Loop Road toward Wall, you’ll come across many more roadside pull-outs with vistas of this area of the park. It seems to go on and on!

Where to eat:

During your day, definitely stop to eat at the Cedar Pass Lodge. This lodge is modern-looking and new, which didn’t quite seem to fit in with the setting of the national park, but inside, it has a very nice gift shop filled with handmade items and Lakota souvenirs, and a casual cafe that serves wonderful fry bread tacos. These native treats can be ordered with buffalo meat or black beans, and they are huge…two people can definitely share one. And yes, they are very fattening. Enjoy!

Where to stay:

The park does have lodging at Cedar Pass, in the form of very nice cabins overlooking the terrain (and the highway, but it’s no big deal). I did not stay the night on this trip, as the park can definitely be done in one day, but certainly this would be a good option as well.

The park is located along I-90 in South Dakota, near Wall. Make a stop at Wall Drug before or after!

Five stops along the Icefields Parkway in Jasper and Banff National Parks

If you’re visiting both Jasper and Banff national parks on your Canadian Rockies vacation (and you should be!), you will drive the Icefields Parkway connecting the two parks. This 3 hour stretch has been described as one of the most scenic highways in the world, and after our fall 2013 visit, I concur. The parkway takes approximately 3.5 hours to drive, but families will definitely want to stop along the way. Where to plan you pit stops:

Icefields parkway hiking

Sunwapta Falls:
About 30 km from Jasper, you’ll come to Sunwapta Falls. Signage clearly marks this point-of-interest, but you can also spot it by the resort and restaurant sitting roadside. Stop for a snack or trip to the restroom, but definitely drive beyond the resort to the falls, which can be viewed from above next to the parking lot or from a footbridge a few yards down. The falls are impressive (yes, even if you’ve been to Jasper’s Maligne Canyon), and even though this isn’t a hiking location, it’s a great place for photos and to let kids stretch their legs.

Icefield Centre:
Athabasca Glacier lies at the approximate halfway point of the Icefields Parkway, as visitors steadily climb up into the mountains from either direction. At the glacier you’ll find the Icefield Centre, a huge building run by Brewster’s Canada. On-site is a restaurant and cafe, plus hotel rooms and a large observation deck. On the ground level is Brewster’s Glacier Adventure.

brewsters glacier adventure

One look out onto the glacier from the deck, and your kids will see what Glacier Adventure is, and probably want to do it: visitors board bus-sized all-terrain vehicles and drive out onto the ice, where they can stand out on the glacier. Sounds cool, but is it worth the $49/adults and $25/kids ticket price? That depends on what you want out of it: if you want to be able to say you’ve walked on a glacier or simply love cool vehicles, the answer is yes. If you expect an adventurous experience or a hike, the answer is no.

glacier adventure

The vehicles, called Ice Explorers, take you along a short but steep road (the second steepest commercial road in North America, to be exact) leading onto the ice. Once there, they park in a snowplowed area the size of a small parking lot along with other Ice Explorers and let you out to walk on the snow. What we liked most about the experience: the interesting facts presented by our guide. Note: Expect to get your feet wet unless wearing waterproof boots, and bring gloves and a jacket.

Parker Ridge trailhead:
There are multiple trailheads along Icefields Parkway, all clearly marked (and most with parking areas and decent pit toilets). One of manageable length for a brief stop is Parker Ridge, which lies just beyond the Icefield Centre toward Banff. The 3 km round-trip hike offers views of the Saskatchewan Glacier and Mt. Castleguard on a clear day.

Peyto Lake and Bow Summit:
Peyto is a short road-side hike to the lake, with the option of hiking further toward Bow Summit for alpine wildflower viewing and meadows. This is the highest point on the Icefields Parkway. Picnic tables make this a great place to stop and picnic and photographers will be happy!

lake louise

Lake Louise:
Only 57 km from Banff, Lake Louise is a must-do stop, if not an overnight or all-day excursion. From the Lake Louise exit, the lakeshore is only a few kilometers away. Park in the large parking lot and walk to the lake to take in the views and snap some photos, gawk at beautiful Fairmont Chateau Lake Louise, and, if time permits, take a hike. The lake loop is an easy walk for kids of all ages, but if you have time, we recommend the 7 km round trip ascent to Lake Agnes (trail departs directly from Lake Louise). For your efforts, you’re rewarded with tea, coffee, or a snack at the picturesque Lake Agnes Tea House at the top.

See our video review of more things to do in the Canadian Rockies:

Tip: Remember that you’ll pass the national park ticket booth on either end of the Icefields Parkway. At the time of this writing, admission to the parks was almost $10 per day for adults (almost $5 for kids) or a family fee of under $20 per day. You only need to pay once, and display a receipt on the dashboard of your car.

As I disclose whenever applicable, we were hosted for some activities along the Icefields Parkway, for the purpose of review.

Guide to Sequoia and Kings Canyon National Parks with kids

On a recent tour through several California National Parks, I heard the same thing over and over again from fellow guests and even park employees: “We love Yosemite, but we’ve actually never been to Kings Canyon.” Or, “We come to Yosemite annually, but haven’t experienced Sequoia, yet.” This tells me two things: Yosemite National Park is one of the most popular in the nation (no surprise there), and neighboring Sequoia and Kings Canyon National Parks will be vastly less congested nearly all year long. Are they worth visiting? Absolutely!

Park overview:

Sequoia and Kings Canyon are two distinct national parks with one planning site. They have separate entrances, though the same entry fee will get you into both. They sit side-by-side along the General’s Highway off Highway 198 (accessed from Fresno, California) and sit at impressively high elevation: between 6,000 and 8,000 feet for the most part.  We suggest at least two days in the parks in the off-season, and three in summer, with the majority of your time spent in Sequoia.

What to do:

Giant Forest: 

giant-sequoia-trees

Most of us come to Sequoia for the Giant Sequoia trees. And yes, they’re absolutely worth the trip. These towering giants reside in this region because of the ideal conditions: they cannot grow like this anywhere else in the world. Take the Big Trees Trail to walk amid these giants (you’ll find the hush of the forest soothing…unless you have restless kids with you!). The General Sherman Tree is the largest tree in the world. Bear in mind: the General Sherman is not the tallest tree in the world, but rather the biggest, measured in circumference around its trunk.  The nearby Giant Forest Museum is worth a stop (in the off-season, it opens at 10 am).

Moro Rock:

moro-rock

Absolutely plan an hour or so at Moro Rock in the high season. This overlook includes a short but steep hike up the cliff-like rock, which will feel unsettling to anyone with fear of heights. I fall into that category, but had no problem with this short hike, because guard rails are set at key locations. There’s nothing to stop small children from wandering, however, so extreme attention is necessary. From the top of Moro Rock, the views are unparalleled. It’s possible to see the valley floor from one side of the viewing platform, and the peaks of the Sierras from the other. Point out the tops of the Giant Sequoias to kids: they look like bunches of broccoli from this height. Tip: after Moro Rock, continue a very short distance on the same road to drive through Tunnel Log and picnic in Crescent Meadow. Wolverton Snow Park is another nice resting stop in any season.

Crystal Cave:

I had no idea hundreds of caves lay under the surface of Sequoia National Park! The only cave available to tour is Crystal Cave, and it’s only accessible in summer. If you visit during the high season, this should be on your list.

sequoia-sightseeing-tour

Tip: Take a tour with Sequoia Sightseeing Tours with Paul Bischoff! Paul is a long-time resident of the area, and runs the best sightseeing tour I’ve taken from a private concessionaire in a national park. We spent a full morning with Paul, and learned more about the parks in a few hours than we ever could have guessed. Paul knows where the animals are, the best ways to avoid crowds, and can walk guests right to the most interesting trails and natural wonders.

Grant Grove of Giant Sequoias:

In Kings Canyon, the Grant Grove offers the General Grant Tree, plus a nice, easy hiking loop of additional Sequoias which includes some naturally downed trees. This is a great place for kids to see the root system of these giants, crawl through a fallen Sequoia log, and walk through a Sequoia tunnel! The Grant Grove Visitors Center is nearby as well, but we found it to be pretty limited.

Tip: While staying at Kings Canyon, catch the John Muir impersonation program by talented Frank Helling. Frank performs most Fridays at the Grant Grove evening campfire program during the summer months. I learned more about John Muir from Frank than I have before or since, and it was entertaining for all ages. Check at the Grant Grove Visitor Center to find out exactly when he’ll be performing during your summer visit.

giant-sequoias

Kings Canyon:

In summer, families can drive into the famed canyon, stopping for short hikes along the way. Kings Canyon is home to fabulous backcountry as well: if you plan to backpack in Kings Canyon or Sequoia, apply for a free backcountry permit. The good news: they’re far easier to get than Yosemite permits!

Tip: if you have the opportunity to listen to the storytelling of John Muir impersonator Frank Helling, make time to do this! Frank is absorbing and entertaining, and I learned more about John Muir in the 45 minutes I listened to him than I have before or since! Frank conducts his performances when available; as a park ranger or at the John Muir Lodge about opportunities to hear him speak.

Where to stay:

Kings Canyon offers the busiest ‘village’ of tent cabins, lodging, general stores, and visitors centers at Grant Grove Village. In the off-season, it’s quiet and we recommend the adjacent John Muir Lodge. However, in the height of summer, we’d opt for the less congested Wusachi Village of Sequoia National Park, where you’ll find Wusachi Lodge. This village center houses only the lodge and its restaurant (no adjacent camping and conveniences), which makes it somewhat quieter year-round. Read reviews of John Muir Lodge and Wusachi Lodge.

How to get here:

Access either park from Highway 198 from Fresno California. If you’re doing a loop of Sequoia and Kings Canyon as well as Yosemite National Park (called the Majestic Mountain Loop and highly recommended), you’ll need to depart Kings Canyon and return to the valley floor, then loop around to Yosemite via Highway 41. It’s not possible to drive over the Sierras, which is a good thing for all of us enjoying the parks!

Death Valley National Park with kids: top hikes for active kids

We love exploring Death Valley National Park with kids! And no, you won’t swelter in the heat if you follow our tips! After our fourth visit with kids (stay at either Furnace Creek Ranch or Furnace Creek Campground), we’ve narrowed down our list of favorite Death Valley hikes to our top three. These hikes–detailed below–are best for active, school-aged kids who love exploring, climbing, scrambling, and otherwise giving their parents heart attacks.

Tip: For younger kids, we recommend attempting the same hikes, but adjusting expectations of hike length.

Golden Canyon to Zabriskie Point and Glower Gulch:

golden-canyon-death-valley

The hike up Golden Canyon to the lookout area at Zabriskie Point is 2.5 miles one-way, but multiple alternative routes exist to make it either shorter or longer. If you have two cars, the shortest route is to park one on each end and do the hike one-way. To extend the hike, travel the 2.5 to Zabriskie, then backtrack one mile to the Glower Gutch turn-off, which returns you to the parking area via a different canyon. The Glower Gutch section takes families along a dry wash and then into a very narrow canyon with plenty of scrambling down a dry waterfall. The last 1/2 mile is exposed as you hike along the Alluvial Fan of the mountainside back to the car. The trailhead starts on Hwy 190 just past Furnace Creek Inn.

glower-gulch-mine

What active kids love: the Golden Canyon section of the hike comprises of the first mile or so, and offers lots of exploring up side chutes of the canyon. Kids can scramble nearly to the top of the canyon along these routes. Further up, the trail skirts Manly Peak then offers alternative trails along the ridges of smaller fans (parents can see kids from the main trail). When it gets steep, it’s time to return to the main trail up to Zabriskie. At the beginning of the Glower Gutch section, kids should keep an eye out for a man-made stone wall. Around the back of it exists the entrance of a deep mine tunnel (barred now, to keep humans out and allow access for bats).

Mosaic Canyon:

Mosaic Canyon is one of the most beautiful canyons in the park, with challenging scrambling at the beginning before opening up to a deep wash. The first half of the hike is shaded in the canyon, but the second half is definitely exposed. The hike is just a few miles each way, but you’ll want to stop often to let kids explore.

mosaic-canyon-death-valley

What active kids love: Rock scrambling and climbing abounds in Mosaic Canyon. Numerous side trails take hikers to narrow ridges (careful!) and the beginning of the hike offers challenging climbing for those who seek it. (Otherwise, it’s fairly easy to manage on the main trail.) In the wash, the side trail to the right (as you go up) offers a thrilling walk along the edge of a fairly steep side canyon.

Titus Canyon and Falls Canyon:

Titus Canyon is often driven (26 miles or so from the one-way entrance), but can also be hiked from the ‘exit’ side. The trailhead is located en route to Scotty’s Castle and Ubehebe Crater (also great stops), and families can go as far or short a distance as desired. The steep canyon walls are fun to play on, though be aware that cars can drive past. (They are easy to hear coming, however.) For an alternative without cars, try Falls Canyon, accessible from the same trailhead. Backpackers enjoy this canyon, but it will largely be empty. Either is a one-way route for most families.

titus-canyon

What active kids love: The rock climbing possibilities are more like scrambling here, with kids able to reach impressive heights without much effort. Just be sure young kids don’t get so high that they’re afraid to get down! Geodes can be found in this canyon as well.

Tip: For a non-hike that feels like a hike and looks like a hike (but doesn’t involve a set trail), take kids to Mesquite Sand Dunes near Indian Wells. The trek from the parking lot to the highest dune is 2 miles, but kids can pick their own path (and go up and roll down as many dunes as they’d like in the space between). Bring plenty of water and a hat for shade, as this ‘hike’ is 100% exposed.

For all Death Valley hikes:
Plan to hike early in the day, exiting most trails by lunchtime. Wear sun protective clothing and hats, and insist on everyone carrying water.

Bonus pit stop!

rhyolite-ghost-town

A trip to Rhyolite Ghost Town on the edge of the national park is well-worth a stop on the way in (near Beatty). Kids can explore ruins at-will for the most part, and there’s a short walk to a mine tunnel on the hill outside the ‘town’. Kids can also check out a jail cell and a brothel (whether you explain that last one is up to you!). There are no services here expect toilets, but it’s a nice place to picnic. Beware of rattlesnakes!

Tip: Wondering where to stay in Death Valley National Park? Read our reviews for Furnace Creek Ranch and Furnace Creek Campground.

Hiking Safety: How to keep kids safe in the outdoors

A ramble through the woods, a stroll across a mountain meadow, or a strenuous alpine hike with the reward of a breathtaking vista – it all sounds idyllic until something goes wrong. As a former search and rescue volunteer and EMT, hiking safety is very important to me. I’ve participated in too many wilderness searches that could have been avoided with a few precautions, a little know-how, and the right hiking gear.

nature-hikeTrust me – if golf is “a good walk spoiled,” so is a search for a missing hiker! If you’re planning to explore hiking trails in your region this fall and winter, know what is needed to have a fantastic outdoor experience (and make it home in time for dinner).

Safety Precautions

Before setting out on any wilderness hike, download or buy a topographical map of the trail network so you’ll be aware of trail crossings and alternative routes. Consider hiking with a buddy, or, if you must hike alone, always tell a friend or loved one where you’ll be and when you plan to be back. Many trailheads offer “sign-in stations,” where hikers can register their presence.

Lucky hikers will enjoy spotting wildlife en route; with very few exceptions, these animals will respect your presence if you respect theirs. Carrying bear spray is a good precaution against the rare event of an aggressive animal, but a camera will come in handy far more often.

Gear to Take

Most hikers remember to pack weather-appropriate clothing and their best hiking boots, plus to carry a water bottle when setting out, but they are surprised to learn what else should be in their day pack. While compasses and GPS units are useful, they don’t make the list of absolute necessities. Neither do high-tech hiking poles or hydration systems, despite being nice to have. In fact, hikers carrying just the following five items will greatly increase their chances of survival in the wilderness should they spend more time in the elements than planned:

  • Bandana
  • Whistle
  • Glow Stick
  • Plastic Poncho
  • CD or Mirror

All five of the items above can be purchased for under $10 at any outdoor store or dollar store. Keep all five safety tools in your hiking day pack permanently to ensure they’re at the ready on every hike.

Read our full article on fix.com.


Source: Fix.com

Summer in Idaho: Schweitzer Mountain Resort with kids

In the panhandle of Idaho, high above Lake Pend Oreille and the picturesque town of Sandpoint sits Schweitzer Mountain Resort. While many people know Schweitzer as a ski destination, summer on the mountain has much to offer the active outdoor family from late June until early September. Find miles of trails to explore, ripe huckleberries to pick, free lawn games to play, sprawling vistas to gaze upon, Village attractions to thrill you, blooming wildflowers to photograph, and a chairlift ride to amaze (and somewhat scare) you.

Schweitzer caters to those who love the outdoors.  The main attraction is undeniably the over twenty miles of trails and its connection to the massive Selkirk Recreation District trail system. However, we found that Schweitzer in the summer offers many summer activities aimed at entertaining the whole family from hiking to a playground, pool and thrill attractions. And if you time it right and visit in late July or early August the wildflowers will be in bloom and the huckleberries delicious. 

Tip: Once you’ve explored the mountain, don’t forget to spend a day at City Beach in Sandpoint enjoying the sun, volleyball, sailing, beachside playground or swimming before heading a few blocks over to experience an “auto bridge” that is now enclosed and home to one of the most unique shopping experiences in the country.

Lodging accommodations

Schweitzer offers two on-site lodges, the Selkirk and White Pine, with a variety of room types to address different family needs.  The lodges offer rooms from the standard double queen to three bedroom condos that can sleep up to ten people. The Selkirk Family Suite met the needs of our family of five. It included a queen bed and a twin bed over a second queen, a small kitchenette and table for in-room dining. The room was spacious enough not to be overcrowded when all five of us were present and quiet and relaxing when our youngest went down for her afternoon nap. 

While the lodge included typical hotel amenities like an exercise room and small business center, it was the more unique features and Northwest flare that won over our family. The lodge includes a theater room (first family there picks the movie for the night!) as well as an outdoor heated pool with views of the mountain. It is difficult to describe how or why the pool won us over so completely, but unlike other experiences where the pool area is heavily regulated, Schweitzer takes a more relaxed approach. Do you want to take your food and beverages (even the adult type) out to the pool and eat dinner as the sun sets over the mountains and your children splash around in the shallow end or warm up in the hot tubs?  Of course you do.  And at Schweitzer they let you. 

Note: don’t leave your Pucci’s Pub nachos (they are delicious) unattended as the adorable marmots will move in on them quickly!

The Selkirk Lodge also shares space with the Chimney Rock Grill and Mojo Coyote’s Coffee Shop.  You don’t have to leave the building and both are excellent.  While it was nice to be just a flight of stairs away from our morning lattes, we especially enjoyed the ample portions of the kids’ meals at Chimney Rock. The food came with attentive and quick service that thoughtfully seated us on the shaded patio keeping us out of the more congested areas and provided us with another opportunity to admire the views. 

The Selkirk Lodge is centrally located in the Village and faces the common area on one side and the mountain on the other. From just outside our room we were able to play a game of giant checkers, spend time stargazing with our telescope, and watch the kids enjoy an impromptu dance party. A playground is adjacent, as is a massive colony of marmots, and deer and moose to spot. For reservations and rates go to Schweitzer.com.

The Schweitzer Ultimate Fun Pass

To help facilitate summertime fun in the Village, Schweitzer offers the Ultimate Fun Pass (UFP), which gives all-day (11am – 5pm) access to the chairlift and other paid attractions. The UFP attractions include unlimited chairlift rides, trips down the zip line (for those eight years old and 60 lbs), climbs up the climbing wall, and jumps on the trampoline jumper. Every UFP also includes one bag of dirt and jewels to be sluiced at Cranky Jennings Sluice Box which was a crowd favorite in our family.

Our 10-year-old took advantage of the unlimited rides on the 700’ foot long dual zip lines (and yes, mom did join her).  This was an exhilarating adventure for both child and parent to enjoy together while offering us a unique view of Lake Pend Orielle down the valley. The modest length and height, as well as the extremely accommodating and friendly staff at both ends of the zip line, made for a perfect introduction to the sport for our traditionally tentative and risk-averting daughter.  In fact, mom was more anxious than she was, especially the second time down the line. 

Since our three and six-year-olds did not meet the minimum age or weight requirements, the rest of us moved the short distance in the Village to the trampoline jumper and climbing wall while older sister and mom enjoyed the zip line. A single parent was able to simultaneously supervise the two younger kids on the trampoline jumper and the 25-foot tall rock wall. This was made possible by the attentive and helpful staff who supervise both locations. 

From all of the activities enjoyed with the UFP, surprisingly the sluice box was best received and enjoyed by all ages. Everyone who purchases the day pass receives a bag of dirt that contains hidden gems and stones. Using screens and a running channel of water you can wash away the dirt leaving just the treasures behind. From the magical discovery of a hidden gem to the trading of valuable items and even the imagining of enchanted powers related to different types of stones, the sluice box kept our kids entertained for an afternoon and their imaginations active for days. While we found one bag per kid to be an appropriate level of fun and amount of stones to haul around with us, for those wanting additional fun, individual bags are available for purchase in the Activity Center.

The most anticipated UFP activity for many is the chairlift ride to the summit. It was our three-year-old’s first open-air chairlift ride and we were a bit nervous starting out. Soon we were rewarded for our bravery with spectacular views of the valley below and a pleasant meal at the top of the mountain. Even for kids raised on the marvels of the computer-generated worlds of Star Wars, there is a jaw-dropping, ‘wow’-inducing moment, when you get to the top and turn around and look at the resort, tiny and insignificant by comparison, hovering above the valley and lake below.

The Nest at Sky House opened in 2016 and offers a relaxed but finer type of dining than we expected. If your family is looking for a kale Caesar, scallops, or steak sandwich, at 6000 plus elevation, you can’t go wrong. Kids under age 12 can pick from a cheese quesadilla, cheese pizza or bowl of noodles. The food was well prepared and our server was pleasant and attentive. The homemade raspberry lemonade was perfect for a hot summer day and fueled us up for another walk around the mountain’s summit. The Sky House Bar, also open 11am – 5pm, offers adults beverages as well. Staff will even provide to-go beverage cups as alcohol is permitted on all resort property. 

Tip: for the budget-conscious families or ones with picky eaters, you may want to consider packing a picnic and taking it with you to the summit. Plenty of picnic tables are available, all with a view.

After lunch, our kids took advantage of the opportunity to wrestle around in front of a ‘Danger: Cliff’ sign (increasing parent anxiety) while others could enjoy a round of disc golf, a hike, or mountain bike ride down the mountain.

If you fear heights or have particularly squirmy kids (thankfully our three-year-old sat still except for the last 25 feet), the ride down the lift can be a white-knuckle experience. Rather than looking into and up the hill, you look out over the drop. While most families won’t be fazed by it, some will be hugging the little ones and tightly clinching the safety bar.

There are some practical considerations before purchasing the Ultimate Fun Pass:

  • Weight: Between 30 and 240 lbs for most activities. (60 lbs for the zip line)
  • Age: At least 8 years old for the zip line.
  • Shoes: You must have shoes that are closed over your toes and heel. 

Note: Schweitzer may take a more relaxed approach around the pool; however, they do not mess around with age and weight limits on the Village attractions and mountain bike rentals.  Be warned, you will be weighed on site, on an actual scale. Attractions can be purchased a la carte as well, at the Activity Center, if you don’t think your little ones will make full use of the pass.

Up next, additional summer activities…click on the button below to continue!

fathom-cruise

Pages: 1 2