Tips for Rocky Mountain National Park with kids

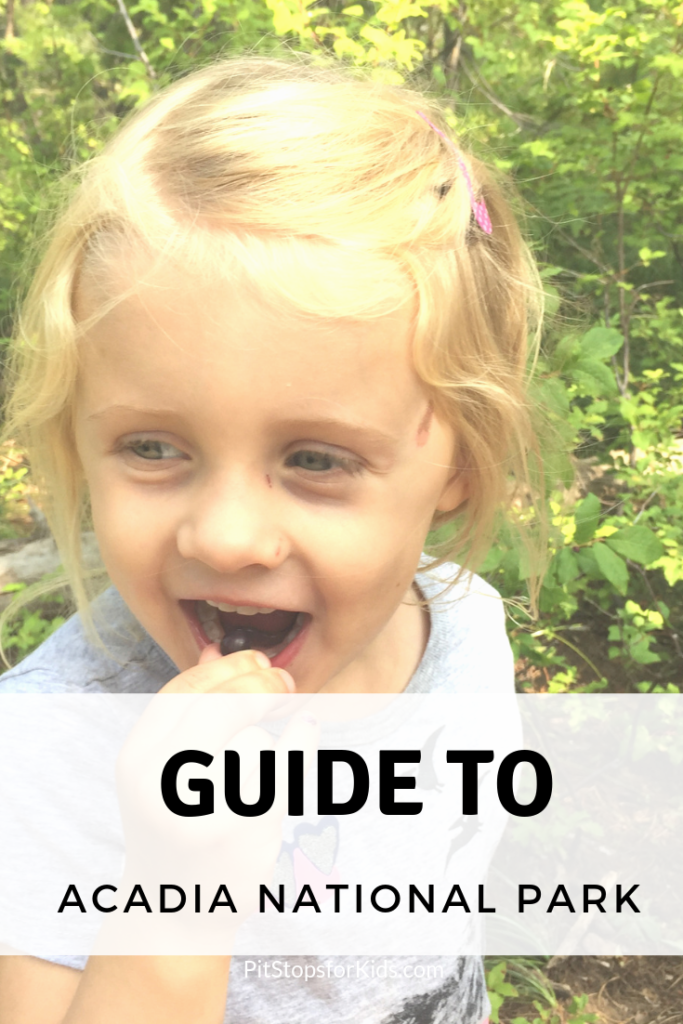
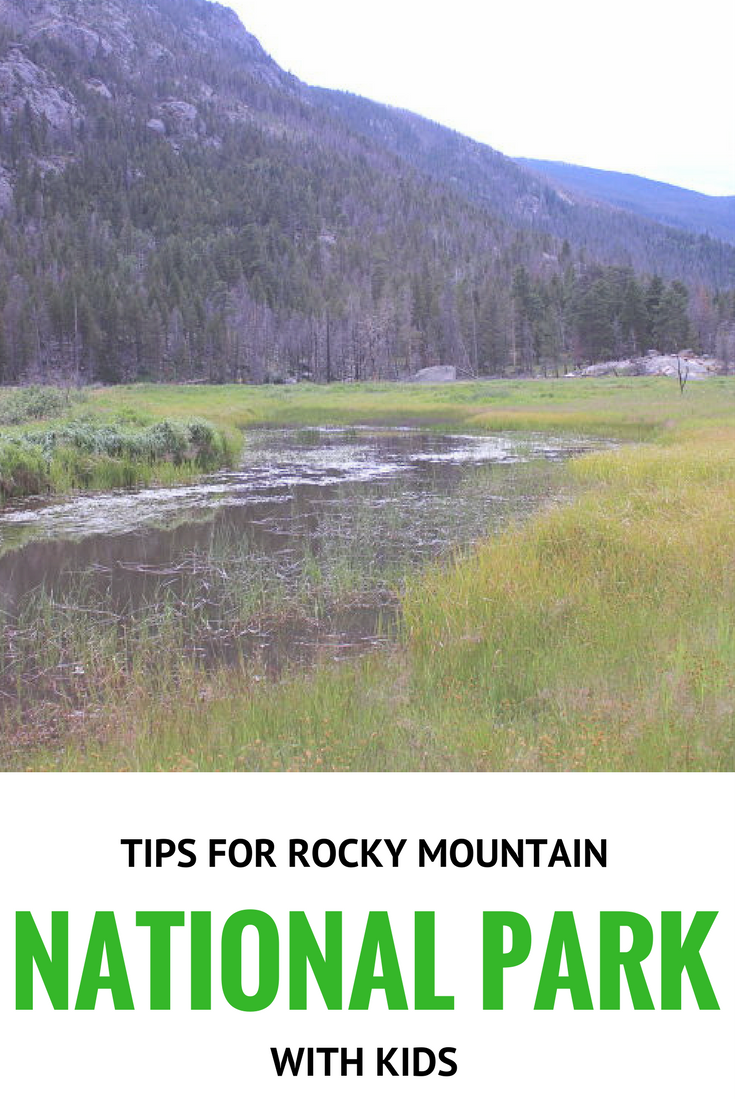
Rocky Mountain National Park is one of the United States’ premier family destinations, a jewel in the national park crown. In the summertime, the weather is beautiful, the scenery spectacular, and the opportunity to interact with nature unparalleled. Here are some things to know to help you make the most out of visiting with your kids.

Tips for Rocky Mountain National Park with kids:

rocky mountain

West side vs. east side:

Experts say the west side of the park (accessed via Grand Lake) is less crowded than the east side (accessed via Estes Park). However, our visit was based in Estes, so this post focuses on the east side of the park.

Be prepared:

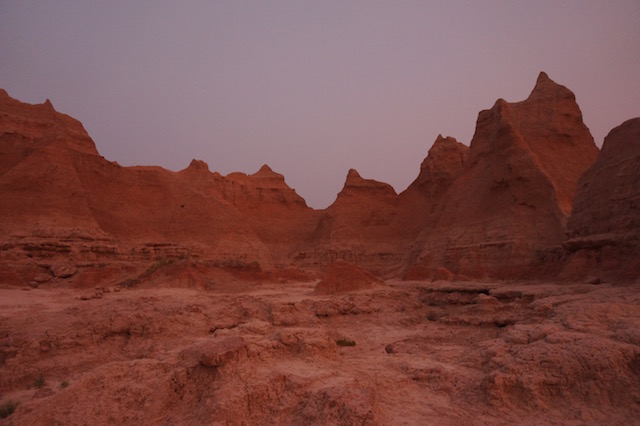
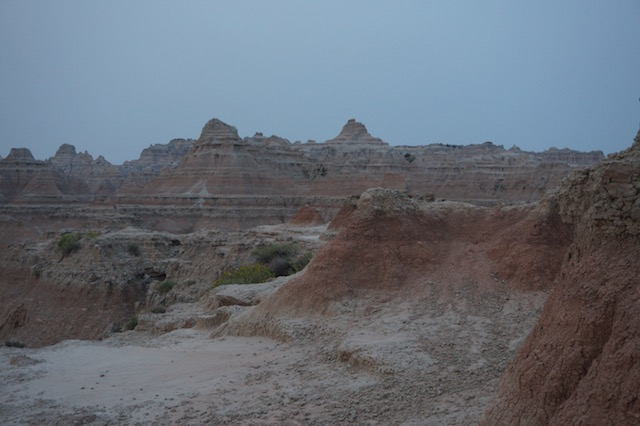
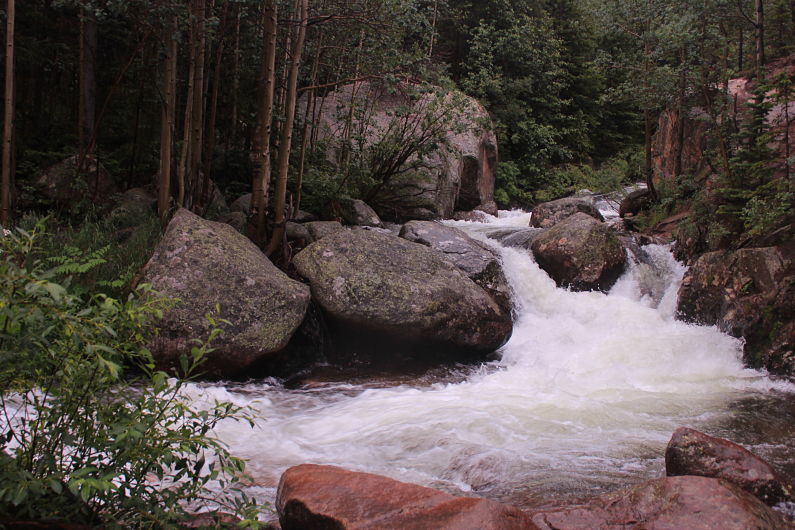
It storms somewhere in the mountains every afternoon, and even in the valleys, the weather is very cool in the mornings and evenings. Dress in layers. Wear long pants. Hiking boots really do make a difference on the uneven terrain. Use sunscreen and bug spray, and consider investing in rain ponchos.

Trail Ridge Road:

This 48-mile drive from Estes Park to Grand Lake is an all-day adventure that climbs several thousand feet through the tree line and into the arctic tundra. Along the route you’ll find countless amazing overlooks and a handful of hiking trails, as well as the Alpine Visitors Center. Trail Ridge Road can be a great experience, but be aware that altitude sickness is a real thing. Take it slow so everyone has time to adjust, and drink lots of water.

Rocky Mountain

Don’t miss out on ranger-led hikes and programs:

You can learn about stars, wildlife, ecology, and more. Schedules are available in the visitors centers. The junior ranger program is a great way to get the kids invested in the park system. Start early in your visit to give your kids plenty of time to complete the activities.

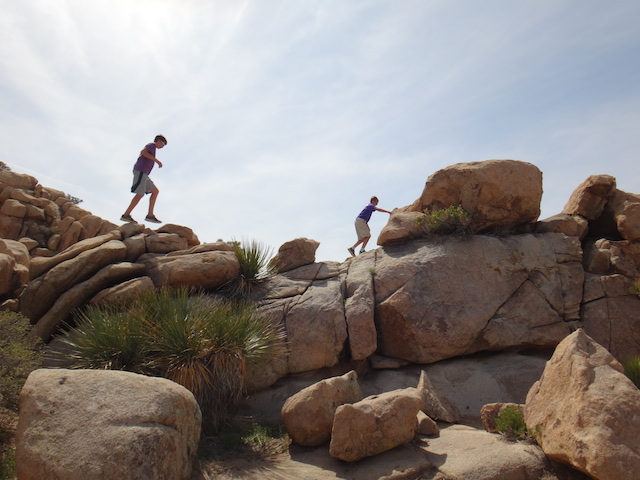
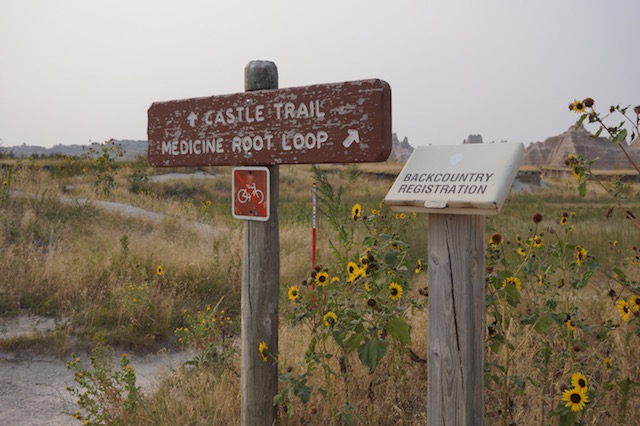
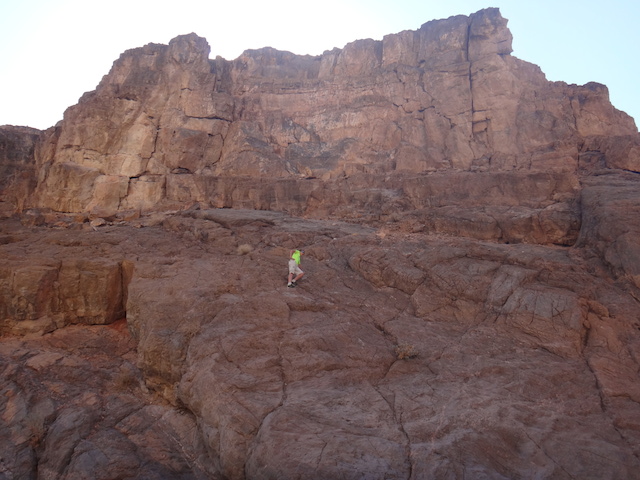
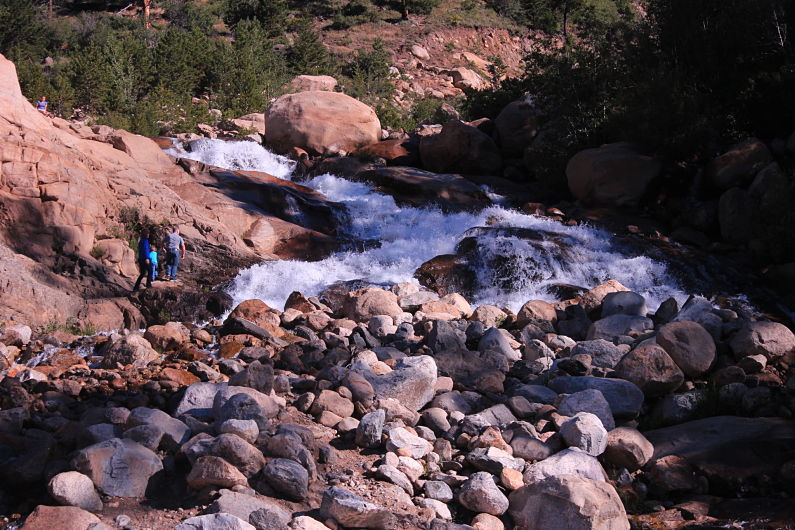
There’s a reason why the popular hikes are popular:

Many of the hiking trails in RMNP are long, and many of the shorter ones are very steep. So if your family is too young for long or steep hikes, you will be part of the throngs visiting a relatively small number of trails. Based on our experiences, I have two suggestions:

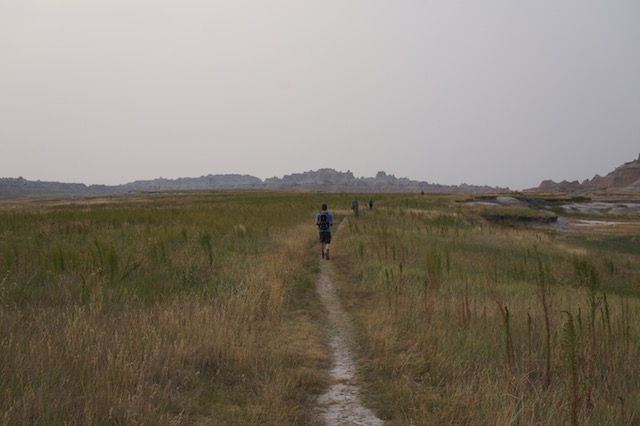
First, get up early—really early. Many of the family-friendly hikes start at Bear Lake, which is a significant drive from Estes, and the parking lot fills early. Have everything prepped the night before; go to bed early and get up at 4:30 or 5 to beat the crowds. Afternoon naps are our friends.

Second, don’t view rain as an automatic death knell to hiking. Afternoon rainstorms often pass quickly. We arrived at the Cub Lake trailhead at the start of a pop-up storm. We waited out the worst of it in the van but then donned rain ponchos and headed out. Twenty minutes later, the sun was out. Two days later we started for Alberta Falls in an intermittent drizzle, and we had the trail almost to ourselves. With ballcaps beneath rain ponchos, we didn’t really get wet at all. You might think you’re sacrificing scenery, but there is a different beauty in hiking amid the clouds. It was well worth the effort. (Caveat: lightning is a different story. As with lightning anywhere, you want to be cautious.)

RMNP

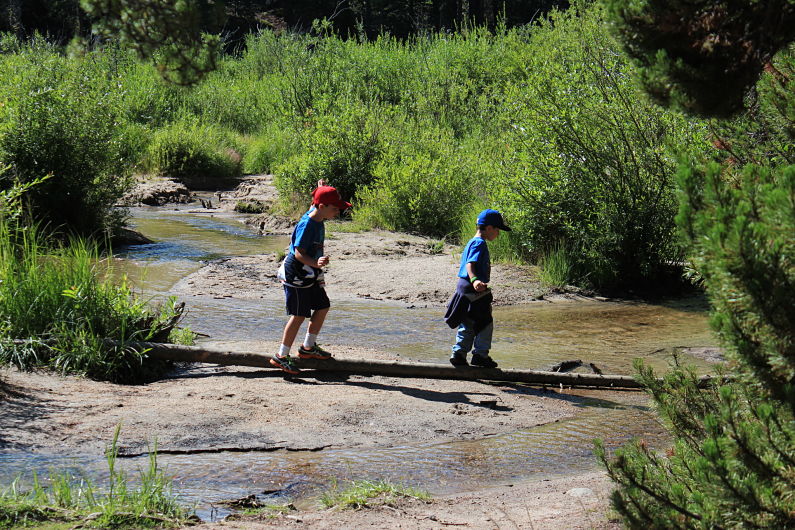
Hiking with young children:

It is possible to take a stroller on some of the trails at RMNP, but in most cases your best bet is backpack carriers. No need to buy one; they’re available for rent in downtown Estes Park.

If your kids are beyond a backpack, you’ll need to plan carefully. Prep your kids in advance for longer, more strenuous hikes—not just physically, but mentally. My sister managed to get her 4-year-old daughter to Emerald Lake, a 3.6-mile round trip with an elevation gain of 605 feet, by having her pretend she was Wonder Woman.

Park amenities:

  • Expect to be out of cell service most of the time you’re in the park.
  • Stay on top of the bathroom situation. Staying well hydrated is part of an enjoyable visit at high altitudes, so you also have to stay on top the need for bathrooms. There are facilities at many trail heads, but not all.
  • The visitors’ centers have clean restrooms and information desks, as well as a range of services including ranger-led programs, gift shops, and educational displays.
  • The national park service runs shuttle buses in the Bear Lake Road Corridor late May through early October. The buses are free, but park entrance fee is required for the Hiker Shuttle, which boards outside the park. Using the buses helps traffic flow and allows you to enjoy the scenery.

RMNP

It takes longer than you think it will:

Traffic through Estes Park gets backed up. The lines at the entrance stations get backed up. Construction in the park causes traffic backup. And hiking at altitude is slower and more strenuous than you might expect. Pack snacks or lunch and plenty of water, and take lots of breaks.

Fees:

Entry fees for Rocky Mountain National Park are very modest at $20 per vehicle for one day or $30 for 7 days. Fees can also be paid per person. You can purchase passes ahead of time online.

Rocky Mountain National Park is located just under two hours west of Denver, Co. Parking and services provided by the national park service are free, although a limited number of adventure outfitters are permitted to operate within the national park.

Our family was offered a media pass to RMNP by Visit Estes Park. My enthusiasm for this amazing place, however, long predates this visit.

Two days in Joshua Tree National Park and Indian Cove Campground with Kids

Joshua Tree National Park is a gem! With a higher elevation than our other favorite desert camping location, Death Valley National Park, Joshua Tree offers a desert experience with more vegetation, wildflowers, and of course, Joshua Tree’s fabled rock climbing boulders. You don’t have to be rock climbers to enjoy it, though you’ll see plenty of that ilk. Our kids absolutely loved the freedom of scrambling and bouldering to their heart’s content directly from trails and campgrounds. Here’s how to do Joshua Tree National Park with kids!

Joshua Tree is definitely worthy of a day trip from Palm Springs, but we highly recommend making two days of it (either driving in or camping). Hiking in the park is not strenuous (almost all hikes are 3 miles or less), and for the non-hikers, there’s plenty of wildflower and cacti viewing, birding, and rock climber-watching (yes, I just made that a word). Here’s what not to miss with a few days in the park:

Split Rock nature trail:

joshua-tree-national-park

Located a few miles past the North Entrance to the park, Split Rock is often overlooked by visitors, making it almost empty during our peak season visit. (If you’re unsure where to go, ask a ranger at the Oasis Visitor Center, which should be your first stop, anyway. Split Rock is a two mile loop that takes you through yucca, Joshua Trees, and most importantly, amid towering boulders. We stopped often to let the kids climb, but whether you want to keep it a traditional hike it up to you, of course. Hikers often spot mountain goats here, though our wildlife spotting was limited to lizards, ravens, and rock climbers.

Hidden Valley:

hidden-valley-joshua-tree

Hidden Valley is a mecca for rock climbers (and it’s fun to watch them here), but is also a great place for kids to scramble and explore. There’s a 1 mile nature trail loop that shows the natural bowl where cattle wrestlers brought stolen cattle to hide them, but kids will be more interested in jumping from rock to rock. This area gets crowded, but there’s room to spread out and most visitors don’t go further than the first quarter mile (in our experience).

49 Palms Oasis:

49-palms

When you’re ready for a trail that doesn’t involve scrambling and bouldering, try the strenuous 49 Palm Oasis loop. It takes hikers up and down canyon ridges to a very welcome palm tree oasis deep in the canyon. The actual oasis area is off-limits due to restoration, but it’s fun to count the palms (we counted 46, so there probably are 49 in actuality), sit in the shade, and check out the green vegetation around the spring. Hike this one in the morning, as there’s little shade.

Where to stay:

Joshua Tree has no fewer than nine campgrounds, as well as motel-style lodging in the towns of 29 Palms and Joshua Tree. We highly recommend camping in Joshua Tree to get the full experience of this spectacular park. There are few things to note about the campgrounds: of all nine, only Black Rock and Cottonwood offer running water and flush toilets. The remainder offer no services except pit toilets. The only reservable campgrounds are Blackrock and Indian Cove.

joshua-tree-camping

We stayed two nights in Indian Cove Campground, and loved the experience. Every campsite is adjacent to Joshua Tree’s famous boulders, and the entire campground is located in a beautiful rock canyon. We stayed in site 90 which is located at the very end of the campground, and considered it as ideal as it gets for a car camping experience. We had no immediate neighbors, and had wilderness surrounding us. We had room for two tents—one quite large—which is not the case with every site.

Tip: If you have a large tent or want to set up two tents, call the ranger station and ask about the particular site you reserved. Pack accordingly! For family groups wanting two adjacent sites, we recommend 63-64 or 99-100. And if you really want some isolation from other campers, consider reserving two sites even for a small group. They’re only $15/night!

When to go:

joshua-tree-cactus

Due to its higher elevation, Joshua Tree is bearable further into the warm weather months than other desert parks (such as Death Valley), but you’ll still want to visit between March and May for the best weather. At the time of our March visit, temperatures reached the 80s in the day, and the 40s at night.

joshua-tree-scrambling


Tip: for more information about Joshua Tree, check out this guide from Live Once Live Wild.

Directions:

Joshua Tree National Park lies 140 miles east of Los Angeles, 175 miles northeast of San Diego, and 215 miles southwest of Las Vegas. You can approach it from Interstate 10 and Hwy 62 (Twentynine Palms Highway).

Zion National Park in winter

Before I visited Zion National Park in winter, I pictured the famed slot canyons and rock formations of the park buried in snow, with park amenities shuttered for the season and the adjacent town of Springdale hard to access on wintery roads. I could not have been more wrong. Thanks to it’s low elevation and Southern Utah location near St. George, Zion National Park in winter is completely accessible, and often warmer than you’d think.

zion-narrows

As we arrived from a weekend of skiing at Brian Head and Eagle Point (yes, you can ski and hike on the same road trip!), we rolled our windows down as we approached the park from Highway 9. It was a balmy 50 degrees when we entered the artsy, scenic town of Springdale, and inside the park, just enough snow dotted the ground and clung to the red rock to be picturesque but not problematic.

What to do in Zion National Park in winter:

narrows

The short answer: pretty much everything you’d do in summer, but without the crowds. We hiked several trails that are usually highly impacted during the warm weather months, encountering only a handful of other people. During the winter, the Zion Canyon Scenic Drive can be done by car; in summer, you must take the shuttle. Most of the hikes that start from points along the drive are open during the winter months, too, which makes Zion National Park your personal playground in December, January, and February.

Hike The Narrows in winter:

zion-national-park

Hiking The Narrows was the highlight of our Zion winter trip. While we loved The Narrows in summer, going in winter is an entirely different experience. Start at Zion Outfitter, located at the entrance of the park by the visitor center. These guys can set you up with dry suits, special river shoes, and booties, which you’ll definitely want for the Narrows in winter. For $45/person, you get dry bibs (that go chest high), Adidas HydroLace canyoneering boots, neoprene socks, and a wooden hiking stick. For a little less, you can opt for waist high pants.

Note: you can rent the boots and socks in summer too, which I now realize would work better than the Keens we wore last time!

You can arrange for a guide to go with you in The Narrows, but families can also do it solo, provided you check the weather and conditions first at the visitor center. The Narrows are known for flash floods, which can happen any time of the year. To get to the river, go up Zion Canyon Scenic Drive to the last stop, Temple of Sinawava. You’ll take a paved trail for one mile, which ends at a good entrance to the Virgin River. During our visit, the trail was icy, so go slowly if needed, and be aware of icicles and potential falling ice above you.

Once in the river, make your way at will, sticking to the shallow spots as desired. The entire way up The Narrows to where it splits with Orderville Canyon takes a couple hours (it’s about 3.5 miles), but families can stop anytime; it’s an out-and-back. Take care to keep your upper body dry; water WILL pour into your dry suit from the top of the bib if you go too deep. Otherwise, the dry suit set up kept us very dry and comfortable.

Note: the canyoneering shoes WILL let in water; this is normal, and the reason for the wetsuit-like sock.

The Narrows in winter are truly magical: the snow and ice contrast with the red rock and water with such beauty, you’ll want your camera out at all times. And unlike in summer, when you’re wading through the river with crowds of people, you may have the river to yourself. I found myself completely alone more than once in the canyon.

narrows


Additional hikes:

The easy hikes along the scenic drive, including the Grotto Trail and Weeping Rock Trail are usually open in winter, but be aware that they may be icy. Bring extra traction for your hiking boots, like YakTraks, and you should be ok. While we were at Zion, we also did the Canyon Overlook Trail, which is located just past the tunnel within the park (take a right at the ‘Y’). Canyon Overlook offers big views for little effort; the whole hike is less than 1.5 miles, and though fairly strenuous, includes features that will be fun for kids, like stair climbs, overhangs, and wooden planks. Just take care with young kids as there are drop-offs along the trail, though the end overlook does feature a railing.

canyon-overlook

While we were at Canyon Overlook, a park ranger also recommended Sand Bench trail to us in winter. The Sand Bench Loop starts at the Court of the Patriarchs shuttle stop and is roughly 3.5 miles (round trip). From the shuttle stop, take the hikers’ bridge across the Virgin River. The trail crosses a stream, then continues past a landslide area from the ’90s. You gain elevation of about 500 feet, much lower than any hikes to the canyon rims. Plan to encounter sand, but as a winter bonus, it may be frozen or at least hardened.

Where to stay at Zion National Park in winter:

We have stayed at Cliffrose Lodge in both summer and winter, and love this property. See why it’s great for families here. The Cliffrose has been family-owned for many years, and the owners are committed to the area, putting money back into their property, and elevating the tourism experience in Springdale and Zion National Park. The lodge is just outside the park boundary next to the visitor center, and the view out of every window is fantastic. In summer, the gardens and access to the river turn the Cliffrose into an extension of the park for outdoor play, and in winter, the open, elegant lobby beckons. A full restaurant is slated to open in 2017, as well.

cliffrose-view

In winter, three outdoor hot tubs are at your disposal (in summer, there’s also a spacious pool), and a breakfast-in-bed (in room) menu is available for $10/person. Cliffrose suites are perfect for larger families, as they have two bedrooms separated by a full kitchen and dining area, with balcony or patio.

Where to eat in Springdale:

Springdale, the tiny town at the entrance of the park, is unlike any other ‘national park town’ I’ve experienced. It’s a destination in its own right, with art galleries, eateries, and specialty shops hugging Highway 9 against the backdrop of jaw-dropping canyons. From the Cliffrose, you’re only a few blocks from just about everything. The following restaurants are our favorites, with a few we haven’t tried added in that have been recommended by locals:

  • 9 East: this upscale Italian and Mediterranean bistro has been opened by a recent executive chef from Las Vegas
  • The Spotted Dog: American bistro fare
  • Bit ‘n Spur: upscale Southwestern/Mexican hybrid cuisine
  • Oscars
  • Kings Landing

How to extend your Zion National Park trip in winter:

I recommend staying in Springdale at least three days in winter to enjoy both the town and the park, then extending your stay in Southern Utah to include Bryce Canyon National Park or a Southern Utah ski resort. Brian Head resort is only about an hour away, where families can snowmobile, ski, and snowboard to round out an adventurous vacation.

Pin it for later:

Zion National Park in winter? Yes, please!

I was a guest of the Cliffrose and Zion Outfitter for the purpose of review. All opinions remain my own.

Bryce Canyon National Park in winter

If you’ve been to Bryce Canyon in summer, you know this national park is incredibly scenic, and also incredibly crowded. Even the ‘shoulder’ seasons of late spring and early fall are becoming congested with tourists. But come in the heart of winter, and you’ll have this playground of natural wonders to yourself.

bryce-national-park

Things to do in Bryce Canyon National Park in winter:

Much of Bryce Canyon stays open year round. With an elevation of around 7000 feet, families may or may not encounter snow; we did, on  our trip, but I was told it varies by season. If there is snow, it’s possible to cross country ski or snowshoe in and around the park, and of course if you encounter dry ground, hiking is an option. Just keep an open mind and be flexible.

Start at Ruby’s:

On the north end of the park, just outside the boundary, lies Ruby’s Inn, which is actually an entire complex consisting of a activities center, wild west dinner show venue, restaurants, and hotel rooms. Reuben (Ruby) and Minnie Syrett arrived in the area in 1916 and founded Ruby’s in 1923. It’s owned by the family to this day.

If you need a place to stay overnight, Ruby’s has clean, basic hotel rooms on the edge of the park, but it’s a great stop if you’re in Bryce Canyon just for the day, too. In winter, Ruby’s offers a winter sports center with an ice skating rink, a nordic track with six miles of trails (which connects to more in the national park) and cross-country ski and skate rentals.

bryce-canyon

We rented skis and took to the nordic track, which curves around the Ruby’s complex to the edge of the canyon. After just a 15 minute ski, you are rewarded with amazing views of Bryce. I suggest taking the two mile loop with kids; cross-country skiing is not hard to learn and a fun way to see Bryce in the snow.

The restaurant at Ruby’s is adjacent, and has a family-friendly buffet at both breakfast and lunch, as well as a menu to order off of. At very low crowd time periods, such as when we visited, they may not offer the buffet, but will still have a full sale and soup bar. Ruby’s is not fine dining, by any means, but a solid choice for feeding the family. Next to the restaurant is an extensive store, where you can pick up souvenirs but also groceries, winter clothing, and anything else you may have forgotten.

See Bryce Canyon with an expert with Bryce Valley Tours:

You’ll have Bryce Canyon to yourself in the winter, but you may not know where to go or what you’re seeing. We had the opportunity to see the park with John of Bryce Valley Tours, who accompanied us on our ski trek and explained the geological history of the canyon as we skied. John also offers half-day and full-day tours, which can be tailored to your family’s interests. Half-day tours are $75/pp, which I think is a good value for the opportunity to have an expert guide you who knows which parts of accessible in snow, which are closed in winter, and the like.

bryce-valley-tours

Stop at the visitor’s center:

The Bryce Canyon visitor’s center is located directly past the entrance, and is small but worth the stop. The exhibit area explains the geological history of the canyon’s rock formations, including the hoodoos you’ll see everywhere. Get the kids their Junior Ranger booklets, and get stamps in your national park passports.

Drive to the most scenic lookouts in the park:

Bryce Canyon is a park that’s big on views. The major lookouts are all open in the winter, even in snow. Drive in and check out Inspiration Point—trust me, it’s aptly named—and Swamp Canyon. The latter is much more stunning than the name suggests. At each of these lookouts, short hiking trails are available. When we visited, the snow was several feet deep, but they were still open, albeit difficult to navigate. If you decide to walk a bit, be careful of your footing, as you ARE on the edge of a canyon. Snowshoes would help.

bryce-canyon

Tips for visiting Bryce Canyon National Park in winter:

  • Call the park ahead of your trip to stay up-to-date on any road closures or closed exhibits; this is the off-season.
  • Be prepared for any type of weather; you could get snow or sun. Make sure everyone in your group has winter boots, waterproof pants, a hat, gloves, and jacket. You don’t want to get caught off-guard and have to buy all this at Ruby’s!
  • If there IS snow, try snowshoeing to get around on the trails.
  • Wear sunscreen; the high elevation causes people to burn easily if the sun is out.
  • Hydrate and go slowly at elevation until you’ve acclimated. Check out our tips for adjusting to high elevations.

Everything you need to know about visiting Bryce Canyon in winter

Haleakala National Park

When I think of Maui, I think sun-kissed sand and stunning beaches…not ascending to 10,000 feet to hike amid peaks. But families vacationing on the island would be remiss to skip Haleakala National Park, where kids will learn about the natural landscape of this breathtaking area, and get a glimpse of a Maui not well-known.

Haleakala consists of both Haleakala Summit and the lower Kipahulu Coast, making it possible for families to hike through barren and beautiful terrain as well as lush vegetation, all while learning more about native Hawaiian ecology and species during one of several ranger-guided talks offered. I love that Haleakala is such a region of contrasts: kids learn about many types of natural beauty, from the high peak to the streams and waterfalls in the park’s Kipahulu area.

Tip: The night sky is so clear at the national park, that it’s home to the Haleakala Observatory. Haleakala is open 24 hours a day, so if you time it right, you can take in the Milky Way as you’ve likely never seen it before!

For one family’s take on Haleakala National Park and its junior ranger program for kids, visit Mary at The World is a Book for an extensive review.

Distance from an interstate: See directions below.

Hours of operation: The park is open year-round, 24-hours a day, seven days per week. Visitor center hours are as follows: Haleakala Visitor Center (9740 ft/2969 m) 5:30 a.m. to 3:00 p.m., Kipahulu Visitor Center (sea level) 9:00 a.m. to 5:00 p.m.

Admission costs: Daily park passes are $10 per vehicle. For more information on park fees, see the Haleakala National Park site.

Directions: Getting to Haleakala National Park includes a beautiful drive through Maui’s ‘upcountry’ of ranches and farms. To reach the Summit Area, start at Kahului via Route 37 to 377 to 378. Driving time to the summit from Kahului is approximately 1.5 hours. To the coastal area (Kipahulu), take Route 36 to 360 to 31. Driving time from Kahului is approximately 3 hours.


One day in Badlands National Park itinerary with kids

We were blown away by the beauty and peacefulness of Badlands National Park! During our one day visit, we found ourselves comparing this dry, rugged, and dramatic park to other favorites: it has much of the same feel as Death Valley National Park and Joshua Tree National Park. However, Badlands adds another element: high prairie wildlife and terrain that will impress in a subtile, almost delicate manner. Here’s what to do with one day in Badlands National Park:

badlands-national-park

Allow me to explain: while the first thing visitors are likely to notice about the park is its dramatic rock formations and chasms (think of Grand Canyon in miniature, or as one fellow traveler put it, of being a giant hiking in the Grand Canyon), it’s quickly evident that beyond, and in some cases, above, these rock formations, lie plateaus, gulches, and lowlands blooming with sunflowers and wildflowers, harboring prairie dogs and rabbits, and opening up onto prairie grasses. The juxtaposition of dry, cracking rock and flowering plants is stunning.

badlands-sunflowers

The park is well-known for fossil finds dating to prehistoric eras, though we learned that dinosaur fossils are not found here. The region was underwater during that time period. Instead, early mammal fossils are found quite regularly, and dig sites can still be active.

How to spend a day at Badlands National Park:

Ready for your Badlands National Park itinerary with kids? Though the park area is quite large, most of the sites and hiking options are in a concentrated area, making this park do-able in a day, if needed. As we always suggest, start at the Badlands visitor center to get your bearings. Here, kids can see a well-made 20-minute video, then tour several rooms of exhibits on the park’s geological history, wildlife, and native history (this is Lakota territory). Stop at the desk and ask for a form on which to document any fossil finds. They can still be spotted in the rock throughout the park, and park scientists depend on visitor documentation to help their research. Cool, right?

badlands-fossils

After touring the visitor center, take the Badlands Loop Road. Backtrack to the Window Trail and Door Trail parking lot.

Tip: to do this itinerary as described, enter the park via I-90 Exit 131 instead of via Exit 110 near Wall. We suggest this direction because it places families at the visitor center early on.

The Door Trail offers an amazing vista of the canyons of the park, with half a mile of ‘trail’, which is actually rock hopping and free-form hiking from marked post to post (the rock bottom here doesn’t allow for a proper trail). The way is easy enough, but kids can make it more fun by climbing a few short rock formations along the path. The nearby Window Trail consists just of a boardwalk ending in a vista to see a very deep chasm in the canyon. Definitely do both. Note: we hit this trail at sunrise, which rewarded us with beautiful light against the stone.

sunrise-at-badlands

Accessed from the same parking lot, the short Notch Trail is great for kids who want more climbing, as this 1.5 mile loop descends through the canyon then up a wooden ladder to follow a ledge to a great view of the White River valley. Only proceed on this trail if you’re comfortable with heights.

badlands-hiking

For those wanting a longer hike, The Castle Trailhead is located just across the street from the Door and Window trails. This trail is 10 miles long, and travels west all the way to the opposite end of the Badlands Loop Road at the Fossil Exhibit. Those wanting to hike 10 miles will need a car to pick them up on the other end. However, thanks to a very user-friendly trail system in the park, it’s possible to hike only a portion of the Castle Trail. Starting at the trailhead at Door, hike a short distance on flat terrain to the junction of the Castle and Medicine Root trails. At this point, families have access to a loop of 4 miles, making the hike around 5.5 miles total, or can opt for an out-and-back for less mileage, turning around at the junction.

badlands-castle-trail

Or, do what we did: after seeing Door and Windows, head back on the Badlands Loop Road in your car and stop at the Saddle Pass trailhead. This quarter mile trail connects you to the Medicine Root/Castle Trail loop for a hike of 4.2 miles. The short Saddle Pass section is severely steep as you climb from the valley floor to the top of the ‘wall’, but once there, the terrain is quite flat. Up on this wall while hiking the Medicine Root Loop, you’ll see prairie grasses, sunflowers, wildflowers, and, possibly, snakes and other small animals. There is no shade up here, so plan to accomplish this part of your day in the morning.

Medicine-Loop-Trail

Further along the Badlands Loop Road, families will come to the Fossil Exhibit Trail. This boardwalk loop of about half a mile features well-done displays en route, which describe the various fossils found here, and whether these prehistoric animals ended up adapting, moving to a new region, or becoming extinct.

badlands

If you depart the park via the Badlands Loop Road toward Wall, you’ll come across many more roadside pull-outs with vistas of this area of the park. It seems to go on and on!

Where to eat:

During your day, definitely stop to eat at the Cedar Pass Lodge. This lodge is modern-looking and new, which didn’t quite seem to fit in with the setting of the national park, but inside, it has a very nice gift shop filled with handmade items and Lakota souvenirs, and a casual cafe that serves wonderful fry bread tacos. These native treats can be ordered with buffalo meat or black beans, and they are huge…two people can definitely share one. And yes, they are very fattening. Enjoy!

Where to stay:

The park does have lodging at Cedar Pass, in the form of very nice cabins overlooking the terrain (and the highway, but it’s no big deal). I did not stay the night on this trip, as the park can definitely be done in one day, but certainly this would be a good option as well.

The park is located along I-90 in South Dakota, near Wall. Make a stop at Wall Drug before or after!

Visiting Manuel Antonio National Park Costa Rica

Manuel Antonio National Park (or Parque Nacional Manuel Antonio), is about a three hour drive from San Jose, Costa Rica, an hour from Playa Jaco, and only a short distance from a number of the coastal towns that serve it. We arrived via the Pacific Ocean, on our Uncruise ship, the Safari Voyager, but once in the park, the same tips apply to cruise passengers and other visitors.

guide to manuel antonio

Manuel Antonio has a well-earned reputation for animal spotting, and during our day there, we were rewarded with sightings of capuchin monkeys, howler monkeys, squirrel monkeys, sloths, white-tailed deer, raccoons, quatis, and more types of birds (including macaws) than we could keep track of. It’s small in size at only about 1,700 acres, but it packs a big punch, with expanses of white-sand beaches, jungle hikes, and wildlife viewing platforms. Because this national park is so popular, it has a daily cap of visitors, which helps with the flow of pedestrian traffic.

You can definitely spend a whole day here, alternating between the hiking trails and the beach; we recommend setting up a beach base camp after your morning hike so people can come and go to explore. Just remember to keep someone ‘manning the fort’ as it were, or monkeys will steal all your possessions!

manuel-antonio

Visiting Manuel Antonio National Park: Top trails for animal viewing:

We absolutely loved the Punta Cathedral Point Trail, which winds from one beach to the next, elevating through the jungle via many series of rustic stairs to prime viewing areas. We saw monkeys here, but the prime sloth viewing is on the aptly named Sloth Trail, which is shorter in length and flatter. Ironically, we ended up seeing a sloth in a tree near the beach. Playa Espadilla Sur Beach and Playa Manuel Antonio appear on the map to be on opposite ends of the park, but are in fact only separated by a matter of yards, making it easy to explore both sides.

manuel-antonio

Tips for visiting Manuel Antonio National Park:

  • First off, start early! The park opens at 7 am, and since it fills up fast (and many animals are most active in the morning and evening), we recommend getting there when it opens. Start with a morning hike while it’s still relatively cool (ha!) then head to one of the beaches for a post-hike dip. In our experience, most visitors tend to settle in at the beaches of Manuel Antonio, and it’s hard to blame them; this park has been voted one of the most beautiful in the world many times for a reason. However, getting off of the sand and into the jungle will reward you with animal sightings.
  • Take precautions around the capuchin monkeys (white-faced monkeys) and the raccoons, as they have become so accustomed to humans, they have no fear and will blatantly try to steal your food, backpacks, hats, and just about anything else. Staying on the trail helps somewhat.
  • Consider hiring a guide. We had naturalist guides included in our Uncruise visit, but anyone can hire a guide for the day, who will walk you through the park. At the time of our visit, they were about $40 US for three hours, and from what I could see from observing them with many families, well worth it. (Note: you can bargain.)
  • Bring a picnic or sack lunch and lots of water. While some vendors are outside the park, no food vendors are inside the park boundaries. We also recommend bringing a few beach towels in a backpack.
  • Wear swimsuits over sun and insect-protectant clothing, such as trekking pants and long-sleeve sun shirts. You WILL want to swim, and you WILL sweat a lot!
  • The entrance fee is $16/pp US for foreign visitors, so plan accordingly.
  • Beware the Beach Apple trees. These highly poisonous trees are (mostly) marked, but even sitting under them and touching their leaves can be dangerous. Eating beach apples is highly dangerous, and usually results in a hospital stay. Take the warnings seriously.

If you need lodging and food recommendations outside the park, check out this post.

Three things to do in Acadia National Park with kids

Acadia National Park may be quite a hike from the nearest urban center or major airport, but this beautiful corner of downeast Maine offers families unlimited adventures, from bikes to boats to hiking trails and, if you’re lucky, the earliest sunrise in the continental US! Acadia is a relatively small park, and offers a lot of short, gentle hikes (and some tough ones as well) in addition to their expansive network of bicycling carriage trails.

Acadia National Park with kids:

These carriage trails are perhaps what Acadia is best known for (in addition to lobster, blueberries, and the rugged Maine coast, of course!) and are perfect for an easy Acadia hike or bike excursion. After a day in the park, you shouldn’t miss Sand Beach (Park Loop Road). A beautiful beach with great spots for checking out tide pools, kids may even want to take a dip…although the water is almost always freezing!

The lovely town of Bar Harbor is located just a mile or so from the park. Bar Harbor has everything you’ll need—outdoor stores, restaurants, and an ice cream parlor on almost every block! Below, get the nitty-gritty on navigating the carriage trails, plus two other great things to do with young kids in Acadia National Park:

carriage trail

Bike the carriage trails:

Perhaps the best way to see the park with young kids is via bike. I rented a bike at Acadia Bike Rentals and took Homer (3.5) and Greta (1.5) out for a ride around Eagle Lake. The folks at Acadia Bike were friendly and helpful, and had me set up and ready to ride in just a few minutes. If you’re visiting during peak seasons—summer and fall—they recommend that you contact them before you travel to reserve your bikes, especially if you plan to rent specialized equipment, like a child’s trailer or tagalong.

To save you from some of the pitfalls that I encountered, I’ll include a few helpful carriage trail tips if you’re riding with or pulling young kids. Access to the carriage trails is within riding distance from Bar Harbor (where most bike rental shops, including Acadia Bike, are located), but it’s about two miles and a lot of it is uphill. You never really know how heavy your kids are until you’re hauling them up that hill! I walked a good portion of the trip to the carriage trails, but I did manage it with enough juice left over for a good morning ride.

I had two toddlers (3.5 and 1.5 years old) sharing a seat, and had to endure a lot of bickering and squirming from the trailer. It might have worked better to have the younger one in a child seat, and the older one in the trailer. Even better, if you have two adults on the ride (sadly, we had one parent stuck at work all day), you can split them up and share the burden—literally!

touch tank

Visit Mount Desert Oceanarium:

Located on the north side of Mount Desert Island, just a few minutes drive from Bar Harbor, is the Mount Desert Oceanarium. The Oceanarium hosts the Maine Lobster Fishing Program, the Maine Lobster Hatchery, the Thomas Bay Salt Marsh, and the Discovery Touch Tank. My advice? Call ahead! You can’t tell from their website, but the only way to see the Oceanarium is by guided tours that go every 1.5 hours or so. Also, a lot of the tour involves lectures on various subjects from a local expert, so very small kids might be too squirmy to enjoy the visit. When we showed up, the last tour of the day had already started and we were able to join them for the last part—the Discovery Touch Tank. In hindsight, this was the best thing that could have happened for us, since our kids are too young to sit through a lecture-format tour anyway. If you have very little ones, you might see if they can accommodate you by giving you a brief tour or letting you join up with another group at the touch tank, since this is definitely a toddler favorite!

Eat at Jordan’s Restaurant:

When I was in college (in Maine, albeit a little bit farther south), I remember coming to Acadia to snowshoe with friends and having a delicious breakfast of blueberry pancakes at Jordan’s Restaurant (80 Cottage Street). I’m happy to report that Jordan’s is still there, and still serving up some tasty pancakes 10 years later! Needless to say, my kids ate blueberry pancakes for lunch every day of our trip…with blueberry juice, of course!

Death Valley National Park with kids: top hikes for active kids

We love exploring Death Valley National Park with kids! And no, you won’t swelter in the heat if you follow our tips! After our fourth visit with kids (stay at either Furnace Creek Ranch or Furnace Creek Campground), we’ve narrowed down our list of favorite Death Valley hikes to our top three. These hikes–detailed below–are best for active, school-aged kids who love exploring, climbing, scrambling, and otherwise giving their parents heart attacks.

Tip: For younger kids, we recommend attempting the same hikes, but adjusting expectations of hike length.

Golden Canyon to Zabriskie Point and Glower Gulch:

golden-canyon-death-valley

The hike up Golden Canyon to the lookout area at Zabriskie Point is 2.5 miles one-way, but multiple alternative routes exist to make it either shorter or longer. If you have two cars, the shortest route is to park one on each end and do the hike one-way. To extend the hike, travel the 2.5 to Zabriskie, then backtrack one mile to the Glower Gutch turn-off, which returns you to the parking area via a different canyon. The Glower Gutch section takes families along a dry wash and then into a very narrow canyon with plenty of scrambling down a dry waterfall. The last 1/2 mile is exposed as you hike along the Alluvial Fan of the mountainside back to the car. The trailhead starts on Hwy 190 just past Furnace Creek Inn.

glower-gulch-mine

What active kids love: the Golden Canyon section of the hike comprises of the first mile or so, and offers lots of exploring up side chutes of the canyon. Kids can scramble nearly to the top of the canyon along these routes. Further up, the trail skirts Manly Peak then offers alternative trails along the ridges of smaller fans (parents can see kids from the main trail). When it gets steep, it’s time to return to the main trail up to Zabriskie. At the beginning of the Glower Gutch section, kids should keep an eye out for a man-made stone wall. Around the back of it exists the entrance of a deep mine tunnel (barred now, to keep humans out and allow access for bats).

Mosaic Canyon:

Mosaic Canyon is one of the most beautiful canyons in the park, with challenging scrambling at the beginning before opening up to a deep wash. The first half of the hike is shaded in the canyon, but the second half is definitely exposed. The hike is just a few miles each way, but you’ll want to stop often to let kids explore.

mosaic-canyon-death-valley

What active kids love: Rock scrambling and climbing abounds in Mosaic Canyon. Numerous side trails take hikers to narrow ridges (careful!) and the beginning of the hike offers challenging climbing for those who seek it. (Otherwise, it’s fairly easy to manage on the main trail.) In the wash, the side trail to the right (as you go up) offers a thrilling walk along the edge of a fairly steep side canyon.

Titus Canyon and Falls Canyon:

Titus Canyon is often driven (26 miles or so from the one-way entrance), but can also be hiked from the ‘exit’ side. The trailhead is located en route to Scotty’s Castle and Ubehebe Crater (also great stops), and families can go as far or short a distance as desired. The steep canyon walls are fun to play on, though be aware that cars can drive past. (They are easy to hear coming, however.) For an alternative without cars, try Falls Canyon, accessible from the same trailhead. Backpackers enjoy this canyon, but it will largely be empty. Either is a one-way route for most families.

titus-canyon

What active kids love: The rock climbing possibilities are more like scrambling here, with kids able to reach impressive heights without much effort. Just be sure young kids don’t get so high that they’re afraid to get down! Geodes can be found in this canyon as well.

Tip: For a non-hike that feels like a hike and looks like a hike (but doesn’t involve a set trail), take kids to Mesquite Sand Dunes near Indian Wells. The trek from the parking lot to the highest dune is 2 miles, but kids can pick their own path (and go up and roll down as many dunes as they’d like in the space between). Bring plenty of water and a hat for shade, as this ‘hike’ is 100% exposed.

For all Death Valley hikes:
Plan to hike early in the day, exiting most trails by lunchtime. Wear sun protective clothing and hats, and insist on everyone carrying water.

Bonus pit stop!

rhyolite-ghost-town

A trip to Rhyolite Ghost Town on the edge of the national park is well-worth a stop on the way in (near Beatty). Kids can explore ruins at-will for the most part, and there’s a short walk to a mine tunnel on the hill outside the ‘town’. Kids can also check out a jail cell and a brothel (whether you explain that last one is up to you!). There are no services here expect toilets, but it’s a nice place to picnic. Beware of rattlesnakes!

Tip: Wondering where to stay in Death Valley National Park? Read our reviews for Furnace Creek Ranch and Furnace Creek Campground.

Dinosaur National Monument with Kids

Spanning both Utah and Colorado, Dinosaur National Monument is a national park destination too massive to tackle in a day, or even a few days. During our visit, we opted to check out only one section of the park, on the Utah side, but we tasted just enough of this park to know we’ll be back. Here’s how to plan a trip to Dinosaur National Monument with kids:

Know the lay of the land:

There are two visitors centers in the monument: Quarry and Canyon, which also represent the major points of access to the park. Quarry is located on Highway 40 in Utah near Vernal, at Jensen. It’s a short drive from the highway. Canyon is located further east on 40 on the Colorado side, with Deerlodge Park even further east. The Gates of Lodore access is on the opposite end of the park, to the north off 34 in Colorado. The entire park is filled with rivers and canyons (the Green River as well as the Yampa). Here’s what to do at each section.

Quarry:

This is your spot for viewing the dinosaur fossils Dinosaur National Monument is known for. Start at the visitors center and watch the short film on the discovery of dino fossils, then check out the exhibits until you’re ready to board the free open-air shuttle to the Quarry Exhibit Hall. This is a must-do: here, you’ll see the great wall of dinosaur bones embedded in the rock (preserved in this way so visitors can see how the ‘log jams’ of bones came to be, under layers of soil). You can even touch some of the 149-million-year-old fossils. Additional exhibits explain what you’re looking at, as do park rangers on duty.

After shuttling up to the exhibit hall, we recommend taking the short Fossil Discovery Trail on the way back down. It’s not shaded, so plan on this one early in the day, but it’s downhill, and there are three spur trails that will lead you to more fossils and even some petroglyphs along the trail. Take the free audio driving tour next, which leads you to more petroglyphs, or the longer Sound of Silence Trail or Desert Voices Trail. Shaded picnic areas are adjacent to the visitor center.

Canyon:

Aptly named, this is the gateway to Dinosaur National Monument’s canyon country. There are no dino fossils in this section of the park. You can drive the 31-mile Harpers Corner Road and hike a Harpers Corner (a short hike suited for kids). This section of the park is open seasonally however, as it gets very wet and sometimes impassible.

Deerlodge Park is the launching point for Yampa River trips, whereas the Gates of Lodore area is the launching point for Green River trips.

If you want to add a river rafting trip to your exploration of Dinosaur National Monument, we suggest going on OARS Rafting’s Gates of Lodore or Yampa rafting trip, to be fully immersed in the park in ways not possible by car on one’s own.