15 ways to fill the dog days of summer: late summer getaways and tips

By this part of summer, some families have already begun the school year, and the rest of us are in the last leg of vacation. If you’re like us, the planned summer trips are behind you, yet empty days still stretch ahead. How to fill these dog days of summer? We have 15 ideas for late summer getaways, day trips, and pit stops.

dog-days-summer

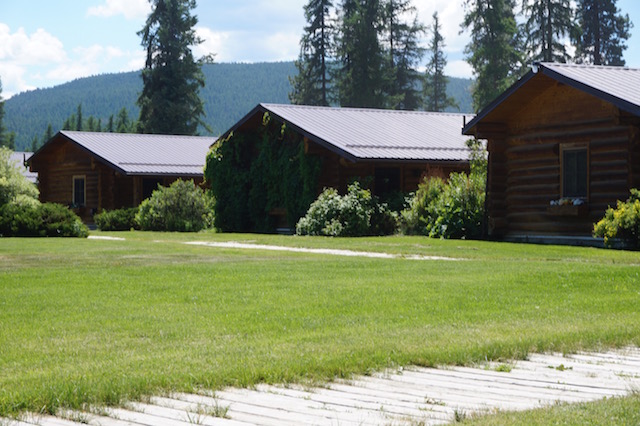
1. Check ReserveAmerica for last-minute cancellations at a local state park.

Yes, you’ll remember we recommended getting summer camping reservations months ago. But last-minute cancellations happen all the time. If your dates are flexible (the days seem to stretch out endlessly at this time of year), make a habit of checking the reservation page for your favorite local campground each morning when you check your email. You never know when an overnight opening may pop up!

2. Find a summer festival.

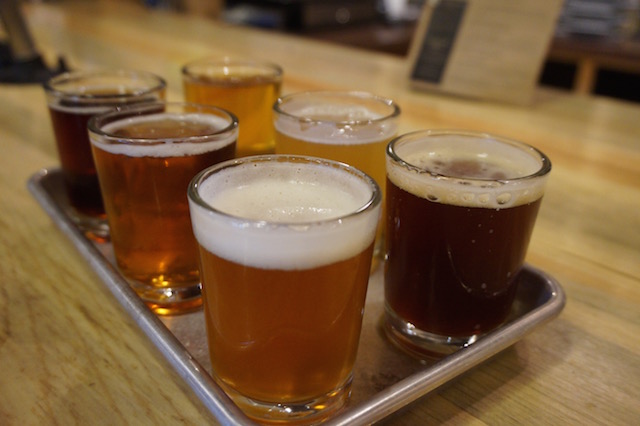
Look in your local paper or the tourism website of your state or city, and make a plan to experience a new-to-you festival. Last summer, we were happily surprised by both a local brewfest (surprisingly kid-friendly!) and local kite festival. Other popular festivals include music festivals and art festivals. Make a day of it, packing a lunch or even planning an overnight.
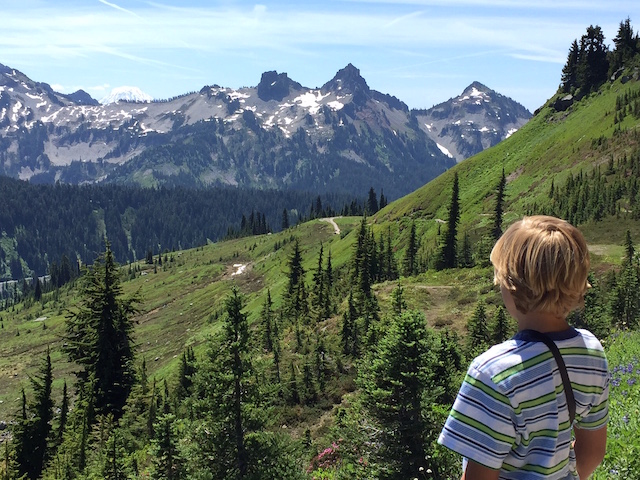
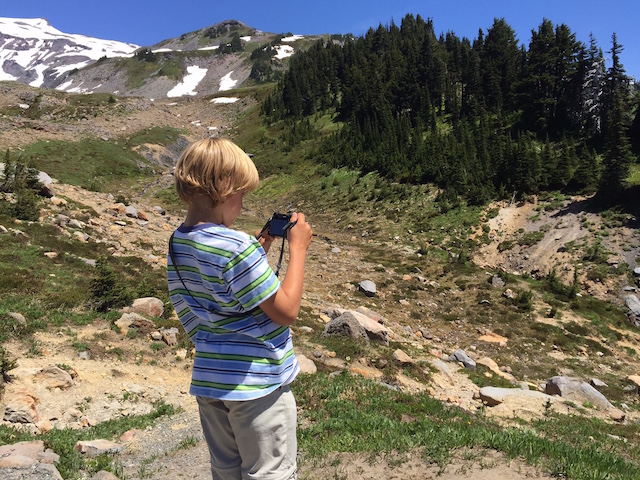
3. Take a day hike.

Too worn out to plan a camping trip? Take a long day hike. Use the long summer daylight hours to plan a multi-hour hike on a trail near home, and bring enough provisions (such as swimsuits, food, water, and towels) to really make a day of it.

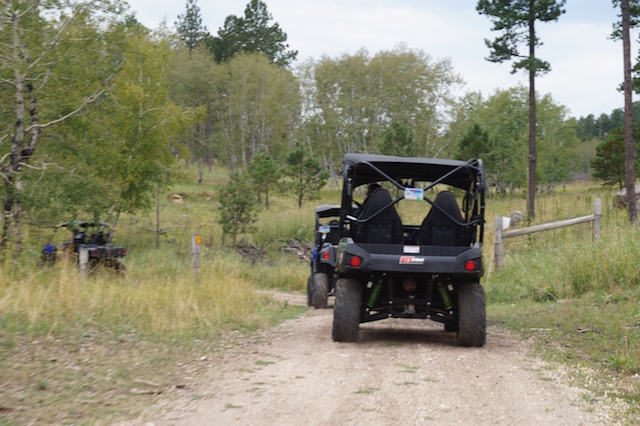
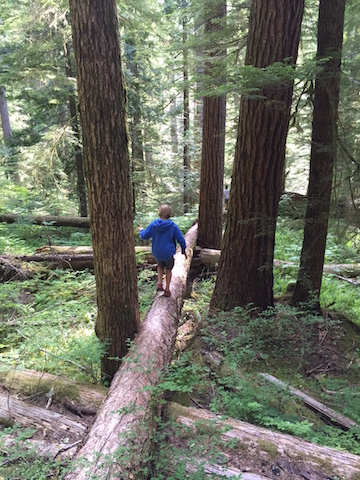
4. Backpack in a nearby national forest.

Feeling more ambitious? An overnight backpacking trip can make you feel as if you’ve really gotten away from it all, without too much time or cash investment. If you have your own gear, all you need is a local national forest (and possibly a permit, usually granted at the forest service office nearest the trailhead). Don’t have backpacking gear? Rent it!

5. Try a new museum.

Do you have a membership to a science or children’s museum? Are you sick of it after visiting all summer? We hear you. Try a new one in another city within your region. Most museum memberships come with to perk of visiting others in a network, which will honor your local membership with free admission. Learn more here.

6. Use a summer hotel deal.

Many hotels offer great incentives to visit at the tail end of summer. Check the website of your favorite hotel nearby or in an adjacent city for an easy getaway. Look for back-to-school specials or themed deals, such as museum packages, mother-daughter packages, or dining packages. Here are some deals available nation-wide at one of my favorite hotel brands, Kimpton.

7. Take the dog to a public pool.

Look for the announcement: at most public city pools, the city offers a ‘dog day’ on the day after the last day the public pool is open for swimming. This is a fun time to let the dogs swim before the pool is drained for the year. If your local pool does not offer a dog day, or you don’t have a dog, look for other fun end-of-summer pool events, such as rubber duck races or boat derbies.

8. Find a wine or ale trail.

Surprisingly, wine tasting and cider or ale tasting can be a family-friendly activity. Many agricultural regions around the country now sport wine or ale trails, where families can drive from location to location for tastings. Many wineries have nice outdoor spaces perfect for picnics or lawn games like bocce ball. Don’t have a wine trail near you? Look for a farm trail with farmsteads to frequent, or find a farmer’s market. Here’s our local wine trail.

9. Look for a living history day.

Give the kids a history lesson before school starts. We’ve found living history days locally that cover everything from pioneering history to Civil War battles. Most living history days will be hosted by a local history association chapter, historical site, or state park. Start your search at the National Historical Society.
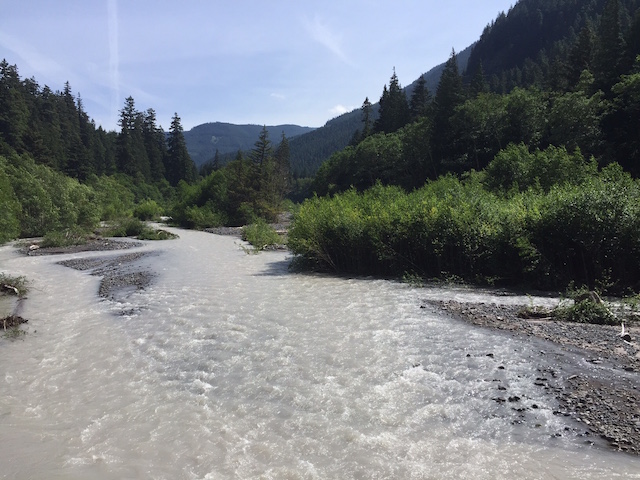
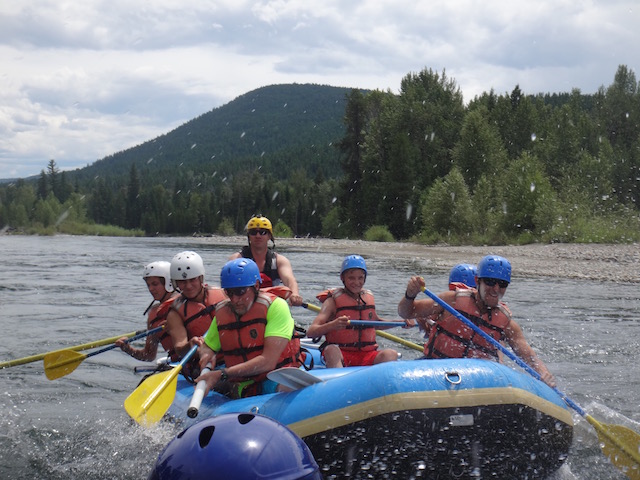
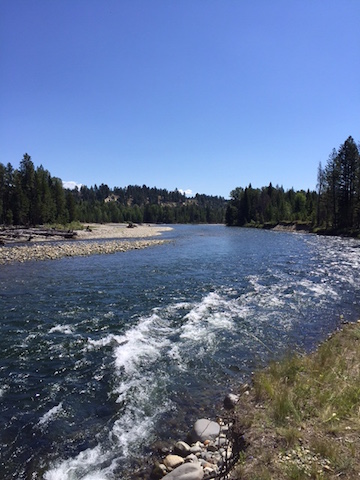
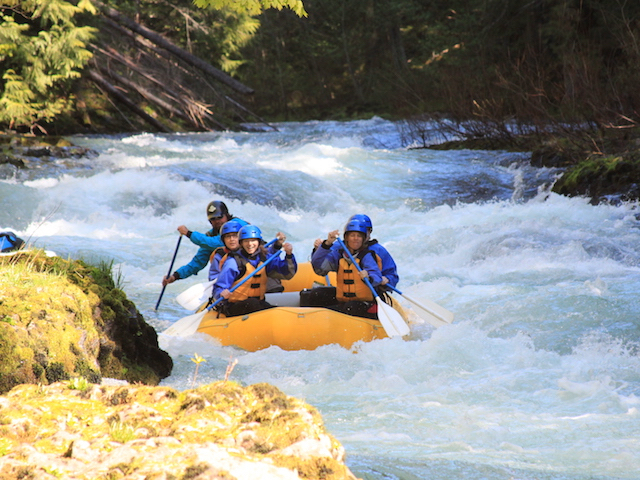
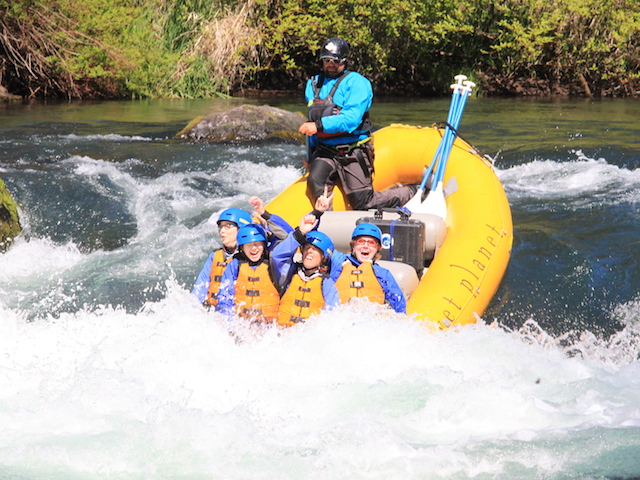
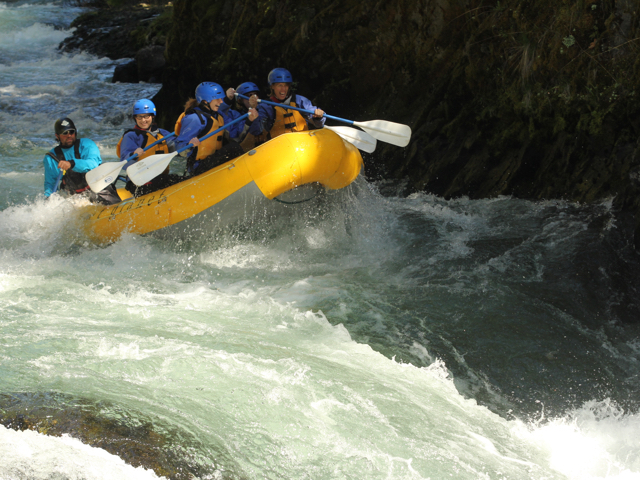
10. Raft a river.

While we certainly love multi-day rafting trips, day trips can be wonderfully fun as well. Take your own inflatable rafts on a tame river, or rent a raft from a local rafting company. Even fairly small rivers tend to have recreational enterprises along them. Don’t want to plan it yourself? Go with an outfitter. Some of our favorite day tripping rivers include the Deerfield in Massachusetts and the Deschutes in Oregon.

11. Have a stay-cation.

Eat out at your favorite restaurant, get tickets to the latest blockbuster, and round out your day with a game of mini-golf. Better yet, plan a ‘local food’ day, and head to the farmer’s market, followed by a trip to a local farm, orchard, or factory, sampling local foods along the way.

12. Camp in the backyard.

Tried and true! We have a large tent set up in our backyard most of the summer, and the kids enjoy inviting friends for tented sleepovers. Don’t forget to move the tent every few days to keep your grass alive, and be sure to turn off any automatic sprinklers! Place a small table in your tent and keep a deck of cards or a board game at the ready, along with a camping lantern.

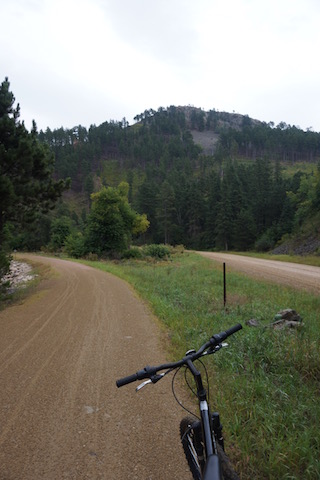
13. Plan a bike trip.

Take your bikes and find a local trail. Many towns and cities now have specialized cycling paths, or families can find single track mountain biking trails. Be sure the trail system you chose allows bikes (as opposed to only hikers) and if you can’t transport bikes easily, find a route from your own neighborhood. Find trails near you.

14. Rent a new water toy.

Head to your local lake and rent a row boat, stand-up paddle board, kayak, or raft. The cost of the rental will be worth it when you don’t have to haul the toy to and from home, and having a novel pastime will keep kids busy for a number of hours. We love playing on SUPs (stand-up paddle boards) the best!

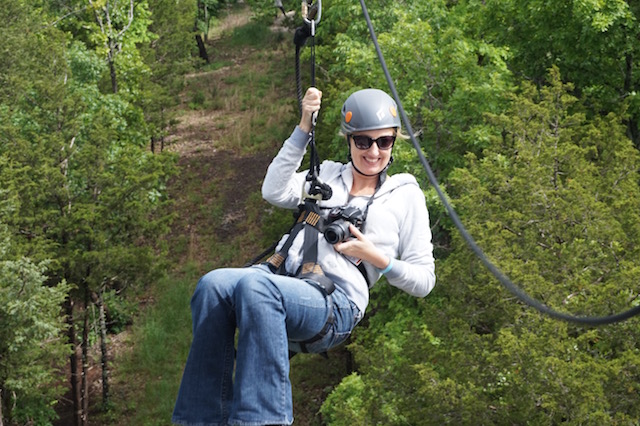
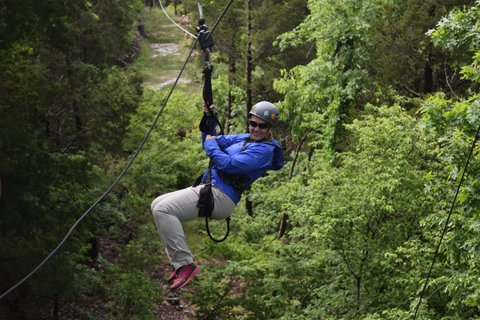
15. Take a tour or have an experience with Groupon or Cloud9.

Find a local activity at a discount with Groupon, or search Cloud9 to find out what adventurous or new experiences are offered in your area. Activities range from paint ball to sky diving to kayaking. Either site can help you find something new to do that you may not have tried otherwise.

What are your end-of-summer plans? How do you beat August boredom?

Guide to Iceland national parks

Nearly ALL of Iceland looks like a national park, so families can’t go wrong finding beautiful outdoor experiences on an Iceland vacation with kids. But Iceland national parks do pack in a lot of interesting natural features you won’t want to miss. Here’s what to see in each.

guide to Iceland national parks

Þingvellir National Park:

Þingvellir is easily accessed from Reykjavik, and is located on the Golden Circle, so expect to share space with plenty of tour buses. However, it’s absolutely worth the trip. Start with the main attractions: the rich Viking history in various sites and the location where you can see the shifting of the tectonic plates (over the course of millions of years). There are several walking paths here (we wouldn’t quite call them hikes), the largest of which will take you up to a viewpoint (which is where they put the visitor center and parking lot, disappointingly) where you can see the deep ravines cut into the landscape. Taking the other paths, you can see Drekkingarhylur pool, the site where women were once drowned for offenses such as adultery, and the waterfall Oxararfoss.

Iceland national park

Next, explore the valley and lake, where you’ll see the historic sites, including one of Iceland’s first churches. Along the Oxara River, you can find the ruins of Viking camps, called budir.

Top extra activity outside the park: Laugarvanshellir Cave People Tour

This lovely tour is still unknown to most tourists (as its new in 2017). Located outside the park on 365 toward Laugarvatn, you’ll see the little house (think hobbit house) cut into the hillside before you arrive at the small parking lot. Go into the tent that houses a small tea room to purchase a tour, which is led by an enthusiastic guide. In fact, days later, our kids commented he was their ‘favorite Icelander they’d met’. The tour takes about 40 minutes, and takes you up the hillside to see the cave an Icelander couple made into a rudimentary home at the turn of the 20th century. Later, another couple inhabited it for a short time. The single room house is historically restored, and includes a sheep barn and cow barn built into the rock. While it’s interesting the see the house, the story behind it is even more fascinating; this really is a story of Icelandic pioneering. Learn more at http://www.thecavepeople.is

iceland cave people

Vatnajokulsthjodgardur National Park:

This was our favorite Icelandic national park, thanks to its dramatic volcanic history and glacier. The visitor center at Skaftafell has a lot of good information: start here and pick a day hike to try. We opted for a loop of about 6 km that took us high up the mountain to spectacular views of Iceland’s largest glacier, Skaftafellsjokull, then cut along a high ridgeline to dip back down to stunning Skaftafoss (certainly a highlight of the park). You can opt for shorter hikes, or longer ones, but for any length, be sure to pack many layers for all types of weather, as you’ll be completely exposed to the elements (as you are in most of Iceland).

Glacier tour operations are located in the parking lot of the visitor center, which can take you onto the surface of the glacier for about $40-60 per person. You are not permitted to walk on the glacier without a guide, as fissures and cracks can be unpredictable. We opted to skip the glacier tour and were satisfied with our excellent views via the hike.

This national park is pretty massive, and offers plenty of F-road goodness for those venturing north, but families can certainly get a feel for the area from the southernmost Skaftafell entrance without venturing beyond Jokulsarlon glacial lagoon.

Top extra activity outside the park: LAVA Centre

Before you enter the national park, stop at the brand new LAVA Centre located at Hvolsvollur. This highly interactive, tech-heavy museum answered a lot of our questions about the geothermal and volcanic nature of the region, which really helped us understand the lava fields, glaciers, and volcanos we saw the following days. The fairly steep entry price (still on par with entry to other museums we visited) is well worth it: get the family pass if it applies to you, to save some money.

LAVA Centre

The museum is divided into several rooms you walk through in order, each with hands-on activities and digital displays. It’s truly hard to describe how great these exhibits are, but I’ll try: one room mimics the properties of ash, giving you a taste of how it feels to be blinded by it in an eruption, and another room allows you to spin a giant globe, showing the shifting of tectonic plates over millions of years. Start with the 15 minute film and follow the map through the rooms from there. All displays are in English.

Snæfellsjökull National Park:

Located on the west side of Iceland on the Snæfellsnes Peninsula, Snæfellsjökull features a big daddy volcano (unfortunately covered in cloud during our visit), as well as black sand beaches with interesting rock formations, caves and lava tubes, and cinder cones. The park is located past the fishing village of Olafsvik, with a visitor center located at the space ship-looking lighthouse about three-fourths of the way through the park. See great views of the ocean and sea stacks here, then book a cave tour a few meters down the road. If you don’t want to spend the money (it’s not cheap), do as we did and take the short self-guided tour of the main cave entrance. All around the cave are smaller lava tubes you can (but probably shouldn’t) climb into.

Iceland

There’s also a well-marked cinder cone in the park, which is an easy climb with metal steps, and affords great views. We loved that at the top, a circular plaque names all the nearby mountains and volcanoes so you can identify each one.

Top extra activity outside the park: Settlement Center 

At the bottom of the peninsula, you’ll first enter Borgarnes on 60. Go to the Settlement Center, one of the best museums in the region. It’s located by the harbor in a warehouse, but inside, you’ll see the history of the Icelandic settlement era and learn more about its famed Sagas.

Beyond the Blue Lagoon: Iceland hot springs off the beaten path

Yep, we went to Iceland for eight days and never went to the Blue Lagoon. Why pay a crazy entry fee to go to an overcrowded geothermal pool, when so many remote, beautiful, and FREE pools exist all over Iceland?

During our camper van road trip in Iceland, we dipped our toes in steaming water every single day, and never paid an entry fee of more than $25 (and usually paid nothing at all).

Where to find Iceland hot springs off the beaten path: 

iceland hot springs

Reykjadalur hot springs river:

In the south, just about 40 minutes outside of Reykjavik, the small town of Hvergerdi offers a 3.5 kilometer hike into the geothermal hills to a hot springs river. Yes, it’s well worth the hike. You’ll climb upward pretty steeply for the first km or so, then work your way up and down over hills with lovely views of the valley below. Eventually, you’ll see steam billowing up, and you’ll quicken your pace, because you’ll know you’re close! At the river, there’s a boardwalk with entry points along the small stream, and a few wooden walls that serve as changing areas. If you follow the boardwalk up, you’ll find the hottest water (so hot it’s almost painful), and as you walk down, you’ll find cooler water (closer to 35-37 C). It’s a lot of fun to move from section to section feeling the different temperatures.

iceland hot springs

If you don’t want to change behind a wall, you can change in the small bathrooms at the little cafe at the start of the hike, or just wear your swimsuit under your hiking wear. Be sure to bring lots of layers, including rain wear, as there’s no protection from the elements (similar to all over Iceland). The hot springs river is free, and does get crowded on the trail (though even in peak season, we found plenty of space in the river to soak).

To get here: Take Route 1 (Ring Road) from Reykjavik to Hvergerdi. Drive through town following the Reykjadalur signage until you get to a gravel road ending in a parking lot.

Seljavallalaug Hidden Hot Spring:

This one may not be so hidden anymore, but it’s still uncrowded. This geothermal pool is located in the middle of nowhere in a tiny valley with green mountains rising dramatically up all around it. The pool was made near the turn of the 20th century, for the purpose of teaching Icelandic children to swim (before the 1920s, unbelievably, most Icelanders could not swim). It has a single pool and rudimentary changing rooms (unisex…it gets interesting). This pool gets some criticism on TripAdvisor and the like, with people calling it dirty. It’s not dirty: it’s rich in algae, natural to Icelandic hot springs. The hike to the pool is only about one km, and our only complaint is that the water is a bit on the cool side (around 35 degrees). Toward the southern end of the pool where the geothermal water flows in, it’s closer to 40 degrees. On a warm day, this is fine, but on the cold, sleeting day we visited, it was painful to get out! This pool is FREE.

iceland hidden hot springs

How to get here: From Route 1, turn down road 242 in the south. Follow the dirt road straight (don’t turn right) and you’ll get to a parking lot with an unused pool about 1/4 mile in. The hike is short into the valley (you can’t see the pool from the parking area though).

Laudar campsite hot pot:

This adorable hot pot (hot tub) is located in the Laudar campsite in west Iceland. The parking lot is at the Hotel Edda, and the walk is just a few meters. There’s a quaint changing hut (unisex, but fewer people are here) and the water is a perfect 38 degrees. You can camp onsite, too, if desired. This hot pot is FREE.

Iceland hot pot

How to get here: From Route 1, take 60 all the way up through the isolated farmlands until you’re above the town of Budardalur. Follow the sign to Laudar.

Secret Lagoon:

So the Secret Lagoon is no secret, but it can be found just outside of the town of Fludir near the Golden Circle. You’ll find a large pool half-formed by natural rock, fed hot water from bubbling geysers nearby. It’s the most expensive pool we visited ($25 per adult), probably because of its proximity to the Golden Circle and its tourism traffic. No matter: it’s worth spending a few hours here.

iceland secret lagoon

How to get here: Take road 30 to Fludir. The sign is just before you enter town. Go down a dirt road for just about a mile.

Hot pot of Flokalaundar:

If you’re willing to drive about two hours (mostly on dirt) from Reykholar in the Westfjords, you’ll arrive at a hot pot nestled right against the sea. Do as the locals do and jump between the warm water (around 38 degrees) and the freezing ocean and back. This hot pot is larger than Laudar but a bit busier. No changing rooms…change in your car or camper. There’s a small parking lot right nearby.

Iceland hot pot

How to get here: From Route 1, take 60 and follow it all the way up into the fjords. Be sure to have a full tank of gas, as there are few services before you reach Flokalaundar. Plan on narrow, steep dirt road for part of the drive. Is it worth it? Yes.

Tip: Can’t get to a natural hot springs one day? Look for a public Icelandic pool! Every town we drove through had their own (look for the water and swimmer signage), and each cost less than $10-$12. Inside each complex, you’ll find a geothermal fed warm outdoor pool (often with waterslides and other features), hot pots, and a steam bath, plus nice changing rooms and hot showers. Talk with locals here, and get to know the real Iceland. Remember to follow custom and shower nude before swimming. Never bring cameras or phones into the pool or changing areas.

Three favorite public Icelandic pools:

Note: Photos are not allowed of Icelandic public pools.

Laugardalslaug: Iceland’s largest public pool complex is only $8 for entry, and in our opinion, beats the heck out of the Blue Lagoon. There are two huge outdoor pools (one is a lap pool, the other has all sorts of features…basketball hoop, big twisty waterslides, climbing ropes, floating platforms, and water toys), four hot pots of various temperatures, a cold plunge, a huge steam bath, a massage area, and a large kiddie pool area. There are spacious and clean locker facilities and hot showers. On the grounds are also sand volleyball courts, exercise equipment, and a ropes course. Laugardalslaug is located in the suburbs of Reykjavik.

Drangsnes: The public pool on the Steingrimsfjordur fjord in the north has all the usual amenities, with a location right on the sea. Best of all, the town has arranged for free hot pots to be placed and maintained right on the beach, should you not need the added amenities of showers.

Kirkjubaejarklaustur: This public pool has views of the town’s pretty waterfall from the hot pots, plus a nice sized swimming pool with small water slide and a kid’s hot pot/wading area. What we loved about this pool was its local vibe: we had the opportunity to talk with many Icelanders here, and all were welcoming.

SaveSave

Earth Day-friendly bucket list experiences and destinations

In celebration of Earth Day, we’ve rounded up our favorite experiences, tours, and travel operations that promote a spirit of ‘Earth Day every day’. These travel experiences, through their passion for their destinations, help create the next generation of environmentalists.

Earth Day-friendly bucket list experiences:

earth day

Uncruise in Panama and Costa Rica:

We just returned from Uncruise’s newest itinerary in Central America, which takes guests through the historic Panama Canal before heading up the Pacific coastline along Panama and Costa Rica. Naturalists onboard the ship, in tandem with local guides and experts, teach guests about the local wildlife in the rainforests, mangroves, and beaches visited. The 62-passenger Safari Voyager allows for a cruise ship experience without the environmental problems large cruise ships pose.

Lindblad Expeditions in the Galapagos:

This Galapagos trip, on the NatGeo Endeavor II, allows families to experience the Galápagos Islands through Lindblad’s ‘360º approach’, guaranteeing an in-depth encounter with its flora and fauna. The 96-guest National Geographic Endeavour II is fully equipped with tools for exploration that will enable travelers to see more of the archipelago’s varied islands and habitat, have up close encounters with wildlife, and experience the Galápagos undersea.

Need more inspiration? We have activities you can add to just about any family trip in the spirit of Earth Day!

Vantage Adventures in Peru:

Vantage Adventures’ Machu Picchu itinerary excels in teaching guests about the storied history of Peru, from the high peaks above Cusco to the fertile plains of the Sacred Valley. Their local guides are unrivaled experts whose love and passion for the country is contagious. We learned so much about Peruvian culture, we could fully appreciate the UNESCO sites we visited, and their conservation. Read more about our time in Peru.

Alaskan Dream Cruises in SE Alaska:

I’ve been singing the praises of Alaskan Dream Cruises’ Alaska itinerary for a long time, and I’m not likely to stop anytime soon. This Alaskan-native-owned company shines when it comes to unique ports of call and intimate, local experiences. We got up close to nature from bears to bald eagles, and our experience was always interwoven with native Alaskan culture and hospitality. After our Alaskan experience, my kids vowed to become stewards of our environment all over again. Read more about our Alaskan Dream experience.

O.A.R.S. river rafting in Idaho:

If you don’t have the know-how or desire to plan your own multi-day backpacking or river rafting trip to experience a week or so in the wilderness with your family, do the next best thing (or if I’m being honest, maybe the first-best thing) and head into the backcountry with O.A.R.S. Their Salmon River itineraries in remote Idaho do more to teach kids (and grown-ups) about the importance of preserving our natural lands than any class or Earth Day festival will do. Immersed in the wilderness, families truly understand why forest service and BLM lands deserve their attention and protection. Read more about our Main Salmon rafting trip.

Tip: Want to embark on your own outdoor adventure bucket list trip? Of course you can! We suggest REI’s new GPS-based apps, which make the outdoors accessible for users of all levels. The REI apps put GPS route info, elevation profiles, interactive maps, photos and more at your fingertips. Try the Hiking Project App, or the bike trail MTB Project App. REI even has a National Parks App!

Exploring Custer State Park with kids

Haven’t been to Custer State ParkGet ready to be impressed! This state park encompasses 71,000 acres, making it larger than some national parks. In fact, some argue that Custer should be a national park, and after visiting, I agree! Plan to stay at least two nights to see the majority of what this park has to offer, or at least one full day to see some highlights. Here’s how to tackle Custer State Park with kids:

custer-state-park

Start with the Needles Highway Scenic Drive:

It’s not often I recommend driving through a park with kids, but Custer’s Needles Highway is breathtaking, and easy to access from the western park entrance at Custer. Plus, it concludes at a great lake and hiking option (more on that later).

needles-highway

After driving past the stockade area and coming into the center of the park, the Needles Highway will head north, winding first through meadows and grassland where you’ll want to keep an eye out for bison. Then, it climbs into the more dramatic, rocky part of the park, taking you through several narrow stone tunnels and opening up on incredible vistas of the Cathedral Spires, Needles Eye, and Little Devil’s Tower. Definitely stop a few times along the way to snap photos (you won’t be able to help yourself), especially after the tunnel that delivers you to Needles Eye. This natural wonder is indeed a rock formation in the shape of a needle’s eye. Hint: mountain goats can often be spotted on the craggy peaks beyond.

needles-eye

Take a hike (or two or three):

Custer State Park is filled with kid-friendly hikes of various mileage and degree of difficulty. We’ll start with what may be the most spectacular:

Harney Peak: Harney Peak has the distinction of being the highest point east of the Rockies (at over 7000 feet elevation). There are several trails that will get you there, marked Trail 9, Trail 4 East, and Trail 4 West. The shortest route to the top of the peak is Trail 9, which is a 3.1 mile (one-way) trail starting at the Sylvan Lake.

harney-peak

The trail is well-maintained, and moderate in difficulty for the first two miles, then gets quite rocky and steep for the final mile. Young kids can absolutely do this hike with the right shoes and the right attitude, and teens will definitely be able to handle it. Most of the way is fairly shaded, but because the final stint is in the open, and because the trail gets very crowded as the day goes on, I highly recommend hitting this trail early in the morning. Pack a picnic lunch to eat at the top, which rewards you with a wonderfully constructed fire tower lookout built by the CCC in the 1930s.

view-from-harney

Cathedral Spires: This trail is also a one-way (out and back) deal, and families will see the trailhead right off the Needles Highway. It’s only 1.5 miles long, but strenuous and mostly open. Another to tackle in the first half of the day, the Spires rewards with amazing views and cool rock formations.

spires-of-Custer-State-Park

Centennial Trail: If you want to try the Centennial Trail, which actually winds 111 miles through the Black Hills from Bear Butte State Park in the north to Wind Cave National Park in the South, 22 miles of it is available within Custer State Park. The French Creek portion is 10 miles one-way, and moderate. It takes hikers through the Narrows, which requires either climbing a 60-foot embankment or wading 100 feet through the creek (way more fun). I recommend doing this trail with kids who are well-adapted to longer hikes and if you have two cars (so you can shuttle). You can do a shorter section of the trail at Badger Hole (approximately 4 miles, but it’s more strenuous).

Badger Clark Historic Trail: For those looking to get out of the car and stretch the legs with an easy loop, this one mile loop offers fun historical background in a pretty setting. The trail is located behind Badger Hole, home of Charles Badger Clark, South Dakota’s first Poet Laureate, and is mostly level, with some short climbs on an even trail.

Go jump in a lake:

Custer State Park is dotted with lovely lakes, all of which offer swimming, canoeing, kayaking, and picnicking.

sylvan-lake


Sylvan Lake: Sylvan is located near the trailhead for Harney Peak, and has a small marina and a trail circling the lake. There’s a general store and lodging, and while it gets crowded in summer, it can be a great place to spend a warm afternoon after hiking. If Sylvan looks familiar, that may be because it was featured (along with Mt. Rushmore) in National Treasure 2.

Legion Lake: Located toward the center of the park, Legion Lake also has swimming, fishing, and picnicking, plus dining at the lodge. If it’s crowded, try Center Lake, to the north up Needles Highway (turn on South Playhouse Road).

See wildlife:

You may see bison just while driving around the park (in fact, it’s very likely), but there’s also the Buffalo Corrals in the south end of the park to visit, and the Prairie Dog Town. Take the Wildlife Loop Road to easily hit both spots, and whenever you stop to get out of your car to snap photos, keep your eye trained on the rocks for mountain goats. We saw several, thanks to some eagle eyes.

Where to stay:

Custer State Park Resort, privately operated within the park, offers five lodges plus specialty cabins within the park. You can check them all out here, but they generally range from stately and elegant (yet still casual) Sylvan Lake to historic State Game Lodge, ranch-like Blue Bell, modern Creekside, and lake house Legion. All have the convenience of services like stores and casual dining.

rock-crest-cabins

If you plan to stay outside the park, I suggest staying in the town of Custer, near the west entrance to the park. I was very comfortable at Rock Crest Lodge. It was located on the highway, but close to town dining and had a nice playground and pool.

Have you been to Custer State Park? What do you recommend?

Beyond Mt. Rushmore: Custer, South Dakota

Mt. Rushmore is iconic, monumental, and inspiring. By all means, go and see it. Check out the museum below the viewing platform, and definitely stop for some vanilla ice cream made from Thomas Jefferson’s original recipe. (The shop is located directly in the monument cafeteria.) After you’ve crossed this landmark off your list, however, you’ll find an array of outdoor, active things to do in Custer, South Dakota and the surrounding area.

things-to-do-in-custer

Custer State Park: 

First and foremost, spend at least a day (two is even better) in Custer State Park. See our full post all about this fantastic park. (Coming soon!)

needles-highway

ATV riding:

Take to the 3,000 miles of ATV trails traversing the Black Hills. We toured the area with Black Hills ATV Adventures, starting at Custer Gulch resort…a private campground outside Custer with trails directly from the campground. Families can rent two or four-person UTVs (buggy-like vehicles with full harnesses and seats) for full or half-days. Trail maps are available on-site, and trails are wide and well maintained. We saw the rural outskirts of Custer this way, and loved checking out the area’s many well-kept ranches and homesteads. The UTVs were stable and safe, and easy and fun to drive. In some areas of trail, it’s possible to drive up to 50 mph. Rentals start at $225 for a four-seat UTV for a family for half-day, and may well be worth becoming your ‘big splurge’ attraction, provided you’re comfortable with driving.

custer-utv

Bringing your own ATVs or UTVs? Start here for more information on permits and trails. 

Biking on Mickelson Trail:

This rail trail runs over 100 miles from Deadwood to the Southern hills, and goes right through Custer. Ride a few miles down and back to get a sampling of the trail, as we did with a free morning, or tackle a larger portion of the trail to and from Hill City or Pringle. To access the trail in Custer, just head across the street from the Chamber of Commerce, downtown. The trail is highly interesting to kids, as it goes over bridges and through rail tunnels.

mickelson-trail

Maps are available in the Chamber building, and rentals can be found at Frontier Photos in Custer or Rabbit Bike in Hill City. Note: you’ll need a trail pass, which is only a few dollars and available at the Chamber.

Aerial Park in Keystone:

There’s a reason this post is centered around the town of Custer instead of the town of Keystone.  Keystone is closer to Mt. Rushmore, and as such, we found it far more touristy and busy than its neighbor, Custer. This said, the aerial ropes course park at Rushmore Tramway Adventures is worth the stop into Keystone. And afterward, if you’re in the mood for some fun souvenir shopping, take a stroll along Keystone’s kitchy downtown district for t-shirts and such. Prices start at $29 for kids, which is a good deal with over 80 elements to try.

Helicopter ride with Black Hills Aerial Adventure:

scenic-helicopter-ride

If it’s in your budget, seeing the Black Hills, Mt. Rushmore, and Custer State Park from the air is absolutely spectacular. We tried this the day we entered the Custer area, and it made for a wonderful introduction to the region. We saw the top of Harney Peak, which we planned to hike the following day, herds of bison, plus an elk and mountain goat, Sylvan Lake, the Crazy Horse memorial in progress, the towns of Custer and Hill City and the Mickelson Trail, and Mt. Rushmore. I had never seen Mt. Rushmore before, and seeing for the first time via helicopter was a very unique way to do it!

rushmore-by-helicopter

Black Hills Aerial Adventure has seven helicopters to use, which means that families can likely ride together, or if not, two helicopters can go simultaneously, so family groups can still enjoy flights at the same time…a big convenience if you’ve ever tried to schedule scenic flights.

crazy-horse-memorial

There are multiple flight packages to choose from; we chose the package that included all the sights above, but we could have downgraded and not seen Mt. Rushmore (if perhaps you’ve seen it). Check out flight options and pricing. The heliport is located at 24564 US Highway 16 in Custer.

Where to eat in Custer:

We found downtown Custer to be easily walkable and kid-friendly, with bison sculptures on the corners (don’t climb them, but admire their paint jobs) and pedestrian-friendly walkways. We ate a great meal at Bitter Esters Brewhouse, located at 607 Mt. Rushmore Road. This restaurant has local brews on tap, brewed on-site, and kid-friendly selections as well. Absolutely indulge in a plate of their potato chip nachos for a starter! Though we didn’t get a chance to try it, Black Hills Burger and Bun Co was also recommended to us.

purple-pie-place

If you have room for pie, head to the Purple Pie Place just down the street. You can’t miss it…the farmhouse-type building is bright purple. They have multiple flavors of pie always at the ready, plus ice cream and sundaes.

Just outside Custer in Hill City, Prairie Berry Winery and Miner’s Brewery are deserving of a dedicated afternoon or lunch stop. Prairie Berry specializes in berry and fruit wines (their Red Ass Rhubarb is quite famous in the area), and their free tasting is very fun. Kids are welcome, and there are even some toys and games set aside for their use while parents are tasting wines. Sandwiches and soups are available for lunch, and just next door, Miner’s brewery offers up great brews on tap, made on-site.

miners-brewery

Where to stay in Custer:

Head to Rock Crest Lodge, located at 15 West Mt. Rushmore Road (just at the edge of town). This roadside upscale motel has rooms and cabins available, plus a nice outdoor pool and playground. I stayed in a roomy cabin with a single bedroom/kitchenette with dining table and bathroom. It had a microwave, sink, and mini-fridge, but no oven or stovetop. However, cabins vary, and some do have full kitchens and multiple bedrooms. This page offers a full list.

We explored the Custer area as guests of the chamber office, for the purpose of review. All opinions remain our own.

Mount Rainier National Park two-day itinerary

On the right day, Mount Rainier National Park can rival the scenery beheld at National Park greats such as Glacier and Canada’s Banff or Jasper.

mount-rainier

Often hidden in cloud, the mountain framed by blue skies is nothing short of breathtaking, and on clear days, the views from the Paradise end of the park reach from Mt. St. Helens to Mt. Hood to Mt. Baker. The day we arrived, looking from volcano to volcano across the Pacific Northwest, we felt awe and respect standing along the famed Ring of Fire.

Mount Rainier National Park is large, but 97% of the park is dedicated wilderness, which means families can reasonably see the best day hikes and visitors centers in two full days, or one full day and two half-days. The order in which you tackle these attractions will depend on how you enter and exit the park. We entered from the north (Seattle) through the White River Entrance, and exited to the south via the Stevens Canyon Entrance. Our lodging was located on the south end, so we toured what we could on the north end (Sunrise) after we arrived, then concentrated on the south end (Paradise and Longmire) for the remainder of our trip.

mount-rainier-national-park

Mount Rainier two-day itinerary suggestions:

Day 1:

Arrival through White River:

white-river

We enjoy entering the park at White River, as this milky-white river gives a good introduction to the volcanic activity on Mount Rainier. The river gets its name from the chalky powder that rubs off granite higher up due to glacial activity. Stop for a picnic at any one of the White River turnouts along Mather Memorial Parkway toward the Sunrise Road turn-off.

Sunrise area hike:

If you’re staying in the Sunrise area, skip the Sunrise Road for now, and head south to sample some Ohanapecosh or Paradise hikes, which will enable you to concentrate on Sunrise on Day 2. However, if you’re staying on the Paradise side, as we did, take the time to detour to the Sunrise Road now, to avoid needing to backtrack tomorrow.

The Sunrise Visitors Center is a good one to hit up for Junior Ranger booklets. Afterward, head to the Sourdough Ridge Nature Trail, which is an easy one-mile loop starting near the Sunrise complex parking lot. You’ll get nice views of Rainier and interpretive signs educating on the flora and fauna. As an alternative, Silver Forest is a two mile out-and-back hike, which starts with informative exhibits en route then moves through an area once-damaged by forest fire. What still stands are the ‘silver sentinels’; long-dead but erect trees that are surprisingly beautiful.

If you want a longer hike, the Naches Peak loop is about five miles, and offers small lakes, views of Rainier, and plenty of subalpine forests. Plus, it takes hikers on a portion of the Pacific Crest Trail, which can be fun.

Ohanapecosh-area hike:

silver-falls-hike

As you drive through the park toward the south, plan to stop for a short hike at either Grove of the Patriarchs or Silver Falls, near the Ohanapecosh Campground. The Grove of the Patriarchs is best if you’re short on time or have very young kids; it’s an easy one mile walk to see old-growth forest along the Ohanapecosh River.

For a longer and more satisfying hike, go into the Ohanapecosh Campground to the day-use/trailhead parking. Take the Silver Falls loop hike, which is about three miles. At the very start, you’ll be rewarded with hot springs activity. Feel the water temperature of the various springs as you go…they get progressively warmer as you get closer to the source of the hot springs. Be sure to detour onto the hot springs loop trail about a quarter mile into the Silver Falls loop, just to the bigger pool that’s jacuzzi-hot. Continue along the Silver Falls trail to the thundering falls along Ohanapecosh River; it’s absolutely worth the mileage! The loop will deposit you back at the campground.

silver-falls

Day 2:

Paradise Visitors Center:

For the Paradise portion of your visit, start early, as the Sunrise parking lots fill up fast in summer. (See below for best time of year to visit.) The Visitors Center offers a nice area of exhibits upstairs, and a 20 minute video that plays several times per hour. We always recommend watching videos to introduce visitors to new parks.

Skyline Trail hike:

skyline-hike-mount-rainier

Right outside the Visitors Center, a network of trails are on offer. The Skyline Trail is one of the most popular hikes in the park, and while we usually shy away from potentially crowded areas, this one is worth it. This loop is over five miles, and takes hikers up in elevation from the Paradise parking lots seemingly to the edge of Mount Rainier itself. The first two miles are steep, but the continuous views of Rainier make this workout less painful, and the crowds drop away the further you go. There are a number of turn-around options in these first few miles; hikers could detour onto the Dead Horse or Alta Vista Trail, and return to Paradise. Everything is well-marked, and rangers are often on-hand at junctions to explain options. Note: the beginning and end of this loop are paved trail, to accommodate shorter hikes for all visitors.

For those wanting to go the distance (recommended if possible), continue up Skyline to Panorama Point, where you can opt between the Low Skyline Trail or High Skyline Trail. Either will continue your loop, but in early season, only Low Skyline is open. When we hiked in June, Low Skyline offered lots of snow across the Nisqually Glacier, which the kids loved. Cramp-ons are not necessary for the Low Skyline Trail, but be prepared to walk through snow (trekking poles are useful).

marmots-mount-rainier

The Low and High Skyline trails merge again to start the long descent back toward Paradise, with an option to cut 1.5 miles off your loop by taking the more direct Golden Gate Trail down to Myrtle Falls, then the lodge area. We opted to stay on the Skyline loop, and were not sorry. The views continue to be spectacular, with creek crossings and wildflowers in the early season. At Myrtle Falls, the trail becomes crowded with visitors for the final few tenths of a mile. Look for marmots along the entire hike: we saw 4-5!

Rampart Ridge Trail Hike:

If you have time to venture further from Paradise to the Longmire section of the park, or if Skyline is simply too crowded on the day you’re visiting,  the Rampart Ridge Trail is a good alternative. This trail is often hiked in summer by the many visitors who do not receive Wonderland Trail permits, and in early season or fall, it’s blissfully empty. The 4.6 mile loop begins at the Trail of the Shadows trailhead, and takes hikers through both wetlands and old-growth forest. The climbs along the loop start out quite gentle, then progress to a series of switchbacks. The reward: views of the valley below and Tumtum Peak. Further along the trail, the views continue, offering sweeping vistas of Longmire and Eagle Peak. When families reach the junction with the Wonderland Trail, a steep descent returns them to Longmire.

Best time to go:

The best time to visit Mount Rainier National Park is mid-June, early July, or September. While coming in June is a gamble (not everything will be open yet, depending on snow pack), it’s far less crowded. Mid-July through August are peak season. Come in fall, and the park will be yours alone!

Where to stay:

Campgrounds:

The campground facilities in the park are fantastic. We really liked the relative isolation and quiet of Ohanapecosh Campground, which is set apart from any visitors centers. The White River Campground is one of the most popular, but with the river nearby, we understand why. Check the national park site for campground information, including which can be reserved ahead of time.

mount-rainier-with-kids

Paradise Lodge:

This national park lodge is beautiful, but located in the thick of things. You’ll get pristine views of Rainier, and have immediate access to some of the best trails (no parking worries!) but also be staying in the midst of the crowds.

Packwood area:

We opted to stay three miles outside the Stevens Canyon park entrance, in the Timberline community of seasonal cabins outside of the town of Packwood. We rented our cabin via VRBO, and were cozy in a retro cabin sleeping six. Renting in the Timberline community, we had access to a community outdoor pool and tennis courts, and enjoyed a nice deck and mountain views, plus a full kitchen for cooking our own meals. There are a few dining options in Packwood (we tried the Blue Spruce Cafe, which served traditional pub food like burgers, fish and chips, and pizza), but you’ll want to do some grocery shopping. Note: AT&T customers will have no cell service in this area.

Have you visited Mount Rainier? Where did you hike and stay?

A week stay at Three Bars Ranch, British Columbia

There are beautiful resorts and vacation properties all over the world. The best start with a stunning destination, then add experiences, dining, and activities in a way that feeds both a sense of adventure and the need for relaxation. Then there are a few truly special, tucked-away places that manage to do all of the above, plus add a certain something that take them over-the-top for family travel. What is this secret sauce? It’s hard to say, but you know it when you experience it: it’s genuine, organic, and rooted in excellent guest service. These magical places make our top 1% of destination reviews.

three-bars-ranch

The Three Bars Ranch in the Canadian Rockies of British Columbia is one of these places. One of the top 1% ones. One of the cream of the crop ones. They don’t get this rating from us by offering the most luxurious accommodations we’ve ever seen (we’ve seen nicer). They don’t get it from serving gourmet food. They don’t get it with a Michelin rating or a bunch of diamonds after their name in the guidebooks. They get it by being themselves, which is an authentic guest dude ranch with a long-standing family history, and by doing for guests: if it’s on your bucket list and can be done in the Rockies, they’ll make it happen.

three-bars-ranch

We’ve now reviewed multiple dude ranches, and our standard advice continues to be: know what you want before you book, then book accordingly. Some dude ranches we’ve experienced focus almost exclusively on their riding program, and are best for experienced riders. Others are more like B&Bs or farm stays. Three Bars Ranch wins in the ‘all-round best for everyone’ category, but after staying for a week, I urge families not to think of it as a dude ranch.

week-stay-three-bars-ranch

Instead, think of Three Bars as an all-inclusive Canadian holiday, or as a family camp. With rafting, mountain biking, sport shooting, tennis, swimming, fly fishing, hiking, and golf in addition to its riding program, Three Bars truly does have something for everyone. But it’s more than that: remember the secret sauce? Three Bars manages to offer all of the above, and do so seamlessly, in a way that makes families feel relaxed, welcome, and comfortable both with the ranch staff and with each other. Trust us: not all dude ranches achieve this.

What to expect at Three Bars Ranch:

Like most dude ranches, families typically book at week at Three Bars. We arrived on a Sunday in late June, pulling up to the ranch house, barn, and other structures at about 4 pm. We were greeted by two of our wranglers at the main lodge, and shown to our cabin, one of about 20 circling the lodge on a grassy court. We settled in, and explored the grounds.

three-bars-ranch

Three Bars is situated on over 1200 acres of pasture, forests, and mountainsides, plus uses an additional 60,000 acres of leased land in the heart of the Canadian Rockies along the St. Mary’s River. The ranch property includes the main lodge where we checked in, the cabins, tennis courts, an indoor swimming pool and hot tub, an activities barn with mountain bikes, and the horse padlocks and barns. Right away, it was clear that we were to consider this property ‘ours’ during our stay, and immediately, the kids felt comfortable wandering (as did we). They found the ping-pong and foosball tables, the pool table in the bar (open to youth players), the cozy gazebo, and the petting ‘zoo’, which is a true manaserie of animals all in need of lots of petting and holding (including a donkey, pigmy goat, pony, chickens, kittens, and goats).

cabins-three-bars-ranch

After a Sunday evening meet-and-greet, welcome dinner, and orientation, daily life at the ranch settles into a routine. Every day, a bulletin board will list the day’s schedule, which will always include a morning and afternoon horse ride, breakfast, lunch, and dinner, and an evening activity. Alternative afternoon activities are always offered: whether it be a scheduled rafting trip or a specifically arranged fly fishing trip, ATV ride, or mountain bike trip. Every morning, head wrangler (and ranch owner) Tyler Beckley comes around to each breakfast table to arrange the day’s activities for each family. This is the time for families to choose which type of ride to go on, or what alternative activity to schedule. As the week wore on, we, like many families, met friends and arranged to ride and play together, asking for teen rides, group rides, and ladies only rides. All were easily arranged.

animals-three-bars-ranch

Our typical day (Mon-Fri at the ranch) started by barely waking up in time for 8 am breakfast (unheard of for us, early-risers!), taking a morning ride of our choice (usually a fast ride while the kids rode with friends, or a family ride), coming back for lunch and a little break, an afternoon activity, which alternated between another ride or a different activity (one afternoon we went target shooting, another we went rafting), then down time in the late afternoon.

target-shooting

We filled this time by swimming in the pool, playing ping-pong or tennis, riding a bike along the trails, or just sitting on the porch of our cabin with a glass of wine.

Our family especially love riding bikes along the single track horse trails and many dirt roads and ATV trails around the ranch; bikes are available in the activities barn (the smallest being 17″ during our visit…a good size for a 10-year-old or up). From the barn area, trails can be accessed easily, either from the pastures or the trails past the large reining barn. We also swam and played tennis, and other families went fly fishing (equipment is available to use) and ATV riding (extra fee).

The ranch bar opens each day at 5 pm, and families tend to gather there to compare notes on the day. Kids order smoothies and play pool, and adults relax over a beer or cocktail. Dinner is at 6:30, followed by an evening activity, always with the wranglers, who also eat meals with guests and socialize naturally with everyone.

rafting-three-bars-ranch

Evening activities during our stay ranged from a reining horse demonstration by horse trainer Jessie Buckley to a volleyball match and a cowboy guitar entertainer. Because it doesn’t get dark in summer in this part of the world until almost 11 pm, the kids tended to play on the lawns or soak in the hot tub until well after 9 pm, with lights out for our crew of school-aged and teen kids well past bedtime.

The Three Bars riding program:

If I had to pick one part of the Three Bars Ranch that is at the heart of the stay, it would be the riding program, though I want to emphasize again that this ranch is about so much more than riding. That said, compared to riding programs at dude ranches we’ve visited that have more of a ‘riding is everything’ attitude, Three Bars is still very much on par.

saddling

The riding is incredible. The horses are very well trained and responsive, and to a person, the wranglers were friendly, competent, and helpful. During our visit, there was a very even mix of ability level on horseback, with about 1/3 of the riders considering themselves novices, 1/3 experienced riders who don’t ride often, and 1/3 frequent riders. On Day 1, everyone was introduced to their horse, pre-selected based on a questionnaire asking for experience level. Every one of the 30+ guests were happy with their horses during our stay.

trail-ride

The first day, everyone I spoke to began by walking only, with wranglers keeping a careful eye on ability level and horse/rider compatibility. We didn’t mind, even though we were eager to trot and lope our horses, because the first ride was a great opportunity to get to know the area and see some of the scenery away from the ranch proper. By our second ride (afternoon of Day 1), our family was trotting, and by Day 2, we were loping (by request…this is not necessary). At another ranch we’d visited, rides started out fast and furious…great for experienced riders but uncomfortable for those who ride only occasionally.

wranglers-three-bars

On subsequent days, we verbalized what type of ride we wanted during the morning check-in with Tyler, whether it be a walking ride, ride with plenty of breaks and play time for kids, medium ride (with trotting and some loping), or fast ride (with more bouts of loping). We rode with our family unit and also with new friends. I absolutely love riding, so I greatly enjoyed the riding program, but individuals who would rather pursue other actives could absolutely do so. My kids loved having their ‘own’ horses for the week, and bonded with them quickly. In fact, even though 13-year-old Calvin, who liked riding fast, ended up with a very slow horse, he didn’t want to switch…he’d learned to love slow Chico!

chico

Dining at Three Bars:

Meals are served at 8 am, noon, and 6:30 pm at Three Bars, and the food is always good. Occasionally during our stay, it was only ok, and sometimes, it was amazing. Full disclosure: I’m not a foodie. Especially during a vacation where we work up such an appetite, I’d honestly rather have good food, and plenty of it, than great food, in tiny, fancy portions.

dining-three-bars

At Three Bars, you get the former. We had no complaints, and always had our fill. The dining staff did an excellent job accommodating my pescetarian dietary needs, as well as others’ gluten-free needs. They can accommodate any type of need, with advanced warning. Breakfast included staples such as egg dishes, hash browns, pancakes, and granola, and there was always cereal, fruit, yogurt, and toast. Coffee was average (if you’re a coffee connoisseur, bring your own!) and water, tea, and coffee was always set out during the day.

Lunch ranged from sandwich fixings to make-your-own-burrito bars, always with freshly-baked cookies and side salads. Dinners ranged from ribs to herb chicken to Italian pastas, always with something for everyone. If you come expecting gourmet fare, you’ll be disappointed, but if your primarily goal is to be served hearty fare, you’ll go away happy. We had brought snacks for our room, but never needed them.

Lodging at Three Bars:

The cabins at Three Bars are very comfortable, visually beautiful, and convenient. Each has a TV with plenty of channels (though we hardly ever turned ours on), coffee service, a full bathroom with tub, WiFi (a godsend since I had to work during the stay), and very cozy beds with high-end linens.

lodging-thee-bars

There are different cabin configurations, but we ended up with two connecting rooms (one with three beds for the kids and a queen bed for me), giving us two bathrooms. Rooms have mini-fridges and cabinet space for snacks, plus plenty of closet space for riding gear and outerwear. Each cabin has a porch with table and chairs out front, all overlooking the main lawn and lodge.

What to know before you go:

st-marys-river

  • Everyone will need riding boots. The good news: boots can be rented from the ranch for $30/stay. This is a great value if you have older kids, as boots are expensive.
  • Everyone will want a cowboy hat. They have them for sale in the store for a reasonable price. We had our ahead of time.
  • Kids under 12 must wear a riding helmet. I felt great about this rule.
  • Remember you’ll need passports or copies of the kids’ birth certificates to get across the Canadian border.
  • Once at the ranch, you don’t need cash other than gratuity. All extra charges will go on a room charge. Tip should be 5-10% of the cost of the vacation, and can be given at the end of the stay.
  • The activities that are not all-inclusive include ATV-riding, shooting, fly fishing, golf, and alcohol from the bar.
  • All riding levels are accommodated. Don’t worry about lack of experience, or having too much experience.
  • The wrangler staff are primarily young people from Canada and Australia. All are wonderful, and will make your kids feel special.
  • Activities such as mountain biking, fishing, golf, and ATV riding can be scheduled at any time. Shooting sports and rafting are scheduled for set times.
  • Kids can participate in shooting sports, regardless of experience. As non-gun-owners, we felt the experience was very safe and positive, with an emphasis on respect for guns.
  • Bring several pairs of jeans per person, and plan to do laundry!
  • Expect to miss your horse when you leave!

We experienced Three Bars Ranch as guests of the ranch, for the purpose of review. All opinions are our own.

Ozarks with kids: Branson Zip Line

Driving into Branson from Springfield on Highway 65, families won’t be able to pass Branson Zip Line at Wolfe Creek Station without the kids noticing the tall towers and cables stretching over the beautiful Ozarks. Go ahead and stop, because if you plan to include zip-lining in your Branson stay, this is the place to do it.

branson-zip-line

A lot of zip lining operations have popped up in this area, but Branzon Zip Line sets the industry standard in the Branson area. Their guides have training on par with the most extensive operations across the US, and the location at Wolf Creek Station has some history to it, too.

Families will want to make reservations in the summer months, because this place gets popular. However, their check-in area and waiting areas are run smoothly, and there’s plenty to see and do while you wait…including nice outdoor areas. Even the gift shop has some interesting and unique items.

branson-zip-line

Kids need to be at least 70 pounds to take the tours, which is heavier than some zip line companies we’ve tried, so come prepared for this. Families choose form three main packages that range from three zip lines to seven, with sky bridges in-between, or can do a combo tour of all eight zip lines and 10 bridges. Alternatively, it’s possible to do the Blue Streak Fast Line and Free Fall separately or as an add-on. The latter is a zip line and tower free fall from 100 feet up. It’s the main structure visible from the highway, and yes, dare devil kids will beg to do it.

zip-line

Each tour is about 5-10 people, with 2-3 guides, depending on guest number. After a safety briefing and getting outfitted into harnesses and helmets, groups head to the zip lines in a Pinzgauer Swiss Army Troop Carrier. This ride alone is quite fun, as the jeep-like vehicle bumps along the rutted dirt roads up Wolfe Mountain.

branson-zip-line

Throughout the tour, the guides give history on the area and the Wolfe family who owned it. We had excellent guides who were fun, personable, and attentive…definitely among the best we’ve encountered on multiple zip line excursions throughout the US. Branson Zip Line is definitely one of the more ‘hands-off’ zip lines we’ve experienced; there’s very little guests need to be aware of, as guides will click and unclick you from the lines at all times, and it’s not necessary to stop yourself with gloved hands.

We opted for the ‘Ridgeline’ tour, which included three zip lines and several bridges, and took about 1.5 hours. We didn’t opt for the 100 foot free fall add-on, but the Ridgeline does include a smaller 40 foot drop. The free falls are actually a lot less scary than they sound: you’re attached to a mechanism that allows you to fall for a short period, then smoothly and gradually slows you down before you reach the ground. It’s not jarring or particularly frightening to most people, but can be detoured around should you wish.

zip-line-tower

Distance from the interstate:

The zip lines are located directly off Highway 65, seven miles from Branson.

Cost:

Prices vary by tour, of course, but check this price sheet for current info. Zip line prices start at $69 for adults, $59 for kids, with the Blue Streak single zip and free fall add-on for $44.99. The best deal in the place is the family pass, which is $199 for two adults and two kids, or $249 for two adults and three kids. Kids are considered 17 and under, which is really nice.

Hours of operation:

Hours vary by season, and the operation is closed in winter. Check the website for current hours, but at the time of our visit in early season (spring), tours began at 8 or 9 am.

Directions:

Simply head seven miles out of Branson toward Springfield on Highway 65.

As we disclose whenever applicable, Pit Stops for Kids experienced Branson Zip Line as a guest of the operation, for the purpose of review. All opinions are our own.

Wet Planet Whitewater adventure rafting near Columbia River Gorge

Julie Henning runs Road Trips for Families, a resource for families love to get out on the open road and let their adventures unfold. 

Fed by underground aquifers and the glacial melt of nearby Mount Adams, the second-tallest mountain in Washington State, the White Salmon River never runs dry. A brisk 40 degrees, anyone venturing out on the river encouraged to wear a wetsuit, booties, fleece, a splash jacket and anything but cotton.

white-salmon

Running fast and high in the spring melt, the river was generating between Class I and Class IV rapids when I embarked on a half-day rafting adventure with Wet Planet Whitewater in mid-April. Wet Planet Whitewater is a rafting and kayaking outfitter located in Husum, Washington just off the Columbia Gorge Natural Scenic Area near Hood River, Oregon.

After receiving safety instruction and practicing paddling techniques on terra firma, our group of four women and one guide dropped into the middle of the rapids six miles upstream at the BZ Corner launch site. Thrilling as much as invigorating, we passed under majestic pines and along waterfalls tumbling into the river canyon that was once a lava tube (in fact, we made a brief stop into a shallow basalt cave formed by lava as it cooled millions of years ago).

wet-planet-whitewater

Depending on the time of year the White Salmon River runs faster or slower (but never dry). In the summer months, groups may have the opportunity to make a 10-food drop down Husum Falls. Too dangerous during our visit, we gladly made a small portage around the falls as the rafts were roped downriver—a group of kayakers received our collective cheers as we watched them plummet through this rocky passage.

At this point in the trip, true thrill seekers may opt to jump into calmer waters from atop the Husum Street Bridge. If you decide to mark this off your bucket list, keep in mind the water temperature and know you might be chilly until the sun dries your clothes.

river-rafting-oregon

Immediately following Husum Falls and the bridge jumping is “the rattlesnake,” a series of rapids where Rattlesnake Creek runs into the White Salmon River. It’s here where rafters have the opportunity to “ride the bull,” a maneuver where everyone moves to the front edge of the raft and plunges feet-first into a concave wave of whitewater. Our guide described this experience as nature’s nasal cleanse and I ended up swallowing and then spitting out a giant gulp of the river.

Wet Planet Whitewater photographers meet up with the rafts at different points along the river and capture groups mid-adventure. The sequence of before/during/after shots of our group “riding the bull” were my favorite (for a laugh, click through some of the shots posted on the Wet Planet Whitewater flickr stream).

The remaining two miles of the eight-mile run remained scenic, but a bit calmer (more waterfalls, majestic pines, red tail hawks circling from above). Our guide explained how the area was impacted by recent flooding and talked about the history and controversy around the removal of a dam that transformed Northwestern Lake into Northwestern Park (and, consequently, led to a resurgence of salmon and steelhead populations in the White Salmon River).

Traveling back to Wet Planet Whitewater by van, we changed into dry clothes and reviewed the photos of our trip. Visitors in the summer months are encouraged to linger over a burger and a beverage on the shaded deck of the Wet Planted Whitewater café. Day-trips include a riverside lunch, but it’s still fun to linger and recount the day’s adventure.

Worth noting is the minimum age requirement for the half-day trip (rafters must be ten and older, and sometimes sixteen or eighteen depending on the trip). That said, Wet Planet Whitewater offers outdoor programs, adventure camps, and youth kayak camps specifically designed with kids in mind.

Please enjoy this video, embedded with photos and sound from our adventure on the White Salmon River. Special thanks to our Instructor and Trip Leader Giani Benevento for his interview and insight.


Date last visited: April 2015


Distance from the interstate: 15 minutes from Highway 84/downtown Hood River, Oregon. Note: You will need $1 to cross the Hood River Bridge between Oregon and Washington.


Pricing: Pricing varies based on the length and duration of the trip (note the minimum age requirements). I participated on the $65/person Half Day trip on the White Salmon River. Food is available seasonally at the Wet Planet Café.


Accommodations: Lodging is available in Hood River. For families, the best bet is the Hood River Inn or a vacation home available through the Oak Street Hotel.


Directions: Wet Planet Whitewater is located at 860 Highway 141 in Husum, Washington. From Oregon Highway 84 take the Button Bridge Road exit and cross over the Columbia River on the Hood River Bridge. In Washington State, take the first left onto State Highway 14 (Lewis and Clark Highway) and then turn right onto State Highway 141. Continue 6 miles on 141. Wet Planet Whitewater is located on the right-hand side of the road.


I received a complimentary half-day rafting trip on the White Salmon River from Wet Planet Whitewater for the purposes of this review. All opinions are my own.