Budget-friendly Spring Break destinations you haven’t thought of

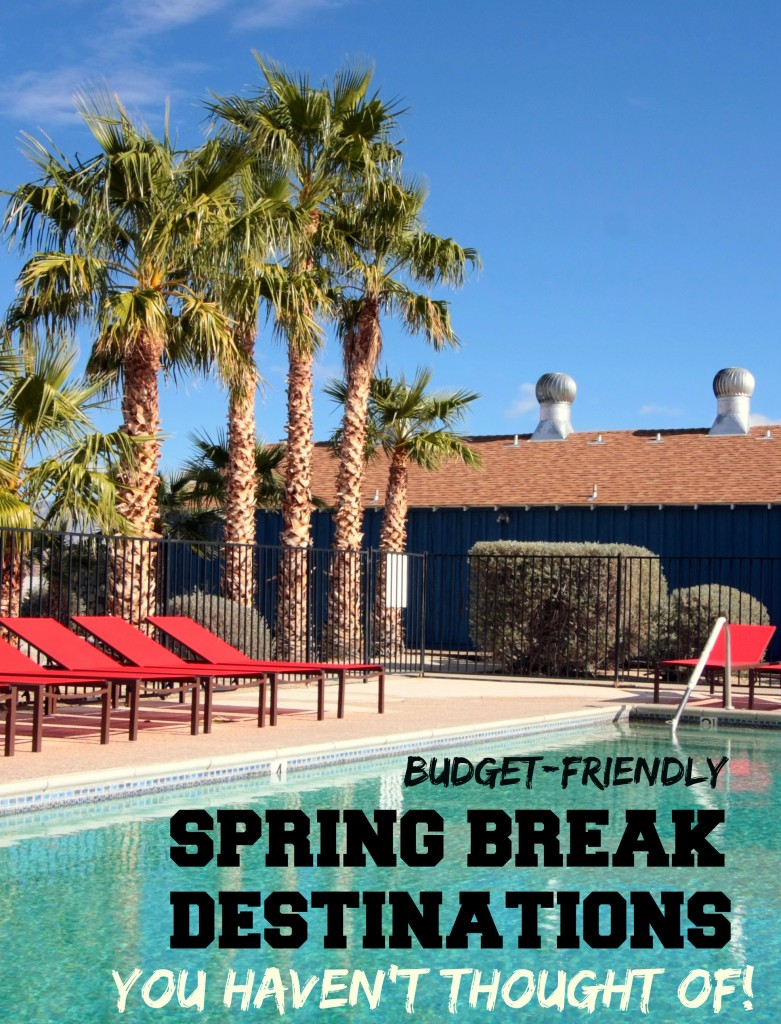
Planning a Spring Break vacation? With only a week or so off school, it can be hard to find a vacation that’s both easy to plan and easy on the wallet. Below, we have over a dozen ideas throughout the US, Caribbean, and Mexico for budget-friendly Spring Break destinations.

Desert destinations:

An easy way to enjoy a warm-weather vacation while saving money is to head to the desert instead of to the beach. Bonus points if you can easily drive to any of these California and Southwest locations:

 Borrego Springs:

glamping

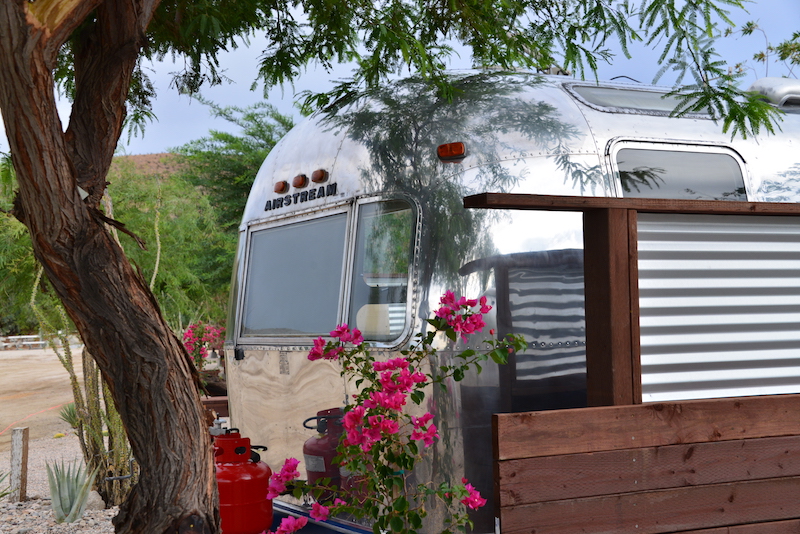
Never heard of it? I’m not surprised! This oasis in Southern California is generally off the radar, but a great fit for active families.  Head to the Palm Canyon Hotel & RV Resort, a boutique clamping resort where families can stay in vintage Airstreams and hike trails location less than two miles from the resort. February, March, and April is the time to come to see wildflowers, and always, the night sky displays brilliant views.

Death Valley National Park:

mosaic-canyon-death-valley

Located an easy drive from Las Vegas, NV, Death Valley is our top pick for outdoorsy families looking for a warm-weather destination. Camp in the park to save money, or stay at Furnace Creek Resort. Our kids love the wide open grassy spaces, the tennis and basketball courts, and the spring-fed pool. In the park, multiple hikes await: go in the mornings and evenings and spend the middle of the day swimming!

Scottsdale, Arizona:

scottsdale-az

Family travel website Global Munchkins recommends Scottsdale for spring break…even if you’re not a baseball fan. For a splurge, stay at the Westin Kierland Resort and get a full water park for the price of your stay. Be sure to take kids to the fun shops and dining options in downtown Scottsdale, and visit Phoenix, and sure, spring training, while you’re in the area!

Tip: Pick up youth baseball equipment to ‘get in the game’ before a trip to watch spring training!

On the way to… destinations:

Let’s get real: sometimes, you’re spring break trip is really just a stopover en route to Grandma’s house, a sporting event, or a longer vacation. We’ve compiled the best ‘on the way to…’ locations from top bloggers.

Bowling Green KY:

mammoth-cave

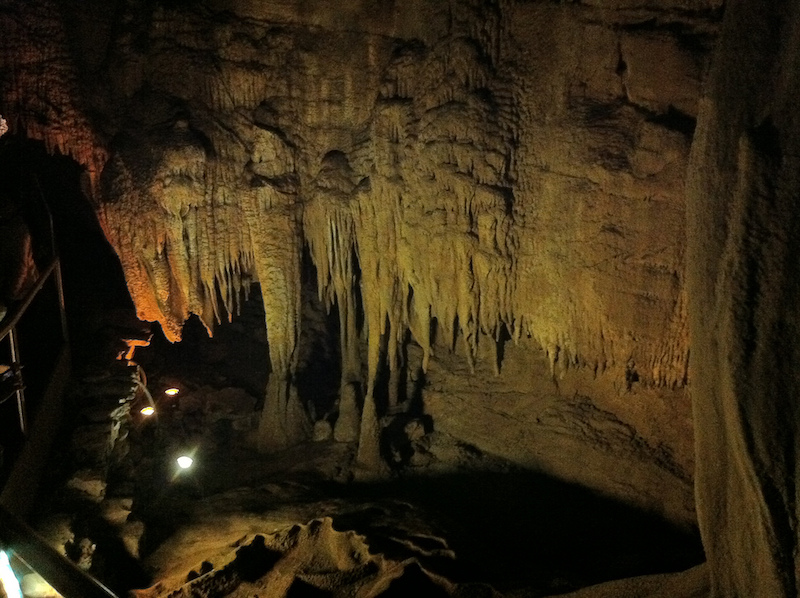
Often a stopover on the way to Florida or other southern locales, Bowling Green, Kentucky is right on I-65 and is home to an astounding 21 cave tours in the immediate area. Road Trips for Families highlights the best, along with dining and lodging recommendations in the city.  If nothing else, be sure to see Mammoth Cave National Park, and perhaps stop at an area museum. You can even at at a dairy and see a car museum on the same day!

West Georgia:

Already vacationing (or living) in Atlanta or St. Simon’s Island? Field Trips with Sue has a full itinerary of West Georgia for an affordable spring break getaway. Highlights include Providence Canyon, Gaines (complete with frontier fort) and the Warm Springs pools. This type of tour offers kids a lesson in history and ecology without them realizing they’re learning…away from school.

French Lick Springs:

For those in the middle of the country, AdventureMom suggests taking a chance on scenic French Lick Springs Resort, Indiana. This resort is known for its stunning architecture, but it also offers activities year round (not just in the summer months). Families can have kids join the kids club, play foot golf, learn about the history of the hotel, and swim in the pools year round. Oh, and parents can get a spa treatment.

Beach destinations:

Want to be warm and feel sand between your toes? You can still book a beach vacation at spring break affordably! Here’s where to go:

St. John, USVI:

st-john

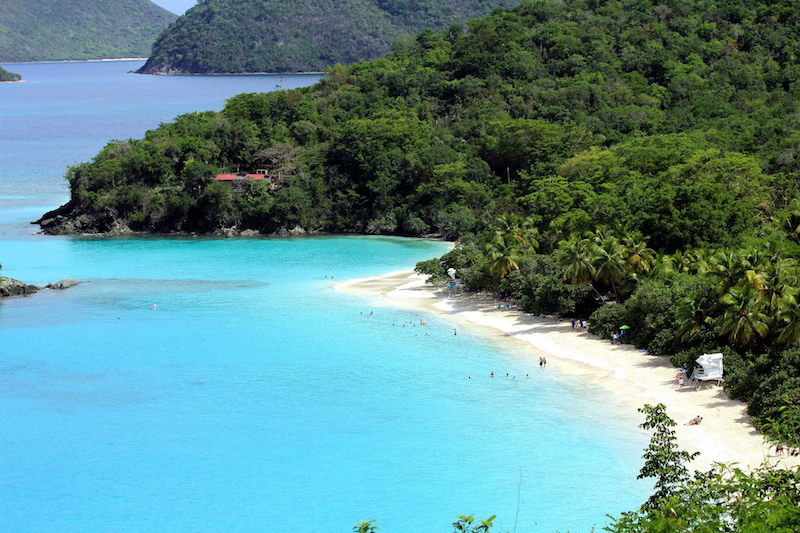
Going to the Caribbean for spring break may not seem like a new idea, but St. John is an unique location you may not have considered. Trekaroo recommends spending your Virgin Islands vacation on St. John because of its low-key, quiet atmosphere, and the many outdoor activities afforded. Virgin Islands National Park is here, complete with multiple hiking trails and beaches, and snorkeling is abundant. Stay in a vacation home to save money!

Ventura, CA:

channel Islands

Just an hour north of Los Angeles, Ventura County West is an easy-to-reach section of the California coastline. Families get both seaside charm and inland adventure. Don’t miss the whale migration at this time of year, taking place through mid-April. When we visited, we used Island Packers; rates start at $37 for adults and $27 for kids. Time your visit right, and you may also see the Celebration of the Whales Festival (March 20, Oxnard) or the California Strawberry Festival (May 21 & 22, Oxnard). Either way, definitely head out to the Channel Islands!

Zihuatanejo, Mexico:

blue venado beach club

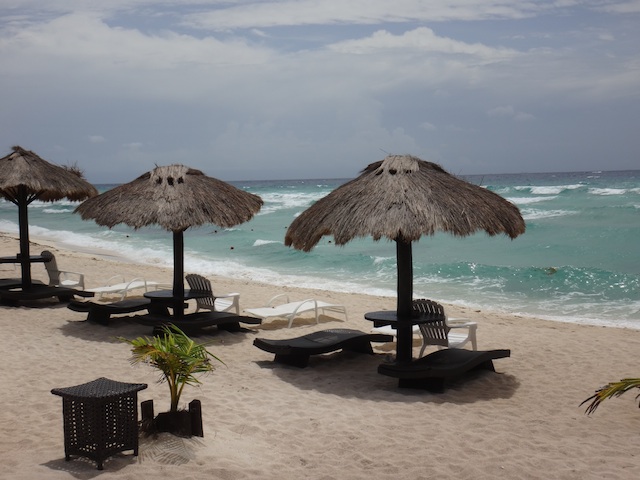
I’d never heard of Zihuatanejo until it was recommended by Pint-Sized Pilot: see the top 10 things to do in this Mexican beach destination! This authentic, non-touristy resort village is quiet, scenic, and affordable with local eats. Visit Zihuatanejo markets, enjoy its festivals, and play in its beaches. It’s located on the Pacific side of Mexico, by Ixtapa.

Loreto, Mexico:

Located on the gulf side of Baja California, Loreto is a great pick for families who want to find an alternative to the all-inclusive resort scene. Walking On Travels recommends finding accommodations in town in her Loreto travel guide, to take advantage of local dining opportunities and the town vibe. Snorkeling, whale watching, and swimming is not far away!

Ski destinations:

Haven’t gotten enough ski days in yet? I’m with you! Some of our favorite spring break ski destinations are smaller, hometown resorts that won’t break the bank.

June Mountain:

june-mountain-teepee

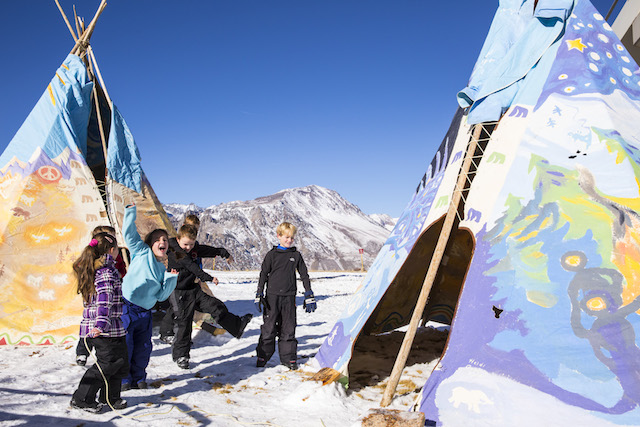
Located adjacent to Mammoth Mountain in Northern California, smaller June Mountain offers affordable lift tickets and lessons amid the most scenic runs out there. In the backyard of Yosemite National Park, June also has a very friendly atmosphere…the lodge is cozy and warm, the instructors cheerful and not rushed, and the lift lines are usually nonexistent. Stay near Mammoth to get the best of both worlds!

Angel Fire:

Heading to New Mexico this spring break for some warm sunshine and some skiing? Get both by combining a trip to Santa Fe with a stay at Angel Fire. Trekaroo recommends this ski resort because of its great amenities for families at The Lodge and the ability to night ski here (a big plus for teens). For spring breaks without much snow, there’s a wide variety of summer activities at Angel Fire as well.

City destinations:

We love city vacations, and during spring break, we like to head somewhere that’s less likely to have frigid temperatures and snowstorms. These outside-the-box ideas fit the bill!

Seattle, WA:

seattle great wheel

Blog With 2 Kids in Tow recommends Seattle and neighboring Bainbridge Island as a temperate getaway with both an city and outdoor-venture vibe. Kids love taking the ferry, checking out the city markets, and burning energy in the excellent city parks. If the weather turns rainy, as it does in this part of the state often, several high-quality kids museums and science museums await.

Tallahassee, Florida:

Don’t overlook Tallahassee for family fun in a warm-weather environment. Family Travels on a Budget recommends this nature-studded city for its zip-lining, kayaking, and hiking. Wakulla Springs State Park offers river boat tours, and in the winter and early spring, it’s possible to spot manatees as they migrate up the river. Horseback riding and lighthouse tours are also on offer for families.

Bonus spring break pick:

The Burren, Ireland:

Ireland Family Vacations, the expert on all things families and Ireland, recommends this unique part of Ireland specifically during the spring. During this low-tourist season, families can spot baby animals in nature sanctuaries, go on cliff walks, and try kid-friendly foodie tours. Learn more at Ireland Family Vacations!

Want even MORE ideas? Here are an additional 18 spring break destinations!

Pin this post!

budget-friendly-spring-break

Photo credit | Photo credit 

Guide to visiting Iceland in the winter with kids

Unless you’ve been living under a rock, you’ve been hearing the word ‘Iceland’ related to ‘family travel’ for a few years now. Families can have a great adventure in Iceland during the warm months (in fact, stay tuned for a guide to camping in Iceland with kids), but many people are still reluctant to try visiting Iceland in the winter with kids. It’s a great time to visit, and if you read on, I’m going to guide you through your worries and reservations so you can take advantage of visiting during this time of year.

Why you should consider visiting Iceland in WINTER!

Advantages to visiting Iceland in the winter with kids:

  • Fewer crowds
  • Cheaper
  • Better chance of seeing Northern Lights
  • Museums and sights are open year round
  • The hot spots/tubs/pools are a big hit in the colder weather!

Why take kids to Iceland?

  • Iceland is very kid-friendly with lots of museums, exhibits and sights that kids would enjoy.
  • If your kids enjoy swimming, they will love visiting the many, many hot spots Iceland has to offer.
  • Icelandic tradition is steeped in elves and trolls, making it a fun fantasy land for kids with active imaginations.
  • It’s a great introduction to international travel because everyone speaks English as well as Icelandic, they drive on the right hand side of the road, and the money is in Icelandic kroners but easy to figure out. Just international enough to make it exciting!

Our concerns about winter travel with kids in Iceland:

  • Shortened daylight hours—We visited in early January when the sunrise was at 11:30 and sunset was 3:30. But it actually gets light around 10:30 and doesn’t get dark until 4:30. Keeping the kids on east coast time, they went to bed late and slept in late, so it worked out fine. (See ”daily schedule” below.)
  • Weather—No matter what time of year you visit Iceland, you have to be conscious of changes in the weather and adapt your plans accordingly. The days were around 40 degrees with very little change at night. It snowed lightly some days, but nothing that made travel difficult. On a few occasions, the wind made being outside too cold. All in all, being used to cold winter weather, as long as the kids were dressed appropriately (and adults!), we were fine. (See “clothing” below.)

What to see and do along the Golden Circle:

We started out by staying in Laugarvatn, along the Golden Circle about two hours from the airport in Keflavik. We stayed at Efstidalur II, a working cattle ranch. This farm hotel is in an excellent location to explore all the sights of the Golden Circle. They serve breakfast and dinner (not included in $140 room rate for a double) and have a wonderful ice cream parlor downstairs.

golden-circle

From this hotel, we could easily access Geysir, home of the famous Geysir and Stokkur geysers. This is a short walk along a path. It is a bit touristy, but a must. There is a café, restaurant and gift shop. It’s also close to Gulfoss, home of Iceland’s most famous double waterfall, Golden Falls.  This can be reached by walking along a path along the top of the ridge as well as down to the bottom of the falls. This location is not to be missed.

Pingvellir National Park is Iceland’s most important historical site where the Vikings established the first democratic parliament. It is also where the North American and Eurasian techtonic plates meet causing a huge fissure. There are many paths into the park from several parking areas. You can visit amazing waterfalls as well as walk along the giant fissure to a visitor center. Near Pingvellir is Fakasel Icelandic Horse Park. We did not go here, but it was recommended to us by locals. You can take a barn tour and see an evening show.

Hot springs to visit in the Golden Circle area:

  • Gamia Laugin (Secret Lagoon) in Fludir. This was wonderful. Bus tours visit here, so you need to come either before 3:30 or after 5:30. You can email them and request a time that is not during their tour hours to guarantee you get in. This pool is in beautiful rustic outdoor setting but with modern shower facilities and towel rentals. Kids loved floating around on the noodles provided and diving down for smooth stones along the bottom. Water was almost too hot for the kids for very long.
  • Fontano geothermal pool in Laugarvatn. This is a more modern facility with several man-made pools, hot tubs and shallow wading pools. It is also next to a lake you can go into (cold!) and then return to a hot pool. Kids loved this one too because they could play in the shallow water and not get so hot!

What we saw along the Ring Road south of Reykjavik:

Just beyond Selfoss, the Ring Road becomes very interesting with lots of green houses and Icelandic horses. After Hella there is flood zone that was covered in muddy lava fromt ohe 2010 eruption of Eyjafjallajokull.

icelandic-horses

  • Seljalandsfoss waterfalls—this is a roadside pull out with paths (icy!) to several impressive waterfalls. There were restrooms but no food service. Lots of jagged cave entrances and rock outcroppings.
  • Skogafoss waterfall—another road side stop with a path to the top of a huge waterfall. There is a restaurant here.
  • Just beyond this in Skogar is the Skogar Folk Museum that we did not have time for, but sounded like it would be fun for kids.
  • We did not make it as far as Vik, but would have liked to have seen its beach.

Reykjavik and the Blue Lagoon:

There’s so much to do in this part of Iceland in winter! Start with the Blue Lagoon: since this is the most famous of all the geothermal pools in Iceland, we had to visit! You need to make and pay for reservations in advance on line. You sign up for a day and time. We almost missed our time, but it would have been okay if we were a little late. This is pricey and very touristy, but it is also pretty amazing. It’s a huge lake, basically, with swim up bars. It gets quite deep and kids have to wear water wings, no matter what their swimming ability, to go out into the deeper water. Our kids did NOT like this rule at all and I wish I had been able to prepare them for it. There is a snack bar but other than a really fancy restaurant, no regular café-type food.

iceland-with-kids

There is a lot to see and do with kids in Reykjavik in the winter. If you are staying in the city center or old town, it is easy to walk everywhere. When booking your accommodations, make sure you are not on a busy street. The bars and pubs stay open all hours and are noisy at night Book a walking tour. We booked a walking tour with “Your Friend in Reykjavik”. Read about them on line or on TripAdvisor. It was just the six of us and our tour guide adapted the tour so the kids would have fun as well. On their recommendation, we booked it on a Saturday so we could visit the Saturday Flea Market. It was a two-hour tour through Old Town, the harbor, the city center, flea market and the town lake, Tjornin, where we fed ducks. This family run company was also very helpful before we even got to Iceland, with lots of insider recommendations and suggestions. Here are a few Reykjavik highlights:

iceland-in-winter

  • Saga Museum—This is a wax museum where you where a set a headphones and are guided through the museum listening to Viking history. It is a bit graphic and our 6 year old wasn’t crazy about it, but it was fun for the rest of us. It has a kid play area where you can dress up. It is in the harbor area. The museum has a fancy restaurant, but there are several cafes long the harbor.
  • Settlement Exhibition—This museum is built around the excavation of an ancient Viking long house. It is underground and has lots of very cool computer generated effects. There is also a really nice kids area with dress up, games, coloring sheets and a Viking set up. Highly recommended.
  • Hallgrimskirkja church elevator—take the elevator up to the top of this iconic church to get some great views.
  • Open Air Museum (Arbaer)—this was only open during the week for 2:00 tours, and our weather didn’t really cooperate but it would be a great place to take kids if it were nice outside.
  • National Museum—we did not take the kids to this, but it has very well organized displays and there were lots of kids in the museum. It has a separate head set program for kids.
  • The Laundromat Café—this is a great family restaurant with a downstairs play area for kids. We ate here four different times! It’s just minutes from Old Reykjavik along the main shopping street of Laugavegur.
  • Laugardalslaug swim complex—We had to drive to this, but it was only about 10 minutes. This is a huge complex that has several full size pools and a lot of smaller hot tubs around it. The kids loved it because it had a twisty slide you could go down.

Up next, packing advice and practical tips for visiting Iceland in winter with kids! Click on the button below to continue.

fathom-cruise

Pages: 1 2

Iceland camper van road trip tips

Iceland has become a popular family vacation destination for many reasons: it is every bit as breathtakingly beautiful as it looks in photographs, there’s essentially no language barrier, it’s extremely family-friendly, and the outdoor recreation and sightseeing is almost endless.

What Iceland is not: cheap. Standard hotels can cost families as much as $400 per night on top of expensive rental car fees (especially if you need a 4×4 car for rough roads). Dining in Iceland is very expensive as well; fast food meals at a basic grill during the time of our 2017 trip were about $15 U.S. per person, and standard sit-down restaurant meals were closer to $45-50 per person. The solution: take an Iceland camper van road trip and combine your lodging and car rental cost and eliminate your restaurant dining out cost. Ready for Iceland camper van road trip tips? Let’s get started!

iceland camper van road trip tips

Start with your camper van rental:

The first stage of planning your Iceland road trip is booking your camper van rental. We used Kuku Campers, one of the largest camper van rental companies in Iceland. Kuku Campers offers just about every size and type of camper van, ranging from small vans that sleep 2-3 people to the larger style we rented, which sleeps five (both are Class C, which don’t require any additional training or know-how to drive). You can also opt between 2×2 or 4×4.

kuku camper

Kuku 2×2 category C camper

We picked this 2×2 van for five people (click on the link to see detailed interior photos) which cost approximately $1800 for nine days ($200 per night). This cost was significantly less than we’d spend on hotels and a rental car. Kuku Campers offers this van in standard (stick shift) or automatic. We opted for standard, as it was cheaper, and  I am comfortable driving a stick shift.

Note: Do you need a 4×4 vehicle? If you’re a regular reader of Pit Stops for Kids, you know we’re a pretty adventurous family. We rented a 2×2 van, and were able to access everything we wanted, and more. You need a 4×4 vehicle only if you plan to drive F roads (Iceland’s most rugged dirt roads), which is needed if you plan to backpack or hike deep in the interior.

The features and configuration of our camper van:

In the front were two bucket seats (the driver’s seat and the front passenger seat). Behind those seats was the kitchen area: a countertop/food prep surface with sink and faucet, storage area for a portable stove/cook top, electric refrigerator (which runs when the car is running), dishes and kitchen utensils and silverware, a large water storage container, and a pantry area for food. Behind the kitchen was the main compartment of the van, which had a padded bench seat in a U shape, surrounded by a roomy kitchen table. Above this was a sleeping bunk. At night, the table and bench seat easily folded down to become a second sleeping area. The bottom slept three, and the top slept two. During the day, passengers could sit on the bench seat with seatbelt while the van was on the road.

kuku-camper

Lots of space: to the front of this photo would be the kitchen area.

In addition to the running water, which ran from a hose from the water container to the kitchen sink, the van had two overhead lights and a nighttime heater (which could be run when the van was turned off). There is no bathroom in the van, but this isn’t a problem (we’ll get to that soon). We found sufficient storage in the van for our bags under the bench seats and at the very back of the van, in addition to smaller storage areas above the front seats and above the kitchen. Lastly, there were useful hooks to hold jackets and rain pants, as well as curtains to pull around the windows at night. These hung on elastic cords, which we used to hang additional items like wet towels and swimsuits.

But was the van hard to drive? 

At first, a little bit, yes. I don’t ever drive anything larger than a minivan at home, so for me, it took a day to get comfortable driving something taller and wider. Icelandic roads are narrower than US roads, so there is definitely a learning curve. I also needed time to get used to backing up the van (though it was far easier than trying to back up a van with a trailer). By Day 2, I was quite comfortable. Overall, driving the van was no big deal, even on dirt and gravel roads, though the van certainly got dirty!

iceland road trip

Stopping to make a snack and take photos on a gravel road. There are plenty of turn-outs to use!

The van took diesel fuel, which seemed to be easily available at every gas station, and it cost me about $160 to fill the tank. We drove for eight days, I filled up twice and topped off once, and I spent a total of $360 on gas. At all campgrounds and parking lots for trails, scenic overlooks, and historic sites, there was ample room to park the van. The only place I had trouble navigating parking was in downtown Reykjavik, and even there, I managed (but it was stressful).

Next plan your trip! Here’s what to expect:

I’m going to say something now that I never say on this site: don’t over-plan. If you allow your itinerary to stay flexible, you’ll be able to advantage of all the many moments of spontaneity possible in Iceland. There are natural wonders and historic sites every few kilometers at times; you can’t do it all, but you can decide what to do in the moment. We planned a general route which included the south, west, and east. We purposely didn’t travel the entire Ring Road because with only eight full days on the road, we wanted to spend more time on side roads than Route 1.

iceland camper van

Waterfall at the base of one of our campsites.

I absolutely loved having our Kuku Camper, because of the freedom it offered. Every day, we traveled WITH our lodging and dining, so we never had to worry about getting to an exact place to eat or sleep each night. In Iceland, especially in the rural areas (which is most areas), we found that restaurants and shops closed relatively early in the day, even in the peak of summer. We were hard pressed to find dining options open after 6 pm, so we loved the ability to picnic our meals anytime, anyplace. We got into a routine of making breakfast in our camper at the campground in the morning, making a picnic or packed lunch to enjoy out and about, and then stopping at one of Iceland’s many, many scenic overlooks to BBQ or cook our dinner on the road. We arrived at each campground at night well-fed and ready to make camp. While we were driving, if someone was hungry, they could simply make a sandwich on the road, and if we decided at the last minute to detour to see or do something, we never had to care about missing reservations.

iceland picnic

Iceland outdoor picnic!

The most unnatural thing to me, as a natural planner, was the fact that you do not need to make campground reservations. If you’ve tried to camp in popular campgrounds in the US in summer, you know this simply isn’t true at home. But in Iceland, they really do mean it when they say their campgrounds do not fill up. They really don’t. Not anywhere. Not ever.

uncruise-review

Pages: 1 2 3

Open Air Adventure Park Estes Park

Estes Park, Colorado, is known as the gateway to Rocky Mountain National Park. But mountains aren’t the only outdoor adventures you can find in this small town. Tucked off highway 36 on the way out to the Beaver Meadows entrance of the park is the compact but surprisingly extensive Open Air Adventure Park.

Open Air Adventure Park is a web of 32 aerial obstacles arranged around a central hub. There are two levels; the lower is 10 feet off the ground, the upper 21. What kind of obstacles? A row of chairs. A suspended canoe. A saddle attached to a zipline. A vertical net to pick your way across. A trail of tires, both vertical and horizontal. There’s even a rappel line to get you quickly from the upper level to the lower, or to ground level. Each element is labeled green, blue, or black to indicate difficulty.

open air adventure park

Open Air Adventure Park Estes Park review:

Your Open Air Adventure lasts an hour and a half and begins with detailed instruction on the safety equipment. A staff member will check everyone’s harness and understanding of procedures on a ground-level mockup of the safety lines you’ll be using up in the matrix. This takes the first fifteen minutes of your time slot, but once you’re cleared, you climb a ladder to level one and are set loose to explore at will.

My oldest son and I have done three aerial adventures now, and what’s nice about Open Air is the freedom to choose your own adventure. If there’s an element you particularly like, you can return to it as often as the crowd allows. The distance across elements is relatively short, so if you’re new to the sport, you might find it less intimidating than launching yourself over a zipline so long, you can’t even see the other end.

Open Air staff members are stationed in several places on the course to monitor safety and help navigate transitions. And of course, the view of the mountains is incomparable.

open air

Age Limits:

Technically, the minimum age is six, but exceptions can be made if a parent is willing to move around the matrix with a five-year-old. In order to explore independently, a child has to be able to hook their carabiners to lines 6 feet above the platform. I needed to shadow (and shepherd) both my 5 year old and my 8 year old, because neither of them could reach the safety lines.

I recommend that if you have small children and/or children who are new to aerial adventures, keep a one-to-one ratio of adult to child. My younger two turned out to be extremely timid, and we ended up causing quite a backlog of people waiting on us to get moving. We also didn’t get to explore as much as I would have liked, because it took them a long time to overcome their fear. A one-to-one ratio will facilitate a more enjoyable experience for everyone.

Either way, minimum weight for participants is 40 pounds, and maximum is 250.

Preparing for your adventure:

Plan to arrive at least 15 minutes early, and be prepared for anything: an Open Air Adventure goes on rain or shine, stopping only for lightning. Wear sunscreen. Gloves are not required, but they’re a good idea. You’ll also need to sign a waiver for yourself and your children (it can all be done on a single form), which can be completed online ahead of time. The Open Air crew loans out lanyards with clear plastic phone cases attached so they are safe on your person while you’re up in the air.

Reservations and Fees:

Tim, one of the owners, told me Open Air tends to be busiest at opening time and in the evenings, but usually it’s less busy around the noon hour. Reservations are made online, with adventures starting every half hour. Fees are refundable with 24 hour notice

An Open Air adventure costs $35 per person, with a discount for parents who come up to shepherd their younger kids around the matrix. Not sure if you can handle the heights? If you try, but can’t make it off the first platform, Open Air offers a “scared out of my mind!” refund of $25.

Location:

Open Air Adventure Park lies at 490 Prospect Village Dr, Estes Park, CO 80517, just behind Fun City, adjacent to Highway 36 (Moraine Ave.). Parking is available on site.

Disclosure: We visited Open Air at a discounted rate, for the purpose of review. All opinion remains our own.

Multi-day kayaking in the San Juan Islands

Families will always see more detail of the area they’re traveling by car rather than by plane, and even more by bicycle than by car. In the San Juan Islands, there’s no better way to explore this vast network of islands than by kayak.

overnight-kayaking

On our previous trips to the San Juan Islands, we arrived by ferry, then visited two islands: Orcas and San Juan. This time, we decided we were ready for the bigger adventure of a multi-day kayak trip in the San Juan Islands, camping on remoter islands en route. We embarked with Crystal Seas Kayak, setting out on a perfectly sunny June morning. For two nights and three days, nothing stood between us and the tides, islands, sea, and sky.

What to expect on a Crystal Seas Kayak trip:

After booking our Crystal Seas trip, we were emailed a detailed packing list and FAQs, so we’d know what to bring. In a nutshell, we needed personal items such as clothing, sleeping bags, headlamps, sun protection, and toiletries. Crystal Seas provided everything else, including all food (and meal preparation), tents, sleeping pads, kayaks, and of course, guidance in the form of two guides.

crystal-seas

We met our guides, Brett and Corey, at a designated pick-up location on San Juan Island. This location is usually the ferry dock at Friday Harbor, but Crystal Seas will work with you if a different pick-up location is more convenient. Both Brett and Corey are local to the islands; having grown up in the San Juans, they knew all the ins and outs of the many islands, currents, and tide flows. We were happy to spend three days with both of them.

We shuttled by van to our put-in spot, the San Juan County Park campground and kayak launch on the east side of the island. We transferred our gear to dry bags, and learned how to load our sea kayaks (they’re like clown cars…it’s amazing how much gear fits!). We headed off by mid-morning, paddling to adjacent Henry Island for our first lunch. We then continued across a few miles of open water to reach Stuart Island, our home for the next two nights.

kayaking-san-juans

We paddled approximately 14 miles from our launch site on San Juan Island, but we took most of the day to do it, stopping to look at interesting sites in our kayaks and taking occasional land breaks. As an occasional kayaker (not a total newbie), I didn’t find the distance too strenuous, but we did find it satisfyingly challenging.

Our kids, ages 16, 13, and 10, fared just as well, if not better, than me and my mom, who joined us for this multi-generational trip. The paddling was less challenging for the teens of course, but it was crucial that they listen to instructions by our guides, because while the water looks calm in this part of the Salish Sea most of the time, the currents and tides are to be respected. Without our guides, we absolutely would have made big mistakes, even though we could see land of some sort at all times.

The ‘marine trail’ campsites at Stuart Island’s Reid Harbor are dedicated for human-powered watercraft only, which means kayaks, not motorboats, sailboats, or yachts. The latter can anchor in the bay, and we enjoyed seeing all the watercraft there, but appreciated that the campsites were more isolated, tucked away in the trees just past the beach.

We set up camp before dinner, each group of two finding a spot for their tent and setting it up. We explored the beach and dock, the kids taking a swim (brrr!) and spotting seals, sea stars, and seabirds of all sorts. After appetizers (yes, really!), we sat down to a dinner of salmon, freshly mashed potatoes, and salad with local greens and homemade dressing. Dessert was a pecan pie brought from a local bakery in San Juan (more on food later).

kayaking-crystal-seas


We settled in for the night by 10 pm (when it starts getting dark at this time of year), and while I woke at first light, the kids all slept in. We planned to remain camped in cozy Reid Harbor, taking a day paddle to explore nearby islands and hike. We enjoyed this more leisurely day, but Brett and Corey also offered an alternative itinerary, which would have included packing up and camping at another island, Jones. While Crystal Seas has a general itinerary set for each trip, we found there was a lot of flexibility when possible.

stuart-island

Our Day 2 included a beautiful paddle around Johns Island, where we floated past a colony of seals and looked for orcas in the strait (no luck this time!). We picnicked lunch on a tiny island (I’m sure it has a name, but I don’t know it, and my map shows it only as a speck!), then paddled ‘home’ to Reid Harbor, where we rested (and they kids played on the beach) before our hike up the nearest ridge to view the islands from 800 feet above sea level. This may have been one of my favorite moments on the trip: the view looked like the most perfect 3D map of the islands I could have asked for. In the sunlight under a blue sky, we could see all the way to the Olympics in one direction and Mt. Baker in the other. We spotted all the islands we’d paddled by, and Brett and Corey pointed out Roche Harbor, on the east side of San Juan. It looked surprisingly close, which is a lesson we learned kayaking in this area: distances are very hard to gauge on the water.

san-juans

We enjoyed another amazing meal, then rewarded the kids with a full buffet of s’mores ingredients. Our teens loved making campfires each night, and having the freedom to explore the campsites and nearby trails.

One of the things that makes backcountry trips, of any sort, so special for our family is the together-time. Without electronics, friends, or schedules in the way, the kids play together like they used to when they had less responsibilities and less social life. This trip was no different. Our youngest got his brothers back, and the teens got their childhood back.

They made swords out of sticks, skipped pebbles, spotted schools of fish, jumped off the dock, and wrestled on fallen logs. In other words, they had untethered ‘boy’ time.

reid-harbor-camping

Our last day, we packed up camp early, in order to paddle back to San Juan with the current in our favor. Thank goodness for Brett and Corey, who know these things! We paddled hard the distance back, with few breaks, necessary in this direction, but again, it felt satisfying to accomplish a hard day’s paddle in just a morning! We picnicked lunch back at the put-in spot, then shuttled back to our car. Looking out over the view of the Salish Sea while we ate our last meal together, we weren’t quite ready to leave!

Food on Crystal Seas trips:

In a word, the food is fantastic. We’ve been on several multi-day rafting and kayaking trips, and the food is always good, but Crystal Seas takes it a step further, serving as many local foods as possible. I’d estimate 70% of the foods served were locally sourced or grown. In addition to our salmon meal, we had a wonderful meal of beef and veggie tacos, plus lunches of caprice sandwiches and salmon wraps and breakfasts of bagel sandwiches and yogurt parfaits. There was always fresh fruit, fresh veggies, and snacks like organic chips, top quality trail mix and bars, and spread and dips.

crystal-seas-food

Note: no alternatives to the meal served were offered to children, so if you have a pick eater, let them know ahead of time. They absolutely accommodate all dietary needs, so I’m sure they could accommodate a child who needs a simpler meal. Our teens ate everything in sight, and our 10-year-old like 90% of the meals, but would have been happy with a plain PB&J a few times.

Helpful planning tips:

If you book at multi-day kayak trip with Crystal Seas, here are a few tricks and tips we learned along the way:

  • If you have a car, but you’ve checked out of your accommodations, park at the courthouse parking lot in Friday Harbor. We parked here on recommendation of Crystal Seas, and our car was secure without a parking fee. They picked us up here, too.
  • Organize your gear the night before. While you won’t have your dry bags until you’re at the put-in spot, you don’t want to be organizing your gear from your suitcase or duffle full of clothes at the dock. We set aside all the clothing and personal items we’d need for each person, and packed them in one large packing cube per person. They we only had to transfer the packing cube to the dry bag.
  • You’ll get a separate dry bag for your sleeping bag. The best type to bring is a lightweight down or down alternative bag, which packs down smaller than a camping bag.
  • Don’t forget any medications you might need. We all needed allergy medication during the trip, and luckily we had it with us. The guides will have a medical kit, so we probably could have left ours in the car.
  • Be prepared to get dirty! The campsites are rustic, and there are no showers (though there is a composting toilet at the campground). We brought Wilderness Wipes with us to freshen up a few times.
  • Be prepared for all weather. We lucked out with three perfect days, but we all had rain jackets and down sweaters with us, as well as gloves and beanie knit hats for everyone. On the flip side, we also had sunglasses (a must on the water!) and sun hats.
  • You’ll have a ‘skirt’ on in the kayak, keeping your lower half dry, so don’t worry about being wet and cold while paddling. Arms will get a bit wet from the paddles, but if it makes you cold, wear a rain jacket under your life vest.
  • Don’t forget to tip your guides. Our worked so hard…they definitely deserved it!

Disclosure: we experienced Crystal Seas on a media rate, for the purpose of review. As always, all opinions are our own.