Mount Rainier National Park two-day itinerary

On the right day, Mount Rainier National Park can rival the scenery beheld at National Park greats such as Glacier and Canada’s Banff or Jasper.
mount-rainier

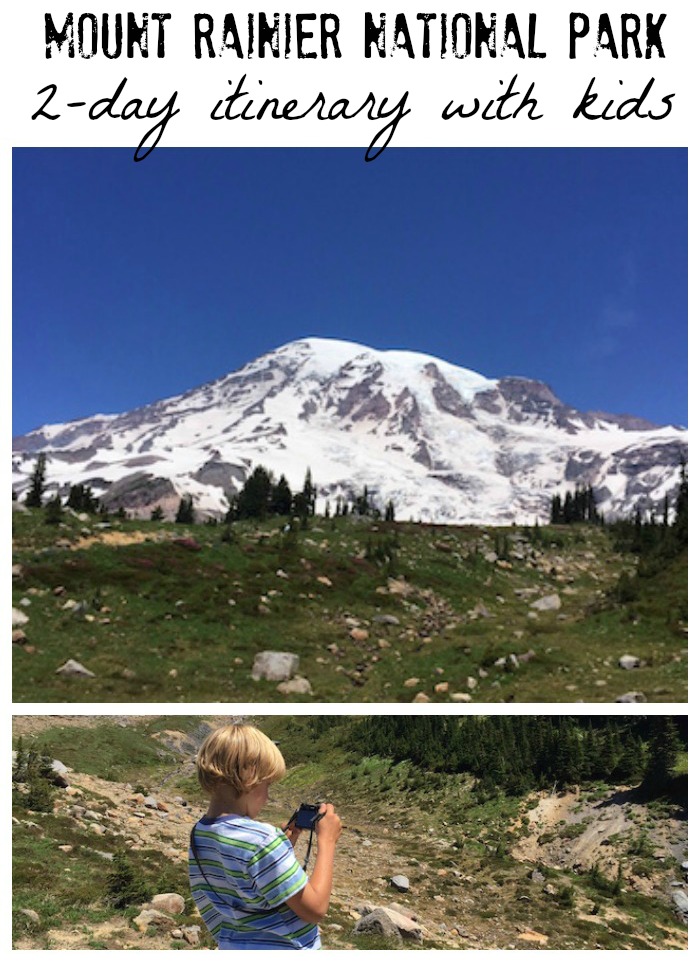
Often hidden in cloud, the mountain framed by blue skies is nothing short of breathtaking, and on clear days, the views from the Paradise end of the park reach from Mt. St. Helens to Mt. Hood to Mt. Baker. The day we arrived, looking from volcano to volcano across the Pacific Northwest, we felt awe and respect standing along the famed Ring of Fire.

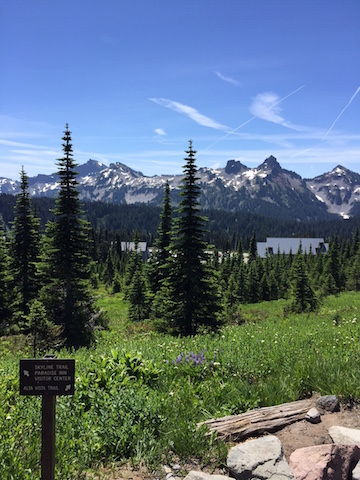
Mount Rainier National Park is large, but 97% of the park is dedicated wilderness, which means families can reasonably see the best day hikes and visitors centers in two full days, or one full day and two half-days. The order in which you tackle these attractions will depend on how you enter and exit the park. We entered from the north (Seattle) through the White River Entrance, and exited to the south via the Stevens Canyon Entrance. Our lodging was located on the south end, so we toured what we could on the north end (Sunrise) after we arrived, then concentrated on the south end (Paradise and Longmire) for the remainder of our trip.
mount-rainier-national-park

Mount Rainier two-day itinerary suggestions:

Day 1:

Arrival through White River:
white-river

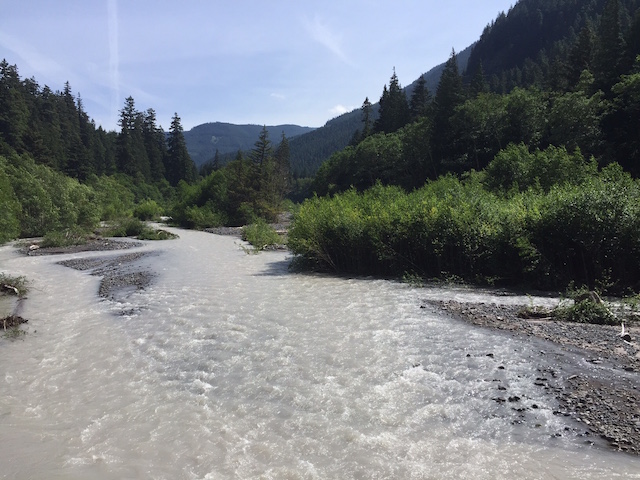
We enjoy entering the park at White River, as this milky-white river gives a good introduction to the volcanic activity on Mount Rainier. The river gets its name from the chalky powder that rubs off granite higher up due to glacial activity. Stop for a picnic at any one of the White River turnouts along Mather Memorial Parkway toward the Sunrise Road turn-off.

Sunrise area hike:

If you’re staying in the Sunrise area, skip the Sunrise Road for now, and head south to sample some Ohanapecosh or Paradise hikes, which will enable you to concentrate on Sunrise on Day 2. However, if you’re staying on the Paradise side, as we did, take the time to detour to the Sunrise Road now, to avoid needing to backtrack tomorrow.

The Sunrise Visitors Center is a good one to hit up for Junior Ranger booklets. Afterward, head to the Sourdough Ridge Nature Trail, which is an easy one-mile loop starting near the Sunrise complex parking lot. You’ll get nice views of Rainier and interpretive signs educating on the flora and fauna. As an alternative, Silver Forest is a two mile out-and-back hike, which starts with informative exhibits en route then moves through an area once-damaged by forest fire. What still stands are the ‘silver sentinels’; long-dead but erect trees that are surprisingly beautiful.

If you want a longer hike, the Naches Peak loop is about five miles, and offers small lakes, views of Rainier, and plenty of subalpine forests. Plus, it takes hikers on a portion of the Pacific Crest Trail, which can be fun.

Ohanapecosh-area hike:
silver-falls-hike

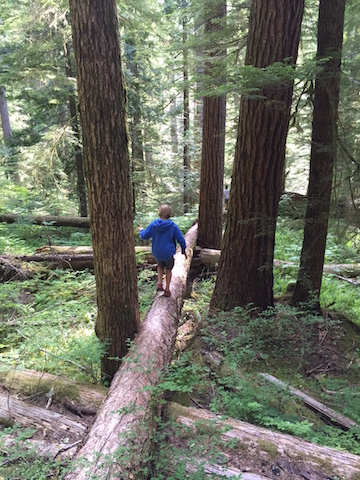
As you drive through the park toward the south, plan to stop for a short hike at either Grove of the Patriarchs or Silver Falls, near the Ohanapecosh Campground. The Grove of the Patriarchs is best if you’re short on time or have very young kids; it’s an easy one mile walk to see old-growth forest along the Ohanapecosh River.

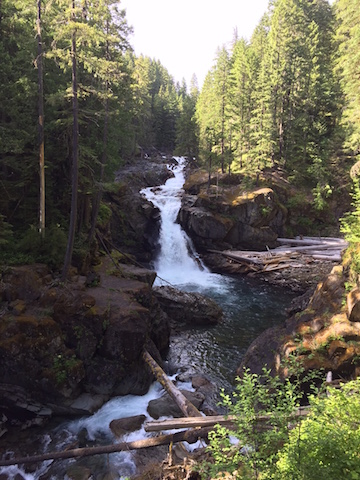
For a longer and more satisfying hike, go into the Ohanapecosh Campground to the day-use/trailhead parking. Take the Silver Falls loop hike, which is about three miles. At the very start, you’ll be rewarded with hot springs activity. Feel the water temperature of the various springs as you go…they get progressively warmer as you get closer to the source of the hot springs. Be sure to detour onto the hot springs loop trail about a quarter mile into the Silver Falls loop, just to the bigger pool that’s jacuzzi-hot. Continue along the Silver Falls trail to the thundering falls along Ohanapecosh River; it’s absolutely worth the mileage! The loop will deposit you back at the campground.
silver-falls

Day 2:

Paradise Visitors Center:

For the Paradise portion of your visit, start early, as the Sunrise parking lots fill up fast in summer. (See below for best time of year to visit.) The Visitors Center offers a nice area of exhibits upstairs, and a 20 minute video that plays several times per hour. We always recommend watching videos to introduce visitors to new parks.

Skyline Trail hike:
skyline-hike-mount-rainier

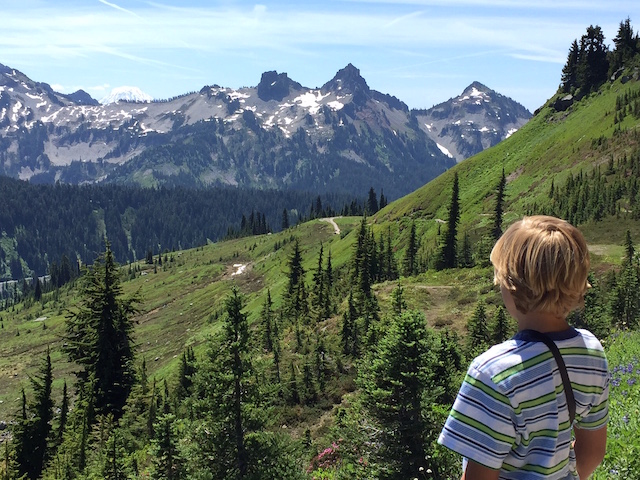
Right outside the Visitors Center, a network of trails are on offer. The Skyline Trail is one of the most popular hikes in the park, and while we usually shy away from potentially crowded areas, this one is worth it. This loop is over five miles, and takes hikers up in elevation from the Paradise parking lots seemingly to the edge of Mount Rainier itself. The first two miles are steep, but the continuous views of Rainier make this workout less painful, and the crowds drop away the further you go. There are a number of turn-around options in these first few miles; hikers could detour onto the Dead Horse or Alta Vista Trail, and return to Paradise. Everything is well-marked, and rangers are often on-hand at junctions to explain options. Note: the beginning and end of this loop are paved trail, to accommodate shorter hikes for all visitors.

For those wanting to go the distance (recommended if possible), continue up Skyline to Panorama Point, where you can opt between the Low Skyline Trail or High Skyline Trail. Either will continue your loop, but in early season, only Low Skyline is open. When we hiked in June, Low Skyline offered lots of snow across the Nisqually Glacier, which the kids loved. Cramp-ons are not necessary for the Low Skyline Trail, but be prepared to walk through snow (trekking poles are useful).
marmots-mount-rainier

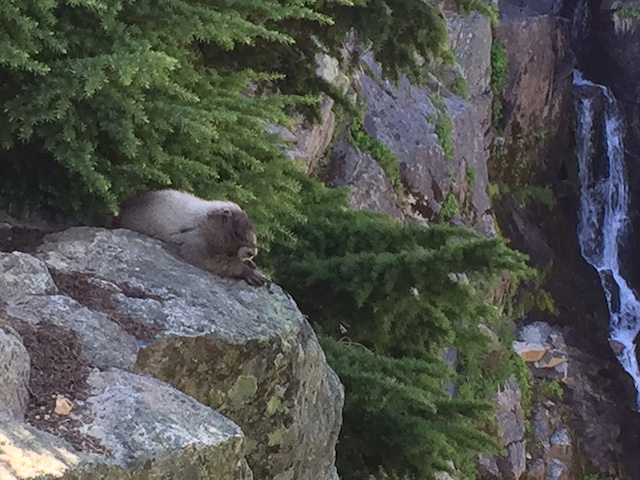
The Low and High Skyline trails merge again to start the long descent back toward Paradise, with an option to cut 1.5 miles off your loop by taking the more direct Golden Gate Trail down to Myrtle Falls, then the lodge area. We opted to stay on the Skyline loop, and were not sorry. The views continue to be spectacular, with creek crossings and wildflowers in the early season. At Myrtle Falls, the trail becomes crowded with visitors for the final few tenths of a mile. Look for marmots along the entire hike: we saw 4-5!

Rampart Ridge Trail Hike:

If you have time to venture further from Paradise to the Longmire section of the park, or if Skyline is simply too crowded on the day you’re visiting,  the Rampart Ridge Trail is a good alternative. This trail is often hiked in summer by the many visitors who do not receive Wonderland Trail permits, and in early season or fall, it’s blissfully empty. The 4.6 mile loop begins at the Trail of the Shadows trailhead, and takes hikers through both wetlands and old-growth forest. The climbs along the loop start out quite gentle, then progress to a series of switchbacks. The reward: views of the valley below and Tumtum Peak. Further along the trail, the views continue, offering sweeping vistas of Longmire and Eagle Peak. When families reach the junction with the Wonderland Trail, a steep descent returns them to Longmire.

Best time to go:

The best time to visit Mount Rainier National Park is mid-June, early July, or September. While coming in June is a gamble (not everything will be open yet, depending on snow pack), it’s far less crowded. Mid-July through August are peak season. Come in fall, and the park will be yours alone!

Where to stay:

Campgrounds:

The campground facilities in the park are fantastic. We really liked the relative isolation and quiet of Ohanapecosh Campground, which is set apart from any visitors centers. The White River Campground is one of the most popular, but with the river nearby, we understand why. Check the national park site for campground information, including which can be reserved ahead of time.
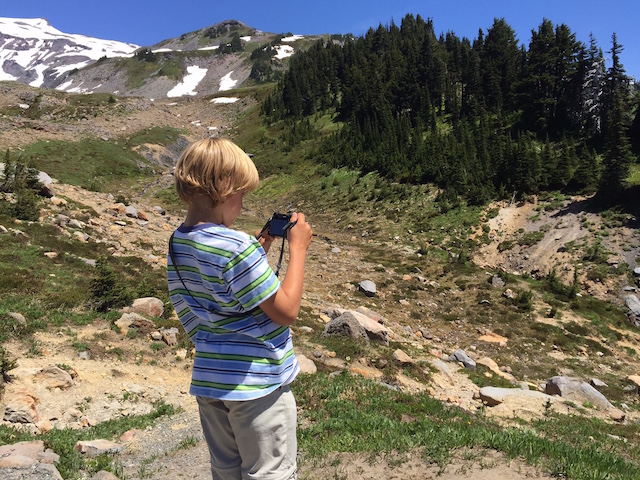
mount-rainier-with-kids

Paradise Lodge:

This national park lodge is beautiful, but located in the thick of things. You’ll get pristine views of Rainier, and have immediate access to some of the best trails (no parking worries!) but also be staying in the midst of the crowds.

Packwood area:

We opted to stay three miles outside the Stevens Canyon park entrance, in the Timberline community of seasonal cabins outside of the town of Packwood. We rented our cabin via VRBO, and were cozy in a retro cabin sleeping six. Renting in the Timberline community, we had access to a community outdoor pool and tennis courts, and enjoyed a nice deck and mountain views, plus a full kitchen for cooking our own meals. There are a few dining options in Packwood (we tried the Blue Spruce Cafe, which served traditional pub food like burgers, fish and chips, and pizza), but you’ll want to do some grocery shopping. Note: AT&T customers will have no cell service in this area.

Have you visited Mount Rainier? Where did you hike and stay?

Multi-day kayaking in the San Juan Islands

Families will always see more detail of the area they’re traveling by car rather than by plane, and even more by bicycle than by car. In the San Juan Islands, there’s no better way to explore this vast network of islands than by kayak.

overnight-kayaking

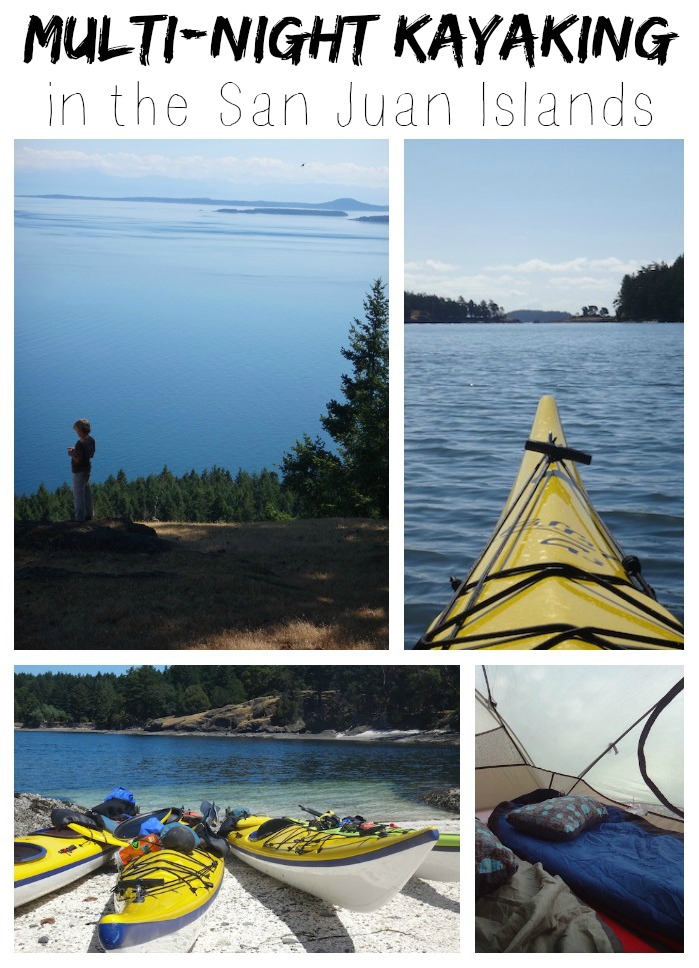
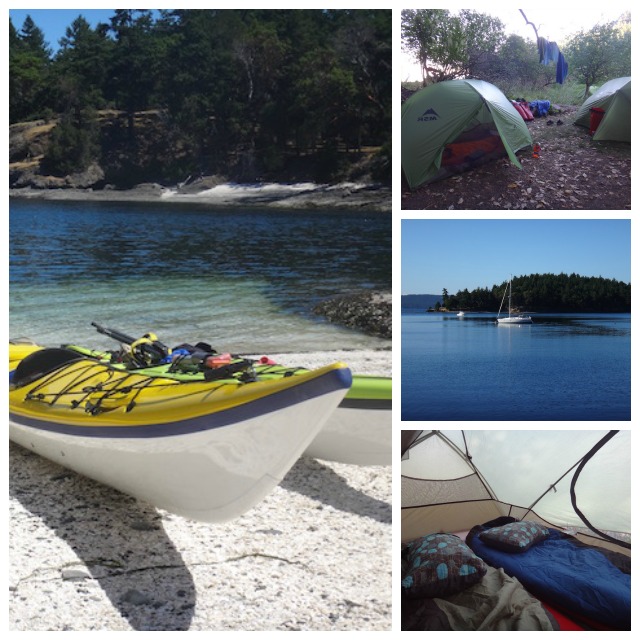
On our previous trips to the San Juan Islands, we arrived by ferry, then visited two islands: Orcas and San Juan. This time, we decided we were ready for the bigger adventure of a multi-day kayak trip in the San Juan Islands, camping on remoter islands en route. We embarked with Crystal Seas Kayak, setting out on a perfectly sunny June morning. For two nights and three days, nothing stood between us and the tides, islands, sea, and sky.

What to expect on a Crystal Seas Kayak trip:

After booking our Crystal Seas trip, we were emailed a detailed packing list and FAQs, so we’d know what to bring. In a nutshell, we needed personal items such as clothing, sleeping bags, headlamps, sun protection, and toiletries. Crystal Seas provided everything else, including all food (and meal preparation), tents, sleeping pads, kayaks, and of course, guidance in the form of two guides.

crystal-seas

We met our guides, Brett and Corey, at a designated pick-up location on San Juan Island. This location is usually the ferry dock at Friday Harbor, but Crystal Seas will work with you if a different pick-up location is more convenient. Both Brett and Corey are local to the islands; having grown up in the San Juans, they knew all the ins and outs of the many islands, currents, and tide flows. We were happy to spend three days with both of them.

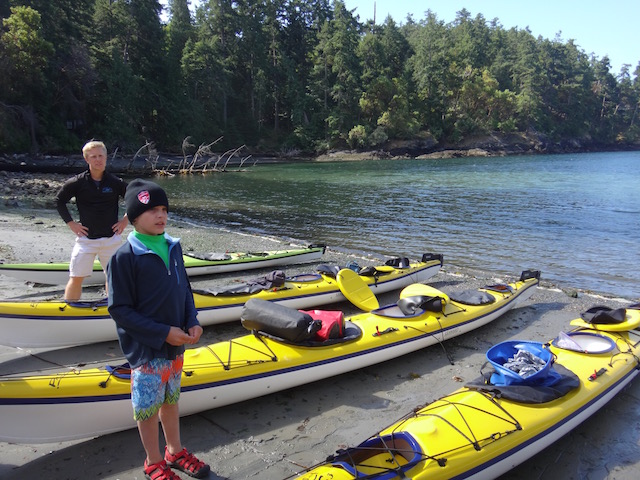
We shuttled by van to our put-in spot, the San Juan County Park campground and kayak launch on the east side of the island. We transferred our gear to dry bags, and learned how to load our sea kayaks (they’re like clown cars…it’s amazing how much gear fits!). We headed off by mid-morning, paddling to adjacent Henry Island for our first lunch. We then continued across a few miles of open water to reach Stuart Island, our home for the next two nights.

kayaking-san-juans

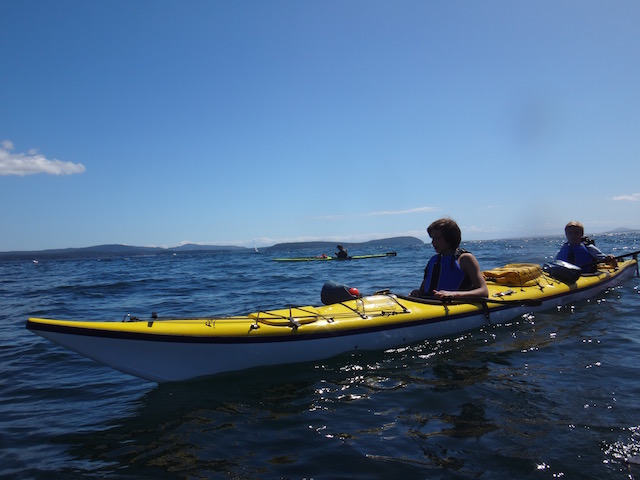
We paddled approximately 14 miles from our launch site on San Juan Island, but we took most of the day to do it, stopping to look at interesting sites in our kayaks and taking occasional land breaks. As an occasional kayaker (not a total newbie), I didn’t find the distance too strenuous, but we did find it satisfyingly challenging.

Our kids, ages 16, 13, and 10, fared just as well, if not better, than me and my mom, who joined us for this multi-generational trip. The paddling was less challenging for the teens of course, but it was crucial that they listen to instructions by our guides, because while the water looks calm in this part of the Salish Sea most of the time, the currents and tides are to be respected. Without our guides, we absolutely would have made big mistakes, even though we could see land of some sort at all times.

The ‘marine trail’ campsites at Stuart Island’s Reid Harbor are dedicated for human-powered watercraft only, which means kayaks, not motorboats, sailboats, or yachts. The latter can anchor in the bay, and we enjoyed seeing all the watercraft there, but appreciated that the campsites were more isolated, tucked away in the trees just past the beach.

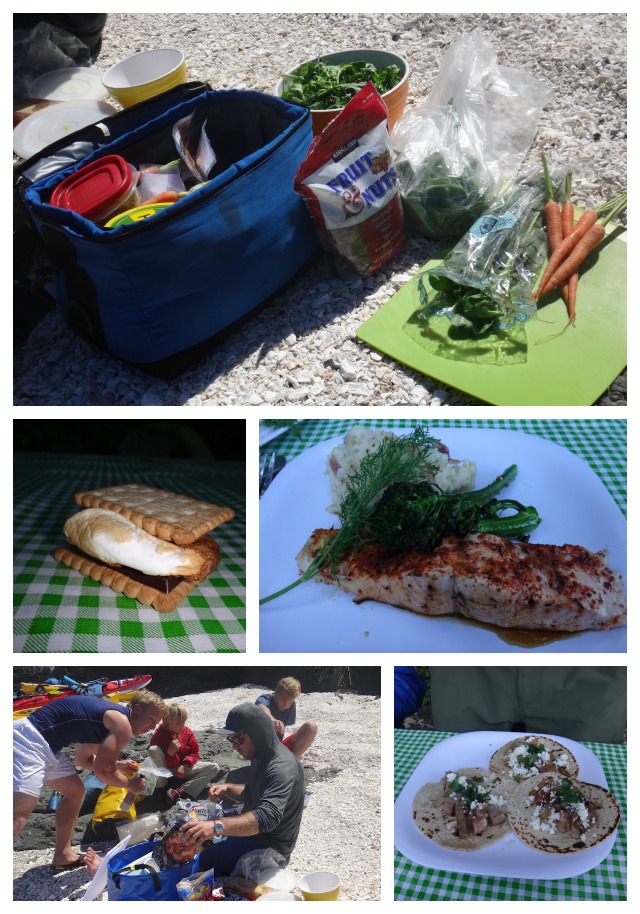
We set up camp before dinner, each group of two finding a spot for their tent and setting it up. We explored the beach and dock, the kids taking a swim (brrr!) and spotting seals, sea stars, and seabirds of all sorts. After appetizers (yes, really!), we sat down to a dinner of salmon, freshly mashed potatoes, and salad with local greens and homemade dressing. Dessert was a pecan pie brought from a local bakery in San Juan (more on food later).

kayaking-crystal-seas


We settled in for the night by 10 pm (when it starts getting dark at this time of year), and while I woke at first light, the kids all slept in. We planned to remain camped in cozy Reid Harbor, taking a day paddle to explore nearby islands and hike. We enjoyed this more leisurely day, but Brett and Corey also offered an alternative itinerary, which would have included packing up and camping at another island, Jones. While Crystal Seas has a general itinerary set for each trip, we found there was a lot of flexibility when possible.

stuart-island

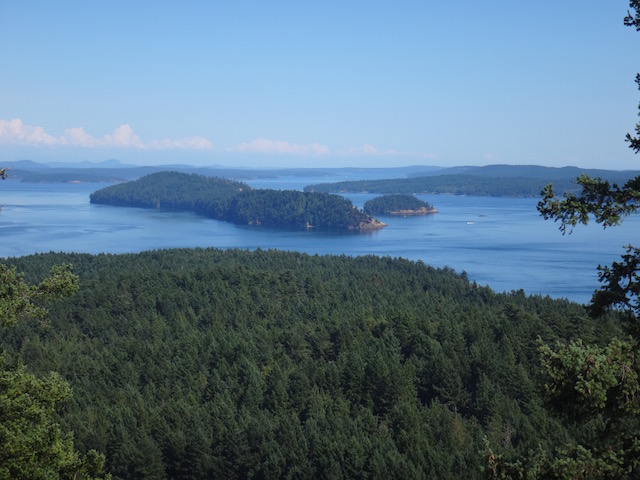
Our Day 2 included a beautiful paddle around Johns Island, where we floated past a colony of seals and looked for orcas in the strait (no luck this time!). We picnicked lunch on a tiny island (I’m sure it has a name, but I don’t know it, and my map shows it only as a speck!), then paddled ‘home’ to Reid Harbor, where we rested (and they kids played on the beach) before our hike up the nearest ridge to view the islands from 800 feet above sea level. This may have been one of my favorite moments on the trip: the view looked like the most perfect 3D map of the islands I could have asked for. In the sunlight under a blue sky, we could see all the way to the Olympics in one direction and Mt. Baker in the other. We spotted all the islands we’d paddled by, and Brett and Corey pointed out Roche Harbor, on the east side of San Juan. It looked surprisingly close, which is a lesson we learned kayaking in this area: distances are very hard to gauge on the water.

san-juans

We enjoyed another amazing meal, then rewarded the kids with a full buffet of s’mores ingredients. Our teens loved making campfires each night, and having the freedom to explore the campsites and nearby trails.

One of the things that makes backcountry trips, of any sort, so special for our family is the together-time. Without electronics, friends, or schedules in the way, the kids play together like they used to when they had less responsibilities and less social life. This trip was no different. Our youngest got his brothers back, and the teens got their childhood back.

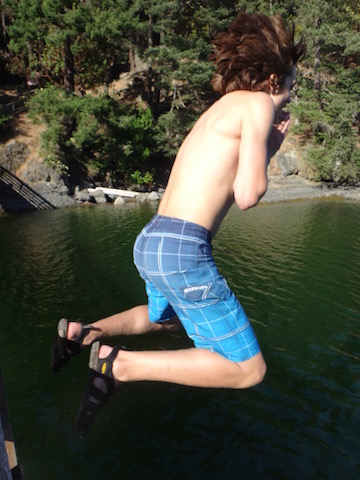
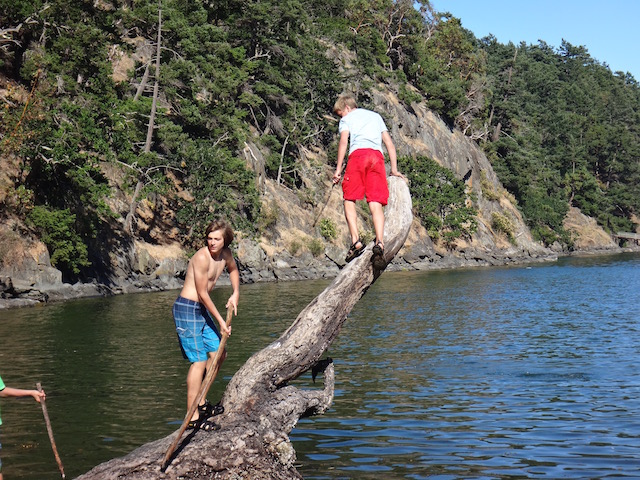
They made swords out of sticks, skipped pebbles, spotted schools of fish, jumped off the dock, and wrestled on fallen logs. In other words, they had untethered ‘boy’ time.

reid-harbor-camping

Our last day, we packed up camp early, in order to paddle back to San Juan with the current in our favor. Thank goodness for Brett and Corey, who know these things! We paddled hard the distance back, with few breaks, necessary in this direction, but again, it felt satisfying to accomplish a hard day’s paddle in just a morning! We picnicked lunch back at the put-in spot, then shuttled back to our car. Looking out over the view of the Salish Sea while we ate our last meal together, we weren’t quite ready to leave!

Food on Crystal Seas trips:

In a word, the food is fantastic. We’ve been on several multi-day rafting and kayaking trips, and the food is always good, but Crystal Seas takes it a step further, serving as many local foods as possible. I’d estimate 70% of the foods served were locally sourced or grown. In addition to our salmon meal, we had a wonderful meal of beef and veggie tacos, plus lunches of caprice sandwiches and salmon wraps and breakfasts of bagel sandwiches and yogurt parfaits. There was always fresh fruit, fresh veggies, and snacks like organic chips, top quality trail mix and bars, and spread and dips.

crystal-seas-food

Note: no alternatives to the meal served were offered to children, so if you have a pick eater, let them know ahead of time. They absolutely accommodate all dietary needs, so I’m sure they could accommodate a child who needs a simpler meal. Our teens ate everything in sight, and our 10-year-old like 90% of the meals, but would have been happy with a plain PB&J a few times.

Helpful planning tips:

If you book at multi-day kayak trip with Crystal Seas, here are a few tricks and tips we learned along the way:

  • If you have a car, but you’ve checked out of your accommodations, park at the courthouse parking lot in Friday Harbor. We parked here on recommendation of Crystal Seas, and our car was secure without a parking fee. They picked us up here, too.
  • Organize your gear the night before. While you won’t have your dry bags until you’re at the put-in spot, you don’t want to be organizing your gear from your suitcase or duffle full of clothes at the dock. We set aside all the clothing and personal items we’d need for each person, and packed them in one large packing cube per person. They we only had to transfer the packing cube to the dry bag.
  • You’ll get a separate dry bag for your sleeping bag. The best type to bring is a lightweight down or down alternative bag, which packs down smaller than a camping bag.
  • Don’t forget any medications you might need. We all needed allergy medication during the trip, and luckily we had it with us. The guides will have a medical kit, so we probably could have left ours in the car.
  • Be prepared to get dirty! The campsites are rustic, and there are no showers (though there is a composting toilet at the campground). We brought Wilderness Wipes with us to freshen up a few times.
  • Be prepared for all weather. We lucked out with three perfect days, but we all had rain jackets and down sweaters with us, as well as gloves and beanie knit hats for everyone. On the flip side, we also had sunglasses (a must on the water!) and sun hats.
  • You’ll have a ‘skirt’ on in the kayak, keeping your lower half dry, so don’t worry about being wet and cold while paddling. Arms will get a bit wet from the paddles, but if it makes you cold, wear a rain jacket under your life vest.
  • Don’t forget to tip your guides. Our worked so hard…they definitely deserved it!

Disclosure: we experienced Crystal Seas on a media rate, for the purpose of review. As always, all opinions are our own.

Weekend Guide to the CA Redwoods

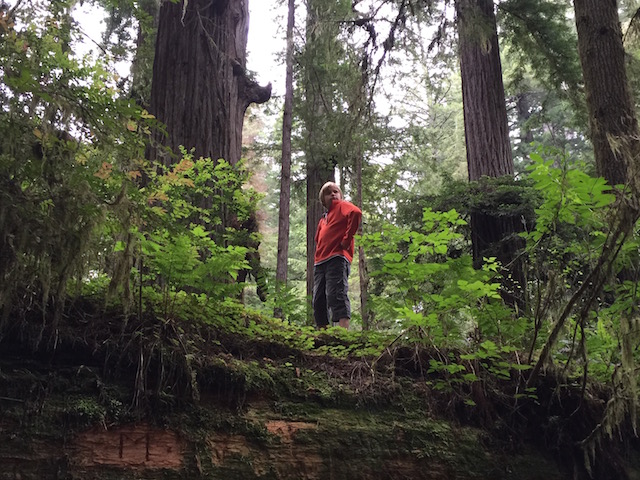
We’re a family who loves spending our vacation days in the wilderness, and few places are as wild and beautiful as the Northern California and Southern Oregon Redwoods. However, we prefer hiking into isolated backcountry sites to campgrounds, and while the Redwoods feature some of the most stunning scenery I’ve seen, the trails are short in length, without ample backpacking options.

CA-Redwoods

Because of this technicality, we passed over this region far too long. At the end of May, we decided to rethink the Redwoods, creating an itinerary for ourselves that included multiple short day hikes sandwiched by a fun cabin stay at the Crescent City/Redwoods KOA.The Redwood groves in this area pocket coastal forests between Eureka, California and Brookings, Oregon. If they had a ‘Redwood capital’, it would be Crescent City, California, which can be accessed either from the coast along Highway 101 (from north or south) or via the scenic Redwoods Highway (Hwy 199) from I-5 in Southern Oregon.

Redwood Trail

Either route will drop your family into increasingly beautiful scenery. Along less than 20 miles of coastline, the Rogue, Smith, and Chetco rivers all flow into the ocean, all of which feed Redwood groves with nutrient rich flood waters. The forests here are damp, with a ground cover of ferns and moss and nurse logs that invite kids to explore and parents to breathe deep and feel rejuvenated.

We started feeling the effects of the magical Redwoods as we drove down Highway 101 past Gold Beach and Brookings, watching the Pacific crash from the car windows. For our introductory hike in the Redwoods, we detoured to drive six miles inland up the Chetco river to Alfred Loeb State Park to try the Redwood Nature Trail. We hiked several looped miles, gaping at the tall trees, pointing out banana slugs and salamanders, and climbing over root systems, then piled back in the car to check out our digs for the next two days: a deluxe cabin at the Crescent City/Redwoods KOA.

KOA-cabin

As a family who prefers isolation to crowds, we’ve been unsure about KOAs in the past…until we started trying them in earnest a year ago. What we discovered: KOAs have changed since I was a kid. Each location is different, but most now offer a combination of resort amenities paired with natural offerings like pretty campsites and rustic lodging that can be perfect as a ‘base camp’ for an outdoor-focused trip.

The Crescent City/Redwoods KOA is situated on a grassy field and Redwood grove (yes, really!) just a few miles from the hikes we’d planned. The RV spots and check-in area are in the open field, but drive down the narrow dirt roads that weave among the Redwood grove, and you’ll find lovely tent camping sites and rustic cabins that are on par for beauty with the best state park campgrounds in the area.

KOA-redwoods

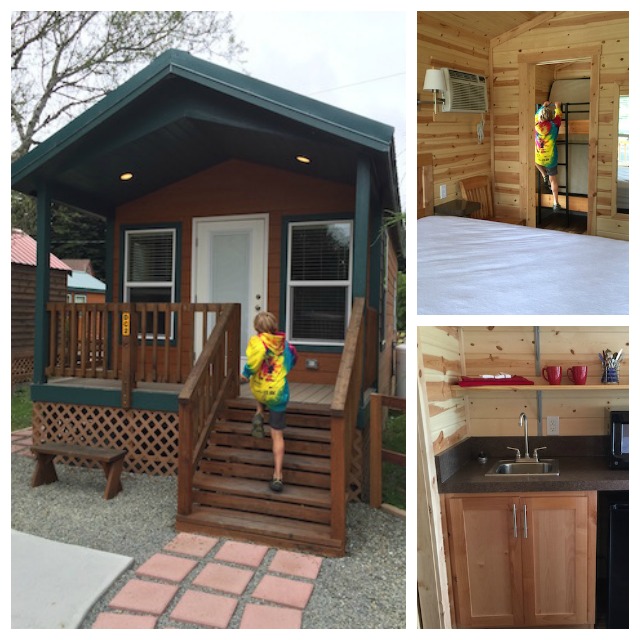
We stayed in a deluxe cabin, which upgraded us from the standard amenities of the rustic cabins (electricity and heaters) to include a full bathroom with shower and a kitchenette (with microwave, sink, mini fridge and coffee maker). The main room included a queen bed, and a cozy annex housed a built-in bunk bed. We also had a TV (not necessary) and WIFI (very convenient for writing down thoughts for this review!). Our little patio included an outdoor fire pit and picnic table, plus covered porch.

KOA-amenities

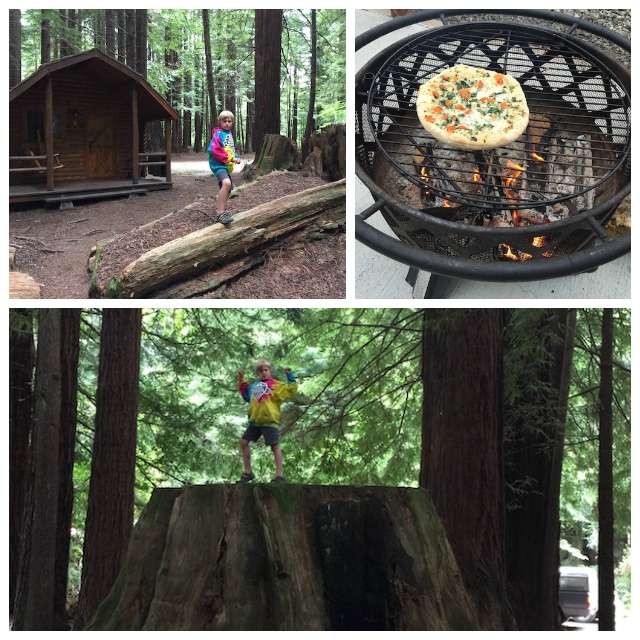
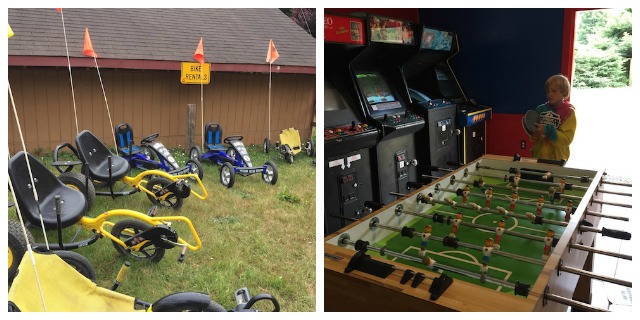
Unlike the standard cabins, deluxe cabins are located in the RV loop, which made me long to be tucked away in the woods. However, the kids liked being steps away from the bike rentals and game room (with ping pong and fusbol), and we had a nice field to look out over. We spent our first night settling into our cabin and grilling dinner, then the subsequent day hiking additional Redwood trails, playing in the ocean, and walking along the Smith River. Every trailhead and beach was within 25 minutes of the KOA. Every time we returned to the campground, the kids scattered to play ping pong, explore the wooded loop, where they climbed on nurse logs and Redwood stumps, and visit the goats and chickens in the KOA petting zoo.

Redwoods Hikes:

  • redwoods-weekendRedwood Nature Trail: This trail is actually a trail network of multiple loops that wind upslope of the Chetco River. You see multiple redwoods and other pines, as well as a clear, cold creek. Be sure to pay attention to which turns you take in order to find your way back to the start, as it’s not as well marked as we would like. Directions: from Highway 101, turn east at Constitution Way to North Bank Chetco Road. Go 7.5 miles to Alfred Loeb State Park. The trailhead is half a mile past the entrance.
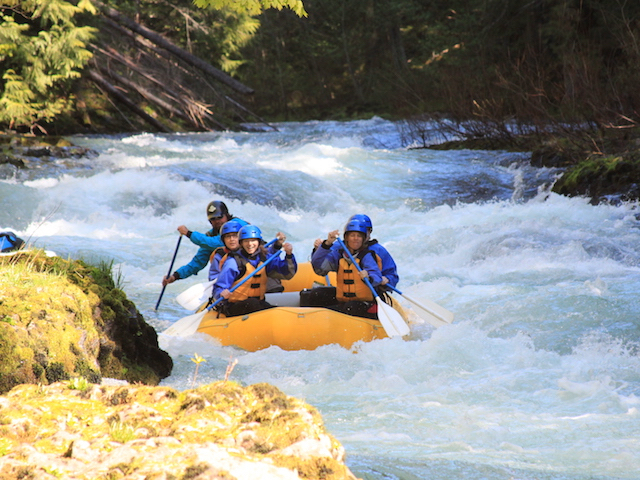
  • Simpson Reed Grove Trail: One of the most stunning trails through old growth redwoods, this trail is less than one mile and is easy to follow and well-marked. There’s an extra loop, the Peterson Memorial Grove, that extends the hike if desired. Also nearby is Stout Grove, an even shorter trail with breathtaking views. Directions: from Highway 199 (Redwood Highway), find the trailhead just before Jedediah Smith State Park, right off 199.
  1. Boy Scout Tree Trail: One of the longer hikes in the area, the Boy Scout trail is 2.8 miles. It passes through the Valley of the Giants to conclude at the Boy Scout Tree and Fern Falls. If you have a full day to explore one trail, this is the one. Directions: From Highway 101 South, take Elk Valley Road to Howland Road to the trailhead. The drive is 25 minutes from the Crescent City/Redwoods KOA.

Nearby beaches:

            Head just a few miles north from the KOA on Highway 101, and you’ll be in Oregon. Our favorite beaches include:

  1. Harris Beach State Park: this beach is characterized by plenty of beach access and sandy space with large rock formations. There are picnic areas as well. Find it right off Highway 101 north of Brookings, Oregon.
  2. Whaleshead Beach: Whaleshead is just a bit further north of Harris Beach, with parking on the east side of the highway and a pedestrian tunnel to the beach. Kids love the creek that runs into the ocean and lots of rock formations.

River Access worth exploring:

Head up Highway 199 just past Jedediah Smith State Park, and swim (in summer) in the Smith River. Families will find swimming holes directly off the road at pull-outs. The Chetco River also offers great wading and swimming at Alfred Loeb State Park east of Brookings. Look for the day use area at the campground.

No matter what you do in the Northern California and Southern Oregon Redwoods, plan to stay at least 2-3 days to get a feel for this region.

Win a KOA stay!

There are KOA campgrounds all over the US, and they all differ in personality, setting, and amenities, which makes each stay actually more interesting and adventurous. Read more stories of KOA stays. Want to have your own KOA adventure? Enter to win a stay at Trekaroo!

KOA-giveaway

Disclosure: This post was written in partnership with KOA. All activities were planned by us, and all opinions are our own.

Wet Planet Whitewater adventure rafting near Columbia River Gorge

Julie Henning runs Road Trips for Families, a resource for families love to get out on the open road and let their adventures unfold. 

Fed by underground aquifers and the glacial melt of nearby Mount Adams, the second-tallest mountain in Washington State, the White Salmon River never runs dry. A brisk 40 degrees, anyone venturing out on the river encouraged to wear a wetsuit, booties, fleece, a splash jacket and anything but cotton.

white-salmon

Running fast and high in the spring melt, the river was generating between Class I and Class IV rapids when I embarked on a half-day rafting adventure with Wet Planet Whitewater in mid-April. Wet Planet Whitewater is a rafting and kayaking outfitter located in Husum, Washington just off the Columbia Gorge Natural Scenic Area near Hood River, Oregon.

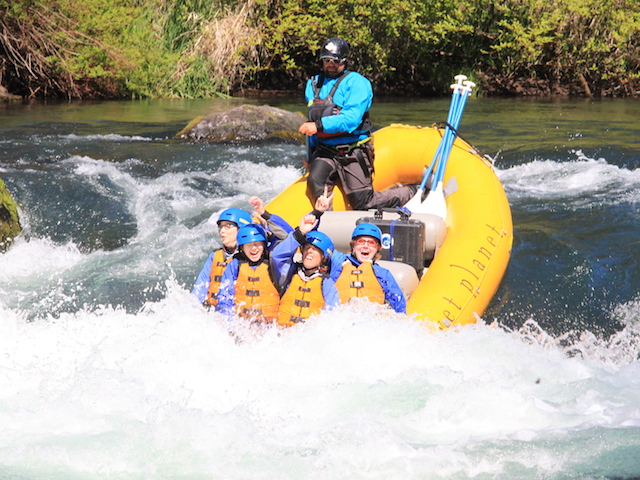
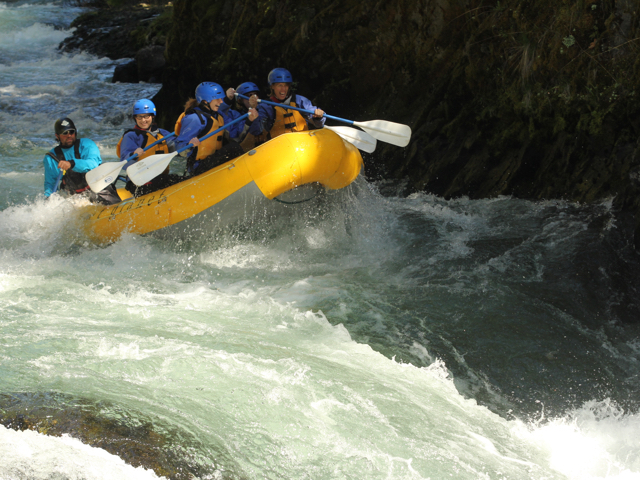
After receiving safety instruction and practicing paddling techniques on terra firma, our group of four women and one guide dropped into the middle of the rapids six miles upstream at the BZ Corner launch site. Thrilling as much as invigorating, we passed under majestic pines and along waterfalls tumbling into the river canyon that was once a lava tube (in fact, we made a brief stop into a shallow basalt cave formed by lava as it cooled millions of years ago).

wet-planet-whitewater

Depending on the time of year the White Salmon River runs faster or slower (but never dry). In the summer months, groups may have the opportunity to make a 10-food drop down Husum Falls. Too dangerous during our visit, we gladly made a small portage around the falls as the rafts were roped downriver—a group of kayakers received our collective cheers as we watched them plummet through this rocky passage.

At this point in the trip, true thrill seekers may opt to jump into calmer waters from atop the Husum Street Bridge. If you decide to mark this off your bucket list, keep in mind the water temperature and know you might be chilly until the sun dries your clothes.

river-rafting-oregon

Immediately following Husum Falls and the bridge jumping is “the rattlesnake,” a series of rapids where Rattlesnake Creek runs into the White Salmon River. It’s here where rafters have the opportunity to “ride the bull,” a maneuver where everyone moves to the front edge of the raft and plunges feet-first into a concave wave of whitewater. Our guide described this experience as nature’s nasal cleanse and I ended up swallowing and then spitting out a giant gulp of the river.

Wet Planet Whitewater photographers meet up with the rafts at different points along the river and capture groups mid-adventure. The sequence of before/during/after shots of our group “riding the bull” were my favorite (for a laugh, click through some of the shots posted on the Wet Planet Whitewater flickr stream).

The remaining two miles of the eight-mile run remained scenic, but a bit calmer (more waterfalls, majestic pines, red tail hawks circling from above). Our guide explained how the area was impacted by recent flooding and talked about the history and controversy around the removal of a dam that transformed Northwestern Lake into Northwestern Park (and, consequently, led to a resurgence of salmon and steelhead populations in the White Salmon River).

Traveling back to Wet Planet Whitewater by van, we changed into dry clothes and reviewed the photos of our trip. Visitors in the summer months are encouraged to linger over a burger and a beverage on the shaded deck of the Wet Planted Whitewater café. Day-trips include a riverside lunch, but it’s still fun to linger and recount the day’s adventure.

Worth noting is the minimum age requirement for the half-day trip (rafters must be ten and older, and sometimes sixteen or eighteen depending on the trip). That said, Wet Planet Whitewater offers outdoor programs, adventure camps, and youth kayak camps specifically designed with kids in mind.

Please enjoy this video, embedded with photos and sound from our adventure on the White Salmon River. Special thanks to our Instructor and Trip Leader Giani Benevento for his interview and insight.


Date last visited: April 2015


Distance from the interstate: 15 minutes from Highway 84/downtown Hood River, Oregon. Note: You will need $1 to cross the Hood River Bridge between Oregon and Washington.


Pricing: Pricing varies based on the length and duration of the trip (note the minimum age requirements). I participated on the $65/person Half Day trip on the White Salmon River. Food is available seasonally at the Wet Planet Café.


Accommodations: Lodging is available in Hood River. For families, the best bet is the Hood River Inn or a vacation home available through the Oak Street Hotel.


Directions: Wet Planet Whitewater is located at 860 Highway 141 in Husum, Washington. From Oregon Highway 84 take the Button Bridge Road exit and cross over the Columbia River on the Hood River Bridge. In Washington State, take the first left onto State Highway 14 (Lewis and Clark Highway) and then turn right onto State Highway 141. Continue 6 miles on 141. Wet Planet Whitewater is located on the right-hand side of the road.


I received a complimentary half-day rafting trip on the White Salmon River from Wet Planet Whitewater for the purposes of this review. All opinions are my own.


Earth Day every day: outdoor adventures that teach kids to love nature

In our part of the world, Earth Day usually dawns chilly and soggy. For many years, I dutifully took my kids out to the local celebration (always held outdoors, of course) so we could freeze for a few hours while batting around an oversized globe-patterned beach ball, learn about sustainable housing and bio-diesel, and eat local produce. Don’t get me wrong: there’s nothing wrong with any of that. But in the past few years, we’ve found a better way to celebrate. We now strive to honor Earth Day every day.

majestic ocean kayaking in Ucluelet

How? By teaching our kids to appreciate nature and the outdoor world that surrounds us. When kids have seen, felt, and interacted with nature firsthand, they’re much more likely to relate to it and strive to protect it as they get older. It’s true that as an outdoor columnist for OutdoorsNW, I have ample opportunity to expose my kids to the wilderness in our region, but the great thing about the outdoors is how accessible it is. Outdoor adventures are usually low-cost (or free), within easy driving distance, and great exercise. The following are our favorite ways to get outside with kids:

1. Go camping.

Camping is cheap, it’s available no matter where you live, and while it takes some effort, it’s a major kid-pleaser. Check out our favorite campgrounds along the Pacific coast, or check your own state park listings for a one-tank-of-gas-or-less getaway. If you’re ambitious, plan a multi-night backpacking adventure.

2. Kayak or river raft.

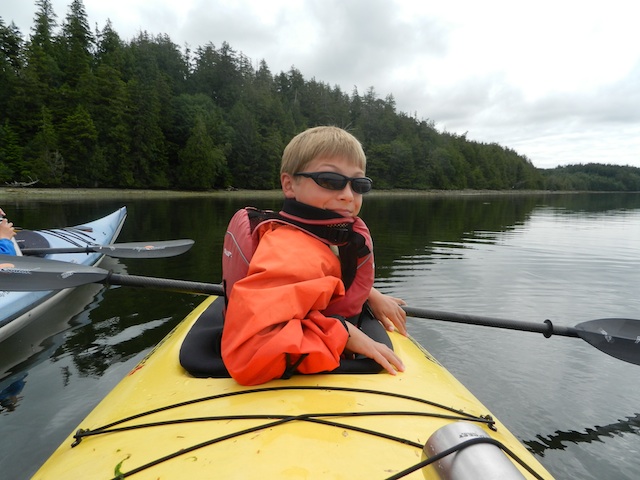
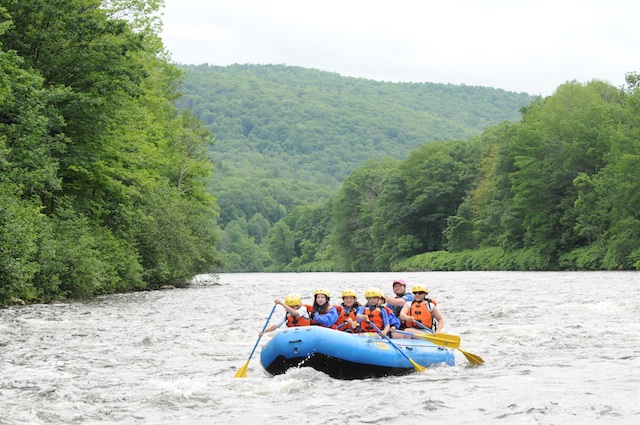
Kayaking and rafting are great ways to introduce kids to water sports. Families can start on still lakes and rivers, and most locations include a guide who can help you get started. You can opt to be on the water for only a few hours if desired, and can return to comfortable lodging afterward. Kids dig kayaking and river rafting because it’s more exciting than hiking, with the same explorative benefits. Our top favorite kayaking and river rafting adventures have included a family float along the Deerfield River in Massachusetts with Zoar Outdoor, an autumn kayaking trip in Oregon’s Cascade Lakes with Wanderlust Tours, and kayaking Vancouver Island Canada’s Ucluelet harbor with Majestic Ocean Kayaking.

zoar-outdoor-deerfield-river

3. Hike!

It doesn’t get more basic than this. Take the kids, give them a backpack and walking stick (both optional), and drive to the nearest trail head. Don’t know where to find one? Start at your local outdoor store and pick up a local hiking guide or simply ask the salesperson. Bring sunscreen, water bottles, and a picnic, and you’re all set. To keep kids motivated and entertained en route, allow them to set the pace and stop to explore, even if it means climbing every third tree or stopping to build (and dismantle) a dam along a creek. If you want to make a vacation of it, start with our top five Western mountain lodges, and spend your days on the trail and your nights in comfort.

Brasada trail rides

4. Horseback ride.

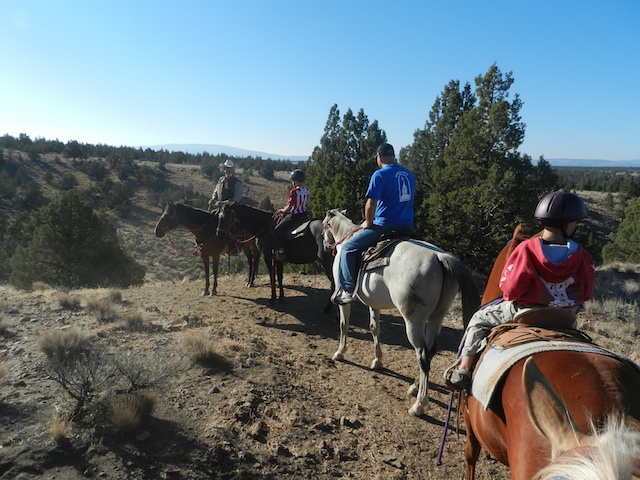
Many rustic or outdoor resorts now offer horseback riding. For roughly the cost of any outdoor excursion (or round of golf or spa treatment) you can introduce your kids to the cowboy (or girl) lifestyle…for a few hours. We love horseback riding while on vacation because it accomplishes two important goals: fun for the kids and the chance to see more of the outdoors up-close. Even kids as young as five can often ride solo. Our favorite horseback riding operations have included those at Brasada Ranch and Colter Bay in Grand Tetons National Park.

5. Mountain bike.

Mountain biking is an expensive way to enjoy the outdoors if you own your own bikes and equipment, but surprisingly affordable to rent for the day at most local bike shops (whether you’re on vacation or at home). Because you can’t always mountain bike on pedestrian trails (but sometimes can), it’s important to pick up a cycling trail map where you rent your bikes. If you want to go extreme, try gravity-based mountain biking at a ski resort in summer. It’s one of the activities my kids (and I) have enjoyed most in the past few years! Learn more by checking out our biking experience at Northstar California.

Leave No Trace principles every family needs to know

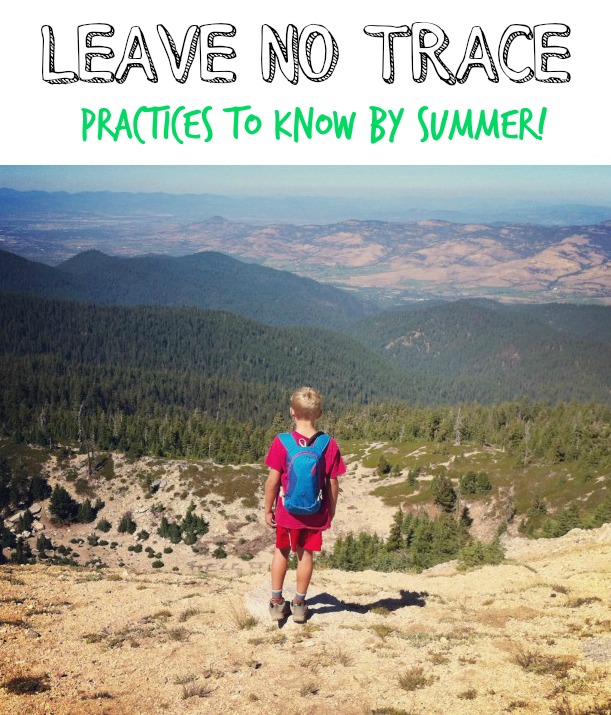
With Earth Day coming up later this month, April is the perfect time to talk about caring for our public lands. My kids have heard the Leave No Trace mantra since early childhood, but it’s always good to brush up on best practices for preserving the wilderness we love.

leave-no-trace


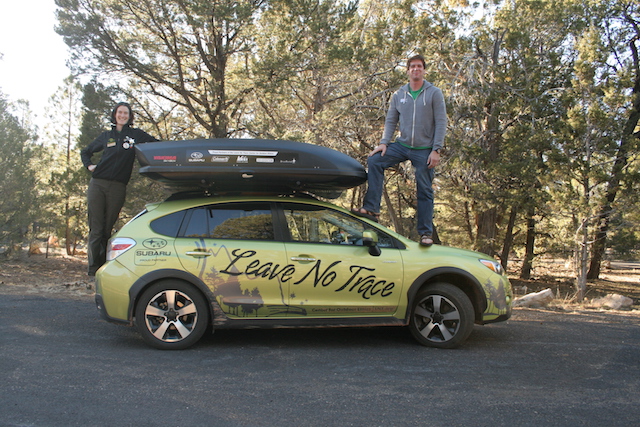
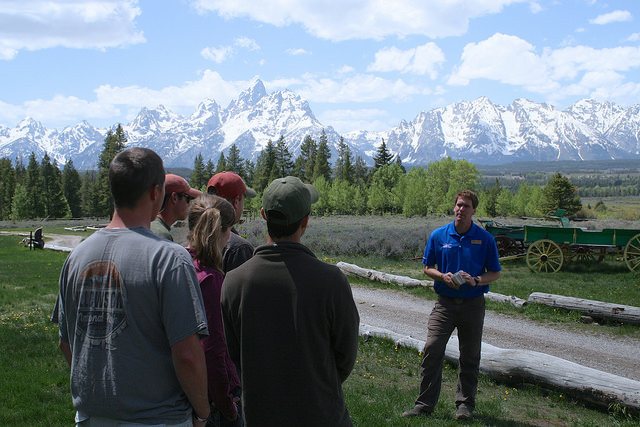
This season, Leave No Trace launches a multi-year, Leave No Trace in Every Park campaign. Subaru/Leave No Trace Traveling Trainers will be visiting ‘hot spots’ across the country (severely impacted areas), giving them attention and helping educate the public. I was lucky enough to sit down with one of them to ask top questions most families have about leaving a lesser impact on the wilderness.

Q: I am aware of the seven principles of Leave No Trace. Is there a ‘crowning’ principle in particular families would bear in mind while in the outdoors?

We encourage people to think of the cumulative impact as a crowning idea for the principles. Over one billion people visit federal and state lands each year. If one person leaves an impact such as litter, feeds wildlife, takes an item out the environment, or walks on a non-durable surface it will not impact the outdoor area significantly, but the cumulative effect of these impacts happening repeatedly over time would have a dramatic impact.

leave-no-trace

Q: How does trail cutting or ‘bush-whacking’ hurt the wilderness environment?

We encourage people to walk in the middle of the trails even when they are muddy. If you walk around the mud you will erode the sides of the trail making it wider and you could crush vegetation on the edge of trails.

As trails widen vegetation diminishes and eventually land management agencies will have to fix the trail. Along the same lines, we encourage people to not cut switchbacks since it can result in the hillsides between the trail to erode.

If a group of people wants to hike off trail we encourage them to disperse, rather than hike in a single file. By dispersing people won’t step on the same spot, which can cause a new undesignated trail to form.

learning-leave-no-trace

Q: Could you describe best practices for finding a suitable campsite in backcountry situations when established sites are rare?

If established sites are rare and the land management agency does not have designated spots that are provided for campers to use we recommend the following considerations. Camp 200 feet (the equivalent to 70 adult paces and 100 kid paces) away from water, trails, and other campsites. Find the most durable surface available such as rock, sand, snow, or dry grass to camp on. If you find a site that is showing some signs of impact, such as significant soil compaction, stay there, but if it is only showing small signs of impact leave it alone for the area to recover. Move on to another more durable site that is showing no signs of impact. Bonus: dish washing tips and car camping tips!

Q: What’s the best way to completely put a fire to ash and ensure it’s safely out before leaving?

Fires are a great part of camping; they give us light, warmth, and s’mores! Making sure that we are responsible with our fires ensures safety for you, other visitors, and wildlife.

Before having a fire, ensure that they are allowed in the area you are camping in.

Ensuring that your campfire is out completely before you leave or go to bed is a very important part of camping. First, choose firewood that is no larger than your wrist as it will burn to ash more easily than larger wood. Check local firewood regulations as some areas do not allow wood not from the area to be brought in as it may harbor invasive insects.

backpacking foods for kids

Be sure to burn all wood to ash. Then, you want to guarantee your campfire is out cold. First, use plenty of water and sprinkle it over the ashes: to help the process use a stick to stir the ashes while pouring the water. If the fire area is too hot to touch, it is too hot to leave or go to bed. Bonus: how to build a mound fire.

Q: Tips for carrying out all trash? For instance, our family always unwraps food items as much as possible before departure, so there’s less trash to carry out later. 

We encourage people to take a trash bag along with all of their other essential items for any outing. Repackaging food before heading to the trail helps decrease the amount of trash you will have to pack out. We also encourage people to even pack out all food scraps. Human food is unhealthy for wildlife; they become dependent on humans for food and become attracted and conditioned to human food and trash. Which is unhealthy for both the wildlife and humans. Fruit peels can take up to 2 years to biodegrade and most are not native to the areas they are left.

We like to say, if you weren’t there would it be there?

Q: Young kids naturally enjoy making forts, rock dams, or other ‘structures’ at backcountry campsites…how can they channel this desire to create and explore in line with Leave No Trace practices?

We get this question all the time. It is important to educate children on the importance of Leave No Trace while still inspiring creativity and fostering a sense of adventure to connect kids to the outdoors. We still encourage children to play in nature and still follow Leave No Trace. Kids can still build forts or structures at campsites and then before leaving they can simply dismantle the structures.

If kids want to collect items, first make sure to check the rules and regulations of the area to make sure it is ok to collect something.

We encourage only taking one item instead of several, this generally also makes that one item more important to the child as they often attach a special memory to one item they have really given some thought to during an adventure.

Q: A nitty-gritty bathroom-related question: Leave No Trace has always stated that human waste and soap or shampoo should be 100 feet from water sources. What about rafting companies’ ‘dilution is the solution to pollution’ method? 

Usually in the backcountry, we want to be 100 feet away from any water sources, trails, and campsites when doing dishes or bathing.

However, western river corridors sometimes have different recommendations for human waste and gray water. In river corridors, the river is usually the most durable surface. The rivers in deep canyons present difficulties for the normal recommendations because you usually cannot get 100 feet for gray water or 200 feet for human waste disposal away from the water.

Leave No Trace recommends packing out all solid human waste with a reusable, washable toilet system. Always follow local regulations as some areas allow the use of bag-type systems to pack out human waste. Often, urine and strained gray water are required to be deposited directly into the river.

The old saying goes, “dilution is the solution to pollution.”


Thank you, LNT, for helping educate Pit Stops for Kids families!

Adventures for Kids in Costa Rican National Parks

Costa Rica has a landscape brimming with opportunities for active adventure. National parks provide safe and pristine environments for rambunctious children to explore. If your youngsters have exhibited interest in climbing, jumping, gliding, or bouncing, make sure to fit some of these activities into your Costa Rica itinerary.

costa-rica

You can usually find a tour that offers some combination of the following activities, and your tour guide can provide you with all the equipment you need.

Of course, family vacations in Costa Rica don’t only cater to visitors with boundless energy. If you get a moment to yourself, take a tour of a coffee plantation, or unwind on the beach, or go for a holistic soak in a volcanic hot spring.

But while you’ve got your kids along for the ride, take them on expeditions that will leave an indelible impression. For most kids, that means experiences that send them into totally new environments. Costa Rica’s National parks will invite them to explore their appetite for outdoor excitement.

Suspension Bridges

Look for hikes that will take you high up in the jungle canopy. Walking over a suspension bridge will add excitement to your hike, and offer spectacular views of the surrounding landscape. In Arenal National Park, the view will include the ancient, snow-capped Arenal Volcano.

Visit suspension bridges in Monteverde National Park to voyage into the heart of the park’s cloud forest – a rare environment that develops when high humidity combines with a high elevation. Cloud forests create a habitat for some of the world’s rarest plants and animals.

costa-rica

Tubing and Rafting

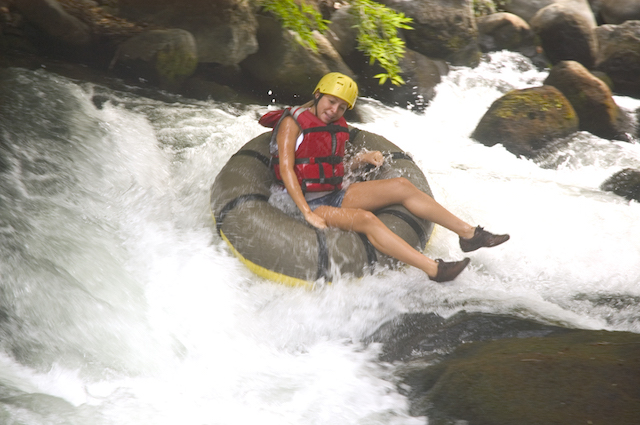
Tubing down a river in Costa Rica will let you see the lush landscape from your own tubular oasis. This is an especially good way to see the jungle – you’ll get to observe the wildlife on the banks of the jungle while you move at a leisurely pace.

Older kids can try something a little more advanced with a white water rafting trip. Your guide will make sure everyone has taken all the necessary safety precautions before you begin your rollercoaster ride down the white water rapids of the Naranjo, Pacuare, or Sarapiquí River.

Kayaking and Surfing

Kayaking allows you to get up-close to the twisted trees that make up Costa Rica’s exceedingly rare mangrove forests. You’ll see marine birds, like spoonbills and pelicans, as well as monkeys. There’s even a chance you could catch a glimpse of a crocodile. Guanacaste National Park and Marino Las Baulas National Park are both good destinations for kayaking around mangrove forests. Manuel Antonio National Park has mangrove forests as well as opportunities for ocean kayaking.

While you’re visiting Manuel Antonio National Park, sign up for surfing lessons. Beaches here offer easy-going waves and plenty of qualified surfing instructors. Even if your kids have never tried it before, they’ll be excited to get into the clear, blue waters of Costa Rica’s Pacific coat.

Rock-climbing

In the midst of the dense Costa Rican jungle, visitors can make an afternoon of rock climbing in a canyon. Surrounded by deep green vegetation, these rocky destinations serve as a habitat for colorful birds and plants. Gorgeous jungle canyons are the perfect place for your kids to push themselves to get to the top.

And as you scramble up the side of the rock face, you’ll have the noisy jungle to serve as the soundtrack to your expedition.

Rappelling in a Waterfall

Waterfalls are easily the most refreshing natural formations. And rappelling down a waterfall is, without a doubt, the best way to recover from a steamy hike through the jungle. Have your kids wear quick-drying clothing so they’ll be ready to spend part of their day conquering the cascade.

Zip-lining

No trip to the jungle canopy is complete without a zip-line ride through the treetops. After admiring the plumage of Costa Rica’s tropical birds, you can join your feathery friends on a flight of your own. This is a thrilling activity, and a good source of motivation for a youngster on a hike.

Molly Kendrick is a part-time traveler and freelance writer for Anywhere Travel. Anywhere can help you discover destinations in Costa Rica, Panama, Peru, and Guatemala, and will create your customized travel plan for free. 

Five unusual outdoor lodging picks for families

Ever wanted to stay the night in a yurt, overlooking the ocean? How about a rustic cabin in the mountains, a tree house in the woods, or even a fire lookout with sweeping views? All of the above are easily accessible to all travelers – no wilderness experience necessary! Extend the camping season with these year-round lodging experiences, and learn where and when to book them.

Yurts: Comfortable Camping Without the RV

Yurts are not just in rural Mongolia anymore! These canvas-sided circular shelters have been popular additions to many state parks across the U.S. and Canada, offering four-season lodging for those without an RV or camper. Perfect for families with young children, yurts come in rustic or deluxe models, all with electricity, beds (bring your own bedding), and heat. Arriving late to the campground? No need to hassle with tent setup! Want to experience the outdoors without sleeping on the ground? Yurts are the perfect solution.

How to book: Search for yurt lodging by state park on ReserveAmerica.com.

Top yurt: Harriman State Park, an Idaho nature reserve outside Yellowstone National Park, offers a select few deluxe yurts, complete with wood-burning stoves inside. Families can bask in solitude, just miles from Yellowstone crowds.

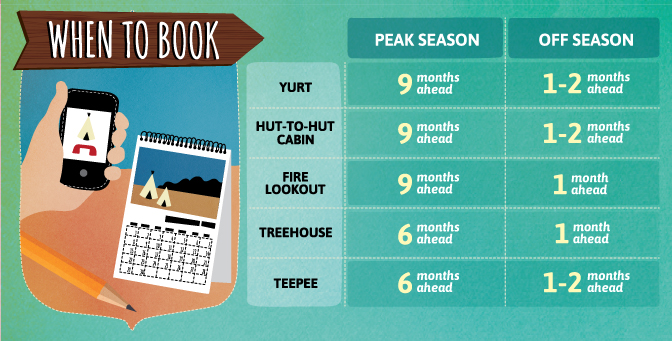
Unusual Campsite Booking Schedule
Source: Fix.com

Cabins and Huts: Cozy Wilderness Lodging

Channel your inner Little House on the Prairie when sleeping in cabins in private campgrounds like KOA Kampgrounds or state parks and reserves. Like yurts, cabins range from simple shelters to “glamping-style” cottages with one to three rooms. Some, such as select KOA cabins, offer full bathrooms and kitchens in their deluxe models. State park cabins typically offer a room, beds, and a porch or balcony, plus a fire pit and picnic table for cooking and dining. Campers wanting to get further afield can opt for a hut-to-hut hiking experience. Run by private companies on both coasts, hut-to-hut operations allow backpackers to hike anywhere between three and ten miles to various backcountry huts. Depending on the operation, huts can include hot meals, full bedding, or simple shelter.

How to book: Reserve KOA Kampground cabins via their official website or by phone, and reserve state park cabins on ReserveAmerica.com. For hut-to-hut lodging, reserve directly through each private operation, such as Outdoors.org or Cascadehuts.com.

Top cabin: For an upscale cabin experience in a resort setting, stay in a KOA deluxe cabin in Jackson Hole/Snake River, Wyoming.

Top hut-to-hut: Appalachian Mountain Club’s network of AMC lodges and huts offers pristine hiking without the heavy packs in Vermont, New Hampshire, and Maine.

Have we whet your appetite for more? Find three more outdoor lodging ideas in our article on fix.com. 


Source: Fix.com

Travel gifts for kids: affordable POV action cam picks

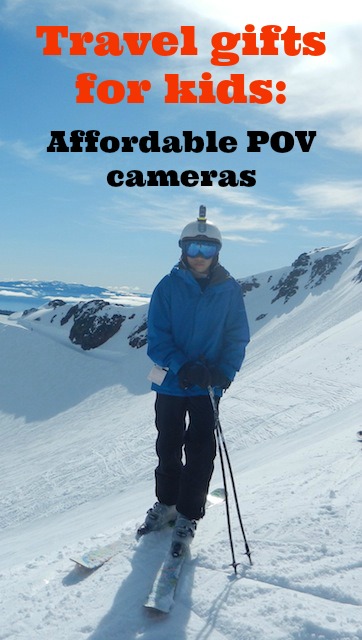
Do your kids want a POV camera or camcorder for Christmas? Tweens and teens love POV cams, and mine are no exception. However, these rugged, adaptable action video cameras can be expensive! Below are two affordable POV action cam picks that won’t set you back and will keep your kids happy during outdoor travel adventures.

best action POV cam

Kids love to challenge themselves and try new skills, and with action cams, they can record their feats, post them on social media sites, and share with friends. My kids bring action cameras to the ski slopes, on mountain biking trails, and even underwater.

Sony Wifi Action Video Camera:

The Sony Action Cam is less expensive than a Go Pro, with all the same bells and whistles. Kids can mount the camera on their helmets, take them on or under water with the waterproof case, strap them to their handlebars, or wrap them around their head with a headband. The Action Cam is small enough to toss into a lightweight backpack or even a jacket pocket, and with only one button for on and off, gloves don’t even have to come off to get the scene rolling. Unlike a Go Pro, the Action Cam does not have a screen, but kids can sync the camera straight to a smart phone. (There are pros and cons of this: see our full Action Cam review for details.) We like the HD quality and the fact that with wifi enabled, we can upload our videos instantly. It can also be used with a USB cable or photo card. Pick it up as a family gift for under $230 on Amazon.

Oregon Scientific ATC Chameleon Action Video Camera:

The Chameleon is unique in that it shoots duel perspectives simultaneously. While capturing the speed of her snowboard on the snow, your daughter can also video the expression on her own face. Both perspectives are displayed together on a split screen view. The Chameleon is more lightweight than the Sony Action Cam, but also a little less rugged. A waterproof case can be bought as an accessory, as well as helmet mounts and pole/handlebar mounts. It fits in the palm of your hand, and captures full HD video. Like the Sony, video is transferred via photo card or USB, but cannot be transferred wirelessly. Grab it for only $199 on Amazon.

Want more travel gifts for kids? Here are some ideas!
Best hydration packs for kids
Nikon Coolpix Giveaway

Summer activities at Utah Olympic Park

If you’re staying in Park City, Utah in summer, definitely take time away from historic downtown and your resort pool to play for the day at Utah Olympic Park. Fun in winter, the park is even more action-packed during the summer months. Here’s what you can expect in terms of summer activities at Utah Olympic Park.

See Olympians training:

The park was built for the 2002 Olympic Games, and remains a training ground for ski jump, bobsled, and more. Most days at the park, guests can watch youth and adults training at the facilities. There’s also a free museum on Olympic history that’s well worth checking out.

utah olympic park

Play on the zip-lines and ropes course:

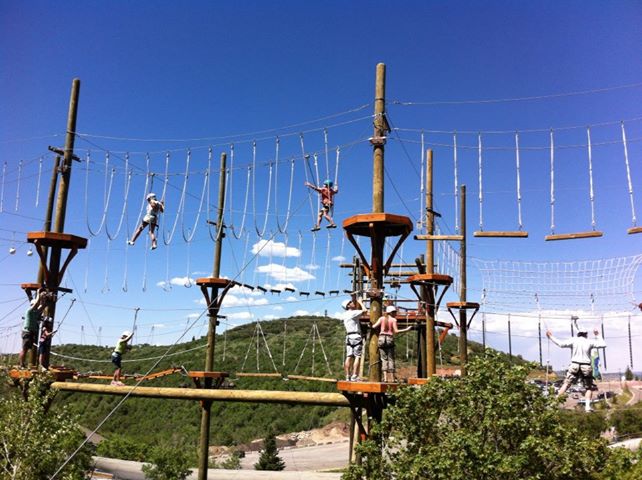
For only $40 per person (far less than the cost of a ski ticket in winter!), kids get unlimited use of zip-lines, high ropes courses, and more. Guests choose from three levels of Adventure Courses: our eight-year-old opted for the most basic course, but quickly realized he was ready for more. It was no problem to send him on his way to try the more challenging elements. We loved the flexibility of the courses, and the all-inclusive rate.  Kids as young as five can start on the Discovery Adventure. The Canyons Adventure is designed for age seven and up, while the Summit Adventure is for the most daring. There’s even a Drop Tower for taller kids.

Try a chair lift ride:

For kids who are not skiers, a chair lift ride is a great way to experience a fun aspect of the sport. And the views from the top of the chair include most of the valley, plus a new perspective on the challenging ski jump chute. Rides are inexpensive and a great compliment to a museum visit for younger kids or adults.

Go on the bobsled:

Older kids can experience the thrill of a bobsled ride on the only full-length course in North America. This ride is less intense than its winter equivalent (and less expensive) but still offers 5 G’s of force as you twist and turn down 15 curves behind a professional driver.

Experience zip-lines:

The Utah Olympic Park zip lines propel riders 50 mph. We loved that there are two side by side, so family members can enjoy this together.  There’s also a more kid-friendly freestyle zip-line, which is shorter and less steep.

Try the alpine slide:

Perfect for younger kids, the alpine slide is tame enough for anyone (kids can ride with parents) but exciting enough to keep teens entertained riding solo. The slide is built with stainless steel construction, with straight-aways, drops and 18 banked turns.

Date last visited: June 2013

Distance from the interstate: minutes from I-40

Admission: Gold Day Pass is $65 for adults, $40 for kids, and includes everything except the bobsled ride ($75 extra cost). Some activities are unlimited. See details. Single activities can be purchased separately as well, for very reasonable prices between $5-$15.

Summer hours: hours for various activities vary, but generally, attractions start opening by 10 am and close at 6 pm.

Directions: The Utah Olympic Park is located at 3419 Olympic Pkwy. From Park City or The Canyons Resort, easily follow well-marked signage.

This post written in partnership with VacationRoost. We were not compensated for reviewing any of the activities above.