Dealing with camping mishaps: Camping tips for families!

It’s almost camping season! If you’ve been reluctant to enter the wilderness with your family because of worries or fears, read on! Our camping tips address the most common camping mishaps, and how to deal!

Those who camp regularly know it’s not all sunshine and rainbows. Here’s what to expect from the unexpected and what to do when you encounter camping mishaps. Read on for camping hacks!

Coleman-tent

When The Weather Turns Against You

Bad weather is the most common mishap encountered by campers…even when car camping. Usually nothing more than an inconvenience or temporary delay of outdoor fun, weather can sometimes become dangerous. Here’s how to protect yourself from serious weather issues from mother nature.

Rain: It’s good to be prepared for rain when camping. Be sure to bring a reliable rain fly for your tent, rain jackets for everyone in the family and, if rain is predicted, an extra shelter or canvas tarp to put over eating and cooking areas. It can also help to bring an extra beach towel to use as an entry mat to your tent to wipe off dirty feet when campsites get muddy.

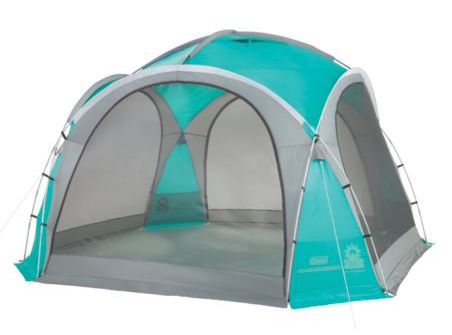
Wind: High winds can cause major problems for campers. If you are in a camper or RV, fold down all awnings and external structures in the case of high wind and, in tents, secure your shelter with guy lines and stakes. Beware of “widow makers” when pitching tents or parking RVs: these dead-yet-standing trees can fall over easily in high winds.

Heat: Always plan your tent site with shade in mind and look for campsites with trees, rocks, or vegetation that will provide some relief. Freeze jugs of water before departing home so you can have access to icy water along with homemade ice packs. Wet bandanas or other clothing to cool skin and camp near bodies of water for easy access.

Wildfires/lightning: A regular occurrence most summers in the western United States, wildfires can certainly ruin a camping trip. The good news: families in campgrounds will have advance warning of any needed evacuations. Check your state’s US Forest Service website for possible fires in the area of your campground and have a back-up plan in case of road closures or campground closures. To avoid lightning strikes, ensure your campsite is not the highest point in an open environment, and do not hike to vistas and peaks if lightning is possible. Cars and RVs (except canvas-topped or fiberglass), bathrooms wired with plumbing and electricity, and other wired buildings are safe places in a lightning storm. Tents are not.

Tip: For all weather-related issues, know the campground’s evacuation procedures before your arrival. You can find this information at a ranger station or check-in booth.

When Someone Becomes Injured or Sick

Minor illnesses and injuries are common while camping, and most can be addressed with a simple bandage or extra s’more for dessert. Prevent blisters before they start by wearing well-worn shoes and sandals while camping. If you’re prone to blisters, use moleskin or bandages specifically for blisters before you hike.

silver-falls-hike

Because you’re in the outdoors with less access to sterile environments, cuts and scrapes should be treated immediately to prevent infection. Always carry a standard first aid kit with antibiotic ointment packets and antiseptic wipes in addition to various-sized bandages.

If your campsite does not offer running water, such as a hike-in or backcountry site, beware of Giardiasis. Also known as Beaver Fever, Giardiasis is an intestinal illness caused by microscopic parasites. It’s caused by drinking untreated water and can result in diarrhea and dehydration. Campers at a campsite with running water (in developed countries) will not need to worry, but those camping where water is sourced from lakes or streams (or in undeveloped countries) will need to treat water before drinking. Be sure your camping gear includes a filter or pump system for your water bottle.

Finally, deal with those annoying buzzing creatures in the outdoors with topical anti-itch cream or hydrocortisone for minor bites and stings. Always carry Benadryl (oral) in case of swelling or discomfort, even if you don’t think you’re allergic to any type of insect.

Tip: For all health-related issues, know where the closest hospital is located and have local emergency numbers on hand.

Addressing Common Camping Nuisances

There are always a few things we’d rather not deal with while camping but that are hard to avoid. Here’s what to do about the worst offenders.

Difficult neighbors: When car camping at popular campgrounds, you’ll often have neighbors. Usually these camping buddies are outdoor lovers like you and will be quiet and courteous. But if they turn out to be disruptive neighbors, they can ruin your trip. Here’s what to do when faced with loud, arguing, or partying campers:

  • Speak with them directly, in a friendly manner.
  • Talk to a campground host. Each campground will have one or more of these citizen enforcers; their campsites will be marked as host campsites. The host should speak with the offending campers.
  • Ask to move campsites (if hosts cannot control the situation).
  • Call the local authorities if the situation makes you feel unsafe.
  • Follow up after your trip with the campground owners or government agency (if it’s a national or state park). They can’t take action that will help to prevent this issue in the future if complaints aren’t lodged.

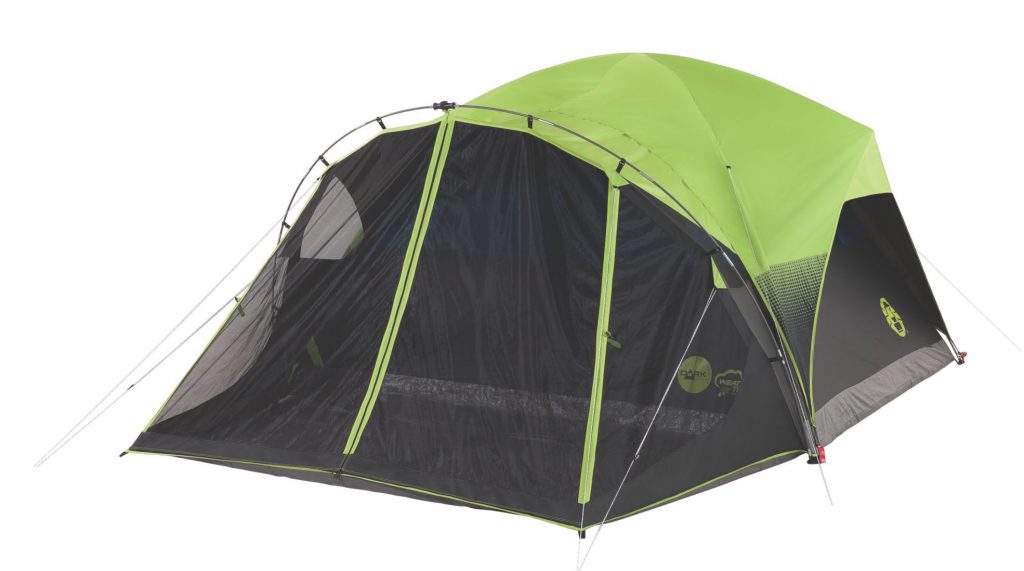
Mosquitoes: Always a pest, and now a danger in some regions for those susceptible to the Zika virus, mosquitoes need to be controlled (as much as possible) within your campsite. Have a secure shelter to use when necessary (such as a tent or screen room), wear insect-repelling clothing, and use natural repelling remedies around camp. At night, make a campfire and let the wood smoke repel mosquitos for you!

Some mishaps are bound to arise while camping, and they can even make for great stories! Anticipating them and following our camping tips and tricks means you will be prepared and won’t allow them to define your whole trip.

Subscribe to our Pit Stops for Kids seasonal newsletter, and get an exclusive travel ‘cheat sheet’, free! Click here!

Pin for later!

Everything you need to know to avoid (or deal with) camping mishaps!
Source: Fix.com Blog

10 tips for avoiding altitude sickness while vacationing


The first time I traveled to high altitude while on vacation, I didn’t take the threat of altitude sickness seriously. After all, I reasoned, I had grown up in the mountains, and knew how to enjoy myself in the thinner air. But I had been living at low altitude for years, and the first time I exited my mountain condo at Keystone Resort Colorado for a morning jog, I suffered. At first, I worried my poor performance meant I was terribly out-of-shape, but the persistent headache and queasy stomach I endured the rest of the day told another story: I was suffering from altitude sickness.

joshua-tree-scrambling

When I returned for a high mountain vacation with my kids, I had renewed passion for avoiding altitude sickness! We guzzled water pre and during our trip, ate and slept well, and had a great time. Before you head to high elevation with your kids, read the following tips from Dr. Josh Brown of Santa Fe’s Internal Medicine Specialists. (Yes, Santa Fe is at high elevation!)

  • Start Exercising Now: If your trip includes strenuous physical activity, start an exercise plan that includes extra cardio activity for the month or so prior to your visit.
  • Stay Hydrated: Begin drinking extra water a day or two before arriving at your destination and continue to stay well hydrated throughout your trip.
  • Limit Caffeine and Alcohol: Try to avoid or limit beverages that contribute to dehydration.
  • Eat Foods High in Potassium: Foods such as broccoli, bananas, avocado, cantaloupe, celery, greens, bran, chocolate, granola, dates, dried fruit, potatoes, and tomatoes will help you replenish electrolytes by balancing salt intake.
  • Take Ibuprofen: Recent studies show that altitude sickness can be effectively prevented with this common and inexpensive over-the-counter medicine.
  • Plan for Trouble Sleeping: It is safe to assume that you will have difficulty sleeping, particularly during the first night in a higher altitude. Take it easy and allow for extra time to rest.
  • Climb High, Sleep Low: This mantra is especially important if you are hiking or camping at elevations above 10,000 feet. If you can, arrange the itinerary so that there are gradual increases in elevation spread throughout your trip.
  • Wear Sunscreen: Remember that higher altitude means less atmosphere to filter the sun so there is a much higher chance of sunburn compared to sea level. Apply sunscreen of at least SPF 30 or more even in the winter. 
  • Know the Symptoms: Altitude sickness can cause loss of appetite; fatigue or weakness; dizziness or light-headedness; pins and needles; shortness of breath upon exertion; persistent rapid pulse; drowsiness; and peripheral edema (swelling of hands, feet, and face). Contact your doctor if your symptoms are severe or don’t clear up after a couple days.
  • Consult With Your Doctor: People who have had serious bouts of altitude sickness in the past should check with their doctor or an online pharmacist, like The Independent Pharmacy, about prescription medications, like Diamox, that can help alleviate symptoms. Those who have significant heart problems should also check with their doctor before traveling as higher altitudes can cause an increase in blood pressure for a few days. Be aware that those who wear oxygen, have lung problems or have difficulty breathing may experience additional complications at high altitude.

Enjoy staying and playing at high altitude destinations with your kids this summer!

Tips courtesy of Dr. Josh Brown, used with permission.


Hiking Safety: How to keep kids safe in the outdoors

A ramble through the woods, a stroll across a mountain meadow, or a strenuous alpine hike with the reward of a breathtaking vista – it all sounds idyllic until something goes wrong. As a former search and rescue volunteer and EMT, hiking safety is very important to me. I’ve participated in too many wilderness searches that could have been avoided with a few precautions, a little know-how, and the right hiking gear.

nature-hike
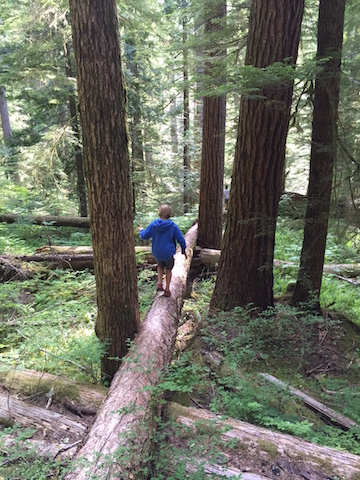
Trust me – if golf is “a good walk spoiled,” so is a search for a missing hiker! If you’re planning to explore hiking trails in your region this fall and winter, know what is needed to have a fantastic outdoor experience (and make it home in time for dinner).

Safety Precautions

Before setting out on any wilderness hike, download or buy a topographical map of the trail network so you’ll be aware of trail crossings and alternative routes. Consider hiking with a buddy, or, if you must hike alone, always tell a friend or loved one where you’ll be and when you plan to be back. Many trailheads offer “sign-in stations,” where hikers can register their presence.

Lucky hikers will enjoy spotting wildlife en route; with very few exceptions, these animals will respect your presence if you respect theirs. Carrying bear spray is a good precaution against the rare event of an aggressive animal, but a camera will come in handy far more often.

Gear to Take

Most hikers remember to pack weather-appropriate clothing and their best hiking boots, plus to carry a water bottle when setting out, but they are surprised to learn what else should be in their day pack. While compasses and GPS units are useful, they don’t make the list of absolute necessities. Neither do high-tech hiking poles or hydration systems, despite being nice to have. In fact, hikers carrying just the following five items will greatly increase their chances of survival in the wilderness should they spend more time in the elements than planned:

  • Bandana
  • Whistle
  • Glow Stick
  • Plastic Poncho
  • CD or Mirror

All five of the items above can be purchased for under $10 at any outdoor store or dollar store. Keep all five safety tools in your hiking day pack permanently to ensure they’re at the ready on every hike.

Read our full article on fix.com.


Source: Fix.com

Your Favorite Travel Spot Needs You: How to Protect the Outdoor Places We Love

Whether you’re packing up the family for a National Parks tour or getting in a historical monuments road trip, you can give your trips new meaning this summer with Team Sierra.  We love Team Sierra’s fun community of planet-lovers – they’ve come together to raise funds to benefit Sierra Club because protecting the places we live and play is so important and each of us can make a real impact when we all take action together.  Team Sierra is dedicated to protecting our public lands, making the outdoors more accessible for everyone, and helping cities commit to 100% renewable energy, and we highly encourage you to join the team!

It’s never been more important to protect our planet – more than preserving the places we love to visit, it’s also about leaving the world a better place for our children. With Team Sierra, you and the family can set up your own fundraising webpage with one of their many events or create your own campaign.  Every Team Sierra member gets 1:1 support from a professional staff member, and earns Team Sierra swag as they go! Team Sierra and Sierra Club have also proven that they know how to make an impact. As the largest environmental grassroots non-profit, Sierra Club is known for bringing people together to make real change – which is also what makes Team Sierra’s fundraising program so powerful.

Examples of family-friendly campaigns you can create:

The Outdoor Challenge

Use your family trip to challenge yourselves to explore, enjoy, and protect the beautiful places that you see.  The Outdoor Challenge is happening now and wraps up on August 10th, National S’mores Day.  Complete activities like birdwatching, beach cleanup, or hiking a new spot and raise money to earn exclusive collector’s badges that the kids can show off on their backpacks come September!

My Favorite Species

Whether you’ve got sea turtle fans or want to keep the pollinators around for the beautiful flowers, you can dedicate your fundraising to your most beloved species.*  When you pass the $39 mark, you’ll get a plush animal for the littlest, and a fun educational book about endangered species for that summer reading challenge.

My Finish Line

For many, the idea of running 13 miles is unappealing.  For parents who’ve shared a sedan with their 3 kids for the past week, the thought of stretching one’s legs in solitude for 13 miles is a dream.  Join one of Team Sierra’s race events to get those endorphins going and earn that cold beverage.

Create Your Own

Dedicate your road trip to fundraising for our planet by asking supporters for a dollar for every fun fact the kids share about the most recent pit-stop.  Turn those planet themed drawings into greeting cards and auction them off to the fans! It’ so great that there are so many non-profit fundraising ideas out there to help our planet.

By family fundraising, you’re not only giving back to Sierra Club, you’re spreading their mission to the next generation. Sierra Club Mission Statement: To explore, enjoy and protect the planet. To practice and promote the responsible use of the earth’s ecosystems and resources; to educate and enlist humanity to protect and restore the quality of the natural and human environment; and to use all lawful means to carry out those objectives.

How it works:

Set up your fundraising page today!

Note: Sierra Club policy dictates that fundraising pages must be created and managed by an adult 18 or over, but feel free to create a page on behalf of your family!

*My Favorite Species fundraising goes to the general mission of Sierra Club, not to a particular species.

What to expect on an O.A.R.S. river rafting trip

Earlier this month, we enjoyed our fourth multi-night rafting trip with O.A.R.S. If you do something four times, it’s because you love it, and there are very few vacations we’ve loved as much as O.A.R.S. trips. This unique family vacation combines some of our favorite things: outdoor exploration, adventure, isolation and off-the-grid family time, and conservation. And it packages all these elements into a vacation where my husband and I don’t have to worry about directions, dining, or any other major decisions.

oars river rafting

If you’ve read our previous reports from O.A.R.S. trips, which include our two times on the Rogue River, our trip on the Salmon, and our trip in the Tetons, and you still haven’t booked a river rafting trip with your family, maybe it’s because you’re not quite sure what to expect, are not quite convinced such an outdoor trip will be in your family’s comfort zone, or maybe just fear the unknown. I understand. I’m here to help, and I’m going to get really nitty-gritty with you, because knowledge is power, right?

What to expect on an O.A.R.S. river rafting trip:

What to expect from your guides: The night before your trip begins, you’ll meet your trip leader and fellow rafting companions at a nearby hotel or resort. I’ll go into more detail about those fellow rafting companions in a bit, but first: the trip leader. This is an individual, male or female, who has the most authority during your trip. Trip leaders rotate throughout the season, so keep in mind that some of your additional guides on your trip may also have trip leadership experience and be every bit as competent. In my experience, O.A.R.S. trip leaders are ruggedly outdoorsy types between age 30-45, who have often made the outdoor recreation industry their career choice. Your trip leader will go over logistics for the launch the next day, issue your dry bags (more on that soon, too), and tell you any updates on weather, packing, or water conditions.

oars river rafting trip

You’ll meet your additional guides the following day, at the put-in location. Sometimes, the put-in is nearby, just a short van ride away, and sometimes, as is the case on the Salmon River in Idaho, it’s a charter plane flight away. On our trips, which ranged from as few as 10 guests total to 18 guests, we always had 3-4 additional guides. These guides are generally younger (with the exception of any guides who are also trip leaders). Some are college students, but most are in their 20s. We’ve had some great guides and some just ok guides, but never a bad guide.

What to expect from your fellow guests: Well, you can expect just about anything and everything, which is one of the ‘unknown variables’ of commercial river rafting. In a small group, in a fairly intimate setting of camping together, it is frankly a big bummer to get saddled with people you don’t get along with or don’t like for whatever reason. It’s a risk, no way around that. However, while we have been on O.A.R.S. trips with guests who occasionally annoy us, we have never experienced a downright ‘bad’ guest. I believe this is because in general, the individuals and families who book multi-night river rafting trips have something essential in common: we all value the outdoors and the opportunity to explore the scenic river.

rapid-scouting-oars

If you do encounter a guest who is, shall we say, difficult, there are a few things you can do to help the situation. First, trust the guides. If a guest is difficult, they are aware of it, and are the best authority to curb any unwanted behavior. Best to allow the guides to be the ones to tell guests where to place their trash, not to hog the kayaks, or to stop diving headfirst into the water. Second, if both you and the other guests have kids, it can help to set some basic shared rules in place right away. That way, kids don’t feel frustrated when rules are different for others. Most of the time, this happens naturally, because O.A.R.S. sets the rules for rafting, swimming, use of PFDs and helmets, and even how many sodas and snacks are consumed (by kids). There’s very limited ability to be on screens on an O.A.R.S. trip, so likely, you won’t have to contend with varying electronics rules. A few times, we’ve encountered families with vastly different parenting styles from us, but all it took was a brief family meeting to remind our kids that our rules would remain in place for our kids, and that was that.

What to expect from meals and drinks: Aside from group dynamics, people worry most about food on trips, don’t you think? On each of our O.A.R.S. trips, we ate better on the river than we do at home. Every meal was made from scratch with whole food ingredients, and all were cooked and prepared swiftly and efficiently by our guides. Between meals, GORP (trail mix) was available, and before each meal, ‘appetizers’ were set out, even at breakfast and lunch. For example, at breakfast, coffee came out first, along with dry cereal (usually Cheerios and granola), yogurt, and orange juice. When ‘real’ breakfast followed, it might be French toast, eggs Benedict, or pancakes. At lunch, while our guides prepared the meal, snacks were set out such as cut veggies and dip, chips, fruit, and cookies. A typical lunch would include sandwich fixings and/or a hearty salad. Before dinner, a cooler with sodas, beer, and wine was available (with a ration of approximately one soda per day for kids and 2 drinks for adults), along with appetizers such as chips and salsa, bruschetta and toast points, or veggies, followed by salmon and cous cous, steak and potatoes, or enchiladas, always followed by dessert.

OARS-food

If you want to bring additional drinks, families are free to do so, with the general understanding that they’ll be willing to share. Guides store your additional drinks for you, keeping them cooled.

What to expect from the camping experience: On our last O.A.R.S. trip on the Rogue River, we rafted with a family who had never camped outside before, and they rocked it! You get tents from O.A.R.S., which you set up yourself after a demo, at each campsite. You can also rent a sleep kit, which includes a sleeping bag and paco pad (big thick rafting pad) and liner. Or, you can bring your own sleeping bag and pad (though if you do, I still recommend using a paco pad for comfort…you can rent this solo). Most nights on the Rogue and Salmon, we didn’t even bother sleeping in our tent, the weather was so nice. We slept under the stars, setting up a tent only for changing clothes and storing belongings.

OARS

Within each campsite, it’s easy to find a little corner for your family, but you’ll want to remember that you won’t have total isolation or much privacy. Expect to still see the other tents, the guides’ sleep pads, and the camp kitchen area. I promise this is no big deal: you get to know fellow guests very quickly on an O.A.R.S. trip, and you can always set up your tent for some privacy.

What to expect from the bathroom experience: Okay. Let’s get real: this is the issue people are afraid of most. How do you take care of your bathroom needs when you’re in complete wilderness, away from any plumbing whatsoever? Two ways: first, you pee in the river, as mandated by Leave No Trace (dilution is the solution to pollution). This is easy to do during the day…after all, you’re in the river most of the time. It’s harder during the evenings and mornings at camp, especially for women. Men tend to just walk a few paces downriver and stand to pee into the current from the shore…no biggie, no one even notices. Women, here’s what you do…and sorry for going here, but I’m in the outdoors a lot, and very comfortable with this stuff: if you need to pee and you’re out of the water for the day, you go behind one of the rafts, which will be ‘parked’ at the shoreline for the night. Behind their protective wall, you squat by the water, facing the camp. This ensures you moon the river, not the camp. After a few tries, I promise you’ll get good at this and no one will see a thing. When you’re getting used to this technique, it helps to wear a skirt or sarong, so you can eliminate even the mooning part.

For #2, O.A.R.S. sets up what they call the Groover (so named because it used to be a simple bucket or square metal box that would leave grooves on your backside). Now, it has a toilet seat (luxury!). The guides always set up the Groover at camp, in a discreet (but rarely discreet as you’d like) location from the hub of camp activity. You’ll know where the Groover is because there will be a hand wash station (two buckets of water with a foot pump and soap)…and the Groover will be a short walk from this station, hidden as best as possible behind trees, willows, or other natural barriers. It is by no means completely private, with doors that lock, etc, and I know that’s hard to handle at first. But I promise you’ll get used to it. And the thing is, everyone is in the same boat. You’ll know you won’t be interrupted because if you have the TP, others know someone is using the Groover, and when you’re done, you bring the TP back to the hand wash station. The Groover is for solid waste only, as everything in it is packed back out (per Leave No Trace rules), so no peeing in the Groover. However, if you would rather not pee in the river, there is a pee bucket next to the Groover, for that use. I know, this is so gross, but this is the nitty-gritty part, and I bet it helps to know what to expect ahead of time.

salmon-river

What to expect on the river: The actual river is probably what people worry least about, but I’ll cover a few things anyway. Depending on your destination, most O.A.R.S. trips include paddle rafts (where lots of people can paddle together, with a guide), oar rafts (with a guide rowing only), and IKs or duckies (inflatable kayaks), paddled by guests individually. Sometimes, there are also stand-up paddle boards. IKs and paddle boards provide the most adventurous way to experience the river, but all the methods of river transportation are fun. Guides do a good job of making sure popular boats are shared evenly, but you can help by not ‘hogging’ certain things, like IKs. Often, rafters using IKs will need to take a ‘ducky test’ or ‘ducky practice’, where they’re required to purposely flip it over, flip it back upright, and get back in, in water over their head. This is not as hard as it sounds, and most people can do it with some practice and instruction. Kids usually need to be 12 to ‘ducky’ on their own, but tandems to be shared with parents are also available. Most of the time, you paddle the river for a few hours in the morning and a few hours in the afternoon, with the remainder of the time used for lunch, short side trip hikes, and swimming time.

Have additional questions about what to expect on an O.A.R.S. river rafting trip? Ask me in the comments! 

SaveSave

Travel Gear We Use: Top sleeping bags for backpacking families

It’s time to think family camping! Get your family geared up for the summer camping season by snuggling up in a down or down-alternative sleeping bag! Today on Travel Gear We Use, we’re listing our favorite sleeping bags for backpacking and camping families, with lightweight and kids’ picks.

Best sleeping bag we use for kids:

north-face-for-kids


We love our son’s The North Face Dolomite 20F Youth Sleeping Bag. No, it’s not the most compact bag on the market, but that’s ok with us. Kids’ bags, by definition, are smaller, so it’s possible to get away with a bulkier model and still fit it into smaller sleeping bag compartments in youth-sized backpacks. The Dolomite is rated to 20 degrees, plenty warm enough for us, and ours has lasted through three kids and counting! The price is right, too, at only $119.

Best sleeping bag with a larger toe box:

big-agnes-lulu

If you’re wondering what a ‘toe box’ is, you either haven’t used a ‘mummy’-style sleeping bag, or don’t mind its restricting nature. I fall in the latter category (I actually love the tight space that warms me up faster), but some members of our family hate it. They’ve been looking everywhere for a sleeping bag made for backpacking that offers a roomier toe box, and we finally found it. The Big Agnes Lulu 15 stuffs into a compression sack and is lightweight enough for carrying long distance (it weighs in at just over 3 pounds), but features a wider bottom half that most bags. It’s rated at 15 degrees, with a fill weight of 24 ounces. Pick one up for as low as $139.

Best sleeping bag for ultra-light backpackers:

kelty-trail-logic

Maybe you’re not trying to beat any ultra-light backpacking records, but you’d still like to carry one of the lightest sleeping bags on the market. Or maybe, you’d like your older kids or elderly parents to carry a lighter bag. We love the Kelty TrailLogic Kelty SB20 delivers, with a weight of two pounds. The best benefit of a lighter bag? It fits into a stuff sack roughly half the size of its counterparts, which means more room in your backpack. Hey wait a minute…that means I carry more gear, doesn’t it? The SB20 will set you back $299, but you’ll see why once you pick it up.

Best sleeping bags for those who prefer a quilt:

backcountry-quilt
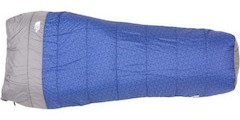
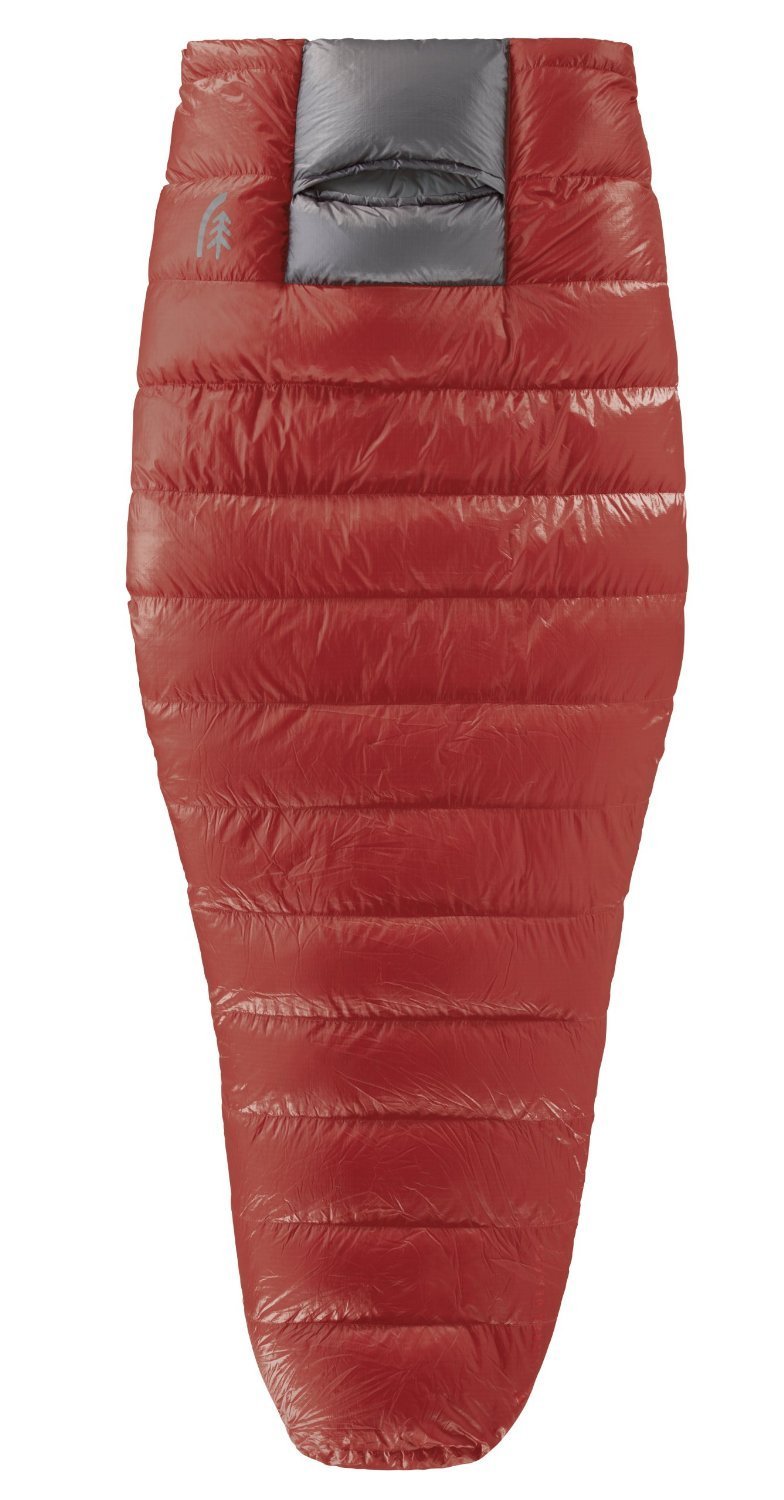
Did you know there was such thing as a sleeping quilt or backcountry quilt? These ‘sleeping bags’ don’t zip all the way around, which prevents that clammy, enclosed feeling some of us just can’t stand. If you’d rather sleep outdoors under a blanket or quilt than in a sleeping bag (but still need the warmth of a bag), Sierra Design’s Backcountry Quilt may be for you. You still get the 2-season warmth of 800-fill synthetic down, plus a hide-away hood and hand pockets to keep extremities warm at night. But the design remains open on the upper half, which allows you to feel like you’re under a blanket, not wrapped like a burrito.

The Backcountry Quilt is sold for as little as $150 for a 1.5 season weight, but you’ll want to spring for the $250 version to ensure you can use it in almost all conditions.

Our other favorite is the new Big Agnes Big Pine bag, which works with any pad size and is a great quilt option for road tripping, couch surfing, hotel stays where perhaps a child is on a rollaway bed, and the like. It can be used as a quilt or can be zipped to be a sleeping bag. It’s also great for summer season camping and backpacking. Our favorite feature is that it’s made with DownTek, which is sustainable down that’s water repellent. You can even zip two together for a double sleeping bag! This is by far the most versatile quilt option we’ve tried.

Best budget sleeping bag:

cosmic-20
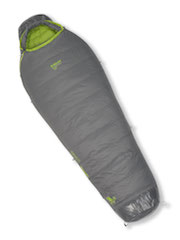
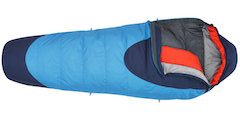
If you need a solid sleeping bag for a family member that is rated to 20 degrees for three-season comfort in the backcountry, you don’t have to break the bank. The Kelty Cosmic 20 gets our pick for the best bag for your buck. It’s only $149, and while a little heavier than most bags, you still get DriDown, Kelty’s down blend that resists moisture (so you don’t get that soggy, damp issue with your down sleeping bag after being dusted with morning dew). You also get a draft collar, a feature that used to be found only on more expensive models. It packs down into a stuff sack, though again, it won’t be as compressible as it’s more expensive cousin, the SB20.
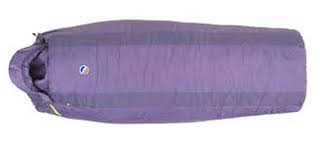
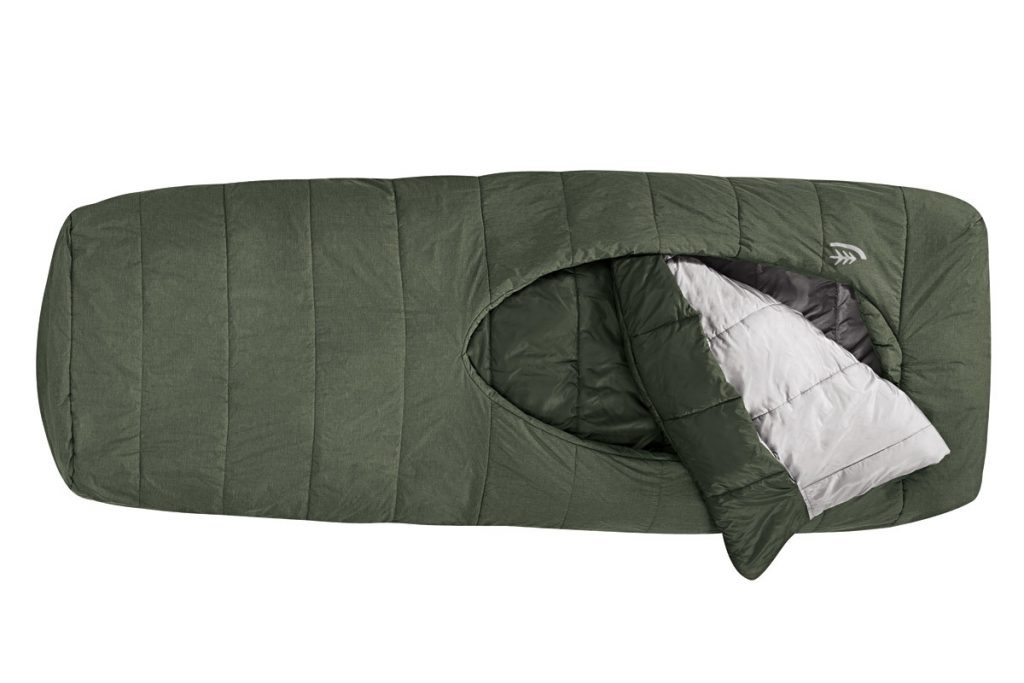
Best luxury car camping sleeping bag:

sierra-designsThe Sierra Design backcountry beds are so comfortable, you’ll think you’re sleeping in a bed…really. They’re not as lightweight as some, so we think they’re best for car camping and road tripping, but they’re ultra-plush and fit nicely on or over think pads and cots. They come in single or duo size, with two basic designs: front country (rectangular for comfort) or backcountry (mummy-style and more packable for backpacking). They all come with an extra blanket flap that makes the sleeping bag feel more like a made bed, as well as hand pockets and slips for your pad. We love them!

How to choose sleeping bags for your family:

Start by deciding whether to go with down or a down alternative. It’s hard to ethically harvest down for sleeping bags, and since the synthetic version is arguably just as good, it’s easy to go without. Not sure which is best for you? We like this down vs synthetic guide from Sierra Trading Post.

Next, access your temperature needs. Will a bag rated at 30 degrees be enough for your use? Will you need a zero degree-rated bag? Determine where you’ll be using it, and in which season.

Finally, make sure a ‘youth’ sized bag will fit your kids (tweens may fit better in adult bags). Go into your local outdoor store to try out bags, and while you’re at it, bring your backpacks so you can be sure the sleeping bag of your choice fits into the sleeping bag compartment (if you care about that).

Once you’ve bought your bags and brought them home, remember to store them in a space where they can remain free of their stuff sacks. This is better for the bags. We hang ours from pegs in our garage, with each bag’s stuff sack set inside.

Find more gear in the Travel Gear We Use series (click below):

How to teach kids the joys of fishing (and plan a fishing trip)

Fishing is an easy and relaxing activity that’s easy for children to learn and gets them outside to enjoy nature. If you’re interested in learning how to teach your children the joys of fishing, discover some helpful tips and advice for making memories and new experiences for you and your children.

how to teach kids the joy of fishing

Foster an Interest in Fish First

Before you take your children out for their first fishing trip, help them learn more about water and fish by taking them to the beach, aquarium, or nature center. Being able to learn about where fish live and how they survive will help foster children’s natural curiosity. When you feel like your children are able to handle a day on the water, you can use what they’ve already learned to make the fishing trip more enjoyable for everyone.

Fish in Well-Stocked Water

Any experienced angler can tell you that fishing has much downtime when you’re simply waiting for the fish to bite. For adults, this time is usually relaxing, but for young children, this time can try their patience. While you can use the experience to teach them about patience, you also want them to enjoy a reward for their efforts. When you start out by fishing in well-stocked ponds or lakes, you lessen the chances of leaving empty-handed.

Need gear? Discover some helpful tips about beginners fishing rods.

Get Equipment Appropriate for Children

Fishing rods made for adults are too big and heavy for children to handle. Instead, you’ll want to buy equipment made specifically with their size in mind. Read more here about choosing the best fishing pole. Even with the right equipment, children won’t be able to cast the line on their own at first. Either cast it for them and then hand them their rods or place sinkers on their lines and let them drop the sinkers directly in the water.

Additionally, consider using a small piece of rope to tie the fishing rod to the boat or dock. If they accidentally drop their rods, the rods won’t end up at the bottom of the water.

Try a Fishing Charter

As your children start to learn the joys of fishing, you can add some extra adventure and make great memories together by booking a fishing charter. Your captain will typically know the waters well and can take you to places where you’ll increase your likelihood of a catch. Additionally, most fishing charters also offer bait, tackle, and fishing licenses; all you and your children have to worry about is having a good time.

Watch the Weather and Time

When you decide on taking a fishing day, make sure the weather is perfect. If the weather for the day will be windy, rainy, cold, or very hot, consider postponing the trip to another day. Additionally, you want to keep your children’s first few fishing trips short. Most young children can handle only one or two hours at a time.

Help your children learn more about the outdoors by teaching them the joys of fishing. With the tips presented above, you and your children will make wonderful memories as you enjoy fishing together.

Image via Flickr by Lake Mead National Recreation Area

Coleman camping gear and #FindYourPark

It’s camping season in most of the US and Canada, and I’m excited to spend time in the outdoors for the next few months. Most of us are now familiar with our National Park system’s #FindYourPark initiative, which is helping more families than ever discover outdoor recreation in state and national parks.
coleman-camping-gear
Most families are also familiar with Coleman, an outdoor gear brand with a long tradition of creating family-friendly camping equipment. We’ve been using Coleman gear since I was a kid. Right now, Coleman is partnering with #FindYourPark. Through 2017, Coleman will host a variety of outdoor experiences that will enable America’s youth and their families to connect with our national parks in unique ways.

Want more camping info? Get Pit Stops for Kids’ camping gear list!

To round out this partnership, Coleman will also offer a limited edition line of products including grills, stoves, lanterns and coolers that commemorate our national parks to ensure Americans are well equipped to head out to the parks. To kick off the camping season, we wanted to share reviews of some of our favorites, and let you know how to get them.

Coleman camping gear we’re using this summer:

Carlsbad Fast-Pitch tent:

carlsbad-tent

The Carlsbad tent sleeps six and includes two living spaces: a 10 x 9 ft. tented space and a 10 x 5 ft. screen room. It’s roomy vertically too, with a ceiling of 5 ft. 8 in. Families can easily spread out, with extra sleeping space in the screen room if the weather is dry, or you can use that space for a few chairs, a game of Uno, or everyone’s shoes and gear.

A few features we love: The Carlsbad features Coleman’s ‘Dark Room Technology’, which means it stays darker inside than the average tent. When you have kids with an earlier bedtime or hope that you’ll all sleep in a bit, this is golden. You also get window awnings, which is more than just a cute feature: they allow you to keep windows zippered down, even in rain, which reduces condensation in the tent. Lastly, the Carlsbad is one of Coleman’s ‘Fast Pitch’ tents, which means that for its size, it’s very easy to set up. Forget the heavy, awkward set up stage: some of the poles are pre-inserted, and it really only takes five minutes to be up and running. Buy on sale for $169 on Amazon, or grab a 4-person model for only $134.

Big N Tall cot:

coleman-cot

 We’ve really fallen in love with cot sleeping when we’re car camping. To be honest, we sleep outside on cots much of the summer. Cots are more comfortable than air mattresses for us, and sleeping off the ground simply feels like a luxury when we’re camping. The Coleman Big N Tall cot is part of their Big N Tall line, which, in our opinion, isn’t just for bigger people. The oversized cot is simply more stable and wider, which is good news for anyone. It’s designed in a military style with an X frame, and is quick to set up.

A few features we love: The design on the Big N Tall cot is a manly yet understated topography map design in sand tones. I realize a cot’s selling feature isn’t its looks, but it’s always nice to have something nice looking in your campsite! It comes in a rolling carrying case, with is really good, since this baby is heavy! Pick up the Big N Tall for $135. You can also find standard-sized Coleman cots for $79 and under.

Mountain View Screen Dome Shelter:

mountain view-screen

Coleman’s 12×12 screen dome shelter went up in our yard in May and won’t come down until August, except to go camping! We use it daily for bug-free outdoor space and outside sleeping space throughout the summer months, and it’s a wonderful addition to car camping sites when you need a bug-free zone. It has an open bottom/floor, which means you can set it up around fixed picnic tables at campsites for mosquito-free eating or card games during the twilight hour. I won’t lie: set up takes longer than for your average tent (it took us about 15 minutes) and the poles are bulky and heavy.

A few features we love: You get 50+ UPF, and the roof is waterproof (we’ve tested it extensively). You get some side-panel ‘walls’ you can drape on one or more sides if you desire, which is helpful for keeping out sun on one side, privacy, or during rain storms. If you don’t need the shelter to be screened to keep out bugs, you can zip away the attached screens to use the shelter as just a sun dome (great for sporting events). The inside height is over 7 feet, so you won’t need to duck. Pick it up for $181 on Amazon.

Conquer 200L LED Headlamp:

coleman-conquer

Sorry, flashlights, but we’ve switched entirely over to headlamps for our illumination needs while camping. We love the hands-free convenience, and the way headlamps easily convert from pathway illumination to reading lights to lanterns (just wrap one around a large plastic bottle of water). The Conquer headlamp is bulkier than we’d like for backpacking, but ideal for car camping and for kids to take to camp. It’s rugged exterior can take a beating, and the headband can be adjusted to fit just about everyone.

A few features we love: The Conquer features BatteryLock, which stops battery drain. Believe it or not, you won’t be changing out the batteries constantly! It has five modes, including high spot, high flood, low spot, low flood, and red, and lumens ranging from 200 (high spot), 150 (high flood), 70 (low spot), and 20 (low flood). You need three AAA batteries, but the LEDs never need replacing. Pick it up for just $25. There are stronger, brighter models available as well, going up to about $45, but honestly, this is all you need.

Pit Stops for Kids selected as Oboz Footwear Ambassador

Readers of Pit Stops for Kids know how much we love to cover outdoor travel, and how we advocate equipping kids (and Mom and Dad) in proper outdoor gear in our Travel Gear We Use series. This year, we’ll be taking this passion a step further as official ambassadors for Oboz Footwear.

Clouds Rest Yosemite National Park


If you look on the right-hand side bar of the site, you’ll see at glance the brands and publications with whom the Pit Stops for Kids team works most closely. These are not advertisers. They are not chosen at random. I either write additional content for their sites, or, in the case of Oboz and Aventura Clothing, which I introduced readers to last year, we have a working partnership.

My East Coast editor and I test a lot of gear and travel products each year, and we don’t take this lightly. As a parent, I understand how difficult it can be to find solid gear reviews, and how big an investment quality gear can be. We are not paid by Oboz (or any other brand to review their items). Paid posts are always clearly marked on Pit Stops for Kids, or are displayed as ads.

Oboz makes hiking boots and shoes for men and women, not kids, but I decided to accept Oboz’ invitation to become an ambassador for two reasons. Firstly, Oboz supports our mission of whole families getting outdoors and into nature. Plus, those teen boys grow into adult shoes in a hurry, don’t they? Secondly, I am already familiar with Oboz products, and know I can stand behind them. I told Oboz as much when they interviewed me for this position, but I never told them–until now–the exact experience I have with their hiking boots.

Here’s what happened. Last summer, our family embarked upon our annual three-day backpacking trip. I had reviewed the Oboz Bridger Mid BDry earlier in the year for Practical Travel Gear, and loved them, so I grabbed them for the trip. We began hiking well after dinner, and wanted to make good time. We covered six miles fairly quickly. So quickly, in fact, that I didn’t notice the hot spots developing on the back of my heels until about mile five, at which time it was really too late to prevent them from becoming full blown blisters. I nursed my wounds during our camp day that followed, but when it came time to pack out, my feet were still angry and raw. I was forced to cover the distance back to the trailhead in my water shoes, paired with wool socks to keep out pebbles and dirt. I was so angry at my Oboz I wanted to fling them from a summit (and this was before Cheryl Strayed made this trendy).

granite-lake-backpacking

Calvin, wishing his mom would hobble along faster.

When I got home, I looked up Oboz Footwear’s customer service information. It’s important to note that when we review products, we often work directly with brand representatives. Therefore, if there’s a problem, it’s fixed fast. Is it fixed that fast for other customers? Sometimes I don’t know. So I made a point to go through the usual channels at Oboz instead of calling my PR rep. I got a response to my email lightning fast. The service rep asked me many questions about my boots, about my feet, and the terrain of my trip. Yes, I told him, I’d definitely broken them in beforehand. Yes, I’m an experienced hiker. We both scratched our heads. Finally, their team asked me to send photos of the shoes. When I went to do so, I noticed something…I’d taken the insoles out of my Bridgers a few weeks before to wash them, and never put them back in. 

The obvious result: way too much room in my boots, leading to friction and blisters. I was so embarrassed as I apologized to the folks at Oboz. They were kind enough to pretend this happened all the time. I found my insoles and all was well again with my boots. Moral of the story: Oboz has great customer service and will help make sure your boots work for you, even if you’re an idiot. (Now we’ll just have to wait and see if they still want an idiot for an ambassador.)

If they keep me, I’ll be writing regularly for Oboz during 2015, offering hiking and backpacking tips, shoe reviews, and backpacking trip reports both here and on their blog. I’ll cover expert stuff like, ‘hey, don’t forget to assemble your shoe before wearing it’ and other high-level ideas. I hope you’ll follow along, and get inspired for your own family outdoor adventures! If I can do it, you can!